All-terrain vehicles improve access to the backcountry. ATVs and side-by-sides excel at carrying people, but their restricted cargo room limits the gear we can haul in, and the meat we can pack out. To better suit my outdoor adventures and projects around my homestead, I needed more space to haul the necessary gear. It was time to build a utility trailer!
Advertisement
In the spirit of any good DIY project, salvaged materials kept my costs down. I used as much repurposed metal as possible to create my ATV trailer. When using old metal, good prep improves weld quality, so I brushed or ground off rust and old paint.
Advertisement
I rate this project as intermediate both for its required skill level and time to complete. To tackle this project, you’ll need access to a welder and a compliment of workshop tools. I chose wood planks for the decking, so a method to cut wood to length helps too. I’m not a welder by training, so there was a steep learning curve.
Nevertheless, using a MIG welder and attention to detail, I achieved ‘professional’ results.
The hardest part of the project was coming up with a design. Plan considerations included trailer purpose, bed size, ground clearance, tires, hitch, load capacity and overall trailer weight. Some of decisions were easy, based on locally available materials – type of hitch, for example. Others crystalized after much deliberation. With my trailer specs and materials in hand, it was time to start cutting.
Advertisement
I cut the metal parts with a chop saw, a bandsaw and a special thin cutting blade on an angle grinder – any of the three will work well. The three-foot by five-foot frame was built using one-and-a-half-inch square tubing, which is strong and makes a superb platform on which to mount everything else. Simple butt joints to make neat square corners simplified welding for a beginner. Using two-inch square tubing for extra strength, I welded the tongue at 26 inches, allowing ample clearance between the ATV and trailer, even during tight turns. For frame strength and a place to secure the decking, I welded angle iron side to side across the trailer in strategic locations.
The wheel assembly is the most complicated part of this project. An online search returns several suitable ideas, from a simple straight axle with no suspension, to more complex walking axle designs. For me, design considerations included the type of tire. I opted for a standard 14-inch trailer tire and reduced the fabrication process by purchasing a pair of bolt-on equalizer torsion axles for a five-bolt rim. Swapping tire hubs to a four-bolt ATV style will accommodate off-road ATV-style floatation tires. I fabricated the axle supports using angle iron. Using the wheel assembly as a template, I marked and drilled holes to accommodate the bolts.
I used a wire wheel on an angle grinder to clean and rough up the metal surface of the trailer prior to painting. For paint, a rattle-can of spray paint for metal did the trick. To prevent slipping when wet, I plan to add a rubberized rocker guard paint on the tongue.
With the trailer still upside down, I bolted the axle assemblies to the frame and installed the tires. My wife and I easily lifted the trailer off the sawhorses and rotated it to sit on the ground right-side up. It wasn’t too heavy, yet!
Next was cutting the trailer decking – I used spruce 2x6s and 2x8s – securing them to the trailer using self-tapping metal screws into the angle iron supports. For longer life, I’ll paint the deck with a water seal. Treated lumber works well too, I just didn’t have any on hand at the time.
After the trailer frame and deck was built, it was time to focus on the sides. For now, I just needed a cart to haul logs and game out of the field, so I added arms that flare out from the trailer for more capacity. An alternative is quick-detach brackets and modular sides to slide in, to suit your adventure.
The last step was installing a trailer coupler. I used a standard part-store aluminum ball-hitch coupler, simply bolting the basic coupler through the tongue. I admit, I do admire the swivel hitch designs for safety considerations in rough terrain – if you misjudge your centre of gravity, your cart can tip without flipping the ATV on its side as well.
I had a great deal of fun researching and building this project. I learned new skills and created something that makes me proud to look at and use. Plus, I now have a custom trailer that is more solid and heavy-duty than most commercially made items of this size. If I wished to get it inspected and licenced, I could use it on the road behind my truck as well.
Have fun choosing your options and building your own utility trailer!
Step 1, plans and parts: I decided on the size, shape and parts specification for the trailer I wanted to build. I scrounged used metal where I could and purchased the parts and materials I needed.
Step 2, layout: Metal parts measured and marked in preparation for cutting.
Step 3, cutting: I used a chop saw to cut most of the metal parts to length.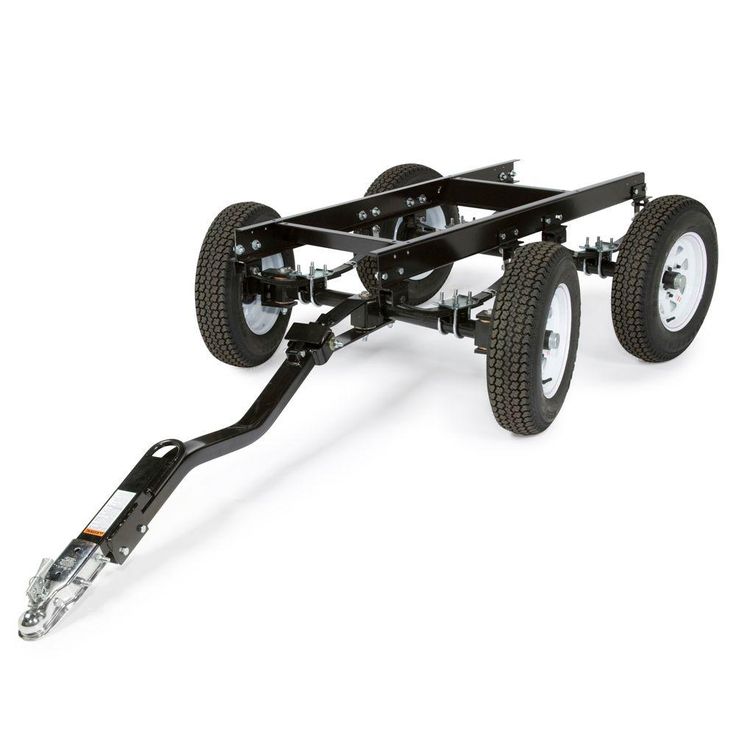 A metal cutting bandsaw is another method for cutting metal parts.
Step 4, metal preparation: Good metal preparation is crucial to good welds, especially when using recycled metal. Here, a wire brush on an angle grinder removes old paint and rust.
Step 5, welding: Magnetic clamps hold the workpiece while welding, keeping everything square. For the perfect fit, the axle assemblies were used as a spacer while the supports were tack-welded into place.
Step 6, painting: After welding the frame, the steel was painted before assembling.
Step 7A, assembly: The axel assemblies were bolted onto the frame supports, followed by tire installation.
Step 7B, assembly: The hitch coupler was bolted to the tongue to facilitate future upgrades or replacement.
Step 8, final details: Install side arms and pre-cut decking.
The final product, showing clearance, axel assembly and tires.
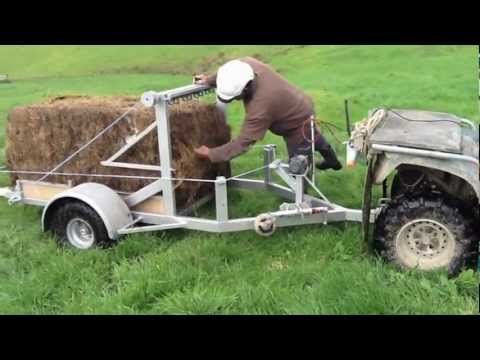
When you get too old and out of shape to be lifting deer onto the back of your ATV you get smart and build a meat wagon. And it's going to be mighty handy next year for hauling seed, lime and fertilizer.
I actually got a lift for my ATV.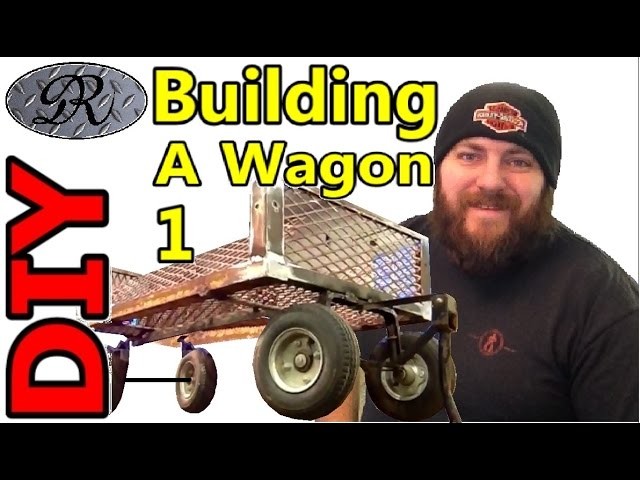 It works off the winch. It works pretty well. When you release the winch, it comes off the front of the ATV and lays on the ground. You drag the deer on it, buckle it in, and retract the winch. The gizmo then picks up the deer and sets it on the front of the ATV.
Here is the one I got: http://greatdayinc.com/products/atv-accessories/powerloader/
I did have a cart but I found there are places that it is hard to maneuver a trailer when retrieving a deer that I can easily drive an ATV up to. The down side is that it runs about $300.
Thanks,
Jack
Great job semisane! Looks handy.
yoderjac said:
I actually got a lift for my ATV. It works off the winch. It works pretty well. When you release the winch, it comes off the front of the ATV and lays on the ground. You drag the deer on it, buckle it in, and retract the winch. The gizmo then picks up the deer and sets it on the front of the ATV.
Here is the one I got: http://greatdayinc.
com/products/atv-accessories/powerloader/
I did have a cart but I found there are places that it is hard to maneuver a trailer when retrieving a deer that I can easily drive an ATV up to. The down side is that it runs about $300.
Thanks,
Jack
Click to expand...
Good thing you got your lift bought already, It would be $900 if your tax plan was put into place! LOL
Last edited by a moderator:
MoBuckChaser said:
It would be $900 if your tax plan was put into place! LOL
Click to expand.
..
It is all relative big fellow. Any tax adding to the price of goods is offset by the lack of income tax. It doesn't increase or decrease tax. It simply keeps the government from hiding the redistribution of wealth in the tax code.
Let's not muck up another thread on this. Semisane has a great little cart there. How do you transport your deer in the field now that you are old and feeble like me?
Great Job semisane! I built one a little bigger, that I could use to haul other things as well.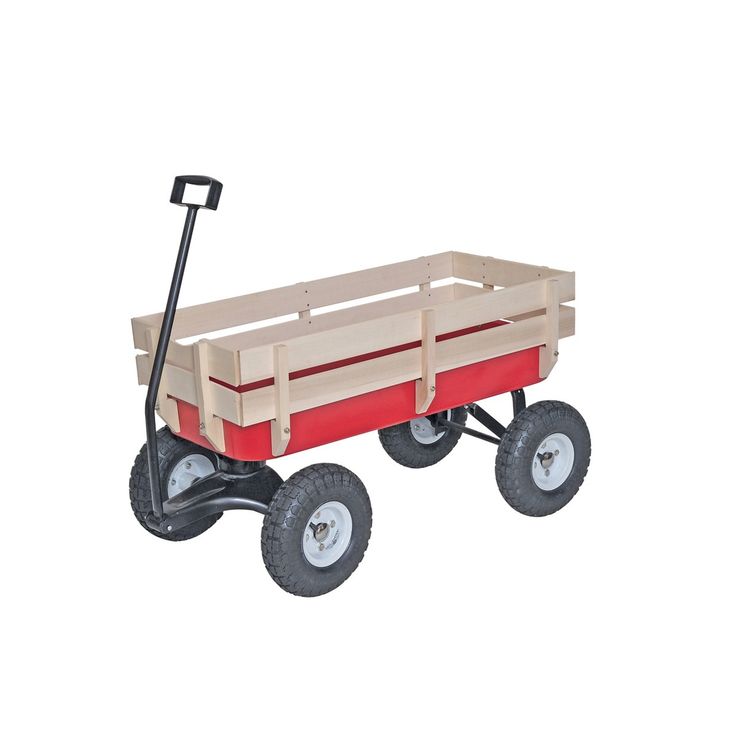 We use it to haul deer, firewood, trees, water tank, fencing, and the 4 wheeler if needed. We can hook the trailer to the car, then drive the 4 wheeler in the trailer and haul it to one of the other farms to use. I think everyone should have some type of 4 wheeler trailer on their land!
Last edited by a moderator:
The most demanded development of the body-building enterprise "Istok" is the "light sandwich" isothermal van.
The van is assembled from three-layer "sandwich" panels, in which 30 mm extruded polystyrene foam is used as insulation. Especially for this design, our engineers have developed a supporting aluminum profile, which allows you to get a solid frameless design. We use galvanized steel with a polymer coating or reinforced reinforced plastic "Optiplan" (Germany) as external and internal cladding.
Light Sandwich is a versatile van that combines lightness (frameless design), strength and isothermality (sandwich technology), durability (modern materials), and, of course, a beautiful modern look.
This solution allows not only to significantly improve aerodynamics, but also to get additional space inside the van to carry a longer load or accommodate an increased volume of cargo.
The van is manufactured using our proprietary Istokovsky light sandwich technology, which gives it a representative appearance and maximum structural strength.
This version of the van has isothermal properties and is in great demand among our partners, Fiat car dealers of the following companies: AVILON, ARM-Service and Avalux.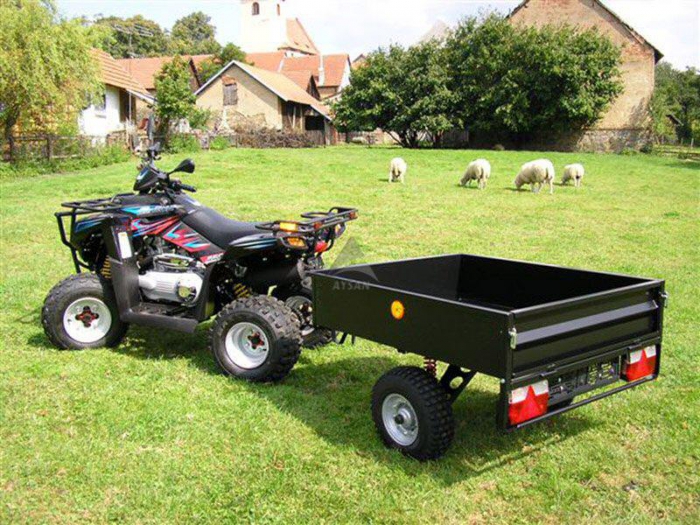
Cabin add-on makes your van attractive and, in combination with correct and harmonious advertising, will be remembered for a long time.
The Light Sandwich Van costs significantly less than the standard Sandwich Van, but in many cases it will be a complete replacement. You can buy a van and install a new van on a chassis at our production facility in the city of Krasnogorsk, Moscow Region.
Isothermal van "light sandwich" on the chassis "Fiat"
Superstructure above the cab acting as a spoiler
Isothermal van "light sandwich" with a thermal insulation thickness of 30 mm paneling (profile - "Istok")
View of the isothermal van of the trailer light "sandwich" from the inside: the van is insulated with 30 mm polystyrene foam
A light "sandwich" van with a side door is installed on the "Nissan" to transport products0003
Light sandwich van on Fiat chassis
Light sandwich van on Volkswagen chassis for DHL
Light sandwich van with an additional superstructure above the cab on Fiat chassis Ducato
Lightweight "sandwich" van on UAZ chassis Patriot
Lightweight "sandwich" isothermal van with a side door and a superstructure above the cab is installed on the Iveco chassis
mm on chassis "Ford" Transit
The details of the standard isothermal light sandwich van are set out in the specification:
| Details of the standard isothermal light sandwich van are set out in the specification: | DOWNLOAD >>> |
Structurally standard isothermal van light "sandwich" consists of base , special power profile "Istok" , side and ceiling " with sandwich " panels 30 mm , rear hinged doors .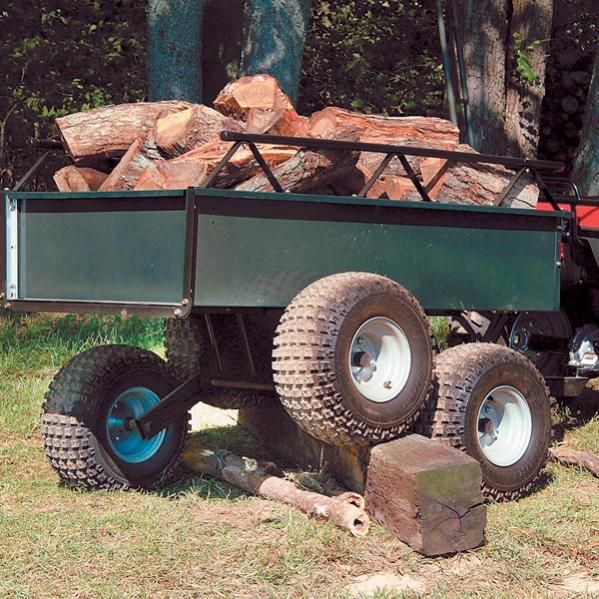 Consider the components of the van in more detail.
| The base is an important power part of the isothermal light "sandwich" van and is produced at our factory according to the chassis manufacturer's instructions, which indicate the technical characteristics and design of the base elements, as well as the method of attaching the van to the chassis frame. For the manufacture of the subframe, we use alloyed steel 09G2S, the longitudinal spar is made with a bevel or cutout in the front part, the van is installed through brackets with the required number of non-rigid fasteners (through disk-shaped spring washers). This design of the base allows the wagon made of light "sandwich" panels to perceive the deformation of the twisting of the chassis frame without damage. The base elements are welded into a single structure and coated with 2-component epoxy enamel Intergard 345 RAL 9001. The floor of the van is made of sheets of waterproof birch plywood with a mesh pattern. | |
| The special "Istok" profile made of anodized aluminum alloy forms the power base of the isothermal van with a light "sandwich" and forms a beautiful modern appearance of the van. The original van profile "Istok" was developed by the engineers of our company not only to obtain a beautiful modern appearance of the van, but also to obtain a high-tech van assembly process: the profile has special grooves into which "sandwich" panels 30 mm thick are inserted with imported adhesives and sealants . | |
| Sandwich panels for isothermal vans "light sandwich" are manufactured using "sandwich" technologies: layer-by-layer reinforced plastic or galvanized steel with a polymer coating is laid out on a vacuum table, then a layer of special imported glue, then insulation (extruded polystyrene foam), then again a layer adhesive, and the closing layer - reinforced reinforced plastic or galvanized steel with a polymer coating. The photo shows a sample of a three-layer "sandwich" panel with OPTIPLAN reinforced plastic skins with extruded polystyrene foam insulation. | |
| Side protection is a required option for trucks of class N2 and above, so if your chassis is not equipped with side protection, we recommend ordering it from us. The photo shows the easy-to-use fold-down side protection made of anodized aluminum profiles, which we manufacture and install in our factory. | |
| The rear guard will always protect your refrigerated van and vehicle from unwanted rear impacts, while the retractable ladder and handle make it easy to get into the van. | |
| Rear swing gate is an important and integral part of any van. To install the gate in a "light sandwich" van, first a galvanized or stainless steel gate portal is formed into which the gate leaves are inserted. Gate leaves for a van made of light sandwich panels are made in three layers 30 mm thick: inside insulation made of extruded polystyrene foam, and outside and inside galvanized steel with a polymer coating or reinforced plastic. Istok uses for its vans only imported fittings from Tumzf (galvanized or stainless steel), automatic Push locks, rubber-plastic seal. |
All photos posted on the site show only the general layout of the product and do not carry information about the materials and components used.
| Call! You can get more detailed information by calling our specialists by phone, and actually see the finished products at our production site in Krasnogorsk Contact numbers: +7 (495) 241-22-66 - multichannel +7 (495) 562-31-18 - "Vans" department +7 (903) 796-02-20 - "Trailers" department |
The production and sale of meat products in our country plays an important role. Fresh and chilled meat is an undoubted attribute of lunch or dinner on the table in every home. In order for meat products to reach the consumer in the best possible way, preserving not only the marketable appearance, but also all the useful properties, it is necessary to carefully control the supply of this product, observe the temperature regime and optimal storage conditions for the product.
Leading suppliers of meat products in Russia use a special carcass truck for transportation of chilled meat both for short and long distances. This type of van, as a carcass carrier, will not only ensure the safety of transported meat products in a suspended state, regardless of the ambient temperature, but also compactly and, most importantly, conveniently place meat carcasses in a small space.
Hyundai HD-78 refrigeration truck:
Any refrigerated van, including carcass truck is not just an isothermal van, it is a whole technological system, the correct operation of which requires not only proper operation, but, above all, proper design and assembly.
Polyurethane foam heat insulator, widely used in the refrigeration industry, leads among its own kind, surpassing such common materials as expanded polystyrene (polystyrene), extruded polystyrene foam in terms of thermal conductivity, strength, weight, durability and safety.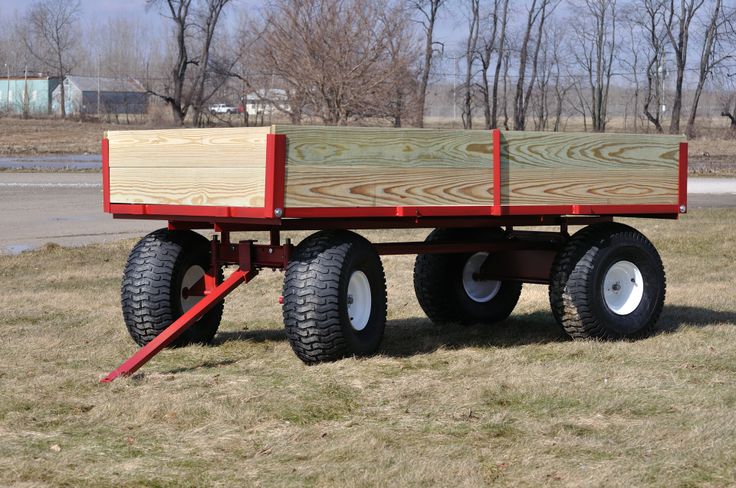 Inside the refrigerated van for transporting meat carcasses, profile guides with hooks are mounted, half carcasses are hung on these hooks. Such a system allows you to optimally preserve the consumer properties of the product, minimizing the contact and friction of half-carcasses against each other and, ultimately, preventing the appearance of foam on the surface of the meat.
To give maximum strength and reliability of the structure, the ceiling in the places where the rails are attached is reinforced with reinforcement. This will allow the carcass carrier to withstand overloads during operation, to secure meat carcasses, avoiding sagging of the sandwich panels. The inner lining of the van can be made of galvanized steel or anodized aluminum, the floor is also covered with perforated anodized aluminum sheet for better adhesion of shoes to the surface during loading and unloading.
The refrigerated van's high performance materials prevent corrosion and make maintenance easier. You can wash the inside of the van with a strong jet of hot water. This cleaning method saves you a lot of time. The fittings of the caravan (locks, hinges, etc.) are made of stainless steel, which is also important during its long-term operation.
Isothermal bodies. The two photos on the left are the pipe system. The two photos on the right are with the rail system.
An important factor in the optimal conditions for the transportation of meat products is a suitable refrigeration and heating unit (refrigerator). Depending on the volume of the body, the quality of the insulation, the thickness of the sandwich panels, the specifics of your company, etc. Each carcass carrier is equipped with its own refrigeration and heating unit ( HOW ), which is necessary to maintain the proper temperature regime. Our qualified specialists will calculate the optimal temperature for storing chilled meat half-carcasses inside the refrigerated carcasses, select and install the necessary refrigeration equipment.