Assembly instructions for the tire carrier portion of the rear bumper
Assembly should only be performed by an experienced fabricator. If you do not have all the necessary tools, experience, or confidence to undertake this project, please seek help before beginning.
INCLUDED COMPONENTS: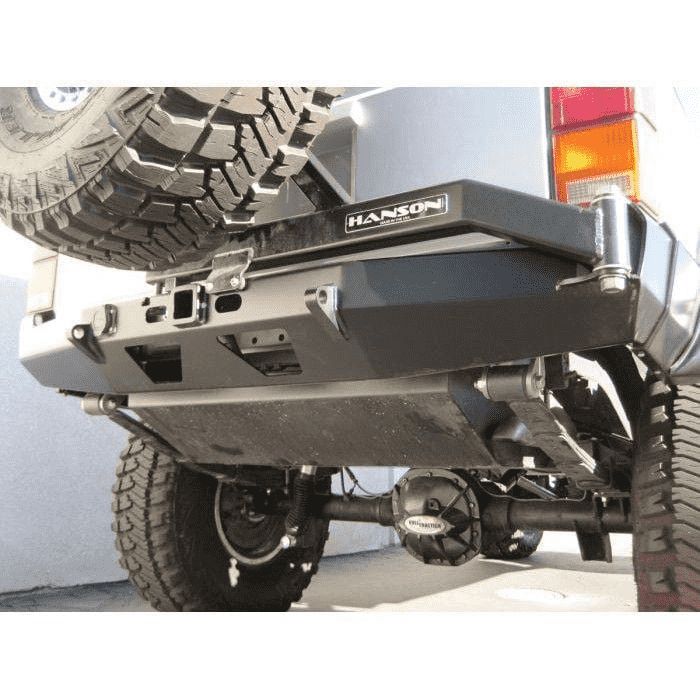
 The angle we chose splits the difference between vertical and the back glass, keeping the tire closer to the vehicle. You can also trim the tube back if you have low backspacing and want the tire closer to the vehicle. BE SURE TO TEST FIT THIS BEFORE TRIMMING THOUGH!!
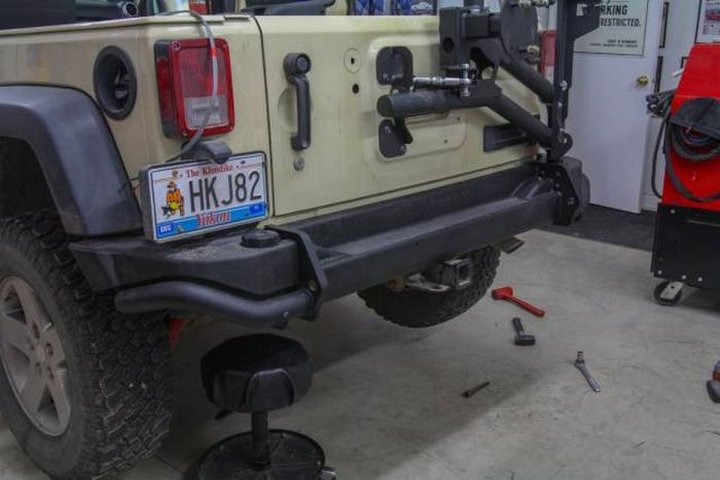 Weld er on!The excess spindle that sticks out below can be lopped off and weld around that area for max strength.Should look something like this!
After fully welding, remove, clean er up, paint to color of choosing, then reassemble!
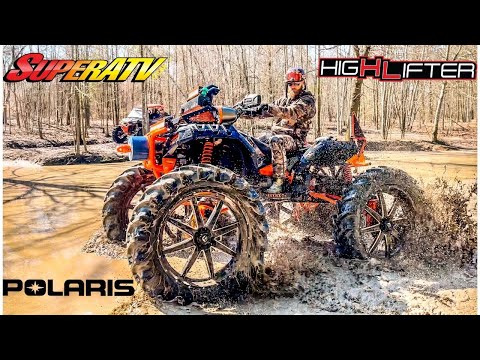
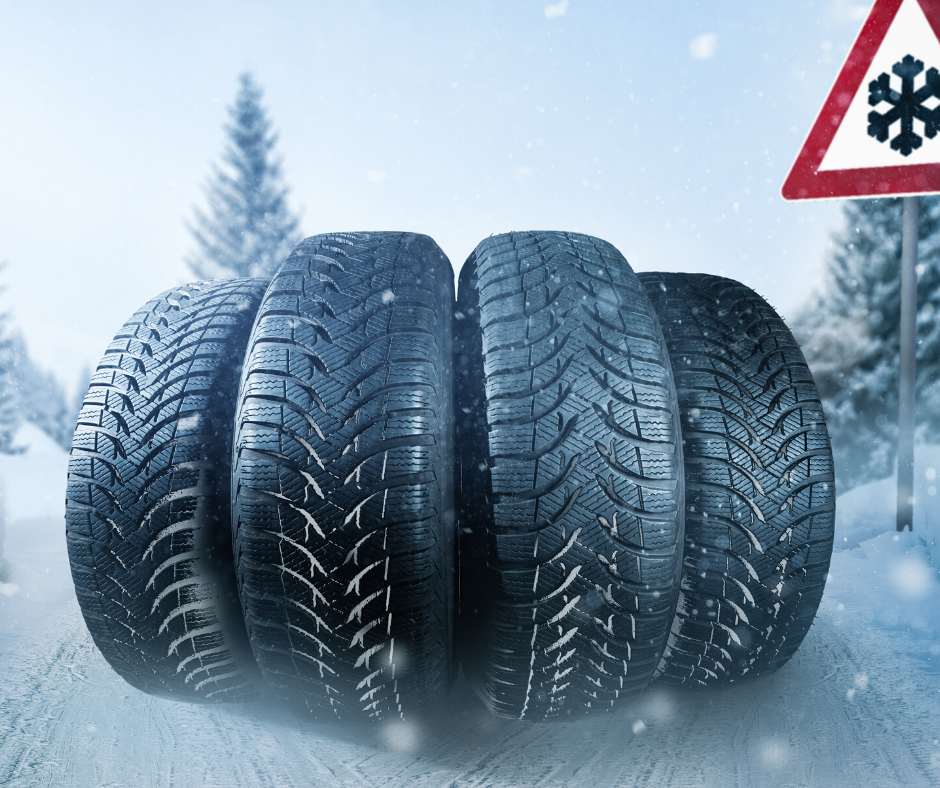
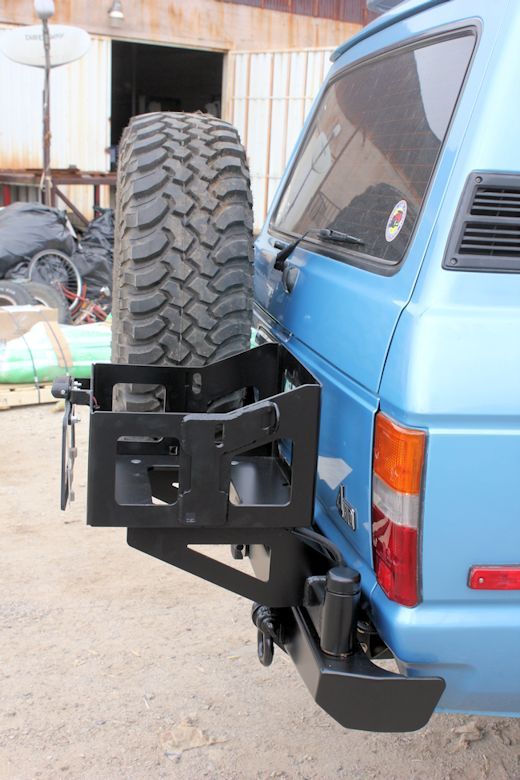
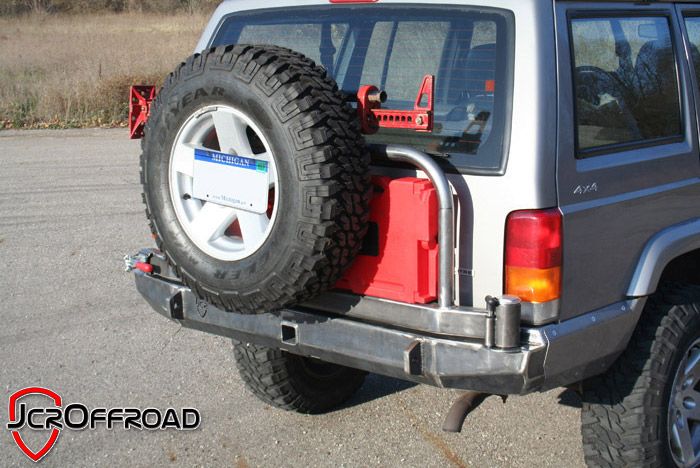
Big tires under your 4x4 are cool. Trust us, the bigger the better—assuming you don't break axle shafts or roll over in a turn. Still, big tires under a 4x4 make it necessary to carry a big honkin' spare tire just in case you get a flat. Storing that big tire can be a pain in the you-know-what. Often, the best solution to this problem is to mount said huge tire on a bumper supported tire carrier.
This has been done at least 100 different ways some with varying success. Here is a rebuild of a tire carrier following a fairly simple formula with small variations on a familiar design. Lots of supply places like RuffStuff have the parts you'll need to build your own.
Generally, there are a few options when it comes to carrying a spare. Most OEMs seem to like to tuck a tire under the back of the 4x4. That's great until either your spare gets damaged by a rock, or you can't get your spare out from under the truck when you need it. That's no good for us. Another option is to put the spare on a roof rack, but that's bad for two reasons.
First, you have to get that mother up and down from there without killing yourself or anyone else, and second, it adds a ton of weight up high where it can cause the most body roll possible. No thanks. A third option is to toss the tire in the back of your rig which is great if it fits—and if it isn't buried in all your stuff when it comes time to use said spare. We reluctantly do this. The fourth option might just be the best, and it's something we've done and will do again, and it's also something several OEM auto manufacturers have adopted or at least played around with. The idea is to build a bumper or body-mounted spare tire carrier. The only drawbacks are that it will probably need to open easily, and also it needs to be strong so it can support the tire's weight and take the bashing that is inevitable with use.
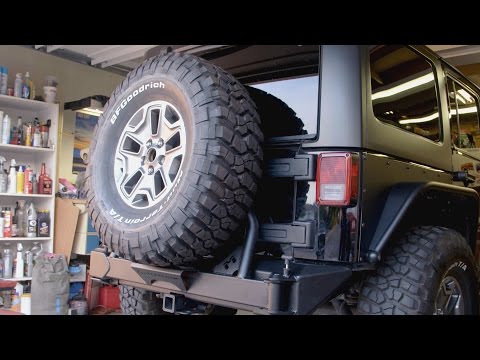
During and after the 2020 Ultimate Adventure, it became quickly apparent that the tire carrier we had modified to fit on the Ultimate International was not happy. It was our fault because we didn't spend enough time re-engineering it to work. It was designed to work on a JK Wrangler, which has a tailgate that helped support the weight of the tire by incorporating mounts that distributed some of the forces to the JK's swing-out tailgate. The UA International has a fold-down tailgate, which didn't offer the same support, but the real issue was the modified tire carrier lacked the torsional rigidity to resist the load the 38-inch Falken WildPeak MT created. Add in lots of hard road and trail miles, and the tire carrier was twisted and as a result wouldn't close properly and one of the welds began to tear. Time to redesign a tire carrier. Here's how we did it, and hopefully now it will last!
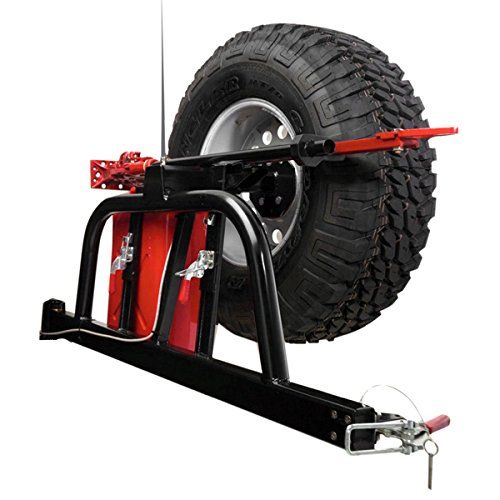
We started with some 2x4 0.120-wall rectangular tubing and a new sleeve from Fab Fours complete with some fresh bushings. We then miter cut the rectangular tube to drop the main part of the tire carrier down a few inches, so it mated up with the flat rear surface of the bumper.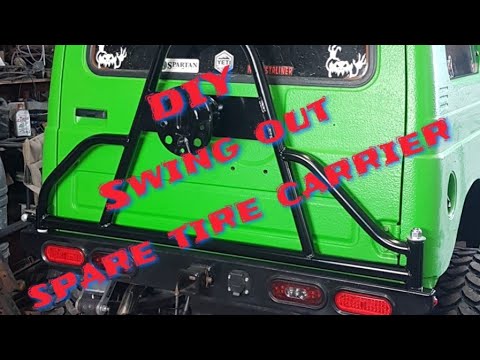 Our plan is to try a more traditional tire carrier design.
The main structural part of the new tire carrier is this rectangular tube. It should support the weight and resist the torsional load that the tire puts on the hinge pretty well. We will be adding some tubing and plate where the actual tire mount will go. Both of these should help make the tire carrier a strong unit.
This is the latch we used on the old tire carrier. It was recommended to us by our Fabrication buddy Rob Bonney from Rob Bonney Fabrication and is produced and sold by Jergens Manufacturing. It's the biggest Ture-Lok Toggle Clamp they sell. Rob also recommended setting the latch at an angle, so the carrier is forced forward and down into the carrier stop. We accidentally set it up the wrong way on the first carrier, so it wasn't securing the carrier as well as we intended. This is the way you want the latch to be mounted. With it latched, it pulls forward and down.
So we used the center of a replacement tire carrier from Fab Fours as the center of our new carrier. This piece has the holes that the actual tire mount bolts to. To make it as strong as possible we are going to add some lengths of straight 1.75x .120-wall DOM to the sides.
Adding bent 1.75x.120-wall DOM to each side forming an A helps support the upright portion of the tire carrier and helps to spread the load between the hinge and the latch. Bending and cutting the tube is pretty straightforward using our bender and miter saw to adjust fitment.
The last few steps of the build once everything is in place and test fitted is to finish weld, making the heavy tack welds permanent—or mostly permanent. We boxed in the end of the rectangular tubing, as well as the open part around the latch.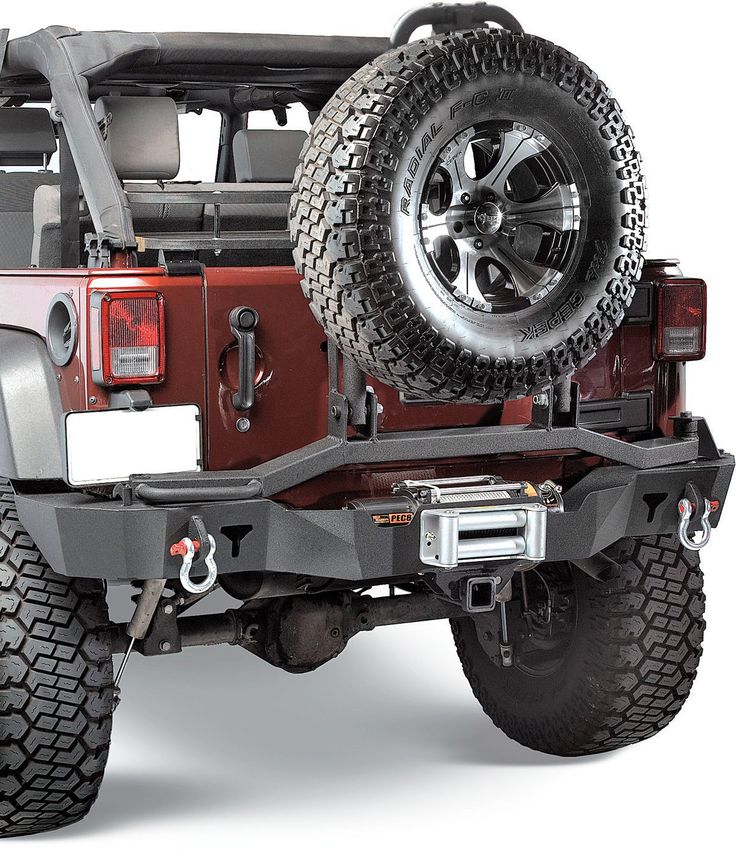 This boxing helps make everything stronger.
With the finish welding done and critical parts painted we handed the Ultimate International back to its owner, our buddy, Trent McGee so he can take care of destructive testing on the unit.
Ask us where to carry out quality bumper repair and we will answer. At our enterprise. Why, you ask? There are a number of reasons for this. The company is not the first day on the service market. We know the market conditions and sell quality products to our customers. Judge for yourself.
If there is a need to restore a damaged bumper, there are options for solving the problem:
Now in more detail about the possibilities of repair
We agree that by applying for a service to "uncle Petya", you save your hard-earned money. BUT, we assure you that the quality, to put it mildly, will be lame. You will soon have to apply again on the same issue. Where will you go? That's right, to the experts. So isn't it better to immediately ask for help from the pros and not waste your money and nerves?
Bumper restoration in Krasnoyarsk at our company is a guarantee of quality and meeting deadlines. This is a team of professionals who perform car restoration work on a daily basis, including the restoration of bumpers.
We have a room equipped with the latest technology, stands and tools to perform the work.
Our masters are constantly improving their skills, honing their skills. You can leave your car and we will set up a time when the work is done and you can pick up your car.
Minor restoration repairs can be done in your presence. We will give a second life to bumpers made of plastic and fiberglass! Suggest troubleshooting:
You can check the quality of work performed by contacting us at the enterprise.
Repair of plastic bumpers by the company's specialists is carried out by one of the following methods:
If you need to restore a bumper made of fiberglass, repair cracks, we offer a piece of fiberglass, which is pre-impregnated with a special resin composition.
Before starting work, the masters of the enterprise remove dirt from the bumper to be repaired. Then, inspect it for obvious and hidden defects (small cracks and chips). Clean the damaged area using a grinder or fine-grained sandpaper.
Carry out degreasing (white spirit) after the preparatory stage. We prime the surface and apply a layer of glue. We put fiberglass on the "sandwich". We give time for hardening and treat the working surface with a colorless varnish, then covering the bumper with car enamel and a second layer of varnish. 24 hours are given for drying, after which the masters proceed with the installation of the bumper.
PAY ATTENTION!
Many car service companies will take on restoration work. BUT not everyone has paint specialists, which is necessary after repairing a damaged bumper. Remember this!
We are fine with this issue, come and see for yourself!
Home / Car painting SZAO in Tushino on Volokolamsk highway - bumper painting in the STO8 service
Bumper painting SZAO in Tushino is one of the activities of STO-8.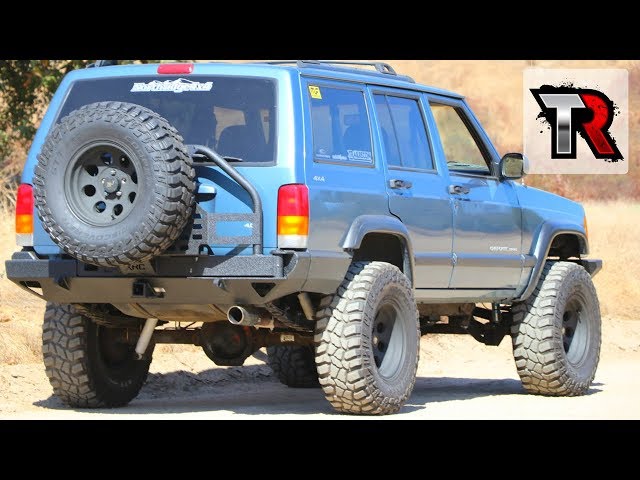 A distinctive feature is a high level of performance at a relatively low cost. If the estimate for the upcoming work seems exorbitant at the official representative, then with us it will be quite affordable for you.
If you think that it's enough to simply cover the bumper with a layer of spray paint, let me disagree with you. This operation involves a whole sequence of actions involving several specialists.
It all starts with the removal of the part. In modern cars, it is made of plastic. Each manufacturer strives to make the bumper mount as reliable as possible, so various fixing methods are invented. Despite the fact that we specialize in Skoda, Infiniti and Nissan, our craftsmen are familiar with all variants of this structural part. This means that you can bring a vehicle of another brand - we will do everything at the highest level.
The tinsmith restores the spare part to its original state. Contrary to popular belief, plastic parts can be refurbished too.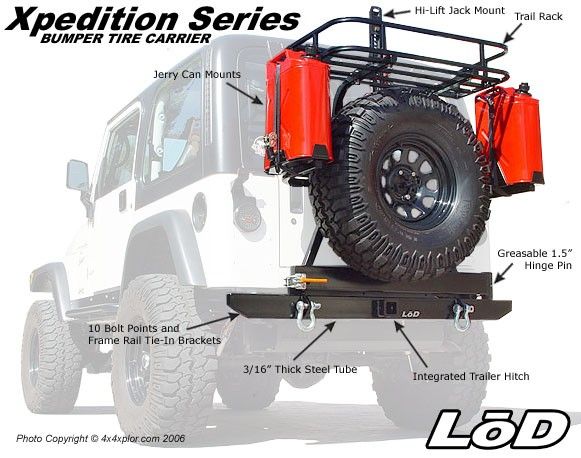 In addition, that part of the structural element that is responsible for protecting the car from deformation needs straightening. At this stage, it is important to do the job flawlessly, because the appearance of the whole car depends on it.
The next stage, which involves painting the Tushino bumper, is the preparation of the part. Work is underway to create a perfectly smooth surface. This is done using a grinder and a special putty. Then the primer is applied.
STO-8 has its own laboratory for the selection and mixing of paint. With the help of a spectrophotometer, a shade is found that completely merges with the color of other parts. An allowance is made for the fact that the paint fades over time. We do everything so that the restored bumper does not show signs of repair even after a long time.
The next stage is the painting work carried out in the painting and drying booth using a special gun and an air preparation unit. Separately, I would like to say about LKM. For us, there is only one brand - DuPont. She is recognized as the best in the world. The main distinguishing features are excellent hiding power, the ability to maintain the integrity of the surface even after many years, etc. Using materials from one manufacturer allows you to achieve their ideal result.
As you can see, painting a Tushino car, in particular, a bumper, is a complex task that requires the participation of specialists of various qualifications, the use of high-quality paintwork materials and the availability of appropriate equipment.
We strive to provide impeccable services to our clients, so we are very scrupulous in the selection of personnel. It is not enough to have a good theoretical base. Only employees with at least 5 years of experience are allowed to execute orders. Let's say more: we do everything in accordance with the manufacturer's technology, which allows us not only to work faster, but also to demonstrate an impeccable result.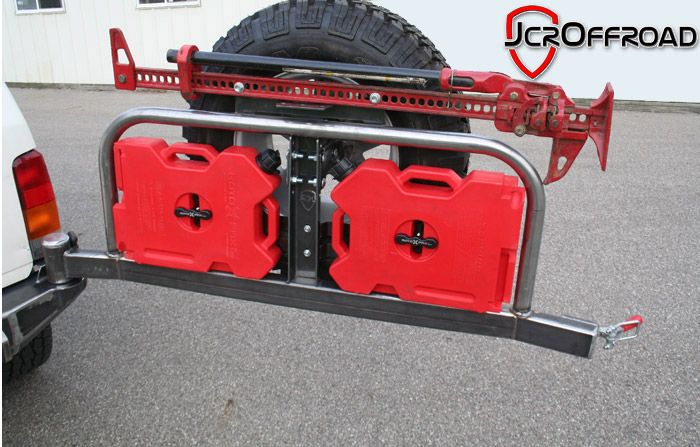
All necessary latest generation technical accessories are available. We use only what meets the standards of the factories where the vehicles are created. In other words, we are able to provide the level of painting that you see when buying a new car in the showroom.
Car painting in Tushino SZAO on the Volokolamsk highway is carried out by prior agreement with the customer. We will not puzzle you with an amount that is twice the initial amount, based on the results of the work. You will know everything in advance. We constantly monitor prices in the market, so the price of STO-8 is always competitive. By the way, if you do not need to perform any operations, the consultation is absolutely free. Just bring your car to us. A telephone conversation is also possible, but in this case it is difficult to guarantee objectivity, because from the words of the owner it is not always possible to form an impression of the upcoming repair.
It is comfortable to cooperate with us.