Home
Shelves
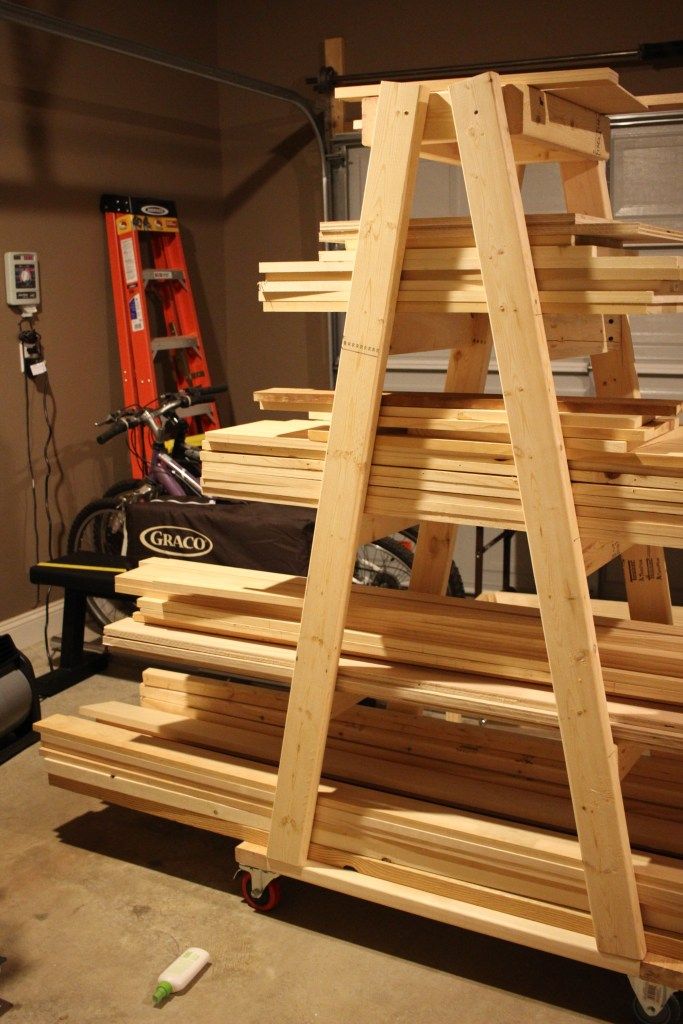
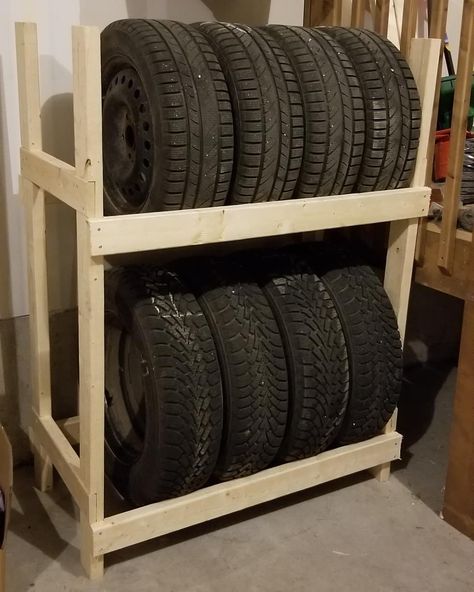
DIY Tire Rack Plans
Jack Sander | Shelves, Storage |
This step by step woodworking project is about diy tire rack plans. Saving space in the garage is important, especially if you have several cars. A good starting point would be to build a nice tire rack, so you keep them organized. My plans come with step by step instructions and you can easily adjust all the dimensions to suit your needs. See my other DIY projects HERE.
We recommend you to invest in the best materials you could afford. Therefore, you should buy weather-resistant lumber, such as pine or cedar. Always take accurate measurements before adjusting the size of the components at the proper size.
Drill pilot holes trough the components before inserting the wood screws, to prevent the wood from splitting. See all my Premium Plans in the Shop.
building-a-tire-rack
Building-the-sides
The first step of the project is about building the sides for the rack. Cut the components from 2×4 lumber at the right dimensions. Drill pocket holes, as shown in the diagram. Align the edges flush, making sure the corners are square. Insert 2 1/2″ screws to lock everything together tightly.
Assembly-the-tire-rack
Afterwards, you need to assemble the tire rack by attaching the horizontal components. Drill pocket holes at both ends of the 43″ long supports and insert 2 1/2″ screws. Add glue to the joints and make sure the corners are square.
How-to-build-a-tire-rack
Fill the holes with wood putty and smooth the surface with 120-220 grit sandpaper. Apply a few coats of paint or stain to enhance the look of the project. Remember that you can easily adjust the size of the rack to suit the dimensions of your tires.
Diy-tire-rack-plans
If you want to keep your tires organized and to save space in your garage, check out this project. If you like my project, don’t forget to SHARE it on Facebook and Pinterest.
Smart Tip: Don’t forget to share your projects with me, as I love seeing what you guys are working on. Send me the pics HERE. In addition, take a look over the rest of my DIY projects HERE.
Get PDF Plans
Thank you for reading our project about diy tire rack plans and I recommend you to check out the rest of the projects. Don’t forget to LIKE and SHARE our projects with your friends, by using the social media widgets. SUBSCRIBE to be the first that gets our latest projects.
error: Content is protected !!
This step by step diy woodworking project is about tire rack plans. The project features instructions for building a wooden double tire rack. The rack is build from 2x4s, so the costs will be relatively low and anyone can get the job done. You can make adjustments to the size of the rack to suit your needs. Work with attention and make adjustments to the design and overall dimensions if you want to get the job done in a professional manner.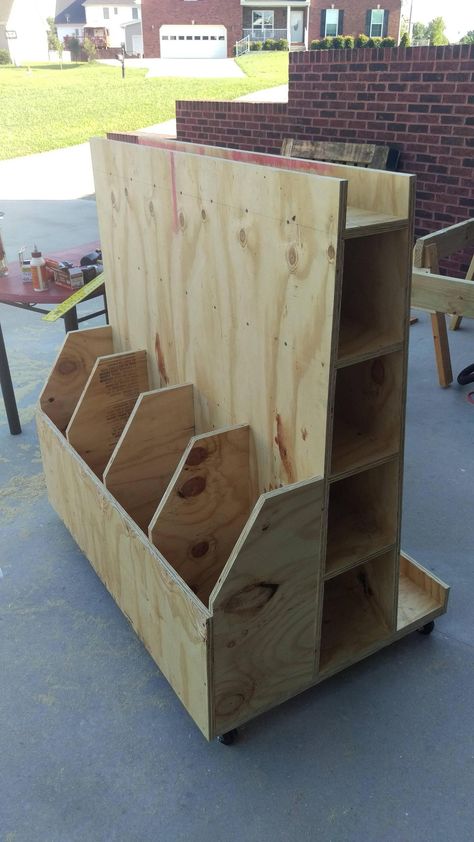
When buying the lumber, you should select the planks with great care, making sure they are straight and without any visible flaws (cracks, knots, twists, decay). Investing in cedar or other weather resistant lumber is a good idea, as it will pay off on the long run. Use a spirit level to plumb and align the components, before inserting the galvanized screws, otherwise the project won’t have a symmetrical look. If you have all the materials and tools required for the project, you could get the job done in about a day. See all my Premium Plans HERE.
Build a tire rack
[tabs tab1=”Materials” tab2=”Tools” tab3=”Time”]
[tab id=1]
[/tab]
[tab id=2]
Hammer, Tape measure, Framing square, Level
Miter saw, Drill machinery, Screwdriver, Sander
Safety Gloves, Safety Glasses
[/tab]
[tab id=3]
One day
[/tab]
[/tabs]
Make sure you follow us on Facebook to be the first that gets our latest plans and for some other exclusive content.
 Also, follow us on Pinterest to get many ideas for your backyard from all the internet! See how you can Support Us with no extra costs to you.
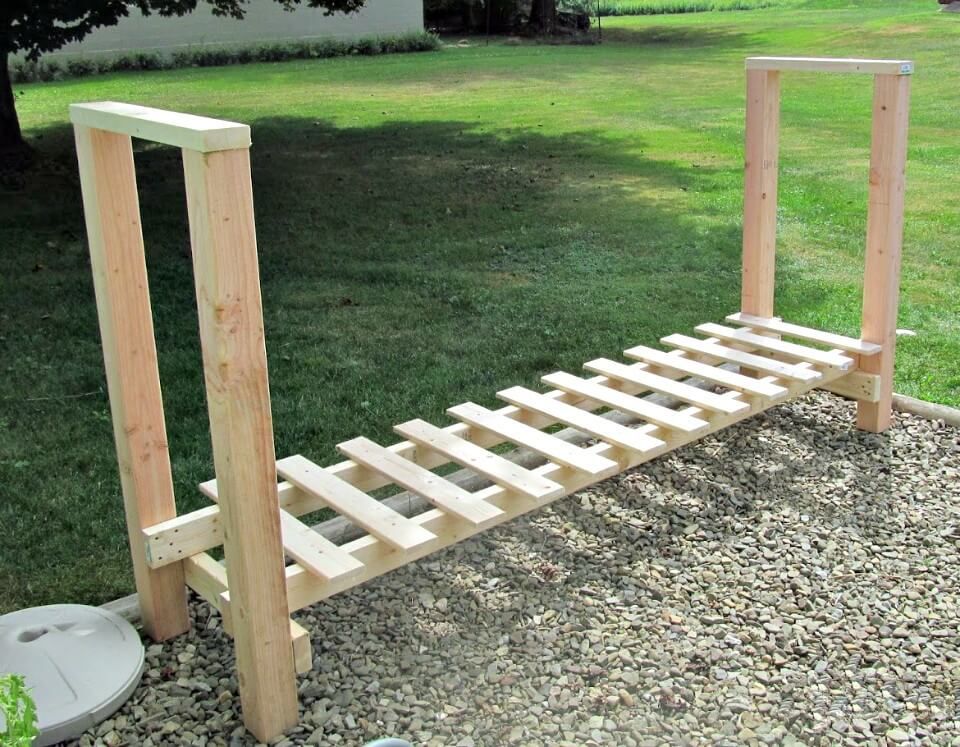
Building the sides
The first step of the project is to build the sides for the tire rack. Cut the components from 2×4 lumber at the dimensions shown in the diagram. Drill pocket holes at both ends of the horizontal slats and insert 2 1/2″ screws into the vertical posts. Make sure the corners are square and align the edges before inserting the screws. Drill pocket holes along the top edge of the vertical supports.
Attaching the top rails
Next, fit the 2×4 rails to the top of the vertical supports. Align the edges with attention and insert 2 1/2″ galvanized screws to create rigid joints.
Assembling the tire rack
After building the sides for the tire rack, you need to assemble the structure by fitting the supports. Cut the supports from 2×4 lumber, making sure you adjust their size to your needs (according to the width of your tires).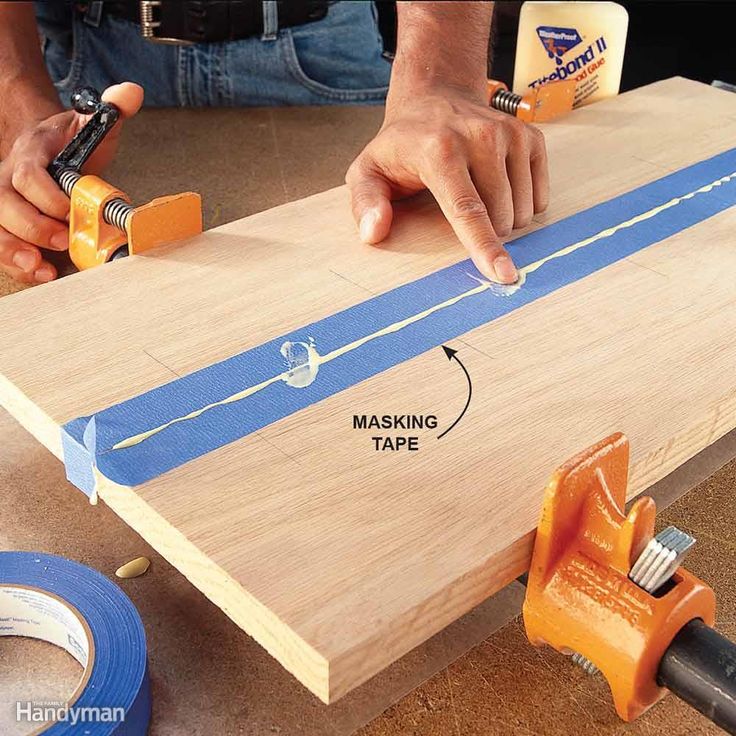 Drill pocket holes at both ends of the supports and secure them to the sides of the rack.
Building a tire rack
Smooth the exposed edges and double check if everything is joined together tightly.
Tire Rack Plans
Fill the holes and dents with wood putty and let it dry out for several hours. Use 120-200 grit sandpaper to smooth the surface. You can add even more vertical supports to the rack, if you want to enhance the storage space.
Top Tip: If you want to enhance the look of the project and to protect the tire rack, we recommend you to cover the components with paint or stain.
This woodworking project was about tire rack plans. If you want to see more outdoor plans, we recommend you to check out the rest of our step by step projects. LIKE us on Facebook and Google + to be the first that gets out latest projects and to hep us keep adding free woodworking plans for you.
Experienced housewives have seen from their own experience that there are no many shelving in an apartment.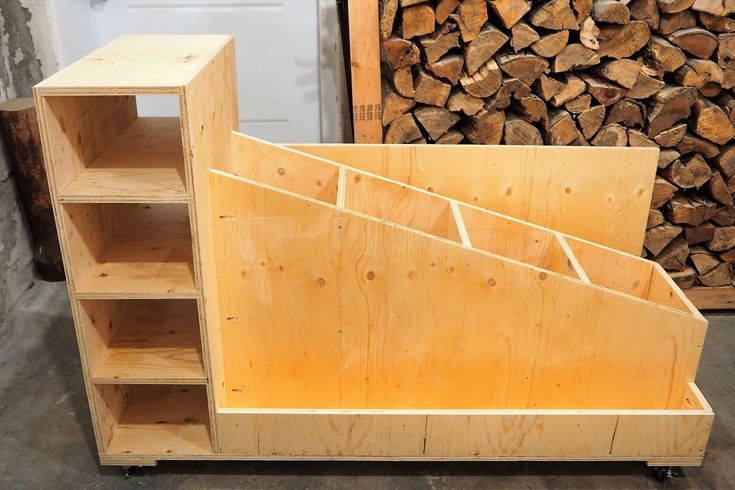 Before a new one appears, all its shelves are filled and again there are difficulties with the placement of various items. Racks are needed both in living rooms and in various utility rooms. Making a simple shelf is not an option for several reasons.
First of all, it can only be mounted on the wall, which is not always convenient. Secondly, the shelf has very little space and does not solve the problem of placing things. Thirdly, the design look of traditional shelves does not meet the high requirements of most of our compatriots.
Rabbage from wood with your own hands 9000The product will be useful only if it takes into account the requirements and wishes of the owners of the house to the maximum. Check out some design solutions for shelving, this knowledge will help you make the right choice.
Table. Rack type
| Rack type | Design brief |
|---|---|
| Stationary | The most common and most spacious design.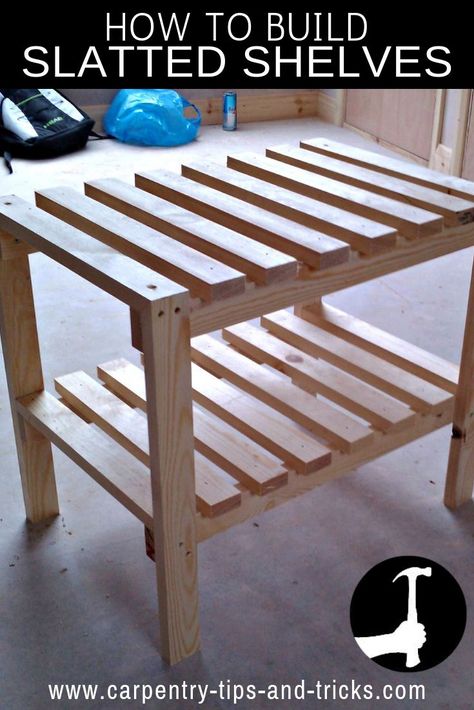 It is a rather large frame of vertical racks, horizontal shelves are installed on special crossbars. If the rack is very loaded, then supports should be used to strengthen the structure. It is a rather large frame of vertical racks, horizontal shelves are installed on special crossbars. If the rack is very loaded, then supports should be used to strengthen the structure. |
| Mobile | Lightweight furniture model, often on casters, can be moved to a new place at any time. Has a relatively small size. In order to avoid leaving marks on soft floor coverings, the legs are made with increased dimensions. |
| Rotating | Original design with one vertical support axis. The rack can rotate on a stand, this allows you to change the location of the shelves and items on them, depending on the wishes of users. |
| Wall-mounted | Looks very much like shelves, but slightly larger. The rack can have several levels and horizontal extensions. |
Each master calculates linear parameters independently, taking into account the initial data. But there are also general recommendations, failure to comply with which may cause a decrease in the functionality of the furniture.
The heaviest items should be placed on the lower shelves, and then in descending order. Proper layout significantly increases the stability of the rack, the risk of overturning is minimized.
Consider the original rack for indoor flowers, the structure is made of natural wood, can withstand significant dynamic and static loads. Corner braces are used to increase stability, they also perform a decorative function.
Step 1. Cut 4 pcs. bar two meters long. Slices must be strictly perpendicular to the plane, the dimensions are as much as possible the same. Choose bars dry, without cracks and rotten knots. If on the bars there is a noticeable slope or sag, then it is categorically not recommended to buy such lumber. The fact is that in the room, lumber will necessarily change the relative humidity index, which will cause a violation of linearity. Before buying, carefully inspect the bars along the length, the planes must be perfectly flat.
Cut timber for posts Minor deviations may occur in construction timber, there are no such stringent quality requirements for lumber. Slightly curved bars are attracted by hardware and aligned. In furniture production, this cannot be done, long bars will be vertical racks, they must be perfectly even.
Step 2 Prepare eight 57 cm pieces. The dimensions of the pieces are 50x50 mm. From these parts, long horizontal jumpers will be obtained in the future.
Cut blanks for long bridgesPractical advice. It is very difficult to make a cut of the desired quality with hand saws, so it is recommended to use a small circular saw. It makes cuts at various angles, and the depth is adjustable. The machine costs relatively little and allows you to significantly speed up carpentry work and improve their quality. Over time, you will learn how to make quite complex furniture with it.
Step 3. In the same way, prepare eight more 27 cm long blocks, they will go to the short lintels of the rack.
You will also need 8 short bridges. Step 4. Cut grooves into the short bars. This must be done in several stages.
Skip all eight parts in the above way.
Tip. Experienced furniture makers do not throw away small sawdust, they will come in handy during the manufacture of putty by mixing them with PVA glue.
Step 5. Remove the worktop surface and lay out the vertical uprights. They now need to mark the location of the shelves of the rack. Place them at the same distance and make marks. From the top and bottom you need to retreat five centimeters.
Lay out long bars on the table and mark the attachment pointsFlowers of various sizes look great on such a rack, select them according to their size and appearance, taking these parameters into account when marking.
Step 6. Drill holes in the fixing points, make sure that the parts do not move. The depth of the hole is equal to the length of the wood screw, and the diameter is approximately 1.5–2.0 mm less than the diameter of the thread body. Without prepared holes, the bars will crack, they will have to be changed. The slightly smaller diameter allows the threads to firmly hold the two pieces together in a single assembly. In our case, the hole diameter is 8 mm, we use hardware Ø7 mm, they must withstand significant loads. Using the same algorithm, make all the crossbars on one side of the rack.
Now you can start assembling the structure, but here there are some secrets.
It must be remembered that all joints of wooden parts must be done with glue. It not only connects wooden structures, but also perfectly aligns the docking point. Due to this, the contact area of the elements increases, the resistance of the rack to loosening increases. We will consider the connection of elements using both self-tapping screws and dowels, since furniture makers use both options.
 The joints are again lubricated with glue, the elements are inserted into the holes and clogged to the end. The exposed adhesive is removed. In this option, it is the dowels that will take the maximum load.
 After fixing the parts, the screws are unscrewed and dowels lubricated with glue are inserted
Glue is squeezed into the recesses, dowels are driven in, the protruding part is cut off
How to assemble the shelving - make your own decision, it almost does not affect the strength and reliability of the structure.
Step 1. Once the two narrow sides are assembled, proceed to join them. Lay flat on the table and insert a long bar between them. Carefully correct the position, the edges should be located exactly in the same plane with the short jumpers already installed.
Place the sides on the table, fix them with clamps and insert the end jumper.Step 2. Hold the structure from moving with one hand, and drill holes for the screws with the other hand.
Holding the structure in the correct position, screw the cross members with self-tapping screwsImportant. Keep in mind that the vertical support already has a hardware, pay attention to its position, the drill bit should go a little to the side.
If trouble has occurred and the drill has fallen into the self-tapping screw, it is recommended to proceed in this order.
 If you are working with a drill on wood, then it will most likely have to be thrown away. It has a sharp tip for centering the hole, which can break off. In addition, the drill is made of mild steel, the lower cutting edges will become dull.
 Step 3. Attach the last side, carefully grind the surface of the rack with a grinder.
Step 4. From the boards, cut the lamellas for the shelves of the rack, a centimeter of thickness is enough. Buying such flat boards in stores is quite difficult and expensive, it is much easier to cut them yourself. To do this, first make blanks of timber of the appropriate length, and then cut them into thin lamellas. If your circular saw cannot give such a significant depth of cut in one pass, then you need to make each lamella in two passes.
Shelf blanks are cut from the timber, after which they are spread into thin diesStep 5. Lay the shelves in place, correct the dimensions if necessary. All parts must be exactly and in the same plane. Now we need to start making crosses. We have already mentioned that these elements perform two tasks at the same time: they increase the stability of the structure and improve its design appearance.
Install the slats on the lintels Step 1. Cut the blanks to the required length from the bar. It is easy to recognize - you need to measure the diagonals and give at least two centimeters on each side of the tolerance for an exact fit.
Step 2. Cut the bars into lamellas two centimeters thick. The technology is no different from the previously described.
Thin slatsStep 3. Take precise measurements of each cross. If you assembled the rack carefully and accurately, then they should be the same, if there are differences - it's okay, you just have to make each part separately.
Trying the spacer on the shelving unitStep 4. Cut the ends at the right angles, push the blanks into place and draw the intersection lines. Do not rush, there should be no gaps in these places. They are very noticeable and indicate the lack of qualifications of the master.
The ends of the spacers are cut at an angle, according to the marking Step 5.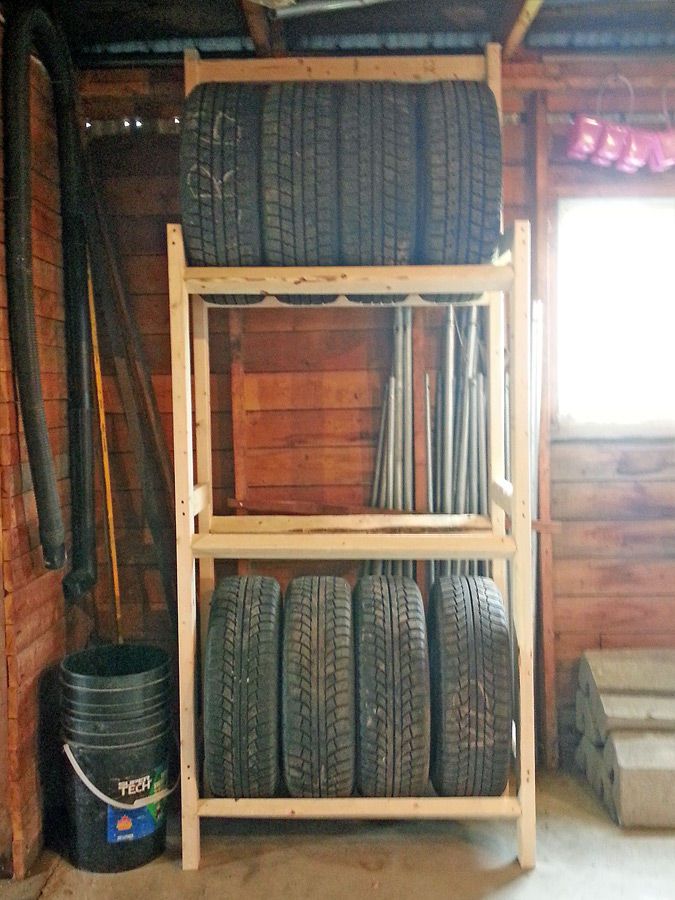 Saw along the lines at half the thickness of the battens. With a chisel, carefully select the wood from the joint. Spread the planes with glue and tighten them tightly with clamps. Leave overnight to dry.
Step 6. Place the crosses on the rack and fix them with small nails.
Install the spacers in placeStep 7. Nail the shelves, adjusting the gap between them using an elementary template at hand.
Fix the shelf strips with nailsStep 8. Clean the surfaces from dust and paint or varnish several times. Choose the finishing method taking into account the interior of the room in which the rack will be installed.
It is most convenient to paint such a rack with a spray gunPractical advice. If a pile rises on the surface of the tree, then after the first layer has dried, it must be removed with a fine sandpaper and only after that the painting should be repeated.
We deliberately did not give some dimensions, understanding the manufacturing technology, it will not be difficult to independently determine the dimensions of the furniture, taking into account the conditions of its operation and functional purpose.
Do-it-yourself wooden rack can be installed in the living room, hallway, kitchen, study and other residential and utility rooms. He will find his place in the children's room, although there are special requirements for furniture. You can buy it in the store, but it's better to make it yourself. Thus, it will be possible not only to save considerable money, but also to create the most convenient and cozy environment for children.
You can read a detailed article on how to make such furniture yourself on our website.
In the article I will talk about the features of a wooden rack with my own hands. I will pay special attention to the role of construction in the interior. I will describe the main types of racks. I will consider step-by-step instructions for making a homemade rack. I will clarify what materials and tools, fasteners and furniture fittings will be useful. I will name the methods of carrying out the assembly of the structure.
A distinctive feature of this design and its main difference from the shelves built into the cabinet is the absence of a rear wall.
Thanks to the design, a visual expansion of the space is achieved.
A room with several of these shelves does not seem cluttered. It is characterized by interior lightness and practicality.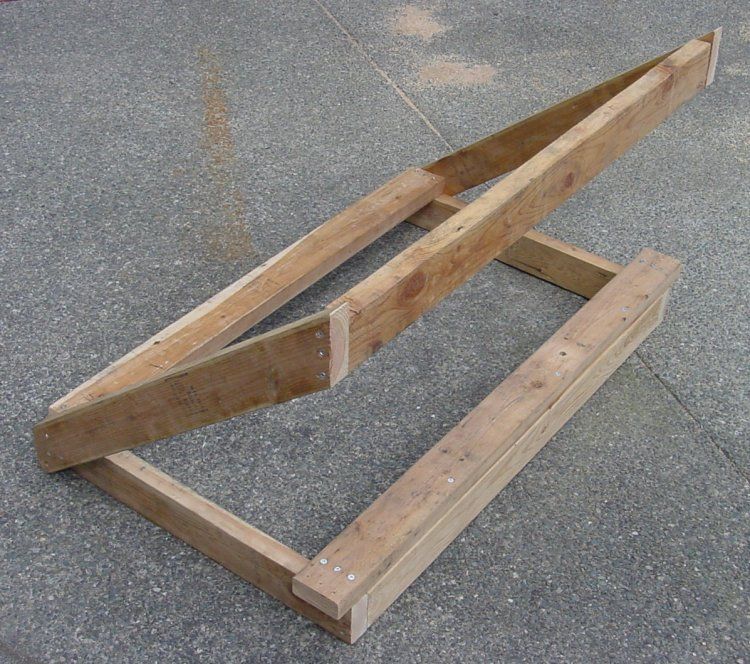 After all, you can put a lot of things on the shelves of the rack.
The main advantages of a wooden rack are:

The disadvantages include the constant accumulation of dust on the shelves. And there are often a lot of them. To fix the problem, you need to wipe the dust twice a week.
There is some fire hazard.
Because wood is flammable and burns quickly.
Racks are divided into: universal and special. The first allow you to store items and parts in containers and without it right on the shelves. The second are for storing metals.
According to the functional purpose and nature of the storage of goods, they are divided into:
Wooden shelving is more often used in offices and at home, less often for warehouses.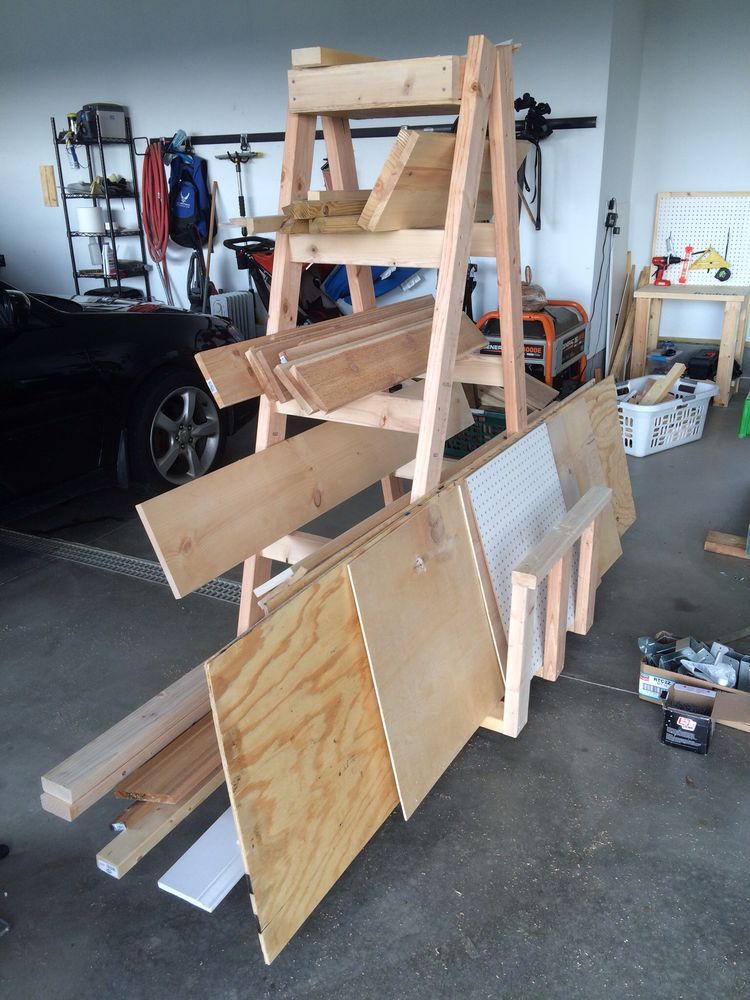
According to their design features, they are:
To assemble the wooden version yourself, you must first make a design drawing with dimensions. And only then, depending on the purpose of this piece of furniture and the intended performance, you can proceed to the selection of a suitable material.
To make the drawing accurate, it is recommended to correctly measure the place where it will stand. If it is a design for storing preservation or tools, then it is better to give preference to simple and reliable forms. Often done in the entire height of the wall. Whereas the width of the shelves will depend on its content. The length of the shelves also depends on what will be stored on them. If these are heavy objects and you need to withstand a large load, it should be no more than 0.9 m. Whereas for light things, the length of the shelf can be about 1.5 m.
Often, wooden models are made to decorate the room. This is where fantasy and forms come in, the lines and the embodiment of the design can be different.
Experts advise using natural wood, such as pine, oak or mahogany, to assemble the structure.
Do not use wood shavings for shelving. Since this material is short-lived.
The shelves will not withstand significant loads.
Features of the choice of material:
 This will significantly reduce the cost of the product.
 From tools and auxiliary materials we will need:
Various fasteners and fittings are required for fastening. Each stage of assembly requires different tools: from wood glue to self-tapping screws. Plus, it all depends on how the structure is assembled. Consider the popular options for such installation further.
Once all the blanks have been cut according to the drawing, assembly can begin.
So: