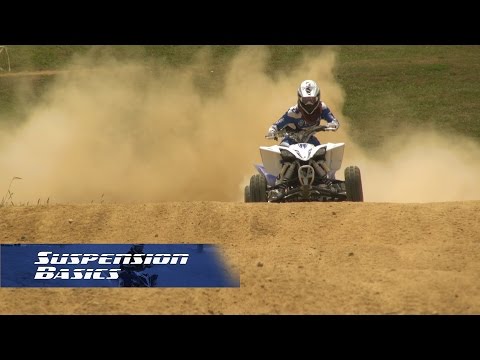
Have you ever wondered how your ATV’s suspension works? Do you need to adjust or lower your ATV suspension but do not know how? Knowing how your ATV suspension works and how to adjust it is important, as it will allow you to enjoy better quality rides.
ATV suspension works by helping the quad stay stable on tough terrain. Shocks and springs help resist rapid compression and unstable bouncing. You can adjust the preload, rebound, and compression of your shocks to make your rider softer or stiffer and raise your ride height.
In this article, you will learn how your ATV suspension works. I will also show you how to adjust, lower, and soften it. Let us get started.
An ATV suspension helps your ATV vehicle get over rough terrain. Unlike a regular car’s suspension designed for pavement and flat roads, an ATV suspension is designed to help you drive off-road.
When driving off-road, you will encounter ruts, bumps, rocks, ditches, logs, branches, and various other obstacles that you just won’t find on-road. The suspension ensures that your ATV vehicle can drive over these obstacles and not get damaged.
A suspension, in simple terms, smoothes out your ride. If you are driving on smooth pavement, the suspension does not have to do that much. However, if you drive off-road, it takes a lot more work to smooth out the ride. That is why ATV suspensions are more complex.
The suspension is responsible for other things as well. It makes sure that your vehicle is stable, even when driving on rough terrain. It consists of various parts that help it do its job, including springs and shocks.
I will go over what these components do in the next section, explaining exactly how your ATV suspension works.
As mentioned before, your ATV’s suspension has several parts that do several things to ensure your vehicle can drive smoothly, even on less than smooth ground.
I will go over several of these parts in this section. Although there is always a lot more to learn about how suspensions work, this section should give you a pretty good understanding of what your suspension does.
The two top things to know about are the springs and shocks. These shocks help absorb the force acting on your vehicle.
For example, when you drive over a rock, the shock absorbers help absorb the shock that your vehicle would receive. If they do their job well and absorb the shock, you will not feel it as much.
ATV shocks usually have oil in them. This oil helps prevent the suspension from compressing. There are various designs available. You might get a shock with an oil reservoir within the shock.
This oil works against the compression that comes with normal bumps and helps keep your vehicle stable.
Also, the springs help prevent compression. The springs’ job is to get your vehicle to “spring” back into its original position instead of being compressed when it goes over a bump or rut. If the springs are strong, your vehicle will not compress as much.
It will not bounce back and forth as much, as the springs will hold it back from that.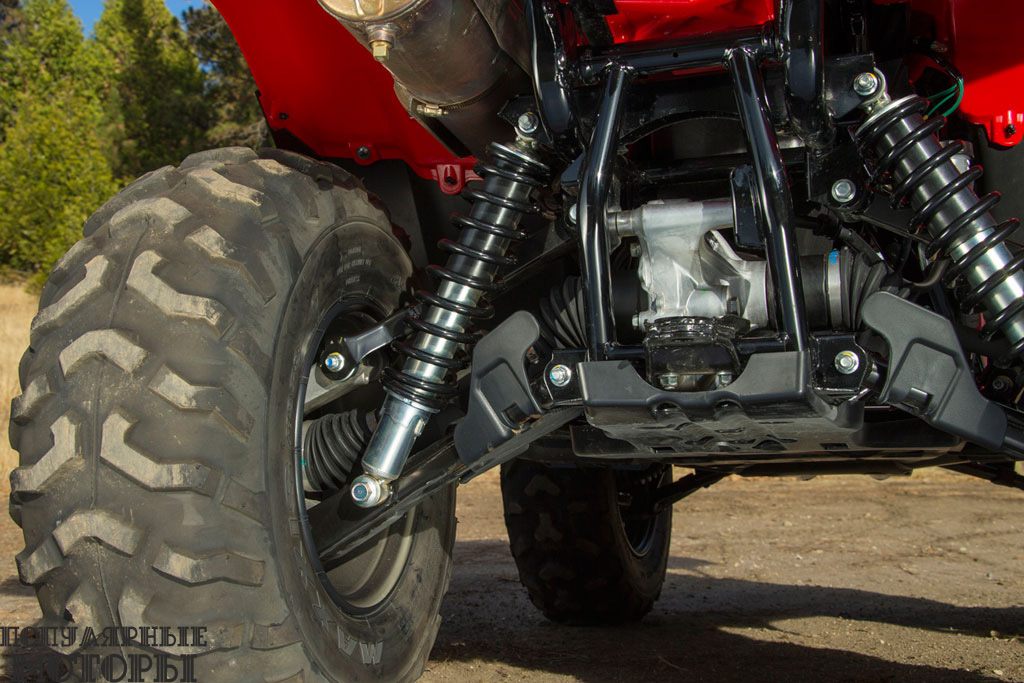 You will not feel the bumps so much in your body as a consequence. Also, you will have additional ground clearance.
If your springs are old and weak, they will not do as good a job in resisting compression. Your ATV will compress more with every bump and rut. You will feel them more in your body, and you will have less ground clearance.
What you might not know is that there are several types of shocks on the market. Depending on which type of shock you have, you may be able to make certain adjustments. Some shocks do not allow you to make certain adjustments.
Here’s a helpful video to give a visual:
There are many types of shocks available. Right now, I will focus on two main types.
This type of shock has an oil reservoir built into the shock itself. The problem with this kind of shock is that as the shock moves back and forth when you go over bumps on the road, the oil can heat up. The reason it can heat up is due to the friction of the shock’s movement.
A monotube shock is the most common type of shock on ATV vehicles. If you have a standard ATV vehicle, you probably have a monotube shock. What is the disadvantage of this kind of shock?
When the oil heats up due to the friction of the shock’s movement, foam can form. This foam reduces the effectiveness of the oil and its capability of resisting compression.
However, some shocks have separate reservoirs. A remote reservoir is connected to the shocks by a tube. You can put a remote reservoir anywhere on your vehicle.
A piggyback reservoir is not located in the shock but right by it. It is normally attached to the shock; hence the term piggyback. However, since it is not inside the shock, it will not heat and foam up like regular monotube shocks.
I mentioned that some types of shocks have different adjustability options. Let me go over that in the next section.
Generally, you can adjust the preload, compression, and rebound of the shocks. However, not all shocks allow you to adjust them in the same ways. I will explain what each of these adjustments is.
The first thing I will discuss is adjusting the preload of your shocks. The preload refers to how much pressure is put on the shocks by default. You will be able to adjust the preload on most shocks, even basic shocks.
Usually, there will be a collar on the shock, which will allow you to adjust the preload. However, not all shocks will have the same type of collar.
Some shocks will have a collar and locking ring that gives you more flexibility in how much preload you can put on your shocks. Other collars might only have five levels of adjustment.
This adjustment is up to you. However, keep in mind that the softer the ride and the less preload, the more likely it is for your suspension to bottom out.
I would recommend that you raise your wheels and entire vehicle off the ground while adjusting the preload. It is simply easier to turn the collar that way.
Adjusting the preload might be the only way to adjust the compression – as I mentioned before, most shocks, even basic shocks, at least allow you to adjust the preload.
Some shocks will have double locker rings. To adjust the preload:
The next type of adjustment is compression. The compression helps prevent your suspension from bottoming out. It is the damping, and it controls the speed of the movement of the shock’s shaft into the body of the shock.
Adjusting the compression allows you to control the speed of the flow of fluid. If the fluid flows too fast, the shock might be too stiff. If it is too slow, the shocks can compress and move rather quickly, which can cause them to bottom out.
So, how do you adjust the compression damping? Usually, there will be an adjustment knob on the body of the shock. It might also be located on the shock reservoir.
There might be several adjustment settings. Usually, the shocks will have a needle valve system and not orifices. When adjusting a shock with a needle valve, you adjust the oil flow, which affects the compression.
I will say that for most shocks, even aftermarket shocks, there is no high-speed compression adjustment. As such, the adjustments you make to the compression damping will matter for small bumps and ruts, not large bumps.
What kind of adjustment is better? I would recommend keeping the oil flow nice and not too slow. Otherwise, the shock can bottom out. The tires will stay connected to the ground.
It will be easier to brake. You do not want to make it too soft. You also do not want to make it too swift. You can adjust the compression based on the track or trailing you are driving on.
Finally, I will discuss adjusting the rebound. Remember, the point of the springs is to make sure your shocks rebound back into their original positions after compressing when hitting bumps or ruts. They can rebound quickly, or they can rebound slowly. That is what this adjustment is for.
If the shocks do not rebound quickly enough, and you keep hitting more bumps and ruts, they will have to compress again. However, to ensure that your suspension is working properly, it needs to compress and rebound after reaching a bump.
If it is not doing that, it will have lost all of its compression travel. It will not work properly, and you may feel your ATV moving quickly from side to side. That is not a lot of fun.
Either way, look for it on the rear shocks of your ATV. Your stock front shocks will probably not have this adjustment possibility, but if it is a second hand ATV with aftermarket front shocks installed, you may very well find this adjustment option on the front shocks.
I know that what I wrote here might seem confusing if you do not know much about suspensions and ATV mechanics.
That is why I am linking the following video, which should help you understand the basics of ATV suspension tuning:
Here is a video that explains the preload very well:
The best way to lower your ATV’s suspension is to buy custom shocks. However, you can adjust the ride height of your shocks as well by adjusting the preload. As mentioned earlier, if you raise the preload and have stiffer shocks, you will have a slightly higher ride height. If you want to lower your ATV suspension, lower the preload pressure.
As for softening the ATV suspension, that is also done by lowering the preload.
Before I close out this article, I will cover some of the most common ATV suspension terms you should know about. Once you know these terms, you will figure out how to work your ATV suspension.
The ride height refers to how high the seat of the ATV is.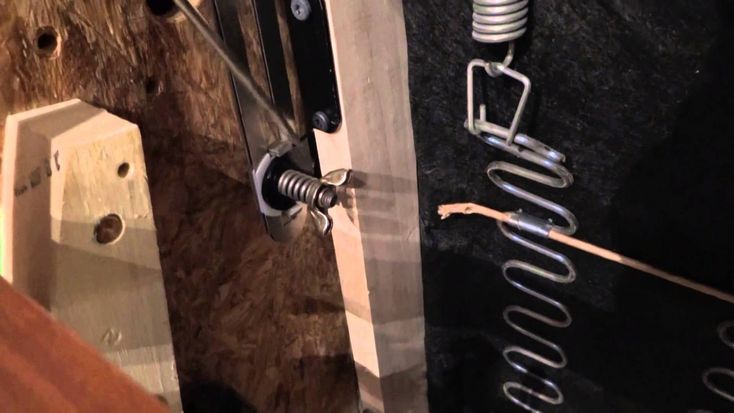 This height is measured at the time the rider is on the vehicle. That is why it is referred to as ride height.
Camber refers to the tilt of your tires. If they are tilted in at the top and tilted out at the bottom, they have negative camber. If they are tilted out at the top and in and the bottom, they have positive camber. There are different levels of positive and negative camber. Why would you want a negative camber?
Tilting them out at the bottom will help increase traction when going through corners. More of the contact patch will have contact with the ground. If they have a positive camber and are tilted in at the bottom, you will lose traction on corners.
Free sag refers to how much travel the suspension has, considering only its weight and not the rider’s weight. That is how much the suspension sags under its weight. The weight of the ATV will lead to some level of compression and sag. Keep in mind that the front wheels’ free sag might not be the same as the back shocks’ free sag.
The front shocks are located on the front wheels and help them resist compression.
On the other hand, the rear shocks work on the back wheels and help them resist compression.
As opposed to free sag, rider sag refers to the amount of suspension travel used when the rider is sitting in the driver’s seat. Remember, this is not the total suspension travel that the shocks are capable of. Usually, it will be around a third or less of the total possible travel. The suspension will sag under the weight of the rider. It means that there is less travel that can be used when driving over bumps and rocks.
I mentioned bottoming out a few times. You want to avoid bottoming out when possible. Bottoming out refers to when the shock is completely compressed. When this happens, your body can feel it rather harshly, and you can get pain. By adjusting the compression to make it move slower, you can prevent the shocks from compressing completely and bottoming out.
I mentioned that you could adjust the rebound. If it rebounds too quickly and jumps up and down, it is bucking. In other words, the shocks are going up and down quickly to the point of being out of control.
At this point, I hope you understand a little more about what the shocks do and what their main components do. You should also have at least some understanding of the main kinds of adjustments you can make and why you might want to do them. The main adjustments to make are the preload and rebound adjustments.
Sharing is caring!
The two main reasons to alter the gear ratio of your ATV is to get more acceleration or to get more top speed. A lot of riders will use terms like ‘gear up’ or ‘gear down’ to describe the changes to their gear ratio by swapping out a sprocket for one with a different number of teeth.
You may have also heard people talk about a ‘taller’ or ‘shorter’ gear ratio. But to understand gearing up or gearing down and what it means to your gear ratio, you have to know what the gear ratio is actually a calculation of.
If you’d prefer to skip all the details about gear ratio, there is a chart below you can use to decide what number of teeth you want your sprockets to be. Just remember, the smaller the gear ratio number, the more top speed you’ll get. The larger the gear ratio number, the more acceleration you’ll get.
To obtain your gear ratio is simple, you can use the chart provided below, or simply divide the number of teeth on the rear sprocket, by the number of teeth on the front sprocket. For example if your rear sprocket had 40 teeth and your front sprocket had 12 teeth. 40/12 = 3.33, your gear ratio would be 3.33.
The term ‘gearing up’ or ‘gearing down’ refers to changing one of your sprockets out with one that has a different amount of teeth, to change your gear ratio. Gearing up may also be called going taller, and gearing down may be called going shorter.
You can gear down by installing a larger rear sprocket (with more teeth) or a smaller front sprocket (less teeth). Gearing down will actually increase your gear ratio number. Gearing down will increases acceleration but will decrease top speed.
You can gear up by installing a smaller rear sprocket (less teeth) or a larger front sprocket (more teeth). Gearing up will decrease your gear ratio number. This will increase your top speed, but decrease your acceleration.
Tire size plays a big role in your gearing. Think about it this way, your gear ratio or ‘final drive ratio’ is changed so your tire rotates more or less per sprocket rotation right. So for every inch you increase your tire size it’s equivalent to 1-2 teeth on the rear sprocket.
Another calculation you could use to give you a better idea is to divide the front sprocket teeth by the rear sprocket teeth, then multiply by tire height in inches and pi. This will give you the amount of ground your tire will cover after one front sprocket rotation.
For example, your front sprocket has 13 teeth, your rear sprocket has 41 teeth, your tire is 22″ tall, and pi is 3.14. The equation would be: 13 / 41 * 22″ * 3.14 = 22.9″
Your tire will travel 22.9 inches for every front sprocket rotation. I know this is getting more in depth than it needs to be, but I find this stuff interesting. If you use this same example, but change the rear sprocket to 44, you will notice the ground covered drops to 20.4″ per rotation.
So we can prove with math this way, that increasing the rear sprocket increases torque and acceleration, but will decrease top speed. With a smaller rear sprocket, more ground will be covered per rotation which increases top speed.
Basically what I meant to say, is that you could effectively gear down your ATV by simply getting larger tires. Larger rear tires will increase acceleration and decrease top speed. While smaller rear tires will decrease acceleration and increase top speed.
This really depends on personal preference, but gearing down has always been recommended for tight trail riding and track riding. If you’re going to be cornering a lot and need to slow down and accelerate often, it’s best to gear down to increase torque and acceleration.
Gearing up is great for open stretches and straight-aways. A lot of people that plan to race their quads in straight open areas will gear up their ATV for more top speed.
I would suggest only changing out your rear sprocket for gear ratio changes if you can. One tooth on the front sprocket is equal to about three teeth on the rear sprocket give or take. It’s a lot easier to make small gearing changes if you only swap out the rear sprocket.
Besides, if you use a smaller than stock front sprocket, you will be causing extra wear and tear on the chain. The chain will need to now make a tighter turn around that front sprocket, which will wear it out faster.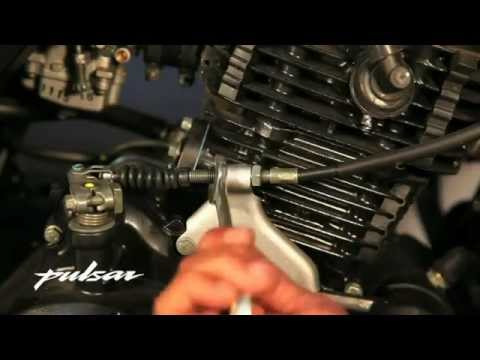
I would only adjust the sprocket by a couple teeth at a time. If you don’t know what you’re doing, you could be making major changes in the way your ATV runs.
If you’re riding through mud a lot, and notice your machine bogging down on you, you may need to gear down a little bit. Be careful though, if you gear down too much, you may notice that you need to shift a lot more often.
With a higher gearing, you will need to shift less, but may not have the power to get out of tough spots. Higher gearing is best for flat straight areas that you have no chance of getting stuck in.
Keep in mind that when changing out a sprocket for a different size, you may need to adjust the size of your chain to fit. If you plan on getting a new sprocket, I would look at new chains as well.
For an in depth step by step guide to change out a sprocket, I wrote a How To Change The Chain And Sprockets On An ATV article to help you out.
This chart can be a guide for you to help decide what size sprocket you might want to go with.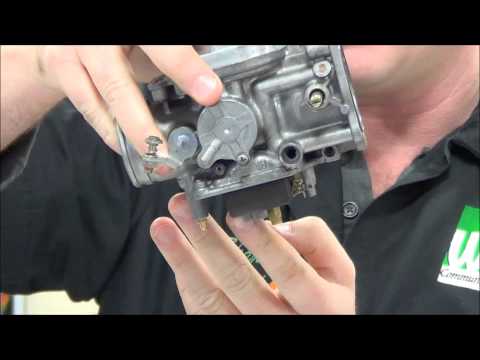 With more rear sprocket teeth, you are increasing your acceleration. With less rear sprocket teeth, you are increasing your top speed.
It’s important to keep your chain and sprockets lubed up and in good working order if you want them to last. It’s true, the sprocket teeth wear down and the chain stretches. But you can help minimize those effects by keeping the chain clean and waxed.
I like to use this Chain Cleaner And Chain Wax Kit from Amazon to keep my chain and sprockets cleaned and working. I like that set because of how easy it is to use the aerosol cans. Just spray the cleaner wipe the chain down, spray some rust protection and chain wax on and you’re good to go.
To find out if you’re chain has stretched you can measure the distance between pins and compare to what’s in your users manual. If you’re replacing your sprocket due to wear, I would suggest also replacing the chain. It’s best for the chain and sprocket to wear together.
If your sprocket looks like this image, replace it. You will notice the teeth on the sprocket wearing out and becoming sharper or scared. If it gets bad enough, it will stop gripping the chain and you’ll feel the sprocket slipping off the chain. When it does finally catch the chain again, it could snap it.
Sharing is caring!
Adjusting the valves on an ATV is one of the most important maintenance steps. Ignoring this operation will adversely affect the operation of the engine, make it difficult to start the ATV, and even lead to a number of serious breakdowns. Therefore, it is important for the rider to figure out when it is necessary to carry out the adjustment and whether it is worth performing the procedure on their own or it is better to seek help from an ATV store in Kyiv.
Experienced motorists advise adjusting the valves on the ATV immediately after purchasing the equipment. The fact is that when assembling devices (especially Chinese ones), manufacturers do not pay due attention to this procedure. And the operation of ATVs with incorrectly adjusted clearances leads to:
The second clearance setting should preferably be done when the vehicle is running in. That is, after 300-350 km of the way, the rider should check the cylinder head.
Please note: An operation such as adjusting the valves on an ATV is considered a mandatory maintenance item and should be carried out every 1000-1500 km.
Before adjusting the valves, you need to prepare the quadric for the procedure. To do this, it is recommended to raise the front of the ATV. This will clean the cylinder head oil bath and remove excess fluid.
Then dismantle the body parts that make it difficult to get to the valves. However, it all depends on the model of the quadric, in some devices you can get to the cylinder head without removing the plastic parts and assemblies.
The rider also needs to prepare tools: an 8 wrench (better with a head so as not to damage the nuts), measuring probes (you can find them in any auto shop) and a hammer.
Let the machine cool down before adjusting the ATV's valves. The procedure is performed "cold", so it is better not to start the ATV before adjusting.
In fact, adjustment is a basic operation, so even a novice ATV rider can perform it. The driver only needs:
 In order not to “lick off” the faces of the nuts, it is recommended to use a wrench with a head.
After making adjustments, start the ATV and observe engine operation. It is possible that at first the device will make a slight tapping sound. However, if the knock is strong, then the valves were not set correctly.
Important: Do not load the ATV heavily after adjustment. Carry out a mini run-in (5-10 km). Also, during the trip, listen to the sounds that the ATV engine makes.
02/19/2021 3867
Adjusting the valves on an ATV is a maintenance procedure. As a rule, the first adjustment of the valves of modern ATVs is made after a run of 1000 kilometers. We recommend checking the valve clearances of the ATV and, if necessary, adjusting them after 300-350 km.
Very often, especially on Chinese-made ATVs, the gaps are set incorrectly right from the factory, also due to heating and cooling cycles, the valves can stretch and the gap will be broken, which can subsequently lead to damage to the valve plates, deterioration of the timing mechanism and even to valve burnout.
So if you're serious about engineering and want to maximize the performance of your ATV engine, don't be lazy and check the valve clearances during your first service.
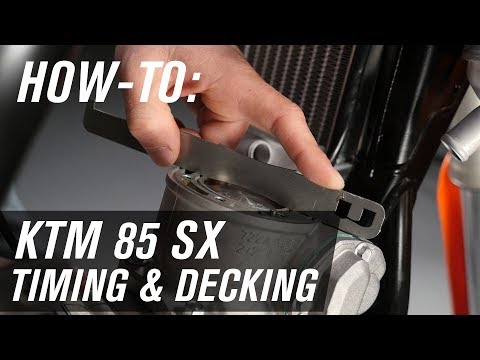
How to adjust the valves on an ATV.
Before unscrewing the valve cover, we recommend lifting the front of the ATV with a winch to empty the cylinder head oil sump, this will allow you to stay a little cleaner when removing the cover and not smear oil on the parts of the ATV. By the way, some ATVs have special adjustment windows to avoid removing the valve cover completely.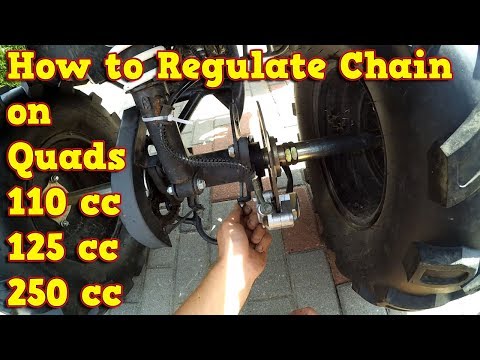
You may need to remove the gas tank plastic trim and the gas tank to remove the valve cover.
Attention! When adjusting, the ATV engine must be absolutely cold (30-35 degrees).
Next, you need to unscrew the cylinder head cover or windows (it is better to use a head, and not a ring wrench, so as not to damage the edges of the bolts). After all the bolts are unscrewed, the cover may not immediately give in, in order to move it, it is better to lightly hit the bottom edge of the cover with a hammer through a wooden block. Do not attempt to use sharp objects to avoid damaging the lugs on the lid.
After removing the cover, carefully remove the rest of the gasket from the cover and from the head so that they do not enter the engine.
Next, you need to set the cylinder to TDC (top dead center) of the compression stroke.
So, in order to catch the TDC, you need to unscrew the viewing window cover, unscrew the spark plug (required) and crank the crankshaft with a manual starter (kick starter) until a special mark appears in the viewing window.
Only check and adjust valve clearances at top dead center (TDC) at the end of the compression stroke. The marks on the timing chain sprocket and the reciprocal marks on the cylinder head help to establish this position.
Sometimes the mark is applied incorrectly and therefore it is better to check the TDC control, being reinsured, by the position of the valves. All dead center valves must be closed.
We need special feeler gauges to check the clearance. They are sold at any auto shop.
Next, we need to check the valve clearance, for which the probe is inserted into the valve stem clearance.
The valve clearance is different for each ATV model, and you can find its value in the manual for your ATV.
The feeler gauge must enter the gap freely (should not cause scratching sensation when moving in the gap), but at the same time, a feeler gauge larger than 0.01 mm should not enter the gap.
If you notice that the valve clearance on your ATV does not match the manufacturer's instructions, you need to make an adjustment.
To do this, loosen the lock nut and adjusting screw, insert a feeler gauge of the correct size into the gap, turn the adjusting screw until it contacts the feeler gauge, and fix the lock nut. Then check the gap again.
It is not necessary to tighten the nuts too hard, a medium hand force on the wrench is sufficient.
After all valves have been adjusted, the cylinder head cover must be reinstalled. To do this, lubricate the tidal surface of the cover with a heat-resistant sealant with a thin even layer (it is not worth saving on it). Let it rest a little (usually within 10 minutes) until the sealant stops staining your hands when touched, but leaves a fingerprint.
Carefully align the head cover and cross tighten the bolts. Do not forget to put back the cap of the TDC control window. Reinstall all the parts you dismantled.
Start the ATV and listen to the engine, do not pay attention to a small knock that does not stand out against the noise of the engine, but a distinct, clearly audible knock should alert you, as the presence of a knock in the engine indicates that the valves are adjusted not properly.