Knowing how to change a tire is a necessary skill for all drivers. If you rely on a cell phone to save you in a roadside emergency, there’s always that chance you will forget to charge it, be out of range, or leave it at home. Flat tires can happen anywhere, and a cell phone is no substitute for knowing how to change a flat tire.
Thankfully, changing a tire isn’t all that hard! Just adhere to the following guidelines to be prepared in case you have a flat.
These items should have come with your vehicle:
Jack
Lug wrench
Fully inflated spare tire
Vehicle owner’s manual
If you have misplaced any of these items, or if your car did not come with these items, you should purchase new ones right away. And be sure you’re regularly inflating the spare tire to your vehicle manufacturer’s recommended PSI. You should check the spare’s air pressure every time you check your other tires.
Remember to check pressure every month and before long trips or carrying extra load.
Here are some items that don’t come with your vehicle but that you should stow in your trunk or glove box in case you have to change a flat tire:
Flashlight with working batteries
Rain poncho
Small cut of 2"x6” wood to secure the jack
Gloves
Wheel wedges
As soon as you realize you have a flat tire, do not abruptly brake or turn. Slowly reduce speed and scan your surroundings for a level, straight stretch of road with a wide shoulder. An empty parking lot would be an ideal place. Level ground is good because it will prevent your vehicle from rolling. Also, straight stretches of road are better than curves because oncoming traffic is more likely to see you.
Never attempt to change your tire on a narrow shoulder near oncoming traffic. Keep moving (slowly) until you find a safer spot. While driving on a flat risks ruining your rim, replacing a rim is better than being hit by an inattentive driver.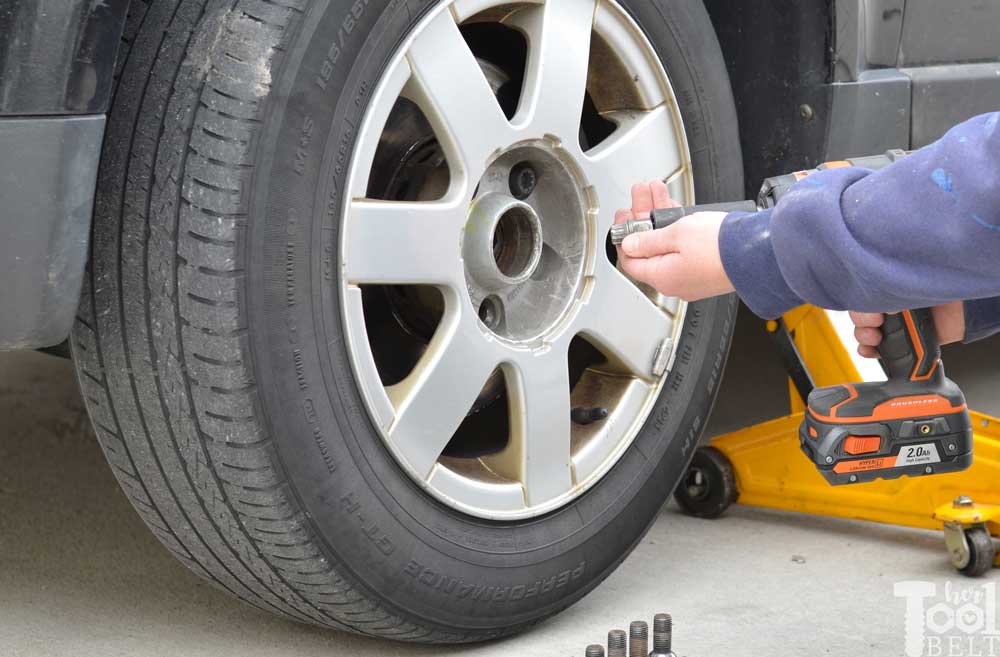
Make sure to consult your owner’s manual and review their specific steps on how to change a flat tire for your vehicle
Your hazard lights or “flashers” will help other drivers see you on the side of the road. To avoid an accident, turn them on as soon as you realize you need to pull over.
Once stopped, always use the parking brake when preparing to replace a flat tire. This will minimize the possibility of your vehicle rolling.
Wheel wedges go in front of or behind the tires to further ensure the vehicle doesn’t roll while you fix the flat tire. If you’re changing a rear tire, place these in front of the front tires. If your flat tire is at the front, put the wheel wedges behind the rear tires.
Bricks or large stones will work just as well as “real” wheel wedges. Just be sure they’re large enough to stop the car from rolling.
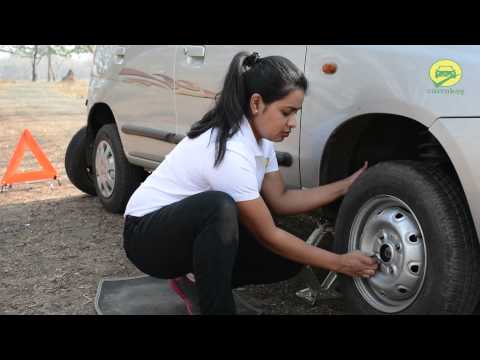
If your vehicle has a hubcap covering the lug nuts, it’s easier to remove the hubcap before lifting the vehicle with the jack. If your lug nuts are exposed, you can skip ahead to Step 6.
Use the flat end of your lug wrench to remove the hubcap. This will work for most vehicles, but some hubcaps need a different tool to come off. Consult your owner’s manual for proper hubcap or wheel cover removal procedures.
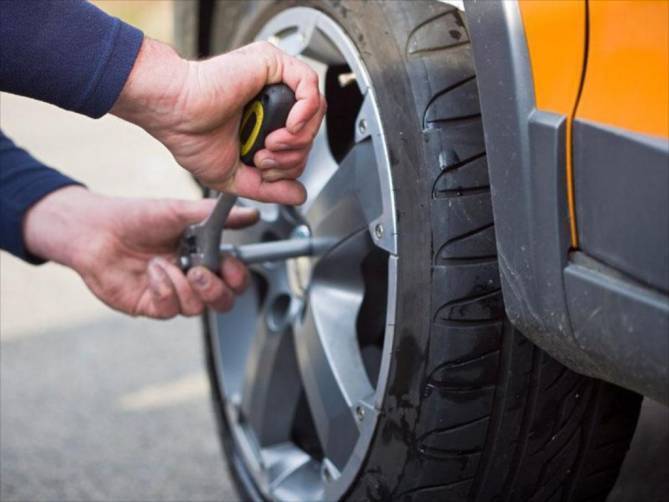
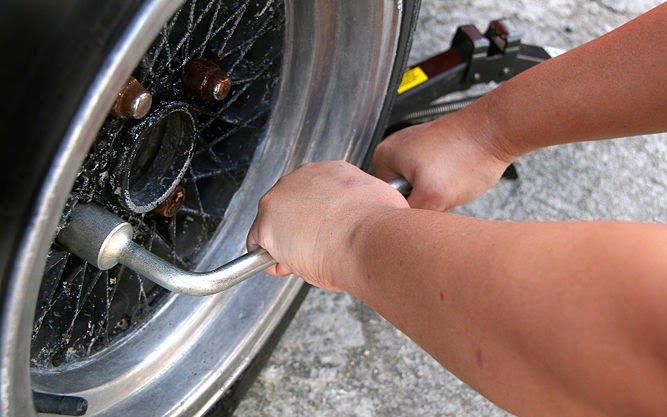
Using the lug wrench, turn the lug nuts counterclockwise until you break their resistance. You may have to use force, and that’s ok. Use your foot or all of your body weight if necessary.
Loosen the lug nuts about ¼ to ½ of a turn, but don’t remove them completely yet. Save that for when it’s time to remove your tire/wheel from the vehicle.
The right place for the jack is usually beneath the vehicle frame alongside the tire that’s flat. Many vehicle frames have molded plastic on the bottom with a cleared area of exposed metal specifically for the jack. To safely lift and avoid damage to the vehicle, follow the instructions for jack placement in your vehicle owner’s manual.
To prevent the jack from settling under the weight of your vehicle and coming off balance, place a small cut of 2x6” wood beneath it before attempting to raise your vehicle. This tactic is especially helpful on asphalt.
With the jack properly positioned, raise the vehicle until the flat tire is about six inches above the ground.
Never put any part of your body under the vehicle during or after raising the vehicle with the jack.
Now it’s time to remove the lug nuts all the way. Since you've already loosened them, you should be able to unscrew them mostly by hand.
Gripping the tire by the treads, pull it gently toward you until it’s completely free from the hub behind it. Set it on its side so that it doesn’t roll away.
Now place the spare on the hub by lining up the rim with the lug bolts. Push gently until the lug bolts show through the rim.
Put the lug nuts back on the lug bolts and tighten them all the way by hand. Once they are all on, check each one again, tightening as much as possible. You will tighten them with the wrench after lowering the vehicle to the ground.
Use the jack to lower the vehicle so that the spare tire is resting on the ground but the full weight of the vehicle isn’t fully on the tire. At this point, you should tighten the lug nuts with the wrench, turning clockwise, as much as you can. Push down on the lug wrench with the full weight of your body.
Bring the vehicle all the way to the ground and remove the jack. Give the lug nuts another pull with the wrench to ensure they’re as tight as possible.
If the hubcap you took from the flat tire will fit your spare, put it in place the same way you removed it initially.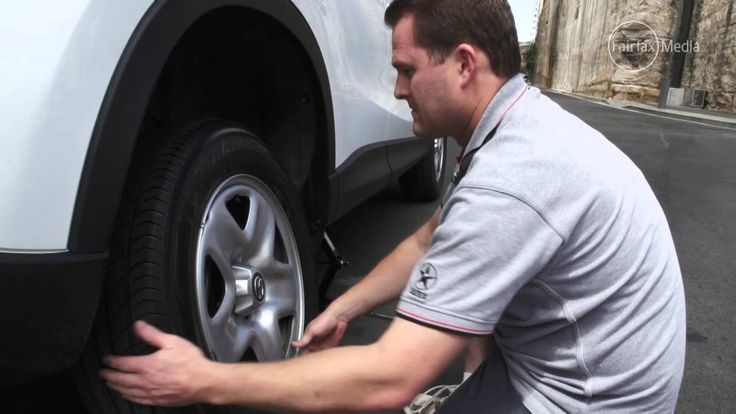 If it doesn’t fit, stow it away with the tire when you stow your equipment.
You have before you a jack, a lug wrench, wheel wedges, your flat tire, and possibly a hubcap. Don’t forget to put all of them in your vehicle before driving away.
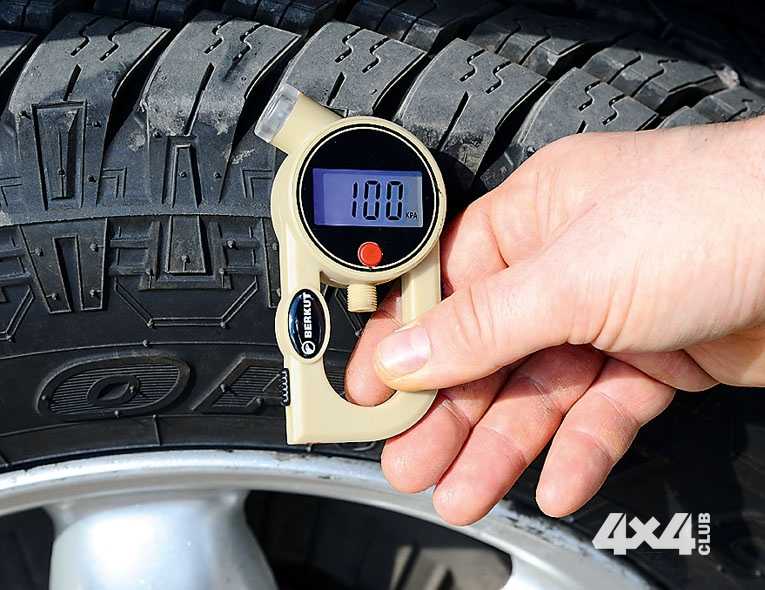
You should check the tire pressure of the spare tire to make sure that it is safe to drive on. “T-Type” temporary spares, also called “mini-spares,” require 60 psi (420 kPa). If the tire needs pressure, drive (slowly) to a service station immediately.
Temporary spare tires aren’t made to drive long distances or at high speeds, so drive cautiously until you’re able to visit a tire technician. A professional should be able to determine whether your tire needs a repair or if it’s time to replace it.
Aside from taking your tire to a professional, the above procedure shouldn’t take more than 15 to 30 minutes to change a tire.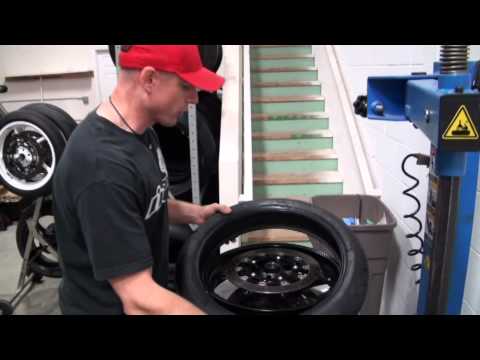 Just be sure you don’t leave out any steps.
It’s beneficial practice changing a tire in your garage or driveway to ensure you’re ready to handle this situation if it ever happens to you.
Knowing how to fix a flat tire is great, but regular tire maintenance is even more important. In addition to reviewing this guide regularly, remember to do the following:
Keep your tires properly inflated
Rotate your tires according to the manufacturer’s guidelines
Monitor for tread wear
All of these precautions will extend the life of your tires and reduce the likelihood of a flat. While there’s no way to prevent flat tires completely, proper care can improve performance and ensure your tires last as long as possible.
There’s never a good time for a flat. That’s why Bridgestone DriveGuard tires are masterfully engineered to keep you moving for up to 50 miles at speeds up to 50 MPH without disruption.
There’s never a good time for a flat. That’s why Bridgestone DriveGuard tires are masterfully engineered to keep you moving for up to 50 miles at speeds up to 50 MPH without disruption.
See Details Find Your Fit
Posted by Nicole Wakelin Know How
Knowing how to replace a tire tube comes in handy when you need to fix a flat on a wheelbarrow, snow blower or lawn mower. It’s not hard to do, and it’s something even a novice can manage. Here are the steps you’ll need to replace a tire tube, as well as some additional tips.
Safety FirstMake sure you’re in a well-lit area with a level surface and you have eye and hand protection. When you’re dealing with a piece of inflated rubber it’s possible for items to go airborne as you work, and there might also be dirt or other debris stuck in the treads that could scratch your hands. Once you’re ready, remove the tire. Next let any remaining air out of the tube by either removing the valve stem core, or simply pressing on the valve core until the tube is completely deflated.
You’ll need oil and two tire bars for the job. Start by spraying the rim and seal with oil, and then let it stand for a few minutes. Next, slide one tire bar between the rim and the tire near the stem. Use the second tire bar to slowly pry the tire over the rim, going around the circumference. You don’t have to remove it completely. You just need one side free so you can reach in and remove the damaged tire tube.
Install the New TubeTo insert the new tube, carefully slip the stem through the hole in the rim so you don’t damage the stem. Put the stem nut on the stem, which should help keep it from slipping as you slide the tire back into place.
Now it’s time to break out the tire bars again. Use one tire bar to pull the tire back over the edge of the rim, and then use the other tire bar to slowly, and carefully, slip the tire into place. Make sure that it’s lined up correctly, and double check that you haven’t snagged the tube in the process. Take your time to avoid damaging the tube.
Once the tire is back in place, all you need to do is inflate it, and you’re ready to go. Replacing a tire tube is something anyone can do with only a few tools, some oil and a little effort.
Check out all tire tube repair products available on NAPA Online or trust one of our 17,000 NAPA AutoCare locations for routine maintenance and repairs. For more information about tire tube repair, chat with a knowledgeable expert at your local NAPA AUTO PARTS store.
Categories
Know How
Tags
flat tire, flat tire repair, lawn tractor, riding mower, snow blower, tire care, tire maintenance, tube, valve stem
Nicole Wakelin covers the automotive industry as a freelance journalist for a variety of outlets. Her work includes news pieces, podcasts, radio, written reviews, and video reviews. She can be found in The Boston Globe, CarGurus, BestRide, US News and World Report, and AAA along with lifestyle blogs like Be Car Chic, The Other PTA, and She Buys Cars. She is active on social media with a large following on both Twitter and Instagram and currently serves as Vice President of the New England Motor Press Association.
A chainsaw is a very useful thing in the household. After all, with it, a lot of tasks of home construction, gardening and landscaping are quickly and relatively easily solved. Chainsaws are a rather capricious tool, but with proper handling it is an indispensable assistant. Which has one weak point: the guide rail. It accounts for most of the operational loads. And this means that knowing why tires fail more often than other parts of chainsaws and how to replace them correctly if necessary will help you save money and time more than once during seasonal or project work with a tool.
The bar and its fasteners are consumable parts. The wear of this unit occurs both under workloads and as a result of improper operation.
You will immediately determine the presence of malfunctions in this area. The tire will not be able to provide normal tension, lubrication and smooth running of the chain, and its fastening will not be able to fix the cutting axis relative to the tool body.
Saw bar holder
It is not safe to operate a saw with a defective bar. Therefore, at the first sign of a breakdown of the unit, you need to turn off the engine and find out what's wrong. Knowing the design features of the tire and its mounting on your chainsaw will help to successfully eliminate the cause of the malfunction.
The bar determines the axis and length of the cut by guiding the chain. But the basis of the mechanism is still the mount. It is installed in the groove between the inner plate on the motor housing and the outer plate located on the chainset cover. The tire and casing are fixed with a bolted connection. This part of the mount is called the "engine assembly", and its shape and design depend on the model of the chainsaw. The tire mounting and the drive sprocket are closed with a separate cover.
Chainsaw bar studs
Saw chain drive links are installed in a guide groove on the bar edge and engage with a drive sprocket connected to the power take-off shaft. When the fixing screws are loosened, the bar can move. The chain tension can be adjusted manually or, like on professional chainsaws, automatically. Finally, a stop is located in front of the tire mount. It serves to securely fix the cutting axis when the moving chain contacts the tree.
Design of chainsaw drive sprocket: with replaceable and fixed crown
A serviceable tire should provide normal chain tension. To check it, you need to release the chain brake and pull the chain by hand in the direction of its movement. If the chain does not move, then the fastener is too tight. It must be slightly released, and then again check the free play of the chain.
Adjusting the chain tension with a key
The main parts of the tire are the body and the groove.
The width of the latter is called the gap. The front part of the saw bars is made of high-strength steel. The tire body is also hardened.
Saw bar assembly
There are various types of saw bars on the market today, which differ in:
Different types of saw bars
The shape of the shank and the location of the technological holes in the bars for most amateur and professional chainsaws are standard, but they can be structurally divided into open and closed. It is obvious that the first ones are inferior to the second ones in terms of reliability of fastening to the case; the tire casing and the bolted connection are subjected to increased loads. You also need to monitor the integrity of the sprocket teeth - if it becomes dull or chipped, it will quickly render the leading links of the chain unusable.
[wonderplugin_gridgallery id=”24″]
The chainsaw tire needs regular maintenance. After each session of work, its grooves must be cleaned of dirt and sawdust, otherwise the lubricant will not flow to the chain. The wear of the groove of the tire should be even, so it should be turned over from time to time. In addition, before starting work, always check the presence of oil on the body of the chain and in the gap.
Checking the operation of the lubrication system
It is not recommended to use more than three chain sets with one bar. During operation, the gap, despite all the strength of the metal of the body of the tire, expands, which leads to the appearance of play when the chain moves and its sagging even with the tire in the extreme forward position of the tire.
Driven sprocket, located at the front of the tire, is lubricated separately. Oil does not get there, unlike the rest of the guide groove.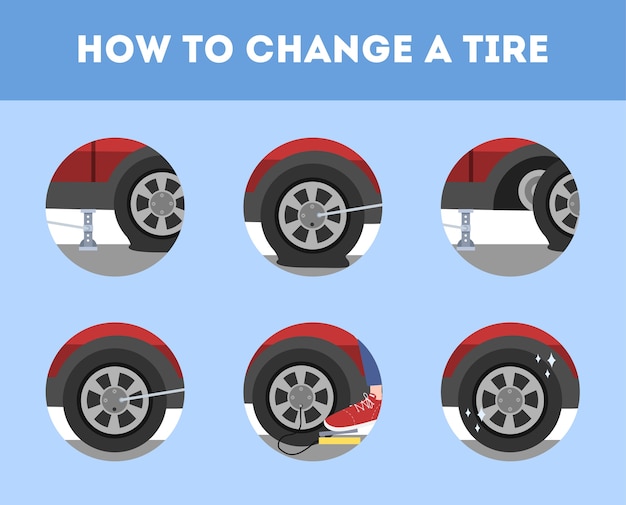 It is poured into special holes in the front of the tire, and if there is no asterisk, it is applied to the toe of the tire.
Separate lubrication system for the nose sprocket
To replace the fastening elements, bar and chain set, the entire fastening mechanism must be disassembled. It does not hurt to prepare a rectangular piece of fabric or cardboard in advance, as well as free space on the table for disassembling the tool and temporarily placing the removed parts.
Chainsaw bar fastening diagram
The fasteners and the chainsaw bar must be replaced when:
That's why the guide bar and fasteners are consumable parts - you only need one universal wrench, supplied with the tool, to replace them. And, of course, knowledge of the algorithm for disassembling, assembling and adjusting the mechanism.
Chainsaw with bar removed
To dismantle the bar mount:
[wonderplugin_gridgallery id=”25″]
After that, put the chain on a new bar and install the last one in the groove to be installed. Next, the headset is engaged with the drive sprocket and closed with a lid. Just before starting work, do not forget to check the absence of slack in the chain and the quality of its tension.
The chainsaw is back to work
If the new bar is fixed and the fitting is correctly installed, the chainsaw is ready to work again. By the way, just in case, you should make sure of this by sawing a few thin branches.
Rate this article:
(22 votes, average: 2.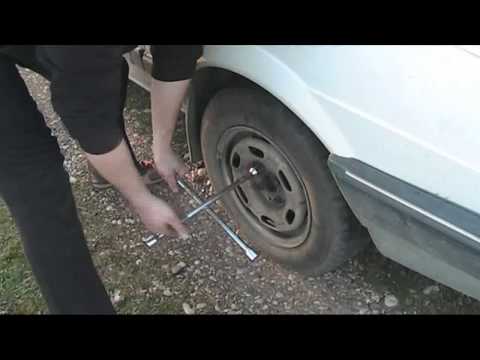 5 out of 5)
Share with friends!
Another season of changing shoes is approaching. And you may remember that on one of the tires after the last winter/summer there is a jamb - a small bump. I don’t want to run to the store for the sake of one new tire. We understand. Or maybe it looks even better if repaired?
Yes, not every wheel that encounters a nail, rebar sticking out of the ground or a sharp stone off-road is considered damaged. Everything, of course, depends on the scale of the damage and its location on the tire itself. Some are easily repaired, while others are simply impossible to do - the tire can only be sent to the trash.
A bulge on a wheel, referred to by drivers as a bump or bulge, is the most common tire sidewall defect. It appears due to a collision with an obstacle or after falling into a pit, more often at high speed. The threads of the sidewall carcass are easily damaged by impact, and the tire at this point can no longer hold the load and air pressure - swelling appears. A small bump sooner or later turns into a big one, and driving with such a defect is dangerous - the wheel can shoot at any moment. At high speed, this is fraught with loss of control, departure from the road and a rollover.
The quality of roads in Kazakhstan contributes to the appearance of bulges on tires
Some types of bulges are repairable, although this is a temporary measure. Not a single patch can restore the factory rigidity. Ideally, change the tire.
Special cord patches can extend the life of a tire with a herniation, even if the swelling has appeared on the tread. The sidewall is a different story. If the swelling appeared at a distance of more than 40 mm from the side, it can be repaired. If not, then the wheel needs to be replaced. Blisters on low profile tires are most often non-repairable.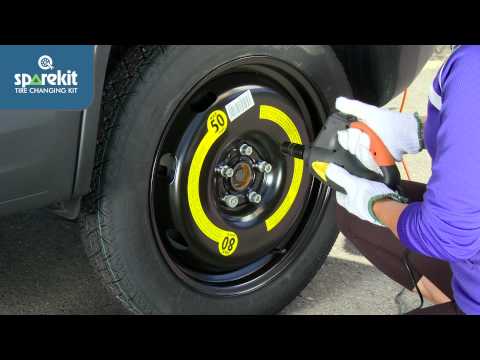
For maximum safety when riding with a repaired bump, insert the tube. This is an inexpensive and reliable solution. On our market, you can find cameras made in China and Russia, the latter are slightly more expensive, but also of better quality.
The elimination of a side cut is a serious operation, therefore, as in the case of a bump, you will have to go to the professionals. We need cord patches, fortunately in our time they are of different sizes and with a different number of layers. And if you do it wisely, then you can't do without special tools and vulcanization.
A cut, by the way, cannot be healed in all cases. If the gap is in the shoulder area of the tire, it is unlikely that anyone will undertake to repair it, since no guarantees can be given here. However, our Kulibins take on even the most difficult cases, cutting out parts of the sidewalls from the tires and even weaving the cord on their own.
Tire overhaul. We would not put such a wheel on ourselves
Low profile tires can be repaired, but more difficult. A tear in the sidewall is easier to seal on tires with a medium or high profile.
Sometimes a cut is confused with a pluck. This is when the outer layer of the sidewall caught on something sharp, a tear formed, but the frame itself remained intact. There is nothing wrong with that, although the drivers at the tire fitting company successfully repair the cut, for which they take it accordingly.
If a piece of rubber remains on the sidewall, then glue it with ordinary superglue (101st). If it came off, then it is better to cover it with raw rubber and vulcanize. Leaving the pluck bare is not recommended, because the tire carcass, often consisting of a metal cord, will quickly corrode.
In Europe, defective or used tires are perforated before being sent for scrap to prevent their resale and possible operation. But they don’t know that we have such holes on the sidewall patched once or twice
Cuts and hernias are not the only possible damage to the side of the tire. You can also spoil the side ring, in the process of changing shoes, for example. If it’s for garlic, then such a tire is already dangerous. Sooner or later, the tire pressure and the load in motion will start to squeeze the rubber off the rim - a wheel explosion can occur.
This ailment is repaired if the wire ring - the base - is intact. There are no special technologies and materials to correct this particular problem, but most often craftsmen use a two-component composition for chemical (also called cold) vulcanization. After mixing, the mass is pressed into a fat-free damage. Compound manufacturers recommend waiting 72 hours before mounting a tire. Of course, our masters do not pay attention to this condition - they put the tire right away. And it’s good if the wheel is flat because of this at night in the parking lot, and not on the road.
If the side ring tears are barely noticeable, but the wheel still deflates, then you can use a special liquid - a bead seal designed to seal a tubeless tire.
These seals have been used in motorsport for some time. In particular, in the American Formula D Drift Series, drivers used compounds to keep the tire on the rim even with minimal tire pressure. Now they are banned.
Pay attention to the left rear wheel of the Nissan Silvia S13. Due to too low pressure, it was literally taken off the disk under load
Every schoolchild has faced this problem when patching the inner tube of his bike after hitting something sharp. Repairing a car tire puncture with your own hands will also not be difficult even on the road. But for this you will need a pump (or compressor) and a universal tire repair kit with harnesses. All this is sold at any car market or gas station.
Repairing a tire on the side of the road with harnesses
The process is simple. If we are talking about the front wheels, then in most cases the wheel can not even be removed, it is enough to turn the steering wheel in the right direction, find the puncture site and carry out repairs.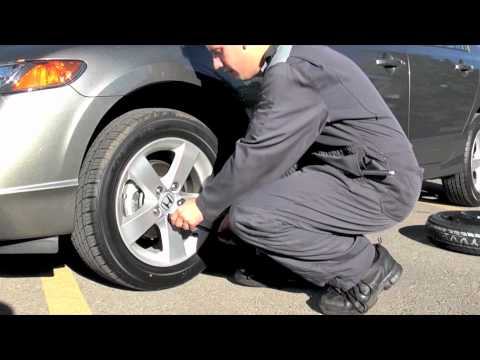 First, the hole is cleaned with a helical awl from the set. The tourniquet itself is smeared with glue and tucked into the eye of the awl, after which it is inserted into the tire hole. With a sharp movement, the tool is removed, and the tourniquet remains in place and clogs the hole. The tails are cut with a knife, but not at the root, it is recommended to leave about 20 mm. The tire is inflated and checked.
Sometimes a nail or self-tapping screw clogs the hole by itself, remaining in it. If you see a hat in a tread, do not rush to pull it out. While the pressure is holding, move to vulcanize. And sometimes they drive with a screw in a tire for weeks.
Repair of a puncture at a tire shop
Punctures are also repaired with harnesses at a specialized service, although among professionals such repairs are not considered long-term. After a few months, the flagella dry out and can let air through. There are more advanced methods like cold and hot vulcanization. The latter is more reliable. In this case, the hole is sealed with an elastic patch, and the funnel from a foreign object is filled with a special compound. After that, a vulcanizer is put on the tire, it heats up the rubber and solders it.
In addition to the plaster, the puncture is also repaired with special cord fungi. Craftsmen process the puncture site: drill it and treat the surface with a tool to roughen it. Then the repair area is lubricated with glue (it is also called cement) and a fungus is introduced. This is done from the inside of the tire. The cap of the fungus is rolled, and the excess legs are simply cut off from the outside.
Puncture repair with sealant
With the advent of tubeless wheels, and later run flat tires, many automakers began to abandon spare wheels. Instead, repair kits with compressors are supplied with the machines. A repair kit is essentially a bottle of pressurized sealant. Later, such spray cans began to appear on the shelves of ordinary car dealerships.
This method has not taken root in the CIS, because the condition of the roads makes it necessary to have at least a stowaway in the kit, but it can also be considered as a method of repair on the road.
The car must be jacked up and sealant must be pumped into the damaged wheel through the nipple. Next, you should spin the wheel, then pump it up, lower the car and drive a few hundred meters. If the tire tightness has not been restored, repeat the procedure.
For commercial vehicles, cutting the tread with a special device (regrower) is a common thing. Moreover, such tire retreading is provided by the factory (marked REGROOVABLE on the sidewall) to increase the service life. But there are entrepreneurs who undertake to deepen the grooves in tires for passenger cars. But they are not intended for such an operation.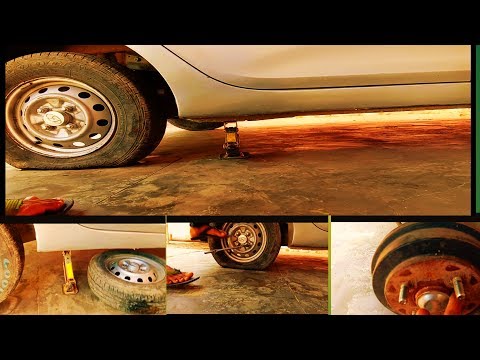 Often used tires for sale are “refreshed” in this way. Be careful!
What is the danger?
The worst option is that the retreaded tire will shoot out on the road, as the master can damage the undertread layer when deepening the grooves. Such a tire will not be able to hold pressure at some point. There will be a boom! At best, the tire will indeed last a little longer, but is the game worth the candle? We think it's not worth it.
How is cutting done?
A regrower is used to cut the tread. Roughly speaking, this is a large soldering iron with interchangeable tips of various shapes. It goes through rubber like a knife through butter.
If the tire is for passenger cars, then it is worth taking on a regrower only in one case - when part of the tread pattern was welded with "new" rubber during repair. This is where threading comes in handy in order to restore the grooves and symmetry of the tread.
Vehicle operation is prohibited if:
— tires have a residual tread height of less than 1.