As the decades have rolled by, bicycle wheels have become ever more complex. However, almost all still adhere to the same basic design – one that a medieval cartwright would recognise.
Comprising a rim held in place by a series of tensioned spokes emanating from a central hub, the strength of the whole assembly depends on each component perfectly balancing the next. Smack them into a pothole and it’s easy to upset that equilibrium.
If your wheels are looking a little wonky, following the six simple steps below will soon whip them back into shape.
We’re looking at lateral alignment, where the wheel is pulling to the side. Pop the wheel out of the bike and into the truing stand. Dial in the callipers on the stand vertically until they’re level with the outer edge of the rim.
Rotate the wheel in the stand. Adjust the distance between the jaws of the calliper until it sits just clear of the rim. Check the wheel isn’t bobbing up and down, as this will require radial truing – or a trip to the bike shop.
While slowly turning the wheel, dial in the jaws until they begin to lightly contact the rim, this will indicate where it is most heavily buckled. Rotate the wheel back and forth to locate the centre of the buckle
If the rim is pulling to the left, find the spoke coming from the right-hand of the hub nearest to the centre of the buckle. If it’s pulling to the right, find the corresponding spoke coming from the left-hand side of the hub.
Give the nipple half a turn. If viewed from above (through the rim) the nipple will tighten clockwise, however when viewed in the stand, this is reversed and it will need to be tightened in an anti-clockwise direction.
Move the wheel back and forth to check the result of your adjustment. If necessary tweak the tension further. Dial in the calliper slightly and move on to the next buckle.
Although it’s possible to accomplish a fast and dirty wheel true without using a dedicated stand, having the right tools definitely makes life much easier. Here are three to consider…
While the £250 Park Tool TS-2.2 Professional Wheel Truing Stand is awesome, it might be a bit steep for the occasional mechanic. This similar stand from Lifeline (£89.99, wiggle.co.uk) is a good budget alternative.
If you want to learn more Park Tool’s Big Blue Book of Bicycle Repair (£29.99, frewheel.co.uk) is a good place to start, with a comprehensive section on servicing and adjusting wheels. Parktool.com also has plenty of great free resources covering all areas of the bike.
Even traditional generic spoke nipples come in an annoyingly wide range of sizes. That’s why it makes sense to get a spoke wrench that’ll fit a variety of different ones. This three-way wrench from Lezyne (£9.99, wiggle.co.uk) is pleasingly ergonomic to use.
Having checked you're still in one piece, the first question following any crash is usually, ‘How’s the bike?’ Unfortunately, even small spills can render your wheels too buckled to continue on your way to the nearest bike shop.
However, if you end up with a wheel that refuses to spin without grounding itself on either the brake or frame, follow our simple steps and you may be able to quickly whip it into shape.
You may be able to roll all the way home without touching the wheel. Release the brake and spin the wheel. If the wheel clears the brake pads and isn’t contacting the frame or fork, it may be easier to wait to repair it. Just ensure the brakes still stop the wheel and ride very carefully.
Working around the wheel, grab pairs of spokes in turn and squeeze – this will reveal any loose ones. If you haven’t had a collision, it’s possible that one spoke has simply slackened off and tightening it may be enough to quickly straighten the wheel so you can ride home for a more thorough check.
Spin the wheel to identify which section is pulling to one side. Rim brake callipers can make a handy gauge. Otherwise, carefully position your thumb against the fork or seatstay. Then locate the one or two spokes opposite the centre of the buckle.
When tightened, the spokes on the left side of the wheel pull the rim to the left, while those on the right pull to the right. Once you’ve identified the correct spoke to be tightened, attach the spoke key and give it a quarter-turn twist counter-clockwise.
Make small adjustments and intermittently spin the wheel to see the effect they’re having. You may have to loosen the spokes adjacent to the one you’re tightening by giving them a clockwise turn. Be careful, as it’s easy to throw the balance of the wheel out.
Wheels are surprisingly complex creatures. Even if they seem to be spinning happily, it’s important that the spokes are evenly tensioned. If you’re unsure about the state of yours following an accident, it’s worth having a mechanic check them in a proper jig.
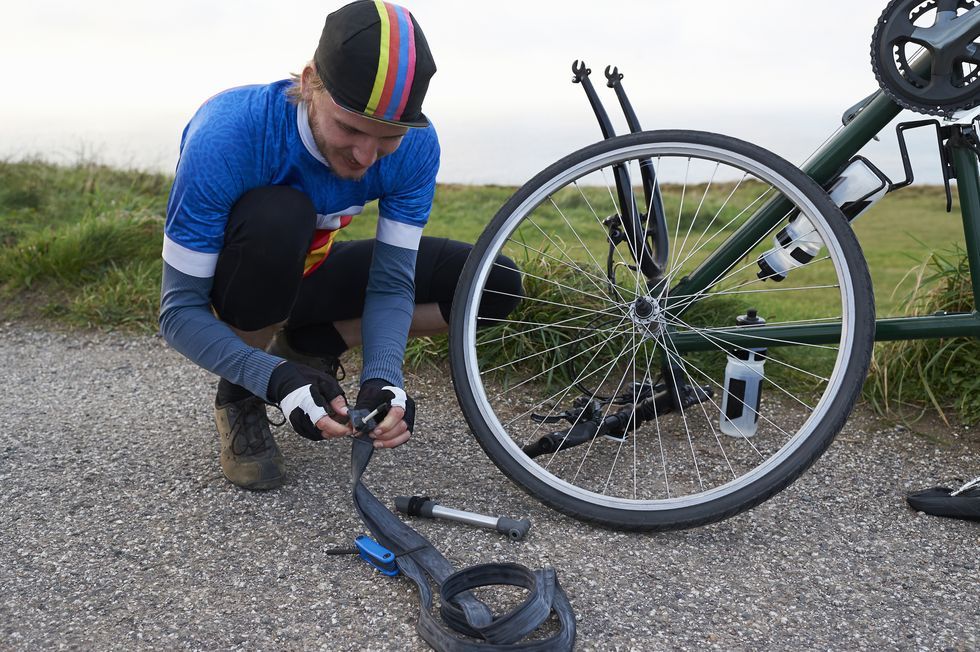
Any kind of impact to your wheel—like hopping off a curb, or hitting a rock or pothole—can knock your rim out of shape. So to keep your bike rolling smoothly and safely, it’s important to maintain straight and warp-free wheels by truing them from time to time.
Truing a bike wheel involves tightening and loosening the spoke nipples to realign warped sections of the rim, and it’s something you can do at home with some practice.
“It’s meticulous and time-consuming, but the actual principle of it is pretty simple,” says Justin McCloud, professional bike mechanic and co-owner of Blackbird Bike Co. in Phoenix, Arizona. McCloud gave us a basic rundown on how to true a bike wheel in your garage or at-home workshop.
You’ll be able to see if your wheel needs to be trued. “An out-of-true wheel will be wobbling laterally, from non-drive side to drive side,” says McCloud. Lift up your bike, spin a wheel, and take a look at it from the front or rear. If you can see it wobbling more than five millimeters left to right, it’s time for a wheel true. In extreme cases, an untrue wheel’s rim might make contact with rim brake pads, or the tire will rub the seat stays or chainstays.
“For safety, I recommend checking your wheel true before every ride,” says McCloud. “Especially with a front wheel—if it’s bad enough that it hits your brake pads and stops you, then you’re going over the bars.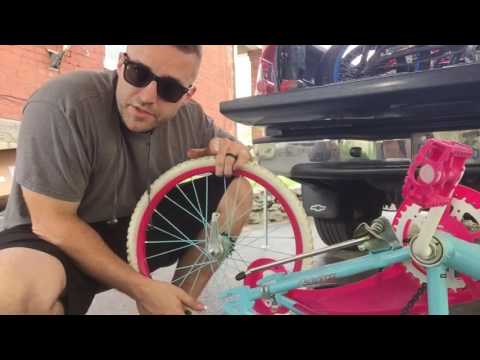 ”
”
Because they’re so much stronger, carbon wheels require truing less frequently than aluminum ones, and when they do, you’ll just see small warps in the shape, so you’ll have to look a bit closer. While aluminum can flex and bend without actually cracking under stress, if you see a big warp in a carbon rim, it’s likely that the rim has actually cracked.
[Want to fly up hills? Climb! gives you the workouts and mental strategies to conquer your nearest peak.]
A truing stand holds your wheel in place and uses adjustable guides along the side of the rim to help you better locate problem sections. It also allows you to set the wheel up on a workbench or table for comfortable, eye-level access. But if you’re working on a rim brake bike, you might not even need one: You can keep the wheel on your bike and use your brake pads as a guide (it helps to set your bike up in a repair stand).
Trevor Raab
Trevor Raab
You will also need a spoke wrench in the correct size. “Park Tool and Pedro’s make a spoke key that [fits] the most popular widths,” says McCloud, but because nipples can come in all shapes and sizes, it’s best to check with your wheel’s manufacturer to see which size wrench you need. If your wheel has bladed spokes, you’ll need a second tool to hold the spoke in place as you tighten the nipple so the blades stay aligned.
$194 at Amazon
Credit: Park ToolNow 18% Off
$11 at Amazon
Credit: Park Tool$10 at Amazon
Credit: Park ToolNow 26% Off
$100 at Amazon
Credit: Bike HandTake the wheel off your bike and set it up in the truing stand, or clamp your bike into a stand if you’re keeping the wheel on and using your rim brake pads as a guide.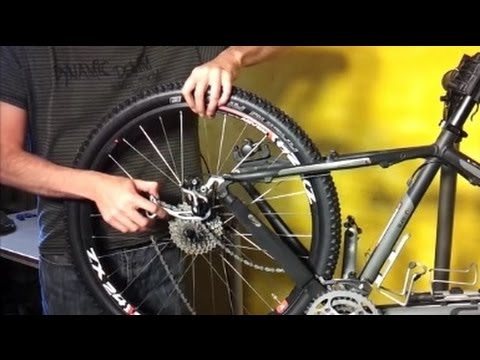 Spin the wheel slowly, and begin to tighten the gauge or brakes as it spins until sections of the wheel make contact with the gauge. These warped areas are where spokes need to be tightened. Once you’ve identified the most warped section of the wheel, start there, and work your way to the smaller wobbles, saving all the fine-tuning for last.
Next, identify the nipple that needs to be tightened to pull the rim back towards the center. If you have a section of rim that’s warped out to the right, locate the nearest nipple attached to the left side of the hub (opposite of whichever brake pad or gauge lever it’s touching), and tighten that to pull it back into place—a half turn should do the trick. In order to avoid over-tensioning the rim, McCloud recommends loosening the spokes on either side of the one you tightened, by about a half-turn.
Loosening a spoke.
Tightening a spoke.
“Spokes do need to have a little bit of wiggle,”says McCloud. “That’s what allows the wheel to flex without everything just breaking.” In order to get a sense of the amount of wiggle you want, he recommends squeezing a few pairs of spokes together in a non-warped area of the wheel to get a feel for how tight they are, and try to match that tension in the spokes you’re tightening.
One thing that’s important to note: All external nipples turn counterclockwise to tighten, opposite of the conventional “righty-tighty, lefty-loosey” wisdom. (If they are hidden inside the rim where you have to take off the tire to get to them, they tighten the normal way.)
If you’re doing this for the first time, we have good news: It’s not something you can do permanent damage to your wheel by messing up. “The biggest mistake you can make is to overtension a spoke to the point where you break it or strip the threading on the spoke or nipple,” says McCloud. If you do that, you’ll need to replace the spoke, but the wheel will still be able to straighten out.
If you start, and you feel really unsure, you can always take it over to your local shop for proper guidance or repair.
So once you’ve eradicated all visible wobbles—voilà!—you’re all set. Throw the wheel back on your bike, and enjoy the smooth, safe ride.
Riley Missel
Riley Missel is an experienced road racer, mountain biker, national champion on the track, and a former Bicycling editor. She is a USA Cycling-certified Level 1 coach, a loud and very stoked Spin instructor, and she will definitely stop the ride to pet that dog.
This content is imported from OpenWeb. You may be able to find the same content in another format, or you may be able to find more information, at their web site.
content
29: Benefits of
A favorite option for mountain bikers who are looking for long trails that aren't too difficult. Ideal for tall cyclists. Tires have better grip on soft or slippery surfaces. They are more comfortable than 26s as they require less suspension and less tire pressure.
The regulation states that tire repairs must be carried out within the central three-quarters of the drawing, called the “small repair area”. It is also not allowed to repair the tire if the puncture is equal to or greater than 6 mm in diameter.
How to fix a bike puncture in 7 easy steps
How much does it cost to fix a flat tire? While you might think that puncture repair can be expensive, it is actually one of the cheapest auto repair services.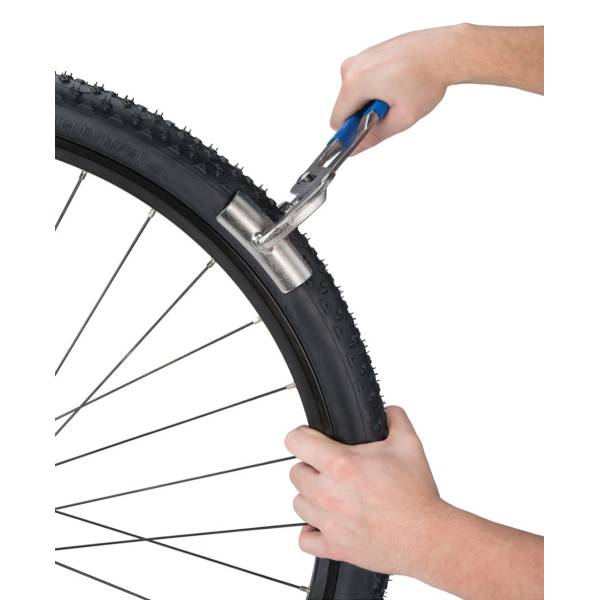 The price usually ranges from 6 to 20 euros, although they are usually around 10 euros.
Materials needed:
The best thing in these cases is to put the vulcanized patch inside, a quick and safe repair, that is, in a workshop, that after a while the tires can lose air and be damaged, of course...
What are vulcanized plasters? If there is a small puncture or superficial cut that does not compromise the safety of the wheel and therefore the vehicle, a vulcanized patch can be used, a method that is more durable and cheaper than a complete wheel replacement.
To apply bicycle patches, first use vulcanizing adhesive to seal the gap. Make sure you apply enough and wait a few minutes for the glue to dry.
Next we detail the prices for the main events: Bicycles. Wheel trim costs $200 to $300, brake repairs are $200, and a patch is $80.
The answer is simple. It's just a matter of physics. Bicycle tire pressure is reduced due to the composition of the air containing nitrogen and oxygen. Be aware that a flat tire is not always synonymous with a puncture.
In fact, continuing to drive on a flat tire means inexorably damaging the tire itself, which can be repaired at little cost. But that's not all: in addition to rubber, after a short time, the rim, on which the weight of the car will be unloaded, will also be damaged.
Driving with a flat tire. Drive slower. Avoid driving faster than 24 to 32 mph (15 to 20 km/h) with a flat tire. You can cause irreparable damage to the metal wheel under the tire and even lose control of your vehicle.
The cost of the plaster is 50 pesos; vulcanized varies from 100 to 150 pesos.
Xiaoling Tire Adhesive 20g Ultra High Quality Tire Repair Adhesive Tire Repair Tool Waterproof Patch Adhesive Patch.
The critical decision after applying the solution is to let the area dry for at least one or two hours, especially if it is hot and humid, because if we let it dry for just a few minutes and apply a patch, it will most likely dry. take longer or finish peeling early.
According to tire manufacturers such as Michelin, the average hover is around one puncture every 50.000 km driven, however everyone knows a driver who has never had a puncture and a driver who loses air from his tires every two to three .
This is a patch with great flexibility. The upper part has a layer of butyl rubber, hence the name of the extra-hermetic lining; They have excellent heat resistance and adhesion to cushion rubber, allowing us to hot vulcanize them.
Engine mounts, also known as engine mounts, are rubber parts with a metal base. Inside the car, they are extremely important elements, as they act as a link between the engine and the chassis.
Tire curing consists of heating the rubber and sulfur on the surface of the tire and applying pressure to either install a new tread band or repair tire damage.
A new tire tread can last up to 100,500 miles, but if the carcass is in good condition, you can potentially go up to 500 miles by vulcanizing it before you can't do it anymore.
According to experts, the typical temperature used for this procedure is between 150 and 170 degrees Celsius and the exposure time is about 10 minutes.
STEP BY STEP HOW TO APPLY A PATCH/APPLIQUE ON A CAP?

These are adhesives based on phenolic resins. These adhesives instantly react to interaction with the surrounding air and dry quickly.
patch | Definition | Spanish Dictionary | RAE - ASALE. 1. tr. patch (‖ install patches).
If this is your first bike, it's best to start with something assembled. With a little knowledge, it's very easy to screw up things like stem size, handlebar type, or how to combine hubs/gears/brakes, plus it's a lot more expensive.
Total**
| Picture | painting type | box price |
|---|---|---|
| in one color | metal | 115 € |
| in one color | hard | metallic | 115 € |
| Two or three colors | hard | metallic | 170 € |
Frame in one color, fittings in another.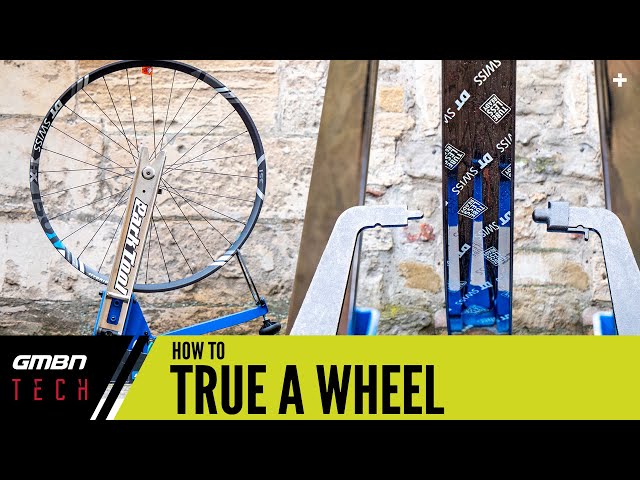 | hard | metallic | 240 € |
Bicycle customization price may vary depending on the design. Prices range from 160.000 pesos to 350.000 pesos.
Insufficient tire pressure.
Too high pressure reduces tire grip; too low pressure allows the tube to pinch on impact (on a pothole, on a step), and rubbing the rubber against itself often causes holes in the tube.
It usually takes about a year for a tire to lose its minimum safe pressure, but if our car has been exposed to extreme temperatures and the situation suddenly changes, the porosity can increase and lose more air than usual.
You will notice how it wears, especially if it takes time at less pressure than recommended. Transportation of a tire in a flat state increases the wear of its outer edges, the shoulder areas of the tire.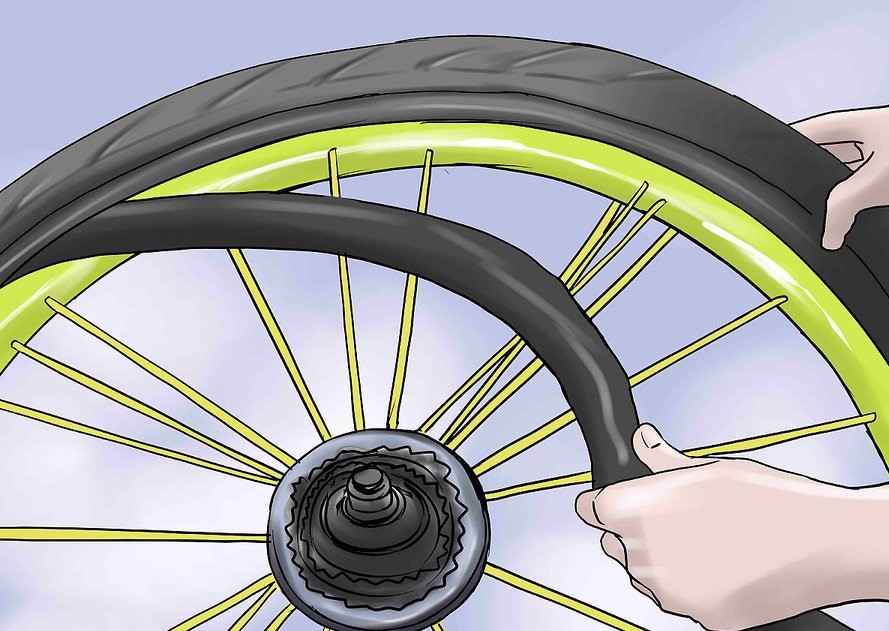 You will also notice that the tire is hotter than the others.
We tend to think that the wheel explodes because of too much pressure or because we step on something sharp while driving. However, most bursts are due to poor tire maintenance, especially low tire pressure.
Typically, tire problems can be caused by either too high or too low air pressure. However, it is the low pressure that tends to cause tires to burst more often.
Make. After you have been exposed to a needle stick or cut, wash the affected area with soap and water. If splashed into nose, mouth or skin, rinse with water. If such exposure occurs in the eyes, flush them with clean water, saline, or a sterile irrigator.
Driving with an incorrectly inflated tire can cause a fatal accident. Insufficient pressure also leads to increased tire wear, reducing their service life to one year. Another major problem is fuel consumption.
Be aware that tires can lose air due to differential pressure, this effect is called the permeation process and affects all tires, regardless of type or application, since the joints that make up the tire are not completely sealed, and their porosity allows ...
Low tire pressure also affects the vehicle's behavior when cornering. In cases where the front wheels are flat, the car tends to understeer; that is, it cannot maintain the desired trajectory and tends to lose the line outward.
Rubber vulcanization process
Rubber vulcanization is an irreversible process in which raw rubber is heated together with sulfur to make it harder and more resistant to cold, as confirmed by Goodyear in 1839.
Vulcanized hard rubber, sometimes sold under the brand names ebonite or vulcanite, is used to make hard objects such as bowling balls and saxophone mouthpieces. Uncured natural rubber is sticky, deforms easily when hot, and becomes brittle when cold.
What is a vulcanizer? Basically, it consists of two heavy metal strips, which are placed one on each side of the pre-prepared joint and firmly held together. Each strip heats up and this combined application of heat and pressure completes the bond over time.
The patch is usually applied to the skin once every 7 days. Every time you change your patch, change it around the same time. Follow the directions on the prescription label carefully and ask your doctor or pharmacist to explain any part you don't understand.
Bicycle mechanics service and repair various models and parts of bicycles.
A derailleur hanger, also called a derailleur dropout, is a bicycle component that screws into one end of the frame to connect to the derailleur.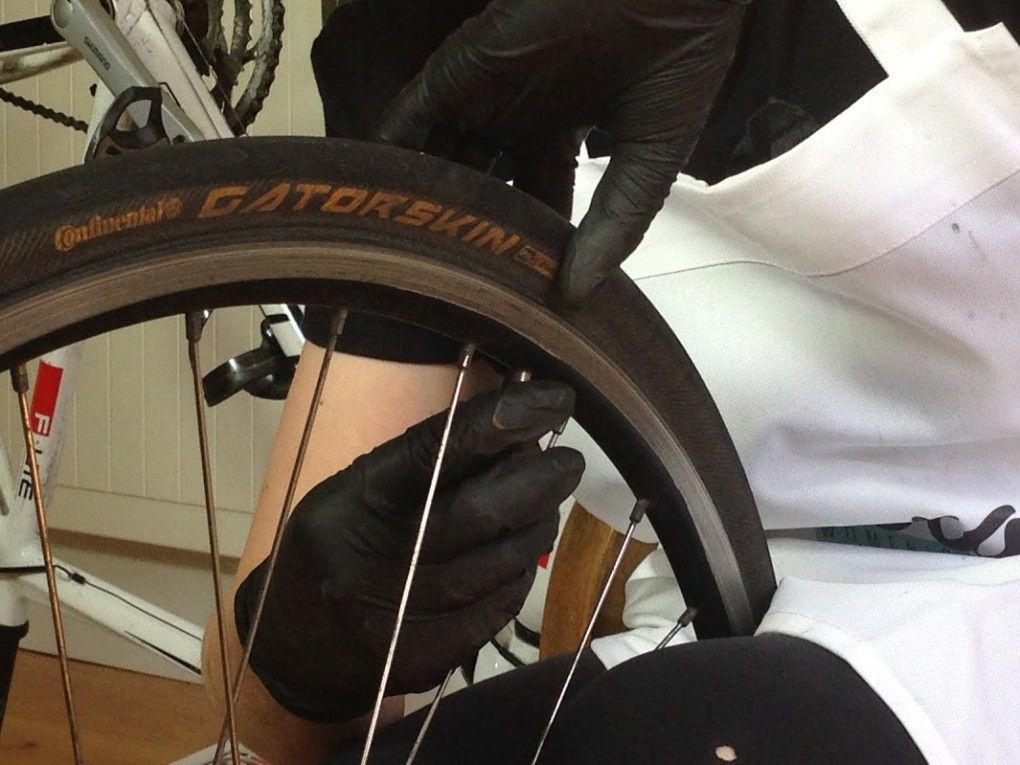 Its function is very simple and at the same time very important: it serves to hold the switch and prevent it from breaking in the event of an impact.
Patch: This is the most common method recommended by professionals because it is a quality solution. After examining the tire, the specialist puts a mushroom-shaped patch on the inside of it, which hermetically closes the cut.
The best thing in these cases is to put the vulcanized patch inside, a quick and safe repair, that is, in a workshop, that after a while the tires can lose air and be damaged, of course...
When cuts are deeper than ¼ inch from the rim to the wheel, or the sides of the rim have been cut, patching is not recommended because it can be dangerous to drive. it is recommended to replace the tire with a new one.
The presence of a lump or egg in the tire is a clear sign that the inner layers have suffered irreparable damage, it is the inner part of the tire, the radial structure that has undergone a rupture. The tire is supported by air or nitrogen pressure (better than the latter).
General flat tire repair processes
Usually the best solution when it comes to repairing small tubes and tires. Meanwhile, tire vulcanization is carried out on those tires that require processing at high temperatures and constant pressure in order to connect the molecules of the repairman and the tire.
The main reason is that the tire has cracked because the surface has hardened, aged and therefore no longer flexible: your tires have crystallized and therefore no longer have proper grip.
views 30161
If you do not know how to seal a bicycle inner tube, then everything is quite simple - you only need glue and a patch. But wrenches, hexagons, disassembly, a container of water and a vise will also come in handy. The set is enough, so you can carry out repairs in any conditions.
Do-it-yourself repair of the bicycle chamber is carried out according to the following algorithm:
 Another option is to find a puncture in the bicycle chamber by ear - listen to where the air comes out;
 Sealing a bicycle wheel tube is easy - just remove it, patch the puncture site with a patch and put it back in place.
How to seal the bicycle inner tube with a repair kit is understandable, but what to do if it is not there, but repair is necessary? For example, a patch can be made from any rubber. Any glue is suitable, but the main thing is not to choose industrial.
There are also critical moments. In some cases, it is necessary to close the hole without glue and without removing the wheel. The patch is applied so that when inflated, it is pressed with strong pressure. But in this case, you need a pump.
If you don't have a rubber patch, a dampened plastic bag or duct tape will do, but only if you don't know how to seal the inner tube of your bike to get home, because the wheel won't withstand heavy loads.
Another option is vulcanization. This requires special tools, but the result is reliable. The point is that the patch and the camera are pressed against each other. Thanks to heating, both elements form a single whole. Before you seal the camera at home, think about vulcanization.
Even if you know how to properly seal a bicycle inner tube, it is worth learning how to avoid a puncture.
One of the most interesting options is cameras that can be sealed by themselves. Resin or a special gel is poured inside.