Whether you’re going on a road trip or making a quick stop at the community center, it’s crucial that your car has a functional spare tire at all times.
It’s equally important that you’re able to get the tire down from under the vehicle when you need it. Some cars come with specialized tools to lower the spare tire and quickly make the change.
However, if the tool is unavailable for some reason, you can still bring down the tire and be back on the road in no time. Let’s take a look at how to get a spare tire down without the tool.
Removing a spare tire without the factory tool is easy when you follow these steps:
Removing a spare tire without a tool might appear daunting at first. However, with the right equipment and process, it’s not too difficult a task.
There are two methods to lowering a spare tire on a Ford truck. Each method uses different tools. As such, your choice will depend on the equipment you have to hand.
This method involves pulling out the key from the spare tire drop assembly and using stock spare tire tools to lower the tire.
To make up for the lack of the factory key, you will need some standard tools like joint pliers, small pieces of wood and an optional helping hand.
After you’ve collected the tools, follow the steps below to remove the spare tire.
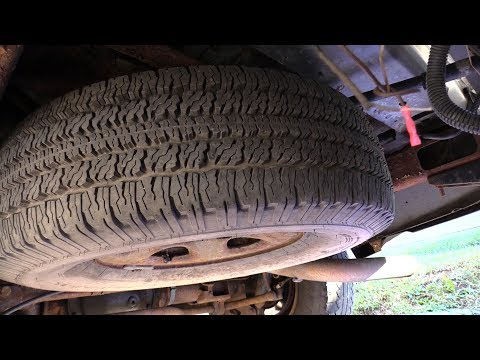
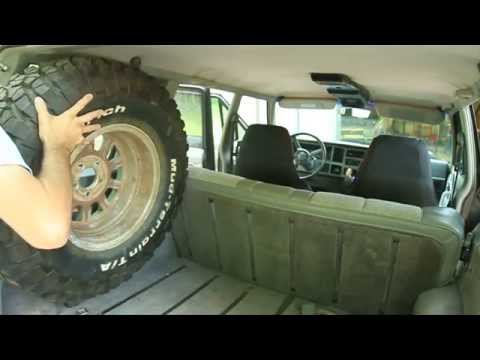
As you already know, the tire hangs from the truck’s underside toward the vehicle’s rear. As such, you will need to go under to gain access.
Before you get under the truck, remember that safety comes first. Therefore, ensure that you park the vehicle properly, on a surface that’s as flat as possible, with all brakes engaged. These precautions are to prevent the vehicle from moving while you work under it.
Locate the guide tube under the vehicle. This is a long, black, plastic pipe near the tire. Twist the tube back and forth while pulling it in the direction of the vehicle’s rear to reveal the drop mechanism for the spare tire.
Still under the truck, move to the passenger side and pull down the tire on this side, putting the wood in the gap between the top of the tire and the truck bed frame.
At this point, you may need that optional helping hand to put in the wood while you hold the tire down.
The reason for putting in the wood is to give you easy access to the drop mechanism without having to move the tire away from the truck bed continually.
Put your hand through the space created by the wood and feel for the key to the spare tire drop mechanism. The key roughly resembles a wheel lug nut, and when you find it, pull it out using the jack or working pliers.
Sometimes, just pulling the key may not be enough, and you may need to wriggle the pliers as you pull.
With the key out, the hole left behind is almost identical to the jack crank. Thus you can use the stock tire tools to lower and remove the spare tire. Insert the jack crank into the hole and turn counterclockwise to lower the tire.
The second method differs considerably from the first. Accordingly, you need a different set of tools, including:
With the tools above, you can bring down the spare tire by following the steps below.
Attach the 14mm socket to the extender. You don’t need to use a high-quality socket, as any low-end one will do.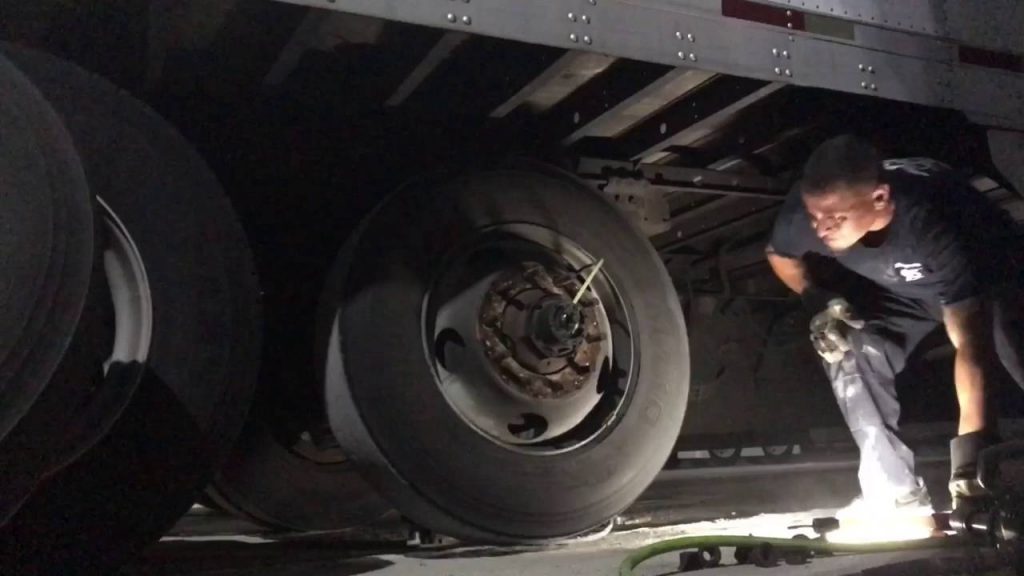 It’s also best to use an extender long enough to reach from the bumper to the spare tire. Aim for an extender that’s around 60–70cm long.
Insert the socket into the hole located on the left (or right, in some trucks) of the license plate. The hole leads directly to the key.
Use a hammer to strike the extender when you feel the socket touching the key. Hitting the extender pushes the socket over the key, providing a better grip.
Four to five blows from the hammer should be enough. Additionally, do not apply too much force to the hammer to prevent damage to the drop assembly. You don’t necessarily have to use a hammer; any object large and tough enough can serve.
With the socket firmly in place, use a wrench to turn the extender counterclockwise. The drop assembly key is similar to the one used on wheel lug nuts.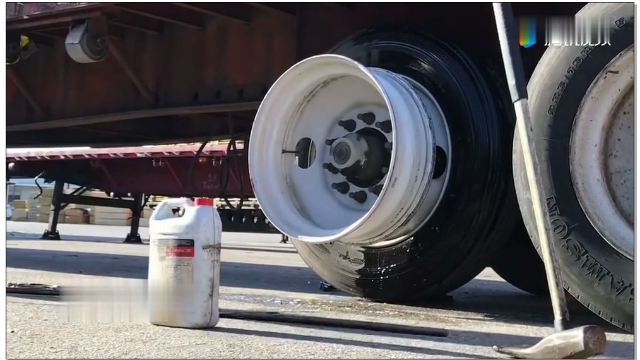 Thus, it will turn as the socket turns.
It may be hard to turn the wrench at first, but it becomes easier as you continue turning, and the tire gets closer to the ground.
By the time the tire hits the ground, the key will be loose and you can remove it. Withdraw the extender from the hole, and use a flathead screwdriver to pry the nut out of the socket.
While the tire is now on the ground, you can’t use it until you detach it from the hoist. To disconnect the tire, reach into the large opening in the middle of the wheel. Next, locate the metal flange connected to the cable and turn it from a horizontal to a vertical position, pulling it out of the rim vertically.
Finally, the hole left behind by the key can fit a jack crank. Put the crank through the opening near the license plate till it gets to the hole vacated by the key. Turn the crank clockwise to raise the hoist back up
While Chevys store spare tires under the truck bed like other trucks, the removal process differs. So, if you’re wondering how to lower spare tire on Silverado without tool, follow the steps below.
You will need a couple of tools, including an ignition key and a jack kit to make a chevy spare tire removal tool.
Like other trucks, the access hole is on the rear license plate’s right side and covered with a rectangular shaped plastic.
Newer models may have a lock over the hole as a security measure. In such cases, use the ignition key to remove the lock assembly covering the hole.
Open the jack kit and select the rod with the broader end and flanges on all sides. This rod is the “female” rod and the one you’ll insert into the now open keyhole.
Get another rod from the tool kit, and attach it to the end of the female rod to make it long enough to reach the spare tire from the bumper. Ensure that the press locks enter properly to prevent the rods from disconnecting while you’re turning it.
Insert the composite rod into the spare tire hole. Press and turn the rod simultaneously until the end locks into the cable crank.
Put a wrench on the other end of the extension rod and turn counterclockwise. The tire will begin to drop as you turn. Continue turning until the tire touches the ground when you can remove the cable flange from the rim.
Furthermore, you can use the procedure above on different models of Chevrolet trucks. As such, you can follow the steps if you’re wondering how to remove spare tire from Chevy suburban.
It’s always an unpleasant experience when you get a flat tire. It’s even worse when you can’t get the spare down for lack of the specialized factory tool.
However, there are other ways to bring down the spare tire even without the tool. These methods are straightforward and use common tools like extenders, flathead screwdrivers, sockets, ignition keys, chunks of wood, pliers and hammers.
Thus, with or without a factory tool, you can get the spare tire out in minutes and be back on the road quickly.
If you're used to having your spare tire on your trunk, it can be quite a daunting task to remove the spare tire under a truck. But don't worry. We got you covered. We've asked automotive experts how this procedure is done so that you can get started on changing your flat tire and be back on the road in a jiffy.
Follow these steps to remove the spare tire from your truck:
Hang on so we can elaborate on the given instructions so you can remove your spare tire from your truck with no hassle. We'll also share with you how to do this task when you don't have your tire removal kit. We'll also have a short discussion on how long you can expect your spare tire to last and how far you can drive using your spare tire.
Before you continue reading, let us say we hope you find the links here useful. If you purchase something through a link on this page, we may get a commission, so thank you!
Unlike regular vehicles that conveniently have their spare tires in their trunks, pickup trucks have theirs underneath the truck bed. This is actually a genius move by manufacturers so that the spare tire won't take up valuable space on the bed of the truck. However, it makes removing the spare tire more challenging.
Don't worry because there's an efficient way of removing the spare tire without breaking your back or endangering your life. Just follow these steps. You can also watch this YouTube video for the demonstration.
Easy, right? You don't have to go under your truck after all!
Brand new vehicles come with a set of factory jack kits or tire removal kits to aid you in getting the spare tire off the truck. You need to familiarize yourself with these tools, so you'll know what they are used for.
The tool that you use to lower the spare tire is called the jack handle. As mentioned above, this is a long piece of tool that you need to assemble so that you can connect it with the vehicle's tire-lowering mechanism. You turn the handle counterclockwise to unfasten the tire until it reaches the ground and you can remove it from the cable and tire holder.
If you don't have this in your tool kit, it's best to buy one as soon as possible. You never know when you're going to need it. Always be prepared for what can happen on the road.
Check out this spare tire jack handle on Amazon.
In case you have a tire blowout and you don't have a jack handle with you, there are other ways for you to remove the spare under your truck. But it would still involve other tools that hopefully you've got in your tool kit.
What you need:
Steps to lower the tire:
 Make sure your car is parked properly on flat ground.
What you need:
Steps to lower the tire:

These are just two ways for you to remove the spare tire without a jack handle. Basically, you can improvise with the tools that you've got to see which one will work best for you.
The lifespan of your spare tire will depend on its tire type. There are usually three types of spare tires: a donut, run-flat, and a matching spare tire.
A donut is also known as a space-saver or compact spare tire. This is smaller and lighter than a regular tire. In recent years, manufacturers began using donut spare tires on their vehicles to reduce cost and save valuable space since a full-sized tire takes up so much room.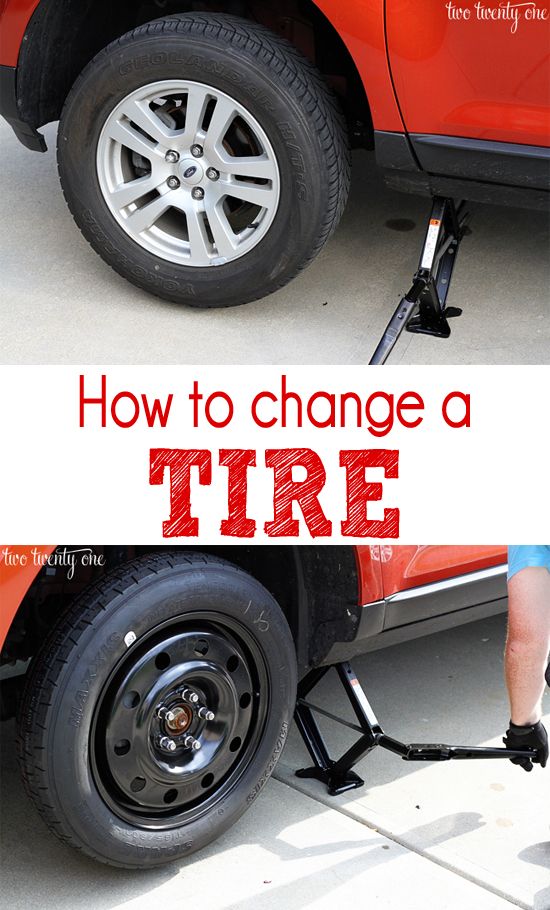
Since they are more lightweight, they help improve the fuel economy and power consumption of your vehicle. However, this type of tire is made of weaker materials than traditional tires. They have a shallower tread depth which makes them more vulnerable on the road.
As such, a donut spare tire is just meant to be a temporary replacement for your worn-out tire. It has to be replaced immediately before you get yourself into trouble while using it.
A run-flat spare tire is more commonly found on newer vehicles. It is also called a zero-pressure tire. It is more durable than a donut tire. It is made of tougher materials that's why it can resist deflation even when it has been punctured.
But still, this is a temporary fix for your vehicle. You're better off having it replaced right away.
This is the most durable among the different spare tire types. It may not be made by the same manufacturer as your regular tires, but it is at par when it comes to performance on the road. As such, you can use it for a longer time after replacing your flat tire with this spare.
Again, the distance and speed at which you drive using a spare tire would depend on the type of tire that you have.
Donut tires are not designed to be driven for long distances. You have to maintain a speed of 50 mph or less. This means that you cannot use this on the highway.
Since donut tires are smaller than your other tires, they have to work harder to keep up with the rest. This makes them more susceptible to damages on the road.
With a run-flat tire, you can go beyond 50 mph since it has better endurance on the road. You can drive up to 100 miles with it. This will give you more allowance to find an able auto repair shop.
Lastly, a matching spare tire can be driven similar to a regular tire. You can go at the maximum allowable speed on the road and there's no limit on the distance.
Take note though that spare tires have different speed ratings so it's best to check yours.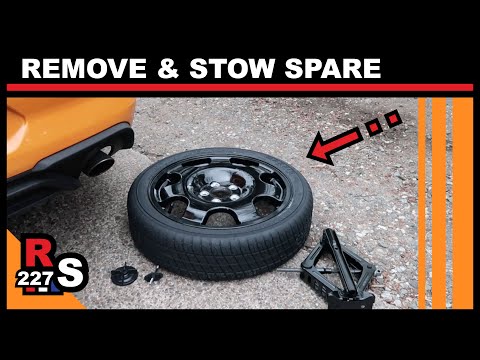 Don't go beyond the recommended speed to avoid damaging other components of your vehicle such as the transmission. It's bad enough that you had a flat tire, you don't need the added expense of additional repairs or part replacement.
Make sure you always have your tire removal kit with you so you can take off your spare tire under your vehicle without any hassle. With the right tools, this task doesn't have to be a chore.
Check out these articles for some related reading:
Does Firestone Patch Tires For Free?
20 Types Of Tires You Should Know
Getting a flat tire is one of the many automotive problems that can strike without warning at any time of the day or night. Even if you are sure that you have nothing to fear in the event of a puncture, since you have a spare tire, damage to the wheel will interrupt your movement on the road anyway and cause a lot of trouble. The worst thing is that if you have a spare wheel, you will not be able to change it for a damaged wheel if you don't know how to do it. In this case, you will have to call a help desk or a tow truck, which will cost a considerable amount. Maybe it's better to learn how to change wheels on a car?
Learning how to change tires will not only save you time, but also greatly reduce your assistance costs. Our online publication offers you a guide with which you will learn that changing a self-damaged tire to a spare one is really not difficult.
But before we tell you how, here are some precautions you should take when changing wheels.
- Keep the spare tire in good condition . If you puncture a tire and your spare tire is not fit for installation, then this will bring unnecessary problems. Therefore, remember the spare wheel must be in good condition. When checking tire pressures, be sure to check the spare tire pressure as well.
- Remember that you must do this at least once a month. In addition, when checking the condition of the wheels on the car, do not deprive your attention of the spare wheel, which also should not have cracks and other damage that may occur due to temperature changes or tire age.
- Never change a tire on the freeway. Remember that changing a wheel on the highway, you risk being in a serious accident. After all, it is not uncommon when many inexperienced and aggressive drivers overtake cars on the right, which often leads to accidents as a result. Believe me, you will not have time to escape. Therefore, we advise you to call for emergency assistance in case of damage to the wheel.
- Also, if you have a punctured tire and you have the opportunity to remove the car from the freeway, then drive the car to a safe distance from the road and only in this case change the wheel . If this is not possible, then, having called for help, do not stay in the car, but move away from it at a safe distance from it.
- Use Tire Puncture Repair Kit. Many auto shops and tire shops sell special kits for the quick repair of tire punctures.
- Be sure to get them even if you have spare wheel . Remember that there are times when, having punctured a wheel, you are not able to jack up the car in order to install a spare tire.
- Please note that many modern cars in recent years are no longer equipped with spare wheels. As a rule, instead of them, the manufacturer completes the car with special repair kits that can repair wheel damage.
- These repair kits will not repair many types of damage to tires. So don't count on them too much. Still, the "spare wheel" is a more reliable way to avoid problems on the road. Therefore, even if the manufacturer has not equipped the car with a spare wheel, we recommend that you purchase the wheel yourself. And of course, remember that a pump or an electric compressor must be in the trunk of a car.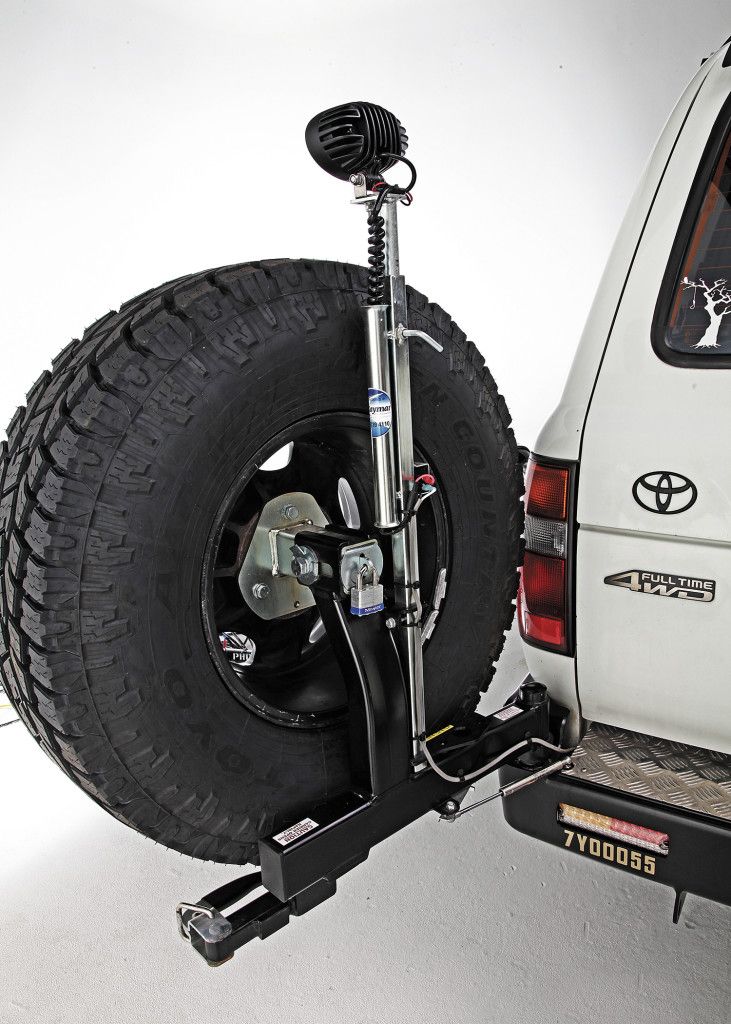
- Be careful when jacking up the machine . Replacing a wheel is associated with raising the car with a jack, which is inserted into a special groove or "platform". If you are not careful or attentive, you risk that the car will either fall off the jack or move to the side.
Have you given up on the idea of learning how to change a wheel yourself? No. Then let's get to the most important part.
Before changing a wheel, make sure your car will not fall off the jack. To do this, make sure that the car is on a flat piece of land or asphalt. Also note that under the wheels of the car there should not be uneven surfaces, bumps or stones that can interfere with the process of jacking up the vehicle.
Including you have to make sure that the surface under the machine is hard enough. After all, by lifting one side of the car, its weight is redistributed to other wheels and in the case of a soft surface, the car can shift and fall off the jack. For example, be vigilant when changing a wheel on sand or when there is mud under the car. In order to understand whether the car can move on the jack, you need to slightly raise the car and shake it, watching the car and other wheels.
Along with the spare wheel, you must also carry a wheel wrench with which you can remove the wheel bolts . If you use secret bolts to protect the wheels from theft, then also do not forget to put a special key (secret) in the car so that you do not end up on the road in a hopeless situation when no one will help you except the tow truck.
If for some reason you do not know if you have a wheelbrace for changing wheels (for example, you just bought a car), then it is probably located next to the spare wheel in the trunk, or in the glove compartment or in the side pockets of the doors .
wheel change . Including the manual on the car will tell you exactly where the special socket for the jack is located and how you can get the spare tire out of the car.
The most dangerous thing that can happen when changing a wheel is if the vehicle moves or starts to roll . To make sure this doesn't happen, you first need to apply the car's handbrake, locking the rear wheels.
Next, if your car is equipped with a manual transmission, you need to turn off the engine, put the gearbox in first or reverse gear. If your vehicle is equipped with an automatic transmission, then set the box to "P" - parking.
Many people think that putting the car on the "handbrake" is enough to start jacking up the car to change the wheel. But it's not. The fact is that the handbrake blocks only the rear wheels, while setting the gearbox to speed will also block the front drive wheels (if your car is front-wheel drive).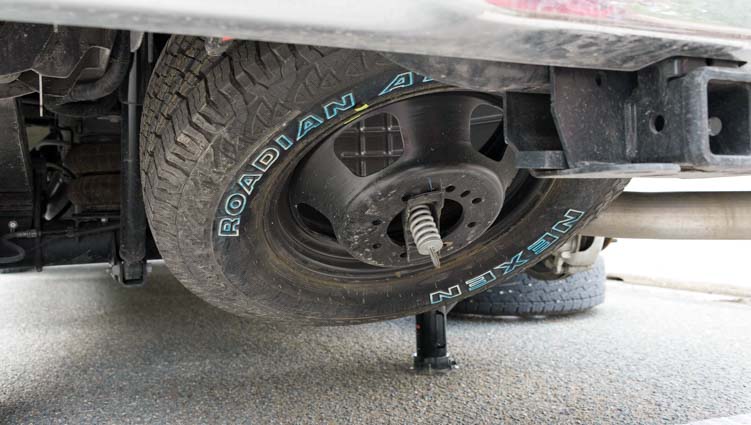
Having done all of the above, you must manually block the other wheels by placing something heavy under them to prevent the wheel from moving. Of course, you can put something heavy not under each wheel. It will be enough to put under the tire, which is diametrically opposed to the wheel being replaced.
That is, if you change the left front wheel, you must definitely place something heavy under the right rear wheel to prevent the wheel from moving. It is advisable that you find bricks or stones and put them in front of the wheel and behind it, thereby blocking it from both sides.
Attention! This is a very important point . Be sure to loosen the wheel bolts before jacking up the vehicle. That is, by raising the car with a jack, you should effortlessly complete the process of unscrewing the bolts. In order to unscrew the nut or wheel bolt, remove the wheel wrench, install it on the wheel fastener.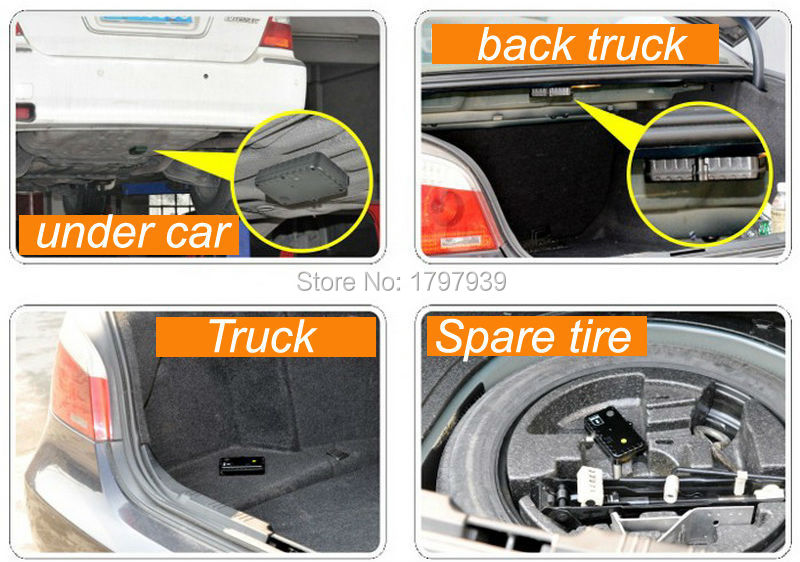
It is likely that you will need to position the key so that you can place a foot or two on it to turn the key under the weight of your body. Once the nut or bolt has begun to move, you can manually loosen it further.
The most important thing is not to over-tighten the wheel bolts, as your task is only to loosen them first. The main thing is that the wheels are still attached to the car and cannot fly off when the car is raised.
The jack is usually located in the trunk, either next to or under the spare tire, or in the special box . Also, in some cases, the jack may be located inside the cabin. Including there are also car models where the jack is under the hood.
In addition to loosening the wheel bolts, you must remove the spare wheel before jacking up the vehicle. The fact is that when the car is on the jack you should not rock the car in order to prevent it from falling.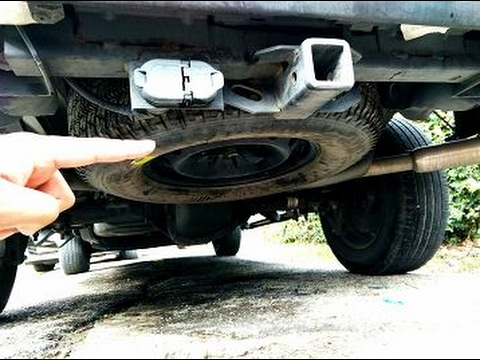
Most modern cars have the spare wheel in the boot. As a rule, the trunk floor rises and a fixed spare wheel is located under it. In many cars, the spare wheel is fixed. How to remove the spare wheel from the car should be detailed in the manual for the car.
Find the correct place to mount the jack . Remember that in every car there are special places on the body for this. As a rule, such places are located under the front or rear windows (behind the front and rear wheel arches). If you are in doubt and do not know where exactly to install the jack, check out the manual for the car, which explains everything in detail.
Following the instructions in the manual, after placing the jack, slowly raise the car . In some jack models, this may require the same wrench that you used to unscrew the wheel bolts. While lifting the machine slowly, check the position of the jack under the machine. If you see that the jack has begun to move, then lower the car and try to rearrange it in a better position.
Now it is time to remove the wheel from the hub . Using a wheelbrace, loosen the wheel bolts/nuts, but not all the way. Then slide the wheel off the hub. Be careful. Remember that the wheel weighs a lot and if you do not remove it carefully, you can injure your back from gravity. Next, remove the wheel bolts and remove the wheel completely from the car.
The wheel is usually secured with four or five wheel bolts . Some models of cars have guides on the hub, through which you can easily hang the wheel on them first, and only then insert the wheel bolts.
True, many modern cars do not have such guides and therefore it will not be very easy to fix the spare wheel. You have to lean the wheel against the hub and rotate it so that the hole on the rim aligns with the hole on the hub.
Aligning the holes on the rim, insert the wheel bolts and tighten them by hand . Do not use a wheel wrench.
Remember to tighten the wheel bolts only after the machine is on all four wheels on the ground or pavement.
After lowering the machine from the jack, proceed to tighten the wheel nuts/bolts . Manually first, as much as possible. Further with the help of a balloon key. For optimum bolt tightening, with the wheel wrench on the wheel bolt, use your foot and your body weight to spin the wheel as securely as possible. As a rule, this step of tightening the bolts must be done several times.
Put the damaged wheel back in the car, also removing the jack and wheelbrace in place . Be sure to remove any bricks or rocks from under the wheels you have placed to prevent the wheels from spinning while the car is on the jack. Your vehicle is now ready to continue on your way down the road.
Please note that if the spare wheel is supplied from the factory, it is usually not designed for full use on the vehicle. Therefore, if you have installed a factory spare tire, do not accelerate above 60-70 km / h. In order to find out if it is possible to accelerate faster on the spare wheel, pay attention to the labels that are applied to the spare tire.
They are usually labeled by the manufacturer. If you did not find such warnings, then refer again to the manual for the car, which, for sure, has recommendations at what speed you are allowed to travel on the spare wheel.
If, after changing a wheel while driving, you hear a repetitive knock, stop and use a wheelbrace to make sure the nuts or bolts on the wheel you have installed are tight enough (as far as possible).