Whether you’re going on a road trip or making a quick stop at the community center, it’s crucial that your car has a functional spare tire at all times.
It’s equally important that you’re able to get the tire down from under the vehicle when you need it. Some cars come with specialized tools to lower the spare tire and quickly make the change.
However, if the tool is unavailable for some reason, you can still bring down the tire and be back on the road in no time. Let’s take a look at how to get a spare tire down without the tool.
Removing a spare tire without the factory tool is easy when you follow these steps:
Removing a spare tire without a tool might appear daunting at first. However, with the right equipment and process, it’s not too difficult a task.
There are two methods to lowering a spare tire on a Ford truck. Each method uses different tools. As such, your choice will depend on the equipment you have to hand.
This method involves pulling out the key from the spare tire drop assembly and using stock spare tire tools to lower the tire.
To make up for the lack of the factory key, you will need some standard tools like joint pliers, small pieces of wood and an optional helping hand.
After you’ve collected the tools, follow the steps below to remove the spare tire.
As you already know, the tire hangs from the truck’s underside toward the vehicle’s rear. As such, you will need to go under to gain access.
Before you get under the truck, remember that safety comes first. Therefore, ensure that you park the vehicle properly, on a surface that’s as flat as possible, with all brakes engaged.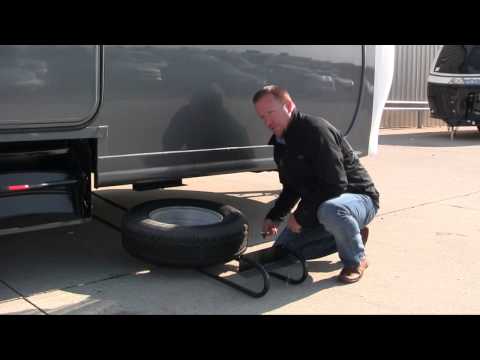 These precautions are to prevent the vehicle from moving while you work under it.
Locate the guide tube under the vehicle. This is a long, black, plastic pipe near the tire. Twist the tube back and forth while pulling it in the direction of the vehicle’s rear to reveal the drop mechanism for the spare tire.
Still under the truck, move to the passenger side and pull down the tire on this side, putting the wood in the gap between the top of the tire and the truck bed frame.
At this point, you may need that optional helping hand to put in the wood while you hold the tire down.
The reason for putting in the wood is to give you easy access to the drop mechanism without having to move the tire away from the truck bed continually.
Put your hand through the space created by the wood and feel for the key to the spare tire drop mechanism.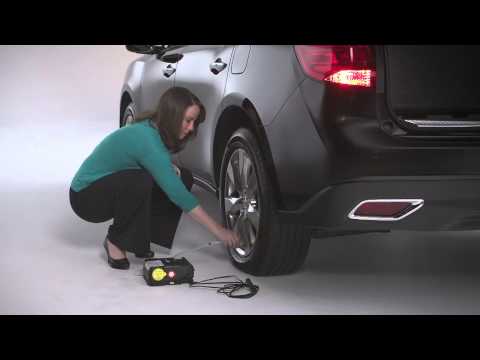 The key roughly resembles a wheel lug nut, and when you find it, pull it out using the jack or working pliers.
Sometimes, just pulling the key may not be enough, and you may need to wriggle the pliers as you pull.
With the key out, the hole left behind is almost identical to the jack crank. Thus you can use the stock tire tools to lower and remove the spare tire. Insert the jack crank into the hole and turn counterclockwise to lower the tire.
The second method differs considerably from the first. Accordingly, you need a different set of tools, including:
With the tools above, you can bring down the spare tire by following the steps below.
Attach the 14mm socket to the extender. You don’t need to use a high-quality socket, as any low-end one will do.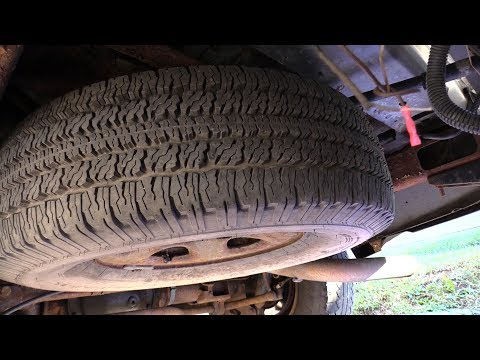 It’s also best to use an extender long enough to reach from the bumper to the spare tire. Aim for an extender that’s around 60–70cm long.
Insert the socket into the hole located on the left (or right, in some trucks) of the license plate. The hole leads directly to the key.
Use a hammer to strike the extender when you feel the socket touching the key. Hitting the extender pushes the socket over the key, providing a better grip.
Four to five blows from the hammer should be enough. Additionally, do not apply too much force to the hammer to prevent damage to the drop assembly. You don’t necessarily have to use a hammer; any object large and tough enough can serve.
With the socket firmly in place, use a wrench to turn the extender counterclockwise. The drop assembly key is similar to the one used on wheel lug nuts. Thus, it will turn as the socket turns.
It may be hard to turn the wrench at first, but it becomes easier as you continue turning, and the tire gets closer to the ground.
By the time the tire hits the ground, the key will be loose and you can remove it. Withdraw the extender from the hole, and use a flathead screwdriver to pry the nut out of the socket.
While the tire is now on the ground, you can’t use it until you detach it from the hoist. To disconnect the tire, reach into the large opening in the middle of the wheel. Next, locate the metal flange connected to the cable and turn it from a horizontal to a vertical position, pulling it out of the rim vertically.
Finally, the hole left behind by the key can fit a jack crank. Put the crank through the opening near the license plate till it gets to the hole vacated by the key. Turn the crank clockwise to raise the hoist back up
While Chevys store spare tires under the truck bed like other trucks, the removal process differs.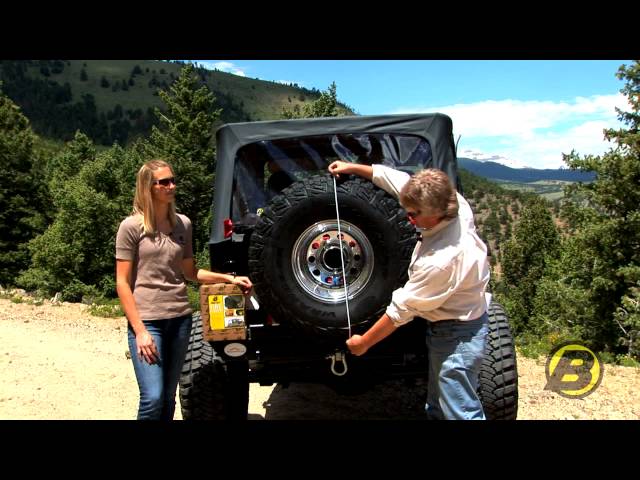 So, if you’re wondering how to lower spare tire on Silverado without tool, follow the steps below.
You will need a couple of tools, including an ignition key and a jack kit to make a chevy spare tire removal tool.
Like other trucks, the access hole is on the rear license plate’s right side and covered with a rectangular shaped plastic.
Newer models may have a lock over the hole as a security measure. In such cases, use the ignition key to remove the lock assembly covering the hole.
Open the jack kit and select the rod with the broader end and flanges on all sides. This rod is the “female” rod and the one you’ll insert into the now open keyhole.
Get another rod from the tool kit, and attach it to the end of the female rod to make it long enough to reach the spare tire from the bumper. Ensure that the press locks enter properly to prevent the rods from disconnecting while you’re turning it.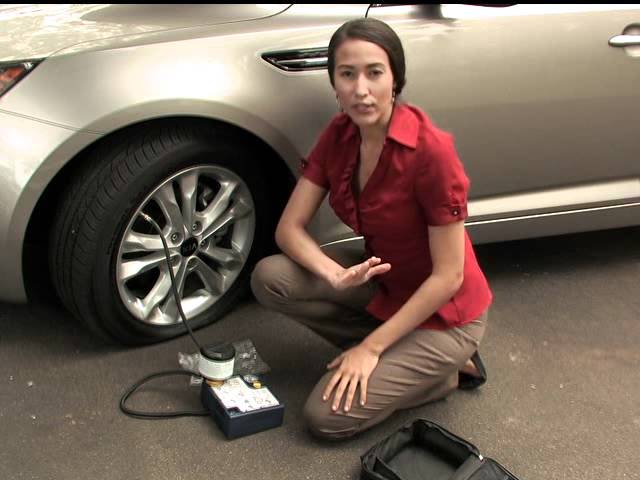
Insert the composite rod into the spare tire hole. Press and turn the rod simultaneously until the end locks into the cable crank.
Put a wrench on the other end of the extension rod and turn counterclockwise. The tire will begin to drop as you turn. Continue turning until the tire touches the ground when you can remove the cable flange from the rim.
Furthermore, you can use the procedure above on different models of Chevrolet trucks. As such, you can follow the steps if you’re wondering how to remove spare tire from Chevy suburban.
It’s always an unpleasant experience when you get a flat tire. It’s even worse when you can’t get the spare down for lack of the specialized factory tool.
However, there are other ways to bring down the spare tire even without the tool. These methods are straightforward and use common tools like extenders, flathead screwdrivers, sockets, ignition keys, chunks of wood, pliers and hammers.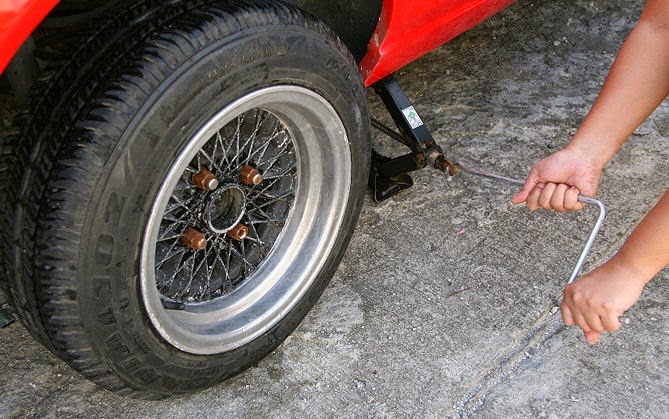
Thus, with or without a factory tool, you can get the spare tire out in minutes and be back on the road quickly.
by Smart Motorist
If you want to know how to lower spare tire without tool, you’re at the right place. This guide contains everything you need to know to complete the task. The step by step instructions given below doesn’t leave any room for confusion or mistake.
They are also easy to follow and practical. You don’t have to be a mechanic to put them to practice. Anyone who has ever held a tool in their life can use them to get their vehicle back on the road in little to no time. That isn’t where the good news end.
Our experts prepared these directives with the assumption that anyone using them would be on their own. That there might not be anyone assisting them in lowering their spare tire. It’s a good thing if you ask us as it means you can complete the task without any help.
Here’s what you need to do:
Before you go about reading our instructions, it’s important to make sure that you indeed have a spare tire in your vehicle. Most people assume this scenario without ever bothering to verify their assumption by looking at the spare tire. Such persons are often left with nothing at the end.
To verify the presence of the spare tire, discard the rectangular plastic cover under the passenger side of your vehicle’s license plate. If you can see an entrance for a key beneath the plastic cover, then you can be sure that your car does indeed has its spare tire.
That you’re going to lower the spare tire without ‘tool’ doesn’t mean you are going to go about the task with bare hands. Doing that would be counterproductive. You will still need some supplies to compensate for the lack of the key. Here’s what you’ll need.
Purchase a jack kit (without the jack). You can buy one from your local hardware store or Amazon. The next item on your ‘to-get’ list is an ignition key. Alongside the components of the Jack kit, the ignition key will loosen the tire’s connection with the wheel.
Experts tell us that one should never change tires on a slope. The same advice is applicable when you’re lowering a spare tire. Vehicles parked on an incline are extremely likely to go backward, thereby putting the safety of the person under the vehicle at risk.
Once you’ve done that, apply the hand brake. Turn on the emergency lights if you’re on the roadside. Put your vehicle in gear (if manual) or in parking (if automatic). Make sure that no one is sitting inside the car and put chocks or similar heavy objects behind all the wheels.
Follow these instructions to lower spare tire without a tool:
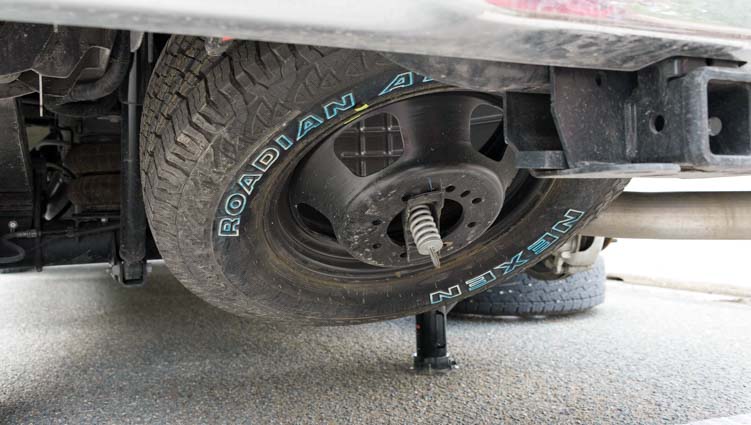
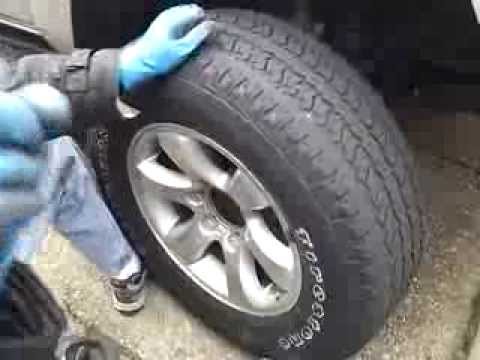
Picture in your mind the exact location of the spare tire. Or you can just fall to your knees and look beneath the vehicle. Fixate your attention to the back of the vehicle. There you’ll see a bulge protruding downwards. That is the spare tire that you’re going to lower.
The exact location of the spare tire will be just behind the tow hitch bar and under the bumper. You can further verify that the bulge is a spare tire by pressing your hand against it. The tire’s trenches will let you know that it’s indeed what you’re looking for.
Insert the ignition key in the hole beneath the plastic cover you discarded earlier. Drag the key towards you and you’ll end up detaching it from the hole. Doing this is vital as it will allow you to fix the assembly at the rear of your vehicle.
Get the crowbar and a couple of rods. One of the roads will have a wider end. Mechanics usually call this end the ‘female’ end. You’re going to insert this end of the rod into the hole that you disclosed in the previous step with the ignition key.
Doing this will help you in two ways. It will provide you enough space to add the male end of the pulley to the female rod. You will also be left with enough space to remove the bumper.
Look closely to make sure that the fitment between the female end rod and the 2nd rod is perfect. Then put this end through the hole.
You have by now one end of the rod into the hole. The other end, which is staying out of the bumper, should now be added to the crowbar. Follow that up by turning the crowbar in an anti-clockwise direction.
This will allow you to swivel the pulley and, by extension, the spare tire to the ground. Keep on rotating as long as the spare tire isn’t entirely on the floor.
This will let you detach the tire from below the vehicle. Keep one hand on the tire and the other on the middle gap of the rim. Apply full force to pull both ends apart and off the peak.
Lowering a spare tire without a tool isn’t exactly straightforward. You have to apply a lot of effort and the whole process will take about an hour for an amateur. Yet it is better than the alternative, which is to wait for hours on the roadside for help. You should therefore be aware of how to accomplish this task.
 Video home / Repair and maintenance / How to remove the spare tire for Lada Largus - station wagon, cross, van. Video
 Repair and maintenance
- from Alexander - Comment
Contents of the entry
The question of how to remove the spare tire for Lada Largus, the owners are asked at the moment when it comes to replacing the wheel. In this article, we will help you and tell you how to remove the spare wheel on a Lada Largus station wagon, Cross and Van.
Since the progenitor of Lada Largus was the French van Dacia Logan MCV, from which the location of the spare wheel was inherited - under the rear of the car on a special bracket. This was done in order to save space in the trunk of a car, and even without a niche for a spare wheel, a flat floor is obtained, on which it is more convenient to load cargo.
1. Open the tailgate.
2. Find a regular jack and remove it to the side. Behind it is a wheel wrench, which we will need to remove the spare wheel.
3. Bend the flap in the trunk carpet to give access to the bracket bolt.
4. Use the wheel wrench to unscrew the bolt to lower the spare wheel bracket.
5. After that, remove the released latch and lower the bracket together with the spare wheel to the ground.
6. Next, pull the wheel towards you.
7. After replacing the wheel with a spare tire, put the damaged wheel on the bracket and put it back.
If you do not quite understand how to remove the spare tire on the Lada Largus station wagon, then I suggest you watch a visual video that shows the work process in detail.
For most owners of a domestic station wagon, it is not news that the mounting of the spare wheel on the Lada Largus was done as unsuccessfully as possible - the mounting bolt is located under the bottom, which means it is affected by moisture, dirt, and road reagents. Over time, it rusts and sours. And at the moment when there is a need for a spare tire — the bolt refuses to unscrew.
clean and lubricate the bracket bolt at least once a season. But who does this until they run into a problem?
If you decide to unscrew the soured spare wheel bolt on Lada Largus, then you will have to arm yourself with the necessary tool and be patient.
1. This work must be carried out on a pit, trestle or lift.
2. We clean the threads from dirt with a metal brush.
3. Wet liberally with penetrating lubricant such as WD-40.
4. Waiting for 10-15 minutes.
5. Trying to move the thread with a wrench. If it goes, then turn the bolt completely.
6. If the thread does not lend itself, we arm ourselves with a gas burner and heat the bolt from the side of the bracket well. After these manipulations, the bolt should either turn out or break off. More often than not, the bolt will come loose.
7. We clean the threads with a metal brush inside the bracket, and change the rusty retainer to a new one, having previously treated it with water-repellent grease.
Due to the inconvenient location and the problem of removing the spare wheel, many Largus owners transfer it to the back door using a special bracket:
On Lada Largus Cross, the spare wheel is removed in the same way as a simple station wagon. The spare tire mounting device has no differences, so there is no difference. The same situation is with the Lada Largus van, where the spare wheel is also placed from below.
All without exception Lada Largus comes with a full wheel as a spare wheel. No temporary huts, dokatok (bananas) are provided from the factory.
Hello everyone! My name is Alexander! I am the author of this article and at the same time the owner of the LADA LARGUS station wagon. I am an auto mechanic, automotive expert! 11 years behind the wheel, 16 years in the automotive field!
View all entries Alexander →
Since the spare wheel is located under the floor of the car in a Land Cruiser, the owners of this car find it difficult when it is necessary to remove the spare wheel on a Land Cruiser 200 or 100. On most cars, it is located in the luggage hole , but in this Japanese it is located differently. Manufacturers have installed a separate design for lowering the spares of their brainchildren, the development of which causes problems.
Contents of the article:
To remove the spare tire on a Toyota Land Cruiser 100, you need to do the following:
To install the removed spare tire into the storage space, follow the described manipulations in reverse order.
For clarity, you can watch a video of the process of how to remove the spare tire on the Land Cruiser 200. It is not necessary to look for a video with a specific SUV model, since the device for lowering the spare tire is identical on TLK vehicles from 80 to 200.
The spare wheel lock is designed to prevent theft of the spare wheel. But it happens that the owner of the car cannot remove the spare tire on the Land Cruiser and needs to remove the protection. The reasons for this are:
The lock can be removed with a flat screwdriver. To do this, pry the pin with a screwdriver at such an angle that pressure is applied to it. Then use the tool as a lever and, with an effort, break out and remove the mechanism blocker.
As a preventive measure, the spare wheel mounting must be tested for serviceability. To do this, you need to make sure that the mechanism for raising the spare wheel is working. Frequency - 1-2 times a year.
To prevent rust and protect against moisture, the winch is painted, disassembled and lubricated with special equipment. This allows you to remove the spare wheel on the Kruzak 200 at any time without hassle.
Oxidation of the spare tire mounting mechanism is the cause of its failure. The emergence of a problem reveals the importance of prevention. But if a breakdown does occur, you need to know what means and measures to take to restore performance.
On car forums, Kruzak owners give several ways to get out of this situation:
 The method is inefficient, since when using these products and getting dirt, a compound is formed that prevents the mechanism from working.
 The solution to the nitrous problem is only a cleaning agent containing molybdenum.
In addition to removing rust, it forms a molybdenum film when applied, which protects the metal from moisture and re-corrosion.