Time to get some New Kid Know-How under your belt and learn to fix a flat. We’ll walk you through the process in detail, but more than that, we’ll cover a couple of habits you can add to your routine to ease you into being a full-time boss on the bike. Take a deep breath. Now, let’s get at it.
Time to get some New Kid Know-How under your belt and learn to fix a flat. We’ll walk you through the process in detail, but more than that, we’ll cover a couple of habits you can add to your routine to ease you into being a full-time boss on the bike. Take a deep breath. Now, let’s get at it.
Flats are easy—both to get and to fix—and while the video above breaks it down to the most basic of steps, let’s deep-dive into the steps to get you truly comfortable with the whole shebang. To kick things off, we turn to Madeline Gulley, bike mechanic and supervisor at Village Service Course—the internal bike shop here at Specialized HQ—to give us the skinny on mechanical tips and tricks for beginners.
She’s been fixing bikes since she was a little kid, and if there’s one thing Madeline wants everyone to know, it’s this: Anyone can do it. Take it away Madeline:
“
”
Because it’s easy. If you can physically ride a bicycle, then you can change a flat—it takes waaaay less coordination.
Madeline Gulley
Stuff You'll Need
Tire levers: Take two—it’ll make this a cinch.
New Tube: Take it out of the box to fit in your jersey pocket or saddle bag.
Air Source: If you’re on the road, a mini-pump and/or CO2 + inflator. If you’re at home, use a floor pump for ease of use.
Determination: You got this!
Before we begin, if there’s a term you’re not familiar with, we’ve included a short list of definitions at the end of this article to fill you in. We also recommend you practice this at home before you get out on the open road or trail. Take your time, too, because the only thing worse than one flat tire is two flat tires. Ready? Let’s fix this flat!
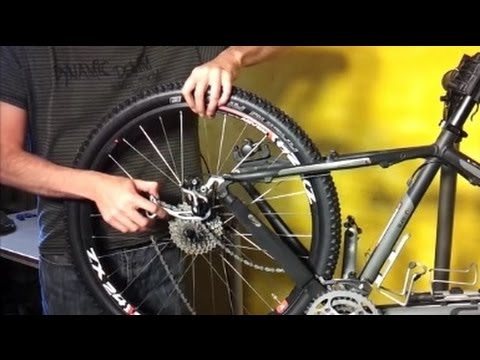
Hmm, did you get a rear flat? It seems more complicated to get the wheel out, but don’t sweat it. For first timers, Madeline suggests that you flip that bike over onto its handlebars and saddle. “It’s the easiest way for you to get it stable,” she says. “And we’re not really concerned about a [perceived] level of professionalism here—it’s more important that you can comfortably change a flat.” Before you flip your bike, change the gear to the smallest cog (physical size) in the cassette so the chain’s slack. With your bike flipped over, stand behind the back wheel and look at the rear derailleur pulley cage—where your chain winds through two little pulleys. See it? Now pull the cage towards yourself, and then use your other hand to pull the wheel up and out. Easy peasy.
PRO TIP: You’re going to get dirty. That’s good. It’s a sign that you’re a badass.
PSSST! THE SECRET TO USING CO2
Using a CO2 cartridge can feel intimidating, but it shouldn’t. Grab your cartridge and inflator—the thing that attaches to activate the air—and you’re ready to go. There are a couple of inflator types. For one type, fully screw the CO2 into the cartridge, put the valve end on your tube, then gently unscrew the CO2—back it off—a tiny bit, and the tire will air up. The cartridge is going to get super cold but don't be alarmed—it’s perfectly normal. Another kind of inflator has a trigger mechanism on it, so after you screw the cartridge in, attach it to the valve. And instead of backing the cartridge off, activate the trigger and the tire will air up. The easiest way to find out what kind of inflator does what is to ask at—you got it—your Local Bike Shop.
Note: You don’t have to put all the air from the CO2 in there. Just go until it feels right. If you keep the inflator head on, you can still get some more air out of it later. Easy breezy.
Some New Kid Habits
While fixing a flat is the number one must-know for new cyclists, we asked Madeline what she thought two essential habits for beginners were. Two stood out: chain maintenance and checking your tire pressure before every ride.
Some New Kid Habits
While fixing a flat is the number one must-know for new cyclists, we asked Madeline what she thought two essential habits for beginners were. Two stood out: chain maintenance and checking your tire pressure before every ride.
Not to be dramatic, but a well-lubed chain is a happy chain. Why do you need a happy chain? Because a well-maintained chain lasts longer, makes shifting easier, and prevents rust and fatigue. The first sign that something’s amiss is almost always some form of caterwauling coming from the chain. Is it squeaking like crazy? Does your chain feel "crunchy" when you ride? It’s probably dry, or caked with muck—however you look at it, that chain's sad. It’s time to make it happy again.
As Madeline says, it’s not just a matter of drowning it in chain oil from time to time, either. If you’re getting in the habit, remember to wipe the chain down while you’re at it: Before you lube it—to wipe the muck and grime off—and after you lube it—to remove excess lube. Madeline recommends that you get in the habit of lubing your chain regularly, not just when the sound of its sad screams finally catch your attention. Think about the conditions you’re riding in. If you ride in the rain, or in dusty conditions, lube your chain afterwards and your chain will love you for it. Here’s a quick guide to when and how.
“
”
Your chain should look shiny. In ideal conditions, it should not be black—unless it is actually [painted] black
1. Use a rag and run the chain backwards through it to clean any built-up grime. Use your hand to back-pedal your bicycle as you hold onto the chain with the rag.
2. Apply lube—aim for one drop per link as you back-pedal the chain, noting where you started so you know where to stop.
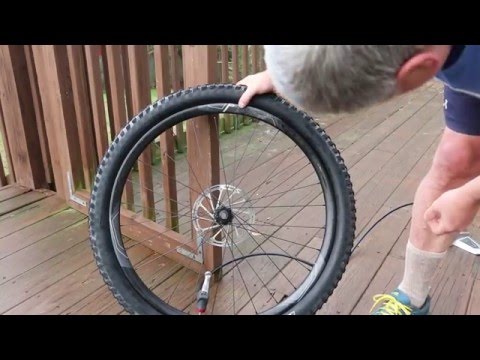
3. Run the chain up and down the rear cassette by changing the gears.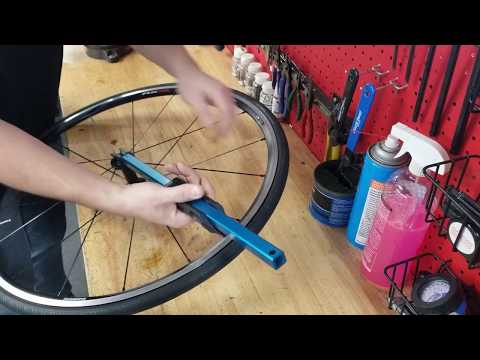 You'll need to hold the back of the bicycle in the air when you do this. It helps if you have a bike stand, but if you don’t, you can hook the nose of your saddle over a porch railing, get a friend to help, or just change the gear, pick it up, and pedal forwards with your hand. Rinse, repeat.
4. Hold a clean cloth on the chain and run the chain backwards again, wiping off excess lube. Now leave it for a little bit—really let that lube soak in.
5. Some people leave it overnight before a big ride, while others give it a half-hour or so. Now wipe the chain again by running it through a rag. There's actually a thing as too much lube. It attracts grime, so wiping it down alleviates this.
PRO TIP: Use the good oil. What chain lube should you use? Well, that’s a hot issue, and it's very much a personal choice. “It’s like picking out someone else’s socks for them,” says Madeline. For New Kids, let’s just keep this simple. Choose the right oil for the conditions, and make sure that it’s a lube that’s specially formulated for bicycles.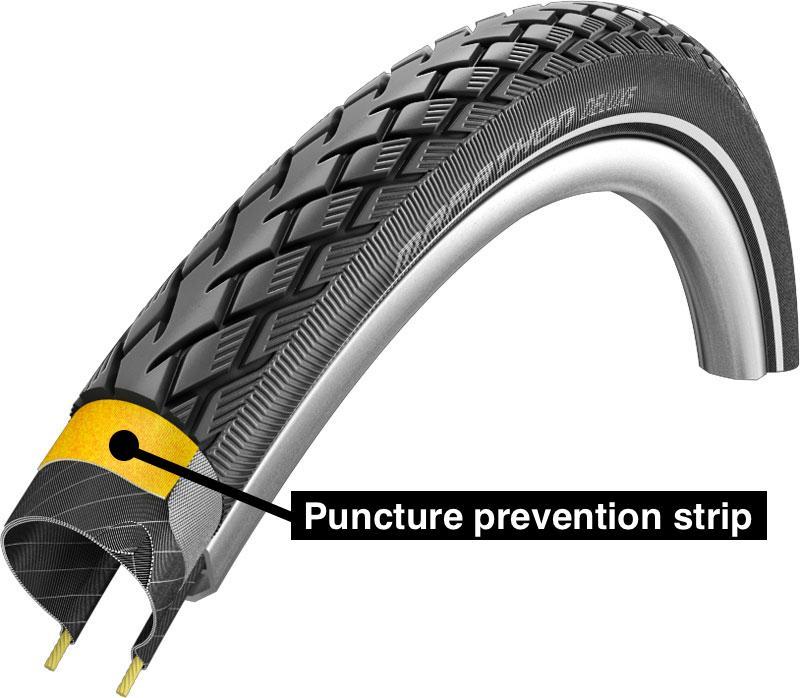 Again, Madeline says to ask at your Local Bike Shop for a recommendation.
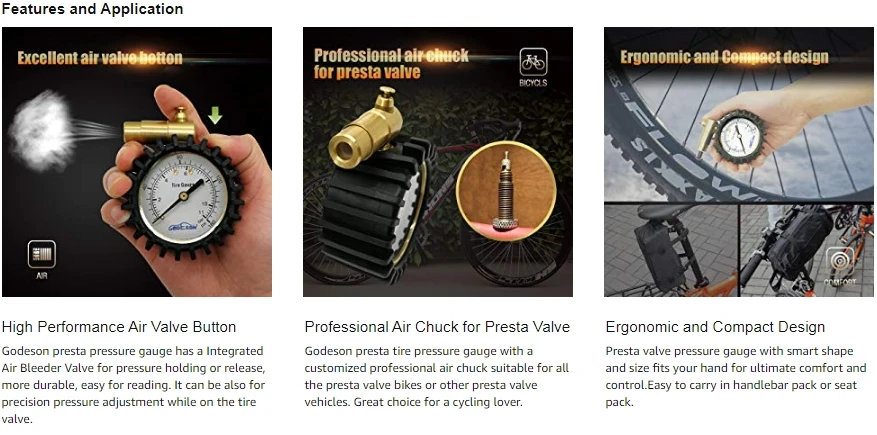
A second habit you should get into is checking your tire pressure before every ride. And while you might think a simple press down with the heel of your hand should be enough, as Madeline warns:
“If you're at the point where it's 'squishy,' you've probably already waited too long. Having a pump with a gauge is something I think everyone should have [at home].”
If you leave the house with your tire pressure too low, you can easily get a pinch flat when you ride over a pothole or obstacle. Too high? That might make for a bumpy and uncomfortable ride. Madeline recommends that you check the recommended pressure—indicated as the PSI on the side of the tire—and then dial it back a little. How much do you weigh? If you’re a lighter rider, you can go lower. If you're heavier, err on the side of a higher pressure.
When it comes to mountain bikes, sometimes you’ll want to adjust your tire pressure based on the conditions at hand.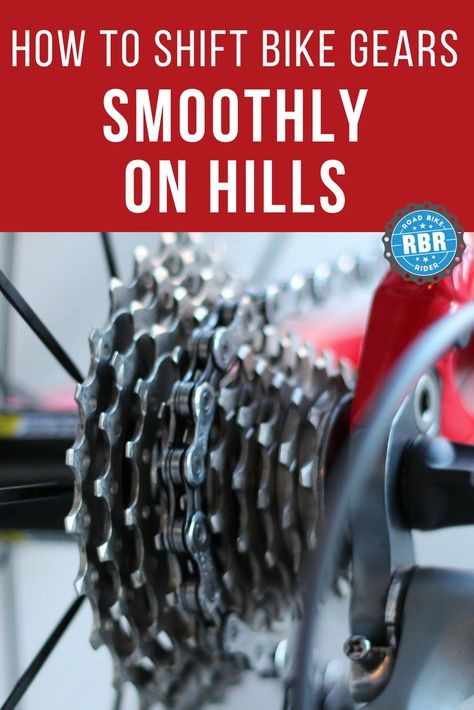 If the trail is dry and in tip-top condition, go for the higher end of the recommended pressure. If wet or muddy, drop the pressure so your tire has better contact with the ground for more control.
Any last bits of advice from Madeline? Get to know your bike. “Knowing what your bike feels like when it's working properly is very important for knowing when your bike is not working properly,” she says. And once more—get to know your Local Bike Shop.
“
”
Your local bike shop wants you to utilize them as a resource. Knowledge is power, so don't be afraid to ask questions. They’ll teach you how to fix a flat. And seriously, ask questions about your bike. ‘Do I have a quick-release or do I have a thru-axle?’ Get to know what these things are called so that you can ask those questions, Google them, or be able to call somebody and ask them how to do it while you're on the side of the road. Learning the vocabulary at the time you purchase your bike can be really helpful for you down the line.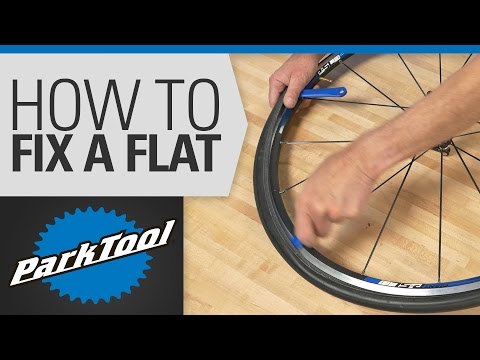
WORTH IT WILL DO
You know-how to fix a flat correctly, but what if time were no object? What if it was a front tire flat—no hassle of the chain—and you had CO2 at the ready and no shortage of “I will crush this” moxie? Do you think you could fix it in under six minutes? Well, ain’t that a coincidence—we have a Worth It Will do that specifically challenges you to fix a flat in under six minutes to earn the Flat-Out Flat Fixer badge. Learn more about this challenge and get ready to cross that off your bucket list.
Learn More
BEAD: Part of the tire—the edge along the inner-side of the tire that fits inside the rim.
BRAKES: Your brakes will be either rim brakes or disc brakes. Rim brakes apply a brake pad to the rim of the wheel, while disc brakes apply the brake pad to a rotor that’s attached to the center of your wheel.
CASSETTE: The set of cogs on the rear wheel. When you change gears, the chain moves up or down the cassette.
DERAILLEUR: The gear-shifting mechanism on a bicycle. There's a front derailleur that shifts from the big ring to the small ring at the front of your drivetrain, and then there's a rear derailleur that shifts gears up and down the cassette.
QUICK-RELEASE: Also known as QR. The quick-release lever allows you to remove the wheel from your bike when fixing a flat. The fork or frame will have slots (dropouts) to slide the wheel in. Pressing the QR lever closed will then clamp the wheel to your frame or fork.
THRU-AXLE: A thru-axle slots through the frame of the fork legs, which are closed (no dropouts). And while some thru-axles have a lever on one end to help you unscrew them, others will require an Allen tool—another great reason to always carry a multi-tool. Check with your local bike shop for what you’ll need.
VALVE: Found on a tube, a valve is where you put the air in. There are two types—Schrader and Presta. A Schrader valve is identical to those found on car tires. A Presta valve is typically found on high-pressure tubes, and has a little metal cap on the end that has to be unscrewed before air can go in. An easy way to remember the difference? You “press” a Presta to release the air.
SEE ALL WILL DOS
Changing a bike tire is a beneficial skill that, as a cyclist, is handy to know. It might seem pretty straightforward, but you can make it very easy or very difficult for yourself if you don’t know how to do it properly. In this article, we will tell you everything you need to know about how to change a bike tire, replace a bike tire, and even replace a bike tube.
For a bike tire replacement, check out our full selection of bike tires. Before we start, the first thing we need to think about is what tools and spares we will need. We highly recommend having these at your disposal;
The first thing you are going to do is remove the wheel. Depending on where you are, you can either turn the bike upside down, lean it on its side, or get it into a stand. Typically you have two different types of skewer which hold the wheel on, a quick release and a thru-axle. Both of these you will need to release and unscrew.
Once removed, your wheel will come out, and you will be able to work on it. A top tip if you have hydraulic disc brakes, ensure that the lever is not pressed with the wheel out as this will cause the pistons to adjust.
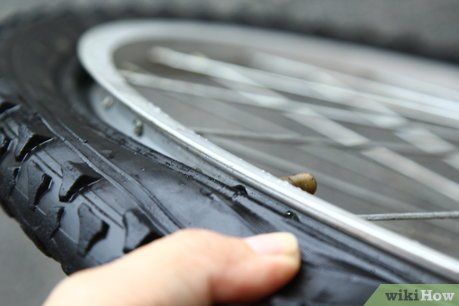
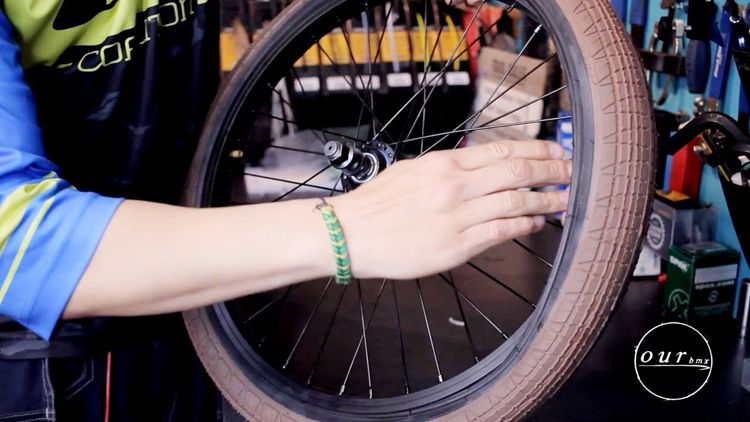
Now, you'll want to deflate the tire, ready for removal completely. You can do this by removing the cap and either unscrewing the Presta valve and pushing the pin or just pushing the pin on the Schrader valve. Once deflated, push the tire's bead inwards to loosen it off the rim.
Now you will want to take your tire lever, insert it under a part of the tire, slowly ease the tire off the rim, and be careful not to snag the inner tube. If you are using tubeless, you might want to put a rag inside to soak up any old sealant, or it might get messy. Once one side is off, you should be able to pull the tire straight off with the inner tube.
Now you have the tire off and the wheel free, you will want to inspect it to ensure that it is in good working order. Check the wheel is straight and true by spinning it in your hand and holding on to the hub. Then make sure there are no cracks near any of the spoke holes. Once you have done this, ensure that the rim tape is in good condition and covers all the spoke holes. If you’re using tubeless, you are doing to give this a big clean and remove any excess sealant.
If you are swapping the tire out because of a puncture, you will need to inspect the tire to ensure the thorn or piece of flint is gone. Then you will need to either swap the tube out or even patch the old one. You can do this by finding the hole, scratching it clear, and sticking a patch on it. We recommend changing a tube instead of patching.
Shop Bike Tubes and Tubeless Kits | Shop Bike Tire Repair Patch Kits
How to put a tire back on the rim? Firstly check the rotation of the side of the tire to ensure it’s going correctly. Start by running one side of the tire into the inside of the wheel and then insert either the inner tube into the tire with it partially inflated to make sure it doesn’t nip. If you are using sealant, you can insert it here or later into the valve.
After this is complete, you will need to pump the new tire up to the recommended PSI. If you are unsure, check the manufacturer's recommendations, but whatever you do, don’t go over the maximum stated on the tire or have it too low that the tire is very spongy. Now make sure the tire is on correctly and is in the bead. You can check this by spinning the tire to ensure it's not lumpy. If it is, push the side of the tire up onto the bead with your fingers carefully.
Now it’s time to reinsert the wheel. You will need to pop the wheel back and ensure it is in the correct place. If you have removed the rear wheel, check that the chain runs correctly. Tighten up the quick release or thru-axle to the proper tightness. Now it’s time to get the bike on the floor. Check the brakes work and that the wheel is tight.
The process is the same for any tire. Generally, the larger the tire, the easier the process. Road bike tires can be challenging and might need a little more attention. For more information on types of tires, check out these pages Link to dirt mountain bike tires, road bike tires, gravel bike tires, and cyclocross bike tires.
How much does it cost to get a bike tire replaced?Firstly you have the cost of the inner tube, sealant, and tires. If you get a tire replaced at a bike shop, they will charge anywhere from roughly $10 to $20 for labor on a tire with an inner tube. For tubeless, it could be $20 to $30 as the process is much more complicated and takes longer.
If they look worn and have a lot of small slices or are giving you a lot of punctures, they will need changing. Depending on the tire, they might give you 5000 miles or 500 miles depending on the discipline and quality of the tire.
How much do bike tires cost?They can be as cheap as $20 or as expensive as $100. It depends on puncture protection, the tire's weight, and performance.
What are the best tire brands?Some of the top current brands are Continental, Vittoria, Specialized, Maxxis and Schwalbe
It will take time to replace a bike tire, but the more you do it the quicker you will get. Replacing tubes and tires is a great skill to learn and will help you while riding out on the road.
Sooner or later, every cyclist has such an unpleasant situation as a bicycle inner tube puncture. Finding a flat tire at home is one thing (although it also requires some knowledge of camera repair), but what if you blew it during a multi-kilometer ride, for example, somewhere in a field? How to determine the puncture site in such a situation, correctly change and seal the bicycle chamber, what kind of glue and patches are best suited for this purpose. In addition, in this article we will consider some of the nuances of repair and proper operation of bicycle chambers, for example, we will talk about what pressure they should have and much more. 9Ol000 Related video
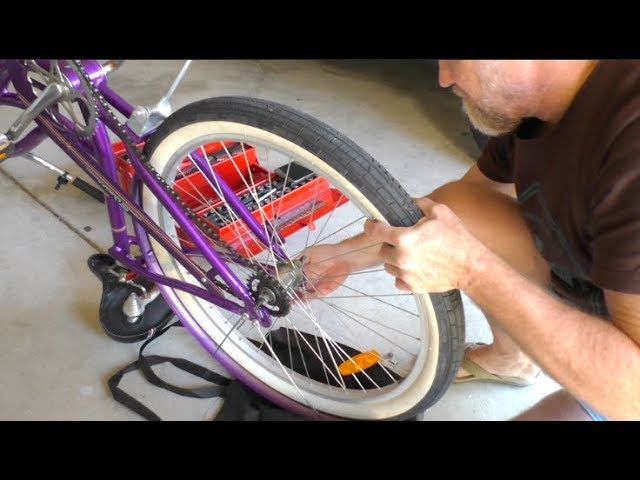
During long trips, it is advisable to carry not only a bicycle tool, but also a spare tube, with which you can quickly replace the failed one and go further. After all, this is much faster than waiting for the glue to dry on a freshly sealed one. Therefore, in this section we will consider such a question as how to remove a bicycle tire and replace the camera when it is punctured.
Be careful not to get a tube between the mount and the rim. This may lead to its rupture. If you do not have a magazine spatula, then you can use any non-sharp, preferably plastic object of a similar shape. It is not necessary to use wooden products for these purposes (they may be with burrs) or metal products that damage the paintwork of the bicycle rim. Sharp objects (screwdrivers, knives, etc.) are strictly not recommended for use. They can damage both the tube and the tire.
 At this stage, we have removed one side of the tire.
 It is important not to turn it over to the other side until we find the puncture site and find it on the tire (by attaching a tube to it).
 After that, we lower it completely through the nipple.
 The punctured chamber should then be repaired, for example after you have returned home from a bike ride or during a break.
At first glance, a very simple procedure for locating a puncture can become much more complicated depending on where you find a flat tire (at home or during a trip). To simplify the search procedure, it should be taken into account that in 90% of cases it is located on the so-called "contact spot" of the wheel with the road, usually no higher than 2/3 of the chamber height. An exception may be damage from the rim (if the rim tape failed on the latter) or the iron threads of the tire cord that came out. Therefore, we will consider several options for how to find a hole in the bicycle chamber through which air is bled.

Not all adhesives and patches are suitable for repairing a punctured bicycle wheel. Therefore, it is worth dwelling in more detail on the topic of what is possible and what should not be sealed with a bike camera. There are several options, which we will discuss below.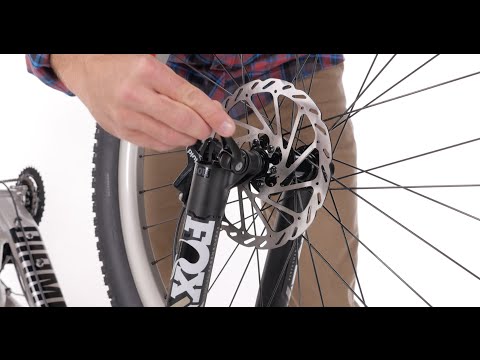
 They are quite common. For several years of use, none of the patches flew off and began to let air through. And the cost of this product is lower than that of famous brands. The disadvantages include that the set contains only glue and patches, and what is most offensive, there are disproportionately more patches than glue. Well, these are already trifles. In general, I advise everyone.
  It is quite difficult to do at home (and impossible in the field) and you can easily screw up the camera.
 After we have found and marked the place of the bicycle inner tube puncture, it is necessary to start its repair, namely, to seal this hole. To do this, you must perform the following operations.
 This information can be found on the adhesive tube. We also pay attention to the exposure time in air and the time of complete solidification indicated there (the last two points may not be indicated).
 If, after you have sealed a puncture on the bike tube, it still deflates over time, you should check: To do this, the place with the patch should be lowered into the water and make sure there are no air bubbles. If they are, then you will have to tear off the old and glue a new patch.
If the tube is damaged at the base of the nipple (for example, it was rubbed by the rim), it is better to replace it immediately. As a rule, such defects cannot be repaired.
To reduce the chance of unexpected tire and tube damage while riding, there are a few simple rules to follow.
 Therefore, if you pump up to 3 bar in summer, then in winter you can increase the pressure by about 1 bar (but not higher than the maximum allowable).
 There are two other devices on the bike parts market that are designed to make life easier (at least they position themselves that way) when riding a bike. This is an anti-puncture tape and sealant, which is poured in a small amount into the chamber and is designed to “tighten” punctures while driving.
Anti-puncture tape is a strip of soft, rubberized plastic or, in more expensive products, Kevlar, that can be glued or simply inserted between the tire and the bicycle tube to protect against punctures. But there are pitfalls here. Cheap anti-puncture, firstly, does not always protect against punctures, and secondly, it can fall apart inside the tire and rub the chamber into dust with its fragments, thereby dooming the latter to ejection. Plus, it's extra weight. In general, after sitting on the forums, I agreed that they are more blamed than praised.
As far as the sealant is concerned, things are not so good either. As a temporary solution, when you don’t want to bother with replacing the camera, you can, of course, use it. But the sealant does not seal the puncture completely, but only reduces air leakage. Plus, there were complaints after use, when they wanted to stick a patch on the puncture site.
In general, according to the editors, it is better to use better quality bicycle tires with built-in puncture protection, carry a spare tube with you and not bother with the above accessories.
After reading this article, we can conclude that replacing and repairing a bicycle inner tube is not such a difficult task, and sealing it during a trip is not much more difficult than doing it at home.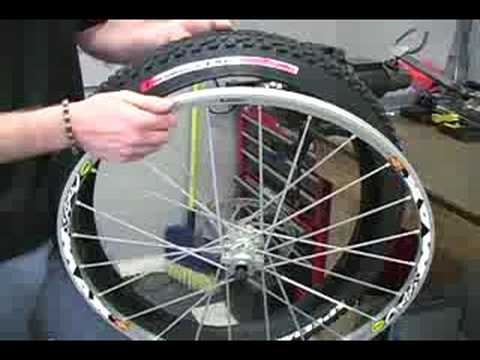 The most important thing on long trips is to have another spare tube and a puncture repair kit with you. Also, do not forget to pump up the chamber to the required pressure in time and change worn-out bicycle tires in a timely manner.
TIRE SIDEWALL MARKING
Indicates the type of rim the tire is compatible with. Unless otherwise noted, should be used on rims with hooks.
Nominal profile width and suitable wheel diameter in millimeters according to ETRTO.
Country of manufacture.
Minimum and maximum pressure in bar and psi. inch.
Specifies the direction in which the tread pattern should be directed when the wheel is rotated forward.
Specifies that the tire should be installed with an inner tube only, not tubeless or otherwise.
TIRE TYPES
TUBE TYPE: A tire for use with an inner tube only.
TUBELESS: A tire for use on tubeless rims only, which can be fitted without an inner tube. Can be used with internal chamber.
TUBELESS READY: A special type of tubeless tire that requires a sealant inside to maintain pressure. Can be used with internal chamber.
TUBULAR: A fully enclosed, stitched or vulcanised, tire construction (tube) that requires a special tubular rim and is glued to it when mounted.
TIRE INFLATION RECOMMENDATIONS
Never exceed the recommended tire pressure.
Proper pressure affects the load, speed and handling of a bike and is vital to performance and safety performance such as braking, maximum traction and tire life.
Inflate tires "cold", that is, not warmed up on the road.
Do not exceed the maximum pressure indicated on the tire sidewall.
Insufficient tire pressure causes excessive creasing and rapid wear.
Excessive pressure causes discomfort when driving and reduces the contact area of the tire with the road surface, which impairs handling and traction.
Before every ride, it is essential to check and maintain the correct tire pressure (while the tires are “cold”), especially on tubeless systems, which are more prone to sudden pressure loss.
WARNING: Driving on tires with improper air pressure is dangerous! This can lead to an accident, accident, serious injury or even death.
TIRE CHECK
The condition of the tires and the air pressure in them should be checked before each trip, and also, and even more carefully, after hitting any object on the road. If the tread is worn and the body material (cord) becomes visible, bulges, cracks, cuts, holes, uneven wear appear on the tire, or the tire shows signs of any other damage, it is recommended to replace it immediately.
Over time, the condition of the tire will in any case deteriorate under the influence of external forces, such as contact with the road, punctures, improper repairs, mounting-dismantling, inflation-deflation, heating-cooling, excessive exposure to ozone, improper storage conditions, etc., etc. . To reduce the impact, tire manufacturers add anti-ozonants and antioxidants to their products.
Since it is not possible to accurately predict what external forces a tire will be subjected to, there are no scientifically based limits on the life that a tire can be given. It is recommended that the condition of the tires (as well as tubes and rim tapes) be checked regularly by a bicycle specialist who can assess their suitability for further use.
As for tubeless systems with liquid sealant inside, it is necessary to check the condition of the sealant itself and change it regularly in accordance with the instructions.
To avoid cosmetic damage, use low-pressure tap water to clean and wash the tire sidewalls. Never use cleaners to improve the appearance of the sidewall, otherwise you will remove antioxidants, which can degrade the quality of the rubber and lead to cracking of the sidewalls. Using hydraulic sprayers with high water pressure can also cause damage to the sidewall.
Avoid excessive mechanical stress on tires and tubes (for example, do not brake by blocking the wheel, do not run into sharp objects, do not drive with insufficient or excessive tire pressure, etc.).
If your bike has rim brakes, the rim is subject to constant wear and tear, which over time can lead to tube failure and puncture. In any case, if you have any doubts about the condition of the tires, consult a bicycle specialist.
High tire pressure can damage the rim, so check the maximum pressure allowed for the specific rim before installing the tire (check with the wheel dealer or rim manufacturer for information on whether the rim can withstand tire pressure).
CHANGING TIRES
PREPARATION
1. Before installing or removing a wheel, read the bike manufacturer's instructions and make sure you know how to handle the wheel mounting mechanism.
2. Verify that the rim, tire, and tube are compatible with each other by checking the instructions for each component manufacturer. A mismatch between tire and rim can cause the tire bead to come off the rim or damage to the inner tube, resulting in a rapid loss of air pressure. If you're unsure, be sure to check with a bike specialist.
3. Make sure that the mounting area of the tire is clean and that foreign objects do not get into the tire, as they can damage the tube, rim tape, the tire itself, or contaminate the sealant (in the case of a tubeless tire).
4. Make sure the rim is in good condition. If it is damaged, then it must be replaced.
5. Check the condition of the rim tape, if used. If it is damaged or does not completely cover the spoke holes in the rim, it must be replaced. Poor quality rim tape is very often the cause of a sudden loss of air pressure.
6. Check the maximum allowable pressure for the given rim type. It must be equal to or higher than the tire. Tires that allow a pressure reduction equal to or greater than 3 bar (43 psi) must be mounted on lug rims.
7. A tire capable of inflating more than 5 bar (73 psi) must be mounted on a lug rim. Hooked rims are marked with a "C" in the size label. If you have any questions, please contact a bicycle specialist.
8. In the case of installing a tire with a tube, talc helps to properly place it in the tire. For latex cameras, its use is mandatory, but it is also recommended for butyl cameras. It is also recommended to install a new tube each time a new tire is fitted or after a puncture.
9. When installing a tubeless tire (Tubless), always check the condition of the valve (nipple) and change it if it looks damaged or if air pressure is lost.
10. When installing a Tubeless Ready tire, always check the sealant and change it if it is dry. Also read the sealant manufacturer's instructions carefully to make sure it's right for your tire.
TIRE REMOVAL PROCEDURE
1. Unscrew the valve cap (nipple) and locknut, completely deflate the tire.
2. Peel off one side of the tire all around from the edge of the rim by applying pressure starting from the area opposite the valve. Tubeless tires may require more effort for this.
3. Position the tire pryer next to the valve and carefully insert it between the tire and rim, being careful not to pinch the inner tube (if any). Then, using a lever, lift the sidewall of the tire off the rim. To make the job easier, always make sure that the other bead is in the rim bed.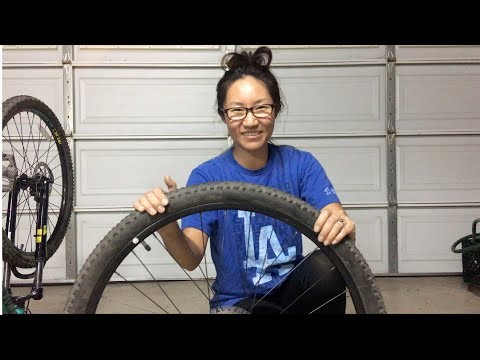
4. While holding the first rig in this position, insert the second rig about 10 cm from the first and repeat the above operation. Then run the pliers around the circumference of the tire to completely separate one bead from the rim.
5. Remove the inner tube, if present, or liquid sealant, if present and still liquid, and then remove the second tire bead from the rim with your hands.
TIRE INSTALLATION PROCEDURE
1. If installing a tubeless tyre, make sure the rim is sealed, tubeless tyre-compatible, or tubeless-compatible. If the rim is tubeless compatible, you will also need a tubeless rim tape that will completely cover the spoke holes. It is possible to lubricate the entire circumference of the rim with a special tubeless lubricant (do not use oil or grease) - this will facilitate the installation procedure and the correct positioning of the tire on the rim.
2. Insert the first bead of the tire into the rim, observing the direction of rotation of the tire indicated on its sidewall, starting opposite the valve.
3. If installing a tire with a tube, slightly inflate the tube, but only so that it becomes rounded, and gently insert into the tire, starting at the valve and completely carefully placing it in the rim.
4. Starting on the side opposite the valve, press the other bead of the tire into the rim and push it around the rim in both directions until it fits properly in the rim. For tubeless installations, add the recommended amount of sealant before inserting the last bead piece. If the tire bead becomes difficult to push into the rim, or the last part of the bead does not snap into place, make sure that the bead around the entire circumference of the rim is in place. If necessary, squeeze the sidewalls of the tire into the rim with your hands.
5. If fitted with a tube, make sure it is not pinched between the tire and the rim or valve, and then secure the valve to the rim with a locknut.
6. Inflate the tire to the maximum allowable pressure using a pressure gauge pump so that the beads are properly seated on the rim. Tubeless tires click into place with a characteristic popping sound. Rotate the wheel by hand at low speed and at an angle to check that the beads are correctly positioned and also that the liquid sealant is spread inside (if the installation is tubeless).
7. The tire is properly seated when the thin line above the side of the rim is equidistant from the edge of the rim all around. Then reduce the pressure to your preference (within the markings on the sidewall of the tire) and close the valve. Do not exceed the manufacturer's maximum pressure for tire, rim and rim tape.
8. When inflating a tubeless tire for the first time, a strong jet of air is required, so you may need a compressor.
9. Before each ride, check the air pressure, tire bead fit, wheel-to-hub attachment, and brake pads (disc or rim).
10. Before using newly installed tires, be sure to first brake test and do a few test maneuvers.
USING TIRES ON FULLY SEALED CARBON AND ALUMINUM CLINCHER RIM WITHOUT RIM TAPE
Fully sealed carbon and aluminum rims, such as tubeless rims, usually don't have spoke holes in the rim, so manufacturers don't mandate the use of rim tape.
However, keep in mind that in the case of bikes equipped with rim brakes, the heat generated during braking directly enters the tire system, significantly increasing the thermal load on all components, such as the tire, the inner tube (if any) and the rim itself. In the event of prolonged braking, riding without a rim tape can cause the tires to deflate quickly, with the risk of losing control of the bike.
This becomes even more relevant in the case of latex and lightweight tubes, as well as tubeless installations. In order to minimize the chance of failure due to overheating, it is recommended to use rim tape for any installation, and to avoid continuous, prolonged braking when descending a mountain, if possible.
USING CLINCHER TIRES WITH CARBON RIM
Carbon rims sometimes pose a risk of tire edge damage due to sharp rim edges. Therefore, before mounting the tire, it is recommended to make sure that there are no sharp edges on the rim hooks.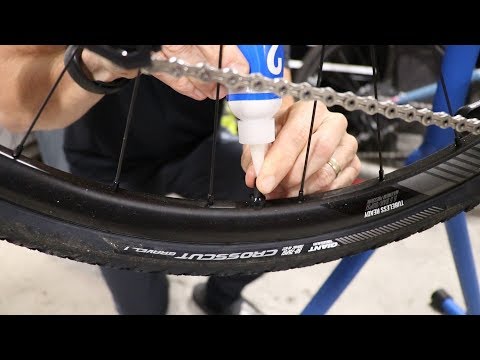 To verify this, carefully run your finger along both edges of the rim - there should be no nicks, sharp protrusions or excessive roughness on it. If there are, then the rim needs to be replaced.
If in doubt, please consult a bicycle specialist.
TIRE STORAGE
Tires should be stored in a cool, dry place at 10°C - 21°C, avoiding contact with heaters.
Storage temperatures that are too low are not harmful in and of themselves, but can cause tire stiffness. In this case, before unfolding the folded tire and mounting, it is necessary to keep it for several hours at a temperature of about 16°C.
Do not park your bike in direct sunlight or in very hot places for a long time.
When the bike is not in use and is on wheels, keep the tires inflated and rotate the wheels periodically to avoid flat spots, especially if tubeless tires with liquid sealant are installed.