Please enable javascript to view the website ..
Repair help > Riding Mowers & Tractors repair > Riding Mowers & Tractors repair guides
January 1, 2015
By Lyle Weischwill
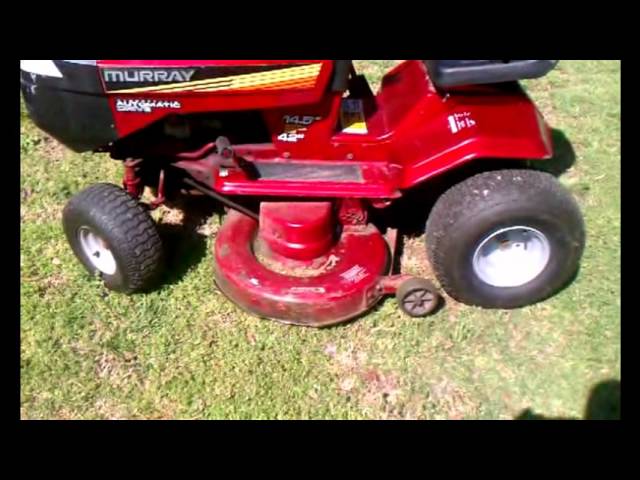
This step-by-step riding mower repair guide shows how to replace the rear tire on your lawn tractor or riding lawn mower if the tire is too damaged to repair. Installing a new rear tire is relatively easy and requires just a few tools and a manufacturer-approved lawn mower part.
Use this repair guide and video to replace the rear tire on Craftsman, MTD, Husqvarna, Murray, Troybilt, Toro, Snapper, Yard-Man, Weed Eater, Ariens, John Deer and Southern States lawn tractors and riding lawn mowers.
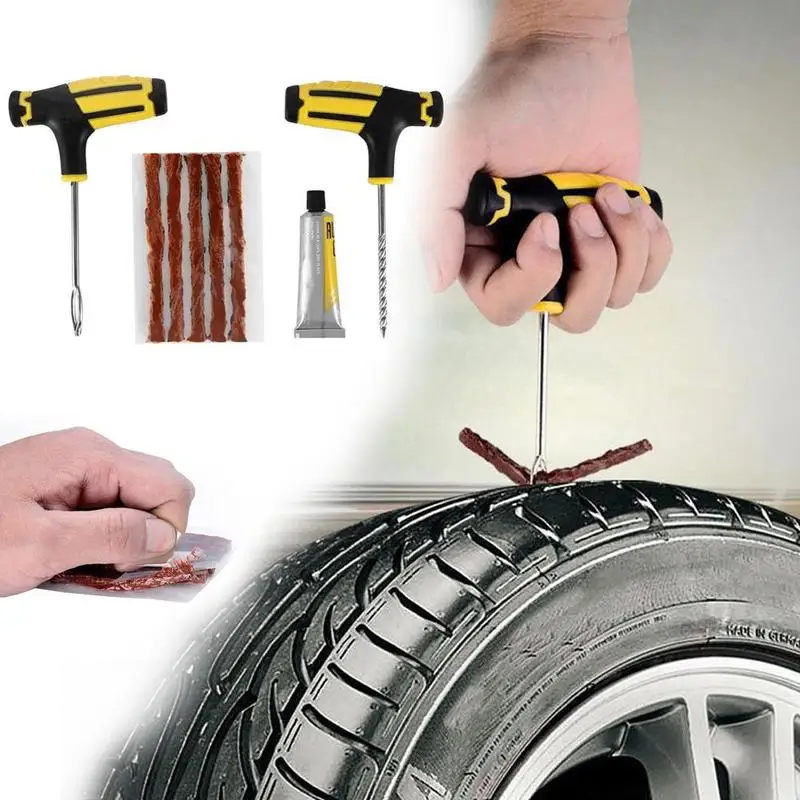
If the tire just has a puncture in the tread, you can fix it with tire sealant. The video How to Repair a Riding Lawn Mower Tire shows how.
Quick links
Tools required
Floor jack or bottle jack
Jack stand
Slot screwdrivers
Pry bars
Pliers
Valve stem core removal tool
Liquid detergent
Water
Wood blocks
Work gloves
Safety goggles
Compressed air supply
Anti-seize compound
Repair difficulty
Time required
60 minutes or less
Repair difficulty
Time required
60 minutes or less
Replacing a rear tire on a riding lawn mower
This video explains how to replace the rear tire on a riding lawn mower.
01.
Park the riding mower on a level surface and set the parking brake.
Turn the ignition switch off and remove the key.
Wear work gloves to protect your hands and safety goggles to protect your eyes.
Lift the riding lawn mower hood and disconnect the spark plug wire.
Lower the tractor hood.
Tip: Disconnect both spark plug wires if your engine has 2 cylinders.
PHOTO: Disconnect the spark plug.
02.
Block the front tires to keep the riding mower from rolling.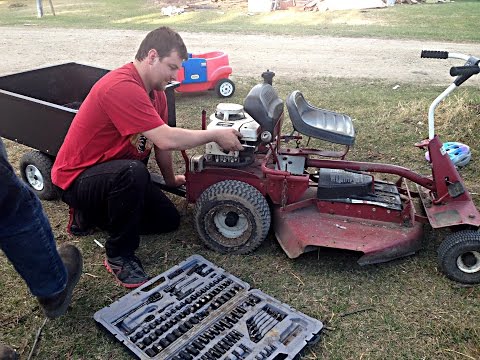
Position the jack under the frame and jack up the riding mower to raise the rear wheel.
Place a jack stand under the frame to support the riding mower.
Remove the jack.
PHOTO: Jack up the riding mower.
03.
Pull off the axle cover.
Remove the retaining ring and then pull off the washer.
Pull the tire off the axle.
Remove the square key.
PHOTO: Remove the rear wheel.
04.
Remove the valve stem cap.
Remove the valve stem core, which lets any remaining air out the tire.
Break the tire bead and pry the tire off the wheel rim on one side.
Pry the tire off the rim on the other side.
PHOTO: Break the tire bead and pry the tire off the rim.
05.
Clean the wheel rim.
Lay the new tire flat on a work surface.
Lubricate the top tire bead with liquid detergent.
Pry the rim into the top side of the tire.
Flip the rim and tire over.
Lubricate the tire bead with liquid detergent.
Pry the remaining side of the tire onto the rim.
Warning: Use blunt tools to pry the tire to avoid damaging the tire bead.
PHOTO: Pry the new tire onto the rim.
06.
Fill the tire with air to seat the tire bead.
Reinstall the valve stem core.
Fill the tire fully with air.
If the tire doesn't fill with air, install ratcheting tension straps around the outer edge of the tread on each side of the tire.
Tighten the straps to force the beads outward.
Fill the tire with air to seat the tire bead.
Reinstall the valve stem core and fill the tire with just enough air to keep the beads seated.
Carefully release the tension straps and then remove the straps.
Tip: If the tire didn't fill with air, install a ratcheting tension strap around the center of the tire tread, tighten the strap to force the beads outward, and fill the tire with air to seat the tire bead. Carefully release and then remove the strap.
PHOTO: Seal the bead to the rim.
07.
Slide the wheel on the axle and line up the key slots in the rim and axle.
Apply anti-seize compound to the square key.
Push the key into the rim.
Reinstall the washer and snap the retaining ring onto the axle.
Push the axle cover onto the wheel.
PHOTO: Lubricate the square key.
08.
Push the jack under the frame and raise the riding mower.
Pull out the jack stand.
Lower the riding mower to the ground.
Remove the wood blocks from the front tires.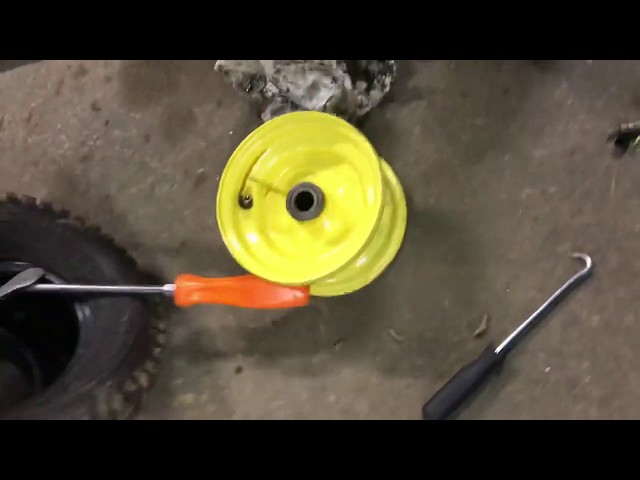
PHOTO: Lower the riding mower.
09.
Raise the tractor hood.
Reconnect the spark plug wire and lower the hood.
Tip: Reconnect both spark plug wires if your engine has 2 cylinders.
Warning: Undertaking repairs to appliances can be hazardous. Use the proper tools and safety equipment noted in the guide and follow all instructions. Do not proceed until you are confident that you understand all of the steps and are capable of completing the repair. Some repairs should only be performed by a qualified technician.
Choose a symptom to see related riding mower and lawn tractor repairs.
Main causes: punctured tire or inner tube, leaky valve stem, damaged wheel rim
Read moreMain causes: worn or broken ground drive belt, bad seat switch, transaxle freewheel control engaged, transaxle failure, dirty carburetor
Read moreMain causes: shift lever needs adjustment, neutral control needs adjustment
Read moreMain causes: worn or broken blade belt, broken belt idler pulley, blade clutch cable failure, bad PTO switch, damaged mandrel pulleys
Read moreMain causes: damaged cutting blade, worn deck pulley, damaged mandrel pulley, loose fasteners on mower deck components
Read moreMain causes: engine overfilled with oil, leaky head gasket or sump gasket, damaged carburetor seals, cracked fuel pump, broken fuel line
Read moreMain causes: clogged carburetor, damaged flywheel key, dirty spark plug, stale fuel, improper valve lash, engine needs a tune up
Read moreMain causes: faulty battery, bad alternator
Read moreMain causes: unlevel mower deck, dull or damaged cutting blades, worn mandrel pulleys, bent mower deck, engine needs tune up
Read moreThese step-by-step repair guides will help you safely fix what’s broken on your riding mower or lawn tractor.
January 1, 2015
By Lyle Weischwill
Your mower can’t run on a damaged rear tire. Here’s how to install a new one.
Repair difficulty
Time required
60 minutes or less
Read moreJanuary 1, 2015
By Lyle Weischwill
If a blade on your mower is dull or bent, replace it following the steps in this repair guide.
Repair difficulty
Time required
30 minutes or less
Read moreJanuary 1, 2015
By Lyle Weischwill
Help your mower run better by replacing the fuel filter during your riding mower's annual tune-up.
Repair difficulty
Time required
15 minutes or less
Read moreUse the advice and tips in these articles and videos to get the most out of your riding mower or lawn tractor.
August 5, 2022
By Lyle Weischwill
Learn about Sears Technical Institute and the advanced technical content being developed for aspiring appliance techs.
Read moreAugust 6, 2020
By Lyle Weischwill
Learn how a blade removal tool makes replacing the blade easier and safer
Read moreApril 9, 2019
By Lyle Weischwill
Keep these 6 things on hand to keep the mower season running smoothly.
Read moreShop Frigidaire FFBD2406NB9B dishwasher parts
Shop LG DLGX2502V dryer parts
Shop Bosch HBL8650UC/10 electric wall oven parts
Repair Kit 35791R 2302860783BLACK LOWER OUTER DOOR ASM WB56X33052Dishwasher Water Inlet Guide Assembly 4975DD1001A partsWasher Motor Stator WPW10419333 partsRefrigerator Can Rack WP13005401SP partsGrill Drip D WR17X23167 partsRefrigerator Door Assembly ADD74296601 partsSlinger Vane 905006MAWasher Outer Rear Tub Assembly DC97-19681A partsHome Electronics Shield 126-02036Elliptical Resistance Motor 241949 partsDishwasher Spray Arm, Lower WD12X10244 partsSpark Plug 715811
Shop Snapper 301016BE rear-engine riding mower parts
Gas Grill Not Hot Enough
Shop GE GSL25JFPEBS side-by-side refrigerator parts
By Diana K. Williams
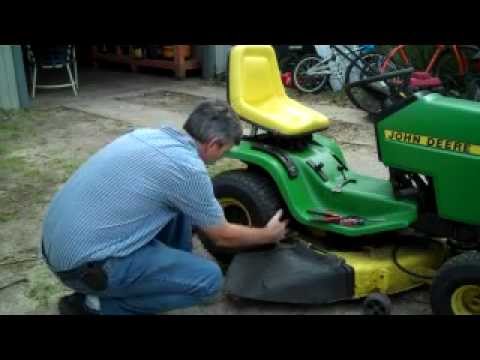
Tires become worn over time and must be replaced, or they can become punctured and need repaired. The John Deere 100 series riding mower uses a snap ring system to hold the rear tire to the axle, making it easy to remove the wheel and replace it yourself, or to take it to a local dealer for repair without having to haul the entire tractor.
Park the mower on a level surface, turn off the engine.
Place the jack under the rear frame of the tractor near the center and jack up the rear of the mower.
Place blocks in front of both front wheels so the mower will not roll forward.
Place jack stands on each side of the jack, where the mounting bolts on the frame are located, and raise them up to meet the frame. They should be high enough that the tire will be off the ground when resting on the jack stands. Lower the weight of the tractor slowly onto the jack stands.
Remove the rear wheel’s plastic cap on the outer end of the axle by twisting it back-and-forth with your hand. This will expose a snap ring and washer.
Slide a flathead screwdriver under the snap ring and pop it out of the groove to remove it. Use care not to damage it. Remove the washer and slide the wheel off the axle.
Slide the new/repaired wheel onto the axle, replace the washer and then the snap ring. You may have to compress the snap ring to make it smaller to get it back into its original position. Ensure it is inserted completely in the groove because this is what holds the wheel on. Replace the plastic cap.
Jack the mower up off the jack stands, remove the stands and lower the mower slowly to the ground.
References
Resources
Tips
 Snap ring pliers come in a variety of sizes, so purchase the right size for your job.
 Warnings
Writer Bio
Diana K. Williams is a certified Master Gardener, has more than a decade of experience as an environmental scientist, and holds a Bachelor of Science degree in biology and environmental studies from the Ohio Northern University. Williams is a winner of Writer’s Digest Magazine's annual writing competition.
 Rear camera for Apple iPhone 6 Plus back camera for Apple iPhone 6 Plus
 378 rubles
26 p.
 Tweezers straight tweezers BAKU BK-11 antistatic
 $106
$120
How to replace the rear camera on an Apple iPhone 6 Plus
Content:
| Step 1 | Step 8 | Step 15,0007 |
| Step 2 | 0039 | Step 16 |
| Step 3 | Step 10 | Step 17,0007 |
| Step 4 | 9000 9000 Step 12 | Step 19 |
| Step 6 | Step 13,0007 | 048 |
| Step 7 | Step 14 |
To replace the rear camera on your Apple iPhone 6 Plus you will need:
Rear camera
Screwdriver
Spatula
Tweezers
Suction cup
Pick
First switch off the phone and unplug the charging cable.
Remove both screws to the left and right of the charging socket.
In order to access the camera module, we need to completely remove the display module. First you need to somehow tear it off the body. It didn't break it though.
To help you, the most common suction cup.
We take a suction cup in our hand and stick it directly on the display, just above the HOME button.
First make sure the suction cup is firmly seated on the display.
Next, place the phone on a flat surface that is comfortable for you (table, chair, floor, closet, etc.)
Hold the spatula in one hand and grasp the suction cup with the other hand while holding the phone.
At the same time, start pulling the suction cup up and hold the phone with the spatula. As in the photo.
The suction cup must be pulled slowly with constant force. Don't jerk.
Peel off the suction cup after the display has separated from the housing.
Grab the display module from the side of the Home button, lift up as if you were opening a book.
Hold the display module at 90 degrees to the phone body.
Atension! At the top of the display are additional clips that secure the display module.
Pull the slightly raised display down (toward the Home button) to remove it correctly.
Holding the display module 90 degrees from the phone body, remove the following screws:
Three 1.2 mm screws
One 1.5 mm screw
One 2.9 mm screw
Remove the metal plate that was screwed on.
It remains only to unhook 4 loops. The main thing is to unhook the cables themselves, and not all together with the connectors themselves.
The first on the list is the front camera.
Unhook it with a spatula.
And finally, the display cable.
By the way, if after assembling the phone some stripes, noises and other glitches appear on the display, then don't be alarmed. Perhaps you crookedly attached this very train. Try to reconnect it and restart your phone.
Remove the display module from the phone case and set it carefully aside.
Take a pair of tweezers and use it to peel off a piece of black tape that hides a tricky screw.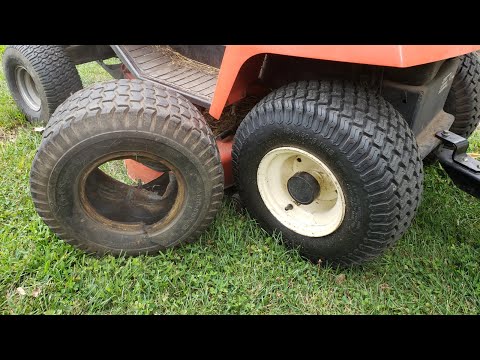 Did he really think we wouldn't find him that way?
Remove the protective cap that guards the camera module.
And now, with tweezers or your fingers, pull the camera itself out of the phone.
Voila! The camera is in your hands, you can start installing a new one.
So, to replace the rear camera on an Apple iPhone 6 Plus, you will need:
Rear camera
Screwdriver
Spatula
Tweezers
Suction cup
Pick
You may also need:
Display;
Housing;
Battery;
Loop.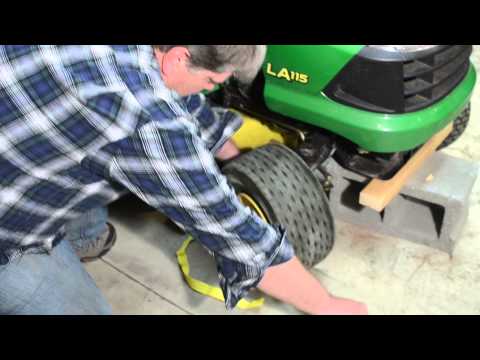
You may also be interested in these products:
Protective glass;
External battery;
Wireless headphones;
Portable speaker.
To replace the rear camera on iPhone 6 Plus:
Turn off the phone, unscrew the screws from the charging socket.
Detach the display module using a suction cup and a plastic spatula.
Raise the display module, disconnect the cables of the front camera, Home button, touchscreen and display.
Unscrew the two screws, remove the protective plug and disconnect the rear camera cable.
Remove the camera from the phone with tweezers.
You'll need:
378 rubles
26 p.
$106
120 rubles
300 rubles
26 p.
$106
$120
How to replace the rear camera on iPhone 6?
Reading time: 8 min.
Content:
| Step 1 | Step 8 | Step 15,0007 |
| Step 2 | Step 9,0007 | Step 16 |
| Step 3 | Step 10 | |
| 9000 9000 9000 9000 9000 9000 9000 9000 9000 9000 9000 9000 9000 9000 9000 9000 9000 9000 9000 9000 9000 9000 9000 9000 9000 9000 9000 9000 9000 | ||
| Step 5 | Step 12 | Step 19,0007 |
| 0007 | ||
| Step 7 | Step 14 | Step 21 |
To replace the rear camera on your Apple iPhone 6 you will need:
So, for starters, turn off the iPhone.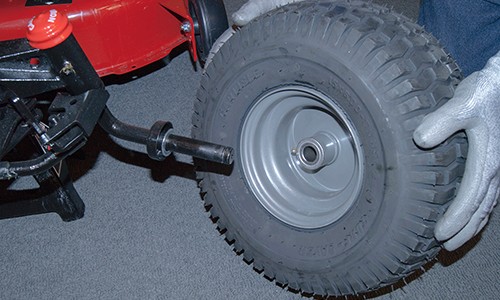
Then find the charging socket (this is where you put the charging cord) and unscrew the two 3.6mm pentalobe screws.
Now let's take a look at the autopsy of the patient. To help you - the usual rubber suction cup.
First, fasten it firmly just above the HOME button.
Place the phone on a table or any other surface (do not use a hot stove, we do not recommend). In general, so that the phone lies and you have free hands at the same time.
While holding the phone with the spatula, at the same time start pulling up on the suction cup.
Take your time and use even pressure.
The display module is held on by a few clips, so you have to pry them off with a plastic tool.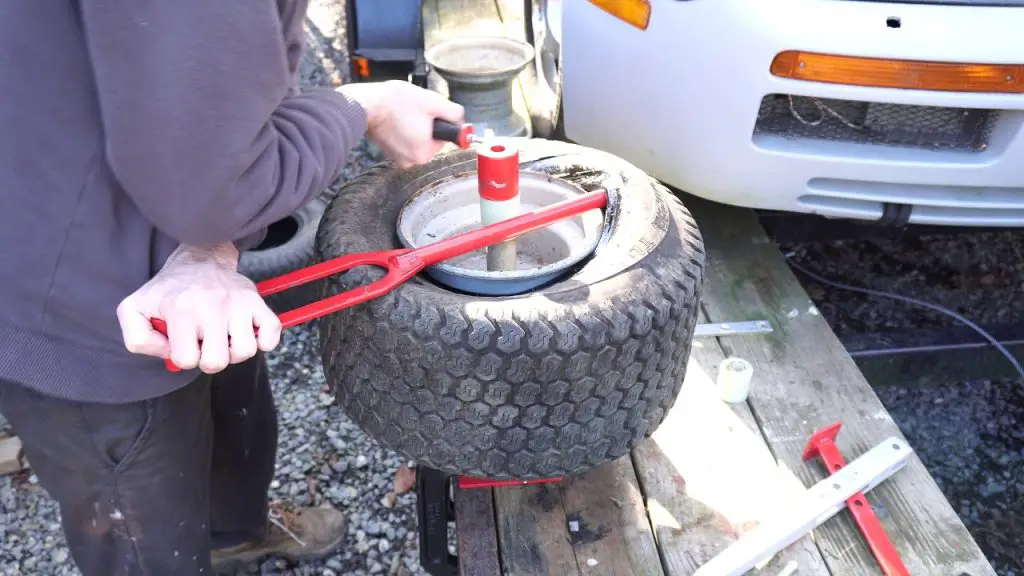
After the display module is separated from the phone case, remove the suction cup.
Grasp the bottom of the display module with your fingers and slowly begin to lift it up.
While removing the display module, keep it in a 90 degree position with respect to the case and do not let it fall back, this could damage the cables.
There are some additional clips on the top of the display module.
The display module must be lifted slowly and slowly, and then slightly pulled down, as if pulling the clips out of their location.
It remains to unhook a few cables, and we will start with the front camera cable.
P.S. In this and the next 3 steps, you need to be very careful to unhook only the cable connector, and not all together with the connector.
And finally the display cable.
By the way, when reassembling, there is a risk that you will incorrectly plug in the display cable. And various interference, glitches and other evil spirits may appear on the phone's display. No need to drift! Just reconnect the display cable again after de-energizing the phone first.
Now we need to "throw off the battery terminal". In general, disconnect the battery cable from the motherboard.
First remove the screws.
Use a spudger to disconnect the battery cable.
Be careful not to tear off the connector itself along with the cable.
Remove the metal piece covering the chamber.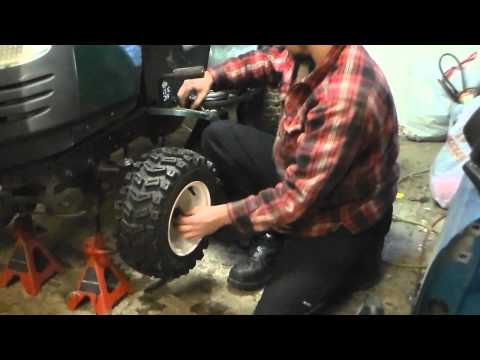
Carefully remove the camera using eg tweezers.
That's it.
To replace the rear camera on an Apple iPhone 6 you will need:
You may also be interested in these items:
To replace the rear camera on an iPhone 6, follow these steps:
 6 mm pentalobe screws from the charging socket.
 300 rubles
26 p.
$106