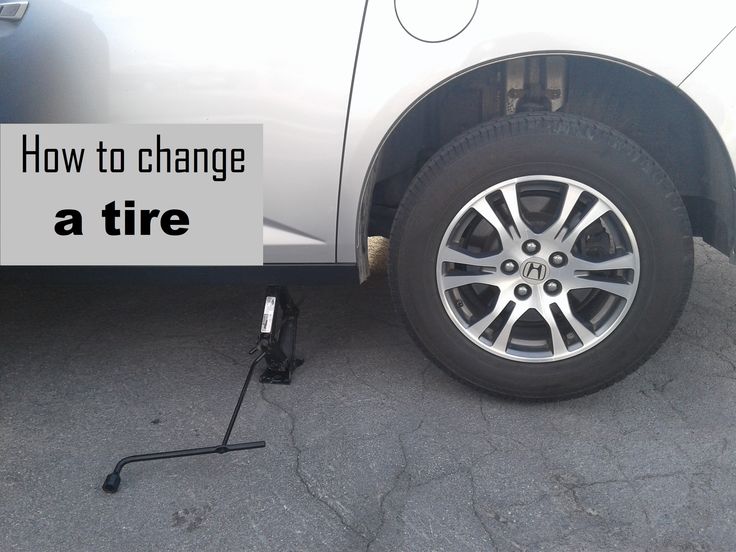
Knowing how to change a tire is a necessary skill for all drivers. If you rely on a cell phone to save you in a roadside emergency, there’s always that chance you will forget to charge it, be out of range, or leave it at home. Flat tires can happen anywhere, and a cell phone is no substitute for knowing how to change a flat tire.
Thankfully, changing a tire isn’t all that hard! Just adhere to the following guidelines to be prepared in case you have a flat.
These items should have come with your vehicle:
Jack
Lug wrench
Fully inflated spare tire
Vehicle owner’s manual
If you have misplaced any of these items, or if your car did not come with these items, you should purchase new ones right away. And be sure you’re regularly inflating the spare tire to your vehicle manufacturer’s recommended PSI. You should check the spare’s air pressure every time you check your other tires.
Remember to check pressure every month and before long trips or carrying extra load.
Here are some items that don’t come with your vehicle but that you should stow in your trunk or glove box in case you have to change a flat tire:
Flashlight with working batteries
Rain poncho
Small cut of 2"x6” wood to secure the jack
Gloves
Wheel wedges
As soon as you realize you have a flat tire, do not abruptly brake or turn. Slowly reduce speed and scan your surroundings for a level, straight stretch of road with a wide shoulder. An empty parking lot would be an ideal place. Level ground is good because it will prevent your vehicle from rolling. Also, straight stretches of road are better than curves because oncoming traffic is more likely to see you.
Never attempt to change your tire on a narrow shoulder near oncoming traffic. Keep moving (slowly) until you find a safer spot. While driving on a flat risks ruining your rim, replacing a rim is better than being hit by an inattentive driver.
Make sure to consult your owner’s manual and review their specific steps on how to change a flat tire for your vehicle
Your hazard lights or “flashers” will help other drivers see you on the side of the road. To avoid an accident, turn them on as soon as you realize you need to pull over.
Once stopped, always use the parking brake when preparing to replace a flat tire. This will minimize the possibility of your vehicle rolling.
Wheel wedges go in front of or behind the tires to further ensure the vehicle doesn’t roll while you fix the flat tire. If you’re changing a rear tire, place these in front of the front tires. If your flat tire is at the front, put the wheel wedges behind the rear tires.
Bricks or large stones will work just as well as “real” wheel wedges. Just be sure they’re large enough to stop the car from rolling.
If your vehicle has a hubcap covering the lug nuts, it’s easier to remove the hubcap before lifting the vehicle with the jack. If your lug nuts are exposed, you can skip ahead to Step 6.
Use the flat end of your lug wrench to remove the hubcap. This will work for most vehicles, but some hubcaps need a different tool to come off. Consult your owner’s manual for proper hubcap or wheel cover removal procedures.
Using the lug wrench, turn the lug nuts counterclockwise until you break their resistance. You may have to use force, and that’s ok. Use your foot or all of your body weight if necessary.
Loosen the lug nuts about ¼ to ½ of a turn, but don’t remove them completely yet. Save that for when it’s time to remove your tire/wheel from the vehicle.
The right place for the jack is usually beneath the vehicle frame alongside the tire that’s flat. Many vehicle frames have molded plastic on the bottom with a cleared area of exposed metal specifically for the jack. To safely lift and avoid damage to the vehicle, follow the instructions for jack placement in your vehicle owner’s manual.
To prevent the jack from settling under the weight of your vehicle and coming off balance, place a small cut of 2x6” wood beneath it before attempting to raise your vehicle. This tactic is especially helpful on asphalt.
With the jack properly positioned, raise the vehicle until the flat tire is about six inches above the ground.
Never put any part of your body under the vehicle during or after raising the vehicle with the jack.
Now it’s time to remove the lug nuts all the way. Since you've already loosened them, you should be able to unscrew them mostly by hand.
Gripping the tire by the treads, pull it gently toward you until it’s completely free from the hub behind it. Set it on its side so that it doesn’t roll away.
Now place the spare on the hub by lining up the rim with the lug bolts. Push gently until the lug bolts show through the rim.
Put the lug nuts back on the lug bolts and tighten them all the way by hand. Once they are all on, check each one again, tightening as much as possible. You will tighten them with the wrench after lowering the vehicle to the ground.
Use the jack to lower the vehicle so that the spare tire is resting on the ground but the full weight of the vehicle isn’t fully on the tire. At this point, you should tighten the lug nuts with the wrench, turning clockwise, as much as you can. Push down on the lug wrench with the full weight of your body.
Bring the vehicle all the way to the ground and remove the jack. Give the lug nuts another pull with the wrench to ensure they’re as tight as possible.
If the hubcap you took from the flat tire will fit your spare, put it in place the same way you removed it initially. If it doesn’t fit, stow it away with the tire when you stow your equipment.
You have before you a jack, a lug wrench, wheel wedges, your flat tire, and possibly a hubcap. Don’t forget to put all of them in your vehicle before driving away.
You should check the tire pressure of the spare tire to make sure that it is safe to drive on. “T-Type” temporary spares, also called “mini-spares,” require 60 psi (420 kPa). If the tire needs pressure, drive (slowly) to a service station immediately.
Temporary spare tires aren’t made to drive long distances or at high speeds, so drive cautiously until you’re able to visit a tire technician. A professional should be able to determine whether your tire needs a repair or if it’s time to replace it.
Aside from taking your tire to a professional, the above procedure shouldn’t take more than 15 to 30 minutes to change a tire.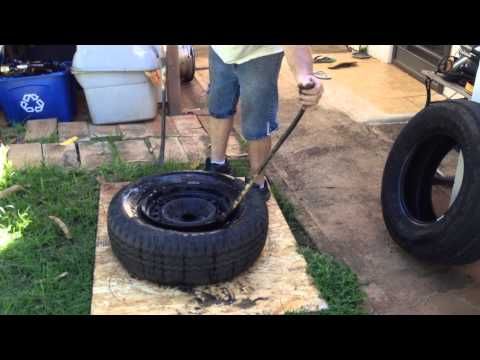 Just be sure you don’t leave out any steps.
It’s beneficial practice changing a tire in your garage or driveway to ensure you’re ready to handle this situation if it ever happens to you.
Knowing how to fix a flat tire is great, but regular tire maintenance is even more important. In addition to reviewing this guide regularly, remember to do the following:
Keep your tires properly inflated
Rotate your tires according to the manufacturer’s guidelines
Monitor for tread wear
All of these precautions will extend the life of your tires and reduce the likelihood of a flat. While there’s no way to prevent flat tires completely, proper care can improve performance and ensure your tires last as long as possible.
There’s never a good time for a flat. That’s why Bridgestone DriveGuard tires are masterfully engineered to keep you moving for up to 50 miles at speeds up to 50 MPH without disruption.
There’s never a good time for a flat. That’s why Bridgestone DriveGuard tires are masterfully engineered to keep you moving for up to 50 miles at speeds up to 50 MPH without disruption.
See Details Find Your Fit
It’s everyone’s worst driving nightmare, and when it happens, chances are that you’ll know almost right away. We’re talking, of course, of a flat tire—it will immediately throw off the balance of your car, as well as your steering. In the event of a flat tire, you’ll want to be ready—especially if you’re driving alone, which is the case for over 66% of car trips. Without someone available to give you a hand, you’ll need to equip yourself with the proper knowledge to handle it on your own.
When you find yourself in this situation, we recommend that you know all the steps for not only changing your tire but for doing it safely. If you don’t know where to start, don’t worry. We’ve put together a comprehensive guide on how to execute this process without a hitch.
Before you take any sort of trip—even a relatively short one—you should make sure to have the tools that you’d need in case of an emergency. Nowadays, many new cars don’t come with a spare tire. Instead, they come equipped with a tool merely meant to patch them. Unfortunately, this can’t fix every problem, and you need a more reliable emergency kit. Make sure that you always have the following tools in your car:
Ideally, you would want to pull over in a parking lot. However, if there isn’t one readily available, don’t damage your vehicle further by trying to find one. Pullover onto a flat surface (level ground is extremely important) and be sure that there’s enough room between you and the moving traffic. Shift your car into park and turn on your hazards.
If the impact that popped your tire was rough enough, your rim may also become bent. If it’s a minor bend, you’re still clear to put on the spare and drive it somewhere nearby to have the problem dealt with immediately. A bent rim can cause a slow leak, so you’ll want to address it right away.
If the damage is substantial, don’t drive on your rim—have it towed instead. A rim that’s significantly bent isn’t safe to drive on and you are at risk for an accident. Replace the part at your earliest convenience. Your mechanic may offer to supply the part himself, but you can order models specific to your vehicle. For example, Toyota Corolla rims are available online for (typically) a more affordable price.
You want to loosen the lug nuts before jacking up your car.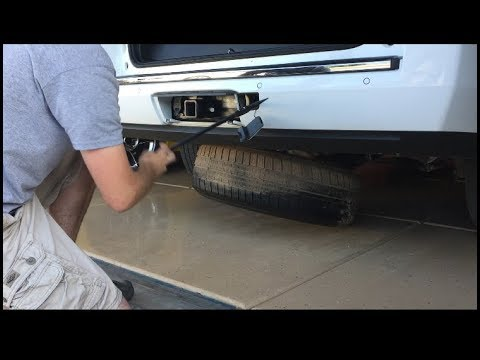 However, be careful not to completely remove them. A single counter-clockwise turn with the wrench for each bolt will suffice.
This is where you want to be especially careful, especially if you’ve never changed a tire before. Your car likely weighs at least 2 tons, so be aware that you’re dealing with an impressive amount of mass. The first thing to do (if you can) is to block the wheels to ensure that they won’t roll. As we mentioned earlier, it’s imperative that you park your car on level ground. If you find yourself on hot asphalt, this can cause your jack to push down. To avoid this, we recommend placing a wood block underneath it.
If you’re supporting your car solely with a jack, do not, under any circumstances, go underneath the vehicle. Though you’re unlikely to have to for a tire replacement, if you find yourself in this situation, hold off until you have further stabilizing equipment.
Once you properly jack and secure your car, you’ll finish removing the lug nuts. As you did before, turn them counter-clockwise until they’ve released from the wheel. If you’re having trouble removing them, you may have to use a bolt key. Be sure to push the wrench downwards as opposed to up, as this will make them easier to remove. Once you have them off, be sure to put them somewhere you won’t lose them.
Once you remove the lug nuts, take off the flat tire by holding it with both hands and pulling it toward you. Don’t remove it by applying pressure up or down, as this could potentially cause the jack to move slightly.
Once you’ve got the first tire off, replace it with the spare by lining the tire up with the bolts. After placing it, you can put the lug nuts back in place. Start by screwing them on with your hands, and once you can’t turn them anymore, continue to tighten them with the wrench.
After you’ve made sure that your spare tire is secure, you can lower your car. Most cars will have a scissor jack. As such, you can lower these by gently turning the handle counterclockwise.
Once you change your tire and lower your car, be sure to check the tire pressure on the spare. It’s best to have a tire gauge in your vehicle at all times so that you can regularly check that everything is as it should be. Spare tires will oftentimes have low pressure due to long periods of inactivity.
Since you don’t want to drive off a lot with an insufficient amount of air, you should check your spare’s pressure every three to four months. Even if you do this, however, you’ll still want to check the pressure after changing it.
If you have the traditional tire gauge, using it is simple. You’ll want to remove the cap from the tires valve stem and press the gauge against it. If placed with an even force, you’ll be able to collect an accurate reading.
Spare tires are lifesavers, but they aren’t meant for long periods of use. Traditionally, they tend to be smaller than the rest of your tires. You should try not to drive faster than 55 mph when using a spare, and you ideally don’t want to drive it farther than 30 miles before having it replaced.
Hopefully, you or a mechanic will be able to patch the tire that blew out. In the case that it’s irreparable, you don’t want to wait to invest in a new one. Once you fix or obtain a new main wheel, remember to fill your spare up with air. You’ll want to ensure that it’s in proper driving condition before returning it to the back of your car.
Share
0 A punctured wheel is usually indicated by external noise, as well as loss of speed and poor handling. If the car pulls to the side, and in order to keep it on the road, you have to make an effort, then most likely a puncture on one of the front wheels. If the back of the car starts to skid, then the problem is there.
When this happens, you will know exactly what it is. Don't panic by any means. Align the car and, gradually reducing speed, pull over to the side of the road.
You can't drive on with a flat tire, but it's also not a good idea to stop in the middle of the road. Therefore, do not be afraid to drive a couple of tens of meters and choose a flat, dry place on the side of the road.
It is best to stay away from moving traffic so as not to cause an accident and risk your life.
Drivers of cars with a manual transmission must engage first gear, and owners of automatic transmissions must shift the lever to the park (P) position.
And in any case, you need to put the car on the handbrake.
After parking the car in a safe place, do not forget to turn on the hazard warning lights and install the warning triangle located in the trunk. In settlements, it is placed 20 meters behind the car, and on the highway - 40 meters.
In the same place, in the trunk, find a spare wheel and a jack with a wheelbrace. Usually the manufacturer places all this in a special niche under the floor, which can be reached by lifting the bottom panel.
It is good if you have a pump and a pressure gauge with you, as well as wheel chocks. And, of course, gloves will not interfere, since you still have to get your hands a little dirty.
After removing all the tools and spare tire, place them next to the punctured tire and ask all passengers to get out of the car. Even if it's freezing cold or pouring rain outside, safety comes first.
Despite the handbrake and the gear engaged, before installing the jack, you must additionally fix the wheels with stops. For them, however, any stones or pieces of brick will pass.
If the rear wheel needs to be replaced, the chocks are placed on both sides of the front wheels and vice versa.
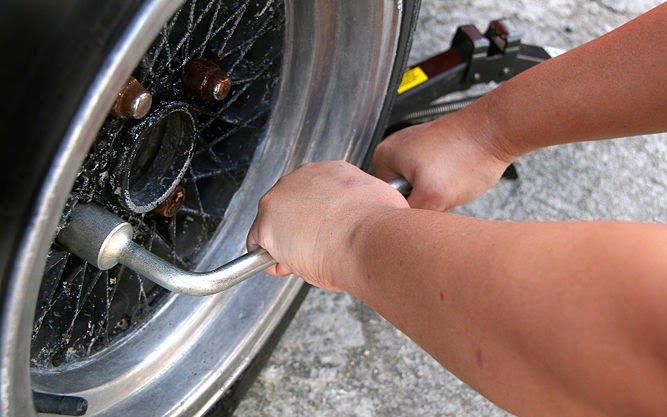
You are now ready to remove the wheel. First, remove the disc from the plastic cap and use the wheelbrace to loosen the bolts. To move them from their place, you will need a lot of effort, which can be provided by the weight of your body by simply pressing on the key with your foot. It is not necessary to completely unscrew the bolts: it is enough to unscrew them one turn.
The machine must then be jacked up. In no case should you install it anywhere. Especially for these purposes, there are small reinforced places on the bottom, which are usually located behind the front wheel or immediately in front of the rear. The manufacturer designates them using triangles or cutouts at the bottom of the thresholds. If the weld is covered with plastic pads, they will break at the jacking points.
Place the jack under the bottom and start turning the jack handle clockwise. Be sure to make sure that the jack rises evenly, does not heel.
If under the weight of the machine the bottom leg of the jack sinks into the ground, you need to put something like a piece of board or brick under it.

Do not raise the wheel too much. It is enough to stop 5 cm from the ground. After that, you can completely unscrew the bolts and remove the punctured wheel from the hub. It is better to slide it under the car as insurance, and put the bolts somewhere on a rag so that they are not lost.
It remains to replace the punctured wheel with a spare. To do this, align the holes on the disc with the holes in the hub, put the wheel on and screw on the bolts, completely wrapping them by hand.
It is important to install the nuts that fasten the wheels to the hub with the semicircular side towards the rim, and not outward.
Remove the punctured wheel from under the machine, lower the jack and finally tighten the bolts. You need to do it right. On wheels with four or six holes, opposite bolts are tightened in pairs. If there are five holes, then you need to pull in this order, as if you are drawing a five-pointed star.
It remains to assemble the tool, remove the jack and stops, and also check the pressure in the installed wheel and, if necessary, pump it up. If the pump is not at hand, you can ask for help from passing drivers.
If you are using a small spare tire, the so-called stowaway, then remember to be careful: it can usually be driven at a speed of no more than 80 km/h and for a distance of a maximum of 100 kilometers.
And, of course, try to repair a punctured wheel as soon as possible in a specialized tire shop, so as not to tempt fate and not drive without a spare wheel.
Flat tire on the road, no one around, tire shop far away. Here's what you need to do to put a spare on your own, even if you've never done it before.
Turn on emergency lights.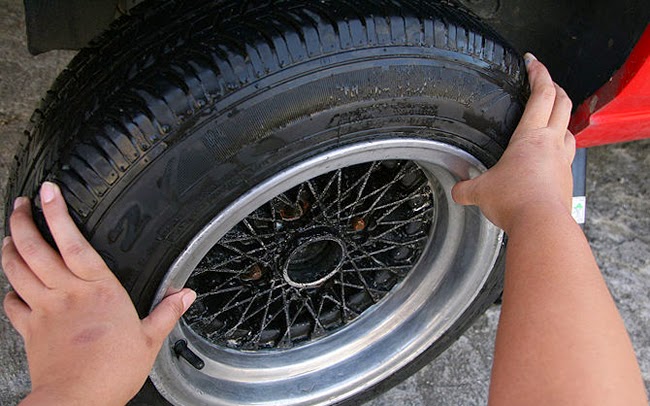
Place warning triangle on the road. Usually it is in the trunk.
The sign must be installed behind the car at a distance of 15 m in built-up areas: this is approximately 22 steps for a person of average height. If the wheel needs to be changed on the track, a distance of 30 m is required - approximately 45 steps. This is especially important in the evening or at night when visibility is much worse. In the dark, you also need to wear a reflective vest.
Put the car on handbrake . Mechanics - handbrake and first gear. A car with an automatic transmission - on the handbrake and in the parking mode.
To ensure that the machine does not start moving, additional wheel chocks or stops can be fitted.
This is what wheel chocks look like under a car wheelNo shoes - stones or bricks of the right size will do.
Install the wheel chocks on the opposite side. For example, you need to replace the rear wheel - the stops are placed under the front wheels.
You will need a jack, a wheel wrench and a spare wheel.
Jack and wheel wrench usually look like thisThe wheel is in a niche under the boot. In some cars, for example, "Niva" or "Oka" - under the hood.
The jack must be installed exactly under the jacks that are in the car . If the jack support is misaligned, the vehicle may roll over onto its side.
If the ground is loose or wet, the jack will fall through, so you need to put something solid under it. Suitable floor mats, boards, bricks or branches.
Properly installed jackRaise the car a little : no more than 1 cm.
SourceRemove punctured wheel . Use the wheel wrench to loosen the wheel bolts. If you can’t do it with your hands, you can stand on the key with your feet.
Raise the vehicle with a jack until the wheels are off the ground .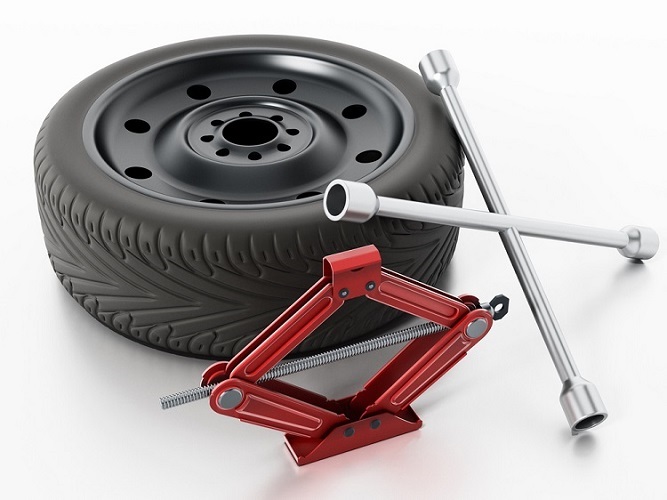 It is necessary to finally unscrew the bolts - with your fingers or a wrench - and remove the wheel.
Place the removed bolts in such a way that dirt does not get on the threaded part, otherwise the threads will be damaged. With a faulty thread, the wheel will not be firmly attached to the car.
Install the spare wheel:
Check that the wheel is correct:
