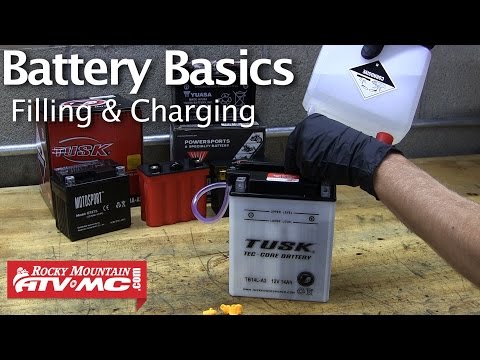
If you leave your ATV to hibernate over the winter or to languish unused for months on end, you might have some issues getting your ATV to rouse from its long slumber. In this guide, we'll learn why this happens and what to do to restore your ATV battery.
Image from www.boostatv.com
ATV batteries that are left to discharge completely often won’t take a charge, and even if they do, they’ll not have as long a lifespan as they used to have. Extreme heat and cold are also hazardous to your battery’s well-being.
The way to avoid your battery’s slow death is through the use of a smart charger or trickle charger. Both of these types of charger can be set to monitor your ATV battery and keep it at full charge while you’re not using it for an extended period. This keeps the battery from discharging and maintains its health.
But what if your ATV battery dies completely? Is it possible to restore dead ATV batteries that have been completely discharged? In most cases, yes, you can use a multi-mode smart charger to bring your ATV battery back from the dead.
ATV are waterproof & breathable riding gear
Find out the items that suit your needs
Image from www.atv.com
Let’s say you own a battery charger that you’ve used to charge your ATV battery in the past but this time it isn’t working. This is often because the ATV battery has been completely discharged so the charger doesn’t recognize the battery is connected at all.
It is possible to trick the charger into starting its charging process on your dead battery. Your charger should be capable of outputting amps as low as 1-3, depending on your ATV battery’s specifications. Using a charger that can only output at 10A like a dedicated car charger can cause an ATV battery to overheat.
For this trick, you’ll need another charged battery and a set of jumper cables.
1. Connect up the two batteries with a jumper cable, bridging their positive terminals.
2. Connect another jumper cable to the negative terminal of the good battery and attach the other end to ground or the dead battery’s negative terminal.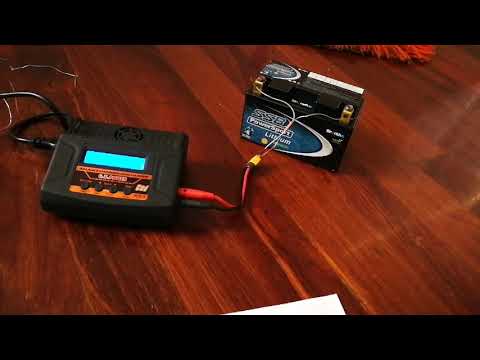
3. Start up the charger.
4. Once the charging process has begun, disconnect the cable from the good battery’s positive terminal.
5. Disconnect the cable from the dead battery’s negative terminal.
6. Disconnect the cable from the good battery’s negative terminal.
7. Wait for your dead battery to fully charge and test it out.
Many smart chargers will detect when the voltage is too low to perform a standard charge. A secondary Soft-Start mode will be used in an attempt to recover the battery.
If the Soft-Start mode is successful, the smart charger will switch to a Constant Current mode and begin charging the ATV battery as normal. If the Soft-Start mode isn’t successful, an error message will show and you’ll need to replace the battery.
ATV are waterproof & breathable riding gear
Find out the items that suit your needs
Image from www. thedrive.com
A chief cause of the early failure of ATV batteries is sulfation. Sulfation is a build-up of lead sulfate crystals that happens over a battery’s lifetime. Every time you charge or discharge a battery, sulfate forms. Overcharge, undercharge, or leave your battery to discharge for several days, and sulfate will form much more quickly.
Smart battery chargers with a desulfating feature work to break down these crystals in the battery plates. They do this by sending a range of high-frequency electronic pulses through the battery that dissolves sulfate quickly.
Desulfating battery chargers either have a specific desulfation mode to recondition a battery or simply perform desulfation during every stage of the charging process. Smart battery charger manufacturers delineate the various stages of the charging process in different ways, but you can typically expect:
1. An Initialization Mode, where the smart charger diagnoses the state the battery is in,
2. A Bulk Charge Mode, where battery voltage is applied at a constant rate until it reaches a predetermined level,
3. An Absorption Charge Mode, where the battery voltage is kept constant while the charge current amplitude drops,
4. And a Maintenance Charge Mode, where the battery is kept at a voltage slightly higher than if the battery were fully charged.
Having charged the desulfated battery completely, the battery will offer better performance and lifetime now that the desulfation has been reduced.
SPORTSMAN Black
36 EUR
28.80 EUR
-20%
HIT
ENDURO LIGHT Graphite
the most durable
458 EUR
366.40 EUR
-20%
HIT
ENDURO Camogrey
the most durable
657 EUR
525.60 EUR
-20%
HIT
ENDURO Graphite
the most durable
279 EUR
223. 20 EUR
-20%
HIT
ENDURO Graphite
the most durable
657 EUR
525.60 EUR
AQUAMASTER-ZIP LIGHT Camogrey
with central zipper
598 EUR
352.70 EUR
-20%
HIT
ENDURO LIGHT Camogrey
the most durable
458 EUR
366.40 EUR
AQUAMASTER LIGHT Red
reliability & comfort
438 EUR
360.30 EUR
NEODRY Black
17 EUR
10.20 EUR
-20%
HIT
ENDURO Camogrey
the most durable
279 EUR
223.20 EUR
AQUAMASTER Blue
reliability & comfort
647 EUR
517.60 EUR
-30%
HIT
AQUAMASTER Red
reliability & comfort
259 EUR
181. 30 EUR
-50%
HIT
AQUAMASTER Orange
reliability & comfort
259 EUR
129.50 EUR
AQUAMASTER Red
reliability & comfort
677 EUR
577.40 EUR
-50%
HIT
AQUAMASTER Camogreen
reliability & comfort
259 EUR
129.50 EUR
BELT
9 EUR
7.20 EUR
ENDURO BF Camogrey
bootfoot waders
528 EUR
422.40 EUR
ENDURO BF Camogreen
bootfoot waders
289 EUR
144.50 EUR
ALL SEASON Black
62 EUR
49.60 EUR
ENDURO BF Camogrey
bootfoot waders
329 EUR
263.20 EUR
Explore all
There are few things more annoying than getting ready for an exciting ATV trail ride, only to find the battery completely dead. You turn the key, but nothing happens, not even a click or a flicker of light.
Luckily, you may be able to restore your dead battery to complete working order, as long as it didn’t sit without a charge for too long.
A battery that has been sitting dead for quite some time has likely gone bad due to excessive internal sulfation and cannot be salvaged.
When a battery drops below 11.5 volts, an internal chemical process known as sulfation begins and continues until the battery loses all of its capacity or eventually shorts out. This process happens gradually but advances relatively fast when the battery sits without a charge.
However, a battery that’s merely drained overnight by leaving the lights on by mistake or from a short somewhere in the ATVs wiring can usually be revived back to complete working order. It’s crucial that you discover the issue before too much time has passed and that you charge the battery as soon as possible.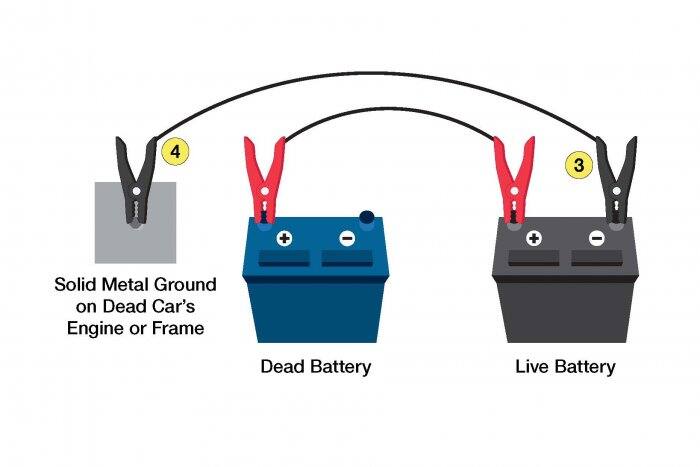
Related: 10 Reasons Why Your ATV Battery Keeps Draining (Going Dead)
But what if your smart charger won’t charge the dead battery?
As a safety precaution, modern smart chargers (or automatic chargers) are designed not to charge defective batteries. While the general idea behind such a feature is good and has likely prevented several charging accidents, it doesn’t always work out as intended.
The problem arises when your smart charger, due to a low voltage reading, mistakenly believes that your battery is faulty and refuses to initiate the charging process. In that case, we need to be a bit creative.
Related: How to Test an ATV or UTV Battery. Good, Reduced, or Bad?
If your smart charger refuses to initiate the charging process on your dead or drained battery, you can use a healthy and fully charged battery to boost the charging process.
The method involves using the healthy battery to pre-charge the dead battery until it’s above the minimum voltage level of the charger.
Caution: Only attempt this method if you know for a fact that the battery is drained but otherwise in good condition. If the battery has been sitting without a charge for a more extended period, it is likely sulfated to an extent where it can no longer be reconditioned.
Connecting a healthy battery to one that shorted out or otherwise damaged may cause damage to the healthy battery as well.
Charging batteries can be harmful if you are not careful. Always wear rubber gloves and proper eye protection, as well as perform the procedure in a well-ventilated area.
Things you will need:
Because you are dealing with a battery that may or may not be damaged, it is always a good idea to disconnect and remove the battery to charge it somewhere at a safe distance from the ATV.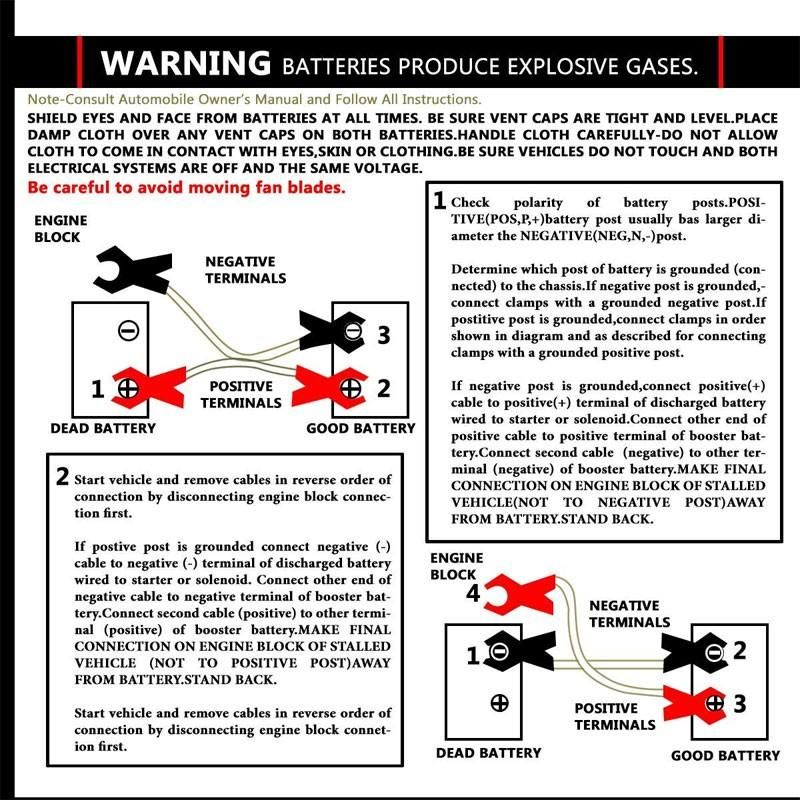 That way, if something unexpected were to happen, like a short, you don’t risk damaging your bike.
Here is a step-by-step guide on how to safely remove and install an ATV battery.
Place the two batteries next to each other in a well-ventilated area. Connect the two batteries in parallel using the jumper cables in the following pattern:
The dead battery will now feed off the charge from the fully charged battery.
Caution: With the red lead connected to the battery, the other end of the lead is hot. Be careful not to touch the negative battery terminals, the negative (black) jumper cable leads, or anything grounded as it will cause a short. Shorting out a battery will likely cause permanent damage to the battery and can be very dangerous.
Leave the two batteries connected for an hour or so to allow the dead battery to gain some charge. Do not let it sit too long tho, as this may drain the healthy battery below what is recommended.
When disconnecting the jumper cables, do it in this order:
Optional: After disconnecting the jumper cables, use a multimeter or voltmeter to read the voltage level of the dead battery. The meter should now read 11,5V or more.
If you do not have a multimeter at hand or don’t know how to use one, you may safely move on to the next step. If the charger is still unable to initiate the charging process, the voltage level of the dead battery is likely still not high enough.
In that case, reconnect the jumper cables and let them sit for one more hour. If that doesn’t help bring the voltage level up, the battery is likely bad and needs replacing.
Connect the battery charger to the dead battery like you usually would:
Now that the battery and charger are set up, it’s time to plug the charger into a wall socket and initiate the charging process like usual. As a rule of thumb, you should use a charger with a charging output of no more than 1/10th of the batteries rated CCA. On an ATV battery, this is typically around 2 Amps.
Check this post if you want to learn how to identify your battery’s CCA and other crucial metrics. If you need a more in-depth guide on how to charge a battery, please refer to this illustrated step-by-step guide.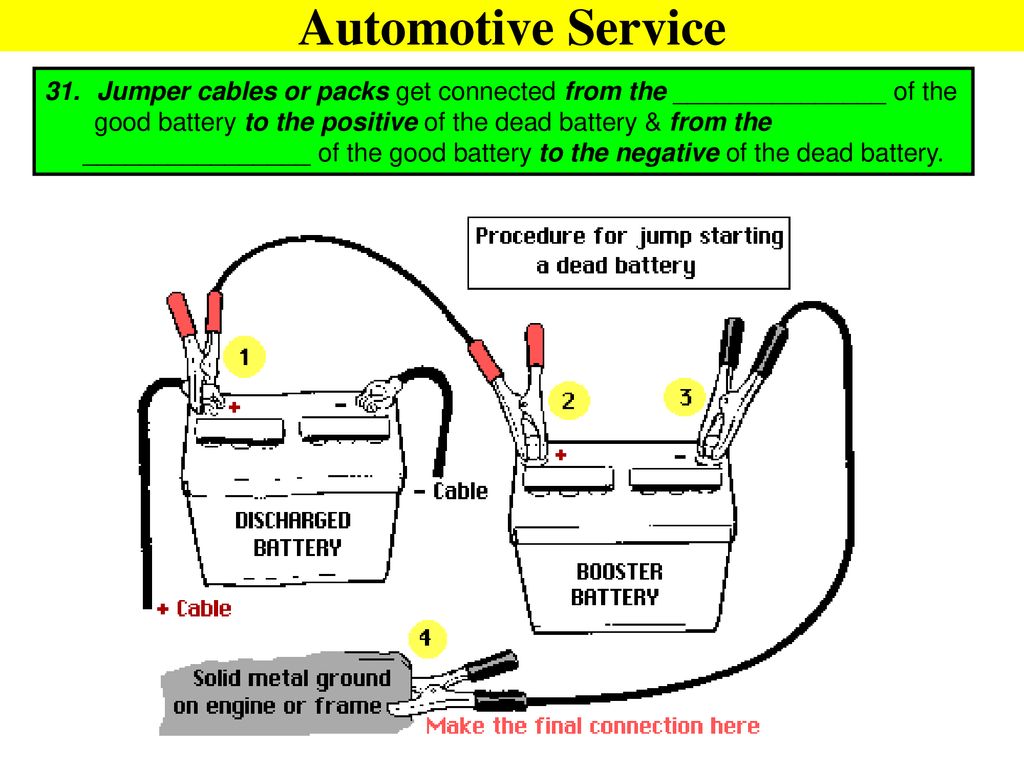
Hopefully, the charger will now initiate the charging process as normal. In that case, allow the battery to fully charge until the charger shuts off automatically or enters a maintenance mode.
This process usually takes up to 24 hours with a battery that is completely drained.
With a full charge, the battery is now ready to be installed on your ATV again.
Remember to charge the healthy donor battery after successfully charging the dead battery to a full charge. It has likely lost quite a bit of charge from being used to boost the dead battery.
As an alternative to using a donor battery and a smart charger, you may use a manual charger to charge the battery overnight at a low-amp setting.
It may need some time to get the charging process going, but you’ll get the best result by not going too hard on the amps. When it comes to charging batteries, slow and steady winch the race every time.
If the lowest amp-setting did not raise the charge when left connected overnight, consider stepping up one notch in amp output.
Caution: When charging ATV batteries, you should never exceed 3Amp charger output. Note that car chargers typically come with an output of 10A or more. Charging an ATV battery at this rate will overheat it and cause permanent damage.
A battery is considered dead when it drains to a charge near zero. While a battery with a charge just under 11.5 volts does likely not have enough power to start a vehicle, it is still not completely dead.
But when a battery sits for too long at a deficient charge (below 11.5V), it will soon become completely dead due to internal sulfation.
There are many ways for an ATV battery to drain to a level where it is considered completely dead.
In some instances, you can restore the battery as long as you charge it before it sits too long with a low charge. Typical scenarios where an ATV battery drains and go dead:
Electric ATVs are rapidly gaining popularity due to their efficiency and environmental friendliness. But many riders still do not know how to charge an ATV on a battery. Improper charging reduces the battery life or the battery loses its capacity quickly. Therefore, let's figure out how to charge a children's ATV and consider the key recommendations of experts.
There are two ways to recharge the ATV battery. The first and easiest is to connect the charger to the appropriate connector. All electric cars and scooters are charged in a similar way, although not all quadrics have a similar socket.
If the ATV does not have a charging port, the rider will have to connect the battery directly to the charging station. To do this, you need:
It is important to note that lithium batteries have a charge control board. This means that after a full charge, the process stops. Although overcharging the battery is still not recommended. nine0003
Another important question many riders are wondering is how to charge an ATV battery with an in-car charger. Yes, such a procedure is possible, but you need to properly configure the charger. For recharging, you can only use devices with adjustable charging current and the ability to set its minimum level (0.5-0.7 A).
Important : The optimal current for charging the battery is 1/10 of the battery capacity (in Amps).
Each vehicle's user manual lists the optimum battery charging time. On average, this figure is 6-12 hours. The charging time depends on the generation of the battery, its capacity and the characteristics of the charger. Don't forget to charge the battery, though. If the battery has 30-40% capacity left, the recharging time should be reduced.
But what if you don't know how long to charge your ATV battery? In this case, you need to almost completely discharge the battery and charge it for 8 hours. After that, the battery should be installed on the quadric, and the charge level should be assessed. If the indicator shows 100%, next time you need to charge the battery for 6-7 hours. In this way, you can determine the optimal recharging time. nine0003
Also remember that overcharging is the main enemy of batteries. It is strongly not recommended to leave the battery connected to the network for 15-20 hours. This leads to a decrease in battery capacity and, accordingly, a decrease in the operating time of the quadric.
Knowing how long it takes to charge an ATV, you can make a schedule for recharging it. For example, the battery can be connected to the network in the evening or after each trip.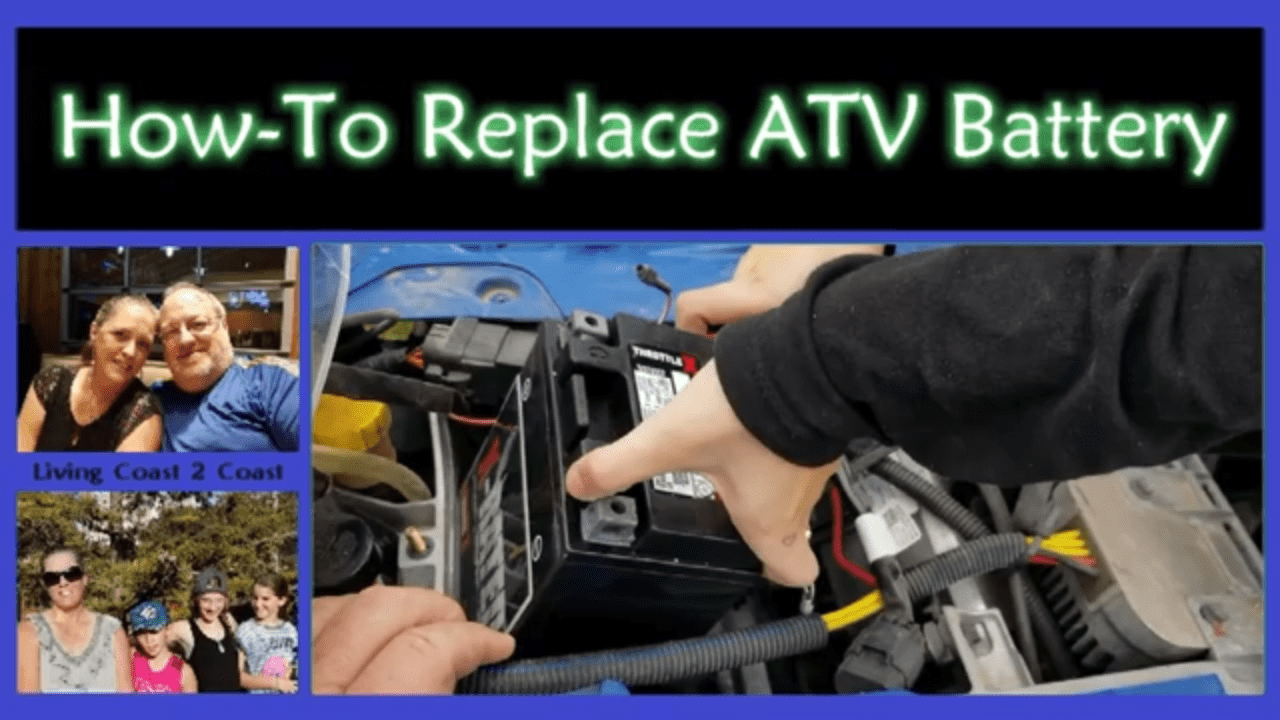 You can also purchase a replacement battery, thereby increasing the riding time on the ATV. nine0003
The battery of any electrical equipment must be properly maintained. Violation of the recommendations may lead to a decrease in battery capacity or damage to it. To avoid such problems, it is recommended:
Separately, it is worth mentioning the "buildup" of the battery. Immediately after purchasing the equipment, you will need to fully charge and charge the ATV several times (2-3 times).
Most riders store their bikes before winter. And in order for the device to be ready for operation in the spring, it must be properly preserved. Preparing an electric quad bike for wintering is quite simple, you just need to find a warm and dry place to store the quad.
Another important conservation point is battery preparation. Before wintering you need:
Note : If you leave the quad battery in the cold, the battery will simply "leak" and stop working.
11/16/2020 7964
Buying a children's ATV or its adult counterpart is not just about being a rider. This technique requires special attention. As a rule, the owners of this motorcycle often do not pay enough attention to charging the battery, which can cause it to fail almost every season. Remember, if you charge your ATV battery correctly, it will last you many times longer.
To avoid premature battery failure and reduced capacity, follow these guidelines:
Always follow the connection diagram when installing the battery in the ATV.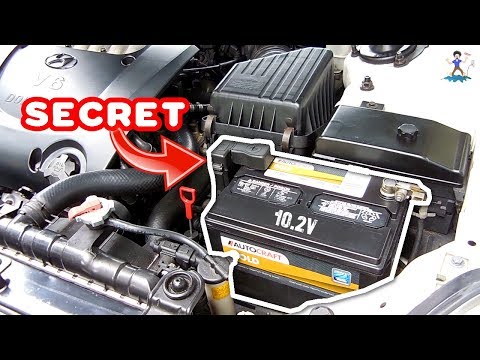 You need to start by connecting the positive terminal. Be careful not to reverse the polarity as this can cause both the fuse to blow and the battery to explode.
If the vehicle battery suddenly stops charging, there may be several reasons for this:
The first signs of regulator relay failure are when the ATV battery starts to drain too quickly. Diagnosis of such a breakdown is carried out by measuring the resistance with a voltmeter at the battery terminals. Repairing any electrical equipment of an ATV is a rather complicated process that a true professional should perform.
Often the best solution when a battery or regulator fails is to replace it with a new one. It is much easier to prevent this kind of breakdown than to fix it later. That is why it is necessary to charge the battery of motor vehicles in strict accordance with the requirements of the manufacturer.
There are two ways to charge the child's ATV battery with the charger. The easiest of them is to connect the charger to the appropriate connector on the motorcycle. True, such a nest is not available on all models of ATVs. If there is no such connector, then the battery should be connected directly to the charger. The battery is charged as follows:
Lithium ATV batteries usually have a board that monitors the battery level. But even in this case, it is strongly not recommended to charge the device longer than necessary. nine0003
Each ATV gel battery manufacturer provides detailed charging instructions. It is very important to choose the right charger with the ability to adjust the amperage in order to avoid overcharging the battery. On sale you can find specialized chargers for ATV gel batteries.
It is necessary to charge such a battery as follows:

.jpg)