A garden is such a calming place of nature, growth, and new life. Each flower bed is entirely unique to itself, with plants, pathways, and decor that no one else can entirely replicate.
Within your garden oasis, there's so much room to explore original design ideas that capture your personal essence.
If you're feeling stuck, no sweat! There are oodles of existing garden art DIYs just waiting to be made. Each one can be adapted to your needs, stamping your home with a completely unique sense of 'you.'
If you're looking for a project that doesn't tug on the purse strings, an upcycle DIY is always a great way to go! It's always great to give old junk a new purpose.
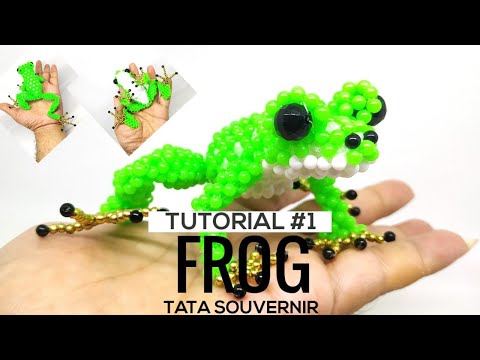
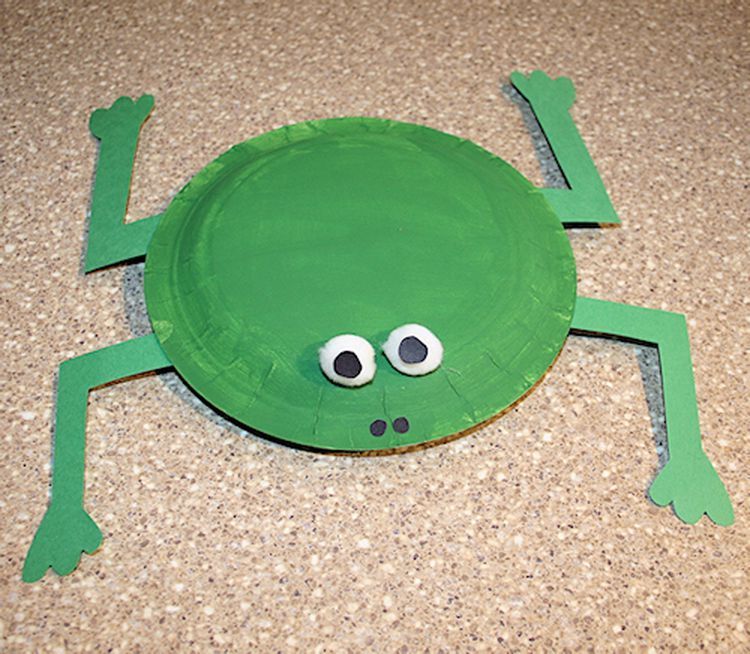
Take for instance a tire frog planter! Though using recycled tires in a garden may seem a little 'tiresome,' if done right, they can actually make for wonderful garden features!
Two Women and a Hoe
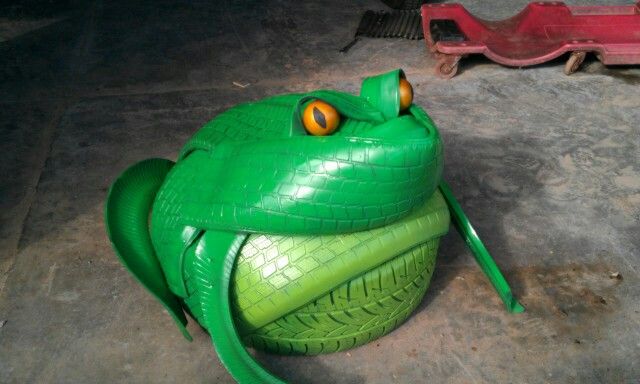
Made entirely out of repurposed tires, Two Women and a Hoe worked their magic and created an adorable tire frog DIY.
Not ones to keep a great idea to themselves, they've also released a step-by-step tutorial for anyone wanting to replicate their design.
Naming the upcycle, 'Frieda La Frog,' you too can create a friendly green amphibian by following this simple guide.
01/16
Karolina Grabowska
|
Pexels
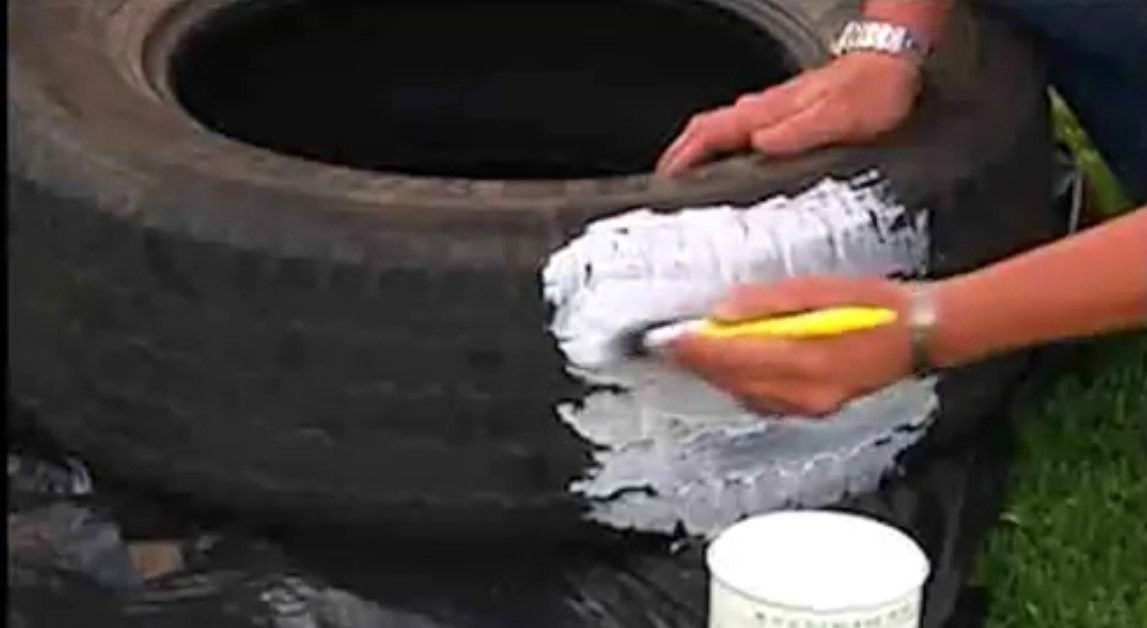
First thing's first: gather together all five of your tires (two car, two wheelbarrow, one truck), and give them a good wash.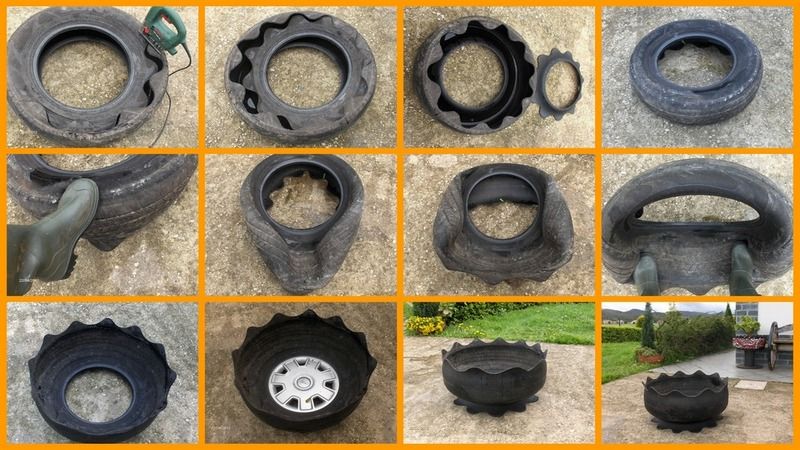 No one wants to paint over layers of dirt!
Allow the tires to air dry completely.
02/16
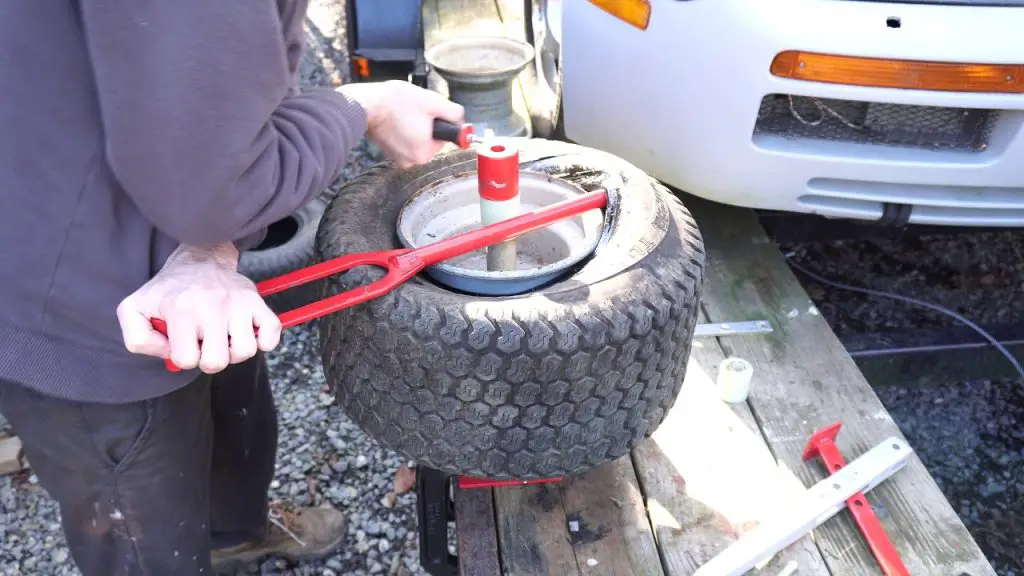
Drill five drainage holes into one side of the truck tire, evenly spaced around the ring.
03/16
Rubbermaid
|
Amazon
Using a sturdy utility knife, cut an old storage bin lid a couple inches wider than the truck tire's opening.
Drill a handful of drainage holes into the lid with a half-inch bit.
Work the lid into the opening of the truck tire so that it covers the bottom hole. (This will be the bottom of the frog's head and should be the same side as the truck tire's drainage hole.)
04/16
Two Women and a Hoe
Using a light-colored marker, draw a large frog hand on a rubber doormat. (Reference may help for this step.)
Cut the first hand using a utility knife, then use it as a stencil for the other three hands and feet.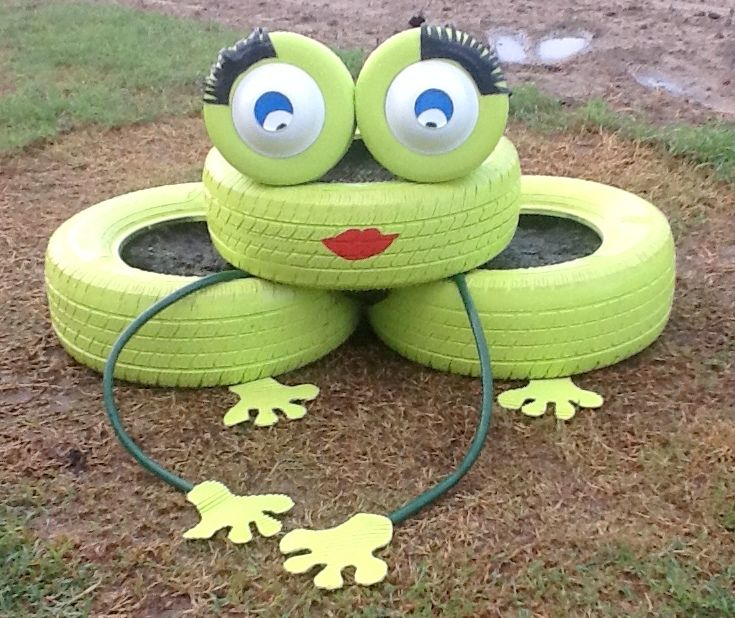
05/16
Now it's time to get messy!
Using a large drop cloth to protect your work area, lay out your pieces: five tires, four feet, a garden hose, and two of your plastic plant pots.
Two Women And A Hoe used matte green spray paint in two shades to achieve their frog's coloring.
06/16
Two Women and a Hoe
Spray paint the two remaining plastic pots white.
After that dries, paint the bottom of each pot blue to look like irises. Use a paint brush for this step so that you don't get blue spray all over your white sides!
07/16
Two Women and a Hoe
Run Duco cement around the opening of the white and blue pots.
Fit them into the inner rim of the wheelbarrow tires so that the blue bottom protrudes out (like bulging eyes).
Glue the other two pots the same way, but to the back of the wheelbarrow tires.
You will have two wheelbarrow tiles with pots sticking out from both sides of the center hole. The green pots will prop up the tires so that the eyes can be on display.
08/16
Fill the seam between the plant pots and tires with a small amount of silicone caulk, sealing them in and weatherproofing them.
After the silicone dries, touch up the seams with a bit of green spray paint.
Tip: Spray a little bit of paint onto wax paper, then use a small paintbrush to cover the caulking.
Alternatively, you can use a clear variety of caulking.
09/16
Two Women and a Hoe
Now, what would a frog tire planter be without pretty eyelashes?
With a utility knife in hand, pick up the black inner tube from one of your wheelbarrow tires.
Cut a section out of the tube that's a little under a quarter of the ring's circumference.
Pinch the inner side of the wedge so that the tube lies flat, then make a series of inch-wide cuts. Be sure to stop an inch or two away from the pinched side.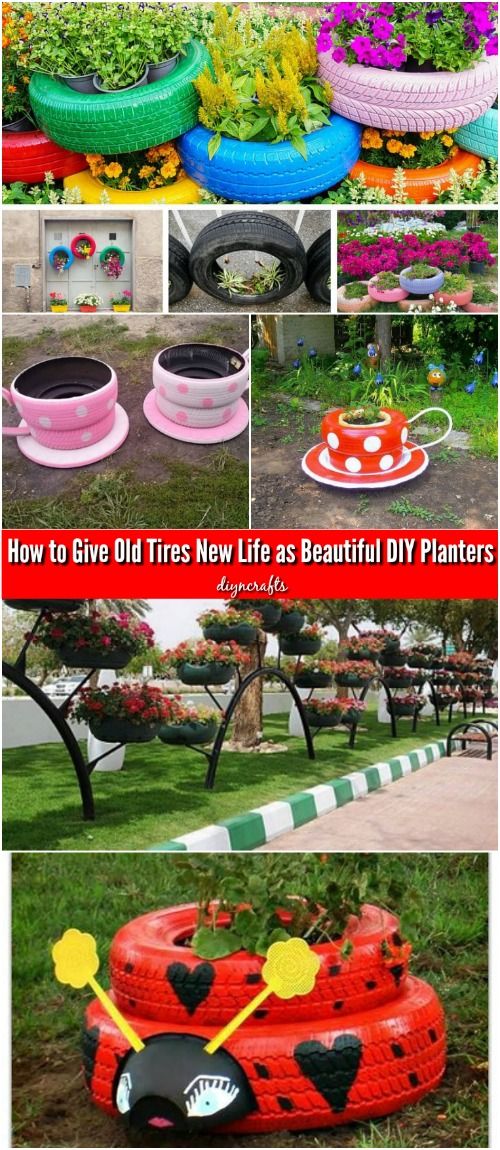
Squeeze the un-cut end of the tube in between the wheelbarrow tire and the metal rim. Secure it in place with more Duco cement.
It should now look like eyelashes sitting atop a sky-blue frog eye! No mascara can achieve lashes as natural as these.
10/16
Two Women and a Hoe
Since you've already beautified the frog's peepers, why not add some bright-red kissable lips?
Lie the truck wheel on it's side. This will now be considered the 'head' of the tire frog!
Use your cosmetology prowess to paint a great set of smackers onto the treads. Try to stay at least a few inches away from the top and bottom edge of the tire.
11/16
Two Women and a Hoe
Facing your large truck tire head-on, center the lips, then balance your two eye-tires upright on top of it.
Make sure they're evenly spaced on either side of the mouth They should also be buttressed against each other.
Draw a couple marker lines on the head to indicate where the eyes rest on the head.
Removing the eyes for a moment, use a utility knife to slice along your two marker lines. (These cuts are going to help the eyes sink into the head for greater stability.)
12/16
Now comes the tiniest amount of carpentry.
In order to keep your frog stable and looking its best year-round, you need to make sure the upright pieces are as wind-resistant as possible.
Using a board of 2" x 6" x 8' treated lumber, cut the piece so that the length is equal to the distance from one frog eye to the other.
Then, position the lumber inside the head tire so that it's sitting snugly beneath the two cut slits.
Place the eyes one at a time into their cut slots. This should cause them to sink into the head an inch or so.
Next, drill 3" long deck screws on an angle through the base of the eye, through the head, and into the piece of lumber.
13/16
Lisa
|
Pexels
One thing (or should I say two things) every DIY tire frog needs is a good pair of legs for hopping.
Set your two car tires down in your desired resting place, then push them together so that they're bumping against one another.
Fill them up with gardening soil, stopping when it's within an inch of the tire top.
14/16
Now, pick up the head and shimmy it so that it's resting atop the two soil-filled legs. (The eyes and mouth should be facing your chosen direction.)
Once you have it centered, pull the head forward so that the front extends over the edge of the leg-tires a few inches.
15/16
Two Women and a Hoe
It's time to give your frog some limbs!
Lift up the front of your frog's head and slide the middle of your garden hose beneath it. Pinning the hose under the tire, let the head drop back down.
Cut both ends of the hose so that they're a couple of feet long.
Next, stake the ends of the hose into the ground with galvanized nails.
Place two of your cutout hands on top of the hose-ends, then stake them into the ground as well.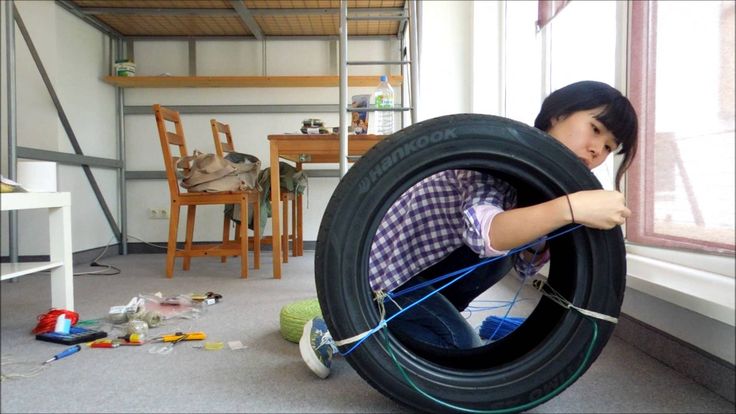
Do the same for the other two feet, but position them so that they're resting right against the bottom of the two leg tires.
16/16
Two Women and a Hoe
Now it's time to fill your frog's head with soil and flowers!
Pour your favorite gardening soil into the head until it's an inch away from the opening.
Now go ahead and plant all of your favorite plants!
DIY tire frogs are an adorable way to bring fun, color, and art into your garden.
They're easy to maintain, you can change the plants as many times as you want, and they're an amazing conversation starter for anyone who walks by!
If you enjoyed this DIY, give Two Women And A Hoe some love for their incredible idea. If you end up giving it a shot, send us pictures of your own upcycled tire gardens!
Please follow and like us:
Follow
How to Make “Frieda La Frog” From Recycled Tires
1. Clean tires and let dry.
2. Select which side of the large tires will be down. Drill 4-6 holes in that side of each tire to allow excess water to drain.
3. Cut storage tote lid about 1-2” bigger than largest tire opening. Poke 3-4 holes in it for drainage, and work it into the tire to cover the bottom hole.
4. Use utility knife to cut 4 feet from rubber door mat. I drew the first with a silver Sharpie and cut it out, then used it as a template to make the others match.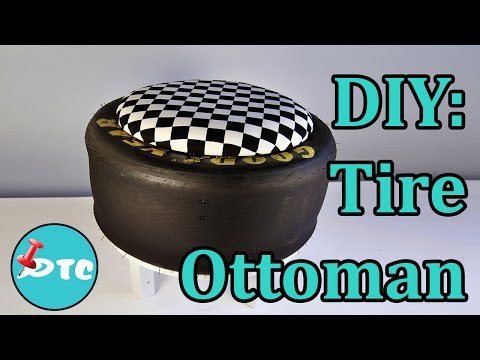
5. Lay all the tires, feet, hose, and 2 of the bowls out on drop cloth and start painting! I used Valspar flat spray paint/primer-in-one, in “Tropical Foliage” color. It took about 5 cans. I didn’t paint the underside, since they wouldn’t be visible.
6. Paint the other two bowls white – I used Rustoleum flat white. Once dry, paint the bottom of these two blue.
7. Using Duco cement, glue the bowls into the rims of the small tires. The white bowls are the eyeballs, and the green ones on the back give the eyes a bulgy look from behind.
8. Spread a bead of silicon caulk on joint of bowls and rims. Once it dries, touch up the paint. Spray the caulked part on the back of the eyes. To touch up the front, I spray paint onto a piece of wax paper or foil and use a Q-tip as a brush.
9. For eyelashes, cut a wedge-shaped section of inner tube, then use scissors to make cut from the inner edge to about 1-1/2” from outer edge. Use Duco Cement to glue into the space between the tire and the rim.
10. Using red paint and brush, add mouth to largest tire.
11. Now the slightly tricky part – making the eyes stable in their mounting. First, set the eyes on the “head” tire and cut two slits in the large tire with a utility knife. This allows the eyes to sit down into the tire a bit.
12. Insert the piece of lumber into the head tire under where the eyes will sit. Install deck screws at an angle through eye tire, head tire, and into lumber. Do this with both eyes. They will have a little wobble to them, but not much. Later, when this tire is filled, stability gets even better.
13. Put it all together! Lay the 2 body tires side-by-side on the ground. Fill them to within an inch of the inner circle with soil.
14. Place head tire on body tires, centered and pulled forward a couple inches.
15. Lift head slightly and slip one end of arm hose on each side, between tires.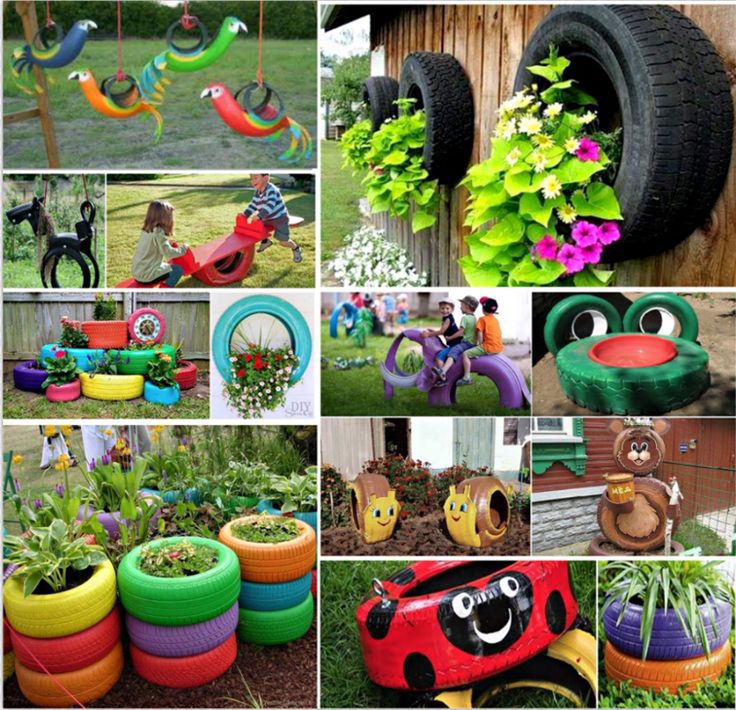
a. Cut off arms to length and secure to ground with galvanized nails as mini-stakes.
b. Place feet in position, and use nails again to hold in place.
16. Fill top tire with soil to within an inch of the inner edge height.
17. Plant with flowers of choice. I chose to use perennial daylilies in the bottom tires, and annuals in the top, so I don’t have to replant more than one each year.
This is how I did it, but if you make one, let your imagination go out and play … get silly or get serious, but make it YOURS!
Finally, and most important, THANK YOU SO MUCH for your interest in Frieda La Frog. I’ve told her how popular she’s become, and I’m a little worried … she’s demanding an entourage, Ray-Bans, and one of those silly little purse-sized dogs …
Happy Gardening!Posted on
 For crafts, you will need three tires, the same in diameter. Arrange the elements so that two are at the bottom, and the last is placed on top of the structure in the center. Everything is fixed and covered with paint. We paint the lower wheels like frog legs, and the upper one like a head. All wheels are located horizontally, a pillow, a fur pouf is laid in their emptiness so that you can sit. Eyes are made from small bicycle tires, they are mounted vertically and can even function as the back of a bench. As a result, you get a shop in two levels, so both adults and children can accommodate on it. nine0002 Place a pillow instead of earth
 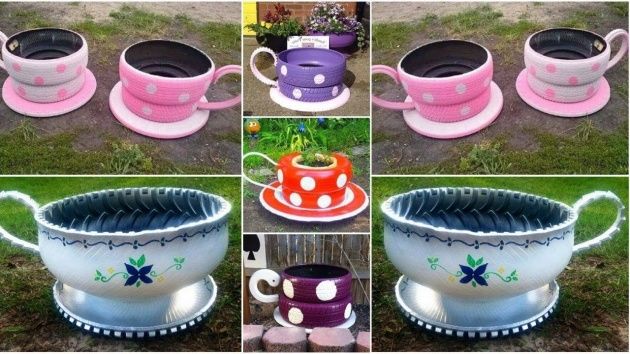 These are two tires of the same size. They are located vertically, so they can also serve as a partial fence of the sandbox, a support. It is better to paint the created composition in a bright green color. nine0002 Cover with sand
 [ads-pc-1]
Frog from an old tire and a basin
Crowned frog
 It is also accepted as a fetish, a protective amulet that provides wealth.
 Tire Frog
Thus, a funny do-it-yourself frog made of tires is an original craft. Its implementation is within the power of every master, you just need to choose a feasible level of difficulty, and everything will be in order. Good luck at all stages of creativity! nine0007
Tag: tire crafts
| ALL ARTICLES » IMPROVEMENT » DIY |
| Everyone periodically encounters obsolete tires, even without owning a car. Old tires can be seen near garbage cans, garage complexes, tire shops. Meanwhile, from old tires you can make a charming decoration for the garden plot - a frog. To make a beautiful, and in most cases also practical frog for decorating a garden or house territory with your own hands, you will need a couple of evenings of free time, a tool for work and consumables: ♦ Used tires in the required amount. Optimal tire size: R-13 or R-16.
Site selection and preparation for structure First, you should decide on the location of your garden beauty. If the composition is placed on the lawn, it may well become overgrown with grass, becoming an element of landscape design! If you choose a site devoid of vegetation, the frog itself should be given more expressiveness by painting in brighter colors.
Milestones: ❶ Washing and drying tires. Tires are best cut with an electric jigsaw, and it is advisable to use "summer" tires - they have more pliable rubber. It is better to make cuts perpendicular to the cords, so they are clearer.
Depending on the functional significance of the frog, the method of fastening the structure is also chosen. For example, for a flower bed frog (pictured below), the tires do not connect at all, but are simply placed tightly against each other and lightly sprinkled with earth. For complex high structures, installation on pins and bolting is used.
Structural design The frog is painted and decorated as your imagination allows.  |
 Consider how to make a frog for a summer residence in several ways.
 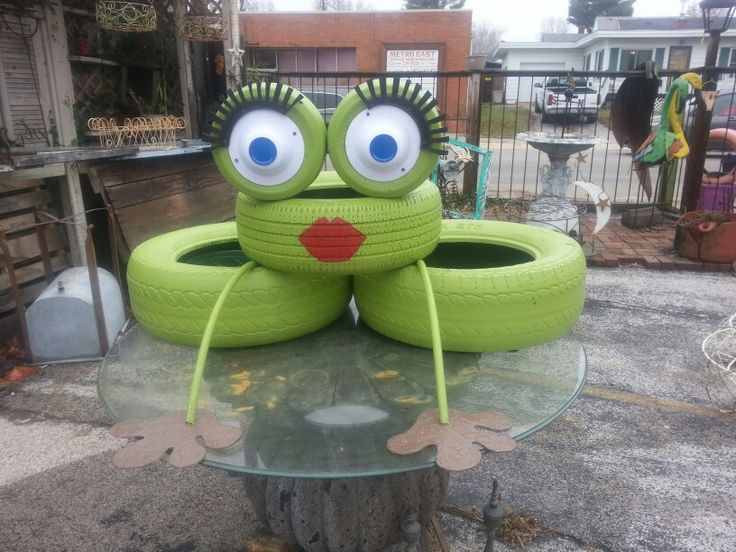 If necessary, prepare a platform for the figure: level it or vice versa - dig the necessary recesses. nine0007