Delivery options and delivery speeds may vary for different locations
Sign In
or enter a zip code
Email * Password *
REPAIR & HOW TO
MAINTENANCE
TROUBLESHOOTING
GUIDES
TIPS & TRICKS
ALL ARTICLES WATCH VIDEOS ABOUT US SHOP PARTS CONTACT US
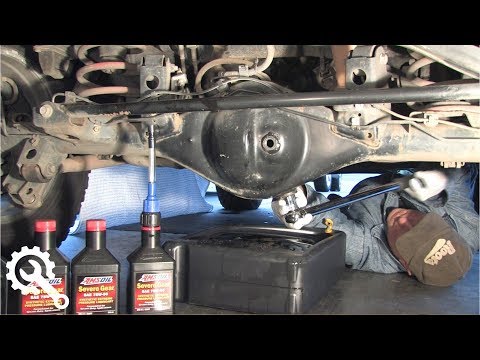
Changing the final drive and front diff oil in a Honda ATV is an often overlooked maintenance task. A Honda Rancher 420 takes the same type of fluid on both ends, and you should change those fluids once every two years, regardless of mileage.
Watch the video above and follow the steps below to change the final drive and differential oils in a Honda Rancher TRX420.
NOTE: Two bottles of Honda drive shaft oil are needed to change both the front differential and final drive fluid.
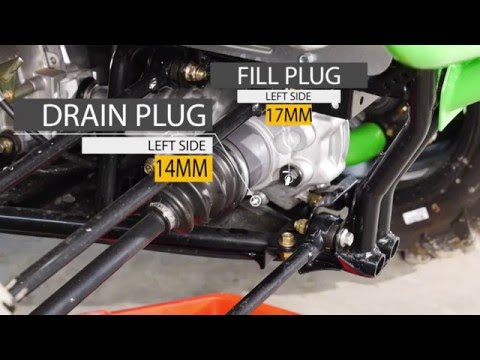
Honda Rancher Front Differential Fluid ChangeStep 1. Remove the top fill bolt (located on the right-hand side of the differential as you’re facing the ATV) with a 17mm socket.
Step 2. Get a drain pan to catch the fluid, and remove the 10mm drain bolt located underneath the front differential.
Step 3. Replace the drain bolt once the fluid has completely drained, and tighten it to 9 foot-pounds.
Step 4. Pour Honda shaft drive fluid into the fill bolt opening from Step 1. It should take between 7.5 and 8 oz. of fluid, but you’ll know it's full when the fluid starts to run out of the opening.
Step 5. Replace the fill bolt, and tighten it with a 17mm socket.
NOTE: Don’t overtighten it. If you have a little excess fluid around the bolt when you’re done, clean it up with some contact cleaner.
Honda Rancher Final Drive Fluid ChangeStep 1. Remove the three 12mm bolts (one at the front and two at the back) underneath the drive housing that hold the skid plate in place, followed by the skid plate itself.
Step 2. Remove the rear 17mm fill bolt on top of the housing.
Step 3. Get a drain pan underneath, and remove the check bolt using a 10mm socket. The check bolt is low on the left-hand side, facing the rear of the unit.
Step 4. Clean around the drain bolt to remove any dirt or mud caked around it, and remove the drain bolt with a 10mm socket. The drain bolt is low and on the right-hand side.
Step 5. Replace the drain bolt once the fluid is finished draining, and use a torque wrench to tighten it to 9 foot-pounds.
Step 6. Fill the rear drive with Honda drive shaft oil. It'll only take about 2.5 oz., but you’ll know it’s full when fluid begins to run out of the check bolt opening on the bottom left of the housing.
Step 7. Replace the check bolt, and torque it to 9 foot-pounds.
Step 8. Replace the fill cap, and tighten it just enough.
Step 9. Reattach the skid plate, tighten the three 12mm bolts that hold it in place and you’re done.
The steps to change the differential fluids on a Honda Rancher are the same or similar across the board for all models. However, if you want to see a slightly different take for another model, watch the video below to see
how to change the rear differential oil on a Honda Rancher TRX 350.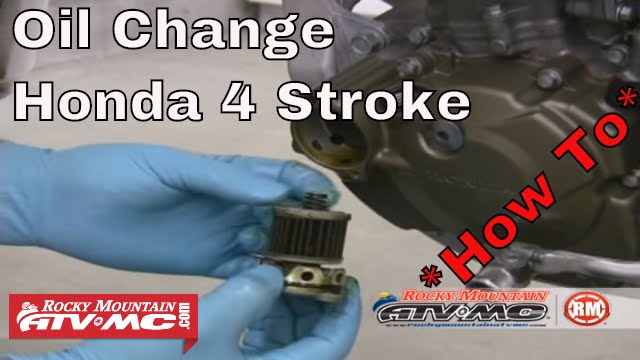
body
Delivery options and delivery speeds may vary for different locations
Sign In
or enter a zip code
Email * Password *
REPAIR & HOW TO
MAINTENANCE
TROUBLESHOOTING
GUIDES
TIPS & TRICKS
ALL ARTICLES WATCH VIDEOS ABOUT US SHOP PARTS CONTACT US
Like every other fluid in your Honda ATV, the rear differential in your Rancher TRX 350 needs to be changed every now and then.
Watch the video above and follow the steps below to change the rear differential oil on a Honda Rancher TRX 350 in minutes.
Tools and Supplies - Honda Rancher 350 Rear Diff Oil Change Honda TRX 350 Rear Differential Fluid ChangeStep 1. Remove the three 10mm bolts that hold the plate underneath the machine that protects the rear differential, followed by the plate itself.
NOTE: If there’s a lot of mud caked between the differential and the plate, it may take some extra effort to remove it even after you get the bolts out.
Step 2. Clean the differential with a brush if it's dirty to make it easier to get to the drain bolt and check bolt.
Step 3. Get a drain pan under the differential, then remove the oil check bolt and drain bolt to evacuate the old diff fluid.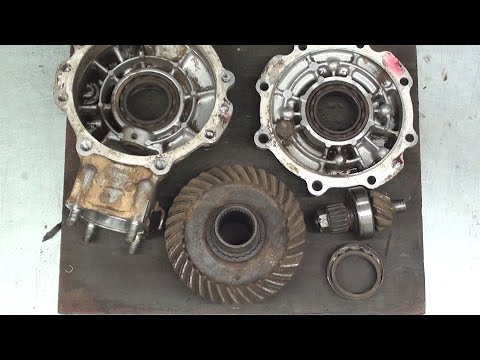 Sitting at the rear of the machine looking at the differential, the check bolt will be on the left side. Remove it with a 10mm socket. The drain bolt is on the right. Remove it with a 12mm socket.
NOTE: Don't lose the crush washers that come with both bolts.
Step 4. Use a 17mm box-end wrench to remove the fill bolt, which is located on the right-hand side of the differential up near the top.
Step 5. Replace the drain bolt, making sure the crush washer is on the bolt. Leave the check bolt and fill bolt out.
Step 6. Pour new rear differential oil into the fill opening until you see overflow come from the opening for the check bolt.
Step 7. Replace the check bolt and its crush washer once the overflow stops.
Step 8. Replace the fill bolt on the top of the differential.
Step 9.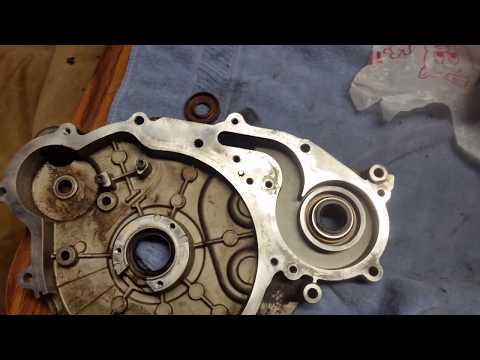 Use contact cleaner to clean excess fluid off the differential, which makes it easier to spot any future leaks.
Step 10. Replace the protective plate over the differential, then tighten its 10mm bolts and you're done.
After changing the rear differential oil on your Honda TRX 350, why not change the motor oil next? It's recommended you change both at the same time anyway. Watch the video below to see how to change the oil on a Honda Rancher 350.
body
Many drivers find it more convenient to drive in an automatic transmission. But it is technically more difficult and refers to expensive components in the car.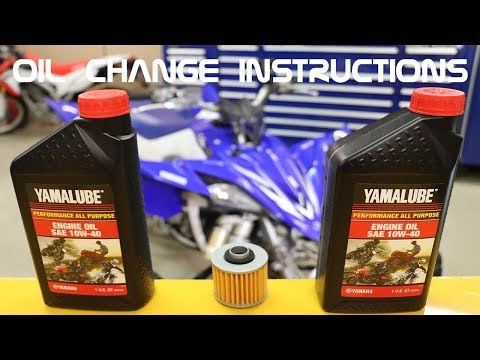 To keep the transmission in proper condition, you need to keep the oil at the level recommended by the manufacturer. Therefore, the driver needs to know how to check the oil level in the automatic transmission and when it is time to replenish it.
Checking the oil level in automatic transmission
On modern cars, the average interval for replacing transmission fluid in automatic transmissions is 60-70 thousand km on the odometer. But sometimes the oil needs to be topped up without waiting for the named period.
Lack of oil level in automatic transmission
Automatic transmission developers recommend checking the ATF level every 5-7 thousand kilometers. This helps to determine the approximate moment when you need to fill in new fluid. In addition, a timely check helps to avoid wear on the seals and the oil pump. nine0003
Signs of lack of fluid in the transmission:
Of course, it is better not to wait for the manifestation of such symptoms and check the oil level mark in the automatic transmission in a timely manner. So the transmission will last longer.
When the lubricant is filled in the right amount, the transmission units work correctly, the machine is better controlled. An effective way to avoid automatic transmission breakdown is timely control of the lubrication level. How to do this is most accurately described by the manufacturer of each brand of car. However, in some cases it is not possible to use the manual, therefore, the control methods are described in stages below. nine0003
Procedure:
Cleaning the dipstick before checking the oil level in the automatic transmission
As a standard, marks are made on the dipstick to measure the level of transmission fluid - for a heated and not heated box. They are designated respectively: "Hot" and "Cold".
When the tool is prepared, you can start checking the oil level in the automatic transmission. nine0003
The work is done in 2 ways:
The cold control method looks like this:
Draining oil from automatic transmission
More reliable information can be obtained by checking in a hot box. To do this, you need to drive 10-15 km to warm up the car. Further, the process looks the same as described above. They only focus on the “Hot” mark.
In addition to the oil level, along the way they find out:
Not all car models are equipped with a dipstick to check the oil level. Sometimes a viewing window is provided for evaluation. In other cases, the box has only 2 holes - for filling and draining oil.
In such automatic transmissions, the appearance of excess fluid is impossible - there is a special tube to drain it into the sump. But it is important to know if the level is low. The procedure looks like this:
Filling oil when checking its level in an automatic transmission without a dipstick
Add oil through the oil filler hole in the motor - pour until an emulsion flows from the drain. Then wait until the excess drains, after which you can tighten the cork.
When operating a car with an insufficient oil level in the automatic transmission, the following symptoms appear:
If you notice at least one of the symptoms, you should add or completely change the oil.
Problems with the machine with a lack of lubrication in the automatic box are caused by the pump drawing in air. Contact parts are less well lubricated and wear out over time. In addition, the box heats up more.
Excess fluid is only possible on machines equipped with a test probe. There is no automatic reset of excess. Excess liquid foams, oxidizes and evaporates with strong heating. As a result, system valves and other elements fail.
With a long drive in this mode, the molecular structure of the oil changes, which affects its quality. As a result, the box parts are poorly lubricated and wear out faster. If you miss the moment, most likely, serious repairs will be needed. nine0003
We examined the average methods and nuances of measuring transmission fluid. But depending on the specific model, small nuances of the procedure appear.
Read also: Oil change in automatic transmission
Obviously, checking the oil level in an automatic transmission is a simple procedure. It may well be performed by the car owner in the garage. The main thing is to follow the basic recommendations and take into account the characteristic features of a particular car model. Sometimes on the probe, instead of two marks, one is applied. Also, depending on the manufacturer, a hot test method may be preferable, but with the engine turned off.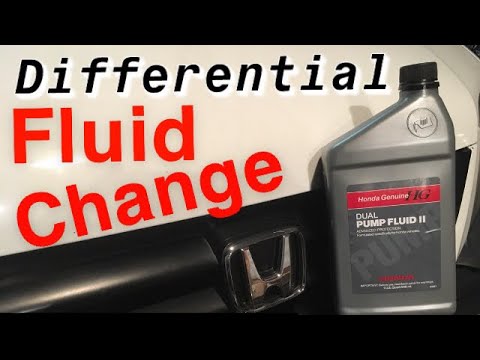 Finally, it is important to know exactly what position the shift lever should be in - park or neutral. Be careful about these features. nine0003
(free manual download)
File Format: PDF
Availability: Free as all manuals on the site. Without registration and SMS.
Additional: Reading Instructions online
66
ATV - 300
Oil Replacement in the rear gear
Page:
( 68 of 97)
navigation
1
2
3
four
five
6
7
8
nine
10
eleven
12
13 nine0003
fourteen
15
sixteen
17
eighteen
nineteen
20
21
22
23
24
25
26
27 nine0003
28
29
thirty
31
32
33
34
35
36
37
38
39
40
41 nine0003
42
43
44
45
46
47
48
49
50
51
52
53
54
55 nine0003
56
57
58
59
60
61
62
63
64
65
66
67
68
69
70
71
72
73
74
75
76
77
78
79
80
81
82
nine0173 8384
85
86
87
88
89
90
91
92
93
94
95
96 nine0003
97
Table of Treatment Instruction