Engine timing is mission-critical. Getting this stuff wrong can spell big trouble. If you suspect timing is out, best not to run the motor.
Checking ATV engine camshaft and crankshaft timing marks is the correct way to verify timing. It’s a simple 4 step process:
By the end of this post, you’ll understand clearly how to check your ATV engine timing marks, why timing jumps and how to fix it, and also other causes of bad timing.
Page Contents
Timing is everything, every component of your engine has an important job to do, and some components have to do it at a very precise moment in the engine cycle. Doing their job too early or too late can make the difference between an engine on full song and no singing at all.
The bottom end of your engine (crankshaft) coordinates the top end (valve train). It employs sprockets, chains, tensioners, and guides rails to keep everything in time. The valves positioned in the cylinder head open and close sequentially, allowing fuel in and spent gases out.
The spark plug needs to fire at the correct time. Ordinarily, when the engine is idling, the plug fires when the engine is at TDC, and it signifies the beginning of the power stroke.
As the engine speeds up, though, the plug is fired earlier. Know as BTDC (Before Top Dead Center), this is because the spark plug takes time to produce a spark. Starting the process early, therefore, means the plug continues to fire at the sweet spot in the engine cycle.
The firing, advancing, and retarding of the spark plug is controlled by the trigger (aka pulse, pickup, or crankshaft sensor (CKP)) and the CDI box (Capacitor Discharge Ignition).
An ignition timing issue may be caused by a faulty CDI box or an incorrectly positioned pickup sensor.
Your ATV engine is a four-stroke simply because it has four clearly defined stages in its operation.
The piston moves down the cylinder and draws fuel mix in through the open intake valve.
The piston moves up the cylinder, compressing the air-fuel mix (valves closed).
Plug fires and the piston moves down the cylinder powering the crankshaft (valves closed).
The piston moves back up the cylinder forcing spent gases out the open exhaust valve.
And the cycle starts over.
There may be lots of reasons why your ATV engine doesn’t sound or operate like normal. Timing is not one of the first items checked unless it suffers from some of the following symptoms:
Don’t rule out some of the simple causes first and they include the following:
Checking your timing is a straightforward procedure, but you’ll likely need to remove a few items to gain access. This guide guesses that your engine is an Over Head Cam found in most modern ATVs. I’ve included a single and a twin-cam, your timing markings will likely be different but not to worry, from the timing diagrams below, you’ll get the picture.
The process goes like this:
 It should align with the mark on the cylinder head.
For twin-cam engines, the process is similar, with just an extra sprocket mark to line up. Typically, both sprocket marks align with the horizon plain of the cylinder head (marked as red lines below) and some sprockets may have an additional mark (not in the pic below), and typically they point straight upwards (90°).
The timing chain and valve train are all mechanical and require adjustment and maintenance for trouble-free service.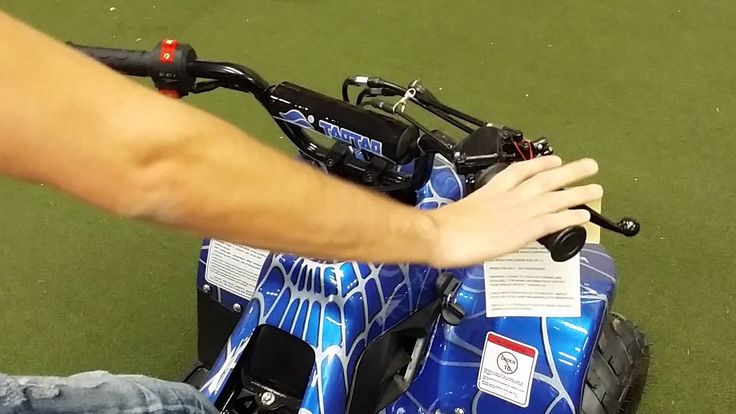
The more usual causes of jumped timing include:
Resetting the timing can be a pain in the ass, but you do need to get it correct. If the timing isn’t correct, the piston could impact the valves, causing some very expensive repairs. Your very first job is to find a manual for your engine. The process, torque specs, and tightening sequences vary from engine to engine.
Critical information and tools
You’ll need to know your timing marks, torque specs, fastener sequences, and you’ll need a torque wrench. You’ll find a list of all the tools I use here on the ATV tools page.
This guide will give you a general flavor of the job ahead.
A full inspection of the chain, sprockets, guides, and tensioner is advised. A failing tensioner is a very common cause of jumped timing, and obviously, if root causes aren’t fixed, timing will jump again and maybe with costly consequences.
You may find these posts useful:
How often to service an ATV?
ATV parts page
ATV won’t jumpstart
Air-cooled ATV white smoke
Will ATV start with a bad stator?
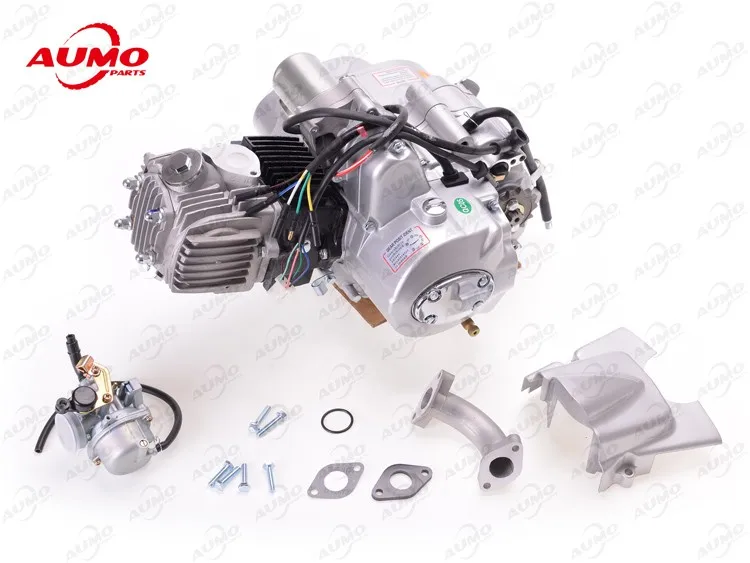
I am putting the head back on my 110cc motor I took the timing chain sprocket off the camshaft when i dismantled it. I have know idea how to set up the timing and the site in the how to section does not really - im having trouble understanding it
get the motor at TDC, piston at the top, with the timing mark on the flywheel pointing straight up to 12 o'clock,
then the cam gear has a pointer at one tooth, this points to 9 o'clock
Firstly take the ignition cover off the engine. Turn the flywheel around until the letter T lines up with the small groove above the flywheel. This is T.D.C on your crankshaft . Then with your top valve cover off with a light check that the 2 cam lobes are facing towards the piston. In this position you should be able to line up the cam sprocket holes up with the cam holes and there is a small circle or arrow on the cam sprocket that should line up with a V groove at the 9 o'clock position on the head. Before fitting the sprocket to the cam,fit the timing chain to the cam sprocket then to the camshaft and then fit the bolts and tighten. Just make shore that you keep the T on the bottom of your engine lined up when you install the cam sprocket and chain to the camshaft. It would be good to check the valve clearances at this time there is a tutoral on this site on how to do this. I hope this helps you. I have done this many times but this is the first time i have had to explain it so i hope it is clear if anyone else would like to add to this they are welcome.
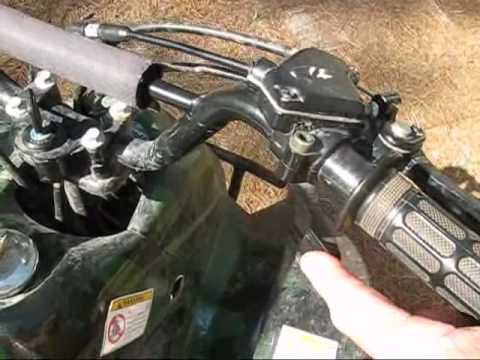
Last edited:
Don't these things have marks on the sprockets?
Can not find a mark on the crank shaft sprocket
This is the timing marks on the camshaft sprocket, note how the three bolts are sitting, that way you cant have the timing out 180 degrees.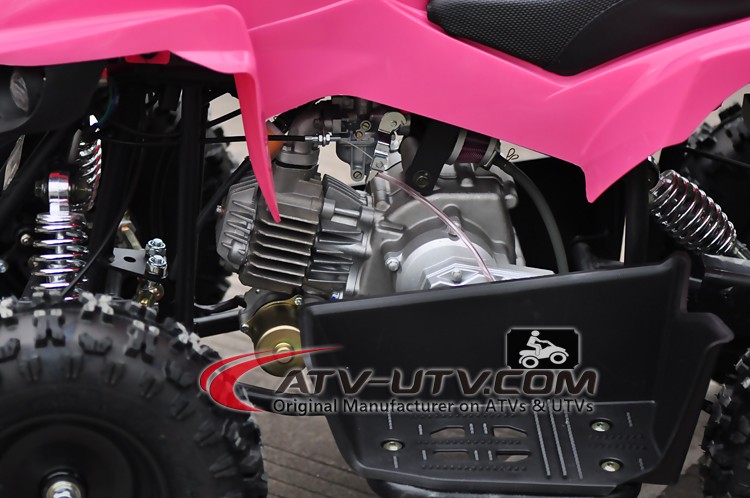
This is the timing marks for the flywheel, as long as the flywheel and the camshaft sprocket marks are aligned with the chain on then your timing is set
flywheel markings
camshaft gear markings
Hey i was trying to set it with the magneto off and did not see the marks Thanks for the photos. Because i took the cam sprocket off i am still confused with what you are saying
I have the crankshaft lined up on the t and the camshaft is between lobes is that right
the camshaft lobes are to face towards the piston
rotn50 said:
This is the timing marks on the camshaft sprocket, note how the three bolts are sitting, that way you cant have the timing out 180 degrees.
![]()
This is the timing marks for the flywheel, as long as the flywheel and the camshaft sprocket marks are aligned with the chain on then your timing is set
Click to expand...
See the cam sprocket picture, that explains how it should sit while the magneto is on the T
Thanks for yor response to this amateur Where is thetiming chain adjuster as i am having a real problem putting the cam sprocket and chain on
At the bottom of your engine on the ignition side it will be on a angle.
there is a bolt on the bottom/underneath of the motor, just back from the crank line
undo it and it will spring out, then there is no tension left on the chain
Thanks for your response, i could not find a mark on the camshaft housing but tried to set it up on your info and it came up good. The bike is running awsome
aah i get you, just done it and the engine fired up great, thanks for the help, those pics are really usefull.
From time to time, the ATV will be naughty and behave differently than you would like. Nothing beautiful lasts forever, right?
One of the most common problems you may encounter is the ATV suddenly pulling to the left or right.
If you are lucky, your problem may have a simple solution)
Let's take a look at some of the most common reasons why an ATV can pull to the side, and of course, here we will talk about how to get rid of these problems.
The most common problem that causes the ATV to pull to one side is the difference in rolling resistance due to different tire pressures. Also, the problem may be associated with natural wear or damage to various components of the chassis of the ATV and, as a result, a violation of the angle of the wheels.
So how do you determine what is causing problems when riding an ATV?
As you probably already understood, there can be several reasons.
To understand why an ATV wants to pull off the road and dive into a ditch when you really don't want to, you need to do a number of checks.
Although I don't have exact statistics to tell you which malfunction occurs most often, I still recommend that you start with what is easiest to check and fix before spending time and money on more unusual and potentially more complex searches.
In my experience, the most common cause, and by far the easiest problem to check and fix, is uneven ATV tire pressures.
Let's look at what happens when ATV tires have different pressures.
A flat tire has a larger area of contact with the road surface than a normally inflated wheel, as a result of which the friction force, and hence the rolling resistance force, applied to such a wheel will be higher. The wheel will roll more slowly. The opposite wheel will run ahead and try to turn the ATV around the slow wheel. That is, if the ATV pulls, for example, to the left side, most likely, the fact is that the left wheel is lowered.
To solve this problem, you need to equalize the air pressure in the ATV tires. It is best to refer to the operating instructions, which must indicate the required air pressure in the wheels recommended by the manufacturer. The pressure in the wheels installed on the same axle of the ATV must be the same.
At the same time, you should be aware that due to the design features and weight distribution of the ATV, the tire pressure on the front and rear axles may differ.
Check with a good tire pressure sensor.
Most manufacturers complete the ATVs with a set of tools and a sensor for checking air pressure in wheels, such as ATVs Yacota SELA 200 , Yacota SELA 150 , Yacota Cabo 200035, Yacota Cabo 20035, , , 9003 MOTAX 200 , MOTAX GRIZLIK and MOTAX RAPTOR .
ATVs MOTAX and YACOTA have these sensors in the standard tool kit. If there is no such device in your kit, I recommend that you definitely purchase it. A very slight difference in air pressure in the tires may well be the reason that the ATV pulls to the side when driving in a straight line.
The air pressure should be checked in both front and rear tires. True, uneven pressure in the rear tires, most likely, will not be the reason for the withdrawal of the ATV from a straight path. Different pressure in the rear tires can provoke another malfunction - premature wear of the rear differential, due to the increased load on it. But this is a story for a separate review.
I always keep this inexpensive instrument in my toolbox, its accuracy is good enough to use.
Also make sure that the maximum tire pressure is not exceeded.
Over time, ATV wheels can wear differently, resulting in the diameter of one wheel being different from the diameter of another wheel. This can also cause the ATV to pull to the side.
To check if the front wheel diameters are the same, you can do a simple check: place the ATV on a flat surface and use chalk to mark the sidewall of each front tire at the lowest point.
Wheels must be pointing straight ahead, gear lever in neutral position. Roll the ATV forward until one of the wheels has made two or three revolutions and the mark you just made is back to the very bottom, to its original position. Look at the mark on the opposite tire. Ideally, it should also be at the very bottom. If this is not the case, the wheel circumferences do not match.
If the reason for the ATV pulling to the side lies in the difference in wheel circumference, then when driving to the right, the right tire should have a smaller circumference, and when driving to the left, the left one.
Wheel circumference can vary not only due to uneven wear, but also due to air pressure differences in the tires.
The wheel is like a balloon, the higher the pressure, the larger its diameter and vice versa.
For this operation, you need to lift the ATV, place it steadily on the supports so that all the wheels are in a suspended state.
It is very convenient to use the bike racks to lift the ATV. If you do not have them yet, and you plan to service the ATV yourself, I recommend purchasing them. They are relatively inexpensive. Tackles will greatly simplify the ATV maintenance process.
Check that there is no excessive play in the ATV suspension and steering joints. Start with the tie rods and steering rack. This operation is more convenient to carry out with an assistant. Have an assistant move the ATV handlebars to the right and left, often and with a small range of motion. And you, in turn, keep your hand on the swivel, which are subject to verification. Check the steering tips and tie rods one by one. You will feel the excess play in the hinge with your hand. If the ATV steering wheel has excessive play, but the tie rod and steering tip are in order, then the steering rack itself or the steering shaft bushing may have play, which can also be checked by hand. The steering column bushing usually wears out over time. The same goes for the ball joints on the tie rods.
Tighten any loose bolts and replace worn parts. Worn parts can break soon, so replacing them won't be a waste of money, even if their wear isn't the reason your ATV pulls to one side.
In addition, the wheel bearings must be checked for excessive play.
To do this, have a helper grab the top and bottom of the wheel and shake it while you check for play in the ball joints and wheel bearings.
Check how easy the wheels turn. The wheels should rotate freely, without noise and crackling. The presence of noise indicates wear on the hub bearing. And the tight running of the wheel is about bearing wear or souring of the brake pads. As we said, if one of the ATV's wheels is spinning at a slower speed than the other wheel, the ATV will pull towards the slow wheel.
If necessary, replace the bearings and service the front brake calipers. Sometimes the caliper is easy enough to clean, and sometimes you can’t do without replacing the brake cylinders or the caliper bracket itself.
Complete the work with suspension lubrication. The chassis of ATVs of the brands YACOTA , MOTAX , AVANTIS is equipped with special grease fittings through which you can easily lubricate the desired suspension unit. We have already told, in one of the reviews, using the example of a gasoline 125 cc ATV MOTAX T-REX , about the features of maintenance of the ATV suspension. Regular maintenance of your ATV will definitely prolong its life.
Control check three: check the running gear for geometry violations.
If you use the ATV for active riding or sports, then it is possible that you have bent some part of the suspension on the next jump. ATV front suspension A-arms are especially prone to damage if you hit a stump or rock while riding. "Fast-growing" trees suddenly appearing in front of the ATV as you drive, a common story!)
A-arms are designed to absorb heavy suspension shock and, through their integrity, retain more expensive and hard-to-find ATV parts that are more difficult, more expensive or even impossible to repair, for example, an ATV frame. It is not always easy to see if the suspension arm is bent or not. It happens that the levers do not have a symmetrical shape, because the ATV suspension was originally designed this way by the manufacturer.
Compare the distance between the axles of the front and rear wheels of the ATV on the right and left sides. If there is a difference, then one of the suspension arms is most likely damaged.
The camber and toe angle can be adjusted by eye yourself, but it is better to contact specialists who have the necessary measuring equipment and data on the required wheel alignment values.
I hope you find this article useful.
For all questions related to the purchase, selection and repair of ATVs and other equipment presented in the VEZDEHOD online store, please contact our consultants. We will be happy to help you choose a new ATV according to the specified parameters and solve any technical issue related to the malfunction of already purchased equipment.
The operation and life of the engine directly depends on the quality of the fuel mixture. The carburetor is responsible for the preparation of the composition, but after prolonged use of the equipment, the settings “go astray”. This results in:
Many riders who decide to buy an inexpensive ATV simply do not spare the technique and ignore this procedure. But even if you plan to change your device in 1.5-2 years, adjustment is needed. The reason for this is increased fuel consumption. A quad with an untuned carburetor "eats" 30-40% more gasoline, and these are tangible costs.
So how do you adjust the carburetor on a Chinese ATV? For this you need:
However, it is important to remember that all adjustments are made only with a "clean" carburettor. This means that the rider needs to remove all the dirt from the node and flush the system to remove condensation and sediment from it.
Note: Just before adjusting, the engine must be warmed up to operating temperature.
To set the carburetor idle speed, the float chamber must first be cleared of fuel. To do this, start the ATV, close the fuel cock and wait until the machine stalls (5-10 minutes). To speed up the process, you can take a little ride on the quadric. Of course, gasoline can be drained, but in any case you will have to warm up the device, so the first method of "removing" gasoline is more effective.
Then:
Read the instruction manual before adjusting the carburetor on a 125cc ATV to be sure. Remember that the location of the bolts is different in different devices, so read the documentation in advance.
To evaluate the quality of the fuel composition, make a test run. After that, unscrew the candle, and evaluate its condition. If it is:
Also look out for these "symptoms": damaged tip (failed electrode), oil deposits (damaged rings and caps), chips and inclusions (sign of a broken motor).
To adjust the mixture you need to twist the needle cover and pull it out. To get the needle, pull out the cable. After that, move the ring in the required direction (lower - more air, but less fuel and vice versa). Then start the engine and make sure it doesn't stall.
The last step in adjusting the 125cc ATV carburetor is adjusting the petrol level.