When you make purchases through links on this site, The Track Ahead may earn an affiliate commission. Also, these posts are based off my own experiences. I am not responsible for any action you take as a result of reading this. Learn More
The No Spring Compressor Method is a way of disassembling your shock assembly (or coilover) without the use of a spring compressor tool. In your coilover/shock assembly, you have a spring that is compressed by a shock between the upper and lower perches, which are connected to the shock. This assembly of shock and spring can be mounted to the frame of the vehicle (via the strut mount on top) and then to the lower control arm (on the bottom). The perches may look different from depending on the type of shock assembly you have, but they serve the same purpose with some models offering some level of adjustability.
If you’re replacing the entire shock assembly, you can remove the whole coilover without taking the shock and spring apart. You can then proceed with installing a pre-assembled coilover. If you go about replacing the front coilovers this way, you won’t need to worry about the release of energy of the compressed spring because you’ll have never disassembled the coilover.
However, if you need to take the shock and spring apart, then you’ll either need spring compressors or you can perform the No Spring Compressor Method. Rather than using a tool to compress the spring enough for you to remove the shock, the No Spring Compressor Method uses the the weight of the vehicle as well as a floor jack, to decompress the spring.
If you do need to disassemble/reassemble the shock assembly, you can go about it several ways. One option is using a spring compressor tool.
Spring compressor tools come in either a hydraulic bench mounted type or a hand tool type. The bench mounted type is a very safe option for this work. People generally don’t have this tool in their garage, but garages/shops will generally utilize such a tool.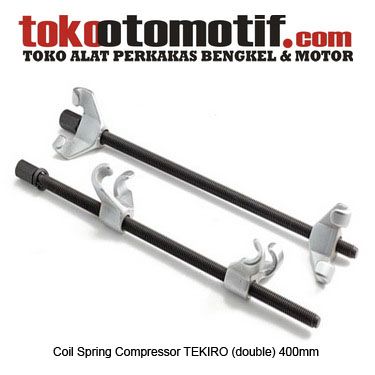 I believe this to be the safest method of assembly/disassembly of the shock assembly. Handing off this work to a trained mechanic with a heavy duty tool such as this one, will offer the least risk for this type of work.
The other spring compressor tool is a hand tool that uses hooks to hold the spring, while requiring you to ratchet down the hooks to compress the spring. This tool is hit or miss. Sometimes when you ratchet down, this tool effectively compresses the spring, but the spring will compress to the point where the arms interfere with the compression of the spring. Therefore, you can’t compress the spring anymore, even if you still have more to compress. Another problem that I’ve seen is that these tools typically instruct you to hand-tighten these tools with a ratchet, but in most cases folks use air wrenches or impact wrenches when they shouldn’t, simply due to the ease of use.
The last method for compressing springs is using the No Spring Compressor Tool. In my opinion when this is done in a safe and controlled manner, it can be much safer and effective than using a standard spring compressor hand tool. What this method does is use the weight of the vehicle as support the top side of the shock assembly, and a floor jack on the bottom end, to slowly decompress the spring until you can diassemble/reassemble the shock assembly. You’ll still need to do a few steps in order for the lower control arm (LCA) to swing down and also allow the floor jack to support and lower it securely.
There’s always some level of risk when working on cars, but I feel this supplemental warning is warranted when dealing with springs. Vehicle springs store up a tremendous amount of energy when compressed, so working with it when not fully understanding how the components work and how they interact with one another is very dangerous. The spring releasing all of its compression energy can seriously injure you, if not kill you. Do your research, watch videos online, and do as much learning as possible to completely understand how the suspension components work before trying this yourself.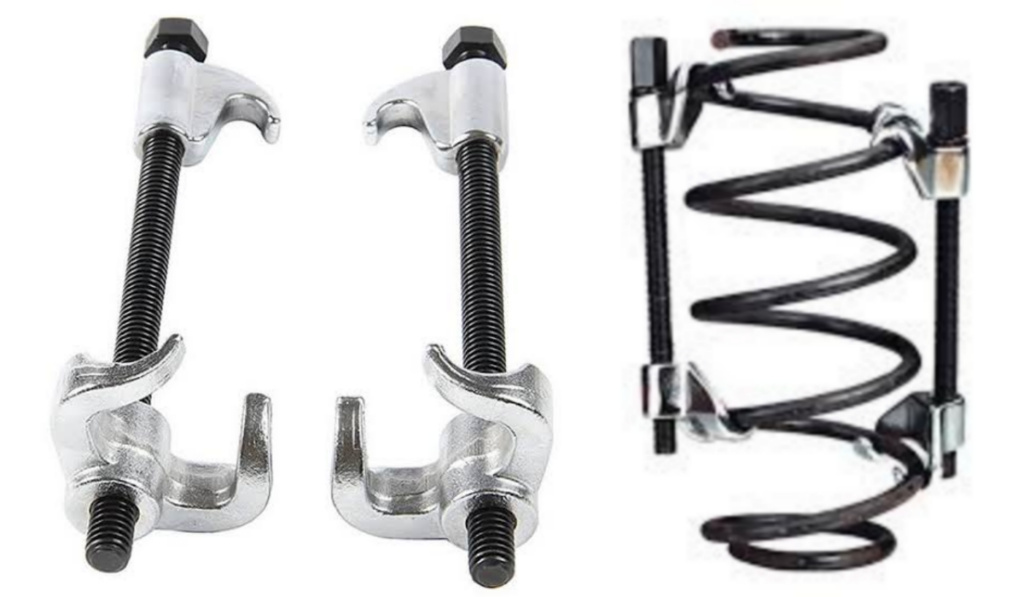
Even go watch a bunch of “coil spring fail” videos on YouTube to know what can go wrong. People have gotten incapacitated and killed from accidents like these, so fully understand that this can be extremely dangerous and fatal if not done properly.
Performing the No Spring Compressor Method will vary from vehicle-to-vehicle depending on the suspension components used on the vehicle. I performed this No Spring Compressor Method on a 2003 Toyota 4Runner which uses a double wishbone suspension up front. Keep that in mind; if you’re doing this on a different vehicle or different suspension setup, please know that you need to still do your research to know if the No Spring Compressor Method works for your application.
Jack Stands: Instrumental in keeping your vehicle propped up and secure. Find on Amazon
Floor Jack: Needed to jack up the vehicle, but is also instrumental in completing the “no spring compressor method” to disassemble and reassemble the strut assembly. Find on Amazon
The vehicle should be raised and supported on jack stands prior to doing any of this work. The weight of the vehicle (supported on jack stands) will act as the support on one end when decompressing the spring.
For the next steps, there are a variety of ways to disconnect suspension components in order to allow the lower control arm to articulate down for this process, but I’ve found the simplest way is the one I’ve outlined below.
These steps are essential to getting your LCA to be able to rotate down and out of the way. The sway bar is connected to the steering knuckle via the end link. The cam adjusters need to be loosened in order for the LCA to rotate. The lower ball joint needs to be disconnected in order to separate the LCA from the wheel hub.
The bottom connection (lower shock connection) is still connected to the LCA with the nut/bolt broken loose, but still connected. The upper connection (large center shock nut) will be the last step of removal before the spring can be free to decompress. However, when you disconnect that top center shock nut, the shock’s top center threads are still sticking out of the strut mount. Therefore, it is still supported from lateral movement. The only way for the shock to go is down… that is what the floor jack is for— to allow the LCA (and shock/spring) to lower down with it.
When the spring needs to be be compressed again, the floor jack will be used to push up on the LCA and in effect the spring will be compressed into place. The center upper shock nut will then be tightened to complete the installation.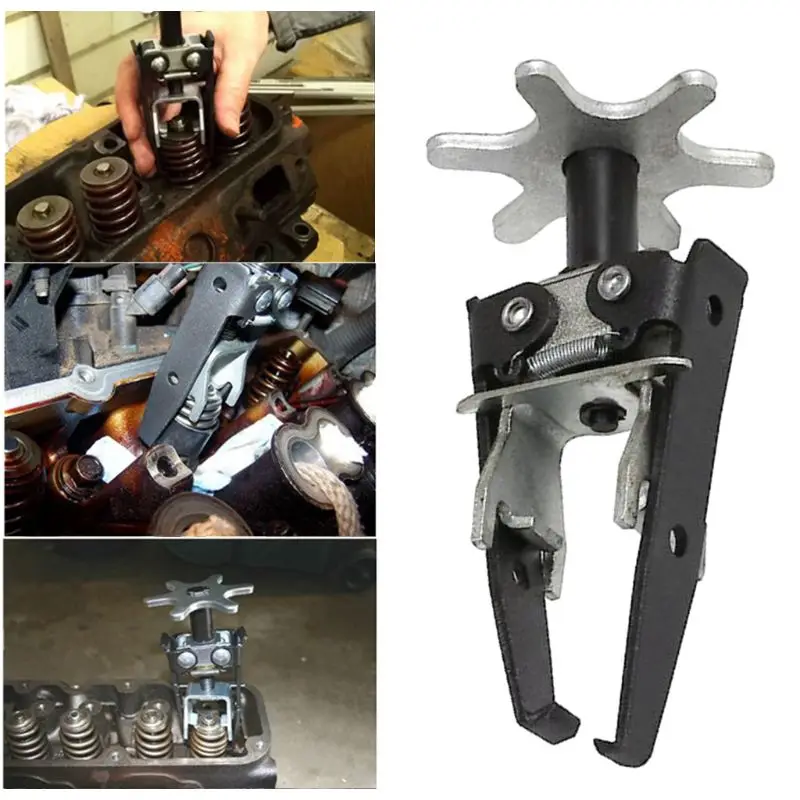
First, jack up the front of the vehicle and support it on jack stands. Remove the wheels. You may set them aside, or place them below each side of the vehicle as an extra safety precaution in the case the jack stands fail. Finally, make sure to chock the rear wheels with wheel chocks so that the car will not roll and cause the car to come off of the jack stands.
Move the floor jack into place. I’ve swung it over into this position where the handle points to the front of the vehicle. This way, I can operate the jack from the front and out of the way of any danger. If anything goes wrong and the spring shoots out, it is encased in the wheel well or it shoots out the side.
Begin by disconnecting the front sway bar end links from the axle on both sides of the vehicle. You can leave the end link connected to the sway bar as you are mainly concerned about separating the sway bar from the steering knuckle.
Mark the alignment cams with a paint marker so that they can be positioned back in place during re-installation. You might need to remove some panels or skid plates under the vehicle to get access to these cam bolts.
Loosen but do not remove these cam adjustment bolts. This will allow for articulation of the lower control arm (LCA), which will allow the LCA to rotate and provide additional room to remove/install the front shocks/springs. Penetrating oil can be used if these bolts are stubborn to break loose. You may need to use a box end wrench on the nut on the other side of the cam adjuster to loosen this bolt.
There are two lower ball joint mounting bolts that need to be removed as well. Once these bolts are removed, the tip of the LCA will be able to be separated from the wheel hub. Keep in mind that the two lower ball joint to lower bracket nuts flank the center castle nut. So removing the two nuts on both sides of the castle nut will allow the wheel hub to separate from the lower bracket.
I’ve seen some other people remove the center castle nut in order to separate the ball joint itself, however separating a ball joint can be challenging and may require a ball joint puller. I find going with the lower bracket nuts easier to deal with.
Loosen, but do not remove the lower shock mount nut; use penetrating oil if you need it. Keep the bolt and nut in place still as this is the only thing that is still keeping the front spring compressed. It’s wise to keep the lower shock mount bolt/nut there for safety.
At this point, the only thing holding the shock and spring in place is:
At the bottom of the coilover: the lower shock mount (which you still have the nut and bolt in place to hold it to the LCA)
At the top of the coilover: the top center shock mount (large center nut still needs to be removed)
Know that the spring is pre-compressed with the shock and is secured via the large center nut. The other three nuts that surround the center nut hold the shock assembly to the body of the vehicle.
Therefore, if you are simply replacing the entire shock assembly, then you can remove the three top mount nuts (that surround the center nut), and this will disconnect the strut assembly from the body. The whole shock assembly will have the shock and spring—still compressed with the center nut. However, for the No Spring Compressor Method, you will leave these three nuts in place and will be focusing on the large center nut. By doing this, you will be removing the shock and spring but the top perch/mount will still be connected at the top with those three nuts/bolts.
Remove the large center nut and this will disconnect the spring and shock from the upper shock mount. Therefore, when you bring the LCA down along with the spring and shock, it will be supported against the upper shock mount when decompressing the spring.
The center nut may need an additional wrench or allen wrench to keep the bolt from turning while you loosen the center nut.
Go over to the jack handle and very, very slowly lower the control arm and decompress the spring until it is fully decompressed. As you release all the energy from the spring, you will hear all sorts of disconcerting creaks as the spring decompresses.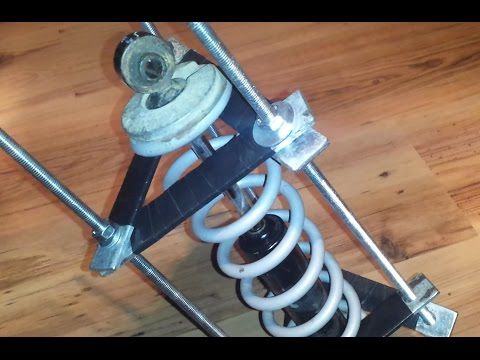
Eventually, the spring will be fully decompressed and you no longer have the danger of spring under compression that can shoot out at any moment. You should be able to move the spring around and be able to feel that there is no compression on the spring.
Now, you can now remove the lower shock to LCA bolt. You can tap the bolt out with a hammer and punch.
Now, the full strut assembly should be able to be removed; carefully guide it down and out from under the car.
When you reinstall a spring and shock, you’ll have the whole coilover minus the top perch and associated hardware that will go above the top shock mount. The top perch (with three mounting bolts to the strut mount) should still be there if you haven’t removed it. Carefully guide the coilover into position.
Rotate the shock itself so that the lower mount hole lines up with the lower control arm opening.
Press up on the shock and move the LCA down so that the lower mount hole lines up with the LCA mount. Then insert the lower mounting bolt through and hand-tighten; you still torque this after the strut assembly is reinstalled.
Make sure the coil spring is rotated within the shock so that the top and bottom of the coil matches the top and bottom perches as shown below.
Now, get the floor jack into position so that when it jacks up the lower control arm, it contacts the very end of the LCA. This will be the same position in which you lowered the LCA previously with the floor jack.
Slowly jack up the floor jack and you will see the LCA begin to lift the shock assembly into place. Remember that prior to raising the whole assembly with the floor jack, the bolt that comes out of the top of the shock is sitting right below the level of the top strut mount. Therefore, when you raise the whole assembly with the floor jack, you need to do it very, very slowly with very slight increases in height.
As you do this, you can go back to the wheel well and make sure that you guide the top shock mount bolt through the top opening. If you don’t guide it through this opening properly, you’ll basically be pressing the top shock mount bolt right into the strut mount (not good).
Continue to slowly jack up the LCA (while guiding the upper shock mount bolt through) until you see the bolt start to protrude through the top strut mount. Make sure the floor jack is supporting the LCA securely without any possibility of it slipping off of the floor jack.
As you are jacking up the shock assembly, you are compressing the spring— again reintroducing danger of the spring’s energy. Be very careful. Also, check that the tips of the spring are still lined up with the top and bottom perches as you are jacking up the shock assembly.
You’ll need to get it jacked up enough to where there is enough thread to fit the remaining hardware: the top bushing, bushing retainer washer, and nylok nut. Fit these parts onto the upper shock mount bolt and then screw in the nut until you have full engagement.
Torque the center nut and the shock assembly is secured to the top hat.
Torque down the lower shock mount bolt/nut to the LCA.
The (2) lower ball joint to lower bracket nut needs to be reinstalled and torqued.
Finally, reinstall the front end links to the steering knuckle and hand-tighten these snug.
Repeat this for the other side of the vehicle and you’ve successfully completed the No Spring Compressor Method.
Make sure to torque all movable suspension components when the weight of the vehicle is on the axles. You don’t want to torque everything when the vehicle’s axle is drooped down. You want to do this when the vehicle weight is on the suspension. Lower the vehicle back onto the ground and begin torquing down all of the components.
Torque the lower shock to LCA nut/bolt down.
Torque down the front end links that you previously tightened snug.
The alignment cams should be in about the same position of where you marked them. This should be torqued down. Getting the alignment cam adjustment back to its original position allows you to safely run the vehicle to an alignment shop, where they can do a full alignment based on your new suspension components.
That completes the No Spring Compressor Method, which in my opinion is the safest way to handle diassembly and reassembly of shock assemblies at home. The safest choice overall is to have a shop handle this type of work, but if that is not an option this one works superbly.
Note to the reader: If you’re planning to make your own spring tool, we probably can’t stop you. We can show you what we’d do to minimize—but not completely eliminate—the chance you’ll end up becoming a ghost instead of driving a Phantom. If you’re the type that’s comfortable risking critical bodily harm to save a few bucks on a spring tool, however, keep reading….
If you’re a regular patron of my Hagerty columns, you know that I’m in the middle of a budget front-end refresh of my 1974 Lotus Europa Twin-Cam Special. This time around, I’m focusing on separating the shocks and springs.
There were two reasons why this task was required on the Lotus. First, one of the goals of the refresh was to evaluate the condition of the original shocks. I had performed the classic test to see if the shocks were seized or blown by bouncing the car at all four corners and checking that each corner moved and then stopped. However, the shocks were 45 years old, felt very soft, and I’ve been wrong before about the difference between “very soft” and “blown.”
This is a much better test: With the spring/shock assembly out of the car, remove the springs and then manually compress and extend the shocks. This allows you to directly feel if they’re blown or binding. The second reason was that, while I had things apart, I wanted to lower the nose via replacing the front springs if that was cost-effective to do so or cutting them if it wasn’t.
On nearly all front suspensions, whether a car has double wishbones and coil-overs like the Europa or MacPherson struts like my vintage BMWs, the springs are mounted directly on the shocks. To disassemble the pair, the spring must first be compressed. With MacPherson struts, there’s a housing with an integral bottom spring perch, and an upper perch plate and a bushing at the top that looks a bit like a man’s hat. The bushing contains a bearing, as the whole point of the design of a MacPherson strut is that it absorbs the shock as well as rotates when you steer the car. The top of the shock piston is threaded and protrudes through the center of the bushing. A nut holds it all in place.
On a double wishbone suspension, however, the shock and spring don’t directly interact with the steering, so there’s not the same hat-shaped bushing/bearing at the top. Instead, they’re configured like rear coil-overs with just the traditional rubber through-eye bushings at both ends of the shock. The spring is held in place with a retaining plate or collet that tightens as the spring presses upward on it.
In either case, in order to disassemble the shock and spring, you first need to compress the spring to release the pressure on whatever nut, bushing, or retainer is holding it in place, remove that piece, and then, in a controlled fashion, release the tension in the compressed spring. If you didn’t know what you were doing and simply undid the nut at the top of a MacPherson setup (and don’t EVER do this), the tension from the spring would suddenly and explosively release, and the nut, bushing, upper perch, and spring would violently eject themselves, possibly into your face. On a coil-over setup like the Lotus has, you’re prevented from that form of idiocy, as the spring must first be compressed to take the pressure off the slotted retainer, which is then withdrawn around the shock’s piston.
Now, compressing a spring does carry some risk. Those springs are beefy enough that they support the weight of the car without bottoming out. And you need to compress the spring even further in order to remove the nut or retainer. This creates the dangerous triad of A) an increased amount of stored energy, B) a configuration that’s inherently less stable than the assembled spring and shock, and C) having parts that are now unsecured and can act as projectiles if something goes wrong. For these reasons, you’ll often read that compressing springs is an inherently dangerous activity best left to professionals.
Of course, you can say that about any auto repair. With the proper tools and procedures, spring compression and removal can be performed safely, but if you jury-rig it, you’re courting danger. I’ve been wrenching on my own cars for 40 years, have pulled apart a lot of shocks and springs, and have never even come close to having a mishap. I don’t regard it as a binary “safe/dangerous” thing. I more think about it the same way I do jacking up a car and working under it—something with risk that needs to be managed with proper tools and practices. If you use a commercially-available spring compressor designed for your application, you’re on the safer edge of the envelope. Conversely, if you hastily jury-rig something using ratchet straps or, worse, hose clamps (don’t do either of these things!), you’re risking disaster.
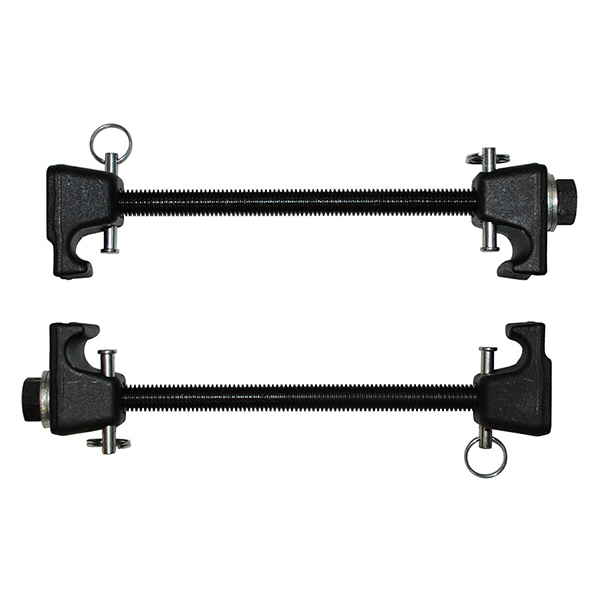
I have several different spring compressors. The first is the ubiquitous style with a pair of threaded rods, each of which have pronged “claws” at the top and bottom. You place one of them on each side of the spring, then tighten them evenly with a wrench or a socket on the nut at the top of the rod. Because, structurally, there’s not much to them, and because if they break or slip the results can be catastrophic, these claw compressors have gotten a bad rap over the years. The ones I own are probably 40 years old, high quality, American made, and the claws are plenty long enough to wrap around the spring and hold it. I see that some of the new ones now being sold address the slippage issue by having pins that lock the claws in place around the spring.
The second is a big mechanically-cranked plate compressor that resembles an old-style tire-changing jack with two twisted plates on it. You crank it open, insert the plates between the coils of the spring, and crank it closed, pulling the plates together and thereby compressing the spring. I use this one unless there’s some reason I can’t, such as the spring being too big or small to fit between the plates.
My plate compressor. Rob SiegelSo, imagine my surprise when, after removing the front coil-overs from the Lotus and laying them on the floor, neither of these spring compressors would work. Both had the same problem: The coils of the springs were too closely stacked together to get either the plates or the claws between them to grab and squeeze the spring.
I looked on several Lotus forums (as well as on Jaguar forums, as the skinny coil-overs on E-Types are similar) to see what spring compressors people use, and the answer was most surprising: Folks build their own. The favored design uses a pair of metal plates with a right-sized hole at each end to trap the spring but allow the end of the shock to pass through, and several threaded metal rods with nuts and washers to pull the plates together.
Now, I didn’t want to build a spring compressor. I was happy to pay for something that was the right tool for the job, worked quickly and efficiently, and was commercially available and thus presumably vetted for safety. Plus, I don’t have the means to cut that big of a hole in plate aluminum. In addition, as it happens, the two-plate design doesn’t easily work for Spax shocks where the perch and the collet are combined into a single retainer, as the thing the plate would be pushing down on would be the very thing that needed to be removed.
I asked for some advice from the owner of one of the Lotus parts houses I buy from, and he said that some folks report success using motorcycle spring compressors. Most of these are compact variants of the threaded-rod design with a single claw on both ends small enough to fit between tightly-packed springs.
An inexpensive single-claw motorcycle spring compressor with horrible reviews sold on Amazon. amazon.comHowever, when I read the reviews, I saw many comments like, “Junk; lasted for one spring.” Also of concern was the caveat that warned “For motorcycle springs only—not for ATVs or UTVs.” And here I was, looking at applying these products to something even bigger—springs on a car. Granted, the Europa is only a 1600-pound car, but still.
I bought a compact spring compressor I found on Amazon that reportedly was car-spring-capable and had small single claws. The reviews seemed to say that it worked fine as long as you don’t try it on large truck springs. Unfortunately, when it arrived, I found that even its small claws were too big to fit between the Lotus’ tightly-packed springs. I considered grinding the claws down with a Dremel tool, then thought better of it and returned it.
Stymied for a solution, I looked at dozens of videos on YouTube about homemade spring compressors. For motorcycle springs, many folks simply used a pair of ratchet straps looped through the coils and passed around a bolt through one of the eye bushings. However, anyone who has worked with ratchet straps knows that there’s not a controlled way to release the tension. One fellow demonstrated a very clever way of ratchet-strapping a coil-over to a floor jack, snugging the straps, then raising the jack to compress the spring. In theory, this has the advantage of allowing you to control the release of the spring tension by slowly letting down the floor jack.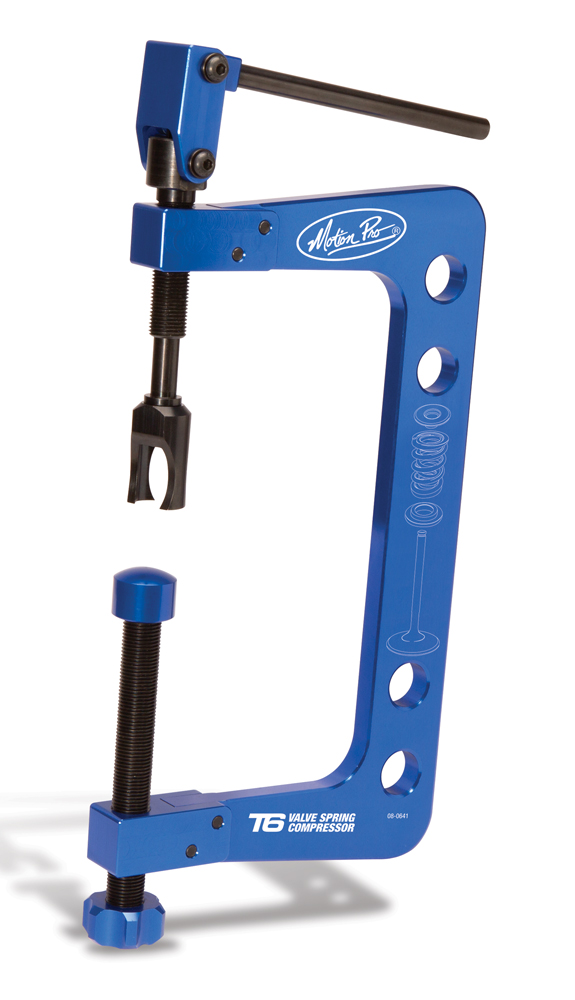 It was intriguing, but the Lotus’ coil-overs were quite a bit taller than those on a motorcycle, and I wasn’t convinced they could be centered, held upright, and balanced on the jack safely.
In the middle of all this, I was researching new shocks and lowering springs. I learned that the preferred route these days is to buy shocks with adjustable damping rates and height-adjustable spring perches so both the stiffness and the ride height can be tweaked. Unfortunately, the cost for such a set is about $1300, which was more than I was prepared to spend on my somewhat ratty survivor Europa. I found a guy on eBay selling a set of vintage Spax adjustable shocks with fixed perches and springs on them for $225 shipped. He agreed to a 14-day return period during which I could evaluate them and return them if the shocks were seized or blown or if the adjustable damping didn’t work. I figured that, for that price, it was worth it just for the adjustable shocks, and if the springs turned out to lower the car, it was gravy.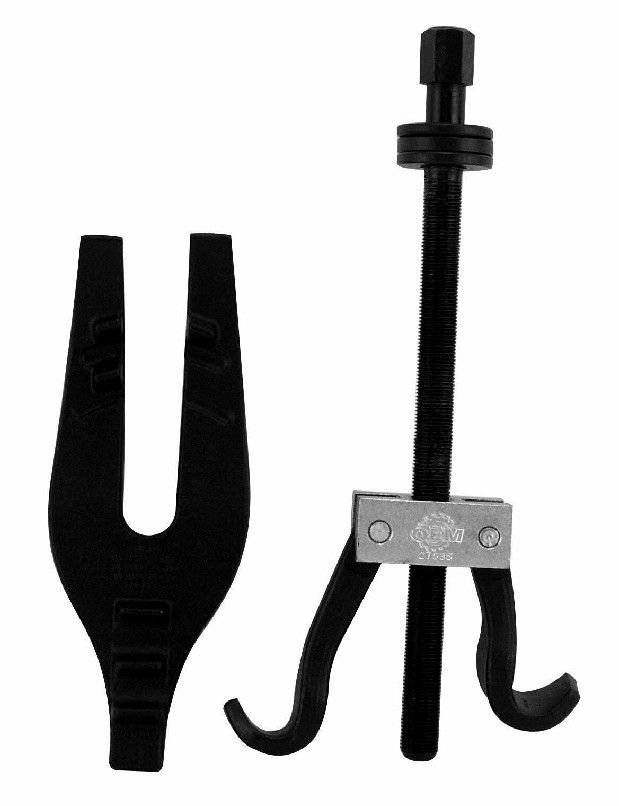 So I bought them, and when they arrived, I had 14 days to build a spring compressor and disassemble and test all four shocks.
I took one of the front shock/spring assemblies to a local hardware store and tried a variety of things, including turnbuckles—those devices with a right and a left-threaded hook where you rotate the body and the two hooks are pulled together. I found that a turnbuckle with a 4-inch-long body and 3/8-inch diameter hooks was about the right size to—when secured to the bottom of the shock with a threaded rod through the eye bushing—reach near the top of the spring. Unfortunately, the diameter of the 3/8-inch hooks was too big to fit between the coils.
That’s how tightly packed the coils are. Rob SiegelI found, though, that 3/16-inch S-hooks were just small enough to fit between the coils. I could then grab the other end of those with the turnbuckles. I bought what I needed, took my treasure trove home, and went to work.
At this point, my inner lawyer is yelling at me to tell you A) not to build a spring compressor at all, and B) not to build one using hardware store-bought components with an unknown weight rating. In my defense, the components I bought were stainless steel and were purchased from the rigging-related hardware section (that is, the S-hooks weren’t for shower curtains). If I had to do it again, I’d figure out what I needed, order proper weight-rated components from McMaster-Carr, and use threaded carabiners (“quick links”) instead of S-hooks. And, again, I stress that the larger context of this was that I could not find a workable commercially-available compressor, and the one recommended by a Lotus parts supplier had horrible Amazon reviews explicitly stating that it failed.
I laid everything on the floor and gave the turnbuckles and hooks a few test-tightenings, compressing the spring to the point where the retaining plate was loose, then backing off.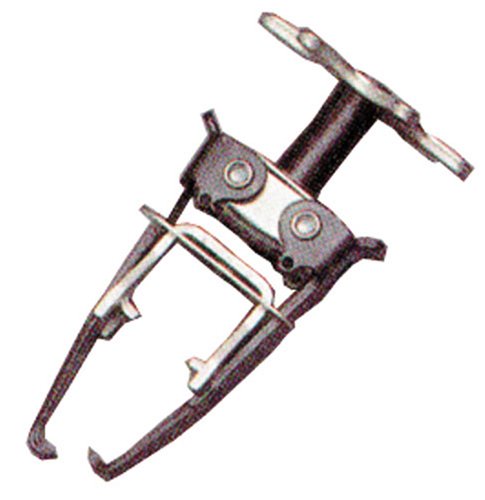 I looked for bent components and found none. The only issue was that the hooks tended to slide unevenly down the incline of the coil spring, causing the spring to twist and tilt, which threw it off center and made it difficult to remove the retainer.
I solved this problem by clamping a small Vise Grip on the downward-facing side of each hook to prevent it from sliding. After that, it worked perfectly. Taking great care to never have the compressed spring aimed at any part of my body, I was able remove the retainer, unscrew the turnbuckle, and remove the spring.
The spring compressed enough to withdraw the retaining plate from around the shaft. Rob Siegel And out. Rob SiegelWhen I tried the turnbuckles and hooks on the rear assemblies, though, there was a problem: The rear springs were much longer, so the turnbuckles weren’t able to reach the tops of the springs. I extended them with lengths of chain. That allowed reach, but the 4-inch body of the turnbuckles didn’t allow for enough spring compression. I found that temporally inserting a rod through the upper eyelet to trap the partially-compressed spring, removing the chain links, and tightening the turnbuckles further solved the problem. To release the tension from the spring and remove it, I needed to do the same thing in reverse.
I photographed my home-engineered turnbuckle-and-hook-based solution and posted it on Facebook. An acquaintance who works at one of the two Lotus parts houses in this country commented “Well done. That’s how we do it at the shop.”
The little compressor saw quite a bit of use, as I needed to disassemble not only all four original shocks and springs to satisfy my curiosity (one of the rears turned out to be so soft as to effectively be blown) but also to test the four used Spax shocks I’d just bought (all were fine, and the adjustable damping appeared to function). Before I use it again for reassembly, I’ll buy some 3/16-inch threaded carabiners (“quick links”) to replace the S-hooks.
To summarize: In my opinion, spring compression is not a binary safe/unsafe thing. If you have any doubt regarding its safety, don’t do it; just pay someone. But the point is, you can buy a new spring compressor with poor reviews, try to use it on a spring that’s bigger than what it’s designed for, and have it break and injure you. Or you can select one with good reviews, use it carefully for its intended application, and probably be fine.
In my case, I felt I had no choice but to build my own. But whatever else you do, remember this: Test it, go slow, look for bent parts, and never aim a compressed spring at any part of your body!
***
Rob Siegel has been writing the column The Hack Mechanic™ for BMW CCA Roundel magazine for 33 years and is the author of five automotive books. His new book, Resurrecting Bertha: Buying back our wedding car after 26 years in storage, is available on Amazon, as are his other books, like Ran When Parked. You can order personally inscribed copies here.
Podolsk,
15 km Simferopol highway To contacts
#enduro #tuning #Pendant
4 years ago
TheRacetech Gold Vavle is an affordable way to customize your fork and add progressive compression. Together with the valve, it is recommended to change the spring selected for the appropriate parameters. This modification significantly increases the efficiency of the suspension. When upgrading brakes, this is a must-have upgrade that allows you to use them to the maximum.
We have already installed a similar valve with a spring in the shock absorber - there is a separate article about this. In the shock absorber, compression and rebound are adjusted by selecting the appropriate washers. In the fork - only compression, and the rebound remains standard, and is regulated by overlapping channels by rotating the adjusting screw in the top plug. Fine adjustment of the rebound is carried out by the selection of oil. Due to the fact that the Racetech valve is adjustable, it is possible to maintain compression work with different oil viscosities.
 In any case, it is better to bleed the pipes and damper according to the manual.
 In general, the procedure is simple, and you can do without special tools. Different forks use a different number of spacers and different thrust bushings, but fundamentally the assembly is no different. You can buy Racetech products in our motorcycle shop stuntexshop.ru
Motorcycle Fork Tuning WR250X
38 961
Recommend
Magazine Training for beginner stunt riders Magazine Training Motocross Enduro - Video School Magazine F4i ZX6R R6 CBR GSXR stunt bike review French Stunt Romain Jeandrot
Have you ever read an article about ATV or Side-by-Sides and come across completely unfamiliar terminology? But what if you knew, let's say, that they are only about the thermohydraulic dissipation of kinetic energy? If this knowledge doesn’t make it easier, then it’s time to really understand the issue.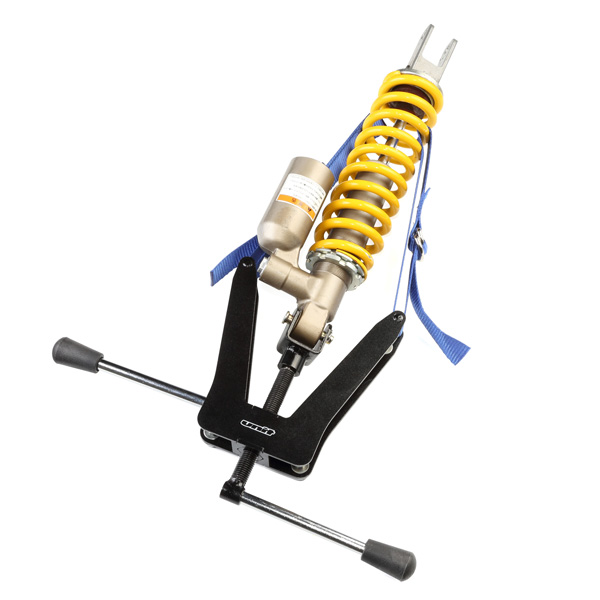
From the very first day, when you are just starting to study the chassis and suspension of your new “iron horse”, it can be easy to confuse a lot of new words and unfamiliar terms that seem to be familiar to absolutely everyone around. Moreover, knowledge (or not knowledge) of this terminology can help you improve your car (or, accordingly, achieve the opposite result). It’s worth understanding it in order to at least find the right suspension settings for your ATV or ATV.
So, in this article you will find a brief "dictionary" of key terms. Armed with new knowledge, you can unleash the true potential of your machines.
First, let's try to get acquainted with the types of settings and their names.
Spring preload: is the pressure setting (or preload) on the shock spring. A large number of basic shock absorbers have only this setting function. This adjustment is made using a female threaded ring on the shock body and a locking ring, which gives more adjustment possibilities, or a five-sided ring, the settings of which are limited to these five levels. Increasing the pressure makes the ride harder and increases the vehicle's ground clearance. Loosening the preload makes for a smoother ride, but can cause the car to hit the bottom of the track.
This photo of a FOX shock shows how to preload the spring using the female ring on the top of the spring (turn clockwise).
Compression adjustment: this setting controls the movement of the rod in the shock body. There are two types of compression: slow and fast. There are two types of compression adjuster: adjusting knob or slotted screw head. These regulators control the flow of fluid into the damper. If the shocks compress too fast, you need to slow down the flow rate, if they are too stiff, you can speed it up. With strong compression resistance, breakdowns after a jump are prevented, the car behaves better when passing large irregularities. As for low resistance, the situation is reversed, the car will perform well when passing small bumps in the track, but strong jumps can cause problems.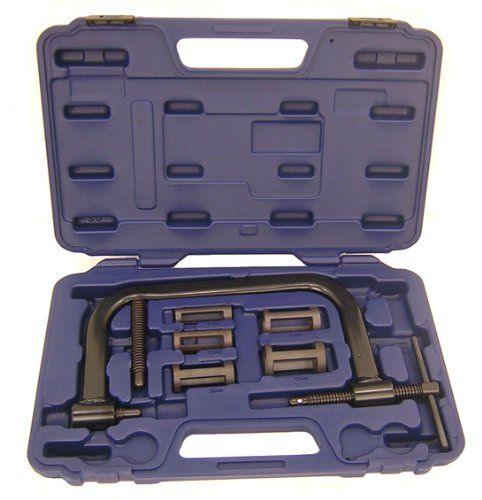 This setting is especially relevant for ATVs and ATVs, with it you can control the suspension when passing uneven terrain, make jumps.
At this point, the driver can only hope that the shock settings are tight enough.
Rebound: this is the speed with which, after compression, the rod returns back to its original state - the one that was before compression. This setting controls the speed of this bounce. This will give you more control over your ATV or Side-by-Side as this setting ensures that the wheel is always in contact with the ground. Adjustment is carried out using a slotted screw or ring, which is twisted at the base of the shock absorber.
After the situation with the settings has become more or less clear, you can proceed to the study of the most common terms.
ground clearance: is the suspension height measured with a fully equipped driver and his equipment in the car.
Sag under weight (cars): this term defines the sagging of the suspension under the own weight of the car, without a driver.
Even the ATV's own weight (without rider) compresses the suspension slightly. This is called weight sagging.
Sag or Driver Weight Sag: this is the data on the full suspension travel when a fully equipped rider sits in/on the vehicle in the starting position. Usually, this value is 30% of the full suspension travel.
Pogoing: this term is used when the spring reverses too quickly due to certain settings and the shock absorbers, most often the rear ones, get the car's rear suspension out of control.
There are many varieties of shock absorbers - for every taste and budget.
Standard fixed: these are gas-filled shock absorbers that can be seen in budget models of ATVs. They are not regulated.
Spring preload: such a shock absorber can be found in sports cars for beginners or utility ATVs. The preload is usually adjusted by tightening the adjusting nut or loosening it.
With compression adjustment: often found in sports cars, such a shock absorber is most often equipped with a spring preload function. Such a shock absorber can be produced both with a nitrogen tank located on the side and without it.
You can see the pressure adjustment knob located on top of the King's piggyback receiver.
Compression and rebound adjustable: this type of damper will be fitted with a separately attached piggyback receiver or nitrogen tank. They will also feature preload rings, compression and rebound adjustment knobs. This shock will give the rider maximum customization options.
Pneumatic dampers: Air springs have been on the market for a long time, and the FOX brand has become one of the leaders in the industry.