When you’re out playing with your ATV in the mud, a tire de-beading from the rim will put a quick stop to your weekend fun.
Ordinary wheels rely on tire pressure to keep the tire seated on the rim. But when you are in the mud, you need all the traction you can get.
And as you probably know, your traction, as well as flotation, will improve drastically when you drop the pressure in the tires down to almost nothing.
The problem with this as it increases the risk of your tire de-beading as well. The solution to this problem is upgrading to Beadlock wheels.
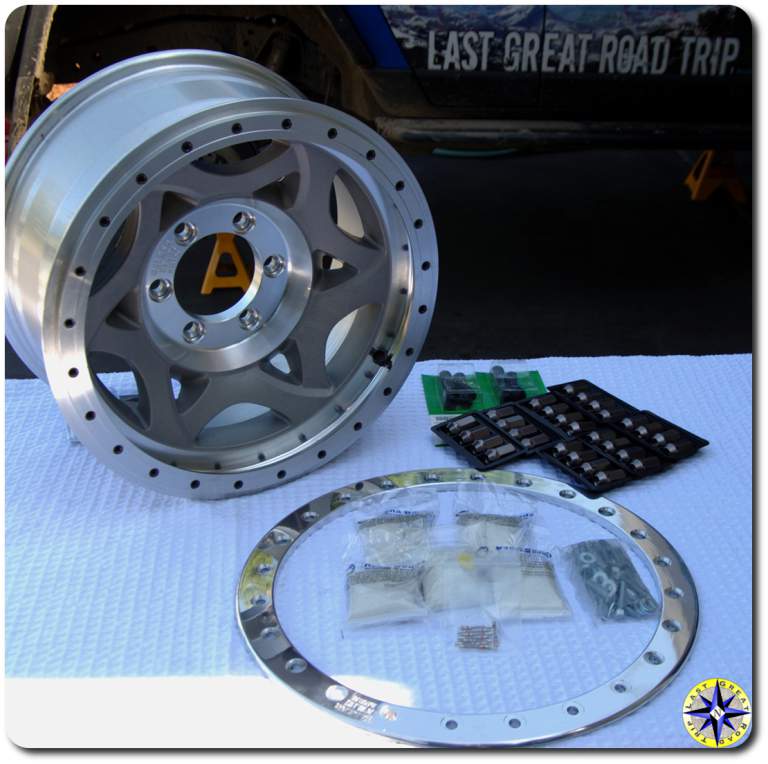
But how does ATV beadlocks work? ATV beadlocks work by clamping the bead of the tire to the wheel. The tire bead is placed between an inner ring welded to the rim and an outer clamp ring. Both of which span the whole circumstance of the wheel. Many small bolts are used to force the two rings together, sandwiching the tire securely in place.
This will prevent the tire from dismounting or spinning on the wheel when you ride with lower tire pressures for better traction.
For most ATV riding, you will be perfectly fine, even if you drop the tire pressure on your stock wheels.
Most ATV tires’ walls are quite stiff, so that they will hold up quite well even with no air in the tire.
At the same time, an ATV is relatively lightweight compared to, let’s say, a Jeep. So for ordinary, “light” off-road riding, you should have no issues.
But as soon as you go a bit more extreme, where you land big jumps or hit rocks and stumps on the sides of the tires, they may not manage to keep the tire in place.
Because as I mentioned, an ordinary wheel relies on air pressure to hold the tire in place on the wheel. The air forces the tire to the outside lip of the wheel, making an airtight seal.
The friction between the tire and the rim, caused by the air pressure forcing the two together, prevents the tire from spinning on the rim when you apply throttle or brake.
When the pressure drops, there will be less force keeping this seal airtight. Therefore, it will require significantly less of an impact to break the seal and dismount the tire from the wheel.
The beadlock wheels come with some extreme benefits, as well as some rather extreme disadvantages. Make sure you consider all of them up against what kind of riding you plan on doing before you run over to the store with your hard-earned cash.
Most off-road applications like riding in mud, sand, snow, or even rocky terrains can benefit a lot from deflating the tires. It’s in situations like these is where beadlocks come to shine.
These wheels do not rely on air pressure to function as the locking rings mechanically hold the tires. You get the benefits of a deflated tire without the added risk of it dismounting from the wheel.
The lower air pressure will increase the tire’s footprint (the area touching the ground), creating both better traction and flotation in the slippery mud or snow.
And when rock-crawling, you also benefit from the sidewall becoming more pliable. This lessens the chance of a sharp rock puncturing the tire’s sidewall as it will rather flex around the rock.
Additionally, you get the bonus of a more comfortable ride when riding on rough terrain. The tires will act more like balloons or bouncing balls as they soak up most of the small bumps and humps you run over.
This is only at low speeds tho. Running with little air pressure at high speeds can be downright dangerous as the bike is dancing around.
In quad racing, beadlocks are often used to keep the tire in place when landing huge jumps and to keep it from spinning during hard acceleration or deceleration.
Beadlocks have their place in quad racing.People in the drag-racing scene are also often seen using beadlocks. However, these riders do not use them because they need to run with low pressure in the tires.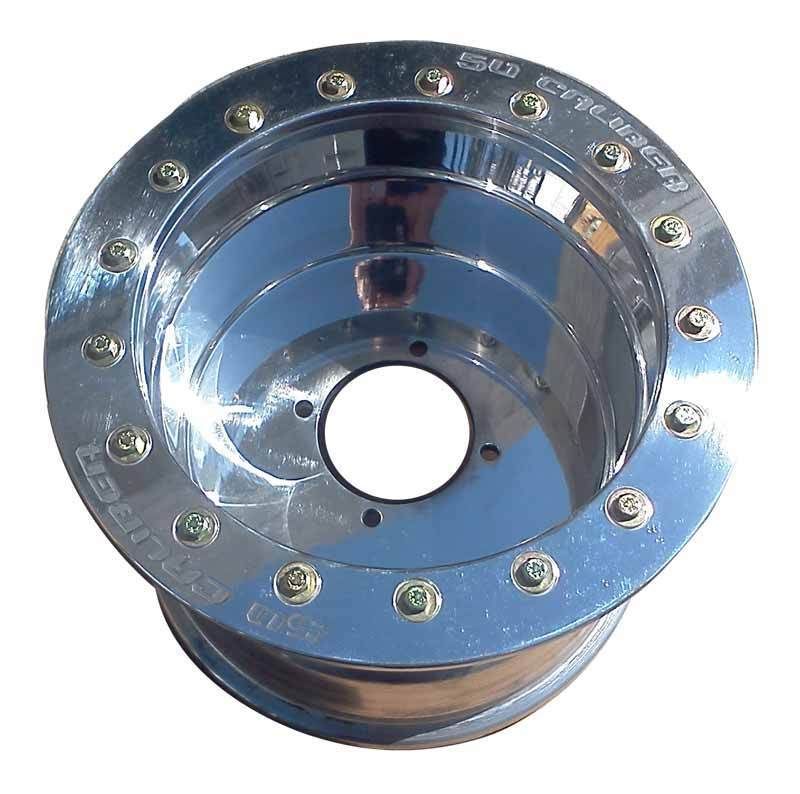
They mainly use them to prevent the tire from spinning on the wheel when the clutch is dropped, and the bike sets into extreme acceleration.
When the engine horsepower gets 2-3 times higher than stock, the air pressure alone is not enough to prevent the tire from spinning on the wheel, even when using higher air pressure levels.
The beadlock will take up some of the hp because of its added weight, but the benefit of getting all of the power down to the ground is what matters in this game.
And then, finally, there is the aesthetic aspect of things. Many riders consider getting these wheels simply because they look so friggin’ cool, without actually needing them for any practical purpose.
Aside from functionality, they sure make the wheel pop!And hey, who am I to judge. Beadlock do lock quite trick, even though looks were probably not what the original inventors had in mind.
That’s why the market of beadlock “look-alike” rims has exploded lately. These wheels have the characteristic outer ring with all the small bolts but do not feature the possibility to clamp the bead in place (locking the bead – hence the name; beadlocks).
So why is not everyone just using beadlock rims then? Well, they do come with some pretty bad downsides, making them not the best option for all riders.
Let’s have a quick look at the most important ones so you can decide if they are something for you after all.
Getting a set will set you back quite a bit more than ordinary rims. The added complexity of manufacturing them combined with a lesser market do put them in the higher price range.
You should expect to pay anything from 1 1/2 to 2 times the price of a conventional set.
The added weight is not always a downside, but you should know that these wheels generally weigh quite a bit more than conventional wheels.
The inner and outer ring combined, plus the small pile of bolts, will add up quite a bit.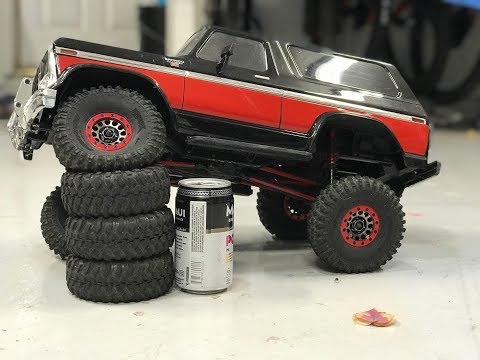
The added weight will affect acceleration, deceleration, and general handling of your ATV. It will also put additional strain and wear on the different components of the undercarriage of the bike.
Properly balancing a beadlock wheel is close to impossible, even when the wheels are brand new. You may manage to get them decent, but some vibration is to be expected in any case.
You will also get dirt trapped between and behind the locking rings as you ride, making the ATV pretty much useless on the trails where speeds are higher. The whole bike will vibrate increasingly more violent as you catch speed.
To get the balancing back to an acceptable level, you may need to completely dismount the tire from the wheel for a thorough cleaning before you put it all together again.
Remember to use the specified torque when tightening the bolts on the locking ring. This is crucial to get a good result and a mistake that many new beadlock owners have to learn the hard way.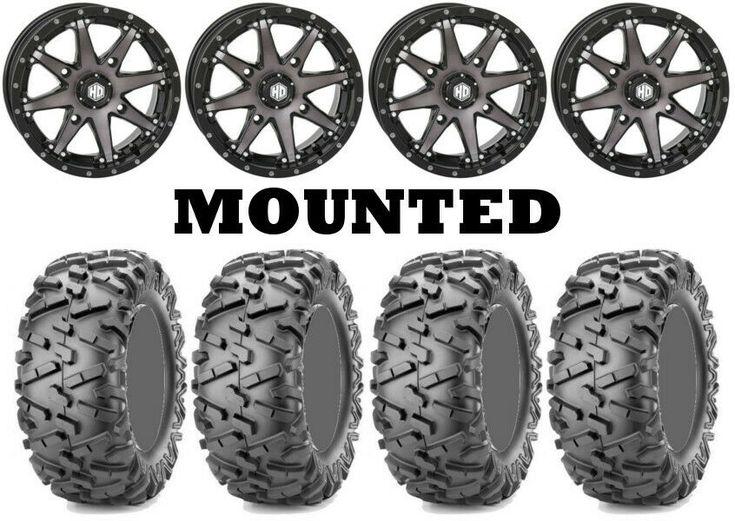
Related: Do You, Can You, and Should You Balance ATV Tires? Best Way?
Beadlocks do require more maintenance than conventional rims.
Except for cleaning when things get stuffed with debris, you need to make sure the locking bolts are properly tightened to the specified torque at all times. Ideally, you should go over each wheel before every other time you go out to ride.
Failing to do so will result in bolts coming loose and falling off, one by one.
If you lose more than a few bolts, the tire may actually come undone, creating a potentially hazardous situation if this happens at higher speeds.
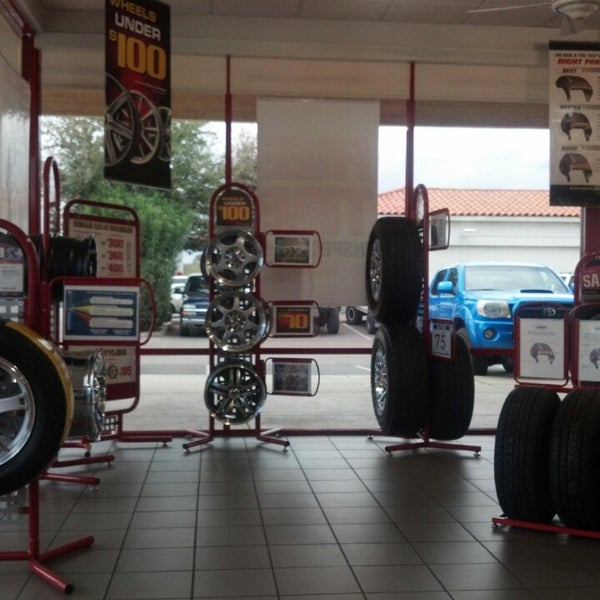
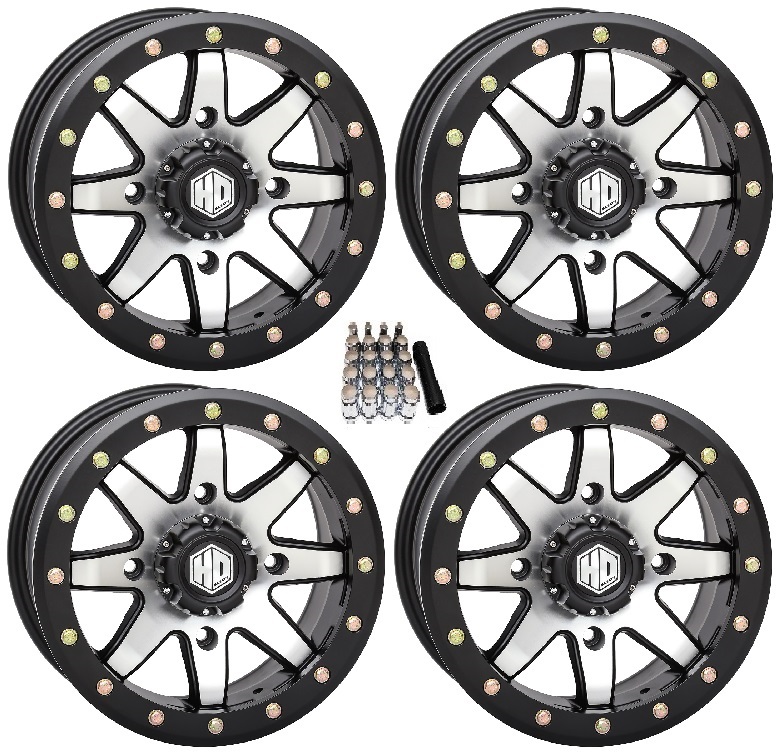
There are many different variations of the beadlock wheel available on the market today. The most common type is where locking rings are fitted to only the outside of the wheel.
Typical ATV beadlock wheels.This is because the outside bead of the tire is much more prone to involuntary de-beading than the bead on the inside.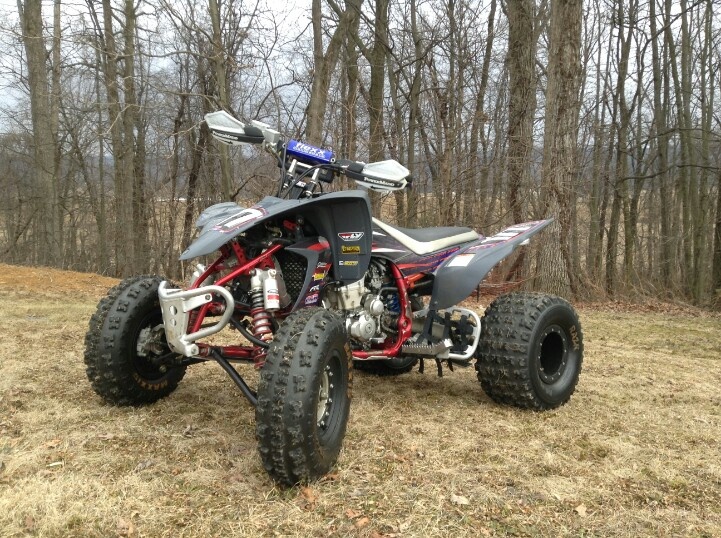
For the most extreme applications, you can also get beadlocks that feature locking rings on the outside and inside the wheel.
This makes for a practically bulletproof setup, but you do run disadvantages like additional weight, cost, and maintenance. Also, these dual-sided beadlocks are quite a bit harder to mount than the one-sided type.
For ATV’s the beadlock wheels typically run in the range from 10-16″, where 14″ is most common. For quad racing, the smaller size wheel and tires are typically preferred.
If you’re in the market for new beadlocks, you should look for a set where the bolt heads are lowered into the ring as this greatly reduces the risk of knocking off boltheads when hitting rocks, etc.
The ring thickness is also a good indicator of the quality of the set you’re looking at. A thicker ring will handle more brutal impacts and are less prone to wearing down prematurely.
Related: Are ATV Tires Tubeless? Tubes vs. Tubeless (Pros and Cons)
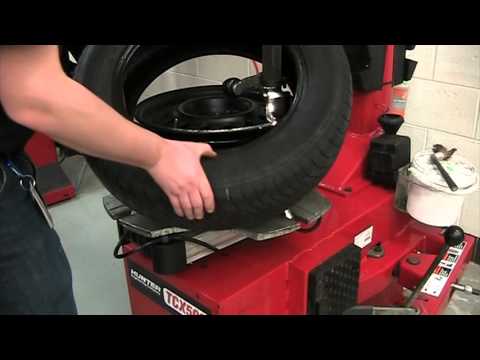
— Beadlock wheels not only look trick, they serve a purpose. To get maximum traction out of your tires, beadlocks allow you to run lower air pressures without the risk of a tire rolling off its wheel. High-horsepower drag quads may also need the beadlocking protection to keep tires from spinning on the wheels after the clutch is dumped. We have seen it happen. In the event you do get a flat tire from a puncture, a beadlock will hold your tire onto the wheel, ultimately letting you finish a trail ride safely or even win that race. Following is a simple step-by-step guide on how to install a tire onto a beadlock-equipped wheel. No tire machine required! The staff of OMF Performance was consulted for this article. To see their complete line of beadlock and complete wheels, visit them online at www.omfperformance.com or you can call directly to (951) 354-8272.
STEP 1:
The first thing you will do after you unpack your new beadlock-equipped wheel is remove the ring from the wheel. With the ring removed, clean the new welded-on bead mounting shoulder and make sure all of the bolt holes are clear of debris.
STEP 2:
Push your tire over the new wheel with the beadlock side facing up. You may want to use some silicon spray or soapy water around the inner bead to help it slip over the new wheel. You should be able to do this without using tire spoons. Do not use grease, as it can make the inner bead slip off too easily when in use.
STEP 3:
With the tire over the wheel, position the edge of the tire bead next to the welded-on mounting surface. The tire will not sit flush in the corner of the two lips. Refer to the cutaway photo of what a properly installed tire looks like sandwiched in a beadlock.
STEP 4:
Before installing the hardware, lubricate the beadlock bolts with anti-seize or equivalent lubricant to prevent galling of the threads. Then by hand, start all of the bolts. Finger-tighten them all the way around the beadlock. Make sure the tire is staying centered around the wheel.
STEP 5:
Now in a crisscross pattern, using a small wrench or T-handle, lightly tighten each bolt. Again, make sure the tire stays centered around the wheel. Every bolt will tighten with the same amount of force. If one doesn’t, it is cross-threaded or the tire bead has moved inward of the mounting surface. Impact wrenches are not recommended for installing or tightening bolts, due to the possibility of over- or undertightening.
STEP 6:
When all of the bolts are hand tight, inspect the bead of the tire and see that it is equal all the way around the beadlock ring. On this Kenda tire there are two parallel lines circling the tires bead that we used for a reference.
STEP 7:
Using a torque wrench, again in a criss cross pattern, tighten all of the bolts to (10-12 foot pounds on a 8, 9, 10, or 12-inch wheel, and 20-22 foot pounds on a 14-inch wheel.) We generally work them down in steps. On a 8-12-inch wheel we go to 4-6 foot pounds first, then 10-12 foot pounds to finish.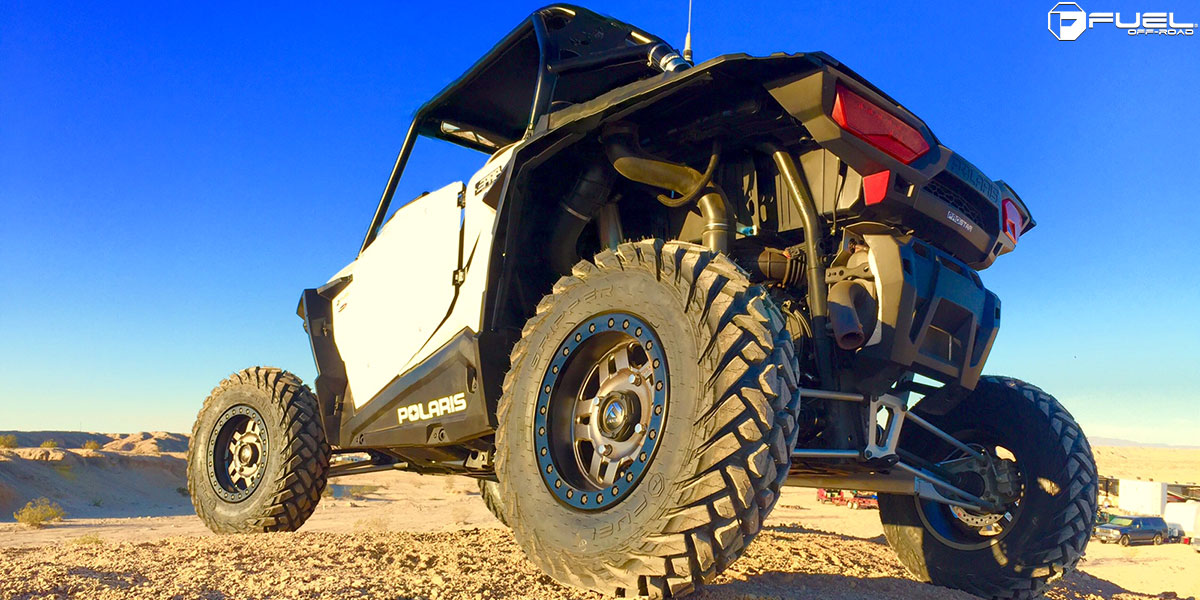 On the 14-inch we do 6-8, the 12-14, and lastly 20-22 foot-pounds.
STEP 8:
To get the inside tire-bead to seat on the rim, apply a liberal amount of silicon spray or soapy water around the bead. With a decent air compressor, you should be able to air up the tire and pop the tire bead on to the rim. Never exceed the maximum seating pressure molded into the side of the tire. Also for safety, we cover the tire and wheel with a large, heavy blanket when seating the bead, in case of a tire, wheel or valve stem failure.
ATVBeadlockDirt WheelsHow-ToMounting Beadlock RimsQuadSport QuadTrail Quad
ATVs are stolen even from garages in the yards of private houses and from guarded parking lots. The risk of theft increases if you post photos on social networks in front of where the ATV is stored, especially with geographic coordinates - this happens if you do not turn off the geolocation function.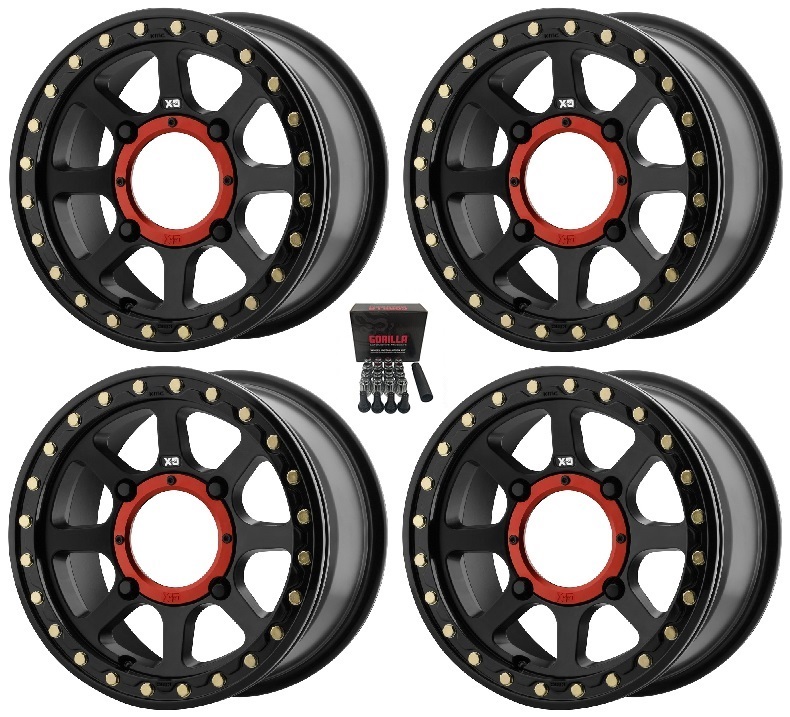
To protect against theft, owners use cables, chains, locks, immobilizers and alarms. GSM beacons help find equipment. Which of these is effective and what to do in case of theft - we will tell in the article.
Steering lock . When the ATV is moving, it rests on the frame or suspension. It can only be removed with a key, which is unique for each lock.
Chain . Allows you to tie the ATV to a tree, fence or other stable object. The optimal chain thickness is from 12 mm.
Rope . An analogue of a chain, but it is easier to cut or bite. The strongest cables are with steel cylinders under a plastic coating.
The listed remedies are only part of the protection: they will delay the hijacker, but they will not prevent theft. In addition, you can put marks on the main components, so that in case of theft it would be easier to identify the ATV.
Immobilizer. Blocks the engine when trying to steal. After installing the immobilizer, to start the engine, you need to enter the secret code from the standard buttons or have a key fob with you - depending on the model.
Alarm. The siren is triggered if the electronic sensors detect an impact, tilt, push, movement, opening the case or turning the ignition key. The alarm system must be with feedback - in order to receive notifications on the key fob or SMS messages on the phone. Since thieves use devices to jam the GSM signal, it is better to buy a model that periodically sends coordinates notifications to the server - if the information is not received, the server will inform the owner about it.
Lighthouse. Device with GPS/GLONASS receiver, GSM module and batteries inside. Sends the coordinates of the location of the ATV to the owner. In the standard mode, it turns on 2-3 times a day, so it is difficult to find it with a field indicator. It is advisable to put 2 beacons - both are unlikely to be detected.
Immobilizer, alarm and beacon are combined with each other and can be part of a single security and search system. One of the most effective is Cesar Moto X from Cesar Satellite. It monitors the coordinates of the ATV in real time, and in case of a hijacking attempt, it sends a signal to the monitoring center. A few minutes after the discovery of suspicious activity, a rapid response team arrives at the scene. The system is not afraid of water and does not discharge the battery, and you can control it from your smartphone.
If the ATV is insured only against theft, the money will not be paid until the criminal case is closed. Therefore, the risk of theft must be specified in the contract - so that compensation can be obtained even before the opening of a criminal case.
Documents for issuing a CASCO policy:
Unlike OSAGO, the CASCO contract is not public and is concluded by mutual agreement of the parties. This means that the insurance company may refuse to issue a policy for any reason. The risk of failure is less if the ATV is new, with an anti-theft system and does not have significant damage.
Garage burglary protection:
This will not provide complete security. That's why you need to install an alarm.
Autonomous GSM alarm system .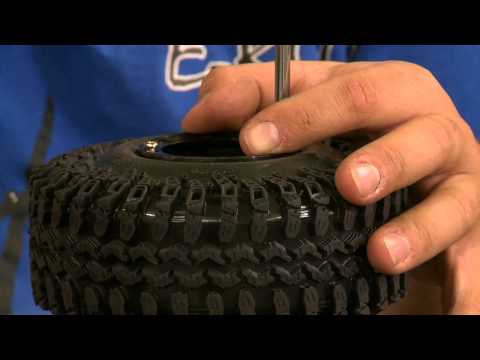 It has a built-in power supply, turns on the siren when you try to hack and sends SMS messages to the specified numbers. The downside is that the police will have to be called on their own, and how quickly they will arrive is unknown.
Private security alarm . This is a security system that sends a signal to the central monitoring station. The operator sees that an alarm has gone off at one of the facilities and sends a crew there. The arrival time of the rapid response team is from 4 minutes.
Brief action plan if the beacon was not installed on the ATV:
Most likely, after the announcement of the theft is published, scammers will call and demand a reward for the exact address of the vehicle's location. It is easy to figure out the deceivers - they will not be able to name the exact signs of the ATV and send a photo. The chance of running into scammers is higher if the frame and engine numbers are fully indicated in the ad - they will be used as evidence.
After calling the police, a district police officer will come and take a statement. Then you need to go to the precinct to complete the application. You will need a passport, PTS, STS and keys.
You need to get from the police:

If the ATV is insured under CASCO, you need to go to the office of the insurance company and fill out an application for theft. At what time is specified in the contract. You will need:
Usually CASCO money is paid out in 2-3 months.
To protect the ATV from theft, you need to tie it with a thick chain, put a lock on the steering shaft, install an alarm with an immobilizer and a beacon and issue a CASCO policy. It is desirable to equip the garage with a security system. You should not photograph equipment near the house or garage and use the geolocation function when shooting.
Photo avtovzglyad.ru
gearboxes suspects even the most irresponsible ATV owner. But what to do with the undercarriage of an all-terrain vehicle, so that it faithfully serves for many, many seasons, even hardened lovers of mud are not always known. The portal "AutoVzglyad" will help to understand the problem.
Dmitry Zlenko
The chassis of an ATV can, by and large, be considered a consumable item. Some manufacturers make parts and assemblies with a large margin of safety (for example, to make a hodovka on a Yamaha Grizzly, you need to really try), others deliberately underestimate the resource life in order to force brand fans to visit dealer service centers as often as possible.
Chinese, Russian and some American manufacturers especially sin with such a "customer-oriented" approach. Meanwhile, in order to extend the service life of even a not very hardy walker, it is enough to regularly service it even with inexpensive, but extremely effective means.
Photo avtovzglyad.ru
Let's start with the suspension arms. If there are silent blocks in them - levers, then nothing needs to be serviced here, we just ride until the silent blocks are "tired". But much more often, quadric levers work on pressed plastic bushings, inside of which there are spacer metal bushings.
When driving through mud, water with small fractions of sand inevitably gets inside this structure, and the plastic bushings begin to wear out, and the metal bushings begin to rust. To prolong the life of the suspension arms and knuckles, after each ride, these components must be injected with grease. And best of all, as practice shows, this should be done with the help of high-temperature grease for LM 50 Litho HT bearing hubs. It is clear that temperature anomalies do not occur in the bushings of the suspension arms, but the beauty of the drug is that it is universal: that is, this “gel” can process both bushings of fists and suspension arms, as well as driveshaft crosses and wheel bearings.
It should be noted that LM 50 Litho HT absorbs impact loads well, adheres excellently to the surface, and is highly resistant to water. The temperature range of its use is from −30°С to +140°С. And do not forget that regular maintenance of the walker not only prolongs its service life, but also guarantees your safety. After all, a wheel that has fallen off at speed or a wheel bearing that has become wedged is not such a rare occurrence for ATVs.
Photo avtovzglyad.ru
Photo avtovzglyad.ru
True, to do this simple procedure is oh how difficult. Since bolts with a nut tend to rust, sometimes the threaded connection will turn sour so that the wrench will break rather than the nut will break off. Another product from Liqui Moly will relieve such torment - a rust solvent with molybdenum disulfide MoS2-Rostloser.
This spray is specially designed to remove rust and facilitate the subsequent dismantling of threaded parts in cases where the threads are damaged by corrosion. The agent perfectly dissolves iron oxides and has a high penetrating power. And a special substance, molybdenum disulphide (MoS2), provides lubrication to the threads, which levels the presence of damage caused by corrosion on it. To unscrew the soured rusty nut, just pop on the connection, wait a few minutes and take the keys. By the way, MoS2-Rostloser, among other things, protects the parts treated with it from corrosion. A very useful tool for any country garage, because it is useful not only for the repair and maintenance of an ATV.
There are such components in ATVs and UTVs that, on the one hand, need care and lubrication, but on the other hand, the use of “greasy”, non-drying compounds is not allowed, since this will stain riders' clothes. For example, ATV seat locks, buggy door hinges, UTV pedal assemblies. But for knowledgeable people, this, frankly, is not a problem.
Photo avtovzglyad.ru
Photo avtovzglyad. ru
So, in the Liqui Moly product line there is a dirt-repellent white grease Wartungs-Spray weiss. The agent forms a lubricating layer to which dirt, dust and moisture do not adhere. And what's more: it prevents the formation of rust in the places of application, prevents the formation of so-called frictional corrosion. The resulting soft layer of non-sticky lubricant tightly “clings” to the contact point, reducing the friction of parts and protecting, among other things, from freezing of parts.
A logical question: is it possible to treat ignition locks with this lubricant, because, after all, moisture also gets into them and the larva eventually becomes completely unusable. In principle, nothing bad will happen to the castle, but white stains around will hardly please. And if you consider the ignition locks of BRP ATVs, into which keys with chips are inserted, then the use of such a composition can, in theory, prevent normal reading of the code.
In fact, for the maintenance of ignition locks and other contact areas where a non-tacky lubricant is needed and oil or silicone compounds cannot be used, Liqui Moly has developed a PTFE-Pulver-Spray Teflon Spray. It forms a dry, transparent and at the same time water-repellent layer on rubbing surfaces, to which dirt and dust do not stick at all. PTFE-Pulver-Spray is free from oils, fats and silicones and is neutral even to sensitive plastics and rubber. It's a little expensive, but the investment, as they say, is worth it ...
Photo avtovzglyad.ru
Photo avtovzglyad.ru
Another chemical composition useful for a country garage is a colorless silicone grease Silicon-Spray. Used to lubricate contact areas containing plastic or rubber parts.
Liqui Moly Silicon-Spray eliminates plastic squeaks (especially true for quadrics, because all of their bodies are made of plastic, which eventually begins to make extraneous sounds as a result of friction of one part articulated with another. In addition, the product protects rubber and plastic parts from drying and exposure to ultraviolet light.
Photo avtovzglyad.