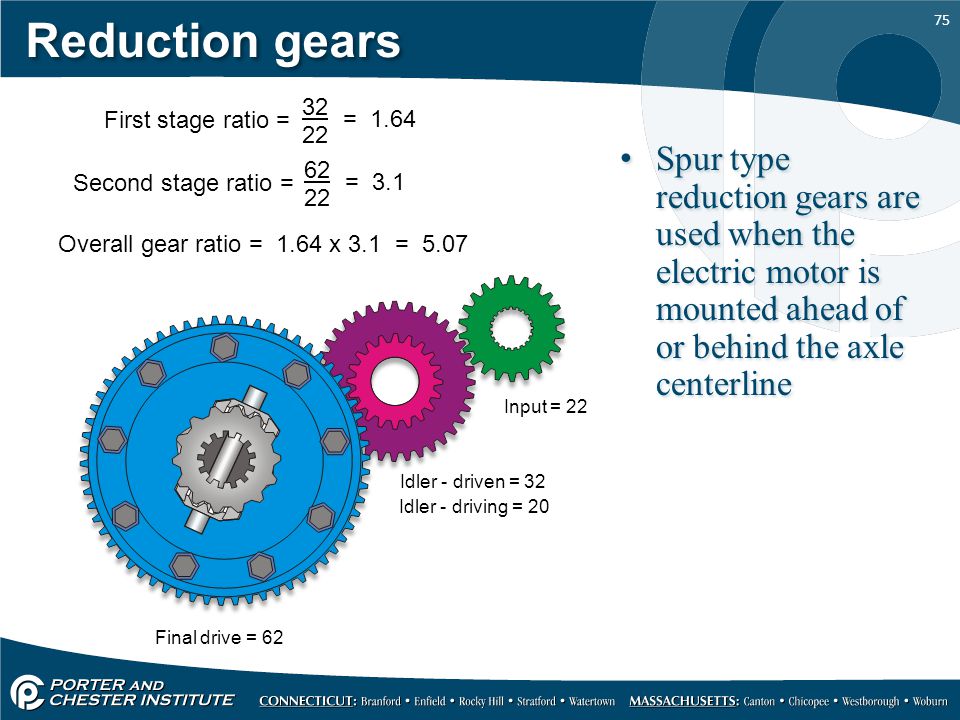
GDP Portal Gear Lifts give you a lift and a gear reduction in one package, and they let you choose between a 15%, 30%, and 45% gear reduction. That’s a lot of choices! And you might have some misconceptions about what a gear reduction really does or why you’d want a small gear reduction instead of a huge gear reduction.
Never fear! We’re here to answer some common questions about this mystical force that lets your cousin ride like a pro, but leaves you getting winched out of the mud. We’ll help you understand why gear reduction is important, why you might need it, and how you can get it. Spend some time reading now, and you will be talking ratios and torque with the best of them later.
Why Should I Care about Gear Reduction Ratio?You should care about gear reduction because it helps to create more torque.
Ah, torque.
Here’s another word most of us claim to understand, but just in case you don’t—allow us to explain it. Torque is the amount of power that your engine produces to turn your tires. Simply put, the more torque your UTV can produce, the easier your engine can turn your wheels (which leads to faster acceleration). Less torque leads to higher top speed, but slower acceleration and less power.
More than likely the answer is yes, especially if you’re considering getting lifted with a set of portals. Even more simply put, if you’re going to put larger than stock tires on your machine, you definitely need more torque. How much torque you want depends on how you ride. A side-by-side that rolls off the showroom floor usually has a clutch and transmission set up for a balance of speed and power based on stock equipment. Your average ATV/UTV rider might find this completely adequate, but if you are all about hitting the trails and getting the blood pumping, you’ve probably already upgraded your machine. The list of upgrades that can potentially affect the performance of your ride is long, but we are going to focus on one of the biggest culprits: tire size.
The biggest torque killer with larger tires is the distance around the tire, or the circumference. When most riders say bigger tires, they are talking about their height from the ground. This is how tires are sold. The size of a tire = the height of the tire from the ground. But by increasing the height of a tire, you also increase the distance around the tire. If we think about the tire as a gear, it takes more force to roll a bigger tire one revolution because it needs to travel a further distance.
An Easy Way to Determine the Gear Reduction You NeedYou can skip reading this next part and use this gear reduction calculator, or you can keep reading and learn something new.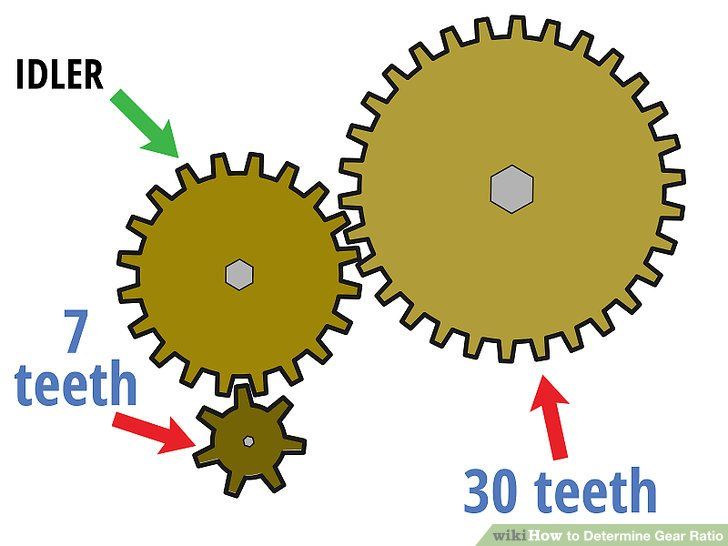 We suggest you keep reading.
If you marked two tires, one 25″ and one 32,” and rolled them both together for a total of one complete revolution (or the distance it takes for that mark to travel from the ground all the way around and back again), the 25″ tire would travel about 78.5 inches while the 32″ tire would roll about 100.5 inches. Trust us on this one—it’s math. (If you want to know more about the math, check out this article on determining gear ratios.) To roll that bigger tire the extra distance, your engine has to work harder because it needs to spin it more to achieve one revolution. In this example, if we figure the percent increase from 78.5 inches of travel to 100.5 inches, we find that you are losing 28% of your torque.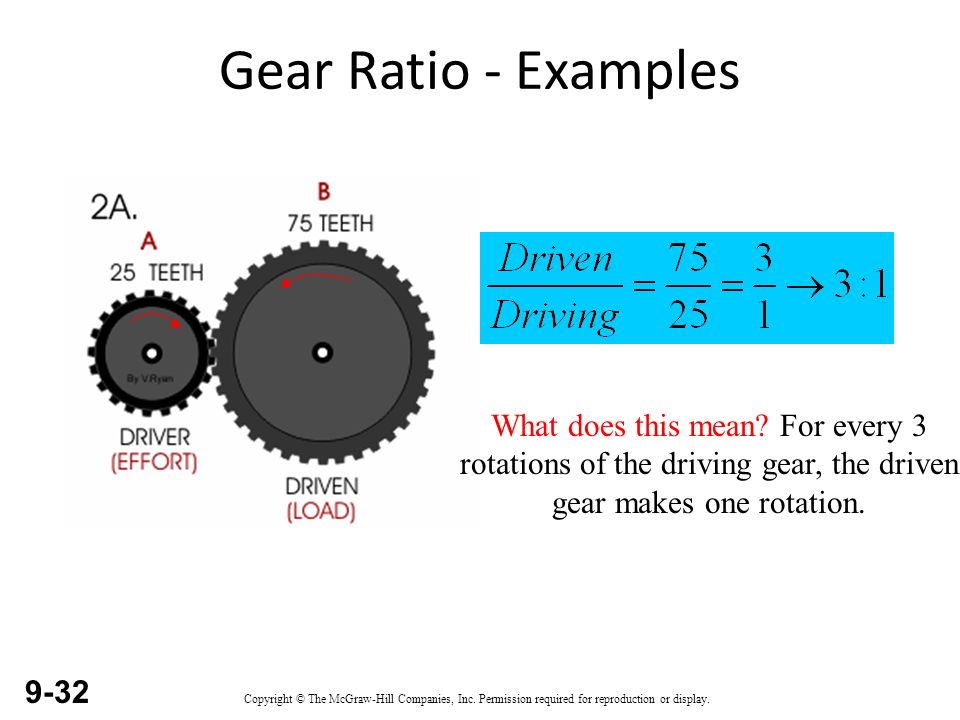 This translates into a loss of acceleration and power.
And now, my friends, we have come full circle. If you want to make up for that loss caused by your bigger tires, you need more power. You need a gear reduction! How much reduction do you need? The simple answer—enough to replace what you lost by increasing your tire size. If you go from a 25″ tire to a 32″ tire, you would need a reduction of about 28%.
How to Choose Which Portal Gear Reduction You NeedWe list the recommended gear reductions for each tire size (and the lift you’d need in addition to the portals to achieve those tire sizes) at the bottom of each of our 4″ and 6″ portal pages. These recommendations are specific to each machine and they tell you which gear reduction you’d want to choose to get back to (roughly) stock max speed.
It’s a very basic way to optimize your speed and your power/acceleration with bigger tires. But you don’t have to follow it. For example, most mud guys aren’t worried about hitting their max speed through a mud hole—they stick it in low and crawl through crazy deep mud on monster tires.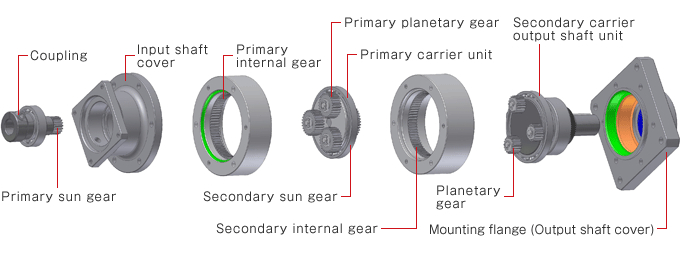 They want the biggest gear reduction they can get, not the most balanced one for bigger tires. That super-high torque lets them plow through mud like it’s nothing.
The same holds true for rock crawlers. More torque is more preferable than power balanced with speed. Getting up and over huge boulders is more about pure power than speed.
With trails and dunes, a smaller, more balanced gear reduction might do just fine. With tires that are just a little bit larger than stock, the smaller gear reduction can get your power back and keep you moving as fast as possible.
I’m Sold. How Do I Reduce My Gear Ratio?One of the best ways to reduce your gear ratio (and get a bigger gear reduction) on your UTV or ATV is to install a portal gear lift kit. Odds are if you’re thinking about bigger tires, you’re already thinking about a lift and now you should be thinking about a gear reduction—a GDP Portal Gear Lift gives you both and more.
Advantages of GDP Portal Gear Lift Kits: They’re Easy to Install
Unlike a transmission kit, there isn’t a need to replace your factory gears. Instead, a portal gear lift is attached to the end of an axle at the wheel hub. The reduction and increased power come from the gears that are built into the box that operates at the wheel. This makes installation much less time consuming and accessible to all riders.
Portals transfer the force of the engine more closely to the object being turned (the tire), so there is less stress on the axles, differential, drive shaft, and the transmission—even less than a stock machine. A transmission gear reduction, on the other hand, can cause more stress on your drivetrain components since they’re subject to even more torque than stock.
You probably need more torque because you added bigger tires or a lift. Remember? That means you also probably put your axles to work at an angle that they aren’t used to because they are now connected to your wheel hubs from a different height than factory. This can cause a lot of stress and wear. An advantage of going with a GDP Portal Lift is that it relocates the axle centerline so you retain much of the factory steering geometry.
Not only are you going to get more ground clearance from your bigger tires, but if you use a portal lift gear reduction, you will also get an increased height of 4, 6, or 8 inches (depending on which lift you choose). This is a big advantage that you won’t get by simply putting in a transmission gear reduction kit.
Finally, SuperATV GDP Portals allow a greater reduction than any transmission kit. This is really important if you have extra heavy tires or need additional torque for heavy rock crawling or climbing. The GDP 4″ Portal Gear Lift provides a 15 or 30% gear reduction, the 6″ GDP Portal Gear Lift gives a 30 or 45% gear reduction, and the 8″ GDP Portal Gear Lift comes with a 45% gear reduction. If you need a lot of torque, the only way to easily achieve it is with SuperATV portals.
Updated by Kavan Wright on 1/30/2020.
If there's one thing you should do after setting up your new TV, it's this: turn off motion smoothing. Tom Cruise is just one of many who argues that this feature is bad for the viewing experience, and we agree.
So why does it get a bad rap? And how do you turn it off? Follow step-by-step directions below for Samsung, LG and Sony TVs.
Although it's designed for better picture clarity and judder reduction, motion smoothing winds up leaving most content looking like it was cheaply shot on video. The result is called the soap-opera effect, and it's the result of advanced video processing, complex display technologies and an array of smaller tweaks designed to improve your viewing experience.
Modern TVs use motion smoothing to compensate for the mismatch between the refresh rates of modern TVs — generally 60 or 120 Hz — and older movies and shows that are filmed at 24 frames per second, or 24 Hz. To sync up with the TV's higher refresh rate, manufacturers use a combination of techniques called frame interpolation.
These approaches vary slightly from one manufacturer to the next, but most consist of inserting black frames that pass too quickly for the naked eye to detect. Others blink the backlight to achieve a similar effect. Some TVs even go so far as to create frames of content to slip between the actual frames from the media source.
All this jiggery-pokery is designed to improve your viewing experience, but it mostly just makes otherwise-great-looking content look cheap. In fact, it's bad enough that several TV and film directors have signed a popular Change. org petition to abolish motion smoothing as a default setting on new TVs.
While cinephiles may loathe to admit it, there is one place where motion smoothing is helpful: live sports. These events are frequently shot and broadcast at lower frame rates, and thus fast-moving content — exactly the sort of thing you'll see in live sports, whether it's a football interception or a speed-skating match during the Olympics — tends to look a bit choppy. If you're mostly watching the big game instead of movies or shows, you may want to leave the motion-smoothing settings alone.
In a perfect world, you wouldn't have to disable motion smoothing at all. Even in an imperfect world, you would expect to be able to easily turn off this feature. Unfortunately, it's not always easy.
The first difficulty is that each manufacturer uses its own name for the same thing. Industry terminology varies; you're likely to see it referred to as motion interpolation, motion estimation or perhaps motion compensation. On top of that, each company uses a different proprietary name for its bundle of motion-smoothing tricks. LG calls it TruMotion, Samsung calls it Auto Motion Plus and Sony calls it MotionFlow.
MORE: How to Watch Live TV Online
The next challenge is finding this setting in the TV's menus. We'll walk you through the process on today's LG, Samsung and Sony TVs, but in each case, you'll have to dig into the TV settings, navigating several menus before finally finding the one you want.
Additionally, you'll usually find two separate settings for motion smoothing: one to improve clarity and reduce blur, and the other to reduce judder, though these may also be called clarity and smoothness.
Samsung calls its motion-smoothing technology Auto Motion Plus, and you can choose to disable it entirely or adjust the settings to reduce the severity of motion smoothing. Auto Motion Plus settings can be found here: Quick Settings > Picture Settings > Expert Settings > Auto Motion Plus.
For more help with the menus and features of your Samsung TV, check out our complete guide to settings on Samsung 2018 TVs.
1. Open the Picture Settings menu. From the home screen, select the gear icon to open the Quick Settings menu. Find the Picture Mode icon on the far left. Highlight the Picture Mode icon, and press up on the directional pad to open the full Picture Settings menu.
2. Open Expert Settings. The settings for turning off Auto Motion Plus are found in the Picture Settings menu, under Expert Settings.
3. Go to the Auto Motion Plus menu. To turn off the soap-opera effect, disable or adjust the Auto Motion Plus feature. This is set to Auto by default, so either switch it to Off (to disable it entirely) or adjust the blur and judder reduction to your liking using the sliders in the menu below.
4. Dial down the blur and judder reduction. If you chose to customize the Auto Motion Plus settings, you'll start with blur reduction and judder reduction.
Blur reduction is designed to cut down on the smearing that happens when fast-moving objects move across the screen at low frame rates, boosting the frame rate by estimating what image would come in between two frames of content and adding the interstitial frames. This is the biggest offender in the soap-opera effect, so pull back on this slider first.
Judder reduction is the other offender. It's designed to reduce the choppiness that can result from showing 24-Hz content (such as a cinema film) on displays with higher frame rates. That introduces a slight stutter, which judder reduction aims to correct. As with blur reduction, if you're still seeing the soap-opera effect, dial this down or turn it off.
5. Turn off LED Clear Motion. The last trick up TV makers' sleeves for "fixing" your picture is to manipulate the backlight flicker. With this feature turned on, you'll greatly reduce the overall brightness of the display by blinking it on and off — a technique meant to simulate higher frame rates.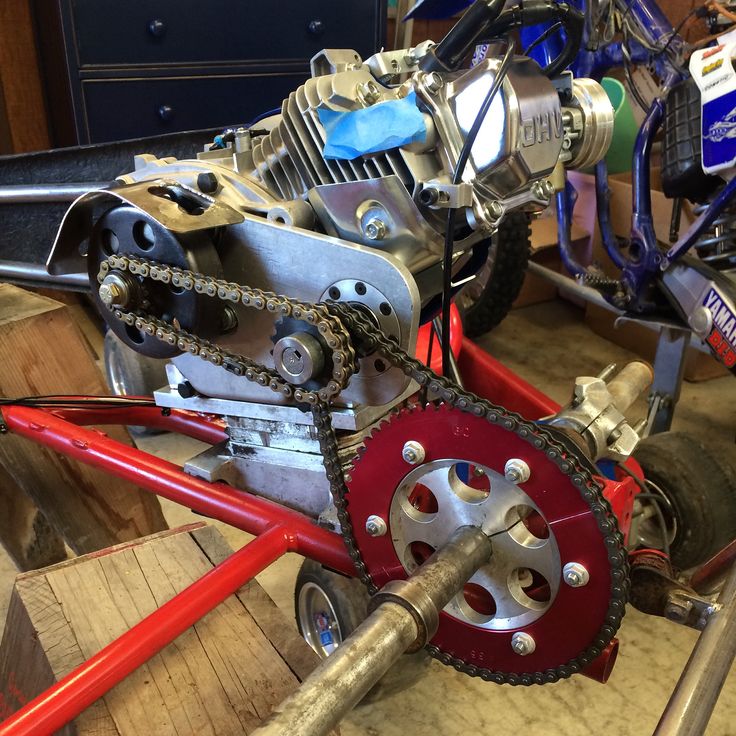 When in doubt, this one is safe to disable.
LG makes some excellent TVs, but it uses motion smoothing — which it calls TruMotion — too. TruMotion settings can be found here:
Quick Settings > Settings > Picture Settings > Picture Options > TruMotion.
For more help managing your LG TV, check out our LG TV Settings Guide.
1. Open the Quick Settings menu. By pressing the Settings button on the remote, you'll pull up the Quick Settings menu along the right side of the screen.
2. Open the main Settings menu. The bottom icon in the Quick Settings menu will open the main Settings menu. The first option is Picture Settings.
3. Open Picture Options. Found in the Picture Settings menu, Picture Options include a number of image-processing features that can be adjusted or disabled, including TruMotion.
4. Open TruMotion settings. At the bottom of the menu, you'll find the TruMotion settings menu. Open it to make adjustments.
5. Disable TruMotion. In the TruMotion settings, you can disable TruMotion, use an existing preset or set your own custom profile.
Sony calls its motion smoothing MotionFlow. You can disable or adjust the settings to turn off motion smoothing, or tweak it to your comfort level. MotionFlow settings can be found here: Home > Settings > Picture Settings > Picture Adjustments > Advanced Settings > Motion > MotionFlow Settings.
For a full explanation of settings and menus, check out our guide to 2018 Sony Android TVs.
1. Open the Settings menu. At the bottom of the home screen, you will find two rows below all of the content recommendations and apps: Inputs and Settings. The bottom row is Settings, and the first option — marked by a gear-shaped icon — opens the Settings menu.
2. Open the Picture Settings menu. The controls for MotionFlow are found under the Picture and Display settings, which are listed in the main Settings menu.
3. Open Advanced Settings. In the Picture Adjustments menu, open Advanced Settings, where MotionFlow controls can be found.
4. Open the Motion menu. The control for MotionFlow settings is found under the Motion menu, which is under Advanced Settings. Here, you will find preset MotionFlow settings, as well as controls to customize MotionFLow settings.
5. Change MotionFlow settings. The simplest option is to simply turn MotionFlow off. If you wish to adjust MotionFlow settings instead, you can use the slider controls to adjust both the smoothness and clearness settings. When in doubt, turn down these settings to reduce the soap-opera effect to some degree and allow you to adjust the effect to your liking.
Credit: Tom's Guide
Get instant access to breaking news, the hottest reviews, great deals and helpful tips.
Brian Westover is currently Lead Analyst, PCs and Hardware at PCMag. Until recently, however, he was Senior Editor at Tom's Guide, where he led the site's TV coverage for several years, reviewing scores of sets and writing about everything from 8K to HDR to HDMI 2.1. He also put his computing knowledge to good use by reviewing many PCs and Mac devices, and also led our router and home networking coverage. Prior to joining Tom's Guide, he wrote for TopTenReviews and PCMag.
Articles
02 Dec
Any wheeled vehicle - from a bicycle to a multi-ton truck - has a transmission in its device: a system that transmits rotation from the engine to the wheels. The operation of the transmission - and therefore the speed of driving - can be controlled by shifting gears.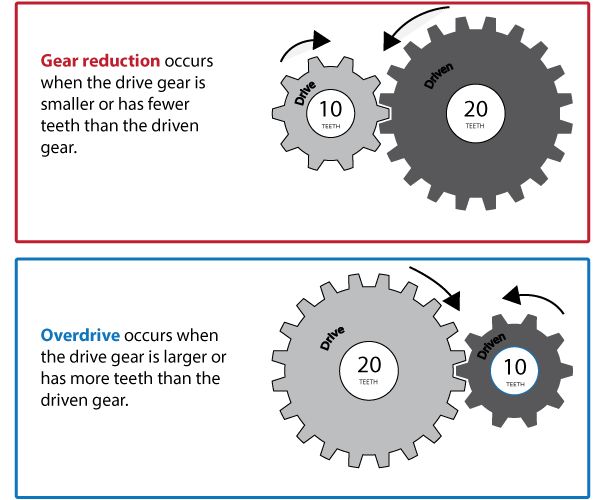 nine0003
Gear shifting is organized differently in each mode of transport. In the article below, we will tell you exactly how to shift gears on ATVs, and what gearboxes are found on such equipment.
Gearboxes for ATVs can be of two types:
Rare and mostly found in older models, but other variations can be found.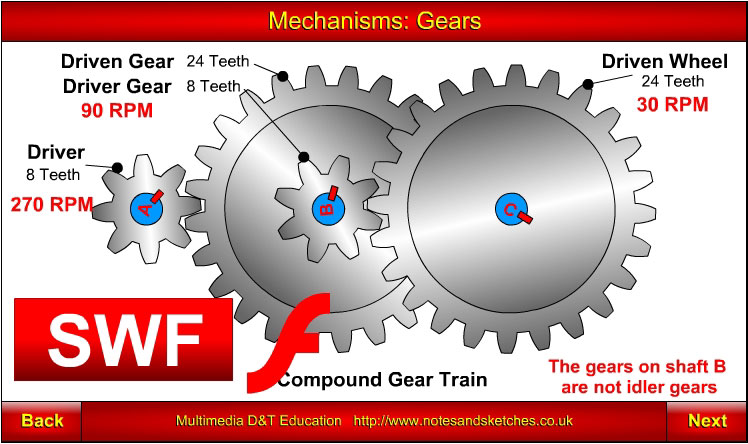 For example - "automatic" with the ability to manually shift gears.
Manual ATVs are a little more difficult to drive (at least at first, until you get used to it), but you can more accurately select the appropriate mode. And vice versa: CVT "boxes" are much easier to operate, they are easy to master for a beginner who gets behind the wheel of an ATV for the first time. But on the other hand, with active driving along a route with variable difficulty, riding a CVT will be a little less convenient. nine0003
For example: you are driving on a flat packed dirt road on H and you see a large stretch of muddy road ahead with deep mud (or a steep hill, or bumps, or stones). You will have to come to a complete stop and shift to L, drive through mud, and when you get back on a dry road, come to a complete stop again and shift back to H. , like motorcycles, and a manual clutch lever on the handlebar on the left. nine0003
The foot lever device can be of two types:
 Gear shifting is carried out with the toe of the foot, pressing the lever from top to bottom (gears from 1 and above) or from bottom to top - from a higher gear to a lower one.
 The shift itself is carried out in the same way as on motorcycles:
 nine0008
 When exactly to switch speeds up and down is determined by the tachometer, speed, road complexity, weight of the load taken and the characteristics of the ATV itself (power, weight).
CVT gearboxes are much more common on ATVs. The clutch in them does not need to be squeezed out, and the “mode” of driving forward is selected from two (most often) options: in high (suitable for driving on an easy route) or in low (for difficult sections, steep climbs and towing) gears. nine0003
An important difference from driving in a manual transmission: switching between L and H is carried out only when the ATV is completely stopped, with the brake applied. To select a mode, move the knob to the desired position. Switching between L and H on the go is impossible.
The rest of the gears - park, neutral and reverse - of course, are also included when the ATV is standing still.
Gears are transmission modes that allow you to adapt your ATV to different tasks and road conditions. Shifting increases traction or top speed. nine0003
In this article, we will tell you how to change gears correctly on ATVs with different types of transmission so as not to break anything and confidently overcome any routes.
The CVT is the most popular 4WD utility ATV.
The variator consists of two pulleys. A belt is stretched between them, which rotates along a larger or smaller radius as the engine speed changes. This ensures a smooth change in gear ratio. In fact, the same thing happens as when moving the gears in a manual transmission. nine0003 The principle of operation of the variator
The variator is combined with the gearbox. The shift lever can be in five different positions:
L - downshift;
H - overdrive;
N - neutral;
P - parking lock;
R - reverse.
Downshifting allows the ATV to climb steep slopes, off-road, or haul loads more easily and without damage to the CVT. In overdrive, the technique can develop maximum speed. It is recommended to use it for driving faster than 10 km/h. nine0003
There is no conventional clutch on an ATV with a CVT. Instead, a centrifugal automatic. Therefore, before each shift, be sure to come to a complete stop, apply the brakes and reduce the engine speed to idle.
To stop, just remove your finger from the throttle trigger - the ATV will quickly slow down and stay even in the H or L position until the driver again increases the engine speed.
For a long stop, it is better to switch to neutral. To prevent the vehicle from rolling away, you can apply a hand brake or a P gear.
Manual transmission is commonly used on small displacement RWD ATVs. Structurally, it is similar to the transmission of a high-speed bicycle, only instead of sprockets there are gears. They are connected in different combinations depending on the selected gear.
In order not to break anything when changing gears, there is a clutch. This mechanism decouples the transmission from the engine and allows the gears to engage without load. To control the clutch there is a separate lever on the steering wheel. nine0003
On an ATV with a manual transmission, the gears are shifted by a lever located at the left footrest. How exactly depends on the specific model. Popular options:
N is a neutral gear, in which the vehicle will not go anywhere. R is reverse.
This is what a manual transmission looks like on an ATV0115 What is the difficulty. It can be difficult for a beginner to move off.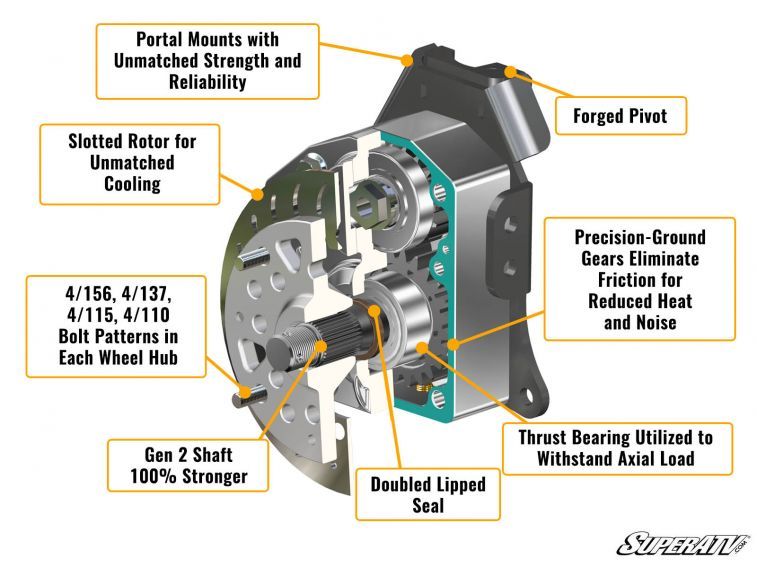 If you release the clutch too quickly or add insufficient rpm, the engine will stall. If you give too much gas and drop the clutch, the vehicle will move with a jerk and may even jump out from under the rider.
What to do. At first, you can try to start without gas at all - just release the clutch smoothly and slowly. This will help you feel the moment when the ATV is ready to go and you need to increase the engine speed. nine0003
What is the difficulty. At first it is not obvious when to switch.
What to do. You can focus on the sensations. If vibration is felt, the ATV twitches and accelerates sluggishly, you need to switch down, and if the engine “roars”, up. Another option is to look at the speedometer. Each gear has its own optimal speed range. Here are the average values:
