By Off-Road Livin'
11/26/2020
To paraphrase an old saying: there’s no such thing as bad weather, only bad tires. There’s a reason they’re called all-terrain vehicles, and there’s a strong case for calling them all-season vehicles. Designed for all types of terrain, from mud to sand and rocks, ATVs and side-by-side vehicles (SxS) are also conquerers of everything winter can throw at them. With a little preparation, your off-road vehicle can become a master of deep snow and severe winter conditions and can even help keep you warm during those cold days on the trail.
In this article, we’ll remind you why your ATV or SxS is an indispensable tool for plowing and other winter tasks, as well as a super fun cold weather recreational vehicle.
Whether it's weekend trail adventures with the family, hunting trips with friends, or hard work on the farm, your ATV or SxS gives you a ton of fun and utility. So why not take advantage of your vehicle all year round and enjoy it just as much in the winter? Your vehicle takes on all sorts of deep sand and mud, and snow is no different. An off-road vehicle can be extremely useful in winter to easily remove snow in your driveway, and once neighbours see what you’re up to, you might even become the most popular person in your neighbourhood. Work quickly turns to fun when the job’s done since snow-covered trails make for some pretty epic days. The key is preparing your vehicle well and having the right equipment that’ll help you enjoy winter. Think of the extra time you get to spend on your favourite ATV or SxS instead of letting it hibernate in your garage.
Shovelling and clearing snow isn’t exactly everyone’s favourite pastime. But when you’ve go the right tools, it can certainly become much easier. It’s also a bit of a secret in the off-road vehicle world that it can actually get downright fun. We can’t promise anything, but you might start getting neighbours knocking at your door, presenting gifts or promising favours in return for a hand with their snow clearing.
Attaching a plow to your ATV or SxS makes clearing large volumes of snow much quicker and easier than other methods, and the nimble manoeuverability of these vehicles enables them to get into tight spots where larger plowing vehicles could never fit. With terrific traction and ample power, clearing even the deepest snow gets much easier. In fact, many people who live in places where winters are more severe purchase these vehicles expressly for this purpose.
Let’s take a look at some of the features and accessories that’ll make plowing snow easy with your off-road vehicle:
Arguably the most important feature. Obviously, snow and ice are slippery and affect traction, making it trickier to manoeuvre. There’s nothing more frustrating than spinning your tires in half a foot of sticky snow because of traction issues, but with 4WD that’s not an issue. Basically, the deeper the snow gets where you live, the more important four-wheel drive is and it’s a game-changer in terms of winter traction.
It’s especially important to have an ATV or SxS with ample torque if you are going to be plowing significant amounts of snow. The general rule is the more engine power the better, but that doesn’t mean a smaller, less powerful engine can’t cope. In fact, they can handle big plowing jobs, but it’ll take more time and they’ll just need several passes to get a clean surface.
It’s cold out there and plowing can often mean throwing on all manner of coats, boots, gloves, etc. But what if you could make it a little bit more toasty? Off-road vehicles have loads of cold weather options like a closed cab with heating and defrosted windows in the case of side-by-side vehicles like the Can-Am Defender PRO, and some ATVs have heated grips to keep your hands warm. Doesn’t that sound comfy?
Snow is heavy and plowing can really test a machine’s limits. Many off-road vehicles have an increased risk of failure if plowing snow for extended amounts of time, so you should be looking for utility models that can really withstand many hours of plowing without giving up. Fortunately, Can-Am vehicles are robustly designed with the best possible materials and have a proven ability cope to with any task, and are depended on worldwide in tough day-to-day work situations.
If your ATV or side-by-side vehicle contains these four elements, you'll be ready to tackle winter and plow snow free from trouble!
Ok, so you know what to look for in a hardworking winter machine, but how should you prepare before doing any plowing?
Nobody wants to be fixing their vehicle in the howling wind and snow. Before setting foot outside, or before the temperatures dip, make sure your vehicle is tuned up and in optimal running condition. Change the oil, check electrical wiring, and ensure all elements are debris-free and working properly on your ATV or SxS. Double check your tire pressure and inspect the tread for excessive wear. If your machine is liquid-cooled, it’s super important to inspect your cooling fluid levels since plowing snow is demanding on an engine and can cause it to heat up fast.
It’s vital to set the plow depth deep enough to clear the snow, but high enough to avoid scraping the surface underneath. Scraping can not only damage paved surfaces, but creates more work for your vehicle, potentially overloading its capabilities. Plow depth can vary for different surfaces and with varying depths of snow, so it should be something you do before every job. The proper angle of the plow depends on the driveway, surface that is being plowed, and where you want the snow to end up. Getting the angle set right will mean fewer passes and will make the plowing effort much easier and cleaner.
It’s important to clean all of the dirt and snow off your ATV or side-by-side vehicle and plow blade after plowing. Failing to remove the snow, ice and dirt clumps while they’re fresh can mean a frozen, rock-hard mess later. A clean plow blade sheds snow easier and is necessary for a good job. Not to mention salt, which can wreak havoc on the plow and vehicle surfaces very quickly. Avoid corrosion and clean your plow and vehicle after every use.
Remember that clearing snow is a big job not only for you, but for your vehicle as well. It can be one of the most demanding things you ask of your ATV or SxS, and that’s why preparing it and taking the time to clean it is going to minimize the impact and extend the life of your vehicle.
It’s time to stop thinking about your ATV or SxS as a purely fair-weather fun machine. Winter presents all sorts of recreational opportunities when you’ve got an off-road vehicle that’s ready for cold weather challenges. Besides being super floaty and fun, snow makes everything seem new and fresh—even those old trails you’ve been down countless times. Winter is also the perfect opportunity to improve your off-road skills with slipperier conditions that can be perfect for learning drifting, loose surface climbing, and more. Winter offers a unique trail riding experience that shouldn’t be missed and, as long as you do it safely, can provide some pretty epic moments.
But you need to prepare your ATV and SxS for winter, and certain terrains can be a challenge if your vehicle isn’t equipped with the right gear. A snow track system for your vehicle is a massive upgrade, turning it essentially into a completely new kind of ride and provides it the traction and flotation your vehicle needs to perform.
As we saw above, your vehicle is likely already pretty well equipped to handle winter, and some upgrades can make it better and more comfy in the cold months. But some off road vehicles are born with winter DNA, like the Can-Am Outlander North Edition, which comes with a windshield, heated grips and visor outlet, factory-installed winch, and extra-low gearing ideal for plowing.
Before stepping out into the cold, you obviously need to bundle up with warm clothing and protective gear, but what else should you do to get your vehicle ready for winter riding? Aside from your routine maintenance, here are some things to consider:
Moisture in the tank or fuel lines is bad news for your vehicle. This is a common issue in the cold because as temperatures swing, water in the form of condensation can form inside the tank. Water or moisture in your fuel will prevent the engine from starting, and water can freeze in your fuel lines and prevent gas from getting to the engine, causing your vehicle’s engine to struggle or not even start at all. Fuel stabilizer will prevent this from happening and keep your gas fresh and your engine running smoothly.
Fresh spark plugs keep your engine running and idling smoothly, and make cold engines snap to life in the winter. While you don’t need to change them every year, winter can be a good time to do it, especially since you don’t want any surprises when the temperature drops.
After months of dusty summer riding, it’s normal for your air filter to be clogged with debris. When the snow’s flying on the trail and gets sucked into the engine, it’ll turn into water, and water plus dust equals — you guessed it — mud. A mud-clogged filter will suffocate your engine from the air flow it needs to stay running smoothly. Prior to winter, a quick blow out of the filter is all it takes and will save you a huge headache later. Just like spark plugs, this can also be a good time to swap out your filter for a new one if you haven’t done that in a while.
Oil keeps your vehicle running smoothly, and rough starts, and a drop in power usually is a sign that your oil needs a topping up or a change. If you already do regular oil changes, then you’re probably fine as long as you make sure the oil level is good, and you’ve been changing the oil filter regularly. Again, if you need a reminder to do it, make it part of a yearly maintenance ritual along with your plugs and air filter.
Now that your ATV or SxS/UTV is prepared to face the cold, remove the cover from your vehicle and get ready to ride.
Winter riding requires a little more gear and accessories than other seasons to keep you safe and warm while out plowing or hitting the trail. It’s vital you and your vehicle are protected in case of anything that can go wrong, so being well prepared is the key.
Here are some essential accessories for you and your ATV or side-by-side vehicle so you can be sure to get the most out of epic winter rides.
Track systems for ATV & SxS/UTVAs we said before, a track kit can transform your ATV or SxS into a completely new vehicle. These kits replace your tires with a track system resembling those found on snowmobiles and offer incredible performance in deep snow and rough terrain. They’ll outperform pretty much any tire in those conditions and can make the impossible possible. Normally with tires, you’d avoid snow deeper than your vehicle’s ground clearance since digging in will leave you stuck, but tracks give you the ability to float on deeper snow and make winter conditions a breeze. The improved traction also makes towing and plowing jobs much easier, and tracks can make hauling in slippery conditions easy, even up steep hills.
It can be tough to find compatible track systems for your vehicle and installation can be a big job.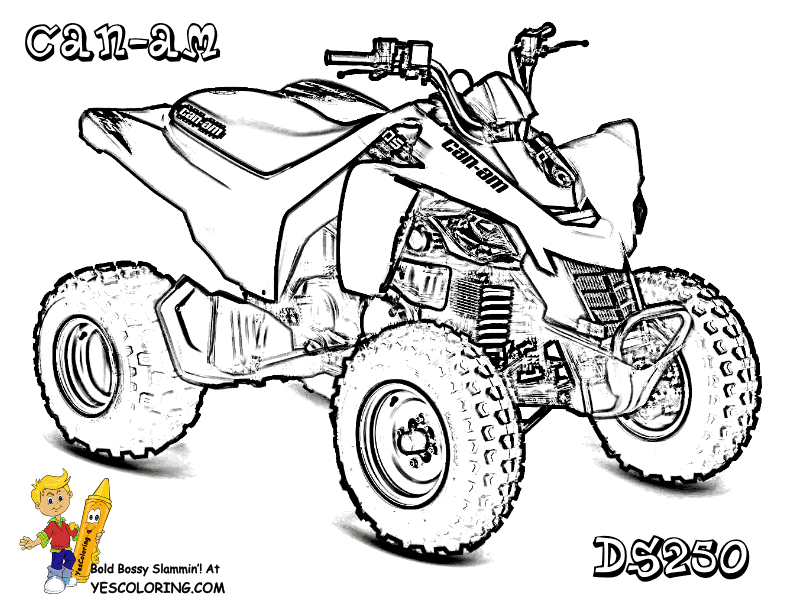 But thankfully, the Apache Track Kits designed especially for Can-Ams are matched to your model’s engine output, chassis setup, speedometer, and work with DPS power steering for perfect control. Learn more about Can-Am ATV & SxS Apache track kits.
If you’re interested in using your off-road vehicle for snow removal, a plow is an obvious must. There are seemingly endless options on the market with some using the existing winch mechanism to lift the plow blade. Taking the time to find the compatible system is important, and Can-Am makes it easy with their ProMount plow system. It’s the fastest and easiest way to start plowing and you’ll be certain it’s compatible with your vehicle. Learn more about Can-Am ATV & SxS ProMount plows.
Cab enclosures for side-by-side vehicle/UTVStaying warm and comfortable is obviously one of the biggest keys to off-road winter fun. Choosing water- and wind-proof clothing is essential, but there are some accessories that can make your vehicle a warm and toasty shelter from the cold. A cab enclosure for your SxS/UTV is a terrific way to shield you and your passengers from the elements, and can make it possible to spend entire days out on the trail in even the coldest months. Some Can-Am models like the Defender Limited and the Defender PRO Limited have a temperature control system included, which allows heating in the vehicle.
Other accessories can also be very useful if you are looking for more comfort in cold weather. Some ATV and SxS models offer heated seats, which can be your best friends on long cold rides. If it's your hands that need some love, then Can-Am offers the possibility of adding a Heated Steering Wheel to your side-by-side or Heated Grips to your ATV. These accessories are just as amazing as they sound and you might thank yourself each and every time you switch them on.
They are true day extenders, and most heated grips and seats are relatively simple to install, fit a a variety of models and come with wire harnesses that make them essentially a one-step install. If you’re out in freezing temperatures, these can help keep your fingers from losing dexterity and give you a more safe and comfortable ride.
If you’ve never experienced winter off-roading, then some preparation and accessories can turn your summer trails into a winter wonderland and your snow clearing chores into a secretly fun task. There’s a world of track kits, plows, and accessories that’ll transform your off-road vehicle into an all-season, do-it-all machine. Perhaps you’ll make hibernating a thing of the past.
COOKIE USE
This site uses cookies to ensure you have the best experience. By browsing this site, you are agreeing to our use of cookies in accordance with our Privacy Policy. Find out more on cookies and how to manage your settings on our Cookie Policy.
Previous
Next
TUV, RoHS, CE and FCC compliant
Constant and rapid heating
Easy to Install
Fully after sales support on any Vvkb block heater
10 block heater patents
Request a Quick Quote Now
buy it Now
Cold starting all-terrain vehicle (ATV) engines increase engine wear, CO2 emission, and fuel consumption. Thus, using utility, sport or kids ATV during winter can be expensive.
With the Vvkb ATV Block Heater, you can use the ATV anytime all year round. Vvkb ATV Block Heaters have a compact, easy to install, fast heating and easy to maintain design.
These ATV block heaters quickly warm up the engine during winter, thereby extending the lifespan of starter components and entire engine. It consumes less fuel and ensures less CO2 emissions to the environment.
Every Vvkb block engine warmer for ATV features a progressive improvement and innovations with an inbuilt pump, thermostat, and control system. They have an aluminum structure designed for rough terrains.
If your ATV requires one block heater, please visit our retail website: www.RVheater.com to purchase.
If you only need one ATV heater, please visit Vvkb block heater to buy!
Rated voltage: 120V / 230V Rated power: 600W/1000W/1500W Current intensity: 5 amps / 8. 5 amps / 12.5 amps
With built-in pump
With temperature controller
As a leading block heaters manufacturer, Vvkb supplies different engine heaters not even ATV block heaters. Other like Truck block heater, car block heater, snowmobile block heater, tractor block heater and so on.
Check all Vvkb block heaters here.
Request a Quick Quote Now
VVKB Block Heaters
Send Enquiry Now
VVKB Block Heaters
Send Enquiry Now
If you’re looking for an efficient, safe and versatile way to heat your ATV, block heaters are a fantastic choice.
But with hundreds of brands, designs and models available, figuring out the right heater for your needs can be tricky.
Thus, by taking a little of your time to read our today’s guide, we can help you narrow the search a bit.
So read on.
By definition, a block heater is a device used for heating the engine block of a vehicle.
And an ATV is an all-terrain vehicle also known as a quad or quadricycle.
An ATV block heater thus is a device used to heat or warm the engine block of all-terrain vehicles.
This type of heater is commonly used in areas that experience bitterly cold winters.
If you live in such areas, you know how troublesome starting a cold engine can prove to be.
ATV Block heater
And, constantly cold starting your engine can lead to the wear and tear of your engine block.
With a block heater, however, you can prevent cold starts and even save your engine block from unwanted wear and tear.
The good thing with this devices is that they are easy to find.
You can purchase yours directly from a manufacturer, or from any auto parts retailer.
Note that having a block heater is not an absolute must.
But for people living in areas that get adverse winter weathers, then an ATV block heater is an absolute necessity.
With this in mind, allow me to further share with you why an ATV block can be a good solution for cold starts.
Why you need ATV Block HeaterThere are many reasons why people with ATVs should use an ATV block heater.
As everyone with a vehicle knows, it can be costly to keep a properly functioning engine when you live in a cold area.
This is you should know that directly cold starting your engine can cause severe damages to your engine.
And, repairing these damages can cost hundreds of dollars per month or more in adversely cooler months.
A good solution for this, therefore, is to install a block heater in your ATV.
This will help ensure the smooth running of your vehicle regardless of the weather is to install a block heater.
ATVThis is because:
1) It will help to reduce the chances of a cold startWhen plugged in, a block heater will keep your engine warm throughout making it easy for you to start it in the morning.
It thus reduces and eliminates the need for cold starting the quad in the morning.
2) It is easy on the engineAn ATV block heater will make it easier for your vehicle to start and run.
As we’ve already established, quad engines tend to have a hard time starting up in cold weather.
During cold weather, the engine will need to work harder and may thus not be able to start right away.
At least not like it does during summer or more favorable weather.
In cold weather, the engine needs time to warm up before it can start and get running.
A block heater, in this case, helps to keep the engine warm throughout the night making it easier to start in the morning.
3) Extend the life of your car engineMost people end up replacing their engines or repairing them due to damages caused by direct cold starts.
With block heaters, you don’t need to worry about this.
These heaters are built to help maintain your vehicle engine at optimal operational level.
With less cold starts, you can rest easy knowing that your engine has a chance to survive winter and more to come.
4) Block heaters are easy to installInstalling a block heater is much quicker and easier than most people think.
The heaters come with installation manuals and accessories like mounting brackets and plugs.
You can, therefore, install a block heater in just a few minutes.
It doesn’t matter the size or position of your engine, the manufacturer’s manual makes all this work easier.
Don’t worry though as I’ll show you a simple step by step process on how to install a block later on in this guide.
In the meantime, let’s explore your options of block heaters in the market.
Types of ATV Block Heaters in the MarketThere are different types of block heaters in the market.
These include:
a) Dipstick HeatersA dipstick heater or oil pan heater as its otherwise known is placed where the dipstick would normally be.
This heater helps to keep the oil warm not the entire engine block as you would expect.
When the engine is warm, it thins and doesn’t sludge up in cold weather thus won’t have a hard time starting up the engine.
Dip stick heaterNote that dipstick heaters are often very effective and inexpensive.
What’s more is that they are very easy to install.
Anyone can install it; you don’t need special skills or experience to do it.
b) Engine Heater BlanketsFor those that live in areas that experience occasional cold weather, engine heater blankets are a good alternative.
These work in a way that’s quite similar to a standard electric blanket.
Engine heater blanket – Photo courtesy: NK GroupThe only difference is that heater blankets are made to be used in extremely harsh conditions.
For these, you’ll only need to plug them into a power source and place them over the engine block of your vehicle.
They will keep the engine, oil and fluid warm throughout the night.
These type of heaters are built to only heat up the coolant in the reservoir.
In Line Coolant HeaterThe heaters come with an inbuilt pump that helps to circulate heated coolant within the engine to help keep it warm
d) Bolt on HeatersThese are a type of heating device that’s designed to heat the whole engine block externally.
Bolt on HeaterThey don’t heat the coolant in the reservoir directly.
e) Radiator HeatersRadiator hose heaters aren’t as common as the other types we’ve mentioned.
They are however quite effective in their functionality.
For this type of heater, you’ll need to splice it into the top radiator hose of your vehicle.
It will heat the coolant from here.
The advantage of using a radiator hose heater is that it is effortless to install it.
So those are the five main types of ATV block heaters.
Make sure that you understand each of them to be able to choose the right heater type for your needs.
Moving on, let’s explore the parts that make up an ATV block heater.
Parts of ATV Block HeaterWhen talking about engine heater installation, it is important you be conversant with the parts of the heater itself.
This is because you will need this knowledge to know what each part is, where it goes and its function.
And not just for installation, knowing your heater parts can be handy for performing repairs and replacements.
So read and take this section with great importance.
As you do that, keep in mind that there are many different types of ATV block heater parts.
The ones in your model will depend on what type of block heater you buy.
Here are some of the more common parts:
a) Control systemThe control system comprises of the control panel, on/off switch among other knobs that you use to set preferred parameters.
The main function of the control system note is to analyse, diagnose and prompt functions within the heater.
Fuel tanks are seen on fuel-powered block heaters.
If you are using one of this, you’ll notice a container-like part where you store the fuel that’s used to run the device.
c) Combustion chamberThe combustion chamber is a very significant part of a block heater.
It is here that heat is produced and released to keep the engine, coolant or oil warm in cold weather.
d) Exhaust systemThe exhaust system as the name suggests is an outlet that releases exhaust waste from the combustion chamber.
Remember that when air/water mixes with fuel and burns, it forms heat and exhaust air/waste.
It is through the exhaust system that exhaust waste and gases leave the combustion chamber.
e) CasingThe casing is the outer cover of a block heater.
This part could be made of aluminum, nylon or plastic depending on the level of rigidity, durability and flexibility needed.
Note that different brands and models feature different casing materials.
So when selecting a block heater, the material is something you’ll need to consider.
f) Heat exchangerThe heat exchanger is located close to the combustion chamber.
Its primary function is to separate cool air and hot air from mixing.
It plays the role of exchanging or transferring heat from the heater.
g) Duct VentA duct vent is a passage within the heater that helps to pass air in and out of the device.
It helps in ensuring proper ventilation to parts within the heater.
h) Fuel pumpThe work of the fuel pump is to pump fuel from the tank to the combustion chamber.
As you’ll notice, the fuel pump is quite a small part.
However, it plays a significant role in ensuring that sufficient amounts of fuel are supplied from the tank to the combustion chamber.
i) Cold air inletThe cold air inlet is a passage for cold air from the engine to the heater’s combustion chamber.
It is this cold air that mixes with fuel and burns to create the mixture of heat and exhaust waste.
j) Ignition plugFor burning to occur in the combustion chamber, the ignition plug plays a very significant role.
It is the ignition plug that delivers the needed energy to the combustion chamber.
This energy helps to ignite the burning process within the air/fuel mixture.
Note that the ignition plug only sparks the burning process but doesn’t sustain it.
k) Hot air outletThe working of an ATV block heater, which I explain to you in a short while, relies on the proper circulation of air in and out of the heater.
And, as I’ve already told you, the cold air inlet is responsible for letting in the cold air.
The hot air outlet on the hand is responsible for letting out already heated air onto the engine surroundings.
Engine heaterIt is this hot air that helps to keep your engine warm throughout the cold.
I’ll help you understand this shortly.
How ATV Block Heater Maintains a Comfortable TemperatureATV block heaters take their power from different sources.
Some use electricity where you’ll need to plug the heater in some electrical wall socket.
There are propane heaters that use gas to function.
And, there are fuel powered heaters that can utilize diesel or gasoline from the vehicle’s reservoir or an independent fuel source.
However, regardless of how the heater is powered, the working mechanism is generally similar across all of them.
So let me explain this briefly.
You see when you install the block heater onto your ATV and put it on, it will begin to function immediately.
First of all, switching it on will prompt several commands on the control system.
Then, the heater will begin to draw its power whether gas, fuel or electric.
This power is used to warm up the heater core in readiness for the actual heating process.
Cold air will be sucked in via the cold air inlet into the combustion.
At the same time, the heater will draw up fuel from the fuel pump into the combustion chamber.
Heating ATV Engine
The cold air and fuel will mix up.
At this point, the ignition plug will kick in and spark a burning process.
The mixture will burn to result in a mixture of heat and exhaust gases.
Once the desired temperature is reached, it will be transferred to the outer parts of the heater which then transfers into the engine and the surrounding parts.
The exhaust gases/waste will be released out of the combustion chamber via the exhaust system.
One of the many features of block heaters is they tend to release heat for long after the device is switched off.
This means that even after the device is switched off, it will still have a warming effect upon the engine and its surroundings.
Now understand that if you’re using an in heat coolant heater, it’s the coolant that will mix with fuel in the combustion chamber.
Once heated, the coolant will be supplied within the engine with the help of an inbuilt pump.
For the other types of heaters, I’ve given brief explanations in the ‘types of ATV block heaters’ section.
That’s it.
Technical Specification of ATV Block Heater
No doubt that for quad owners, ATV block heaters are a convenient solution for the cold.
There are a plethora of them in the market and finding a suitable for your needs can prove to be a challenge.
Read ATV engine heater user manualSo to help guide you out, here are a few elements that you should consider when buying a unit for your vehicle.
I. Applications
You have to choose the right heater for your application.
As it stands, there are block heaters for a variety of ATV applications.
There are heaters for three-wheelers and four-wheelers.
All these vehicles have different heating needs in cold weather so make sure that the heating device you’re getting for it is right.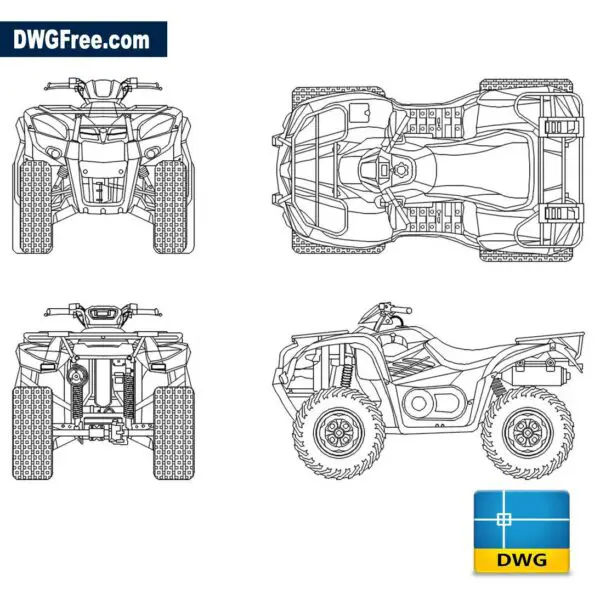
Also considering the application, consider if you need a dipstick heater, a heater blanket, bolt heater or radiator heater.
II. Quality and safety compliance
Generally speaking, block heaters are built with safety in mind.
They are less risky than other types of heaters.
With that being said, you will still need to conduct due diligence in ensuring that you’re buying a safe product.
In this regard, you need to make sure that your product of interest is RoHS, CE and FCC certified.
This is an indication that the heater meets most if not all of the required standards on quality, performance, safety, and reliability.
III. Rated voltage
It is important to choose a heater with the correct voltage rating for your ATV.
Don’t buy a highly rated one if your engine can’t handle it as this may be very risky.
Also, don’t go for a lower voltage than what’s recommended for your engine.
Such a heater may fail to function efficiently.
IV. Dimensions and weight
It is wise to choose a block heater that can sufficiently serve its purpose relating to the dimension of your engine.
A small block heater is enough if your engine is not that big.
Or, if you are not experiencing nasty temperatures that require significant engine heating.
Similarly, a huge engine in a frigid environment will necessitate a big block heater.
It will need a heater that has enough power to heat the engine efficiently.
Another thing, don’t burden your engine with a weight that’s not necessary.
Get a heater that is just the right size and weight for your ATV engine.
V. Heating capacity
As you consider the dimensions and weight, you also need to make sure that your device has enough heating capacity.
You need to ensure that the heater can run at lower temperatures or for less time.
Don’t settle for a heating capacity that’s inadequate.
If you’re not sure about what the right heating capacity for your engine is, ask your supplier for recommendations.
The recommendations will depend on the application, the engine, and the weather conditions.
VI. Warranty
You must check the warranty you’re getting with your heater.
It should be at least one year.
Overall, you need to determine what your need is and how much performance you’re looking to get out of the heater.
So make sure that you select a block heater that will accommodate what you need it for, and that will get the job done.
Step by Step ATV Block Heater Installation Process
As I’ve told you severally, block heaters are the easiest to install.
No matter the type.
A heater like the blanket one only requires plugging into a power source and switching it on.
A majority of the other heaters requires minimal work to install.
Here’s, a general step by step guide on how to go about it;
Step 1: First of all, gather all the equipment and tools that you’ll need. These include screwdrivers, screws, etc.
Step 2: Remove the coolant plug. Remember that the coolant could leak out so put something underneath the engine to capture any leaking coolant.
Step 3: Prepare the heater by applying sealant to the threads.
Step 4: From where you unplugged the coolant, slot in the block heater.
Step 5: Once the heater is put in place, fasten it securely.
Step 6: With the heater properly in place, make sure to wipe off any coolant residue.
Step 7: Start the heater, to test how properly it functions
Well that the installation process.
Simple right?
I know.
So now you can say goodbye to engine starting problems during cold weather.
VVKB ATV Block Heater –Your Trusted Partner for Engine, Parking and Fuel Heaters
Now that you know how much good a block heater can do for you and your ATV engine, are you getting one?
If yes, have you decided on what type of heater you’re importing?
No? Well, don’t worry.
VVKB is a qualified manufacturer of engine, parking and fuel heaters.
The company has heater experts that can help you determine the right block heater for your ATV.
Note that VVKB boasts of over 20 years of experience in producing the world-class engine, parking and fuel heaters.
Today, the company has become recognized as one of the finest leaders in engine heating system designs and sale.
The company is based in the United States but supplies products to many different parts of the world.
They can supply you with any type of heater or heater parts that you require.
Whether it is in Europe, USA, Germany or Sweden, VVKB will make sure that you get the best product wherever you are.
The good thing about all these is that VVKB has a website where users can find any information they need about products.
The website includes many different images as well as straightforward descriptions for your customer convenience.
So don’t waste any time and don’t wait for the cold to come for you to take action.
Give us a call today or visit our website to find the right heater for the cold months ahead.
ConclusionBlock heaters are not only a great way to get efficiency from your engine, especially during the cold months.
They’re also a great way to get extra use and value from the engine while saving money in repairs and replacements.
Remember that the type of heater you choose doesn’t matter as long as it is suitable for your engine.
What’s important is to stop having to wait longer for your engine to start or worrying that it may not even start due to the cold.
Good luck!
Name
Message
Winter is not a reason to say goodbye to your favorite vehicle and outdoor activities until the next summer or spring. Fans of quadrics are well aware that even in severe frosts you can enjoy the ride.
Snow-covered roads, icy climbs and other delights of winter will provide a unique experience of extreme ATV driving, as well as a lot of fun and vivid impressions. However, before you get behind the wheel of a “steel friend”, you need to prepare it for the upcoming winter walk.
Preparation is not only a necessary condition for the smooth operation of equipment in low temperatures, but also a guarantee of the safety of the driver and passengers.
So how do you winterize your ATV? The entire preparatory stage can be divided into several actions that must be performed before driving ATVs:
 For example, if in summer it is optimal to take the brand "10 W-40", then in winter it is more expedient to fill in "5W-40". You should not use motor oil for cars, as it often contains special additives that ensure that vehicles work with wet clutches. Use only a profile specialized product designed for a specific group of vehicles.
 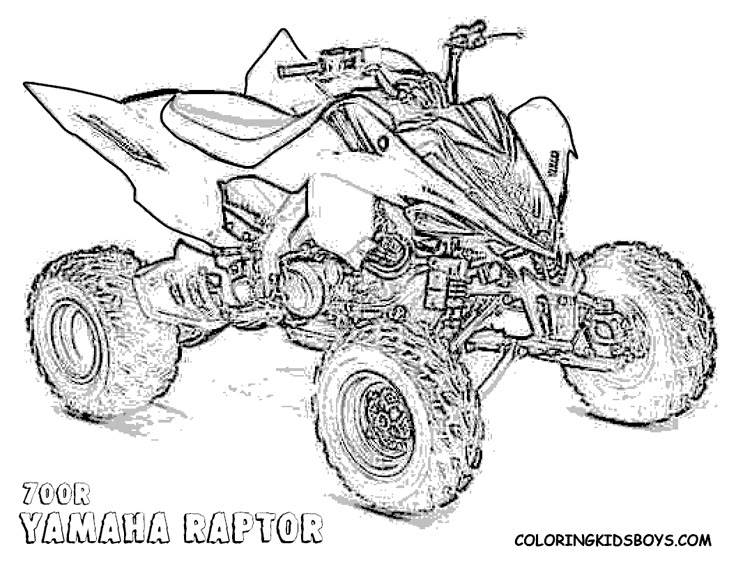 Driving on a summer and winter road is a completely different thing. For winter, the optimal tire pressure is 0.5-0.8 atm. This indicator guarantees good cross-country ability of the ATV even in snowy and icy conditions.
 ATV riding in the cold season has a number of features. What should be remembered when operating an ATV in winter? Main nuances:
 This rule, first of all, applies to owners of carburetor models.
 Another additional recommendation is that the driver has winter equipment. This includes thermal underwear, windproof jacket, heated helmet, gloves and insulated boots. All this is necessary in order to fully enjoy outdoor activities in the winter.
A special issue is storing the ATV in winter. The ideal option is a heated box or garage. Properly organized storage extends the life of equipment by several years. Often, owners store ATVs on the street, after covering it with a moisture-resistant cover. At the same time, many people remove the battery and take it into the house, to a warm room.
If you do not plan to travel in winter, you must drain the fuel, not only from the tank, but also from the hoses. The second option is to add a stabilizer to the tank. After that, do not forget to start the engine and leave it at idle until the fuel fills the entire system. Following one of these rules will ensure proper storage of vehicles in winter and extend their service life.
So, is it possible to ride an ATV in winter? Yes, you can! The main thing is to properly prepare the vehicle for the onset of cold weather and correctly operate it during this period.
Fire, one of the most powerful elements, indomitable, furious, capable of both destroying everything around, turning only into ashes, and illuminating the road in complete darkness, scaring away a wild beast, warming with its warmth, not allowing to freeze even in the most severe frost.
A person of the 21st century, who is used to making fire by pressing an electric piezo on his gas stove in a cozy apartment in a metropolis, is slightly lost when, for one reason or another, he finds himself outside of civilization. Where there are no shops, the shelves of which are bursting with an abundance of products, where the meat is already peeled from the films and cut into portioned pieces, and does not run, jump or fly, somewhere in the forest. Where even bread is sold sliced, in order to completely deprive a person of even the most elementary skills, and bring up in him an exclusively consumer.
But no one will give us a guarantee of what will happen tomorrow. And it is quite possible that those skills that are so diligently erased from our consciousness with each new generation will become vital tomorrow.
Today I will talk about one of the most important skills outside of civilization - making fire.
The first and seemingly elementary rule, but which for some reason is often forgotten, is the location of the fire relative to the bed.
 With a closer location, there is a chance to burn the tent with an arriving spark, or even worse, burn it completely, and it’s good if you are not inside.
 With this arrangement of the fire, we get maximum security, but we also lose several advantages.

All of the above is related to modern lightweight synthetic tents, but if you are an adherent of the classics and you have a canvas tent, then in principle you can place a fire much closer, literally three meters away (depending on the type of fire). For example, if this is a "node", then we will get a pretty good heating of a sleeping place, with a minimum probability of burning it.
As for the direction of the wind, this parameter is no longer so critical. Tarpaulin is not bad at holding small sparks. But for all this you will have to pay for the large weight of the tent, about 5-6 kilograms, the worst protection against rain, in comparison with modern materials. Also, when wet in warm weather, the tarp begins to mold.
Well, if you are a fan of extreme tourism, bushcraft, ease of walking and like to test your skills and your body for endurance, then instead of comfortable tents, set up a canopy or a hut, collecting it from what the forest will give you. In this scenario, on especially cold nights, the fire can be brought closer to two meters (depending on the type of fire, your clothes and the ambient temperature).
To the above, you can also add that, if possible, it is desirable to locate your camp near a water source.
The preparation of a place for a fire must be approached even more seriously than the location of the fire. It must be thoroughly cleaned of forest litter - fallen branches, needles, cones, grass, leaves. The cleared area should be about five times the size of the intended fire.
If there is such an opportunity, then it is better to dig a shallow hole for the size of the fire, a depth of 15-20 centimeters will be enough. Or to impose stones on the perimeter, if there are any nearby. Otherwise, one small spark that fell on the forest floor can do something irreparable.
It seems that everyone, young and old, knows that firewood is used as fuel for a fire. But once in the forest and, having collected twigs lying underfoot, it is not uncommon to encounter the problem of igniting them due to their dampness.
If you find yourself in the forest in early spring, or it’s a rainy autumn in the yard and everything is damp around, then in this situation everything that is lying on the ground is in no way suitable for a fire, at least in the first stages of its cultivation.
It is also worth considering that a lot depends on the type of fire that you want to collect. If you just need to boil a mug of water, then very small branches (brushwood) are also suitable for this task. If you have to cook food in a stationary camp or heat it, then for such purposes you need tree trunks with a diameter of 10 to 35 centimeters.
Now let's play a few situations:
1. Everything is dry in the forest and you managed to find a windblow (wind-blown trees), then your problem is over. Now you just have to saw or chop the tree into logs of the desired size.
2. It's damp in the forest and you found windblow , then before you can effectively kindle it, you need to do a few manipulations. After cutting the fallen trunk across, be sure to split the resulting logs along, we are interested in the dry core of the tree. Of course, I cannot give you a 100% guarantee that it will be dry, but the probability of this is quite high. We break off the core from several poles - this will be the basis of our fuel for the fire, then it is already possible to put the more raw parts with the bark up.
3. It's dry in the forest, but there are only small branches on the ground , and you need normal logs for a quality fire.
Under such circumstances, you need to look for dead wood (dried trees, but not yet fallen). This is pretty easy to do. It doesn't make sense to look at the trunks or the bark, it can be deceiving. You need to look at the tops of the trees. If it is a coniferous forest, then there will be no difficulties at all. Dry needles or no needles at all ensure that the tree is dead and completely dry. If this is a deciduous forest, and it is early spring or late autumn outside, then it is a little more difficult here. You need to look closely at the formation of buds, or the remains of completely fallen leaves.
4. Early spring in the forest, snow in places. Naturally, we make the choice between windblow and dead wood in favor of the latter, but with a small nuance. For the initial kindling of a fire, a part of the trunk at a height of about one and a half meters from the ground is suitable, since everything below is damp due to melted snow.
In this section, I will not consider such options as "splash gasoline." But I also don’t see the point in talking about completely exotic methods, such as lighting a fire with a piece of ice, bottle glass or a Pepsi can. In 18 years of extreme tourism, I have never had to use them.
Means of lighting a fire are not so great, they include standard ones such as matches, a lighter, and less common ones - flint and a fiery bow. If everything is clear with the first two, then I would like to dwell on the last two in more detail.
Steel
Until the 19th century, it was the most common tool for making fire. The flint and flint consists of three parts: flint, flint, and tinder.
Armchair used to be made of iron, but it had one drawback - excessive hardness, and it was difficult to achieve sparks with your hands. Subsequently, iron was replaced by misch metals (an alloy of rare earth elements obtained during the processing of ore), the most common of which in our time is ferrocerium. If in the old days the armchair had various shapes, it could even be a small work of art, for example, in the form of two intertwining snakes, then at present the armchair looks like a metal rod of various diameters and lengths, with a wooden or plastic handle.
Flint was made of a harder material than flint. As a rule, in the old days, the natural mineral flint was used (hence the name). His task was to carve chips in the form of flammable sparks from a softer chair. At the present time, due to the manufacture of armchairs from softer misch metals, silicon has been replaced by hardened steel, in the form of a metal plate or the butt of a knife.
Tinder is any flammable material: cotton wool, dry moss, small wood shavings, tinder fungus, etc.
The flint is a very reliable and trouble-free means for making fire, which is not afraid of either moisture or mechanical stress.
By the way, there is no need to constantly carry all three of its constituent elements with you. Only one flint will be enough, and flint will easily replace the butt of a knife (after all, a person in the forest without a knife is nonsense), or in extreme cases, any pebble of a suitable shape will do.
Everything is easier with tinder - they took a knife, cut off small chips or cut birch bark, splitting it into small fibers. You can find the tinder fungus, which usually grows on birch trees. In general, there is nothing complicated about this.
They make fire with the help of a flint and flint with sharp scratching movements of flint on an armchair so that the sparks that are cut out fall exactly on a pile of tinder prepared in advance. When a small coal appears, we begin to inflate it, as it flares up, putting pieces of birch bark or shavings into it. And now, in our hands is already a real fire.
Firebow
This is already a rather exotic tool, I myself have used it a dozen times, but only in order to develop a skill. In essence, it can be useful to you only in an extreme situation, when something happened to your equipment, but knowledge is never superfluous, therefore:
Now we assemble the structure.
 We stock up on patience, and due to the force of friction, we extract a small coal in our deepening of a flat plank.
 How to light a fire with one match? Very easy! The main thing is preparation.

Bonfire in the winter forest
If the task is to make a fire in the winter forest, then there are two options.
Option one. Clear the place of the fire from snow to the ground. Yes, the task is not easy, because the snow can be waist-deep or chest-deep. But since you are in the forest in winter and you need a fire, then it will not be superfluous to warm up before kindling a fire, especially since this task can be completed even without a shovel, with the help of one hand and foot - personally verified. If you have skis, dig with your skis.
Option two. If the crust is more or less dense, we take several deadwood poles at least two meters long (or better, more), lay them on the snow tightly to each other, like a floor, and already in the middle of these poles we collect a fire. The poles will not let it fall into the snow until their middle burns out, but when this happens, they can be moved to the center again and the fire turns out to be quite long-lived.
Bonfire in the rain
The first step is to find a natural rain canopy in the form of a dense tree crown (be careful not to burn the tree), or build a canopy yourself. With self-manufacturing, in the absence of modern materials, densely laid spruce branches on top of the poles are well suited as a canopy roof. Just keep in mind that the canopy must be made high enough, at least 180 cm, otherwise there is a chance of just burning it.
If the rain is very heavy, and the forest floor can no longer cope with the abundance of precipitation, then, just like in winter, you can make a flooring under the fire, only using poles is already much shorter, 40 centimeters will be enough. The search for dry firewood is no different from that described above in this article.
There are many types of fires. To be honest, I did not use all of them, but only a part, and singled out for myself the most optimal ones, with the highest efficiency, taking into account the labor costs for their preparation.
I will conditionally divide them into two types: for heating and for cooking. I want to note right away that my division does not mean that you cannot cook food in the first form, and warm yourself in the second. It's just that the labor involved in creating them is different, and the requirements for comfortable heating and cooking are also different.
Bonfires for heating
1. Nodia
Deservedly popular bonfire among hunters and extreme tourists. Its main purpose is to heat a sleeping place, a group of people, up to minus 30 degrees. Its second undoubted plus is the burning time, which can be more than 10 hours without additional human intervention. Nodia is also good at cooking for a group of people. It is for a group, since it makes no sense for one or two people at a comfortable ambient temperature to collect Nodya exclusively for cooking. A bonfire is quite labor-intensive, you can’t get by with one knife, you will need an ax or a saw to make it.
To create a Nodia, you will need two or three logs (Nodia can be made from two or three logs). The diameter of the logs should be approximately 30 centimeters with a length of about 2 meters, and more can be. After all, the more massive the logs are, the more heat the fire will give, and the less likely it is to wake up at night from the cold due to its burning out.
We will also need at least four chocks, with a diameter of about 7 centimeters, two of which will be 50 centimeters long, and the rest - 20 centimeters each.
The assembly of the fire is carried out as follows:
2. Taiga fire
Compared to Nodia, it is easier to make, but as a minus, we get the need to wake up 1-2 times a night to move the logs. Other than that, the two fires are very similar.
To create it, we will also need large logs of a similar size, only in an amount of 4 to 5 pieces.
Campfires for cooking
1. Polynesian bonfire
The most rarely seen fire in our latitudes, in my opinion, is very in vain.
I like to make this fire in a stationary camp, because it allows you to cook truly delicious dishes, because in its functionality it resembles an oven, and if you cover it with something on top, you get a smokehouse.
If, for some reason, you want to leave your stay unnoticed, then this fire is the best suited for these tasks, since it is hardly noticeable.
To make it, we need:

Of the pluses, it can be noted that the flame is powerful, clearly directed upwards, not going to the side due to gusts of wind, which positively contributes to quick cooking. If you lightly extinguish the logs so that they do not give an open flame, and hang a piece of meat in the center of this fire, then we will get uniform frying from all sides, and if we cover the hole with something from above, we get a stove with a smoking function.
Of the minuses - you need to dig a hole.
2. Fire well
It is convenient to put any utensils right on top of this fire - a frying pan, a pot, a saucepan, and so on. Also, the directed flame and the slow burning rate of the fire can be attributed to the pluses. The downside is the need to prepare logs of approximately the same diameter and length.
Assembly is carried out as follows:

Here, I probably won’t say anything new, everyone knows that a fire is filled with water. But there are situations when the supply of water is limited, and the fire needs to be put out.
If it is not possible to fill the fire with water, you need to wait until it burns out completely. Yes, of course, this is the time, but the forest and its inhabitants are much more important than your time.
As a second option, fire can be buried with earth. Just be careful - the ground, not the forest floor. It is better to take the earth at a depth of 30 centimeters, since before this value the soil still contains organic substances, due to which the fire can flare up again.
TIP!
To make it easier to kindle a fire, especially in wet weather, we borrow cotton cosmetic sponges from our “second half” in advance at home.