Now that you have your ATV, you get to start the joyful process of maintaining and caring for your ATV. This process can seem overwhelming and a little daunting, but when armed with a little knowledge, taking care of your ATV can be a normal part of your recreational routine. One of the most common items you will need to maintain on your ATV is the battery. The first place to begin when you are caring for your ATV’s battery is deciding what type of battery to choose. Fortunately, this choice is straight-forward and, with a little consideration, you can really maximize your ATV use and investment. When considering which battery to purchase for your ATV, there are three primary types to consider: Lead- Acid (also called conventional), maintenance free batteries (also called Absorbent Glass Mat or AGM for short), and lithium batteries.
Lead acid batteries are the most common type of batteries. They have been around for the longest period of time which is why they are commonly referred to as conventional batteries. Typically, these batteries are easy to identify because they are clear containers with a black top that has caps fastened to it. These batteries have multiple cells separated by lead plates that are charged by battery acid to power your ATV. These batteries have been around for a long time and because of that they are also the most economical option. If you are thinking that ATV batteries are the same as car batteries, you are very mistaken. ATV conventional batteries, unlike most car batteries, take maintenance to make sure they are able to function and run properly. The primary responsibility to you as an ATV owner is to make sure the acid levels stay within the fill lines. Without the proper amount of battery acid between the lead plates, there is a good chance your ATV will not work because your battery will fail. This amount of maintenance may drive you away from choosing a conventional battery, but there is no reason it should.
 The fill lines are clearly marked on the container and with proper care, these batteries can last a long, long time. Since there is loose liquid within the battery, there is a chance that the battery can be a little less consistent on rocky terrain, but overall this is typically not noticed by most recreational users.
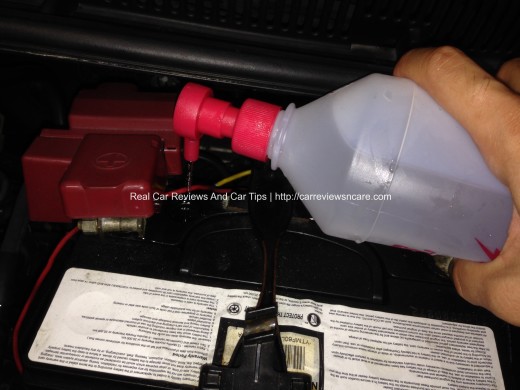
One thing to note about conventional batteries is that they do not come ready to install into the ATV. When you purchase a conventional ATV battery you will need to be prepared to fill the battery and then provide it an initial charge. This process is not difficult, but it does deserve a mention. Before filling any new battery, it is important to read the instruction manual that comes with your specific battery, but most conventional batteries are filled very similarly. Before you begin, you may want to consider filling your battery in an open space, such as outside or in an open garage, because the chemicals being used are corrosive and do have the ability to do damage.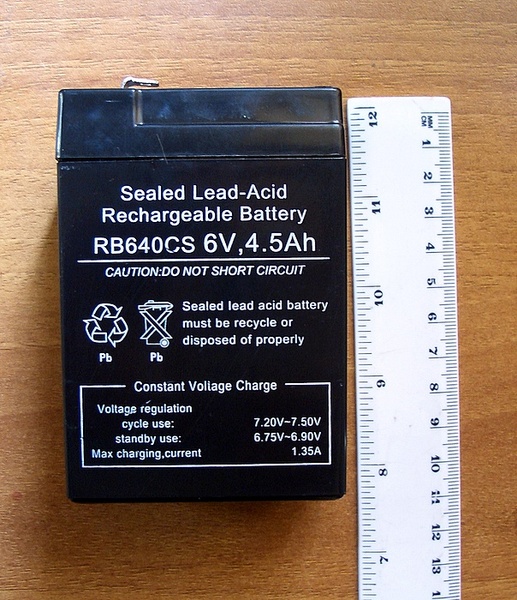 If you do spill some of the chemicals, you can neutralize them by using baking soda and water.
Although every battery will come with specific directions, here is generally what you can expect when filling your new conventional ATV battery. When you purchase a conventional battery, you will notice it comes in several parts. First, you will have the battery housing, which is the clear housing with black top and several caps on top. Second, you will have a container full of battery acid. Third, you will have two sets of tubing: A longer tube, which is typically to be attached to the battery casing permanently and is designed to help the battery expel battery gases during use and the second, smaller tubing is a spout that will help fill the battery casing with the battery acid. As a safety measure, please make sure to wear gloves during the filling process. When you are ready to fill the battery, you will remove the caps from the top of black lid on the battery casing. There are several caps because they allow access to the different sections of battery that lay between the lead plates of the battery. On top of the battery acid container, there will be two spouts. One with a large opening, which is used by manufacturers to fill the container with acid at the factory and a much smaller spout that is used to distribute a much more controlled amount into the battery. Attach the small spout tubing to the smaller spout and begin to fill your battery. Make sure to fill each section to the top of the fill line located on the container. It is most beneficial to initially fill all the sections partially, then tap the side to dislodge any misleading air bubbles and then completely fill any sections lacking fluid. When each section of the battery is adequately filled, you will want to finger tighten the caps back onto the top of the battery casing and you are ready to initially charge your battery.
While in use, your battery will be recharged through use of the alternator, but initially it is up to you to make sure that you are setting a good standard for your battery’s life. Providing a solid first charge allows the battery life to reach 100 percent, which will allow it to be the most effective while used on your ATV.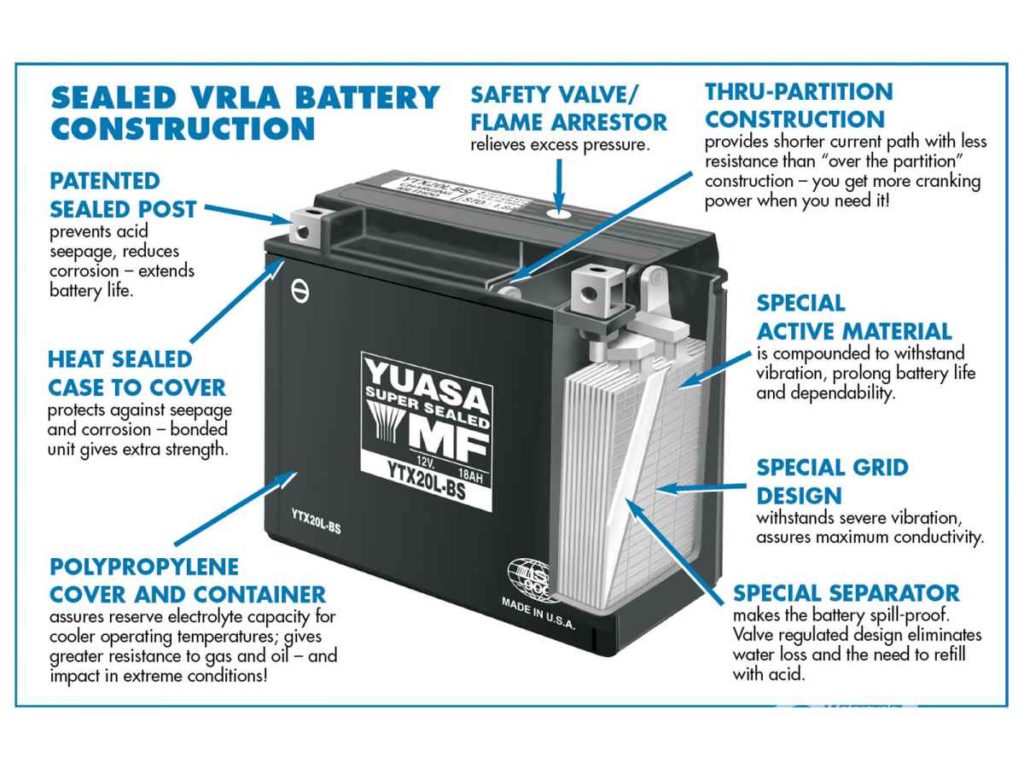 Charging your battery is as easy as it seems, but there are a few important considerations. Firstly, make sure you are using a charger that is appropriately rated for your battery. DO NOT ATTEMPT TO USE A CAR BATTERY CHARGER FOR THIS PROCESS. ATV batteries are not as powerful as car batteries and they could easily be ruined by using a charger that is too powerful. Instead, look at the amps that your battery is rated for. Typically, this is located on the front of the battery and denoted by the letters AH. Then find a charger that is rated for 10% of the amps. If you have a battery that is rated 14 AH you will want to find a charger rated for no more than 1.4 AH. Hook up the battery to charge, but keep an eye on it. If it becomes warm to the touch, unplug the battery and give it time to cool before completing the charge. Many chargers have functions that will automatically turn of the charger when the battery is fully charged. If yours is lacking this feature, unplug the charger as soon as the charge is complete to provide the best charge for your battery.
 Finally, you may notice that the acid levels in your battery decrease during its initial charge in one or more of the sections of your battery. If this happens, carefully unscrew the lid for that section and use distilled water to replenish the liquid to the top fill line of the container. Being a little involved in your initial charge is going to pay dividends in extending the life and health of your battery and investment. Once the charge is complete, you are ready to install your battery into your ATV.
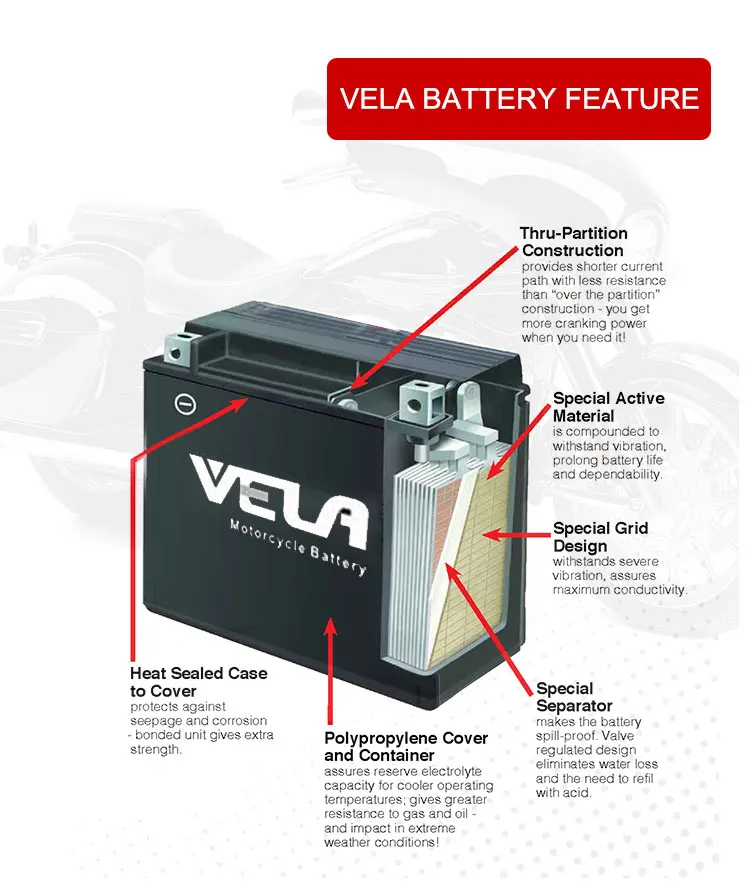
The second type of battery to consider is called a Maintenance Free battery or an Absorbent Glass Mat battery (AGM). These batteries are called AGM’s because they have layers of glass fibers in-between the lead plates that help to absorb the electrolytes and hold the liquid in place. This allows the battery to better control the vibration of the liquid, which provides a more consistent output of energy and better battery life, especially for vehicles that are meant for off roading.
Maintenance free batteries have several advantages compared to conventional lead acid batteries. Firstly, they are typically smaller than conventional batteries. Due to the absorbent layer in between the plates, they also discharge at a slower rate, which is beneficial for vehicles that are more likely to sit for a long period of time. If you are an occasional rider, it may be worth the investment to have a more likely chance of your battery working after sitting for a while.
Although these batteries are “maintenance free,” it does not necessarily mean they won’t require some work on the front end. Many maintenance free batteries come prepackaged and ready to charge, but others will still need you to fill the battery casing with the acid. This process in AGM’s is simplified in comparison to the conventional batteries. In the packaging you will only find three items: the battery casing, an acid pack, and the caps for the top of the battery pack. These types of batteries usually come with acid packs that are pre-measured with foil tops.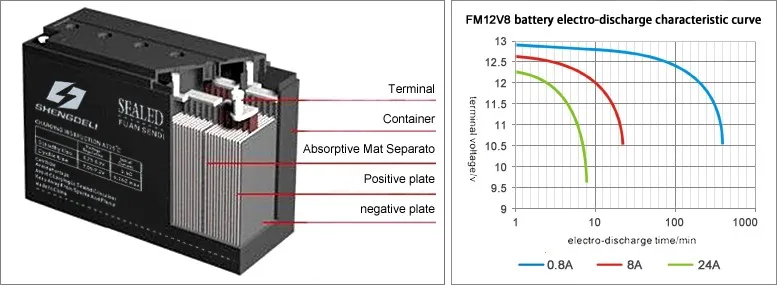 The top of the battery casing will have corresponding points meant to puncture the foil so you simply have to turn the acid pack over, firmly puncture the foil and let the acid drain into the battery. Once the battery is filling, there is a puncture stick that you can use to poke a hole in the top of the acid pack to allow air into the compartments, which will allow the fluid to drain more quickly. This process can take up to an hour to make sure the battery is completely filled. Once the battery is filled, place the battery cap on top. Make sure to hand tighten these caps and not to use a any tools. After the battery is filled, set the battery up to charge with all the same considerations of a conventional battery.
The final type of battery to consider for your ATV is a lithium battery. This is the newest and most specialized type of battery and with that comes a more substantial price tag. These batteries come pre-sealed and ready to charge and install. Unlike lead acid and AGM batteries, there is no liquid in a lithium battery This makes them lighter, smaller and able to be mounted in any position. Lithium batteries are the latest in ATV battery technology, but that does not make them necessary for all ATVs. A lithium battery is not a bad investment, but unless you are a vigilant rider, it may not be a necessary one.
Maintaining your ATV may initially seem daunting, and choosing a battery type is no exception. Any battery you choose is going to be a great choice for your ATV as long as you understand the benefits and responsibilities associated with each battery type. When looking for a battery for your vehicle, take time to consider your specific needs as well as your commitment to maintenance.
Home / Motorcycle How To's & Walkthroughs / How To Fill, Charge and Replace a Motorcycle Battery
Posted by: YouMotorcycle in Motorcycle How To's & Walkthroughs July 16, 2021 0
A complete beginner’s guide to how to fill, charge, replace a motorcycle battery.
So your old motorcycle battery is dead, you’ve read the guide on how to test if your dead motorcycle battery is still good, and you’ve bought a new motorcycle battery. Now what? The filling and the first charge of a new motorcycle battery are critical to it’s long term health. If you do it wrong and you risk irreparable damage to your brand new battery that could not only harm it’s peak performance, but also shorten it’s lifespan in the long term. Here’s how to fill, how to charge, and how to replace a motorcycle battery you’ve just bought the right way.
These 5 steps are super simple, but how well you initially fill and charge your battery, along with proper maintenance is critical to how long your battery will last over time, so make sure you follow them carefully.
This video is the second part of a series where I’ve bought a motorcycle with a lost ownership for dirt cheap to try to fix it up and sell it and make a profit. If you find it helpful, please subscribe to the monthly newsletter (in the sidebar) or to the YouMotorcycle channel on YouTube.
Let’s get started with filling up and installing a new motorcycle battery.
STEP 1 – Place the new battery on a level surface. Take out the acid pack, and press it firmly into the battery to fill the battery with acid.
STEP 2 – Let the battery sit for a minimum of 30 minutes AFTER it’s done being filled.
STEP 3 – Seal the battery and charge it.
STEP 4 – Replace the existing battery by disconnecting the negative battery terminal first.
STEP 5 – Install your new battery by connecting the positive terminal first

THAT’S IT, YOU’RE DONE!
Your battery is installed and ready to go! This is usually the first step towards getting an old motorcycle running again. If you found this article helpful please let me know in the comments section down below, it helps me understand what kind of content you guys enjoy. If you watched the video and enjoyed it, please consider subscribing to the YouMotorcycle channel.
Remember, just because your motorcycle battery is dead, that doesn’t mean it can’t be brought back to life. Likewise, just because you can recharge an old motorcycle battery, doesn’t mean it won’t leave you stranded 20 miles down the road.
Here’s how to test your dead motorcycle to see if it’s still useable (you can also use this method to test your car battery too). A lot of people experience motorcycle battery issues in the spring time from lack of maintaining their motorcycles over the winter, or from starting their motorcycle for the winter without actually riding it. Here’s why you shouldn’t start your motorcycle battery during the winter.
If you do need to replace a motorcycle battery, you should stick with the Yuasa brand of batteries. They’re typically more expensive and much better quality than those suggested in generic best motorcycle battery articles. They may cost twice as much, but they will last you three to four times as long and be much more resilient.
Don’t forget to come along with me for the ride as we get this motorcycle fixed up and sold. We’ll be covering a lot of motorcycle maintenance tips and how-tos along the way, with new content coming out every week.
As always, thanks for checking out YouMotorcycle. Ride safe, but have fun!
BatteryMotorcycle Maintenance 2021-07-16
Tagged with: Battery Motorcycle Maintenance
Previous: How To Get A Motorcycle Title & Make Sure The Bike Isn’t Stolen
Next: How To Install GIVI Monokey Rack (BMW G650GS)
YouMotorcycle is a lifestyle motorcycle blog with an emphasis on helping motorcyclists with insight from motorcycle industry insiders and experts. We remain fiercely independent, innovative, and unconventional.
Many riders don't know how to properly charge their ATV battery.
In fact, if you don't properly charge your ATV's battery, you can cause extremely significant damage.
If you're puzzled too, then this is your lucky day, because I'll most likely show you in detail how to properly charge an ATV battery.
Contents
The ATV has a built-in engine-powered charging system. But the current it provides is not very high.
You can charge the battery during long trips, but this is not always practical. Instead, you can use an external charger.
I will give you 3 easy ways to charge your ATV. By following the 3 steps below, charging your ATV is a breeze.
Before starting all the work, it is necessary to prepare some tools in advance so that you can better charge your ATV. With the right tools, the process is so simple that just about anyone can complete it.
When all the tools are ready, let's get started.
Battery and charger must remain dry during the entire charging process .
In addition, the battery should be somewhere well ventilated to ventilate any gases generated during the charging process.
Recharging or even simply recharging a battery causes a chemical process that releases explosive hydrogen gas. With proper ventilation, you reduce the risk of the gas being agitated by a spark, which could lead to an explosion.
A garage or shed where you can leave the garage door open would be a great place.
If you don't have a completely dry and well ventilated area to hold your entire ATV, consider removing the battery from your bike to charge it.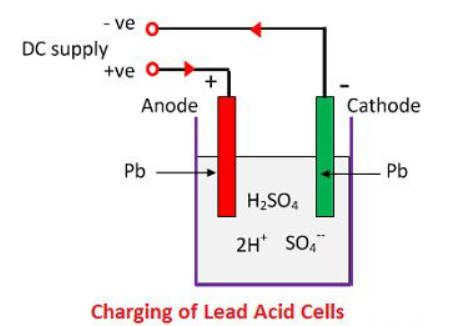
Company The ATV and all accessories must be turned off while charging. to stop the sparks.
0035 open the seat of your ATV to make sure you have access to the battery.
To remove the ATV seat you will need to use a screwdriver to remove the screws protecting the seat and then you need to start loosening all the screws that protect the ATV battery.
It is very important to make sure that the screwdriver you are using is suitable for the screws that hold the seat in place to ensure that it does not damage the screws which can be very difficult to remove once they are damaged.
Once you have removed the ATV seat and gained access to the battery, you will need to get rid of the battery covers .
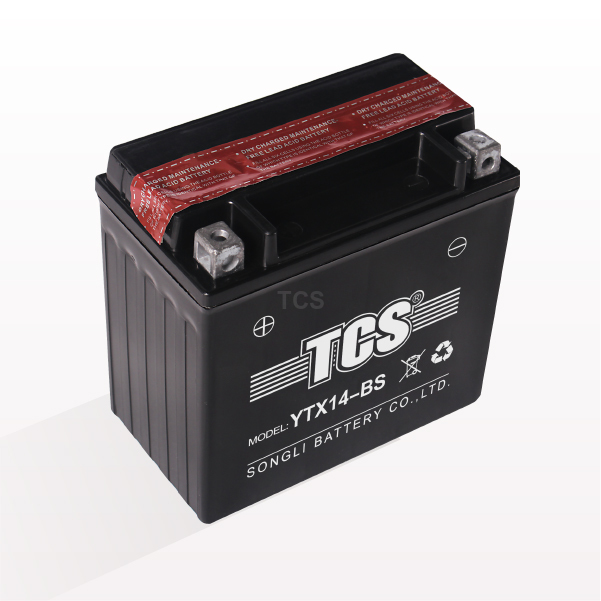
After removing the battery cover, you must determine which battery is in your ATV. This should be clearly classified on the side.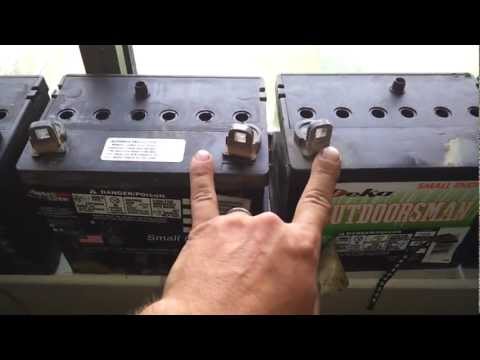
If you can't check the tag or it's missing, here's how to find out which battery you have.
If there is liquid inside and there are removable caps on the front, it is a flooded lead-acid battery. In addition, it will have a partially transparent body, which will allow you to monitor the level of liquid inside.
If there is liquid inside, but there is a flat top without any covers, it is a sealed lead-acid battery. This can also be a VRLA battery.
However, if the battery looks like lead acid, has a high level, and you can't hear liquid inside, it's a gel cell or AGM battery.
If the battery is small and very light, it is a lithium-ion battery.
All ATV batteries, regardless of type, require a 12V charger that provides a low current of 1 to 3 amps. .
Sealed lead-acid, sealed lead-acid, VRLA and AGM batteries can be recharged with a manual charger. However, you need to monitor the charge of the battery with a voltmeter in order not to overcharge it.
This is especially important for sealed lead acid and VRLA batteries, as they cannot be recharged after recharging and may be permanently damaged.
For gel batteries you will need a charger, especially for this type of battery. It's the same with lithium-ion; try to find a lithium-ion compatible charger.
If you want to avoid all these problems, we recommend purchasing an automatic charger . Unlike a manual charger that needs to be unplugged or the current setting changed, once the battery reaches a certain level, you can plug in an automatic charger and walk away as well.
It instantly detects the battery voltage and provides the correct voltage and current. It will automatically stop charging or enter trickle mode when the battery is fully charged. So you never have to worry about damaging your ATV battery.
The ATV battery can be charged while it is in the vehicle or removed. Just make sure you charge in a well ventilated area , the charging process creates flammable gases .
If you are using a manual charger, check battery voltage with a voltmeter . This will tell you how low the battery is, as well as how long it will take to charge it.
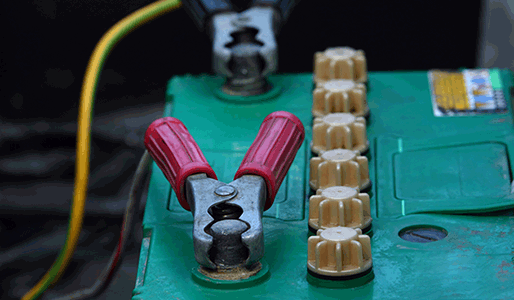
Next, connect the red wire of the charger to the positive terminal of the battery and negative wire to the negative terminal of or a piece of steel around the engine.
Set the hand charger to the ideal charging current. To be on the safe side, select an existing one that is no larger than a tenth of an Ah battery . For a 30 Ah battery, set the current on the charger to 3 A or less.
Connect the charger and start the charging process. Constantly check the charge level of the battery . When it reaches 80%, halve the current. This allows the battery to fully charge.
When fully charged, turn off the charger quickly. If you leave the battery for a very long time, you can enable maintenance mode if the charger has it, or purchase a battery tender to keep it charged.
The automatic charger is much easier to use. You don't need to check the battery voltage or monitor the battery.
All you have to do is select the battery type and voltage. Many automatic/smart chargers have special charging modes for AGM, Li-Ion, GEL and other types of batteries.
Connect the charger to the battery and leave it to charge as well. It will safely charge the battery and also keep it charged without overcharging.

The charging system on an ATV is not as efficient as on a car, so it will take longer to charge the battery properly.
Unless you make hour-long rides each time you start your bike, it will probably use even more power to start the bike than it can charge while you start it.
In addition, ATV batteries are small enough in both sizes to support the overall weight of the bike.
Add to that a few energy-hungry accessories like an ATV winch and you'll quickly find that your battery is too low to start your bike. Leaving the battery at a low charge level in time will further damage the battery.
That is why it is recommended to charge it from time to time to save yourself from problems in the future.
ATV batteries should be charged whenever battery voltage drop is below 12.4-- 12.6 volts . Charge the battery every fall and every spring, and use the battery to keep it in good condition when the ATV is left idle for long periods of time without use.
Car battery chargers typically deliver 10 amps of existing ones, which is too much for an ATV battery. It can overheat and also permanently damage the battery.
If the charger is not set to limit current to less than 3 amps, do not use the car or truck charger.
If you can reduce the current to 3 amps, use the same as the manual charger.
Yes, you can charge your ATV battery with your car, but only to give it a boost. This is useful if your ATV won't start because the battery is dead.
Use the jumper cable to connect the car battery to the ATV battery. Do not start cars and trucks . This can give too much power and also damage the ATV's small battery.
Vehicle battery has sufficient charge to revive a dead ATV battery. After a few minutes, disconnect the connecting cable and try to start the ATV again.
To emphasize, this technique is just for starters . Do not use it to fully charge an ATV battery, given that you have no control over how much current and voltage it receives.
Yes, you can recharge your ATV battery. This happens if you are using a charger that provides too much current or voltage. Leaving the hand charger plugged in even after the battery is fully charged can also cause it to overcharge.
Overcharging can damage the battery, usually completely. This is especially true for sealed batteries where you can't open the caps and regenerate the electrolyte.
How long to charge a motorcycle battery (The Unique Guide 2022)
What does the stator do on an ATV? Most Comprehensive Review 2022
Rodney L. Herron
Rodney L. is a technical writer and product consultant with over a decade of experience in the automotive industry. Rodney is a fan of high performance machines that run fast and loud and is an expert in all things custom. His numerous articles and reviews are available in our knowledge base. Whether something is wrong with your bike or you are building a custom bike, you can trust Rodney's experience.
Electric ATVs are rapidly gaining popularity due to their economy and environmental friendliness. But many riders still do not know how to charge an ATV on a battery. Improper charging reduces the battery life or the battery loses its capacity quickly. Therefore, let's figure out how to charge a children's ATV and consider the key recommendations of experts.
There are two ways to recharge the ATV battery. The first and easiest is to connect the charger to the appropriate connector. All electric cars and scooters are charged in a similar way, although not all quadrics have a similar socket.
If the ATV does not have a charging port, the rider will have to connect the battery directly to the charging station. To do this, you need:
It is important to note that lithium batteries have a charge control board. This means that after a full charge, the process stops. Although overcharging the battery is still not recommended.
Another important question many riders are wondering is how to charge an ATV battery with an in-car charger. Yes, such a procedure is possible, but you need to properly configure the charger.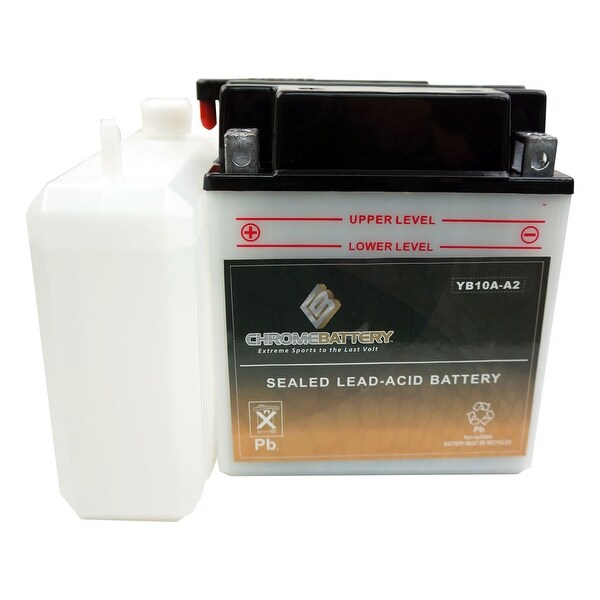 For recharging, you can only use devices with adjustable charging current and the ability to set its minimum level (0.5-0.7 A).
Important : The optimal current for battery charging is 1/10 of the battery capacity (in Amps).
The user manual for each ATV indicates the optimum battery charging time. On average, this figure is 6-12 hours. The charging time depends on the generation of the battery, its capacity and the characteristics of the charger. Don't forget to charge the battery, though. If the battery has 30-40% capacity left, the recharging time should be reduced.
But what if you don't know how long to charge your ATV battery? In this case, you need to almost completely discharge the battery and charge it for 8 hours. After that, the battery should be installed on the quadric, and the charge level should be assessed. If the indicator shows 100%, next time you need to charge the battery for 6-7 hours.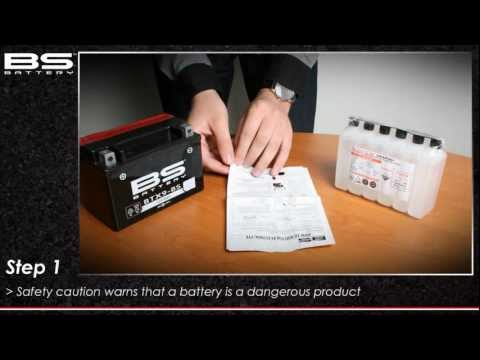 In this way, you can determine the optimal recharging time.
Also remember that overcharging is the main enemy of batteries. It is strongly not recommended to leave the battery connected to the network for 15-20 hours. This leads to a decrease in battery capacity and, accordingly, a decrease in the operating time of the quadric.
Knowing how long it takes to charge an ATV, you can make a schedule for recharging it. For example, the battery can be connected to the network in the evening or after each trip. You can also purchase a replacement battery, thereby increasing the riding time on the ATV.
The battery of any electrical equipment must be properly maintained. Violation of the recommendations may lead to a decrease in battery capacity or damage to it. To avoid such problems, it is recommended:
Separately, it is worth mentioning the "buildup" of the battery. Immediately after purchasing the equipment, you will need to fully charge and charge the ATV several times (2-3 times).
Most riders store their bikes before winter. And in order for the device to be ready for operation in the spring, it must be properly preserved. Preparing an electric quad bike for wintering is quite simple, you just need to find a warm and dry place to store the quad.
Another important conservation point is battery preparation. Before wintering you need: