Flat tires are part of cycling, and most cyclists know how to deal with them. But there are options for changing tires without tools, and tricks that can help you get back on the road faster.
Experienced cyclist sometimes skip the tools when changing tires.What if you’re caught in the middle of nowhere with a flat clincher? Or you might have already broken both your levers, without getting that damn tire off. Don’t lose hope, you can change that tire without any tools whatsoever if you go about it right.
Focus on completely removing the tire from the wheel. Don’t attempt to pull it loose only on one side, you’ll need both hands pulling at the same time from one side, which results in the complete removal of the tire from the wheel.
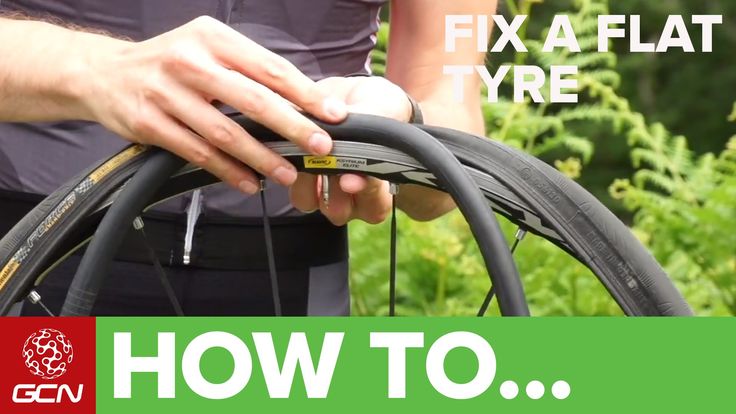
Clinchers work when pressure from the inflated tube seats the bead of the tire inside the rim. It can be tricky to get loose initially, but once it starts it becomes easier. Crouch down and place the wheel in front of your knees. Grasp the tire and pinch it from both directions to break the bead on both sides, rolling it as you work around the circumference.
Place both hands at the top, with your thumbs on the rim. Pull the tire and tube together, toward your body, using your thumbs on the rim to add opposing pressure. Once it starts to come off, it gets easier. When it’s off, inspect it inside and out to find the source of the flat and remove it. Slip the tire back on the rim, seating the tire on the rim, only on one side.
Pull the tire and tube off together.If you’re on a group ride, nothing will impress your friends more than what you do next: Get out the new tube, open the Presta valve and use your cheeks to blow air into the tube. If there’s a Superman on this ride, it’s you. But seriously, it’s easier than it sounds, and only takes a bit of air to inflate the tube enough to stuff it back into the tire.
Push the tire back over the rim using your thumbs. It’s easy enough until you get to the last few inches. If it gets too tough, its fine to roll the last few inches of tire over the rim, it will pop back into the bead as it when it passes over the tight edge. Use your frame pump to fill it the rest of the way, even Superman would have trouble filling it up to 100 lbs using only his cheeks.
Once you’ve accomplished the no-tools procedure, you might even find that it’s quicker and easier to fix a flat without tools. One thing comes into play though; if you’re working with brand-new tires, it is more difficult to accomplish. Tires with more than a few miles on them are easier, and some brands are just easier than others.
Biketoworkday is supported by its audience.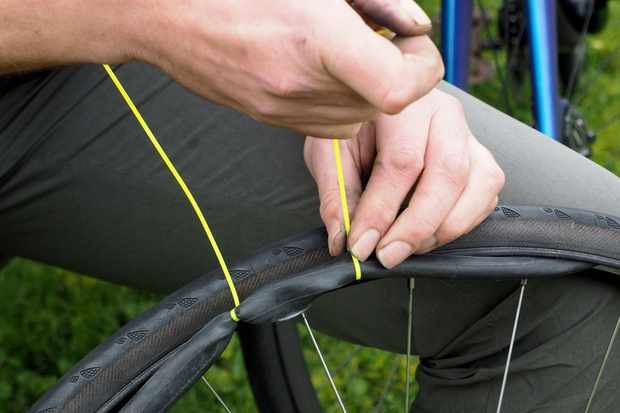 When you buy through our links, we may earn an affiliate commission. Learn more
Written by Gary Johnson / Fact checked by Henry Speciale
One of the worst things that could happen to a cyclist is having a flat tire during long-distance biking. There are times when you mistakenly forget to bring a bike repair kit, and you have nothing to use to fix it.
Thus, it is vital to build up some repair skills to prepare you for this kind of cycling scenario. So, how to fix flat bike tire without tools?
Well, you have to learn how to remove the tire from the rim, inflate the tire tube, and put it back to the bike rim. The procedure is easy once you read our guide below:
Table of Contents
 Remove the tire
No one likes a flat tire that keeps going flat. It is a major hindrance on the road and can eventually compromise your safety. Having a flat tire means having to slow down, and taking time to inspect and repair your bike.
There are several reasons why your bike tire goes flat. Here are the top culprits of your flat bike tires:
1. Glass shards
Glass shards are hard and strong materials that can easily puncture any object. They cause a lot of damage, especially to pedestrians or bikers because they are often not visible on the road. You can easily pass through it without even noticing. The next thing you know, the material punctured your tire, and now it’s starting to deflate.
Thus, it is essential to be very observant when biking. If there are any shiny material on the lane, it’s probably broken glass that has the potential to damage your bike tire.
2. Goatheads and thorns
Thorns and goatheads are also culprits. Goatheads are plant-born spike balls that can easily penetrate your tire. They are caltrops that stick to your tires, and eventually puncture them.
Like broken glasses, goatheads are not very visible on the road. Their color easily blend with the environment, and it would be hard for you to see them while biking. Thus, avoid riding on the edges of the trial, where more goatheads are located.
3. Pinch flats
Pinch flats or snake bites are little punctures on the edges of your bike tube. They are the result of the tube constantly being pinched between the road and the bike rim. It usually happens when you are riding at a speed. Most pinch flats start from underinflated tires given the lack of pressure to keep the rim off the road.
4. Tire wear
Excessive use of your bicycle also causes flat tires, and you need to change a bike tire without tools in the process. You might not notice, but your tire develops tumors due to wear. Bike tires that are ridden down to the cords will lack rubber to protect the tube within. As a result, sharp objects can easily penetrate through the material.
In case you unluckily encounter these things, especially during long-distance cycling, you might need knowledge on how to fix a flat tire bike without using any tool:
The first step to fix a bicycle flat tire without tools is detaching the tire from the bike wheel. You have to remove it slowly and carefully and avoid pulling it out from just one side. It is necessary to use both hands, so you can pull the wheel from the two sides.
You have to apply pressure when removing the tire from your bike given that you are not using any tool. Use the same amount of pressure from both sides of the tire to pull them at the same time.
The tire bead is the reinforced section of your bike tire that touches the rim. If you have a clincher road bike tire, it will probably have a tire bead. When you repair a flat bike tire, it is crucial to remove the tire bead by crouching down and placing the wheel in front of your knees.
Then, you need to grasp and pinch it from both directions to break the bead on the two sides. Afterward, roll it down as you follow the circumference of the rim.
To do this, you need to place both of your hands at the top andposition your thumbs on the rim. You have to pull the tire together with the tube towards the direction of your body. Apply pressure on your thumbs that are placed on the rim, so you can easily pull the tire from it.
If it is not starting to come off, add more pressure on both of your hands. By this, you will notice the tire starting to come off, and it would be easier to remove it entirely. Inspect the source of damage and remove it.
Then, inflate it by opening the Presta valve and blowing air into the tube until you are confident there’s enough air inside. Ensure that the tube is in right shape, so you can put it back into the tire easily.
At this point, you should have already fixed the damages and inflated the tire tube. You are now confident to place the tire back to the rim. To do this, you have to push the back over the rim using your thumbs. Add pressure, and do this gradually until it is easier to roll over the rim.
You will notice that the tire pop back into the bead after it passes over a tight edge. Ensure that the tire is back in the rim. Finally, test drive your newly inflated tire and check if it has enough air.
Fixing a flat bicycle tire without tools is easy if you are creative and have the proper knowledge. You will only need some patience, a good amount of energy, and enough skills to be able to remove the tire from the rim, inflate the tire, and place it back to the original location.
May this tutorial on how to fix flat bike tire without tools help you with your flat dilemma, especially in situations where you have no tools to rely on. The steps are very simple, and with just a few tweaks, you will have the tire back up again.
Gary Johnson
“I ride my bike to work for years, but is that enough? Our carelessness towards our surroundings has taken a toll on the environment. And now, everyone is responsible for changes; even the most minor contribution is counted. With this hope and spirit, I started with my partner to establish Biketoworkday to help more individuals commute to their work sites on their bikes.”
02/22/2018
Despite the objective importance of the spare tire, not all drivers always have it with them. Some do not carry a spare tire out of hope or belief that their tires are invulnerable. Others deliberately take this step, as they stocked up with a special tool in advance, which, if necessary, can eliminate a tire puncture along the way. What else can be used and how to do it right? Let's figure it out.
Contents of :
Conventionally, all methods for express tire repair can be divided into two categories:

Consider ways to restore a damaged tire on the road. The first three methods are temporary. The latter, with the right approach, allows you to completely restore the tire.
 Immediately after use, it is recommended to drive 300-500 m so that the sealant is evenly distributed over the entire surface of the tire and does not cause imbalance.
After removing the foreign object, the hole is processed with an awl with abrasive edges: this tool must be inserted into the puncture and cleaned and developed with intensive reciprocating movements several times. Then the raw rubber tow is removed from the package and inserted into the eye of the second awl so that both ends are the same length. The hole in the tire and the raw rubber is treated with an activator. Next, the awl is inserted into the puncture in such a way that small ends of the tourniquet, about a centimeter long, remain outside. After 5 minutes, the excess remaining on the surface is cut off. This method can also successfully eliminate small side cuts.
There is a technique that allows using wire and several bundles of raw rubber to get rid of even extensive side damage to tires. However, it is quite difficult to implement and not every driver will be able to implement it.
Consider a few well-known tools that are most widely used to repair punctures:
 Supplied in a convenient bottle with a hose and a tip for connecting to a tire valve. It works in the same way as most sealants: the container is thoroughly shaken, after that a hose is attached, and the contents from the container are completely pumped into the tire. The maximum diameter of the repaired hole is 4.5 mm. This is almost always enough to repair punctures caused by nails and screws.
 It requires more time and effort to implement than liquid formulations, but when used correctly, it gives a reliable and long-term result.
 Our online store offers a wide range of tire repair products. You can order them through the TopDetal.ru website or by calling 8 800 444-75-16.
Also read on our website about the best liquid rubbers.
Return to the list
Necessary tools and materials for car tire repair, important nuances of work.
Anything can happen on the road. For example, a wheel puncture. It's good if you always have a spare with you. But in some cars, a spare tire is an additional option. In the best case, manufacturers put a “dokatka”.
And what to do if it is not there, and it is far to go to the nearest car service? Then there is only one thing left: to repair the tire yourself.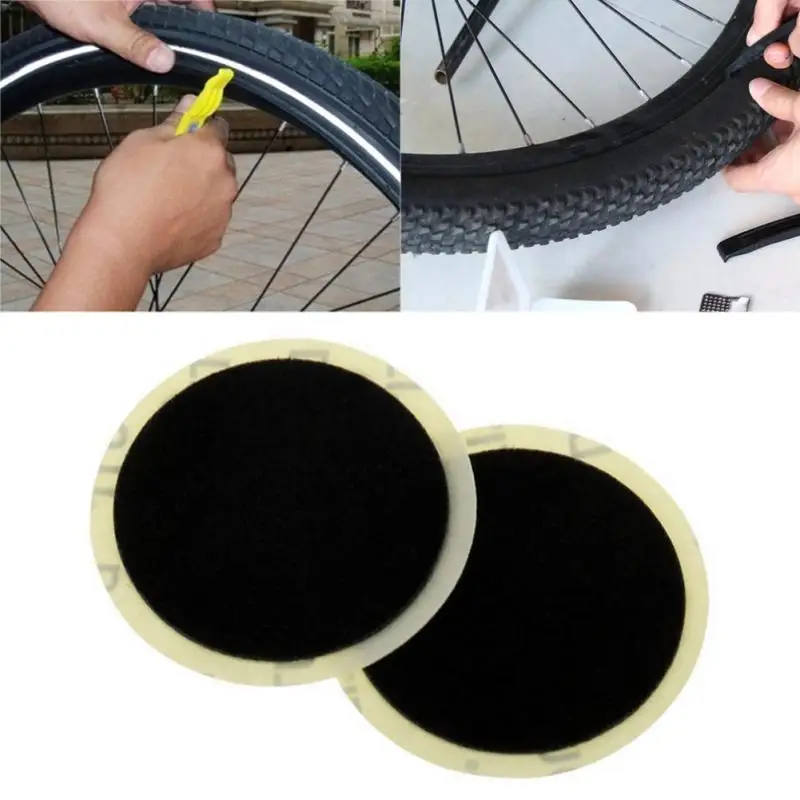 This can be done in different ways, depending on the nature of the damage. In particular, it is possible to repair tires with sealant, a tube, a tourniquet or a patch.
When you notice that the tire starts to deflate, park in a safe area and turn on your hazard lights. Don't forget to put up a warning triangle behind your car. If a breakdown overtook you in a city or village, then install a “triangle” at a distance of 15 m behind the car. If the wheel is punctured on the road outside the settlement, then the emergency sign is set at a distance of 30 m. Despite the fact that a flat tire is considered a reason for a forced stop, you should still not stop directly on the road or where stopping is prohibited. Even with a flat tire, you can drive some distance to choose a convenient stopping place!
If you are forced to stop in poor visibility (eg fog), be sure to wear a reflective vest. This is required not only by the Rules of the Road, but also by common sense.
After that you can start repairing the wheel. As mentioned above, there are several ways. Consider some of them.
Experts advise you to always carry a repair kit - a puncture repair kit. He will help out in an unforeseen situation and help save money, because in auto repair shops they often begin to “breed” inexperienced drivers for expensive repairs of tubeless tires. It is important here to understand what exactly happened to the wheel, and to follow the procedure for repair.
So, repair kit. In it you will find:
The Russian company Airline offers three types of tire repair kits. Their cost varies depending on the configuration. For example, the ATRK-2 kit (the cheapest) contains all of the above tools, except for glue. And the most expensive ATRK-4 set also includes an ergonomic organizer case, a spare awl tip, a folding blade and additional harnesses. The ATRK-3 set is distinguished by the fact that there the tools are equipped with plastic handles, in contrast to the ATRK-4, where the tools are completely metal.
First we need to find the puncture site. To do this, we inflate the wheel to the nominal pressure and spray it with soapy liquid. Where the bubbles come out, there is a puncture site.
Attention! The repair kit can effectively repair a hole no larger than 3 mm. Otherwise, you need to use other methods: a spray sealant, a “fungus” patch, or a rubber car camera.
Usually an object remains at the puncture site, which caused the tire damage. It can be a nail, a screw, a self-tapping screw, etc. As a rule, it enters the wheel at a slight angle, and its head sticks out of the hole.
Apply glue generously over the entire length of the rasp. We remove the “culprit” of the puncture with the help of an improvised tool and, preventing air from escaping, insert a rasp into the hole. It is better if it is screw, not a "grater". To develop and lubricate the hole, the rasp must be rotated clockwise, deepening and almost taking it out. This must be done at the same angle at which the foreign object entered.
Leave the file in the hole so that air does not escape, and in the meantime prepare the tourniquet. We thread it into the eye of the awl (or put it on the needle tip), stretch it to the middle of the length and also grease it well with glue. If the repair kit contains ordinary glue, then we lubricate the tourniquet completely, and if the activator glue, then only the tips. Otherwise, the activator will melt the tourniquet, and it will not be possible to insert it into the hole.
Then take out the file and immediately insert the awl with the tourniquet into the puncture. This requires some effort. The loop should enter the cavity of the tire, and a 1-centimeter “tail” should remain outside.
Attention! If the harness goes completely into the tire, the wheel will need to be re-beaded.
After that, we sharply remove the awl, and the tourniquet should remain in the hole. Next, using a soapy solution, we check the tightness of the seal. If the tire does not let air through, then cut off the “tail” of the harness, leaving about 2 mm. Then it remains only to inflate the tire to the nominal pressure, and you can go further.
Motorists recognize this method of repairing a punctured wheel as quite common, cheap, efficient and reliable. For about two days, it will not let air through. However, this method is rather laborious. It requires speed, precision and physical effort. It is also important not to damage the cord during the expansion of the hole.
Some motorists drive for a long time on wheels repaired in this way, and if the wheel starts to etch, they simply change the harness.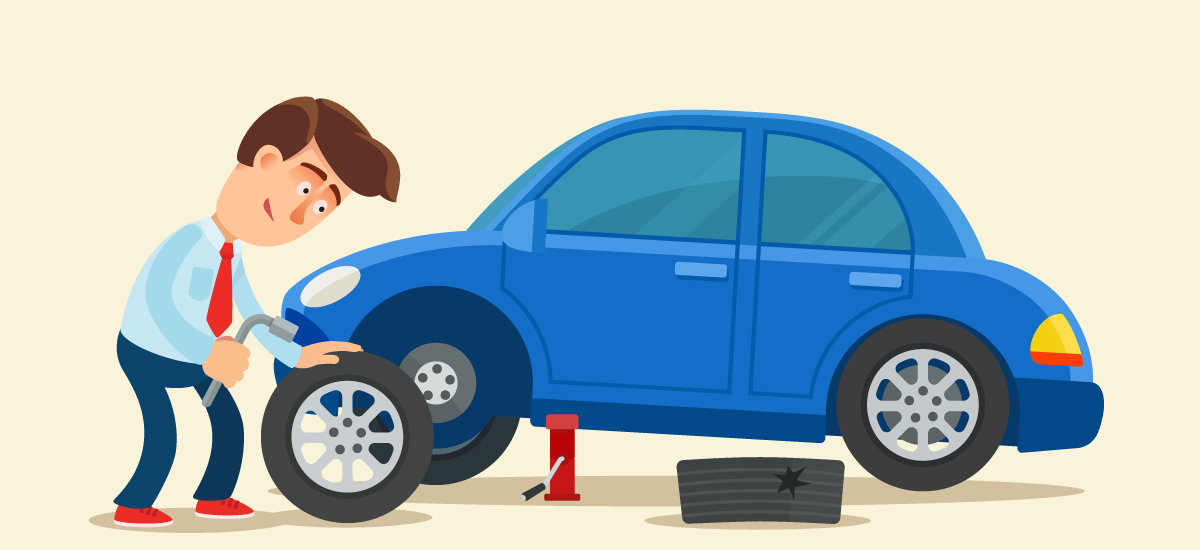 But you shouldn't do that! Still, installing a harness is not a complete repair, and it cannot ensure one hundred percent safety on the road.
Can contains special solution. In the event of a tire puncture, it must be sprayed inward directly through the nipple. Some manufacturers complete their cars with such spray cans instead of a spare wheel. But Russian motorists treat this method with some skepticism.
However, we will consider this method as well. You can buy an inexpensive Runway can. First, we remove a foreign object from the tire. We attach the fitting of the aerosol can to the wheel nipple and press the valve. When the adhesive solution gets inside the tire, pumping occurs at the same time. As practice shows, tire pressure can increase by a whole atmosphere.
But here it is important that the nipple is on top, otherwise the adhesive simply does not spread over the entire wheel. After injecting the sealant, we drive a certain distance by car.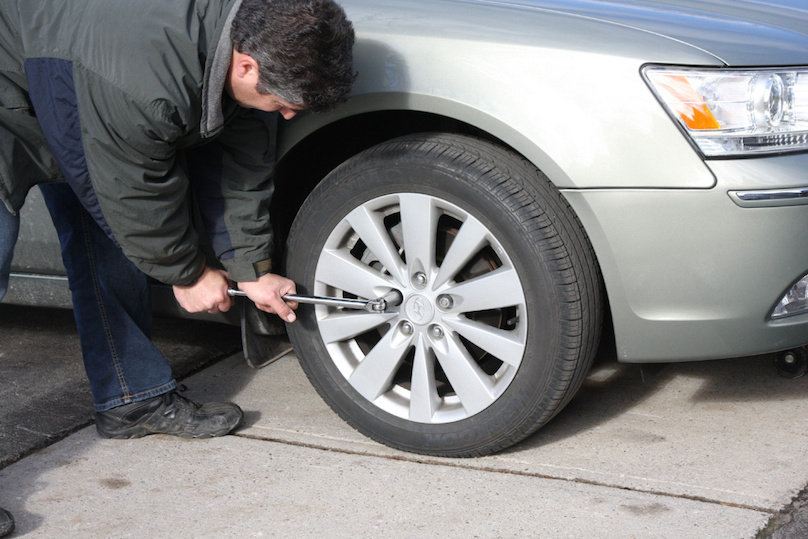 This is necessary so that the sealant is completely distributed inside the tire. And only after that we inflate the tire to the nominal pressure.
This repair is less time consuming and easier than installing the harness. Also, car owners recognize it as quite effective: it does not lower the wheels in a day. But after the procedure, the nipple must be cleaned (blowed out), otherwise the resulting foam will clog the valve, and the wheel will etch air.
It is also not possible to seal a large opening with an aerosol can. And finally, it can affect wheel balance. Experts do not have a consensus on whether, after such sealing, it is still necessary to contact a car service for professional repair or replacement of the wheel.
If you still got to a tire shop with a punctured tire, then it is important to understand what repair methods they will offer you there. There are several ways, and each of them has advantages and disadvantages.
If you have enough time and some car mechanic skills, you can try to apply the fungus patch yourself. But for this the wheel needs to be disassembled. So it is better to entrust such repairs to specialist tire fitters.
The patch is a fungus patch with a metal stem wrapped in rubber and a rubber cap. Such patches are sold in any auto shop, as a rule - in bulk (from 15 pieces in a set) and are quite inexpensive.
To begin with, the outer layer is removed from the tire, the surface is degreased and coated with an activator adhesive. The "leg", also smeared with glue, is inserted into the hole and pulled out from the inside out, sealing it, and the "hat" closes the circle around the puncture.
The patch is glued, pressing with a special hand roller, and the protruding part of the “leg” is cut off.
In the "field" conditions, you can wipe the damaged area with a napkin, apply the activator glue from the repair kit, and instead of using a hand roller, press the patch with your foot, holding it for several minutes. A tire repaired in this way will hold pressure for at least a day.
But with the help of a “fungus” patch, only fairly wide punctures, with a diameter of 3 mm or more, are well repaired, since the “leg” itself is rather thick, and it simply will not fit into a narrower hole. Therefore, tire fitters sometimes cut off the "leg" and glue only the "hat".
Advantages:
The disadvantage of is the high price, in addition to applying a patch, including wheel removal, tire fitting, wheel installation and balancing.
This method places a patch on the inside of the tire. First, the rubber is removed from the disc, then the surface around the puncture is treated with an abrasive, after which it is applied to the hole and a special patch is glued. Typically, this method is used to repair lateral damage.
Advantages:
The disadvantage of is its high cost.
Finally, a tire shop can offer you the same harness fitting. But it's easy to do it yourself. Since such repairs are considered temporary, self-respecting specialists usually do not practice it. And yet it is in the list of services of some workshops.
Advantages:
The disadvantage of is low reliability.
There is another way to repair a punctured wheel - installing a tube. But this "emergency" measure is used extremely rarely, usually for tires that are not worth repairing, or after repairing a "difficult" breakdown. You should be aware that installing the camera requires disassembling the wheel, and this is a rather complicated procedure.
But the advantage of this method is that it is not necessary to prepare the tire in any special way. And almost any camera will do - one or two sizes larger or smaller than the diameter of the wheel.
First, the inner tube is carefully and evenly embedded in the tire. Then the standard spool is pulled out and the chamber spool is pulled out instead. It requires sufficient physical strength, so this method of repairing a puncture can be called a backup.
And now most of them use tubeless tires . They are not designed to install a camera, so you cannot ride a wheel repaired in this way for a long time, although it will not go down for a long time. You can leave such a wheel as a "spare tire". It will help out in an emergency.
A puncture can also be repaired by a combination of a tourniquet and patch repair or by hot vulcanizing. But the first method is used very rarely and only for specific injuries. It is almost impossible to carry out such a procedure on your own.
As for hot vulcanization, it is used to seal side cuts. The process consists in preparing the cut site, filling it with raw rubber and processing it with a hot press.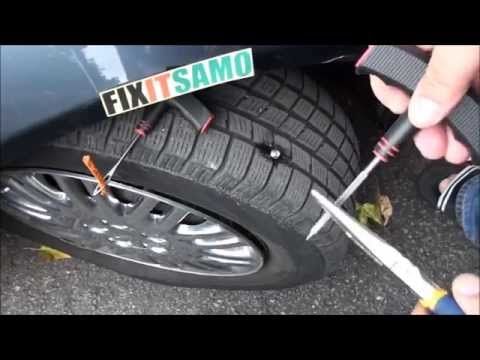 Equipment for this method is very expensive and not available in all auto repair shops. It is often more profitable to buy a new tire than to repair a damaged one in this way.
It also happens that there is no puncture, and air comes out of a faulty spool. To check this, you need to pour it with water. Air bubbles will release the leak. If there is a new valve in stock, then simply replace it. If not, you can try unscrewing the old spool valve and screwing it back in. Even if this helped, it is still necessary to install a new spool in the near future.
A completely flat tire is best inflated without a spool. To do this, unscrew it, inflate the tire and quickly wrap it back. The absence of a spool increases the air flow and facilitates the operation of the compressor. You can also hang a flat tire and raise the car with a jack. Due to this, the tire will fit better on the disk, and the inflation process will be simplified.
Rim leak is more serious damage than a puncture.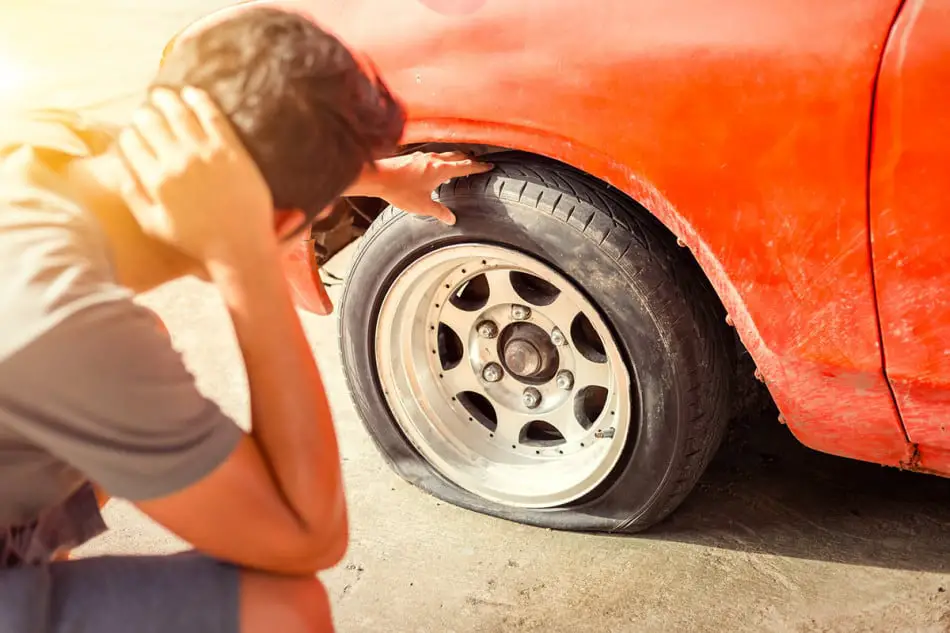 It can appear if the wheel has fallen into a hole with sharp edges, and the disk is deformed. If the disk is damaged, it needs to be straightened, and if the sidewall of the tire is damaged, it most often needs to be replaced.
To minimize these situations, carefully inspect the rims every time you change tires. Avoid corrosion - and this applies to both steel and alloy wheels. If your rims have bulged paint or rusted rims, put the tires on rim sealant. This will help save money on fixing air leaks around the rim.
Another situation: you have found a puncture site, but it is "empty" - that is, there is no foreign object sticking out there. Naturally, this accelerates the release of air and the reduction of tire pressure. If there is no repair kit at hand, you can temporarily solve the problem by inserting a screw or self-tapping screw into the puncture, and then quickly go to a car service. If there is no self-tapping screw at hand, unscrew it from some interior part.
In conclusion, I would like to remind you that do-it-yourself tire repair is only a necessary measure, although less costly and time-consuming compared to professional tire fitting.