It’s pretty rare to get a flat tire when you have a tubeless setup. The sealant inside your tires will quickly seal small holes and cuts to keep you rolling on the road or trail. However, flats are always possible – even with tubeless. Whether you’ve discovered your tire is flat after storing it in the garage, or you lose pressure after a sudden impact with a rock, we have you covered with the tips you need. Check out our guide to fixing your tubeless flat and getting back out on your ride.
You also might need:
PRO TIP: Opt for plastic tire levers over metal ones. They won’t scratch the surface of your rim and they are lighter and easier to carry!
 If you find a large hole or gash in the tire that cannot be fixed with sealant alone, you’ll need to patch the tire and you might even need to install a tube until you arrive home.
PRO TIP: If the last bit is super tight, start back at the top and use your hands to wiggle the tire into the center of the rim. Just like you did at the beginning to loosen the bead from the rim, this creates extra slack in the tire and will make it easier to get onto the rim. While you wiggle the tire push down. When you get to the bottom, you might be able to pop that tire on with your bare hands!
 Then, just give it a spin and squeeze your brake to make sure everything works like it should. Nice job!
How to Choose the Right Saddle
How to Store Multiple Bikes and Gear in Small Spaces
How to Adjust Your Suspension on the Trail
How to Adjust a Dropper Post
How to Set Up Mountain Bike Suspension
Get Your Printable Fix-a-Flat Zine
How to Fix a Flat Tire | Tubeless
How to Fix a Flat with a Tube
Top Five Bike Maintenance Tips
What to Pack for an Epic Mountain Bike Ride
How I Became a Professional Bike Mechanic
How to Use a Torque Wrench
How to Select Mountain Bike Tires
How to Select Road Bike Tires
How to Perform a Safety Check on Your Bike
The Importance of Proper Bike Fit
How to Prep Your Bike for Riding in the Rain
How to Replace Disc Brake Pads and Rotors
How to Cut MTB Handlebars
Trailside Bike Repair Fix Guide
How to Setup Tubeless Tires
How to Silence Common Bike Noises
How to Replace Handlebar Tape on a Road Bike
How to Pack and Ship a Bike
How to Wash a Bike
How to Adjust a Bike Derailleur
How to Repair a Broken Bike Chain
How to Make a Wall-Mounted Shelf to Hang your Bike
How to Make a Bike Hook out of Pipe Fittings
How to Carry a Yoga Mat on a Bike
Removing and Reinstalling a Bike Wheel for Transport
How to Navigate the Subway with a Bike
How to Lock your Bike in a City
Parts of the Bike
How to Fix Squeaky Disc Brakes
Bike Safety | Hand Signals and Riding Tips
Cycling at Night: How to Light Up Your Bike
While a tubeless setup is certainly less likely to puncture than a tubed tire, there is still a possibility for air loss.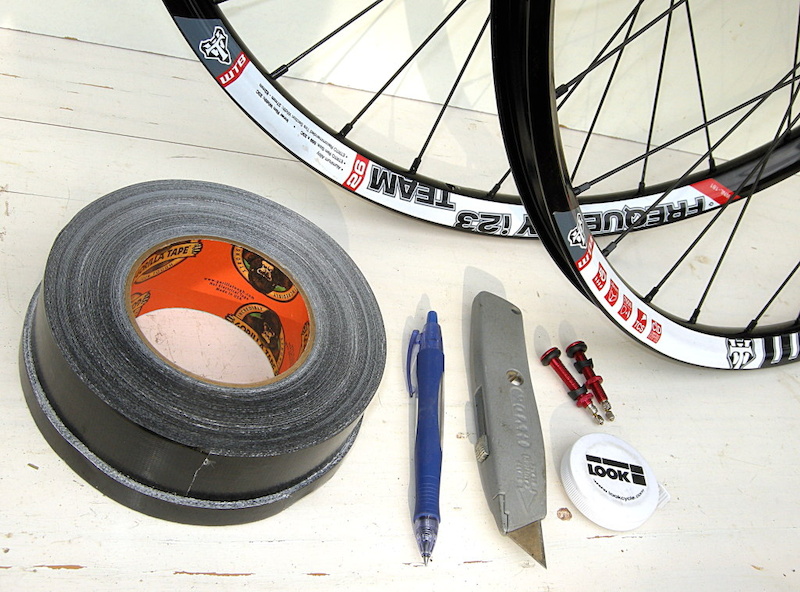 Therefore, you should be prepared with the correct knowledge and tools to fix a tubeless puncture on the trail and at home. Here are the most common tubeless issues you might encounter and how to fix them!
Never heard of tubeless? In our ultimate guide to MTB tubeless, we explain everything you need to know about tubeless setup, tires and much more!
There are a host of different scenarios that lead to a puncture or air loss on the trail but in the end, you always have one goal: seal the system so it can hold air again. With a tubeless setup, this job is often quickly taken care of by the sealant, meaning small thorns etc aren’t that problem. IMPORTANT: renew your sealant every 6 months (or every time you change a tire) to make sure it is able to work as effectively as possible.
Luckily, tubeless punctures are relatively rare. However, if you do find yourself with a deflated tire this guide will help you get back on the trail ASAP! We also recommend carrying a spare tube, just in case!
Depending on the severity of the problem, fixing a tubeless puncture can take less than a minute with the right tools. You will need a mini-pump (or Co2 cartridge and inflator), a tubeless tire plug set (click here to read our tire plug group test), a tire patch and a tube for the worst case. Luckily, it is possible to store all of these tools without needing to wear a backpack. They will easily fit into a hip pack (we tested 24 in a big hip pack group test), or even on your bike.
Fixable on the trail? Yes
Time needed for repair: 1-5 minutes
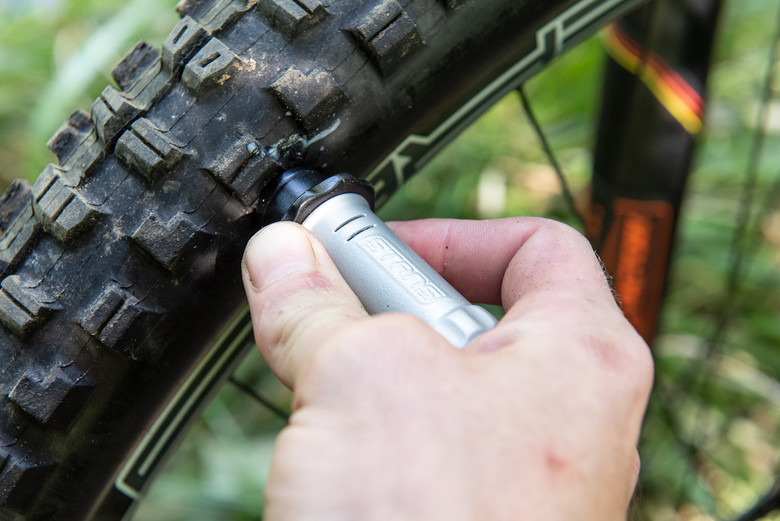
This kind of puncture is caused by small thorns, sharp rocks or nails etc on the trail. It is probably the most common tubeless puncture, and luckily also one of the easiest to fix. In fact, you might have already punctured on the trail without realising, as the tubeless sealant in your tires often seals these small punctures immediately.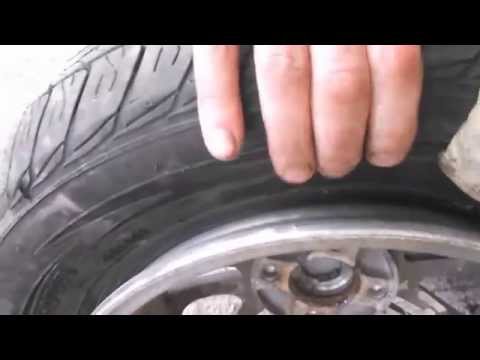 If, however, the hole is too big for the sealant to fix on its own – often caused by a pinch flat – you will need a tubeless plug kit. The first step is to find the hole (or holes) and wipe away any surrounding dirt. If you are riding in a group, ask a buddy to keep their finger over it to minimise air-loss. Then, quickly thread the tire plug through the plug installer.
Depending on the size of the hole and the plugs, there are two techniques to plug the tire. For smaller punctures, push the plug into the hole until it fully disappears inside the tire. Then carefully pull the installer out, until 5-10 mm of the plug is visible. Use your fingers to hold the plug in place and remove the installer. If you are sealing bigger punctures with larger plugs, push the plug into the tire just over halfway, so that a “V” shape is left, and remove the installer.
Once the plug is installed, spin the wheel to let the sealant coat the tire and re-inflate if needed. In our experience, if installed correctly, tubeless plugs can last the lifetime of the tire and do not need to be removed. However, it is worth trimming the exposed plug to prevent it from ripping out under heavy braking.
Fixable on the trail? Yes
Time needed for repair: 1-5 mins
You’re flying down the trail, pushing around a tight berm and suddenly hear a loud “braaaap”! Your rear tire is not leaking, but it has definitely lost air… What happened?! You have rolled the tire so hard across the rim that the tire bead has pulled away from the rim, briefly letting a lot of air escape, before popping back in place and closing the gap between the rim and tire.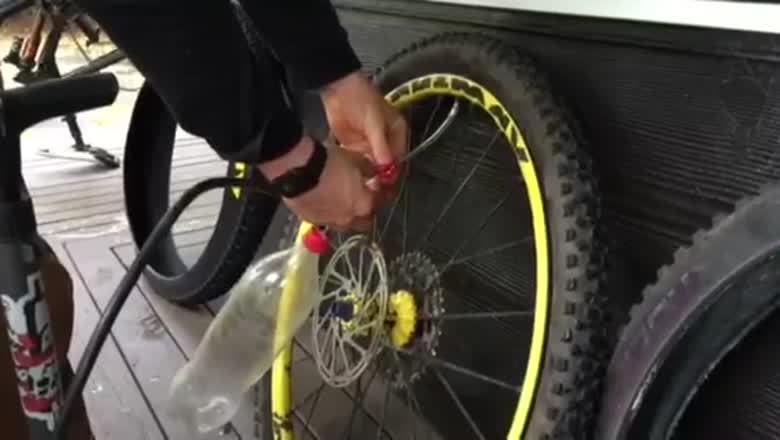 In short, you have burped a tire. There are two possible causes: either you were running very low tire pressure, compromising your tire’s stability or you just hit the turn really really hard. Either way, the fix is simple. All you have to do is re-inflate the tire and keep riding. We recommend checking out our Tire Pressure Guide to find your perfect pressure and prevent burping in the future. You should also top up your sealant before your next ride, as you most likely lost some during the burp. If you burp on a regular basis, even with high tire pressures, you are very likely running a tire that is too wide for your rim width.
Fixable on the trail? No, install a tube and fix at home
A cut sidewall is usually caused by long, sharp rocks which cut a long slit into the tire. These punctures are too big for tire plugs and sealant to seal. Your only option is to install a tube and ride home. If the cut is really big, try protecting the tube by sticking some tape or plastic etc in between the tire and the tube. Depending on the severity of the damage, you can try fixing the tire at home by thoroughly cleaning the tire inside and out, roughening up the inside of the tire with sandpaper and applying a tire patch with vulcanising glue. Otherwise, the tire is a write-off.
Fixable on the trail? No, install a tube and fix at home
Time needed for repair: 20+ mins
If a spoke punctures through the tubeless rim tape, you will quickly start losing air through the spoke holes. Unfortunately, there is no easy fix and you will have to install a tube to get you home (make sure the spoke is not protruding into the rim bed!). In order to fix the issue at home, remove the tire and the rim tape and clean the rim thoroughly. If spoked snapped, replace it… Make sure you know why the spoke punched through the tape: check for even spoke tension and make sure your rim is an intact running true.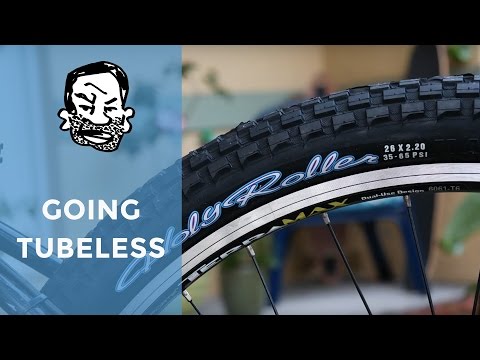 Re-tape the rim (with new tape) and set up tubeless. Check out our Ultimate Guide to Tubeless for everything you need to know!
Fixable on the trail? No
If your rim is damaged and leaking air, it’s time to (carefully) head home.If you have dented your rim and it is losing air, the only option is to install a tube and carefully ride home. Make sure to thoroughly inspect the rim first – if the damage is too bad you will have to walk back.
Fixable on the trail? Likely
Time needed for repair: 5-10 mins
If your valve is leaking, try tightening the lock-nut that holds it in place. Sometimes they rattle loose, causing the leak. Admittedly, we all have bent or somehow messed with our valve core trailside. When releasing air for example… If your valve core is broken, no need to panic.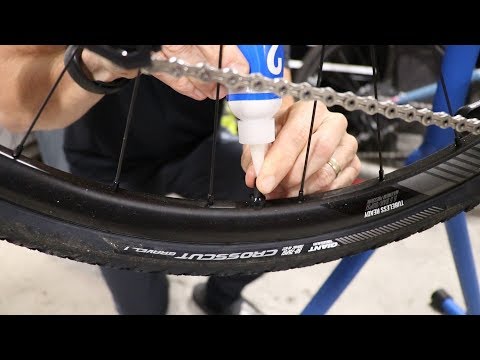 You often carry one around inside your spare tube without even knowing! Remove the core from the spare tube, carefully remove the one from the tubeless valve (this will let all the air out of the tire) and install the spare valve core. Pump the tire back up and ride on.
Are you doing everything right, yet still ending most rides in deflated disappointment? You are probably running the wrong tires! Luckily, we have put together a massive tubeless MTB tire group test, so you can find the perfect tire for your bike!
With the correct setup and tire choice, tubeless punctures are very rare. However, if you are caught off-guard and puncture, we hope the tips above will get you back onto the trail ASAP. Tubeless punctures are not scary, and definitely not a reason to stick with a tubed setup. Remember, you can always install a tube and ride home!
Did you enjoy this article? If so, we would be stoked if you decide to support us with a monthly contribution. By becoming a supporter of ENDURO, you will help secure a sustainable future for high-quality mountain bike journalism. Click here to learn more.
Words: Finlay Anderson Photos: ENDURO Team
Tubeless tires can hardly be called the know-how of the bicycle industry, however, they still raise questions for many. The topic itself, as a rule, is surrounded by a lot of skepticism and distrust, which are more often explained by a lack of understanding of basic things and a lack of experience in riding such wheels. To dispel all these doubts, we answer the main questions related to tubeless technologies.
These are bicycle tires that do not have a tube. At the same time, tubeless technology is not only about tires. We are talking about a whole wheel system, which also includes a special rim and a sealant that gives the wheel anti-puncture properties. The tubeless concept makes the bike more comfortable to use and improves its riding performance, which will be discussed in order.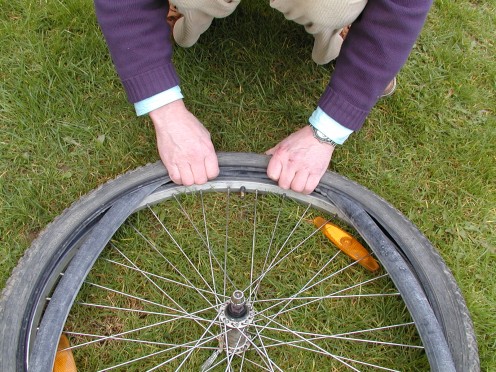
How long ago did this technology appear and can it be trusted?
Those who hear about bicycle tubeless for the first time usually tend to be suspicious of them. You can dislike this technology for subjective reasons, but you definitely shouldn’t distrust it. Tubeless tubes have been massively used for cars and motorcycles for several decades, and during this time they have not given reason to doubt their reliability.
The first tubeless systems for bicycles appeared in 1999, when the French rim brand MAVIC, in collaboration with tire manufacturer Hutchinson, presented their concept of a simple and effective tubeless wheel. In the 2000s, this technology remained the prerogative of mainly professional athletes, who quickly appreciated its main advantages: lighter weight, more air in the wheel, good "traction" and durability.
In recent years, tubeless has finally ceased to be perceived as something exotic. For example, today a significant part of the MTB and almost all touring cars come with such wheels as standard.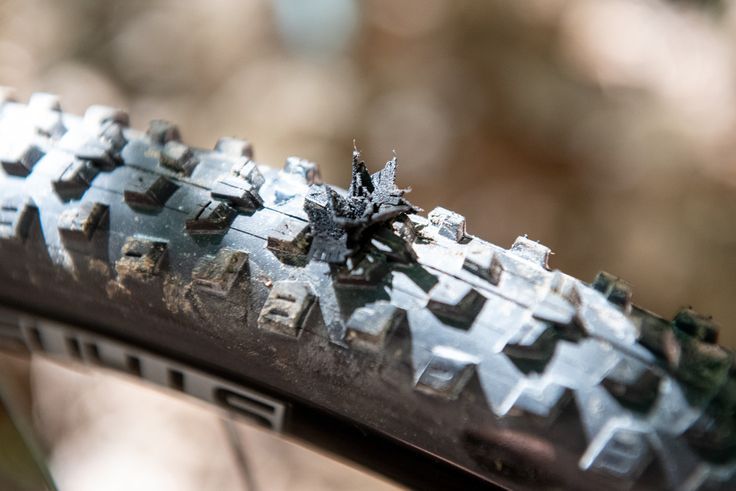 A wide variety of sealants are also available on the market, and the number of those who are discovering the benefits of tubeless technology is steadily increasing.
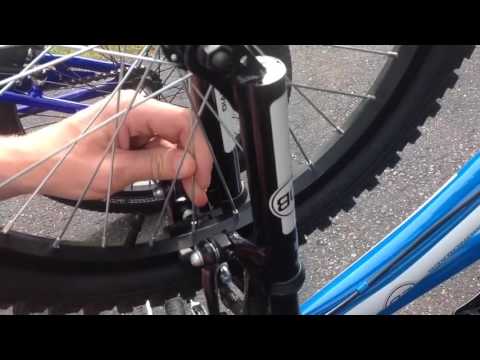
The tubeless system provides a special rim and tires that are labeled tubeless ready or TR. However, the rims themselves are easy to distinguish visually - they have a low side and characteristic walls with recesses, forming a kind of lock in which the tire cord is wedged when air is injected. Due to this, in the inflated state, the rubber reliably and hermetically “sits” on the rim, without breaking off the wheel even at low pressure. The rim itself is additionally glued with a sealing tape, after which the nipples are installed separately.
The benefits of tubeless wheels are revealed no matter how often and what kind of bike you ride: whether it's weekend trips, extreme downhill or long-distance touring. Nevertheless, for certain categories of cyclists tubeless still open up more opportunities: first of all, we are talking about those who are seriously passionate about off-road.
When actively driving off-road with tubeless tubes, you can ride on lowered wheels and at the same time not be afraid of such an unpleasant type of puncture as a snake bite. Low tire pressure, in turn, gives better handling, dampens vibrations more effectively and generally provides more comfort on difficult tracks. If we are talking about cyclists, then they appreciate tubeless for their anti-puncture qualities.
Road bikes also use tubeless wheels. Moreover, they are the pioneers of this technology. But road tubeless tubes are a different story: they are designed for different operating pressures and have tangible design differences. Therefore, further we will talk mainly about those tires that are put on mountain, touring and city bikes.
These are the two rim formats that define the features of a tubeless wheel assembly. BST is a standard that involves the installation of a special sealing tape that prevents air from leaking through the holes in the spokes.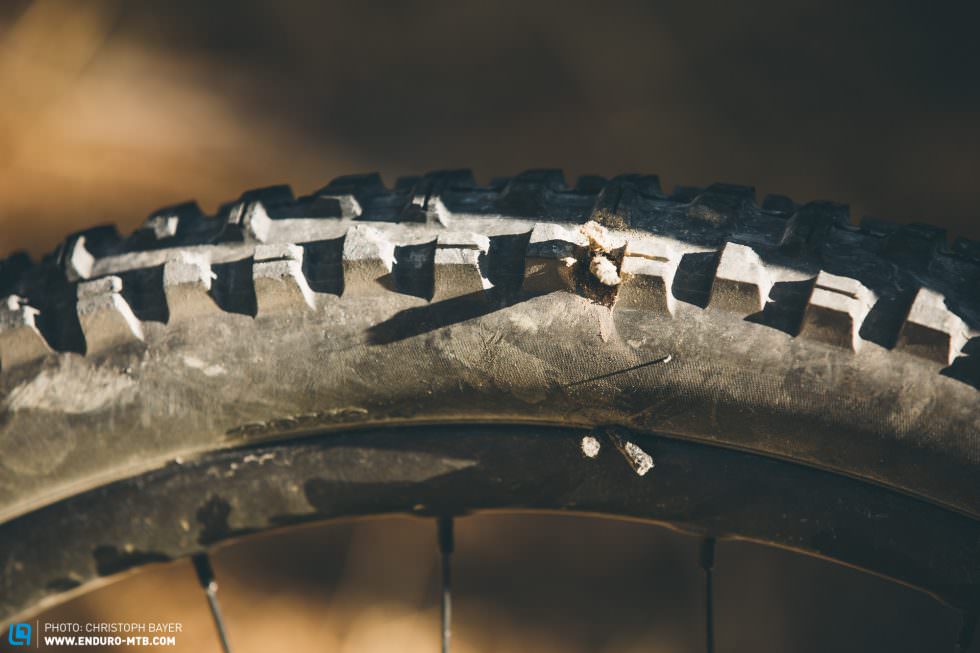 This is the most common version of tubeless systems.
UST is a blind rim in which an additional bridge isolates the spoke holes. Thus, there is no need for laying a sealing tape. In practice, this greatly simplifies life, because when installing a tire (especially without proper experience), the tape tends to crush, which is why you have to reassemble the wheel. It is easy to guess that such rims also have a drawback - their price.
The tubeless system in the form in which we wrote it above is already a full-fledged wheel, it can be installed on a bicycle and hit the road. But there is an important nuance. First of all, tubeless tubes are valued for their anti-puncture qualities: for this, a small amount of a special liquid, a sealant, is poured inside the tire.
Yes, you can. But you should not do this. Firstly, this is illogical: for no reason you are depriving yourself of the main advantage of tubeless - the anti-puncture effect.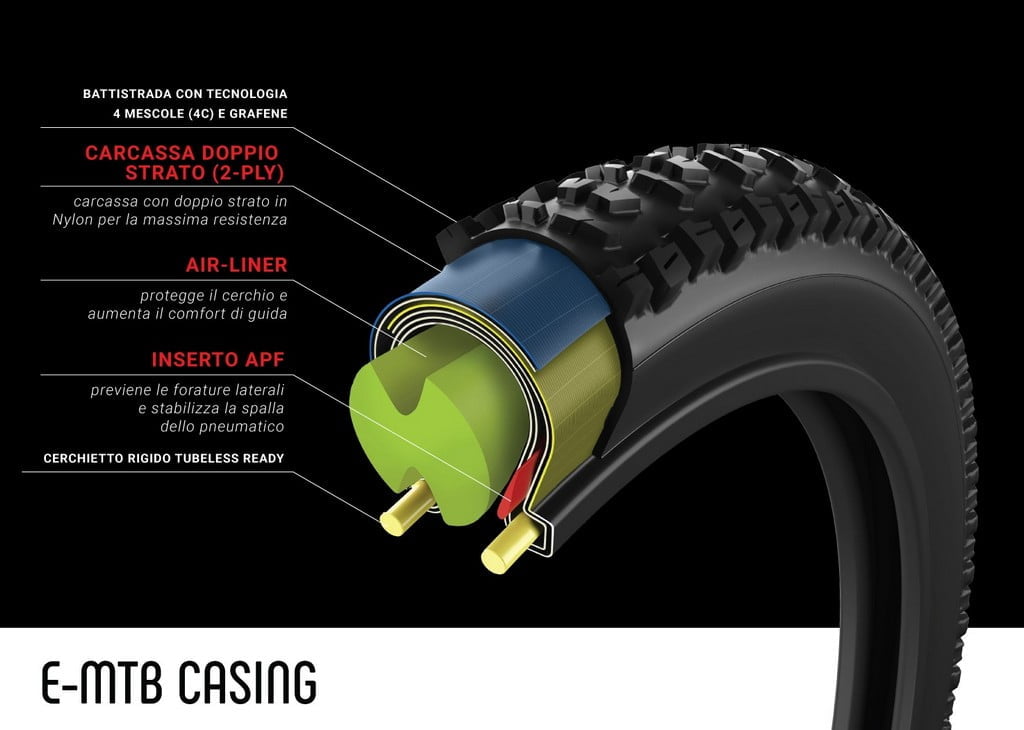 But more importantly, it is very difficult (or even impossible) to inflate such a tire in a completely flat state with a portable pump: to do this, you need either a strong floor pump or a booster. Naturally, no one will take such bulky things with them on the road. Filled with sealant 95% of punctures "seal" without a critical loss of pressure, and in most cases there is no need for even light pumping. Thus, the probability of being with a flat tire is very low.
So, if you put tubeless, sealant is still needed. Such fluids are easy to find in any bike shop, they are inexpensive and require replacement on average once every three to four months, so there is no need to talk about any inconvenience. Yes, in order to cope with the fill, you need to acquire a certain skill, but this is much easier than constantly changing broken cameras. In addition, sealant can be replaced once a season in a specialized service.
Bicycle sealants are based on fine particles (rubber or polymer fibers) suspended in a liquid carrier. Inside the wheel, the sealant does not polymerize: it is in a liquid state and is distributed along the inside of the tire during movement. When a puncture occurs, the air flow begins to push the solution out. A fine suspension clogs the hole, and the sealant dries quickly. Thus, there is a reliable "sealing" of the puncture.
If we talk about typical punctures - collisions with thorns, wires, small glasses - such damage is self-healing without a noticeable loss of pressure. Usually, a puncture can only be guessed from a small spot on the surface of the tire. Naturally, the sealant works with more complex damage. You can count on it even if you pierce the wheel with a thick nail, 4-5 mm in diameter. If you don't understand how a liquid can seal such holes, you can watch numerous crash tests on YouTube that demonstrate the miraculous properties of sealants.
The consumption per tire is from 50 to 100 ml. If we are talking about standard MTV tires, the golden mean is about 60 ml per wheel.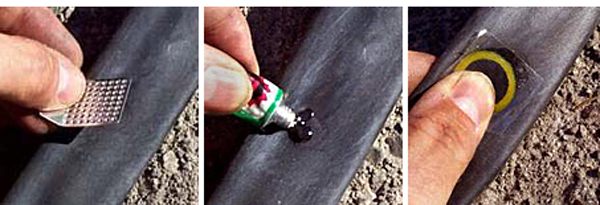 The exact dosage will always be written on the bottle. It is difficult to get confused even for those who do not like to read instructions: most sealants have measuring containers or a dosage scale on the bottle itself.
Here, too, everything is conditional and depends on the characteristics of the specific composition and intensity of punctures. In the absence of serious damage that entails the leakage of a large volume of sealant, you can easily skate a whole season on one fill. Some cyclists prefer to do an incomplete start-up gas station and gradually add 20-30 ml of fluid every two to three months. You can also navigate by how effectively the sealant works: if you see that small punctures are sealed with a strong deflation of the wheel, it may be that the composition is no longer enough and it needs to be added. Be that as it may, sealant is a very economical thing that lasts for a long time.
The sealant inside the tubeless tends to dry out, forming a characteristic film.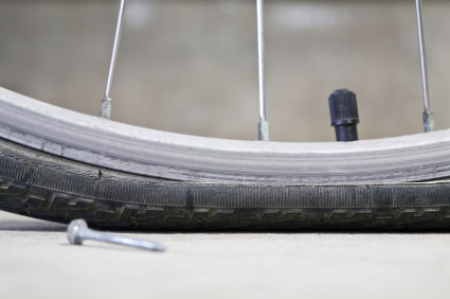 Whether or not to clean the tire cavity is up to you. This is a purely aesthetic moment, which does not affect the operation of the anti-puncture fluid. The sealant can simply be added as it dries and not bother with unnecessary worries. It is more likely that the tire will completely wear out than it will have time to completely clog with dried filler.
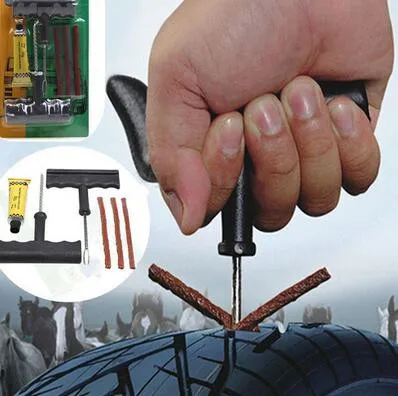
Serious damage - large diameter punctures, small cuts, run over nails with subsequent tire rupture - are repaired using special repair worms. These are rubber or fibrous bands that are inserted into the hole to reduce its area and allow the sealant to seal the puncture.
With long longitudinal cuts it is more difficult. Here you need to either sew up the dissection with nylon threads, or stick a patch on the inside of the tire. You don’t have to worry about the tightness of the repair site - the sealant will do this work, of course, if it does not have time to leak out. But being able to inflate a completely flat tire with only a portable pump will require skill.
In fairness, we note that such complex injuries are rare for most cyclists. But for those who are seriously passionate about off-road, it is better to play it safe with a spare camera. In this case, having caught a cut, you can always drain the sealant, unscrew the nipple from the rim and install a regular camera. And in order not to drive with a “hernia” protruding outward, we recommend placing, for example, a bill folded in half under the cut on the tire.
Tubeless allows you to forget about such an unpleasant form of damage as a "snake bite" forever. It usually happens when at full speed you catch a pothole in the pavement, unsuccessfully jump onto a curb or run into a stone on a downhill. Hitting the edge of a hard object, the tire is crushed, and the rim walls work like incisors, damaging the chamber in two places. In tubeless wheels, this scenario is excluded, because. there is nothing to break through here. Of course, it can be assumed that the rim will cut the tire itself, but this should be a blow of enormous force, which is almost never encountered in practice.
Rejection of the chamber increases the volume of air in the wheel. This changes the contact patch (it becomes flatter) and allows the wheels to better absorb off-road bumps. Add here the ability to ride at low pressure, without being afraid of a snake bite, and it becomes completely clear why tubeless lovers of hard off-road riding so idolize. Soft tires with a large contact patch "fit" all the bumps in the road, giving excellent traction on rocks, forest primers and other off-road.
In addition to traction, tubeless tires improve shock absorption, dampen vibrations better, and generally provide more off-road comfort. At the same time, to get the most out of this rubber, you need to experiment a lot with tire pressure, trying to find the indicators that will best suit your individual riding style.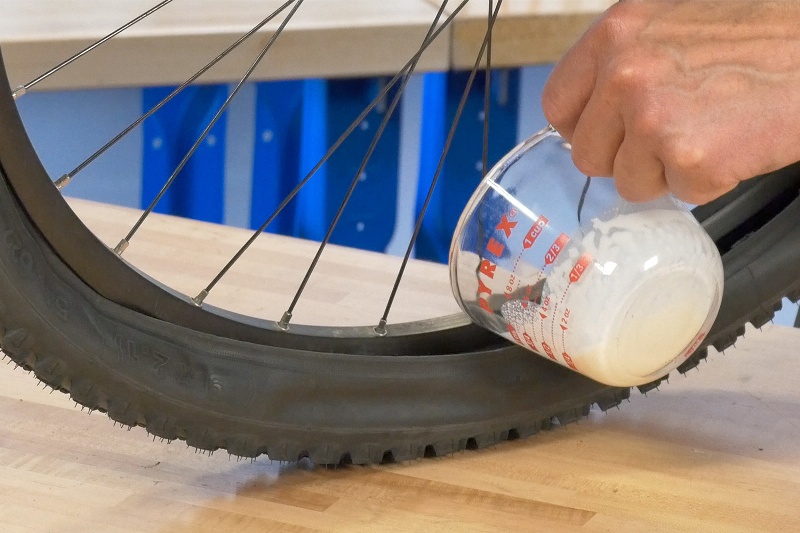
Finally, the camera is extra grams. By refusing them, you can save an average of 70-100 g of weight on each wheel. For some, this may seem like a formality, but it is worth considering the fact that extra grams on the periphery of the wheel have a stronger effect on driving performance. This difference is especially felt on road bikes: road bikes, gravel, touring.
They also exist. Moreover, it is far from formal. First, it's the price. The difference becomes especially noticeable when you buy tubeless systems separately: rims, tires + small things (tape, removable nipples, sealant). For tubeless you will have to pay an average of one and a half times more than for ordinary wheels, plus or minus the same class. And if we are talking about more advanced UST rims, then this means another + 30-40% to the cost.
With tubeless by default, everything is more difficult in terms of installation (here we are talking about conventional BST systems). You need to learn how to properly glue the tape, accurately insert the nipples, carefully install tight rubber, making sure not to displace the tape and not fill everything with sealant. On the other hand, all this comes with experience, but what you will always have to put up with is the difficulty with pumping a completely flat tire.
A tubeless tube cannot be inflated until its landing board snaps into place on the rim. To do this, you need to sharply introduce air into the tire. The tire should straighten up and fall into the grooves with a characteristic click - then it can be safely pumped further. This all sounds simple if there is a compressor in the garage. Putting a tubeless tube into the grooves by pumping air with an ordinary floor pump is quite difficult, and almost impossible with a portable bicycle pump.
All this makes life much more difficult. But there are solutions. In the field, a compact can of compressed air can help out. At home, installing tubeless tubes greatly simplifies the booster.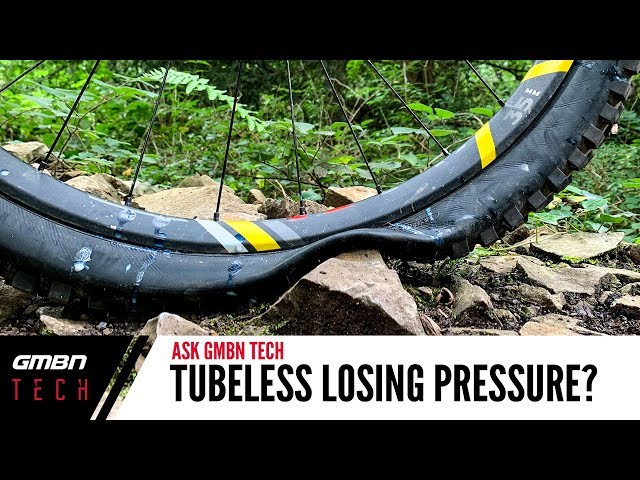 This is a cylinder into which a high pressure is pumped with a pump, then it is connected to a nipple, the valve is lowered - and the air from the reservoir pumps up the wheel sharply.
As you can see, tubeless cameras also have enough disadvantages, but it is wrong to consider them in isolation from the advantages. For example, the probability of being with a completely flat tire away from home is very low, due to the anti-puncture qualities. Complicated installation is offset by the lack of punctures and roadside repairs. And by overpaying in price, you save on interchangeable cameras, and, of course, win as a roll on off-road.
Everyone loves to ride a bike. Well, almost everything. And the head of the metropolitan traffic police, Dmitry Korzyuk, rides it, and the founder of the Internet portal TUT.BY, Yuri Zisser. But will cyclists be able to fix a two-wheeled vehicle if a wheel suddenly breaks on the road? Blogger Alexander Deshchenko decided to fill this gap.
A bicycle is a rather complex technique. And any technique tends to fail over time. I will try to enlighten those interested in common breakdowns, as well as throw in some repair ideas.
There are plenty of parts on the bike. Of course, it does not reach the tractor, but still it will take a couple of days for someone who decides to take care of studying the names and purposes of at least most of them. Therefore, we will not deal with this, we will limit ourselves to the minimum that is necessary for successful and safe movement.
If your bike rides, the pedals turn without extraneous sounds, and the gears (if equipped) change easily and naturally, you can be envied. Seriously - as with people, there are no completely serviceable bicycles, there are underexamined ones.
The most common "disease" among new bikers is flat tires. Rubber is not completely sealed, and over time, tire pressure decreases. In addition, the cleanest city in the world does not let you relax, from time to time providing an excuse to practice bicycle repair.
If such a misfortune has overtaken you, do not panic - of all bicycle diseases, blown-out wheels are the easiest to "treat". If at home you found a flat tire during the second whole, try pumping up, maybe you just didn’t pump up the previous time.
By the way, pumps are cheap, portable and good, you can choose any two characteristics. Personally, I always have an inexpensive portable (more precisely, portable, because it hangs on a frame) pump at hand, and at home there is a good stationary one. In principle, pumping wheels is also better in the mind. At the end of any, even the cheapest and Chinese tires, the working pressures for which this tire is designed are indicated. If you don’t pump enough, you run the risk of breaking through on any bend in the terrain. If you pump it over - you can simply burst, like Piglet's balloon in the famous cartoon. Although, of course, there is a pattern "pumped up less - it's softer to ride, pumped up more - it rolls better. "
"
But back to the flat tire. If you pumped it up, and it went down again, then it’s bad business with him, not with you. But here, too, you should not be especially upset. It is quite possible that when the wheel is inflated with the naked ear, a whistle of air is heard, or even some foreign object sticks out, indicating the place of the puncture.
If the rupture is visible, you can pull out a piece of the chamber with a hole, seal it, put it back and do not even remove the wheel from the fork. In bike shops you can find a wonderful mobile kit for patching wheels, a small box is sold for little money, the lid of which is two plastic spatulas for disassembling the tire, and inside there is a number of patches, a tube of glue and a piece of sandpaper.
If you have an interest in cycling, I highly recommend it, the thing is simply irreplaceable. Of course, the set is more likely to be marching and will not help in difficult situations, however, most of the common punctures heal.
By the way, the patches from the kit are quite large in size, they can be additionally cut into several smaller pieces. It is very simple to seal the hole found on the camera - you clean the surface around it a little, smear it with glue and press the patch tightly. Usually they are made of "raw" rubber, so the main thing is to fix it correctly on the camera, carefully fill it back into the wheel and pump it up, and then under pressure it will flatten to almost zero thickness and implant like a native. And finally, you can inspect the tire itself for cuts.
Based on materials from the Avto.tut.by portal
It's time to turn on spring and update your technical wardrobe. Surely your young lady has been dreaming of a beautiful bike for a long time or has already grown out of the previous one.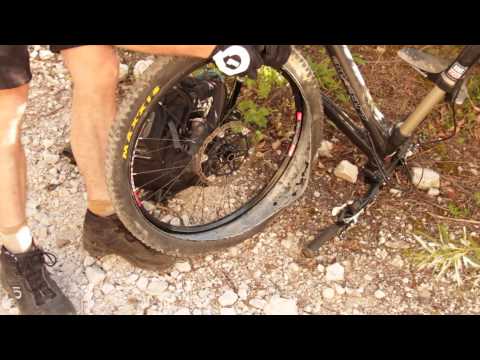 It's time to make a choice and have time to buy a 24-inch bike with a favorable discount. Female teen models, of course, not much ...
We are often asked - "...what is a butyl inner tube for a wheel?". Let's read this short article together to get the answer to this question. Let's start with the definition of what is butyl? Butyl is a highly elastic and airtight synthetic rubber, to which…
Artem Gorev, a cycling specialist, dispels all myths. Most people who want to buy a bike are not particularly knowledgeable about the subject and have a natural desire to consult with someone before buying, and they: - turn to their friends for help, ...
Bicycle specialist Artem Gorev advises: Every time I sell a bike to a person who is at the very foot of the cycling Olympus, I give a short briefing, i.e. I list the most important, in my opinion, points that a novice cyclist should remember in .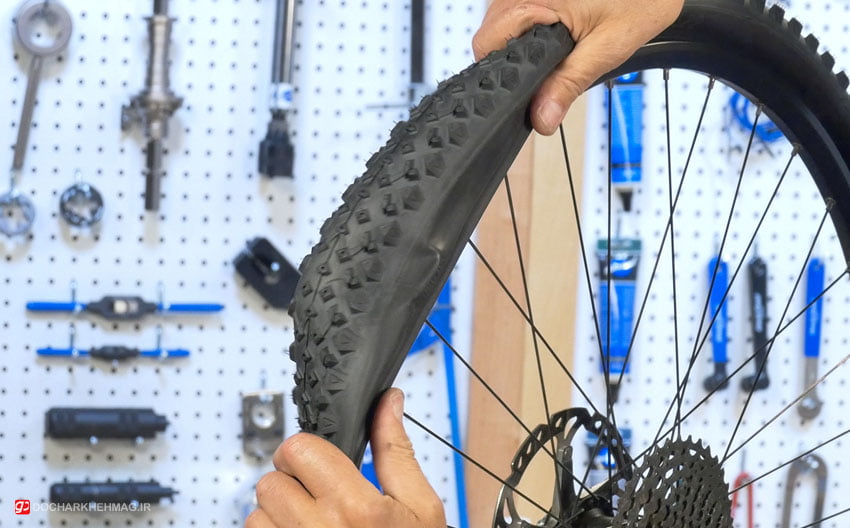 ..
..
Valuable advice is given by bicycle safety specialist Artem Gorev. Oddly enough, but with age you begin to appreciate life more (at least, I noticed such a feature in myself), it would be nice to think about the reasons for this paradox, but I will restrain myself, the purpose of this article is somewhat different.…
Artem Gorev, expert on safe cycling, tells. You bought a bike and hit the road for the first time. Of course, you are aware that this is not a safe business, but excellent knowledge (and observance) of the rules of the road relaxes you, an ugly inner voice whispers ...
Bicycle specialist Artem Gorev conducts research and gives advice. The other day I read an interesting article written by American professional rider Neil Bezdek called Finding the Right Cycling Coach.