A slow tire leak is more than just a nuisance. A leak can lead to low tire pressure. Not to mention, prolonged running on an underinflated tire can lead to more extensive tire damage or even cause a dangerous blowout.
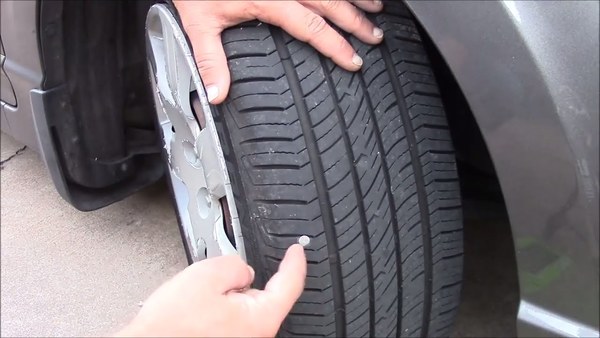
If you’re experiencing a slow leak, here are some things to look for:A tire puncture: It is a common misconception that a puncture will cause the tire to immediately go flat. However, in many cases the object that caused the puncture remains lodged in the tire and prevents the air from leaking out quickly. As with all tire leaks, it is important not to ignore a puncture. Eventually the object will either wear down and/or work its way out of the tire. For more on this read our article How to Repair a Tire with a Safe, Permanent Fix.
Wheel damage: Another common cause for slow tire leaks is damage to the area where the tire bead meets the rim. This type of damage is typically cause by the driver hitting the curb, taking a speed bump at high speeds OR those dreaded potholes! The impact deforms the wheel’s metal surface which may cause the tire to pull away from the mounting surface of the wheel.
Valve stem damage: The third most common cause for slow tire leaks is worn out or damaged valve stems. Time, use and exposure to elements can cause your valve stems to wear out and cause leaks.
Diagnosing your tire leak:
If your vehicle is equipped with TPMS, you will know right away if you have a leak. If the sensor light on your dashboard goes off, you inflate all the tires back to proper pressure and the light goes back on a few days later – you likely have a leak. If your vehicle does not have TPMS, its important to check your tire pressure regularly.
Once you’ve identified that you have a leak, use TECH Chek to locate the source of your leak. Simply spray the product all around the tire.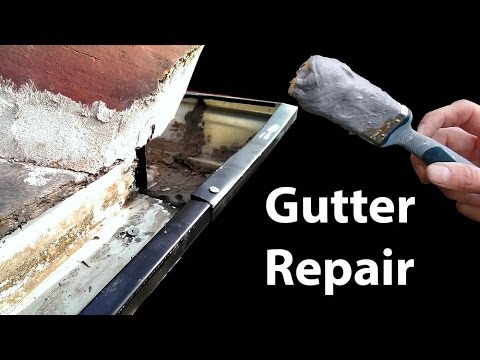 Where the surface of the tire begins to bubble is likely the source of your leak.
It’s important to have your tire diagnosed by a professionally trained tire shop or mobile tire repair service as soon as possible. In the case of a puncture, you may want to use a tire repair kit to keep your tire properly inflated until you can have it serviced. The leak should then be permanently fixed using a proper tire repair consisting of a cured rubber stem and repair unit.
If the leak is caused by a damaged valve, a trained tire technician can typically replace the valve at a minimal cost. In some cases, however, the tire may need replaced.
If the leak is caused by a damaged wheel, a tire technician may be able to reseat and seal the tire using a bead sealer. However, if the damage to the wheel is significant, unfortunately that means you may need to replace the wheel itself.
To read more about the types of damage that can and cannot be repaired, click here!
Your tires are where the rubber meets the road – literally – when it comes to the safety and performance of your car. That means, if your tire is leaky, you could be putting your safety at risk.
A leaky tire causes low tire pressure, which can decrease fuel economy, and put you at risk for a blowout. It also decreases the ability of your car to handle properly, making it more difficult to respond to emergency situations or drive in inclement weather.
In this article, we’ll discuss how you can diagnose and fix slow tire leaks. Don’t just ignore that low pressure sensor – check out this guide!
The Most Common Causes Of Slow Tire LeaksThere are three common issues that cause slow tire leaks. Let’s discuss each one of them now.
If your valve stem is damaged, there will be a slow and constant leak. This leak could come from either the body of the valve, or the base of the valve, where it meets the tire.
Contrary to popular belief, puncture damage usually doesn’t lead to an immediate flat tire or blowout, in most cases. This is because the object usually remains lodged in the rubber, preventing air from leaking quickly.
There are a few ways you can diagnose a slow tire leak
 If one of your tires seems perpetually under inflated, chances are you have a leak.
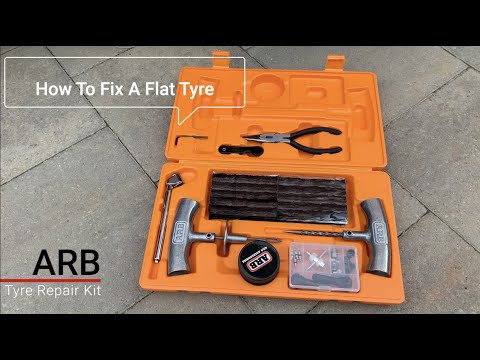
If you have a slow tire leak, you’ll want to have it repaired professionally as soon as possible. In some cases, you may want to keep a tire plug or patch kit in your vehicle. These kits are easy to use, and can keep your tire inflated until you bring it to a professional tire repair shop.
To permanently fix a tire leak caused by a puncture, you will need a “plug and patch”. This method of repair involves removing the tire from the wheel, and placing a combination plug and patch on the tire.
If your leak is caused by a faulty valve, you may need to replace it or your tire. Leaks caused by a damaged mounting surface may require you to replace the entire wheel.
If you need to repair a tire damaged by a puncture, or you think your valve or mounting surface may be damaged, we can help!
Schedule your appointment on Ride Time today, and come to our service centre now in Winnipeg, to make sure you stay safe on the roads!
Shaft seal leakage is one of the most common pump problems. In our article, we consider why a leak occurs, how to eliminate it or prevent its very appearance.
The most vulnerable point of the pump in terms of tightness is the point where the drive shaft passes through the casing. It is here that fluid leakage is most likely, which immediately affects the operation of the equipment and the state of the environment. According to statistics, most pump failures are shaft leaks.
A leak appears as a result of corrosion, damage, or wear of rubbing surfaces. The intensity of wear increases in the presence of abrasive inclusions, operation at high temperatures, and improper selection of sealing materials.
It also affects the mode of constant loads, leading to breakdowns. Worn-out parts and seal elements are replaced or restored. The specific causes of leakage and corrective actions depend on the design of the seal.
The main types of pump shaft seals:
 Use in pumps for pumping liquids with low pressure and low shaft speed is allowed.
 Diaphragm air pumps and pumps with a magnetic coupling do not leak liquid. Equipment with a membrane design does not have a shaft and a motor, the movement of the fluid occurs under the action of a diaphragm located in the housing.
Fig. 1. Food diaphragm pneumatic pump Argal DDE SPN 30.
For models with a magnetic coupling, the shaft is completely inside the pump. The torque is transmitted from the drive magnet of the electric motor to a magnet built into the back of the impeller.
Fig. 2. Chemical centrifugal pump with magnetic coupling AlphaDynamic ADM 15.
The absolute tightness of the body of such equipment increases safety when pumping chemically active, flammable or toxic liquids.
A gland-packed pump must have some shaft leakage to wet the packing. Otherwise, due to overheating of the stuffing box, the shaft or the protective sleeve put on it is worn out, the leak becomes stronger.
For guaranteed lubrication, a double oil seal is sometimes used. A hydraulic seal is installed between the packing rings in the form of a metal spacer ring of an I-section. The liquid leaving the pump enters the water seal through the tube, which then moistens the packing.
In the absence of leaks, loosen the stuffing box tightening. The operation is performed after the pump has stopped. Once loosened, the equipment is allowed to run for approximately 10 minutes with steady leakage, then the gland is lightly tightened. The operation is repeated until the leakage reaches the desired level.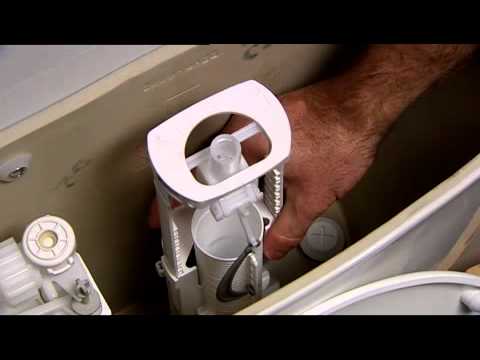
You can try to repair the leak by lightly tapping the stuffing box with a hammer. If the stuffing box had time to overheat, the pump is cooled before the next start. The running-in of the stuffing box can last several hours.
With increased leakage, adjust the position of the packing and tighten the nuts of the stuffing box cover. If the situation has not changed, additional measures are taken.
| Causes of increased leakage | Corrective action |
|---|---|
| Packing wear | They put an additional ring or completely replace the packing, the rings are carefully adjusted along the shaft |
| Wrong choice of packing section | Set up padding to the correct size. |
| Packing damage due to lack of lubrication | Replace damaged packing with new |
| Incorrect choice of packing material | Replace with packing of suitable material |
| Protective sleeve wear | Replace gasket and bushing |
| The formation of recesses in the area of contact between the shaft and the packing | Replace the shaft or restore the surface |
| Seizures, nicks, scratches on the shaft or protective sleeve, shaft ovality | Process the part on a lathe, grind or replace |
The pressure balance can be quite difficult to find, because during operation the packing either expands or contracts.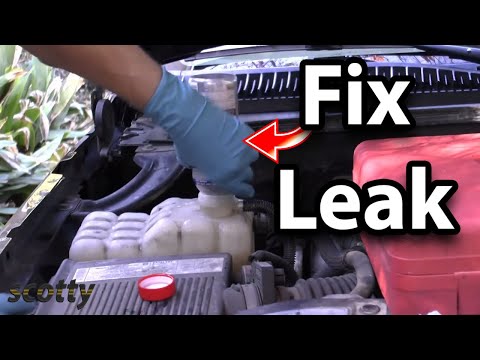 Manufacturers see a way out of the situation in the use of bolts with pressure springs or spring washers, elastic materials, but there are no ideal solutions.
The cuff due to friction gradually wears out itself and develops the surface of the shaft in the contact zone. Leakage may occur due to incompatibility of the working medium and sealing materials, mechanical damage to the shaft, improper installation or poor quality of the seal. With prolonged use, the rubber loses its elasticity and becomes stiff.
Example of a lip seal device:
Measures to eliminate the leak that has arisen due to the indicated causes - reinstallation or replacement of the cuff, restoration of the shaft surface, use of the equipment strictly for its intended purpose.
Mechanical seal pumps are allowed to leak fluid to form a lubricating film between the rotating and stationary parts. The absence or insufficient formation of a film leads to damage to the sealing surface.
Example of a lip seal device:
To prevent hazardous materials from leaking out or when pumping liquids that adhere to rubbing surfaces, such as syrups, a double seal is used in a back-to-back pattern. The sealing fluid for lubrication is supplied to the assembly. The barrier fluid pressure exceeds the pressure of the working part of the pump, thus blocking the exit of the pumped medium from the housing to the atmosphere.
If it is not possible to supply barrier fluid from the outside, the "tandem" scheme is used. The two mechanical seals are installed with the same orientation. The cooling barrier liquid is supplied from a self-contained tank, usually at a lower pressure than the pumped medium.
The allowable leakage rate is calculated using the formula:
where Q is the leakage rate, R m is the average radius of the sliding surface, h is the film thickness, ∆p is the difference between the pressure of the pumped liquid in the pump casing and atmospheric pressure, η is the dynamic viscosity of the liquid, b is the width of the sliding surface.
The above formula is valid only for parallel friction surfaces. If the surface is beveled during service, the formula for calculating the leakage rate is not applicable.
Increased leakage indicates wear of the friction pair or damage to the secondary sealing ring. The equipment is stopped and replaced. If a leak occurs due to strong vibration of the shaft, the centering is performed and the rotor is balanced.
Incorrect selection of material also plays a negative role in this case, for example, when using secondary seals made of ordinary EPDM rubber for pumping petroleum products. Increased leakage is also possible at the first start, after the running-in of rubbing surfaces the situation normalizes.
Other possible causes of seal failure:
The mechanical seal is fixed only after the shaft has been brought into working position. If removal is required, use pullers.
The slightest misalignment or axial displacement of the shaft can negate all the advantages of sealing. Manufacturers solve the problem of misalignment by installing a support ring with a spherical interface under the sealing ring, and axial displacement by using glands with a spring-loaded design.
The oil seal needs regular maintenance, maintenance is carried out only by qualified workers. Maintenance personnel must periodically inspect the seals, inspect the shaft journal, and check the tightening force. The disadvantage of cuffs is a limited scope.
For these reasons, manufacturers of pumping equipment are gradually moving from stuffing boxes and cuffs to mechanical seals. They are more durable, suitable for pumping any material in a wide range of conditions, and do not require such thorough maintenance throughout their service life.
The type of seal and the material of the friction pair are selected based on the properties of the pumped liquid, operating temperature and pressure indicators, and shaft rotation speed. The pump must only be used for pumping liquids for which the equipment is designed. Leakage of hazardous materials poses a serious threat to bystanders.
Content:
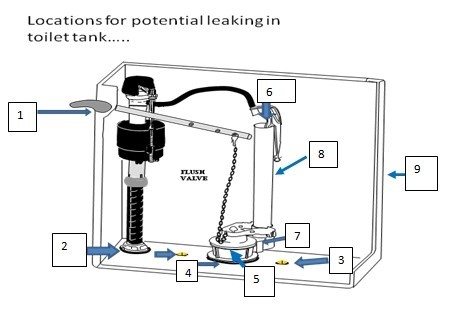
Signs of a leaky toilet
Flushing cistern
Most common problems
- Constant flow
- Breakage of the float mechanism
- Damaged seal
- Leaking after flushing
Preventing toilet leaks
Conclusion
Video
Leaking utilities or plumbing within a home is a serious problem that requires immediate attention. A particular case of such a problem is the leakage of the toilet bowl, which can be identified by the murmuring sound from under the lid after flushing. There can be many reasons for this phenomenon, and each of them deserves detailed consideration. How to fix a leak in the toilet, and will be discussed in this article.
The process of flushing consists in a long or short-term supply of water into the toilet to remove all waste products from it. The starting point for this process is pressing the tank button or interacting with another control element (lever or knob). The flush ends either after a certain time, provided for by the design of the tank, or after the tank is completely empty.
The control element is connected to a drain valve, which, in turn, is connected to a locking mechanism. The latter, upon completion of the drain, provides cold water access to the tank for subsequent flushing. The system is quite simple, and its meaning boils down to the fact that the entire control of the drain process is carried out by the user himself.
If the toilet is leaking from below when flushing, then this is a clear sign that the entire system needs to be checked for malfunctions.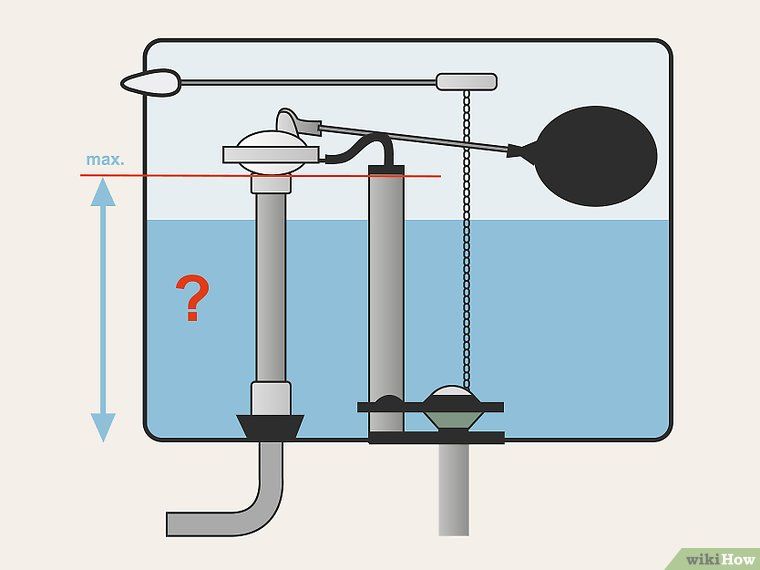 In addition, sometimes the flow of water does not stop at all, and this phenomenon also indicates the presence of problems.
Among the most noticeable signs of incorrect drain operation, the following points should be highlighted:
In trying to understand what to do if water is constantly flowing in the toilet, you must first understand the causes of this phenomenon. For example, the formation of condensate is directly related to the movement of cold water through pipes.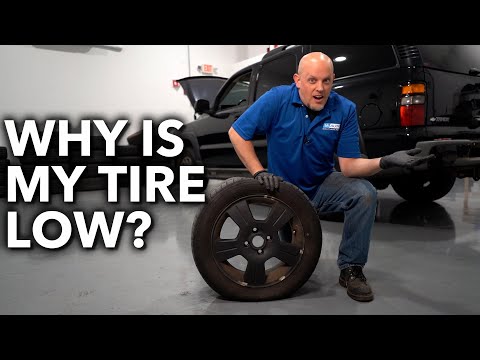 During normal operation of the system, water is regularly used, and before each flush it has time to heat up to a temperature at which condensation is excluded.
If smudges began to appear on the internal surfaces of the toilet bowl, then ordinary dirt that got into the flush tank may be the cause of their appearance. The solution to this problem is to completely clean the tank from any contamination, for which you need to completely remove water from it, remove the fittings and thoroughly clean all surfaces, paying particular attention to the bottom of the tank. However, this does not always help, so you have to figure out what to do if water flows in the toilet, in more detail.
There are several standard valve configurations. The oldest of them is a drain equipped with a rubber pear. The design of such a tank is extremely simple and can only work with a side supply. However, it is pointless to dwell on this option for a long time - it has long been outdated and is practically not used today.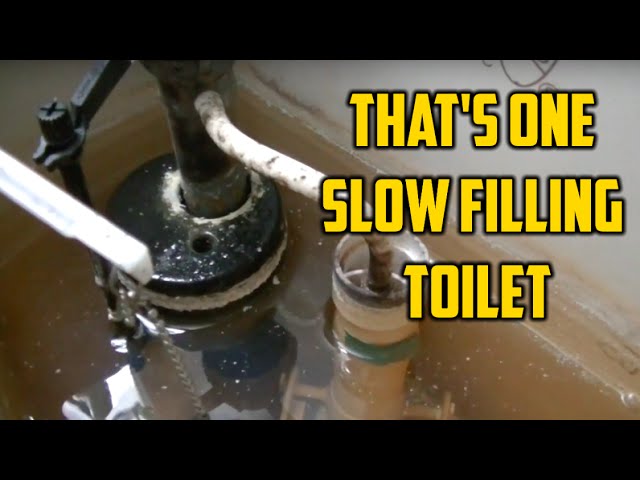
A more relevant scheme is the design, which includes two modules - drain and float. The traditional float, fixed on a thick metal wire, has been brought to a more perfect state. Standard floats block the water from below, and this method is considered more effective. However, side options can also be found, although not so often. In any case, the float system is adjustable, which allows you to independently adjust the volume of water supply.
All structural elements are quite simple and interchangeable, so if you need to work with them, there are no difficulties. If there is a desire, it is quite possible to completely disassemble the mechanism located in the tank. Of course, before this you need to turn off the water and completely empty the tank capacity.
To dismantle the internal elements of the tank, specific tools are not required - most of the work can be done by hand, and the rest is done with the help of keys. Older models of tanks were equipped with a large number of metal parts, but modern products use only plastic, which is more reliable, strong enough and can withstand direct contact with water without any problems.
Parts may vary in size and color, but the principle of their work is always the same. This makes it possible to painlessly replace individual parts when they are worn or damaged. The only thing that will need to be done in this case is to choose the right size for the new part so that it fits. The wrong choice will return to the original task - what to do if the toilet is leaking from below.
There can be many reasons and accompanying signs of a tank leak, but they all come down to two main categories:
You need to understand the intricacies of each specific situation in more detail in order to understand exactly why the toilet bowl is flowing and find the best solution to the problem.
A small stream of water that constantly flows along the back of the toilet is a clear sign that signals the need for urgent system repair. If the water in the toilet does not flow very intensively, then at first you may not notice it. In this case, you should pay attention to an indirect sign, expressed in the form of a rusty sediment on the toilet. Rust and plaque appear if the water supply is not equipped with filters that purify water from various impurities.
The first step is to understand why water flows in the toilet. Of course, the toilet bowl and the mistakes made during its installation are excluded - in this case, the problems would look completely different. Water can only flow due to a malfunction in the tank, and that's what you need to deal with.
Tank check technology consists of the following steps:
This technology is relevant for any models of tanks, so you can always use it for repairs. However, before that, you need to understand exactly why the toilet is leaking.
Malfunctions in the operation of the float can be noticed even visually - just look under the cover. Most often, the problem manifests itself in the fact that the float does not reach its original level, but is always at the same height. The result is the following situation - the float simply does not respond to changes in the volume of water in the tank, which triggers the overflow system, and excess water flows from the tank into the toilet. The root of this malfunction is usually the loss of the tightness of the float.
Another common reason that the toilet is flowing from below is a breakdown in the attachment of the float mechanism. The solution to this problem is to replace the float. To do this, you need to remove the old part, come to her store and choose a model with similar characteristics.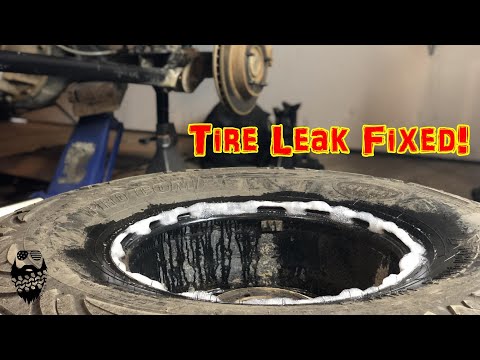 Usually, after replacing the float, the flow stops, but it is still worth carefully observing the operation of the system for at least a couple of days. See also: "If the toilet cistern is leaking - causes and remedies for leakage."
Another reason that water is running in the toilet is a malfunction or wear of the seal. Usually such parts are made of rubber or polymers. These materials wear out the fastest, so this element is considered the least reliable part of the drain mechanism.
The o-ring is usually located right at the point where the water exits. In addition to the direct sealing function, this ring also works as a filter that filters out various impurities contained in the water. Of course, the smallest particles in this case act as an abrasive, gradually wearing out the material of the part. As a result, you have to figure out how to fix a leak in the toilet bowl.
A contaminated part can simply be cleaned using the following algorithm:
If the part was damaged, which was discovered during inspection or during the cleaning process, then it will be easiest to replace it. Replacement should be made regardless of the nature of the damage to the seal, whether it be deformation, ruptures or cracks. And, of course, it is impossible to return the damaged part to its place - after that, water flows from the tank into the toilet bowl with the same intensity in the very near future. See also: "What to do if the toilet bowl is leaking - possible causes and solutions."
The second common problem is that water flows from the tank into the toilet only after flushing. Usually the jet flows until the tank is filled with water to the maximum value. Of course, in this case, water losses will not be very large, but, firstly, they increase water consumption (respectively, the cost of funds), and secondly, over time, lead to the appearance of plaque on the back wall of the toilet bowl.
Among the most likely reasons that the toilet is leaking after flushing, it is worth noting the following points:
In any case, in order to understand how to repair a push-button flush of a leaking toilet, you first need to inspect the structure. If a visual inspection does not give anything, you will have to disassemble the mechanism and look for the cause of the problem manually. See also: "Why water is not drawn into the toilet bowl - possible causes, solutions to the problem."
It is not difficult to notice the skew of the drain mechanism, since it is always indicated by the jamming of the flush button. In some cases, the button may even fall into the container. And the question arises of what to do - the toilet is flowing, although it is impossible to even press the button. To deal with such a problem, you will need to remove the tank cover and understand why the column has moved from its original position. If there is no damage to the parts, then the problem is solved by simply returning the part to its place.
There are other situations - for example, if there are large particles of dirt under the seal that got there from the pipeline. When the volume of water is low, the valve is relaxed, causing water to flow into the toilet. After filling the tank, the pressure increases and the leak stops. And here you need to figure out what to do - the toilet passes water, and a superficial examination did not give a result. The answer is simple - to get rid of such a problem, you will need to clean the entire tank and its working elements very well.
To improve the performance of the drain system and neutralize negative factors, you can use the advice of craftsmen who know exactly how to fix the toilet so that water does not flow. For example, so that the seal always fits snugly against the drain hole, the column axis can be weighted with some kind of load. As a result, the ring will always ensure the tightness of the structure.
In order not to encounter problems during the operation of the toilet, it is worth carrying out a number of preventive measures: