Ruts on your trails
So what do you guys do about ruts on your trails from driving the ATV through? My land is heavy clay and it holds water like crazy. I know the answer is to stay off of them while wet but if I waited until the trails dried out it would be literally mid to late July and anytime it rains it will be soft and moist again. That would not allow much work to be done and I need the UTV for a lot of the stuff I do.
Some of my main trail is "ditched". Other parts are not. And once it is rutted it holds water literally forever. I stay off my side trails and just drive when I have to. For example last weekend when I planted apple trees I need the UTV to get trees, fencing, stakes, etc in to my spot.
What can be done both temporary and permanently to fix this? I've considered trying to fill up some of the large ruts with small straight trees and get them to sink into the ground so they don't tip up but yet fill in some of the rut and then spread the weight of the UTV along the tree. So you would be driving on the tree in the rut which would be recessed in the rut. I have no idea if that will work or not. My clay is real sticky so I thought it might work.
I have a logging scheduled in 2016 where I don't want to stick a ton of money into the trails at this point but I am starting to bottom out in places and need some help. Plus I know it would be expensive to fix it right with gravel or to ditch the entire thing.
.
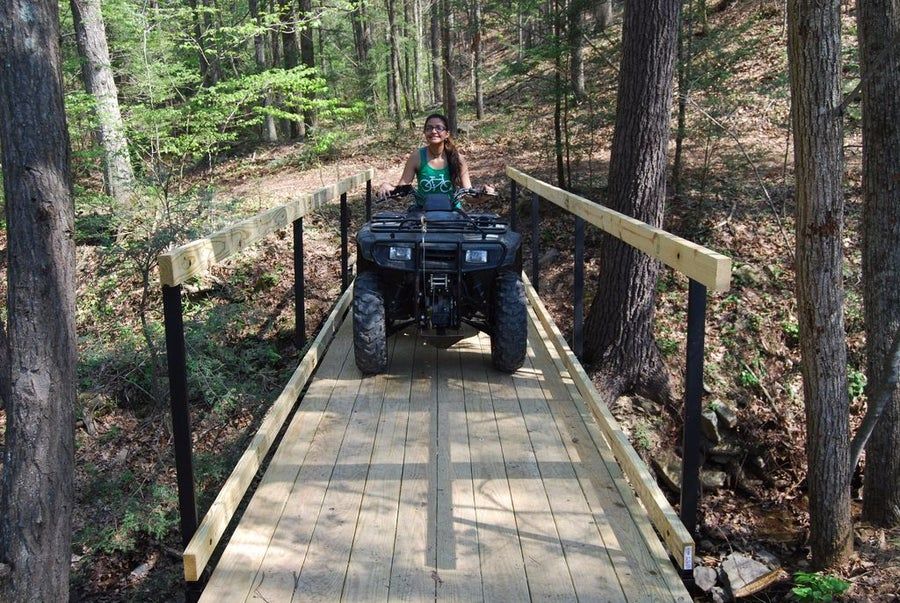
This is how it begins (which I can handle):
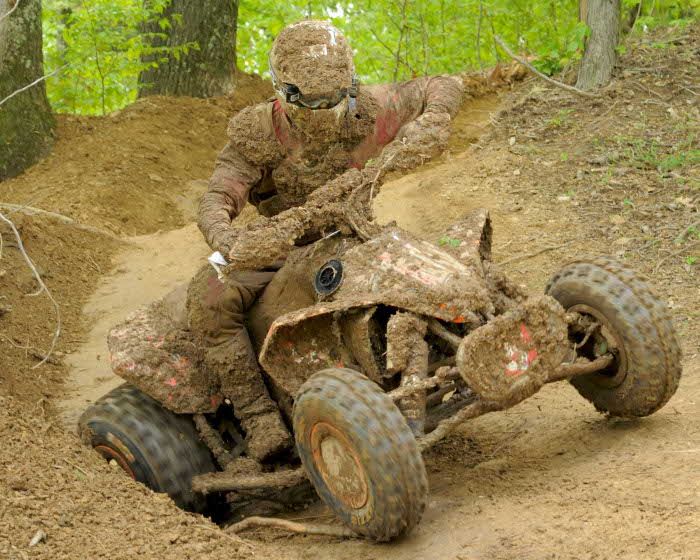
Then it turns into this:
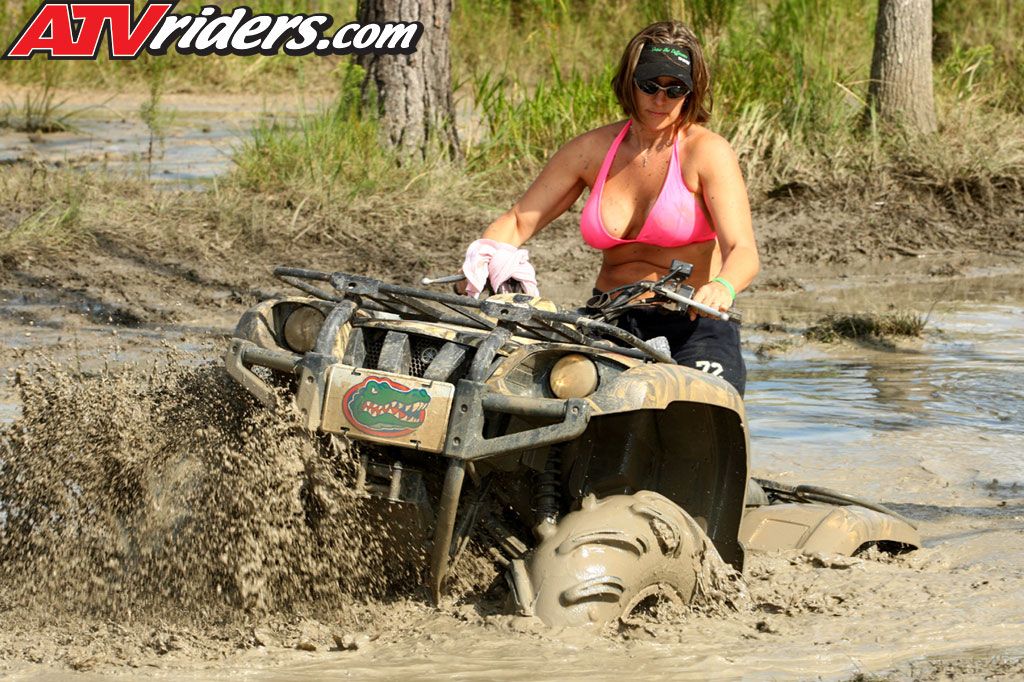
My worst part of the trail looks like this.
I understand this is a problem with not a lot of good answers. I am just looking to start a discussion on things I may not be thinking of to help this out. I've actaully thought about selling my land and cabin just because I am so annoyed with this darn clay. Thanks.
loads and loads of mulch during the logging in 2016???
Novemberforever said:
golf ball size gravel?
Click to expand.
..
1/2 mile of it? That is how long my main trail is. And I'm not expert but it would take a lot of it because it would push into the clay quite a bit.
bueller said:
loads and loads of mulch during the logging in 2016???
Click to expand...
Maybe? But a half mile of it? How deep would it need to go?
what about a tracked Argo?
I have a 6 wheel Bigfoot Argo that is way easier on my wet trails than the 4 wheeler. Put the tracks on I bet it would be a winner.
Long term solution is gravel -yes the larger stuff (roughly 1/2 as big as your fist). It will sink into the clay (not as badly as the smaller gravel), but it will take the use better than the bare soil. Biggest expense with gravel is the trucking cost. You would typically go about 4" deep for somehting like a driveway for a road vehicle. Something else to consider - just an idea here - is something like the old cordroads. I live on a gravelroad currently that passes thru an area that holds lots of water. The base of the road is old logs laid across the road and then gravel is laid on top. Every once in a while they set the grader a little too deep and catch a log and pull it up - that was how I found out about its construction. This constructions essentially allows the road to float as the ground shift. Maybe something to consider for your more worste case spots.
If I have my math right that is 228 yards of material, at 1.4 tons per yard thats 320 tons or 16 truck loads assuming 20 tons per truck.
Rome wasn't built in a day. Wasn't paid for in a day either!
bat man said:
what about a tracked Argo?
I have a 6 wheel Bigfoot Argo that is way easier on my wet trails than the 4 wheeler.
Put the tracks on I bet it would be a winner.
Click to expand...
That is actually something I thought about but forgot to post about. I think they even make tracks for my Kawa Mule.
jwill1776 said:
If I have my math right that is 228 yards of material, at 1.4 tons per yard thats 320 tons or 16 truck loads assuming 20 tons per truck.
Click to expand...
What does a truck load cost assuming trucking is only 10 miles? Any idea? You still gotta spread it though. Wonder how many days he would have into that.
j-bird said:
Long term solution is gravel -yes the larger stuff (roughly 1/2 as big as your fist). It will sink into the clay (not as badly as the smaller gravel), but it will take the use better than the bare soil. Biggest expense with gravel is the trucking cost. You would typically go about 4" deep for somehting like a driveway for a road vehicle. Something else to consider - just an idea here - is something like the old cordroads.
I live on a gravelroad currently that passes thru an area that holds lots of water. The base of the road is old logs laid across the road and then gravel is laid on top. Every once in a while they set the grader a little too deep and catch a log and pull it up - that was how I found out about its construction. This constructions essentially allows the road to float as the ground shift. Maybe something to consider for your more worste case spots.
Click to expand...
I thought about the cord roads too. Like what loggers use by putting trees crossways. My only question is how do they install those efficiently and how would i do it?
j-bird said:
Rome wasn't built in a day.
Wasn't paid for in a day either!
Click to expand...
Very true. Gotta start somewhere. Just got to figure out what method is the best to build Rome.
BJE80 said:
What does a truck load cost assuming trucking is only 10 miles? Any idea? You still gotta spread it though. Wonder how many days he would have into that.
Click to expand...
Just checked my area, ballpark $26 per ton and $35 delivery per truckload, I'm sure costs vary widely by location.
I have the same problem. Last year the township redid (dug out) the ditch's. They were looking for a place to get rid of what they dug out. I took 20 truck loads, granted it was dirt, weeds, stone & some trash (but not much) but it was also free. Rented a tractor for a day and spread it on the low spots. Some places the trail was raised over a foot. It's not near as bad this spring but I still have more work to get them right.
Instead of creating an 8 foot wide trail, could you just put the gravel down in the tracks, so two strips 2 feet wide each would cut the amount of material needed in half.
kabic said:
Instead of creating an 8 foot wide trail, could you just put the gravel down in the tracks, so two strips 2 feet wide each would cut the amount of material needed in half.
Click to expand...
That is not a half bad idea. Just fill those areas in and then only drive on those areas.
tooln said:
I have the same problem.
Last year the township redid (dug out) the ditch's. They were looking for a place to get rid of what they dug out. I took 20 truck loads, granted it was dirt, weeds, stone & some trash (but not much) but it was also free. Rented a tractor for a day and spread it on the low spots. Some places the trail was raised over a foot. It's not near as bad this spring but I still have more work to get them right.
Click to expand...
That is a sweet deal. What do you plan on doing long term? What ideas have you had to fix it? Just brainstorming.
BJE80 said:
That is a sweet deal.
What do you plan on doing long term? What ideas have you had to fix it? Just brainstorming.
Click to expand...
Try to get more from them this year. I also live in a town that has 5 very large compost piles. I gotten much from them to fill holes & low spots in my plots. It take me about a hour to load, travel, unload & return to the pile, cost me my time and gas. I haul about 1500 lbs. per load. Once the plot is done it's trail time.
tooln said:
Try to get more from them this year.
I also live in a town that has 5 very large compost piles. I gotten much from them to fill holes & low spots in my plots. It take me about a hour to load, travel, unload & return to the pile, cost me my time and gas. I haul about 1500 lbs. per load. Once the plot is done it's trail time.
Click to expand...
Boy, if i start hauling trailers and doing trips back to my plots with fill I would need to fix my trails first. They would get destroyed even in summer and I would likely get stuck eventually. My plots need fill too.
kabic said:
Instead of creating an 8 foot wide trail, could you just put the gravel down in the tracks, so two strips 2 feet wide each would cut the amount of material needed in half.

Click to expand...
If you can get your hands on a smaller dump truck you can block the center of the tailgate just wide enough where stone won't fall in the center of the road and only in the ruts. We have done that before it saves a lot of time shoveling and moving stone around by hand.
Table of Contents
Back | Next | Cover Page
Geosynthetics for Trails in Wet Areas: 2008 Edition
Case Studies
The following case studies show how geosynthetic materials were used to solve problems on trails. One of the studies points out problems that can arise if geosynthetic materials are installed improperly.
Geoblocks for ATV Trails
The Francis Marion National Forest in South Carolina had serious erosion problems on all-terrain vehicle (ATV) trails. The ATVs were causing ruts. Water collecting in the ruts compounded the problem (figure 16). The forest reinforced the trail with Geoblocks, solving the problem (figure 17). Other national forests and national parks now use turf reinforcement products to reduce erosion and reinforce ATV trails.
Figure 16—An ATV trail in South Carolina
before Geoblocks were installed.
Figure 17—The finished trail after Geoblocks were
installed in the Francis Marion National Forest.
Geocells for Trail Bridge Approaches
The Tongass National Forest in Alaska is using geocells to build approaches for trail bridges (figure 18). In the past, approaches have sloughed off because of the steep embankments and wet conditions there. The geocells have worked wonders and are highly recommended for trail bridge approaches in the Tongass (figure 19).
Figure 18—Using geocells to construct
a trail bridge approach.
Figure 19—A finished trail bridge approach
in the Tongass National Forest.
Geotextiles for Underdrains
The Bureau of Land Management in Oregon had trouble with water going over a trail (figure 20). Large rocks were used to create an underdrain (often referred to as a French drain). The large rocks were placed on the ground and a geotextile fabric was laid over the rock (figure 21). The geotextile fabric was used as separation to keep the trail's surface material (crushed rock) from migrating down into the larger rocks. The finished trail (figure 22) allows water to flow through the underdrain.
Figure 20—An ATV Trail on BLM land in
Oregon before geosynthetics were used
to construct an underdrain.
Figure 21—Constructing an underdrain from
large rocks, with geotextile serving as
a separator between surface material
and large rocks.
Figure 22 —A finished rock and
geotextile underdrain.
Geocell Problems
Trail maintainers had the right idea when they decided to install geocells at the approaches to this bridge (figure 23). The geocells would provide a stable approach to the bridge and keep the fill material from soughing. Unfortunately, they did not install the geocells deep enough to allow 2 to 3 inches of gravel cover above them. The geocells were exposed to traffic and gradually unraveled, creating an unsightly and unsafe approach.
Figure 23—Geocells placed too close to the surface
may unravel.
The top of the geocell should be 2
to 3 inches below the surface of compacted tread fill.
Top
Back | Next | Cover Page
At the beginning of the next season, the main thing is to properly re-mothball your favorite all-terrain vehicle that has stood for several months. To do this, you need to carefully check the status of all nodes and systems.
We'll tell you exactly how to prepare an ATV for the season.
Next, we'll tell you exactly what to do.
The plastic elements of the body may have cracked in the previous season, and this may not have been noticed before conservation. The leather or leatherette of the seat could also crack, and the filler could come out from under the cover. It is better to fix such defects immediately (lay the filler inside, sew the seams apart or apply a patch) - otherwise the holes will increase, and the upholstery will have to be completely tightened.
The seat and body are inspected after washing the ATV to make sure all surfaces are clean
Engine oil : if the ATV “wintered” with the old one before the winter, it is better to replace it with a fresh one, especially if it has served more than 1000 km in difficult conditions. If the oil was changed before conservation, you need to check its level: is it gone.
Grease : Inject through all injection points. Usually they are on movable hardpoints. But it is better to look at their exact location in the instructions for the ATV.
Antifreeze : we measure the level in the expansion tank (usually it is visible under the front left wing) - if it has fallen below the minimum mark. You need to check it only on a cold engine (before starting it, or 10-15 minutes after stopping).
Brake fluid : check the level - if it has fallen below the minimum mark. Usually ATVs have two brake fluid circuits: for the front brakes and a common one. The container for the front circuit is located directly on the handlebar, next to the brake lever. The "common" reservoir is usually mounted under the rear left fender.
Spark plugs : we take it out of the engine (to do this, remove the engine compartment shield) and inspect. If there is soot or plaque, they are replaced. In general, spark plugs are rarely changed, approximately every 6000 km. If this mark is very far away, they can not be checked, since access to them is usually very inconvenient.
Air filter : inspect, if clean, leave. It is usually located under the seat, covered with a lid.
Oil filter : if the oil changes, the filter also changes. It is located on the left side, under the protective cover.
Fuel filter : inspect after checking the gas tank. To get to it, you need to remove the left side of the lining and the left engine compartment cover. If the tank is clean or has been filled to the top, the filter will likely remain clean. In this case, it can be returned to its place. If it has not been changed for a long time, the tank has not been filled with gasoline or there are traces of corrosion on the walls of the tank, the filter must be replaced.
Drain the old gasoline and fill it with fresh one. If, before conservation, gasoline was filled not under the neck or was not filled at all, and the tank was empty all winter, it must be examined with a flashlight: is it clean inside? If there are signs of corrosion on the walls, and flakes of sludge or any other dirt are visible at the bottom of the gas tank, the fuel system will have to be flushed.
For flushing, you need to completely drain the “wintered” gasoline, fill in fresh fuel to the edges of the gas tank and start the engine so that it disperses along the entire highway. After that, remove the cap from the tank, add gasoline if necessary. Then we also drain this fuel and again inspect the walls of the gas tank again. If rust remains, most likely the tank will have to be removed and washed more thoroughly.
Check charge and recharge if necessary. You also need to inspect the terminals, cable lugs and the battery case itself - if there is any plaque on them. If there is, we clean it with a sponge with a solution of water and baking soda.
The ATV battery is located under the seat
Engine : check if there are any oil leaks.
Drive : belt - check for integrity, chain - for rust. We also check the tension and tighten if necessary.
Radiator : Remove the grille and blow it out with a vacuum cleaner or compressor. If it is heavily soiled (for example, fluff, leaves, dirt) after the previous season, wash it under pressure.
Wheels :
Suspension, ATV stands on a flat surface without slopes : alternately press on the ATV from the top front and rear, and then over each wheel separately - check if there is any play, if the shock absorbers work normally. When pressing on either side, this part should rise and fall evenly without swaying.
Suspension arms must be intact: no corrosion, dents, bends, cracks, holes0036:
 If there are holes, dust will get inside, which means the anther needs to be changed.
 If something was removed from the ATV before conservation (for example, the battery, protection of the levers and the bottom), we install everything back.
When the external inspection of all parts is over, the parts are installed in their places, all technical fluids and consumables are replaced - you can finally start the ATV.
For the first time after winter, this must be done with particular care. The sequence is:

 In general, a compression check is not a mandatory item (since not everyone has their own compression gauge, and with proper preservation, compression could hardly have fallen), but useful. It can be skipped if the engine starts normally.
 If no problems have been identified on all points, you can plan the first full-fledged departure.
The ATV is constantly subjected to significant loads, due to which the components of the vehicles wear out. This leads to a deterioration in the operation of the equipment or its breakdown. Therefore, let's figure out what to do if the children's ATV does not start. In this article, we will look at the main problems and ways to "resuscitate" the ATV.
Usually, ATV problems are caused by improper use of the ATV, high loads and irregular maintenance. The main reasons why the ATV will not start are:
To determine why a children's ATV is not working, you need to start with the simplest - technical fluids. Quite often, the problem arises due to the banal lack of gasoline. In this case, the quadric will not start or will start to stall. Therefore, before each ride, the rider needs to check the fuel level in the tank.
The ATV may also not perform well due to poor engine oil. If problems occur after changing the fluid, drain the lubricant, flush the system and fill in new oil. This is especially true for devices with a four-stroke engine, which must be "bathed" in grease.
Most riders store their ATVs for the winter. And if the procedure was performed incorrectly, it will be difficult to start the quadric after a long period of inactivity. Let's start with a simple battery failure. After a long stay in the cold, the battery can “leak” and completely fail. Do not forget that the battery could simply be discharged.
Also, in case of improper preservation, rust appears in the ATV fuel system, the spark plug and wiring fail.
To pinpoint the cause of the failure:

But if a children's ATV does not work on a battery, it would be best to contact a specialized service. Technicians will need to check the ATV's engine, wiring, and batteries.
Quite often, problems with starting the quadric engine appear due to a starter malfunction or damaged contacts. To make sure that this is the cause of the malfunction, you need:
But what if you are far from home and the starter does not work on the children's ATV? In this case, you need to close the relay contacts. This way you can start the ATV engine.
Something as small as a spark plug can also prevent the quad from starting. Therefore, it is important to inspect the part, and if it is damaged, it should be replaced. But if the electrode is intact, you should:
In addition, the rider should check for spark. To do this, you need to unscrew the candle, place it in the cap and touch the metal surface (without paintwork). A blue spark should jump on a serviceable element.
There are many reasons why a child's ATV won't start or stall.