As an Amazon Associate we earn from qualifying purchases made on our website. If you make a purchase through links from this website, we may get a small share of the sale from Amazon and other similar affiliate programs.
Getting a flat on your lawnmower tire can be such a pain. And repairing the tire can be even more of a pain! There are plenty of options to find out how to fix a tire online, but the sheer amount of options from YouTube to forum sites may cause a headache.
To help ease your brain from ensuing headaches, I have compiled a list of three ways to repair a tire and the types of equipment you will need to repair your tire. This will put you on the right track.
For every tire, including lawnmower tires, there is a point of no return when a tire cannot be repaired. It is essential to know the difference between what can be fixed and what cannot be fixed. That’s why this article has a section dedicated to what tire damages and mishaps cannot usually be fixed using these three repairing strategies.
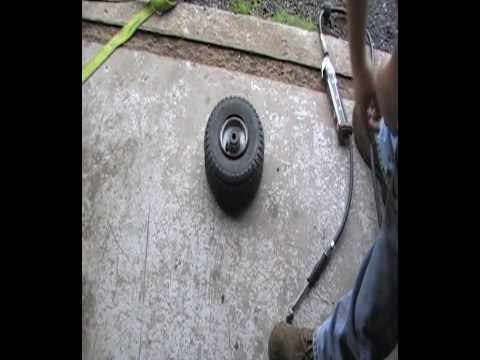
If there’s a small hole caused by an impaled object on your tire, one of the best ways to repair it is by using tire sealant.
Using sealant to repair a lawn mower tire is ideally a straightforward process. But there are a few different types of sealant to choose from, so knowing the right one to choose is vital.
Pressurized sealants cost around the $6-12 range, so you won’t have an empty wallet trying to look for one. Pressurized sealants are cheap and only made for one-time use.
Liquid sealants, which pour into the valve stem of a tire wheel, cost a little bit more, around $9-12. You will need a compressor or portable tire inflator for the liquid sealant to work correctly.
Tire sealant kits come with a compressor, and they can cost in the $30-80 range. I would recommend getting a sealant kit over the other options. The kit provides the compressor that liquid sealants need and inflates the tire unlike what most pressurized sealants claim they do.
If you need recommendations on what type of tire sealant is the best, check out Consumer Reports’ tire sealant review page. Consumer Reports gives excellent micro-reviews on which sealants are capable of filling 2.4 mm and 5.8 mm tire holes. They also list the price of each sealant, so you don’t have to look it up.
Before you do any work, DO NOT pull out the object that is causing the hole in the tire at first. This will cause the sealant to be unable to seal the hole. You can pull the object out of the tire after applying sealant, as shown in the directions later.
Some sealant bottles may come with a chart to tell you how much sealant you should use for the size of the tire you’re fixing.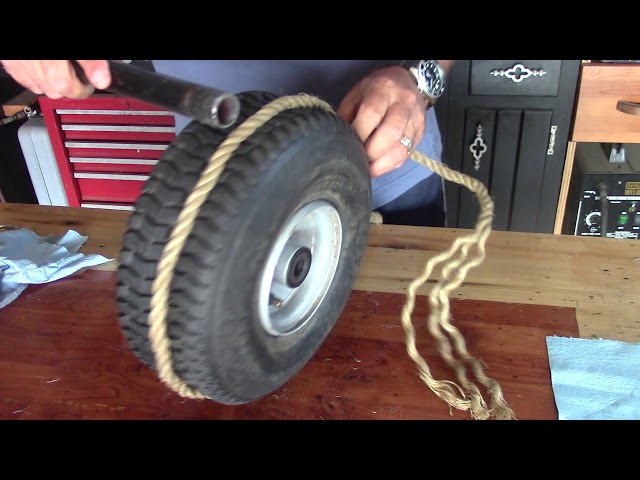 Make sure you look at the chart to see how much sealant you should use or else your tire will not have enough sealant, and the leakage will happen again.
Tools Needed:
Directions
This video here from TireJect explains the process step by step.
 com
comA tire plug kit is another way to fix a hole in your tire. Usually, tire plug kits come with a reamer/plug tool, some plug wires which block the hole, and some contact cement.
To plug a tire, the tire needs to be removed from the car, so a floor jack is necessary. Here are some of the tools you will need to patch up the tire.
Tools:
If you don’t have a tire repair kit, make sure to have these individual items on hand:
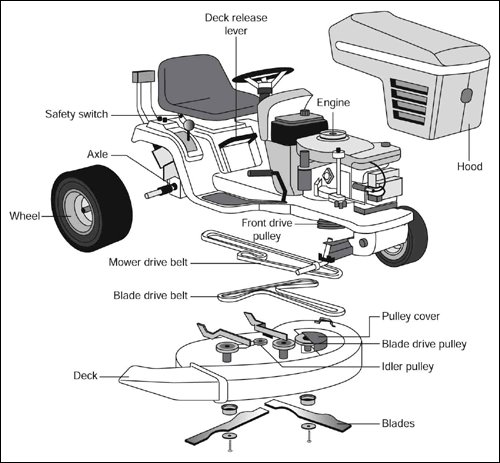
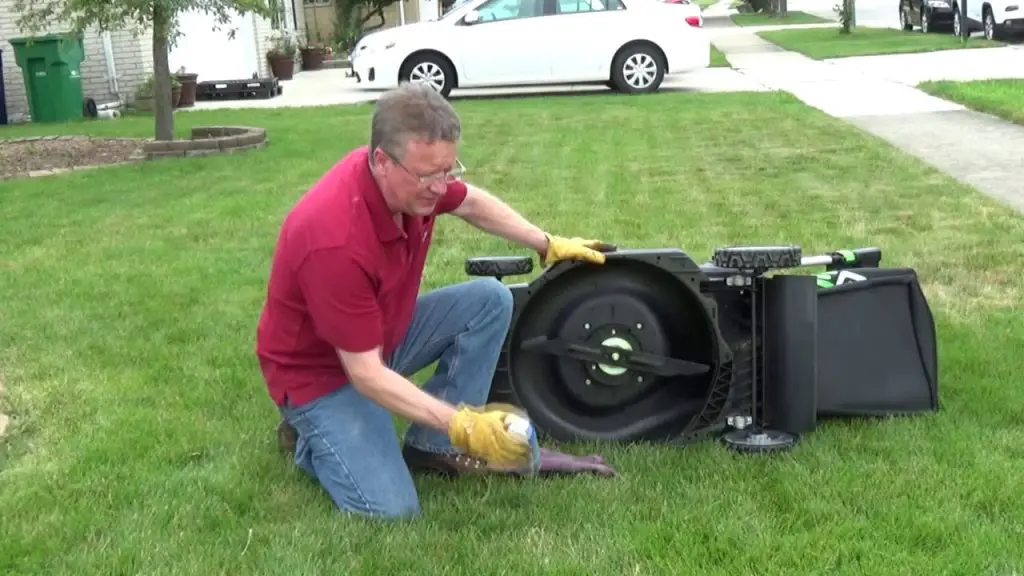
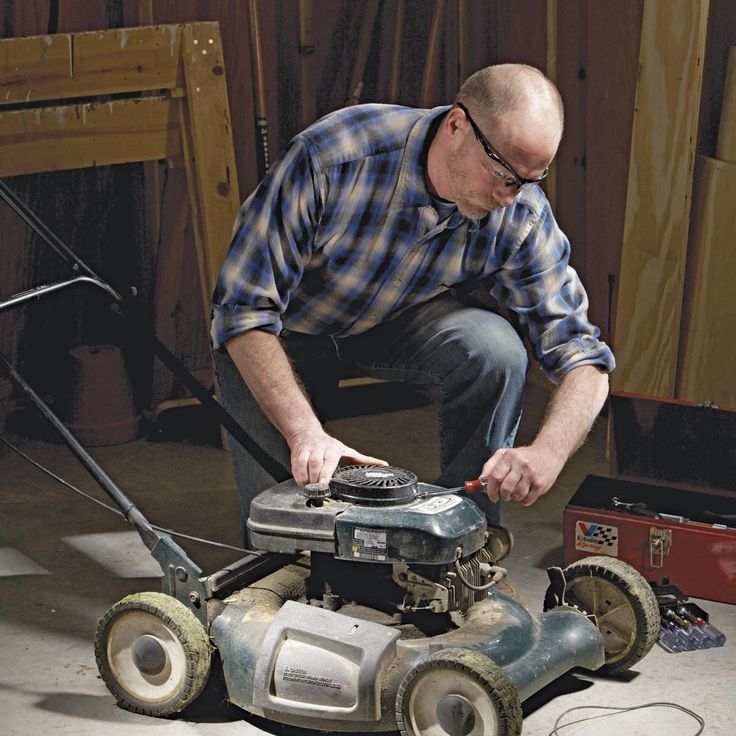
Removing a Tire from a Lawn Mower
To plug the tire, you’ll first need to take it off the lawn mower. Follow the directions below to ensure you properly remove the tire, which will also help make sure it goes back on properly.
Directions:
Now that the tire has been removed from the mower, it is time to patch the tire using a tire plug kit.
Directions:
 The air from the leak will make bubbles from the soapy water, showing you where the leak is.
Helpful hint… I have seen videos on YouTube where people have poured the contact cement on the plug after inserting the plug in the plug tool. This also works.
This video here expains the process quite well:
Reinstalling the Tire
Patching a tire is considered the most efficient way to truly repair your damaged tire and can usually fix larger holes than plugs and sealant. The reason why patching a tire is considered the most efficient is because patching doesn’t just check the outside of the tire, but the inside as well.
When a tire has a hole in it and begins to lose air, the sidewall starts to deteriorate, leaving black dust from the sidewall on the inside of the tire. This can be prevented by patching a tire.
If you plan on patching a tire, prepare yourself. Patching a tire is easily the most challenging tire job out of the three ways to repair your tire in this article. You know the saying: hard work produces the best results.
But, the sidewall itself can’t be patched. Any damage to the sidewall itself, whether it’s from an outside source of weakening from within, will require a new tire.
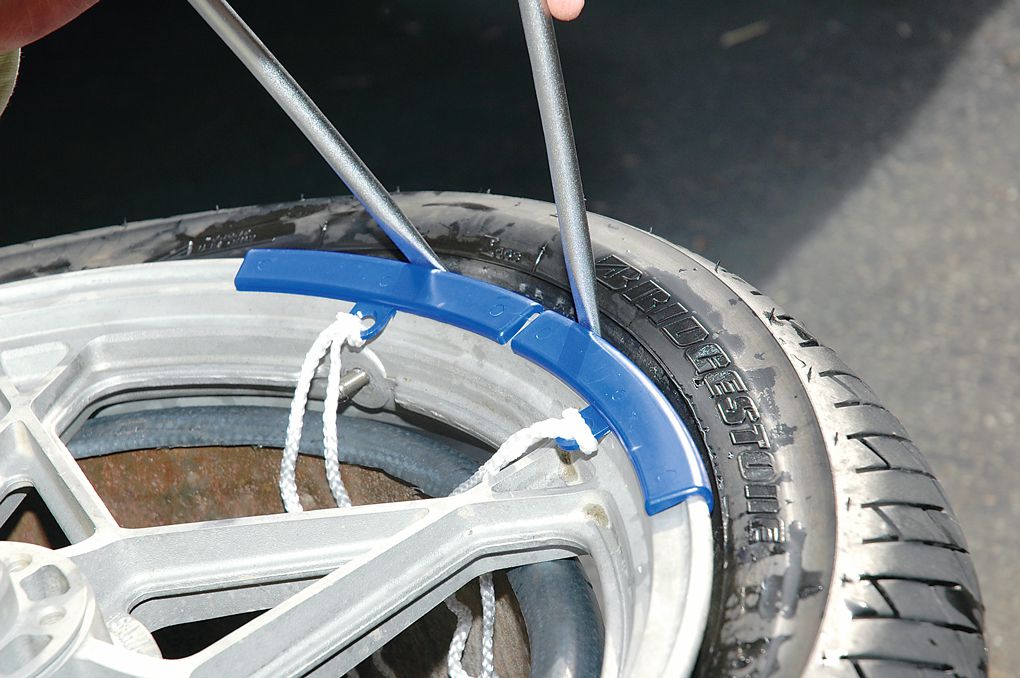
Much like using the tire plug kit, patching a tire requires a floor jack to remove the tire from the lawnmower. Patch kits take things one step further, though. Removing the rim of the tire is a crucial step. You will find out how to do so here!
Tools Needed:

To save you some more time, we’ll start these directions after removing the tire from the lawnmower. Look back at the directions for “Removing a Tire from a Lawnmower” to learn how to do that properly.
Directions:
 Put your foot on the rim of the tire to hold it still.
Helpful hint: Not all bead breakers are the same. Some may require a hammer to break the bead while some do not.
Directions:
 This may take a few tries to get the hole to a size large enough for the plug to fit in, so do not stop at just one push inside the hole.
Lawn mower tires tend to last five years. Sealants, Plugs, and Patches are all perfectly fine ways to repair and expand your tire’s life expectancy (though I believe patching to be the most efficient).
But, there are points where tires have reached the point of no return. Car owners need to know when that point has been reached. Look below for more details!
To check for dead tread, insert a penny into the groove with Lincoln’s head right side up. If you can see all of Lincoln’s head, you should probably replace your tire.
You can fix a flat lawn mower tire on your own, as long as it’s not too far gone. Using sealant, plugging, or patching a lawn mower tire are each effective in their own right. It’s essential to fix the flat tire before any permanent damage is done.
The sidewall can become damaged if there’s a leak in the tire, and that is not a DIY fix. Keep an eye on your lawn mower tires and be ready to replace them about every five years.
Are you a landscaping enthusiast and want to help me grow Landscapingplanet.com? I am looking for writers! Just send me an email at [email protected]
It can be very uncomfortable to have a flat tire on a riding mower. If it is partly deflated, It may affect the mower’s handling and cause it to slip on the surface, making your job more difficult. It also adds excessive load to the engine and can cause a higher fuel consumption. If the tire is completely flat, you can not use your mower until you fix it. A flat tire may be caused for several reasons. This blog post shall explore these reasons separately and explain how to fix a lawnmower’s flat tire.
How do I fix a flat tire on a riding lawnmower, step by step:
 Check the tire pressure for each tire using a pressure gauge.
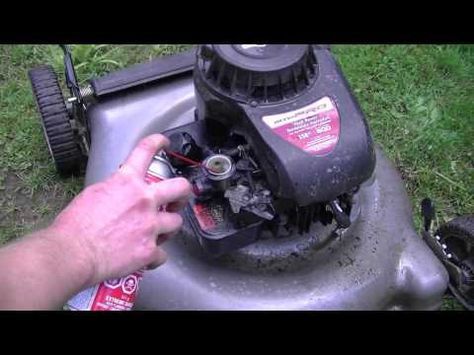
Tubeless tires do not have a separate rubber tube to carry the air inside them. Pressurized air is stored within the tire to withstand the lawnmower’s entire weight and the individual himself. The air pressure inside the tires can fall due to a variety of reasons. The tire can be punctured by a sharp object that allows the air to leak out. Generally, in winters, low temperatures enable the air to condense within the tires, resulting in a pressure drop. In all these situations, the tires should likely be filled with air.
To further elaborate on the steps listed in bold, we suggest going through the whole post.
Contents
We shall focus on the procedure for repairing a flat tire along with other issues that can occur with a lawnmower tire.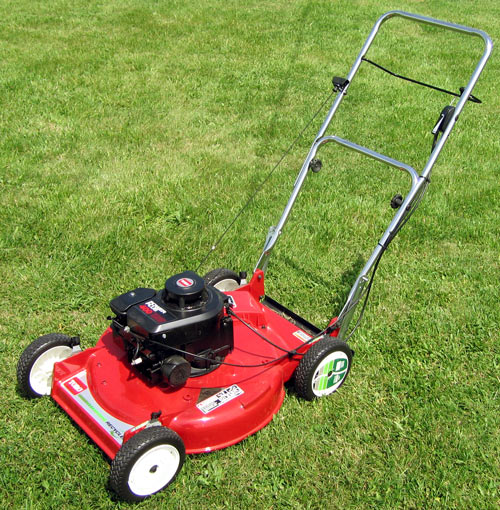
There may be two main ways to conduct a tire inspection. You should visually inspect the tire to see if any tire is flat and needs to be fixed. You can also measure the air pressure within each tire to see where more air needs to be pumped.
You can need a pressure gauge to calculate the value of the air pressure within each tire. You may do this by connecting the pressure gauge to the stem of the valve.
If you have an air compressor at your side, it has a pressure gauge mounted, so there is no need to buy one separately. The prescribed pressure value is generally indicated on the side of each tire. If not given, you can check the manufacturer’s suggested value set out in the lawnmower manual.
Determine the air pressure inside all four of the tires. If the value falls by a large amount short of the recommended value, you may need to pump air inside it. We’re going to come to that step later.
Suppose any tire appears flatter than usual; attempt to bend over it and press it. If you can press it comfortably, you need to pump the air inside.
Some more expensive riding lawnmowers have a tire pressure monitor that will warn you when the tire pressure is lower than it should be. There are also aftermarket systems you can add to your machine.
Search for sharp objects such as iron nails, pins, glass splinters on each tire tread area. If this is the case, the tire is punctured and needs to be fixed before inflated with air.
You might come across a situation where the tire has fallen completely off the surface, and the air inside has leaked. In all these cases, it is important to repair the tire first before filling it with air.
Here, we’ll clarify how to patch tires that have either been punctured or lost contact with the rim.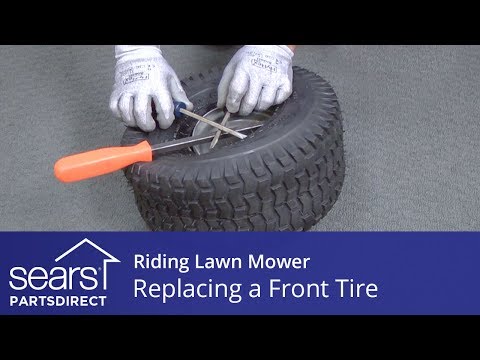 If your tire isn’t damaged, you can switch directly to step 3. Start with checking the type of tire you have. There are two main tire types: tubeless tires and tires with an inner tube.
If you use a tire with an innter tube, it makes the most sense to remove the inner tube and check it for leaks. It is possible to use a sealant with an innertube, but it is not advised. If you have removed the inner tube, you can inflate it and use water or soap water to locate the leak. If the area is not too big, you can fix it easily with some glue and an inner tube patch. Do not forget to check the valve as well. If you have found the hole, it is easy to fix. Always check the tire itself for any sharp object. You know the location that you just patched, so it is easy to find the area on the tire itself as well. Check carefully on the inside of the tire with your hand and remove the culprit. If the area on the inner tube is considerable, it is better to replace the inner tube.
If a sharp object, such as an iron nail, is stuck inside a tire, it can cause air leakage. To check there is an air leak, you can pour soap water at the puncture site to see if any air bubbles are developed. Please be careful that you do not withdraw the punctured region’s sharp object until the opening has been repaired. You should follow the steps below to patch the punctured tire:
 You should apply a sealant quantity depending on the size of your tire.
In the case of tubeless tires, it is possible that if your tire loses contact with the rim due to a strong cornering force, it loses all its air. It usually occurs when the tires are old and near the end of their service life. However, if you’re trying to repair this tire, you can follow the steps mentioned:
With the air filled within the tire, the rope can be withdrawn, and the tire is all ready to be used again.
After the tire has been repaired and checked for any damage, we can pump air inside the tire. For this action, you should follow the following steps:
 If it is still low, keep inflating it with the compressor until it reaches exactly the specified value. Stop overfilling the tire, as this can cause the tire to burst.
The rule of thumb is that the sealant should be replaced every six months. The sealant appears to dry out over time and may split if the tires are pushed to a bumpy surface. In these situations, you don’t need to extract the old sealant unless there are clumps that can be picked up by hand.
In most riding lawnmowers, tubeless tires are used. Such tires do not have an inner tube, and the rim locks the beads in place. There are the following pros and cons:
You can replace your tubeless tires when they are fully worn out and no longer provide enough traction. When the tire is either leaking air right after it has been filled or torn by a knife or a very sharp rock, it should be replaced.
You should regularly check the tire pressure of your lawnmower. The best would be at the beginning of each mowing season, but at least monthly. We always suggest that the tires be filled to the specified amount and not more than that, as they should cause the tires to burst. Refrain from driving the mower when the tire is flat as it is uncomfortable and overloads the engine. If you’ve ever ruptured your tires before, make sure to keep filling them with sealant every six months as the old sealant becomes ineffective after that.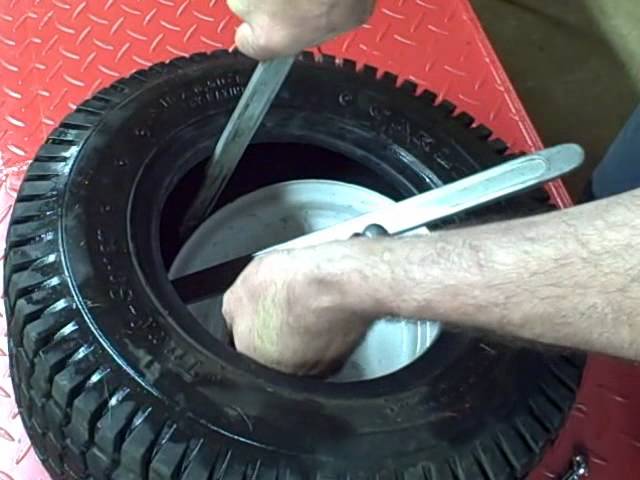
If your lawn mower has a flat tire, there are several ways you can fix the problem. First of all, you need to determine if the tire is really flat. you can try to fix it. Here are four steps you can follow to fix your lawn mower tire:
Repairing a lawn mower tire can be done by following these simple steps:
There are several reasons why a lawnmower tire can deflate. One common problem is that the air inside the tire compresses over time, causing air pressure to be lost and eventually failure. Another potential cause is a tire sidewall puncture or tear, which can allow water and debris to get inside and damage the inner rubber layer. mechanics. In any case, there are a few simple steps you can take to fix a flat lawn mower tire without taking it in for repair.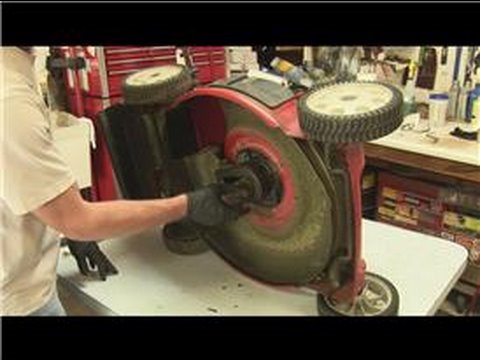 First, try inflating the tire with an air pump to its maximum pressure. with a brush or vacuum cleaner. Finally, replace the crushed tube with a new one and inflate it again until the proper pressure is reached. e.
If you notice that your lawn mower cuts like it used to, the problem might be one of its tires. Here are some tips to fix a flat tire on your lawn mower:
4 Inspect the wheels for cracks or other damage that could cause they can reduce traction when cornering, which can cause you to lose traction when you try to roll over (called "wheel lock"). If necessary, have a qualified mechanic replace cracked or damaged wheels with new ones that are properly protected from moisture and corrosion (using special wheel sealant).
5 Park the mower in a location where it will not be exposed to extreme weather conditions such as strong winds or heavy rains to help prevent wear and possible damage caused by items that do not meet normal operating conditions.
How to fix a lawn mower tire:
When it comes to lawn mowers, one of the most common problems is a flat tire. If you notice any of the following symptoms, it might be time to replace your lawn mower tire:
- Your lawnmower is not mowing as well as it used to.
-The blade seems to be stuck in one place or does not turn freely.
- You hear a lot of noise when you try to start the mower.
- Your tire's tread has worn significantly.
If any of these symptoms are present, it may be time to change the tire on your lawn mower. Here are some tips on how to fix a flat lawn mower tire: 1) Check tire pressure regularly. Low air pressure can cause problems with both traction and engine performance.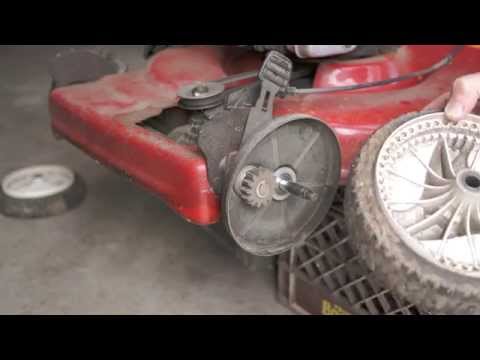 2) Replace worn blades. Over time, the blades wear out and become less effective at cutting grass.
Yes, you can change the mower's tire yourself. The process is quite simple and only takes about an hour. Here are the steps:
One option to purchase a replacement lawn mower tire is to visit your local hardware store. Another option is to find a retailer online that sells lawn mower tires. Some retailers sell wholesale lawn mower tires while others may only sell lawn mower tires. certain brands. It is important to check the size and type of lawn mower tires you need before purchasing.
Replacing a lawn mower tire can be expensive. The cost of a new tire typically ranges from $30 to $60 depending on tire size and type. In addition, wheel bearings may need to be replaced if the wheel is damaged. If the lawn mower has been in an accident, you may also need replace other parts such as the frame or engine. In general, a lawn mower tire replacement can cost anywhere from $100 to $300.
There are a few things you can do to fix your lawn mower tire yourself. First, make sure the blade is sharp and properly adjusted. Second, check for debris or rocks in the wheel bearings. Finally, if the tire is completely flat, it is best to take the lawn mower to a repair shop. However, there are many simple fixes that can be done at home without requiring the lawn mower to be taken to a repair shop. Here are four tips:
 Then use a floor pump fitted with an appropriate pressure gauge (usually listed on both sides of the pump handle) to inflate the tires until they are about two-thirds full (or as close as you can get). Be careful not to over-inflate tires; this can cause them to burst when used later in their life cycle. Replace air-inflated tires every three months, or more frequently if they show signs of wear such as cracking or bulging sidewalls.
 Most lawn mowers have tires that can deflate. However, not all lawn mowers have the same type of tires. Some lawn mowers are equipped with inflatable tires, while others are solid rubber. deflate. If your mower has an inflatable tire, you should only replace the tire if it has deflated.
If your lawn mower's tire is flat, it may just need to be replaced. However, if you notice any other problems with your lawn mower, such as difficult starting or excessive noise, it may be worth taking it to a mechanic for further inspection.
Another change season is approaching. And you may remember that on one of the tires after the last winter/summer there is a jamb - a small bump. I don’t want to run to the store for the sake of one new tire. We understand. Or maybe it looks even better if repaired?
Yes, not every wheel that has met with a nail, rebar sticking out of the ground or a sharp stone on the road is considered damaged. Everything, of course, depends on the scale of the damage and its location on the tire itself. Some are easily repaired, while others are simply impossible to do - the tire can only be sent to the trash.
A bulge on a wheel, referred to by drivers as a bump or bulge, is the most common tire sidewall defect. It appears due to a collision with an obstacle or after falling into a pit, more often at high speed. The threads of the sidewall carcass are easily damaged by impact, and the tire at this point can no longer hold the load and air pressure - swelling appears. A small bump sooner or later turns into a big one, and driving with such a defect is dangerous - the wheel can shoot at any moment. At high speed, this is fraught with loss of control, departure from the road and a rollover.
The quality of roads in Kazakhstan contributes to the appearance of bulges on tires
Some types of bulges are repairable, although this is a temporary measure. Not a single patch can restore the factory rigidity. Ideally, change the tire.
Special cord patches can extend the life of a tire with a herniation, even if the swelling has appeared on the tread.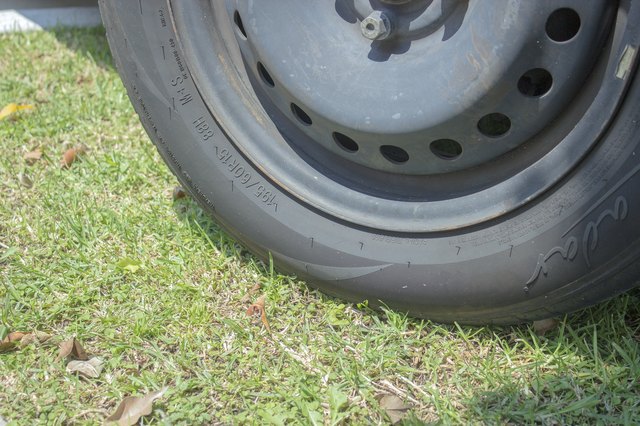 The sidewall is a different story. If the swelling appeared at a distance of more than 40 mm from the side, it can be repaired. If not, then the wheel needs to be replaced. Blisters on low profile tires are most often non-repairable.
For maximum safety when riding with a repaired bump, insert the tube. This is an inexpensive and reliable solution. On our market, you can find cameras made in China and Russia, the latter are slightly more expensive, but also of better quality.
The elimination of a side cut is a serious operation, therefore, as in the case of a bump, you will have to go to the professionals. We need cord patches, fortunately in our time they are of different sizes and with a different number of layers. And if you do it wisely, then you can't do without special tools and vulcanization.
A cut, by the way, cannot be healed in all cases. If the gap is in the shoulder area of the tire, it is unlikely that anyone will undertake to repair it, since no guarantees can be given here. However, our Kulibins take on even the most difficult cases, cutting out parts of the sidewalls from the tires and even weaving the cord on their own.
Tire overhaul. We would not put such a wheel on ourselves
Low profile tires can be repaired, but more difficult. A tear in the sidewall is easier to seal on tires with a medium or high profile.
Sometimes a cut is confused with a pluck. This is when the outer layer of the sidewall caught on something sharp, a tear formed, but the frame itself remained intact. There is nothing wrong with that, although the drivers at the tire fitting company successfully repair the cut, for which they take it accordingly.
If a piece of rubber remains on the sidewall, then glue it with ordinary superglue (101st). If it came off, then it is better to cover it with raw rubber and vulcanize. Leaving the pluck bare is not recommended, because the tire carcass, often consisting of a metal cord, will quickly corrode.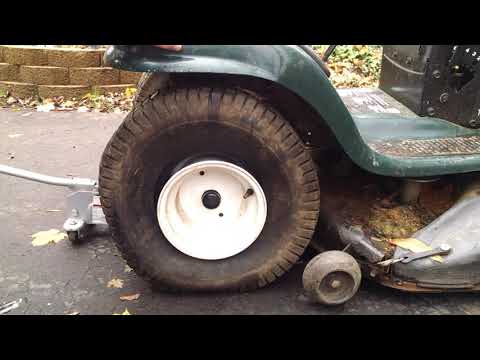
In Europe, defective or used tires are perforated before being sent for scrap to prevent their resale and possible operation. But they don’t know that we have such holes on the sidewall patched once or twice
Cuts and hernias are not the only possible damage to the side of the tire. You can also spoil the side ring, in the process of changing shoes, for example. If it’s for garlic, then such a tire is already dangerous. Sooner or later, the tire pressure and the load in motion will start to squeeze the rubber off the rim - a wheel explosion can occur.
This ailment is repaired if the wire ring - the base - is intact. There are no special technologies and materials to correct this particular problem, but most often craftsmen use a two-component composition for chemical (also called cold) vulcanization. After mixing, the mass is pressed into a fat-free damage. Compound manufacturers recommend waiting 72 hours before mounting a tire.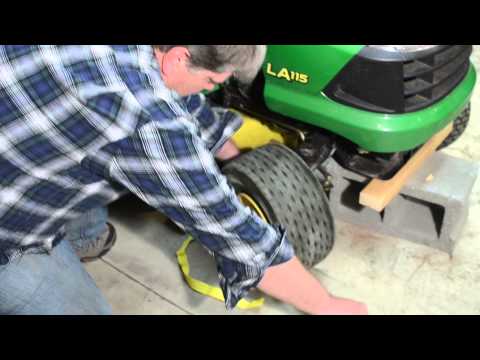 Of course, our masters do not pay attention to this condition - they put the tire right away. And it’s good if the wheel is flat because of this at night in the parking lot, and not on the road.
If the side ring tears are barely noticeable, but the wheel still deflates, then you can use a special liquid - a bead seal designed to seal a tubeless tire.
These seals have been used in motorsport for some time. In particular, in the American Formula D Drift Series, drivers used compounds to keep the tire on the rim even with minimal tire pressure. Now they are banned.
Pay attention to the left rear wheel of the Nissan Silvia S13. Due to too low pressure, it was literally taken off the disk under load
Every schoolchild has faced this problem when patching the inner tube of his bike after hitting something sharp. Repairing a car tire puncture with your own hands will also not be difficult even on the road. But for this you will need a pump (or compressor) and a universal tire repair kit with harnesses. All this is sold at any car market or gas station.
Repairing a tire on the side of the road with harnesses
The process is simple. If we are talking about the front wheels, then in most cases the wheel can not even be removed, it is enough to turn the steering wheel in the right direction, find the puncture site and carry out repairs. First, the hole is cleaned with a helical awl from the set. The tourniquet itself is smeared with glue and tucked into the eye of the awl, after which it is inserted into the tire hole. With a sharp movement, the tool is removed, and the tourniquet remains in place and clogs the hole. The tails are cut with a knife, but not at the root, it is recommended to leave about 20 mm. The tire is inflated and checked.
Sometimes a nail or self-tapping screw clogs the hole by itself, remaining in it. If you see a hat in a tread, do not rush to pull it out. While the pressure is holding, move to vulcanize. And sometimes they drive with a screw in a tire for weeks.
Repair of a puncture at a tire shop
Punctures are also repaired with harnesses at a specialized service, although among professionals such repairs are not considered long-term. After a few months, the flagella dry out and can let air through. There are more advanced methods like cold and hot vulcanization. The latter is more reliable. In this case, the hole is sealed with an elastic patch, and the funnel from a foreign object is filled with a special compound. After that, a vulcanizer is put on the tire, it heats up the rubber and solders it.
In addition to the plaster, the puncture is also repaired with special cord fungi. Craftsmen process the puncture site: drill it and treat the surface with a tool to roughen it. Then the repair area is lubricated with glue (it is also called cement) and a fungus is introduced. This is done from the inside of the tire. The cap of the fungus is rolled, and the excess legs are simply cut off from the outside.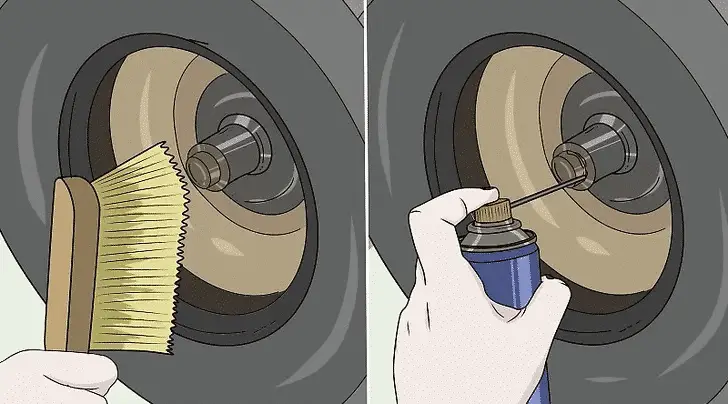
Puncture repair with sealant
With the advent of tubeless wheels, and later run flat tires, many automakers began to abandon spare wheels. Instead, repair kits with compressors are supplied with the machines. A repair kit is essentially a bottle of pressurized sealant. Later, such spray cans began to appear on the shelves of ordinary car dealerships.
This method has not taken root in the CIS, because the condition of the roads makes it necessary to have at least a stowaway in the kit, but it can also be considered as a method of repair on the road.
The car must be jacked up and sealant must be pumped into the damaged wheel through the nipple. Next, you should spin the wheel, then pump it up, lower the car and drive a few hundred meters. If the tire tightness has not been restored, repeat the procedure.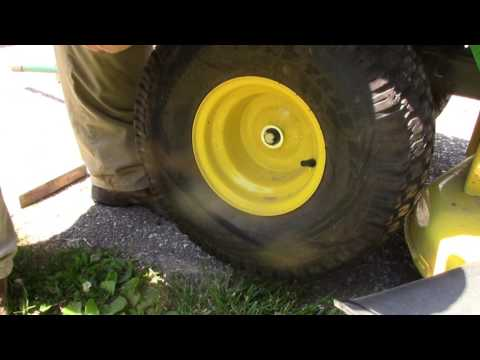
For commercial vehicles, cutting the tread with a special device (regrower) is a common thing. Moreover, such tire retreading is provided by the factory (marked REGROOVABLE on the sidewall) to increase the service life. But there are entrepreneurs who undertake to deepen the grooves in tires for passenger cars. But they are not intended for such an operation. Often used tires for sale are “refreshed” in this way. Be careful!
What is the danger?
The worst option is that the retreaded tire will shoot out on the road, as the master can damage the undertread layer when deepening the grooves. Such a tire will not be able to hold pressure at some point. There will be a boom! At best, the tire will indeed last a little longer, but is the game worth the candle? We think it's not worth it.
How is cutting made?
A regrower is used to cut the tread. Roughly speaking, this is a large soldering iron with interchangeable tips of various shapes. It goes through rubber like a knife through butter.
If the tire is for passenger cars, then it is worth taking on a regrower only in one case - when part of the tread pattern was welded with "new" rubber during repair. This is where threading comes in handy in order to restore the grooves and symmetry of the tread.
Vehicle operation is prohibited if:
— tires have a residual tread height of less than 1.6 mm;
- tires have punctures, cuts, ruptures that expose the cord, as well as delamination of the carcass, delamination of the tread and sidewall;
- tires in size or load capacity do not match the car model;
- tires of various sizes, designs (radial, diagonal, chamber, tubeless), models, with different tread patterns, winter and summer, studded and non-studded, new and restored, are installed on one axle of the car;
— Tires retreaded according to the second repair class are installed on the front axle.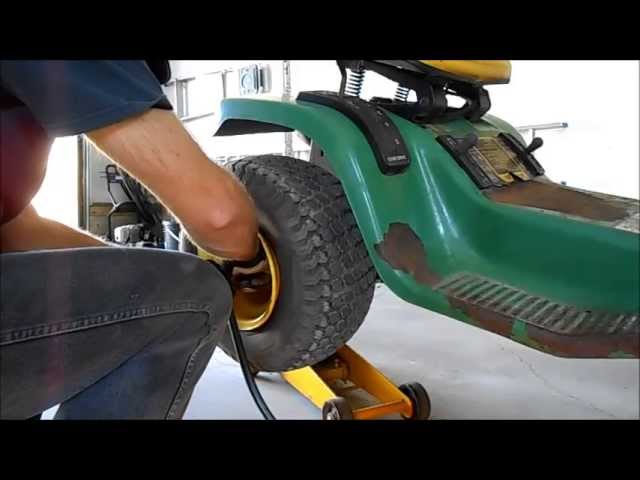
Learn more