Luckily, having a tire wobble on a true rim is not so commonly seen these days. Years ago, I remember it was a must-happen situation with pretty much any inner tube setup. Tubeless setups were a bit more fortunate to avoid these problems because of the air pressure being spread perfectly even on the tire’s sidewalls. However, I find that it still happens from time to time even today, especially with cheaper tires. Even though we’ve gone so far in wheel-tire compatibility, some factors won’t allow this problem to stay in the past.
I think this qualifies for one of the most frustrating things for anyone working at the bike shop. Everyone I know, at least. So I decided to answer some questions and help with some tips, for anyone that doesn’t have lots of experience with it.
I’m sure some of you have seen their wobbling wheels or tires and thought, I can go ride and fix it some other time. I’ve done it several times in the past until I learned better. I completely understand that wobbling may seem okay but it’s far more complicated than losing only the efficiency.
Let’s start with the most important thing in mountain biking and that’s traction. Especially us who ride mountain bikes for recreation, we value traction over speed. Or at least we should, even though that’s not always the case.
There are several ways in which tire wobble can affect traction. First and the most obvious is that sideways wobble can affect your balance while rolling over rocks or roots. Most of the tire slips happen over those two, and the result is a nasty fall to the ground. A tire that wobbles simply slips to the one side or the other more often than not. An easy way to ruin your fun on a trail.
The second way would be a vertical wobble which creates a hump on the tire. When you are riding on a road you will experience constant bumping. The thing is, that bumping usually gets unnoticed on a trail because you are riding over stuff that bumps you anyway. Your muscles will prepare for certain balance changes when you face rocks or roots. However, a wobbling tire will cause unexpected bumps in wrong situations and disrupt your balance. Most of the time it will just be annoying but it can actually make you fall to the ground.
Let’s be real, wobbling wheels/tires won’t cause injuries so often but they will cause damage to your bike in a lot of ways.
Wobbling can put a lot of sideways force and sideways impacts on your wheels, increasing the chance of wheel spokes breaking. This is actually why they break in most of the situations.
Not only that but your rims can become permanently untrue. There is a point after which you can’t true your wheel anymore unless you want to force it back by putting pressure on the rim with your hands. Or even worse, hit it repeatedly with a hammer which rarely ever works. Had this happen a few times, mostly on under $300 wheels.
Usually happens when you ride on a wobbling tire for some time because each impact puts force on the spokes unevenly, slowly weakening the rim. Which then results in a destroyed wheel.
Have you ever noticed that right side bearings in the back wheel usually gets broken first? It happens because of the chain pull causing more stress on the right side where the cassette is. It literally tries to bend the hub that way.
Why am I mentioning this? Because the same thing happens when a wheel starts to wobble. Sideways tension caused by wobbling puts unnecessary stress on the bearings by literally trying to twist the hub. It’s not uncommon to see axles breaking or at least bearings wear out quickly due to wheel or tire wobbling.
The wheel lock is something that happens when your tire hits the frame and gets stuck. For some of us that like to use as wide tires as our frames allow us, that’s not so strange thing to happen. On one of my bikes, the tire is so close to the frame that I end up truing the wheel after each ride. Just to be sure that it won’t mess up my intentions of having a good time on the next ride.
For all the reasons I mentioned above, tire wobble must be eliminated completely for a setup like this to even function.
Rim tape is the most common reason why a tire won’t seat properly. If a rim tape is wider than it should be, then it can reach the rim wall. Since it is where a tire bead should sit, it will create friction and not allow the bead to pop up there.
Sometimes it happens because a rim tape simply slips out of the center and it’s an easy fix. After it no longer touches a rim wall, the tire should be seated with ease, if there are no other problems involved.
For glued tapes, if they are too wide you should cut them to the proper width.
When running a classic tube setup a number one mistake most people do is they insert a tube without pumping it up just a bit first. It’s necessary for a tube to acquire its shape before it’s inserted inside a tire. What I’ve usually seen around is people claiming a tire is defective because they didn’t insert the tube properly. Without inflating it first, it usually gets twisted or folded inside and results in the tire not seating properly in that spot.
Luckily, it is an easily fixable problem.
I’ve had this very problem with one tire lately. I’ve had an almost brand new Maxxis Ardent Race tire somewhere around. Since I don’t like my stuff being randomly left all over the place, I’ve used zip ties to tie it to a bike stand. Usually, there would be nothing wrong there but I left it really tightly tied exactly over the bead for a long time.
Of course, the bead got damaged. Or to be more precise, the rubber that covers the bead got damaged. Now that defect won’t allow the tire to be seated. For some reason, it gets stuck on the rim. It works fine a wider rim though but the rim I want to use it on is more of an old type mountain bike rim with deep rim walls which simply cause too much friction with the tire.
In the bike shop, I’ve had several cases of defective tires.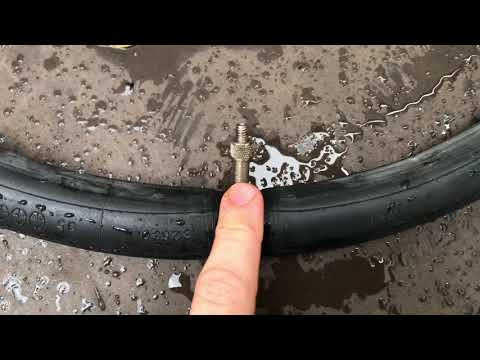 Sometimes happens that a tire has a bubble-like deformation. From what I know it’s a common thing to happen during a tire manufacturing process and they usually trash it right away. Even if they don’t, bike shops usually return them upon arrival. But still, sometimes they slip into customers hands.
So yeah, this is a situation that you may have. Check your tire in detail and inspect it for any deformation that may cause wobbling.
The first thing I always try to do is to increase air pressure. Obviously, I’ve already put it on maximum air pressure stated on a tire but you can actually go safely over the limit.
Maximum air pressures are really safe limits in order to prevent damage during the actual riding. However, when there are no outside forces at work, tires can safely withstand more pressure than they would while riding.
I usually go 25-30% over the limit, no more. That was, in my experience, safe enough to never do any damage to the tire, as long as you put it back to the right pressure before riding. And I would say not leaving it on high pressure for too long, you never know.
Soap is an excellent lubricant to use for a tire to slip into place. You can start by using soapy water or any soap-based cleaner, rubbing it all the way around the tire bead will usually be enough to seat it properly.
However, it tends to dry quickly so it’s sometimes difficult to manage if a tire is giving you problems in several places. In that case, I like to use liquid soap without any water. It’s a bit more jelly-like which makes it a better lubricant and it dries much slower. It’s more effective in every way except that it leaves a mess behind. You should clean the rim afterward if you have rim brakes. Otherwise, your brakes might be a bit squeaky.
When soap isn’t enough, you can try and use a bit of chain oil, any penetrating oil spray or a silicone spray like DuPont Silicone Lubricant. These work miracles in seating a tire but there is a drawback. you need to be really careful with the amount and surface they come to.
If you have rim brakes I would advise not to use these at all. But if you decide to use them anyway, you need to completely clean your rims with alcohol or otherwise, your brakes won’t work.
The second thing you need to be careful about is not to spray them on parts of a tire that touches the ground. Your tires will become slippery and you will lose all traction. It’s extremely dangerous!
The reason why a tire won’t seat properly can be some rubber residue. This usually happens with used tires because they are a bit worn out already.
A good way to make sure you have a clean surface on both rim and tire is to clean them with rubbing alcohol like Solimo 99% Isopropyl Alcohol. If the residue was the problem, this will certainly help. And if it doesn’t, now you have a clean surface to use soap on.
You can try forcing it to seat on the rim. However, this is the last resort. Only when a tire is lubed enough with soap and it still won’t pop into place, then you can try to use a bit of force.
There are a lot of ways in which you can do this but my favorite is using a workshop clamp. You need to put a rag or something around the tire first to make sure you don’t damage it. I’ve had one slice open once on a sharp clamp edge. All that’s left is to try and bend it in the opposite direction from the spot that won’t sit on the rim. Don’t use too much force though, you can damage the rim.
Wouldn’t recommend doing it this way to everyone, as this method requires some experience and knowledge about tires and wheels composition to avoid causing damage.
by vanseijen
Table of Contents
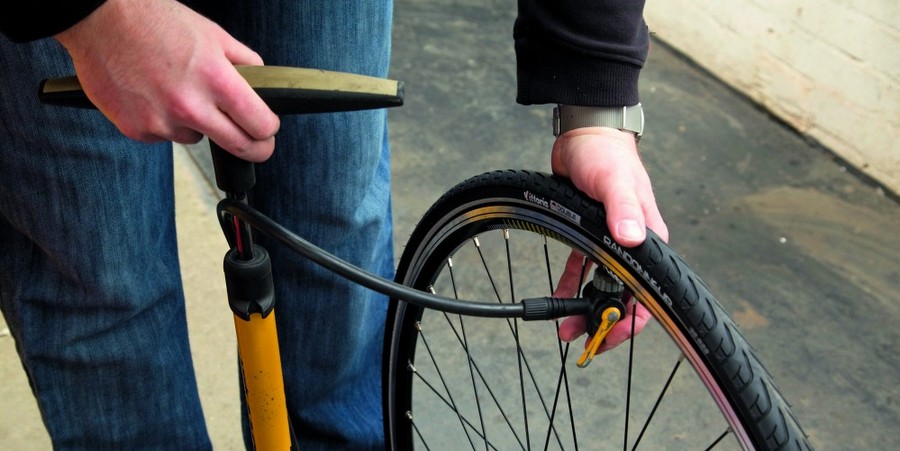
In this article I’m going to explain how to fix a new bicycle tire wobble on true wheels.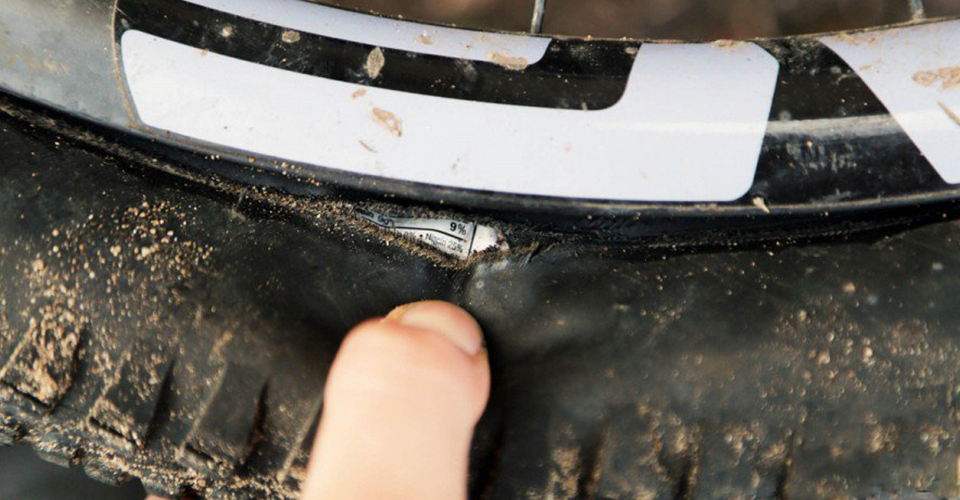 Though every product, including bicycle tires, can have production errors, the chance of this actually from happening and slipping through to a customer is very small. Especially with premium tires.
The tires I’m going to be installing are the smallest width gravel tires available: the Panaracer Gravelking. They are high quality gravel tires, which mimic the tires that originally were on the Koga Miyata Adventure I’m restoring. And the fact that they are Japanese as well, makes the entire bike have a very oriental feel to it, which I like.
They’ll be replacing the Continental Gatorskin tires. Those tires turned out to be a tad too big for the 35mm. width ESGE road bike fenders I bought.
The biggest difference between the two tires is that the Panaracers are folding tires, whereas the Continentals are wire bead tires. For the differences between these two types of tires you can read up on the article: What is the difference between Folding Bead vs Wire Bead.
Funny thing is that the blog states that wire beads are harder to mount whereas I have the exact opposite experience with folding tires flopping back into their folded shape.
If you know your wheels are true, than the cause of a new bicycle tire wobble cannot be the rim.
And premium brands have high quality assurance standards, which basically prohibited a faulty tire from slipping through.
And uneven inner tubes cannot be the cause either. Bicycle tires don’t stretch too the point where one part bulges where the rest doesn’t.
The cause I found is that a deflated tire is incorrectly positioned on the rim, with some parts protruding more than others. I thought that inflating a tube would automatically position the tire evenly on the rim, but it doesn’t.
Why that it exactly I don’t know, but it has happened to me with two totally different tires. But you can very clearly spot a wobbly bicycle tire by simple holding the skewer in your hand and rotating the wheel.
You cannot simply squish the tire into the correct position while inflated. It won’t budge. You’ll need to deflate the tire and position it evenly on the rim by hand.
As a guide you might use the end of the sidewall before the part where the tire bead starts. This part will sit just atop the rim when correctly positioned.
Position it correctly. Inflate the tire and you should have fixed your new bicycle tire wobble. If you like this article give it a thumbs up. If you have any questions or suggestions for new articles, let me know in the comments below. Cheers.
Join Facebook Group
bike repair
In this article I’m going to discuss everything you need to know to fix your creaking bb30 bottom bracket. And it’ll also includes a couple
Read More »
October 7, 2022
bike repair
In this article I’m going to explain how to perform a Hollowtech 2 bottom bracket removal and installation. I had calculated my gear ratio, and
Read More »
October 26, 2021
bike repair
In this article I’m going to explain how to fix a front derailleur not shifting to highest gear. I recently installed a Hollowtech II crankset
Read More »
October 2, 2021
bike repair
In this article I’m going to explain how to overhaul vintage mountain bike pedals. In this case the original vintage Deore XT pedals that came
Read More »
June 10, 2021
This website uses cookies to improve your experience. We'll assume you're ok with this, but you can opt-out if you wish. Cookie settingsACCEPT
The figure eight on a bicycle wheel is the most common deformity. Today, when creating bicycles, the latest technologies are used, but even in an ultra-modern bike, the wheel remains very conservative, spoked. The design in this case is nothing complicated: a sleeve, but a rim and spokes that unite them. During operation, every cyclist is faced with wheel deformation. And the appearance of the “eight” on the wheel is far from uncommon. This is due to the violation of the integrity of the rim and the looseness of the spokes.
And yet why does this deformation occur? During operation, the wheel is inevitably subjected to stress as soon as the cyclist takes his place on the saddle. Let's add bumps in the road - pits, bumps, poor coverage or lack thereof, and the question of the causes of the "eights" disappears by itself. In addition, inexperienced cyclists often distribute their weight on the bike incorrectly, and this also increases the load. Harsh braking, jumping and other extreme sports, as well as long-term operation also make it necessary to adjust the wheels.
As you can see, during operation, the bike experiences loads that are least dependent on your riding style. Over time, the geometry of the wheel rim changes - it is deformed. The speed of its manifestation depends on the presence of rim defects (figure eight, displacement of the "umbrella" and "egg"). It should be noted that the life of the wheels often also depends on the materials from which they are made and their quality. Sometimes inexpensive models may require repair much earlier than those made from expensive components (for example, high-strength rims).
How can I tell if a wheel is bent?
When there is a suspicion that the wheel has lost its original shape, you should turn the bike over and begin a thorough check.
First you need to inspect the wheel in the place of the expected curvature. To do this, it is untwisted, while in the case of the rear, you can do this with the help of pedals. It is visually obvious that the curved sections are shifted to the side during rotation. Now it remains to grab it with your hand in that place and stop it, which is quite difficult.
Another, more effective way is to use a crayon or marker. Spinning the wheel, it must be brought to the rim. First of all, the stroke will remain on the bulge of the "eight". By spinning more and bringing the chalk closer to the rim, you can also determine the boundaries of the curvature.
How to fix the "eight"
And here the curvature is found. Every cyclist can fix it with his own efforts, and given that deformation is not a rare phenomenon, valuable experience comes with time. There are two ways to get rid of the "ailment":
• power rectification;
• tightening and loosening of wheel spokes.
Necessary deformity repair kit:
1) chalk to mark the area with a defect;
2) spoke key;
3) wheel straightening machine (desirable, but not required).
The small figure eight can be removed without removing the wheel. To diagnose the problem, turn the bike upside down to check that the wheel is in the correct position in relation to the brake pads. This process can be divided into several operations. First you need to identify the deformation. While the wheel is spinning, press a piece of chalk against it. In places where the figure eight is formed, you will see a corresponding trace. This simple method will help determine the exact location of the rim deformation.
Next is to tighten and loosen the spokes, but only from a certain side, which will be discussed in detail below. If such manipulations are performed with inaccuracies, you can give the wheel even more deformation. There are several ways in which it can be removed.
Power rectifier
Considering this scenario possible, you should remove the wheel from the frame. But the tire and the camera should not be removed. We turn the wheel with a bulge towards us and take the rim and tire with our hands. In this case, the average deformation requires the location of the hands, equal to 10 and 2 hours on the dial. We use the knee, attaching it to the convex area, and strongly push away from ourselves.
If there is enough strength, it is done in the air. And you can position the wheel vertically, with the deformed section up. In this case, the help of a partner is required, who will press the wheel to the floor. After such an extreme straightening, the wheel is returned to the frame and tested.
But this method is not always effective. It is not accurate, small deformations are not corrected. Among other things, inept actions can provoke new bends. And not every rim will succumb to the impact of the foot - high-strength modern wheels will remain “in their own way”. Although in case the wheel let you down somewhere along the way and the “eight” happened suddenly due to, for example, hitting a large stone, “power straightening” is the only possible way.
Wheel spoke adjustment
The ride quality of a bicycle often depends on the correct tension of the spokes. The tension of the spokes adds strength and elasticity to the wheel. The tires in this case are removed, the tension of each spoke is carefully checked. It happens that the rim is bent as a result of their general weakening. In a situation where the spokes dangle like guitar strings, they should be tightened by 1 turn of the key. In the found area of curvature, a spoke is searched for, located in its center, that is, at the very bulge. The rotation of the spoke must be carried out in the direction opposite to the direction of the bulge. In this case, the spokes located on the sides of the central one are weakened.
If the figure eight is between two nearest knitting needles, then using a special key, the first knitting needle is tightened by a third of a turn, and the nearby knitting needle is twisted in the opposite direction, loosening the clamp also by a third. If the "eight" has a size of three knitting needles, the following actions are taken:
• tightening the central spoke by a quarter of a turn with a key;
• slight loosening of the outer spokes (two times less tension in the center).
If the "eight" has a size of seven spokes, the algorithm of actions is as follows:
• the central spoke is tightened by half a turn;
• the second and third spokes must be loosened by a quarter of a turn;
• the fourth and fifth are tightened by one eighth;
• the sixth and seventh (that is, extreme) are weakened by one eighth.
That is, the alternation of tension and stretching of the spokes should be carried out so that the extreme spokes of the “eight” are weakened. After the procedure, the wheel is installed in its place and tested for possible curvature. If the "eight" is curved in the opposite direction, all tension is eliminated and the tightening on the weakened knitting needles is increased. After that, everything repeats, but to a lesser extent. The result of a long operation is the alignment of the wheel to a perfectly even circle. At first, the work will not go so quickly, but with the acquisition of experience, the speed of adjusting the spokes also increases.
Change spokes
Not all craftsmen know how to assemble wheels with high quality, and therefore it is best to learn how to do it yourself. The assembly is carried out according to a certain algorithm.
1. Knitting work:
• it is necessary to lubricate the spoke threads and the rim in places where there is contact with the nipples, otherwise the spoke will not be tensioned with sufficient rigidity;
• in a situation where the sleeve flanges have a countersink on one side, the spoke heads are on the non-sinked side, it is needed to bend the spoke;
• nine spokes are inserted into the flange in such a way that there is an unoccupied hole between them, and that the heads are located on the outside. In a rear wheel situation, start on the right side of the hub;
• on the rim, among the holes shifted to the right, one should find the one closest to the hole for the chamber nipple;
• the first spoke is attached in this hole, it is considered the key one;
• four holes should be counted from the key knitting needle, moving clockwise, put the next knitting needle and wrap the nipple;
• as a result, there should be three unoccupied holes between the spokes, the spoke closest to the valve hole is located to the right of it, and the cut part of the sleeve is facing the master;
• then the remaining seven spokes are fixed, using every fourth hole in the rim;
• after the wheel is turned over, nine more spokes are connected to the rim, which are inserted into the left flange from the outside;
• the tenth needle should be located to the right of the key one, adjacent to it, but not crossing;
• after mounting the tenth knitting needle, the next eight knitting needles are typed in the sequence defined above;
• and now the drive spokes are already in place and their heads are on the outside of the flange. In this case, the nipples are wrapped only by a certain number of revolutions;
• Tension spokes with heads are installed on the inner side of the flange. A spoke is threaded into the flange hole and the sleeve is rotated so that all the spokes that are in place receive a certain direction that is closest to the tangent relative to the flange. The first tension spoke must cross three drive spokes standing in place, while each tension should pass outside from the first two it crosses under the third, also intersected;
• other knitting needles get on the same principle.
2. Tension
Before tensioning the spokes, wrap all nipples equally. Then you need to start the process, wrapping each nipple one turn. If there is a “shiver” in the knitting needles, the tension increases. We install the wheel for verification and remove all defects such as the "eight".
Eliminate radial runout
The wheel rim in the form of an oval "egg" looks like this: one part of the rim is located closer to the center than the rest. Such a flaw in the wheel appears after unsuccessful landings. Fixing such a breakdown is much more difficult than the usual figure eight:
1) remove the tire and inspect the rim;
2) turn the body of the bike over, spin the wheel while holding an object on top. Mark with chalk the part of the rim that will lift this object;
3) track three directions at the same time:
- loosen the tension from the central spoke;
- pull the adjacent knitting needles by the same number of turns so that there is no figure eight;
- the spokes at the opposite end of the wheel should be tightened to prevent the appearance of an "egg" in another place.
Eliminating such a figure eight requires considerable experience, the process is characterized by its own difficulties. After correcting the “eggs”, you need to press on the knitting needles with all your weight, as in the above scheme - to shrink them.
Editing "Umbrella"
Cyclists are familiar with the concept of "umbrella". The defect is as follows: the wheel rim is shifted to one side and is not perfectly aligned with the center of the hub. How serious the situation from such a displacement directly to the bike depends on the design of the frame and on the configuration of the brakes. This type of malfunction often occurs when the wheel is assembled incorrectly. "Umbrella" is eliminated by analogy, like the usual eight. On the one hand, you need to tighten the knitting needles, and on the other, loosen. In contrast to the elimination of the usual figure eight, in the process of editing the umbrella, the force for each subsequent knitting needle should not be weaker, but should remain uniform along the entire circumference.
To summarize
Eights appear on the wheels of even the most experienced and savvy cyclists. In order to straighten the wheel, you need to remember a few simple rules. Always carefully tighten the spokes of the wheel - there is a risk of damage to the rim. If during straightening one or more of the spokes are overtightened, loosen them and the nearest spokes. Only then repeat the adjustment again.
When riding a bicycle, the spokes often break when they are in a loose state. If during the pulling procedure one or more wheel spokes become loose, be sure to tighten them in order to repeat the adjustment after that.
We welcome cyclists of all ages!
In this most interesting section of our site you will find articles about bicycles, carefully collected and written by us. They reflect all the most necessary technical knowledge about bicycle technology, advice from professionals from the world of cycling, interesting facts and many other entertaining things.
If you are a beginner and do not yet understand complex terms or can not catch technical subtleties, then our experts will always assist you in choosing a bike or explain this or that article - just leave a comment.