Your tires are where the rubber meets the road – literally – when it comes to the safety and performance of your car. That means, if your tire is leaky, you could be putting your safety at risk.
A leaky tire causes low tire pressure, which can decrease fuel economy, and put you at risk for a blowout. It also decreases the ability of your car to handle properly, making it more difficult to respond to emergency situations or drive in inclement weather.
In this article, we’ll discuss how you can diagnose and fix slow tire leaks. Don’t just ignore that low pressure sensor – check out this guide!
The Most Common Causes Of Slow Tire LeaksThere are three common issues that cause slow tire leaks. Let’s discuss each one of them now.
If your valve stem is damaged, there will be a slow and constant leak. This leak could come from either the body of the valve, or the base of the valve, where it meets the tire.
Contrary to popular belief, puncture damage usually doesn’t lead to an immediate flat tire or blowout, in most cases. This is because the object usually remains lodged in the rubber, preventing air from leaking quickly.
There are a few ways you can diagnose a slow tire leak
 If one of your tires seems perpetually under inflated, chances are you have a leak.
If you have a slow tire leak, you’ll want to have it repaired professionally as soon as possible. In some cases, you may want to keep a tire plug or patch kit in your vehicle. These kits are easy to use, and can keep your tire inflated until you bring it to a professional tire repair shop.
To permanently fix a tire leak caused by a puncture, you will need a “plug and patch”. This method of repair involves removing the tire from the wheel, and placing a combination plug and patch on the tire.
If your leak is caused by a faulty valve, you may need to replace it or your tire. Leaks caused by a damaged mounting surface may require you to replace the entire wheel.
If you need to repair a tire damaged by a puncture, or you think your valve or mounting surface may be damaged, we can help!
Schedule your appointment on Ride Time today, and come to our service centre now in Winnipeg, to make sure you stay safe on the roads!
A slow tire leak is more than just a nuisance. A leak can lead to low tire pressure. Not to mention, prolonged running on an underinflated tire can lead to more extensive tire damage or even cause a dangerous blowout.
If you’re experiencing a slow leak, here are some things to look for:A tire puncture:
It is a common misconception that a puncture will cause the tire to immediately go flat. However, in many cases the object that caused the puncture remains lodged in the tire and prevents the air from leaking out quickly.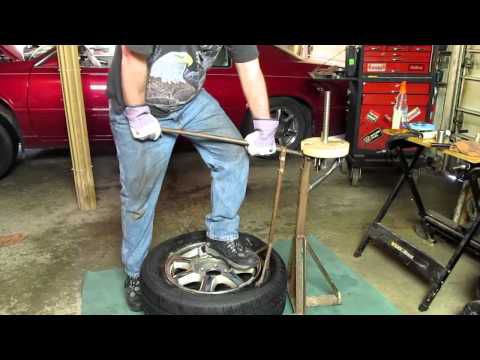 As with all tire leaks, it is important not to ignore a puncture. Eventually to object will either wear down and/or work its way out of the tire. For more on this read our article How to Repair a Tire with a Safe, Permanent Fix.
Wheel damage: Another common cause for slow tire leaks is damage to the area where the tire bead meets the rim. This type of damage is typically cause by the driver hitting the curb, taking a speed bump at high speeds OR those dreaded potholes! The impact deforms the wheel’s metal surface which may cause the tire to pull away from the mounting surface of the wheel.
Valve stem damage: The third most common cause for slow tire leaks is worn out or damaged valve stems. Time, use and exposure to elements can cause your valve stems to wear out and cause leaks.
Diagnosing your tire leak:
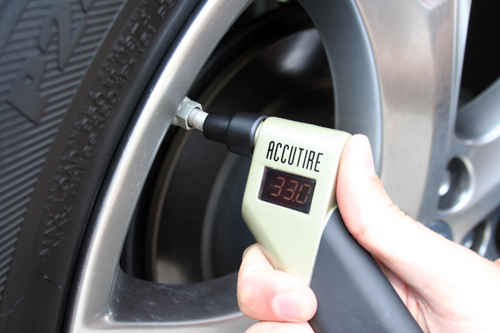
If your vehicle is equipped with TPMS, you will know right away if you have a leak. If the sensor light on your dashboard goes off, you inflate all the tires back to proper pressure and the light goes back on a few days later – you likely have a leak.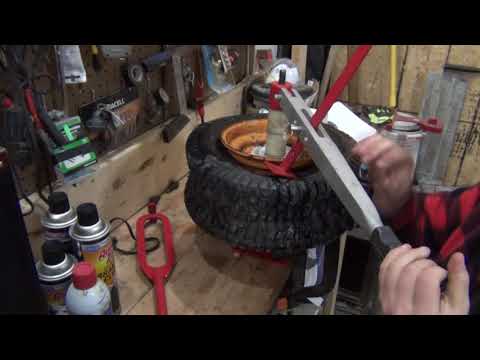 If your vehicle does not have TPMS, its important to check your tire pressure regularly.
Once you’ve identified that you have a leak, use TECH Chek to locate the source of your leak. Simply spray the product all around the tire. Where the surface of the tire begins to bubble is likely the source of your leak.
It’s important to have your tire diagnosed by a professionally trained tire shop or mobile tire repair service as soon as possible. In the case of a puncture, you may want to use a tire repair kit to keep your tire properly inflated until you can have it serviced. The leak should then be permanently fixed using a proper tire repair consisting of a cured rubber stem and repair unit.
If the leak is caused by a damaged valve, a trained tire technician can typically replace the valve at a minimal cost. In some cases, however, the tire may need replaced.
If the leak is caused by a damaged wheel, a tire technician may be able to reseat and seal the tire using a bead sealer.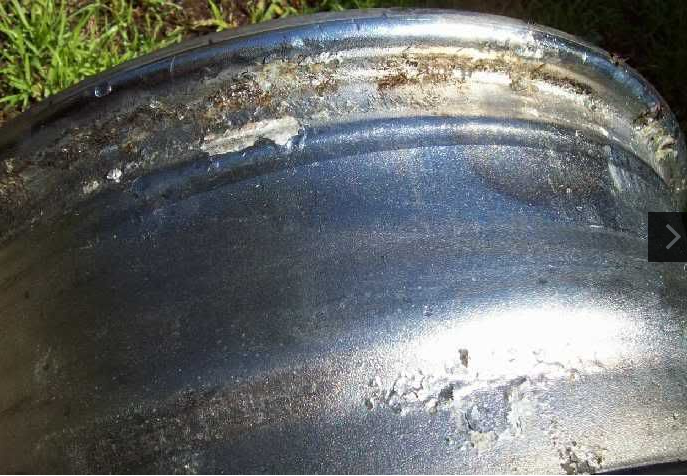 However, if the damage to the wheel is significant, unfortunately that means you may need to replace the wheel itself.
To read more about the types of damage that can and cannot be repaired, click here!
esportby.com
An easy way to quickly restore tire tightness and continue your journey. True, for this you need to have the right wheel repair kit with you.
Maxim Stroker
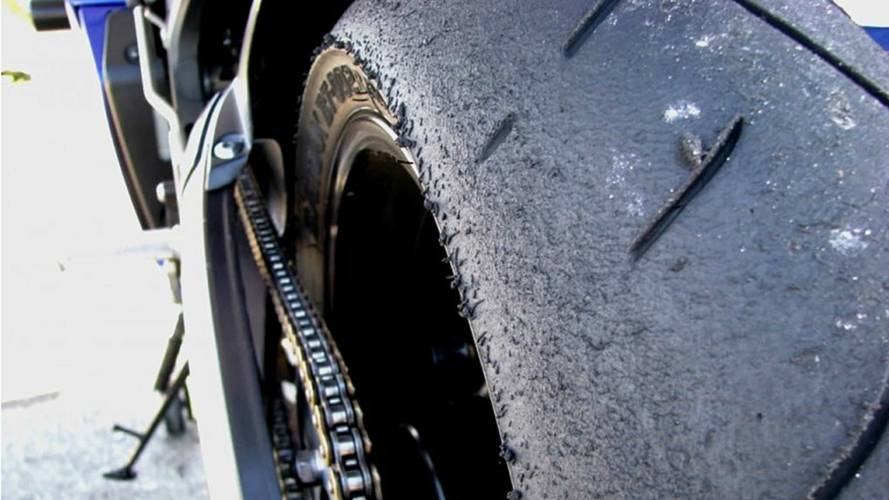
“Catching” a nail, screw or piece of wire in a wheel on the track is a trifling matter and somewhere even everyday. However, it turns into a serious "trouble" if this happens, for example, at night or a couple of tens of kilometers from the nearest tire fitting point. In theory, in this case, you need to put a spare wheel and go further. Although, in the case of a family trip on vacation, the process of digging it out from under a pile of junk in the trunk can turn into an adventure that deserves a separate story.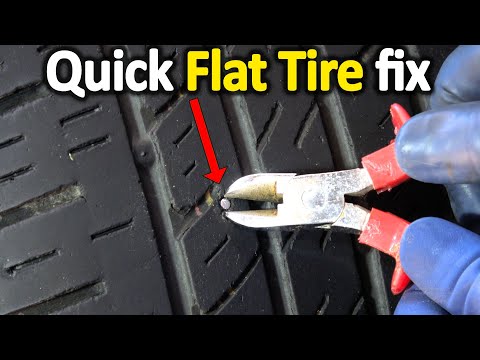 Be that as it may, often the trouble does not come alone and the spare tire can be broken literally on the next kilometer. After all, where one carnation fell on the road, there may well be another one, and another, and another ...
With a couple of crippled wheels, you'll either have to wait an unknown amount of time for a tow truck to be sent in, or fix it yourself. Therefore, in a not particularly urbanized area, it makes sense to carry a repair kit with you to eliminate punctures in tubeless wheels. In principle, it can be of any manufacturer. The main thing when choosing it in the store is to make sure that the “drill” included in the repair kit is not very toothy and sharp. After all, his task is simply to clear a puncture hole in the tire, and not to break its metal cord. The second recommendation: the flagella, which are supposed to close the puncture hole, should be plump and reinforced with thin wire or plastic threads.
n-i.kiev.ua
And the third criterion for choosing a wheel repair kit is the obligatory presence of a tube of glue in it.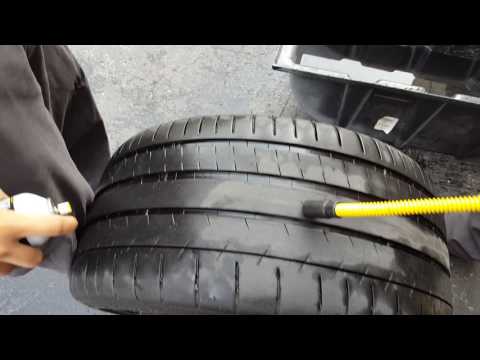 Yes, yes: there are also “glueless” sets on sale, which are essentially useless.
So, we notice that the wheel is flat (or has already been blown off) and proceed to eliminate the problem. Most often, the hole in the rubber is not visible. Therefore, to begin with, we hang out the damaged wheel by raising the car on a jack, and inflate it with a pump or compressor to 3-4 atmospheres. If even after that it is not possible to detect damage by the whistle of escaping air, we methodically and consistently wet the entire surface of the wheel and look for bubbles at the puncture site.
Having found a puncture, we take the “drill” from the set and pierce the damaged area with it several times. So we clean the surface of the hole before gluing. Next, we smear the “drill” with glue from the set and again immerse it in the hole. We repeat this operation and, leaving the “drill” sticking out in the hole smeared with glue, we take out the flagellum and insert it halfway into the eye of another tool - the “overgrown needle” (sometimes called the “awl”), also available in the repair kit.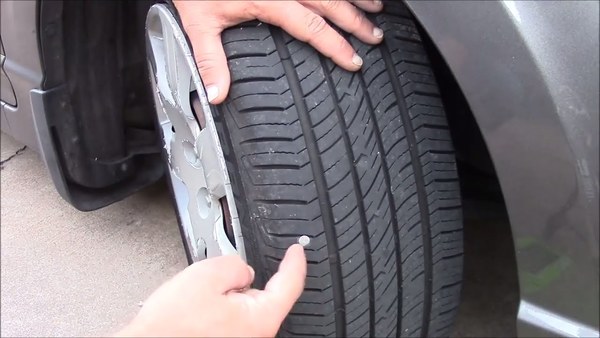 We coat the flagellum with glue and, quickly pulling the “drill” out of the hole, insert our “needle” there so that the ends of the flagellum remain above the surface of the wheel tread. Next, we pull out the “needle-awl” and wait a few minutes until the glue grabs. After that, we pump up the wheel and carefully cut off the protruding tails of the flagellum with a knife. Everyone, you can move on.
Test drive of one of the best family minibuses
19818
wheels, summer tires, cheap cars, repairs, tires, winter tires, track
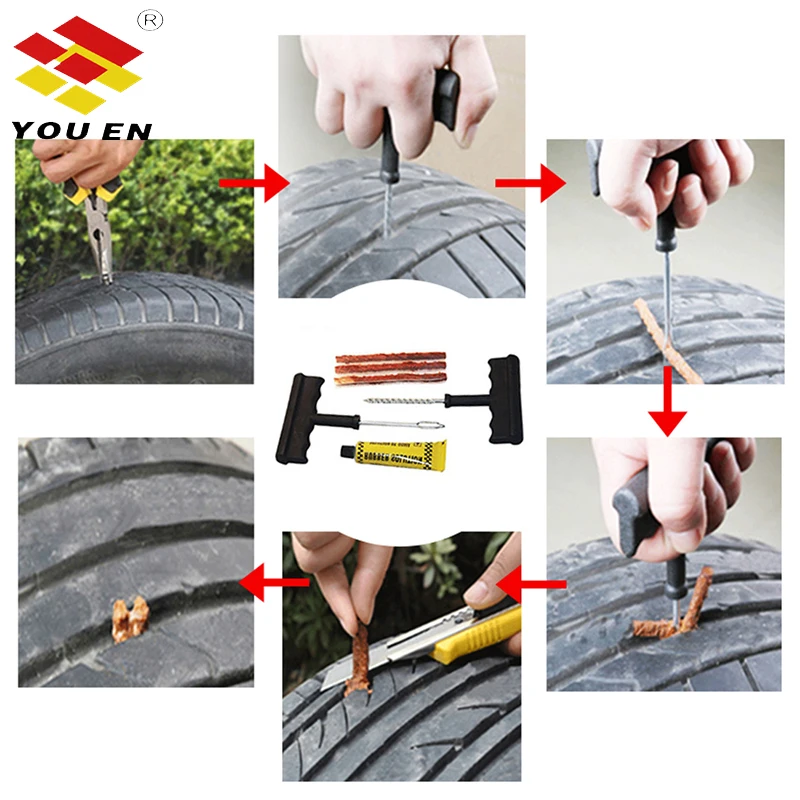
 The driver will be able to seal the tire on his own, without disassembling.
 To learn how to seal a puncture in a tubeless tire, it is worth considering that there are several ways to perform this procedure. Most often, tire repairs are performed using a tourniquet, a fungus patch, and special sprays that tighten the puncture site and stop air leakage.
If you want to learn how to seal a tubeless tire at home with a repair harness, you should follow the instructions:
The machine must be put on the parking brake, and a chock can be used to fix the position of the transport. Next, the car is jacked up and the wheel removed.
You need to carefully inspect the surface of the wheel to find the puncture site. Damage could occur as a result of piercing the wheel with a nail, self-tapping screw or glass shard. In this case, the head of the nail or the edge of the glass will indicate the cut. The foreign object must be removed with pliers.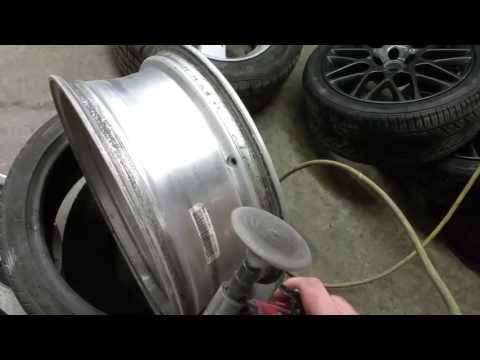 If the puncture site is not visible, you can pour water on the tire, which will cause the air that comes out of the hole to attract attention with a hiss. The puncture site must be cleaned of dirt and marked with chalk or a marker.
Next, you need to take an awl with a screw tip and apply special glue to it. After that, the awl is immersed in the puncture hole and several reciprocating movements are made. The tool should not be removed from the hole.
Then, a repair harness (a strip of raw rubber) is installed in an awl with a needle hole. From two parts there should be identical strips, on which a thin layer of glue is applied. To perform a short-term repair of a large damage, you can apply two rubber strips at once.
The first awl is removed from the puncture, and a tool with a tourniquet is placed in its place. Outside the tire, the edges of the strip remain (1-1.5 cm long). Next, the awl is pulled out of the hole after the tourniquet passes through.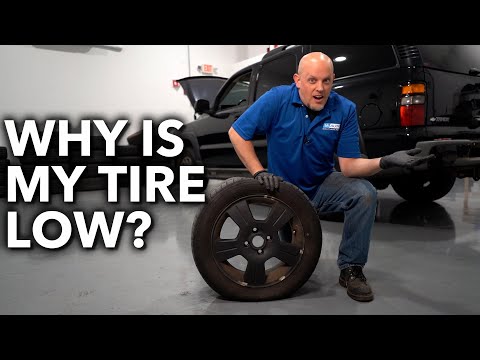 A strip of rubber that has folded in half will remain at the puncture site, and its ends should be cut off.
Having learned how to properly seal a tubeless tire with a tourniquet yourself, and after completing this procedure, you need to inflate the tire to the optimum pressure, after which the wheel can be returned to its place. This method is considered relevant if you need to seal a tire tread puncture, and the hole diameter is up to 10 mm. As for side cuts, the elimination of such a problem should be entrusted to professional specialists working in a car repair shop.
If you are looking for an option on how to seal a tubeless tire with a repair kit yourself, you can perform this procedure using a patch fungus. For this method, you will need to remove the wheel and tire from the disk. You also need to purchase patches in the form of fungi, sandpaper and glue. The repair procedure is as follows:
It is necessary to clean the puncture site, rinse it and remove dirt, as well as foreign objects that damaged the tire.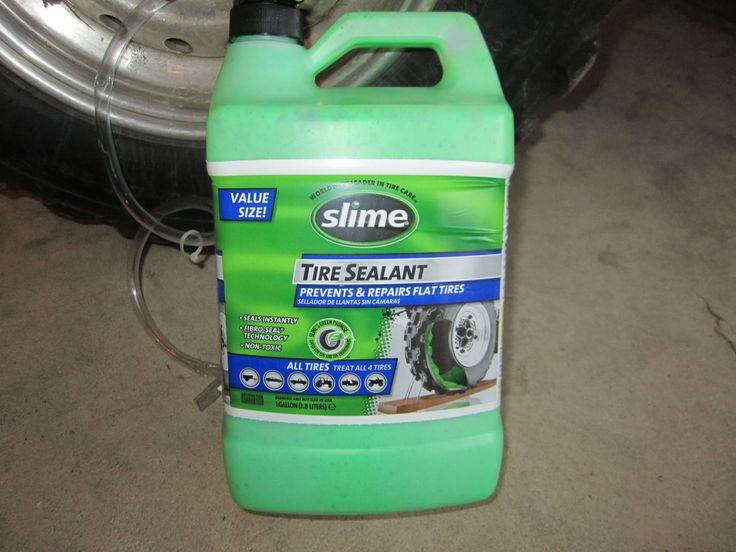
Next, the puncture site is cleaned from the inside to give it a roughness. For this task, you can use sandpaper or a drill with a special nozzle.
At the next stage of work, a fungus of the required diameter and size is selected (patches can be purchased at auto parts stores), based on the size of the puncture.
The patch is covered with glue and placed on the puncture site, after which it must be firmly pressed.
Then the patch must be allowed to dry, after which the wheel can be assembled.
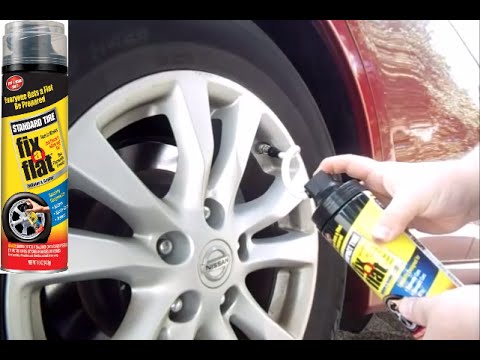
If you are looking for an answer to the question of how to seal Michelin tubeless tires or tires from another brand, you can use the easiest and most effective way. You can use a spare in a can. Sealant allows you to quickly seal the wheel. To apply it, you need to unscrew the nipple (this action is not always required). The contents of the vial must be squeezed into the opening of the nipple and returned to its place.