in: How To, Skills
Brett & Kate McKay • May 26, 2022
The bicycle is one of the greatest tools of self-reliance.
Without any need for electricity or gas, it can carry you far distances.
But bikes only work towards your self-sufficiency if you know how to maintain them. They may have fewer complications than an automobile, but they’re still machines that can break down and need to be repaired.
Several years ago Kate and I bought some bikes for ourselves (our kids already had them) so we could take family rides on Tulsa’s many pleasant bike paths. But I realized that I didn’t know beans about how to maintain our new purchases. If one of us got a flat tire, I wouldn’t know how to patch it. If my brakes were acting wonky, I’d be hosed.
So I set out to learn some basic bike maintenance and repair. It’s been fun. I thought I’d share what I’ve learned with you all in a new series: Bike Maintenance 101.
In today’s inaugural class, we’re kicking things off with how to patch a hole in your inner tube. I remember watching my dad patch a hole on one of my bike tires as a kid. It looked like a huge pain in the butt. But I learned that it’s surprisingly easy. Here’s how to do it.
Let’s get that wheel off so we can get to our flat inner tube.
I like to flip my bike upside down. It makes it easier to work with your wheel. I don’t have one of those fancy bike holders you use to work on your bike.
Getting wheels off a bike is a breeze with today’s quick-release systems. It’s pretty much the same for all bikes. The only difference you’ll encounter is how you’ll disconnect your brakes. That will depend on what type of brakes you have on your bike. Here’s how I removed the wheel on my bike with v-brakes.
It’s really easy to disconnect a v-brake. You squeeze the two brake arms together and unlatch the cradle from the noodle (that’s the thing with the rubber tip on it).
Flip the quick-release lever open and unscrew it until you have enough space to remove the wheel.
You don’t have to take the quick-release rod out of the hub, but if you want to, that’s fine. I think it’s easier to work with the tire without the quick-release rod still in the hub, so I take it out.
Wheel removed!
Time to get the tire off the wheel so we can get to the inner tube. Tire levers will make this job much easier. You can buy them on Amazon. They’re cheap.
Place your first tire lever between the wheel and the tire. You want to get the lever underneath the lip of the tire so you can pry it away from the wheel.
To keep the lip of the tire from going back into the wheel, hook the tire lever into one of the spokes. This will keep your tire and wheel separated, making it much easier to get the rest of the tire off of your wheel.
Place the second tire lever next to your first tire lever. Get it under the lip of the tire. You’ll slide this lever around your wheel to separate the rest of the tire from the wheel.
Here’s what your tire will start looking like as you slide that second tire lever around your wheel. It’s hard at first, but gets easier as you progress. As you can see, more and more of the tire lip is over the rim of the wheel.
Tire successfully removed from wheel. Now it’s time to remove the inner tube from the tire.
Inner tube will be tucked inside your tire. Just pull it out.
There’s the hole.
Get your patch kit.
Inside my patch kit is a metal square that has a bunch of little bumps on it. It’s almost like a cheese grater. Use it to lightly scuff up the area on and around the hole. If you don’t have a little metal cheese grater in your patch kit, you can use sandpaper to prep your patch area. The scuffing will give greater adhesion to the patch.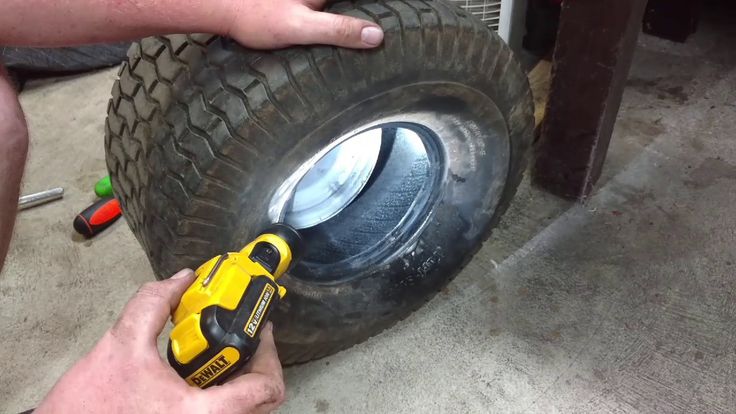
Use a moderate amount of rubber cement. Spread it evenly around an area 1/2″ around your hole.
Pick an appropriate sized patch for your hole. Since mine is so small, I used the smallest patch. Remove the foil backing and stick patch onto the hole.
Peel away the plastic film on top of the patch. Press edges down firmly. Bam! Hole is patched.
Inner tube back in tire.
Tire back on wheel. Getting the tire back on the wheel can be a bit tricky. You may need to use your tire levers to help you get the lip of the tire inside the wheel’s rim. Just make sure you don’t pinch your inner tube between the tire and the wheel. You’ll risk creating a puncture in your inner tube. Once you get your tire back on the wheel, inflate your inner tube and then put your wheel back on your bike.
You can patch your inner tube a few times and not have a problem. If you have more than three patches, you might start noticing that your tire goes flat overnight and you have to pump it up if you want to use it. After your third patch, chuck your old inner tube and replace it with a new one.
Want to start taking action on the content you read on AoM?
Join the Strenuous Life
Learn More
Punctures are a fact of cycling life. For the users of inner tubes they’ll require a repair. This is an easy job and one all cyclists need to know how to achieve with the minimum of fuss.
Our guide below shows you what we believe is the best method fix a puncture. We've included a list of the tools and materials that you will need to complete the job and in some cases where you can buy them. If there are others that you prefer then feel free to let everybody know in the comments.
Tools & Materials
1. Remove the cause
When the tyre goes down, before you remove it from the rim, check the outside closely for the likely source of the puncture. Sometimes it's blindingly obvious, like a whacking great nail, other times small pieces of glass or thorns can be harder to spot. Naturally, spotting them with the tube still in place will give you a guide as to where to look on the tube. If you grab the tube straight out of the tyre without checking, you've no idea where it might be.
2. Check inside
If you can't see or feel the object from the outside of the tyre, remove it from the rim and gently feel around the inside of the tyre carcass with your fingertips. Go lightly and slowly, as the protruding item might be sharp enough to cut you.
3. Double check
The culprit may be small, but you have to be sure that you have them all out. We've fixed thorn flat before, removed the one that did the damage, but missed another that was partially through, ready to do its deflating work a mile down the road.
4. Push it out
When you find the object causing the puncture, push it back out of the tyre carcass. Do this from the inside out, never pull objects fully through the carcass, you're only making a bigger hole in the tyre. Small sharp or pointy items can be pushed back with the end of a multi-tool or whatever 'harder than a finger' bits you have with you.
5. Find the hole in the tube
Add some air to the tube. Small punctures will allow the tube to hold some air long enough for you to pass the tube through your hands and under a moistened lip. You should feel/hear/sense the air escaping.
6. Don't lose the hole
The holes can be hard to see with low air volume, and nearly invisible when the tube is flat. When you've located it, put your finger on it as a marker and keep it there until you can mark the hole properly.
7. Mark the hole
You use the yellow crayon to mark the hole.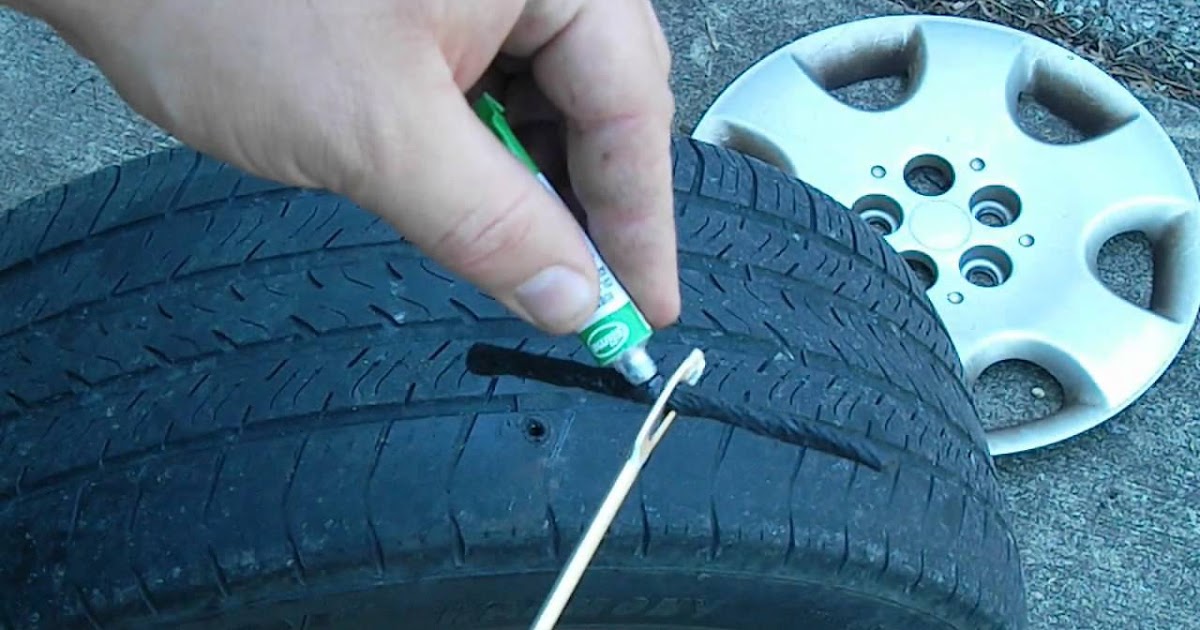 Most patch kits come with a stub of the waxy stuff. It's not ideal as its reluctance to show in the butyl can make accurate location of the hole tricky.
8. Even better, use a biro
If possible, we prefer to mark the position of the hole with a biro. Any colour will do, the ink sticks to, and shows up well, even on black butyl.
9. Get the hole in your sights
We draw a circle around the hole, just a bit bigger than the size of the patch to be used. With the hole in the very centre. We then draw a pair of crosshairs centred on the hole with the ends extending outside the circle. This allows you to rough the site of the hole, apply vulcanising solution and let it cure, without losing the exact centre location of the hole.
10. Rough up the tube
Roughen the butyl around the hole with the small piece of sandpaper included in the patch kit. We have, in extremis, roughened it using a handy kerbstone. You're only looking to give the surface a 'key', so don't make it a ragged affair.
11. Vulcanise
Apply the vulcanising solution. For the sake of avoiding unstuck patch edges, make the glue zone slightly larger than the patch.
12. Wait
Let the vulcanising solution cure. This takes around five minutes, check your particular patch kit brand for the exact timing. Don't be tempted to rush it, however far behind the group you might be getting. One fix is quicker than two.
13. Uncover the patch
When the vulcanising solution has cured, peel the foil backing from the patch, making sure you don't touch the exposed patch surface with your fingers. Leave the plastic layer in place to make positioning the patch on the tube easier.
14. Apply the patch
Look for your cross hair guide lines and when centred, press the patch firmly into position. If you've got time, we leave it for a further five minutes to let the chemical bond really take effect.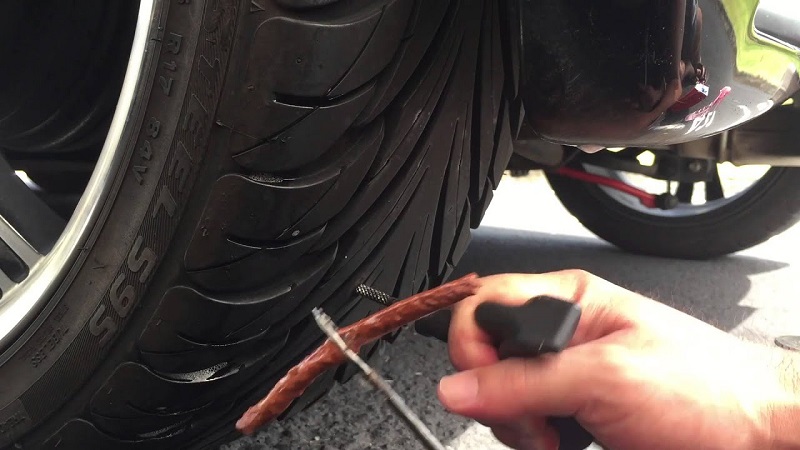
15. Remove the cover
Carefully peel the plastic backing from the patch. They often have a pre-scored line in the plastic, so you can flex and split it and peel off from the centre of the patch outwards, to reduce the chance of pulling the edges of the patch up.
16. Chalk it up
Take the small cube of French chalk from the patch kit and grate a little onto the repaired area. This is to stop the tacky vulcanised rubber and solution from sticking to the inside face of the tyre carcass.
17. Inflate
Give the tube some air. Providing you've spotted all the holes, it'll be going up and staying up. Replace the tyre and tube. Inflate to your favoured pressure and enjoy the rest of your ride.
We’ve noticed you’re using an ad blocker. If you like road.cc, but you don’t like ads, please consider subscribing to the site to support us directly. As a subscriber you can read road. cc ad-free, from as little as £1.99.
If you don’t want to subscribe, please turn your ad blocker off. The revenue from adverts helps to fund our site.
Subscribe
Continue Reading
Although rubber is a reliable and durable material, it can also be damaged. It happened to almost everyone to pierce a car or bicycle tube.
The great news is that it is quite possible to eliminate the consequences on your own and this will not require significant financial investments.
On the roads there are often objects that can pierce, tear, or cut through the tube of a bicycle or car. A nail, a thick wire with a pointed end, a self-tapping screw, broken glass - all this can cause a hole in the wheel.
Damage can be obtained not only while driving off-road, but also on a busy highway, where, in addition to the above, there may also be parts that have come off from a vehicle that has previously passed.
High-quality new tires are less prone to such troubles, but they are not a panacea.
That's why everyone who drives a wheeled vehicle should have at least an elementary wheel repair kit.
A puncture in a wheel at home can be closed with a patch made from a piece of old rubber.
You will also need soap, thinner (degreaser), a bucket of water (a regular puddle will do for road repairs), scissors, a pump, and a good quality rubber adhesive. Well suited "Moment" or a similar tool.
Ready-made tire repair kits are also available, go to any car shop for them. True, the cost of a finished repair kit will be higher than that of a self-formed one.
Wheel tubes can crack, get a cut on the side, puncture. Due to depressurization, air leaks, as a result, the wheels are deflated.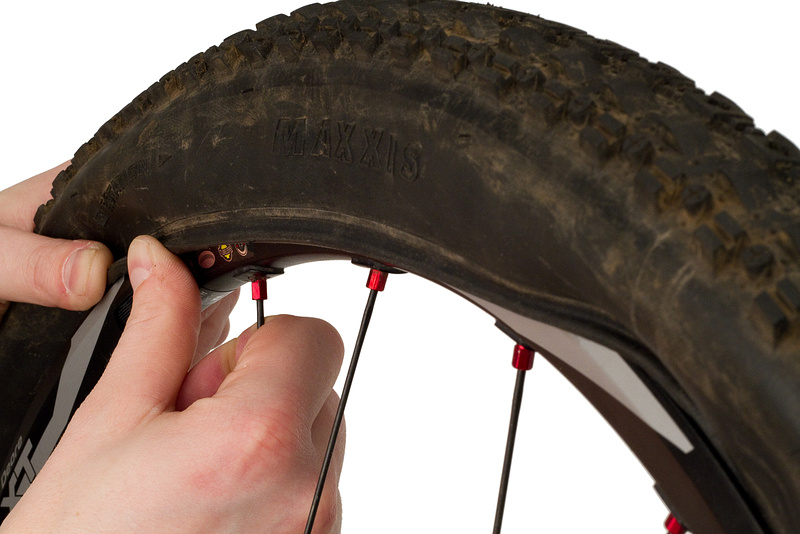 Finding a hole makes it difficult to mud on the tires, which is clearly manifested in wet weather.
Most often, the area where the wheel contacts the road surface is damaged at a height not higher than the upper third of the chamber height. Sometimes the tube wears against the rim when the rim tape is deformed or the tire cords are loose.
Various methods can be used to locate the exact location of the damage. But first you have to remove the camera without using sharp objects and conduct a visual inspection.
If the puncture is not conspicuous, use one of the methods described below.
Water and soapy water will tell you where to look for the tear. To do this, the camera is immersed in water and moved until outgoing air bubbles appear - they will point to the hole.
If the size of the chamber does not allow it to be lowered into water, a soapy solution is applied on top of it and observed.
Ordinary fine dust is also a good clue. It scatters under the pressure of the air leaving the chamber.
To see the location of the puncture, all you need to do is to press the camera firmly in the immediate vicinity of the accumulation of dust particles.
In a quiet room or outdoors where there is no noise, you may hear a sound that resembles a low, thin whistle. It is emitted by air, seeping through the hole. To find damage in this way, the wheel must be pumped up to the stop and listen.
You can feel the cool breeze from the chamber in the absence of wind. To do this, you need to hold a wet hand at a distance of 10-20 mm from the surface of the chamber.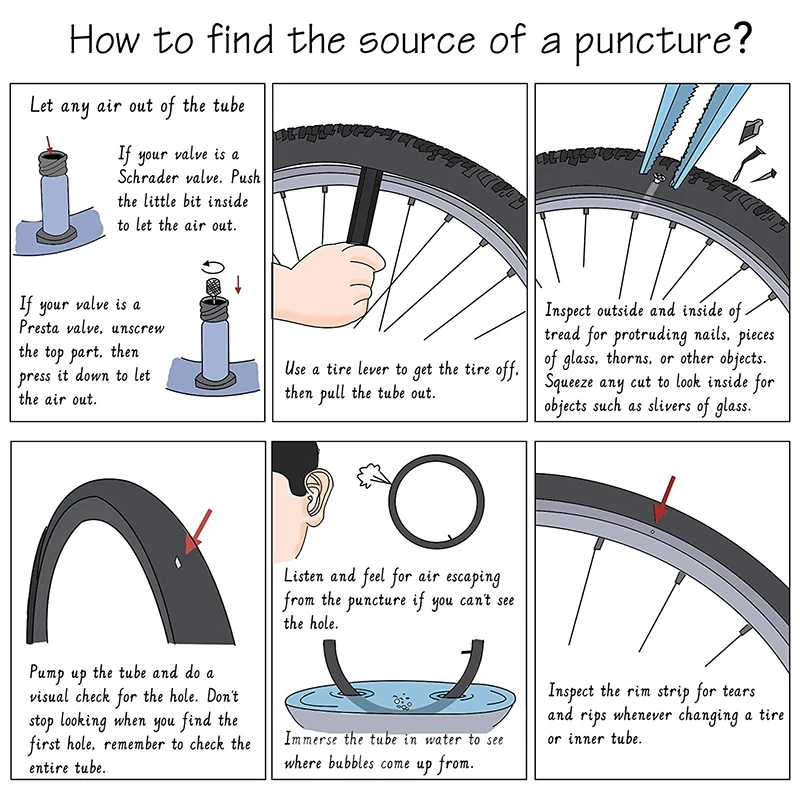
To enhance the effect, you can squeeze the chamber at the same time to increase the pressure of the outgoing air.
When a defect is found, it must be marked with a marker or pen. The further workflow is described below. By the way, these methods are also useful for repairing other inflatable products.
Even a beginner can apply a patch. The process is quite simple. As a patch, you can use a piece of rubber from an old wheel.
The size of the part is chosen so that it covers the hole by 1.5 cm from all sides. Scissors should give the patch the shape of a circle or oval.
After that, you need to take sandpaper and carefully clean the place of damage and the part itself, this will provide a stronger adhesion of materials. The next step is degreasing. To do this, wipe the surface with alcohol or acetone.
Apply the selected adhesive to the chamber and patch, smooth it gently with a spatula and wait 3 to 5 minutes. You may need to apply a second layer, this point should be clarified in the instructions.
It is not necessary to achieve a large thickness of the seam due to a large amount of glue, this will negatively affect the final result.
After that, it is better to lay out the camera on a flat surface and press the patch firmly against it.
The latter must be on top. Tap the patch three times with a hammer, making spiral movements from the center to the edges.
This will increase the grip and help form a stronger bond.
When the glue is completely dry (the time is usually indicated in the instructions), the camera can be returned to its original place and used without restrictions.
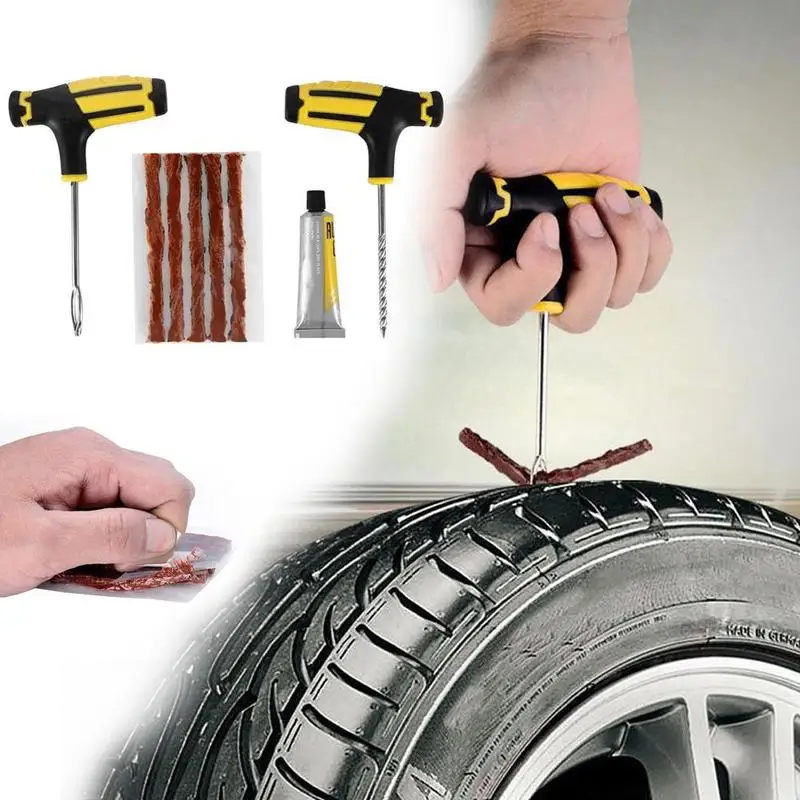
Due to the state of roads and irresponsible citizens who throw garbage on them, cyclists often have to deal with damage to the tubes. The good news is that any person can cope with repairs, although for the first time you will have to try.
Popular products like Super Glue contain cyanoacrylates, which makes the adhesive lines too hard.
These adhesives are not suitable for work with movable and deformable wheel tubes, as they create a connection that does not have flexibility, which easily breaks under load.
This glue can be used in an emergency when a puncture needs to be repaired urgently, but remember that this is a temporary measure and the camera needs a full repair.
The choice should be made in favor of adhesives designed for working with rubber.
They are usually found in bicycle first-aid kits, but a spare bottle is a good idea.
The list of recommended brands includes waterproof "Glue 4508", "Glue 88 N", which can be used to glue rubber parts to metal, "Moment Rubber" - an inexpensive but high-quality glue that sets in 60 minutes, frost-resistant and waterproof glue " Radical".
You can also find a set of patch and Red Sun glue on sale. The quality of the product depends on the manufacturer, before purchasing it is better to carefully study the reviews.
If cycling is a regular activity, it is best to always have a set of tools and materials with you for unscheduled repairs.
This should include glue, patches, a pump, a marker, chalk or ballpoint pen (to mark where the damage is located), a wrench or screwdriver to remove and assemble the wheel (plastic pliers can be used), medium grit sandpaper, water and capacity for it, cargo.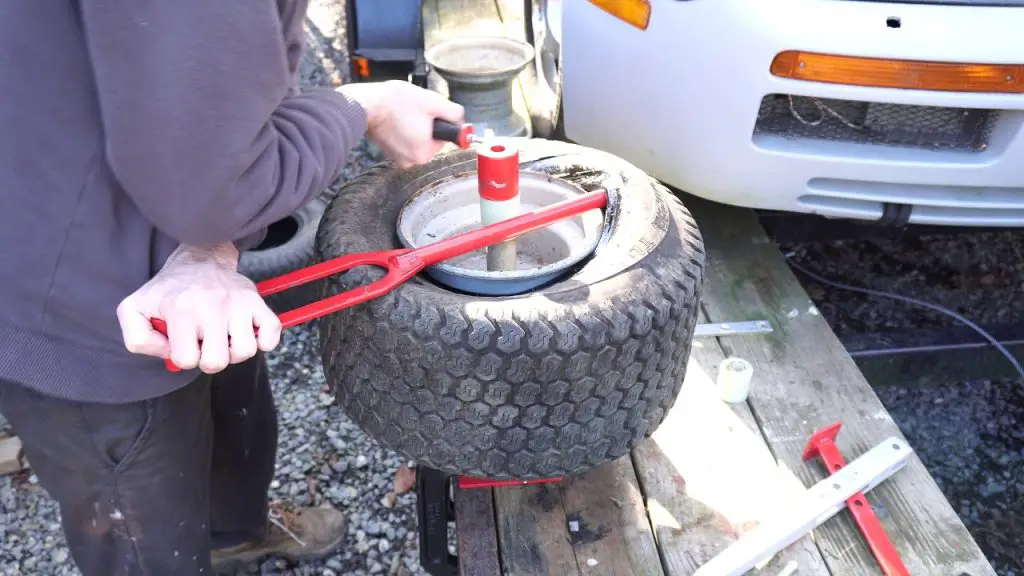
The first step is to disconnect the rim brakes.
After that, the bike is placed on the handlebars and the seat and the eccentrics or bolts on the hub are unscrewed. After that, the wheel can be easily removed. If the rear wheel is pierced, then you need to move the axle towards the steering wheel, while holding the chain with your hand. This will make removing the wheel easier and faster.
Removing the camera requires a little dexterity and some tools. It is better to use plastic tools, they practically reduce the risk of damage to the camera during disassembly.
The wheel must be completely emptied of air. To do this, unscrew the spool.
In modern mid-range and high-end bicycles, it has a special groove cut into it, in inexpensive models it will have to be held manually. Sometimes you will have to lower the camera before removing it.
This is due to the fact that the wheel is made of very thick rubber and during the removal process it gets stuck in other parts of the bike.
Start beading from a point diametrically opposite to the nipple. A mount is inserted between the tire and the rim without touching the chamber located inside.
The second rig is installed at a distance of 15 cm from the first. Instead, you can use any items with which you can pry off the tire without causing damage to it and the chamber located inside.
Using the installed tools as levers, lift the tire off the rim and remove it with your hands. Remove the valve from the groove in the rim and remove the tire for subsequent repair.
To find a puncture in a bicycle tube, it is better to use the method of searching by sound (exhausted air emits a characteristic whistle) or visual inspection.
The found damage is circled with a marker or chalk.
The use of water is undesirable as it will take a long time for the chamber to dry out, and if the liquid seeps inside, problems cannot be avoided.
If damage is found in the area of the valve, do not repair it yourself, it is better to contact a special tire repair center.
The damaged area must be treated with sandpaper and wiped with acetone.
If it is not available (repairs have to be done in the field), sometimes they are limited to wiping with a clean cloth. A patch is taken out of the repair kit, the protective coating is removed, the adhesive is applied to the part and damage is done.
Press the surfaces firmly against each other and hold for the time specified in the instructions for use of the adhesive.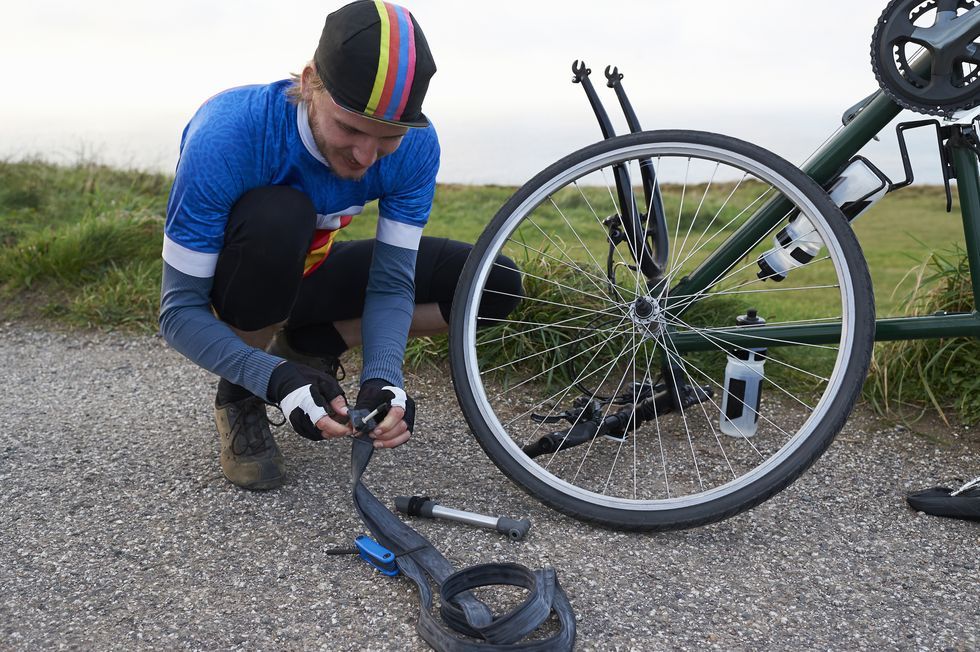 After repair, you should wait until the chamber is completely dry.
A piece of rubber can be used instead of the finished patch, but it must be strong, durable, without signs of stretching and damage. The bonding technique is the same, it will only be necessary to more thoroughly clean and degrease the surfaces before joining.
After the repair, its quality is checked. To do this, the tire must be inflated and check if a whistle appears at the patch attachment site. If this is not observed, you can start assembling the wheel.
The first thing to check is whether the insulating tape on the inside of the rim is damaged.
Then completely deflate the tube and place it inside the tire. Pump some air into it. Using a pry bar or other suitable tool, place the tire with the tube inside onto the rim.
Fully inflate the wheel, screw on the fasteners. Make sure the wheel is fully functional.

There are alternative repair methods. These repair options can be resorted to if the damage to the wheel occurred on the way and there is no way to find the missing materials.
If you don't have glue, but you have a ready-made patch, you can place it on a slightly flat tire and then inflate the tube.
The rubber will be pressed down with pressure, this will allow you to overcome the path to the nearest service center or home.
Also, as a repair patch, tape, moistened cellophane can act. They are pressed tightly against the carefully cleaned puncture zone.
You can also get out of an unpleasant situation with the help of a medical plaster. 3-4 blanks of patches 2-5 cm in size are cut out of it and glued to the hole in increasing order.
The method used by workshop professionals is most often used for repairing car tires.
However, it is also suitable for bike tubes.
A technician in a specialist workshop will repair the puncture by placing a patch on it and heating the rubber until it melts while compressing it. As a result, a homogeneous joint will be formed, which will last a very long time.
Vulcanization is the most reliable method for bonding damaged tires. There are even devices for home use - mini-vulcanizers, but their use requires skills and safety.
The repair procedure is the same as for repairing a bicycle inner tube. It is necessary to disassemble the wheel, clean and degreaser and use a bicycle tire repair kit.
After the adhesive has hardened, the stroller can be used.
If a scooter wheel is damaged, you will need rubber glue and a self-tapping screw to repair it.
The scooter is turned upside down with its wheels (they do not need to be removed), the surface is cleaned of dirt and a self-tapping screw, thickly covered with glue, is screwed into the puncture. Next, you need to wait for the polymerization of the seam and pump up the wheel.
This method will work as a temporary solution so that you can get to the nearest auto repair shop.
If the tire does not contain a tube, a tourniquet, sealant or a special fungus patch is used to repair it.
The preparation is the same as for conventional cameras. The key point is the need to ensure one hundred percent tightness. A patch fungus or a tourniquet covered with glue will cope with this task.
It is also possible to fill the hole with sealant. The product can be used after 1-2 hours.
For those who do not want to spend time repairing after each puncture, self-sealing chambers have been developed.
They contain a resin that seals holes from the inside. The cost of such a camera is an order of magnitude more expensive, and it is twice as heavy as an ordinary tire.
The disadvantage of the invention is that over time it will have to be repaired. To minimize the risk of damage, you should adhere to the following recommendations
There is also a special tape to protect the tubes from punctures. It is a strip of Kevlar or rubberized plastic and is placed inside the wheel between the tube and tire.
However, continuous use of the tape is not recommended because it can cause rapid wear of the camera. In order not to have to frequently repair wheels, you need to ride in specially designated areas and on clean roads.
Here are some simple, clear instructions on how to repair a bicycle inner tube quickly and correctly.
1. Locate the tire puncture
Starting at the valve, check all sides of the bicycle tire to find the cause of the puncture. Remove any shards of glass or sand that you notice. Even if you find one of the possible causes, keep checking the tire until you get back to the nipple.
2. Remove the tire
Vent the chamber. On the side of the wheel opposite the nipple, using a special tool (available at all good bike shops) or a similar handy tool, loosen about 5 cm of the tire as shown in the picture. Alternately rearranging the special tool along the entire diameter of the wheel, remove one side of the tire from the rim.
Pull out the chamber. Remove the tire completely, this can be done by manually moving the entire tire in one place from the wheel rim.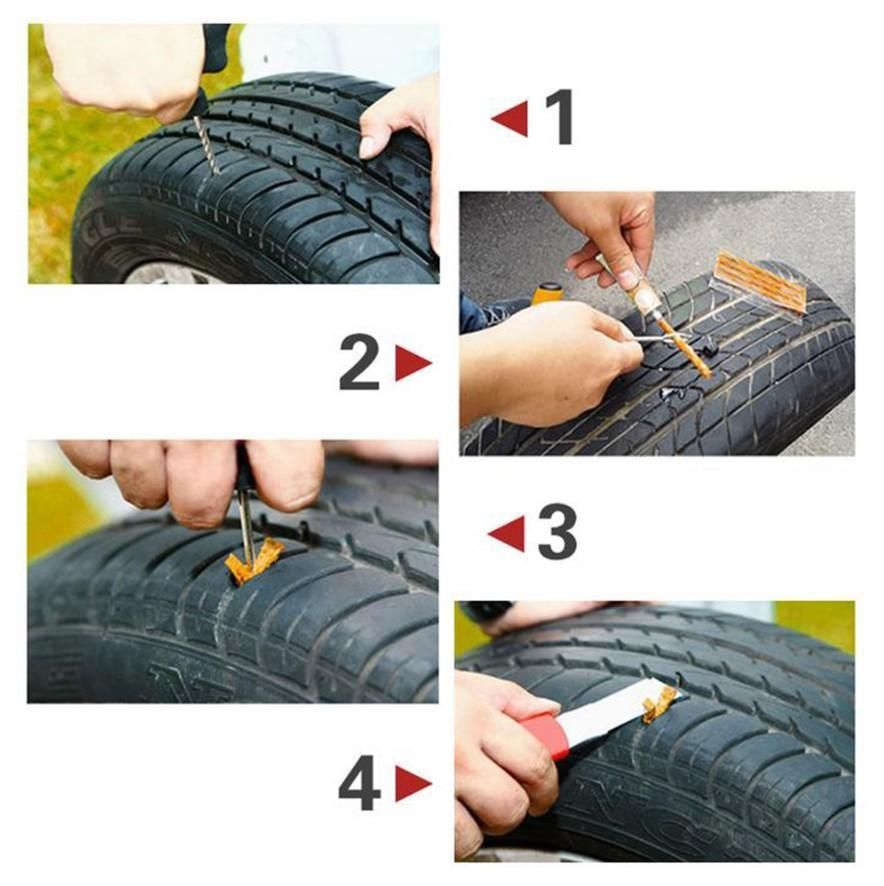
3. Inflate the punctured chamber
Inflate the chamber and listen for air to pass through. Examine the camera from all sides. If the hole cannot be found, re-inflate the camera and place it in a container of water. After finding the puncture site, dry the chamber before moving on to the next step.
Be careful: When inflating the chamber, do not twist the pump so as not to pull the nipple out of the chamber.
4. Prepare chamber
Choose the correct rubber patch size - use a larger than smaller patch size if in doubt. Roughen the surface of the camera around the hole with sandpaper. Make sure all mold marks on the chamber are completely erased and the surface is flat.
Apply one drop of rubber adhesive and spread around the puncture 2 cm larger in circumference than . Let dry - the rubber adhesive will change from glossy to matte. Apply a second thin layer in the same way as
5 Tape the puncture site
Inflate the bladder a little to help highlight the position of the hole.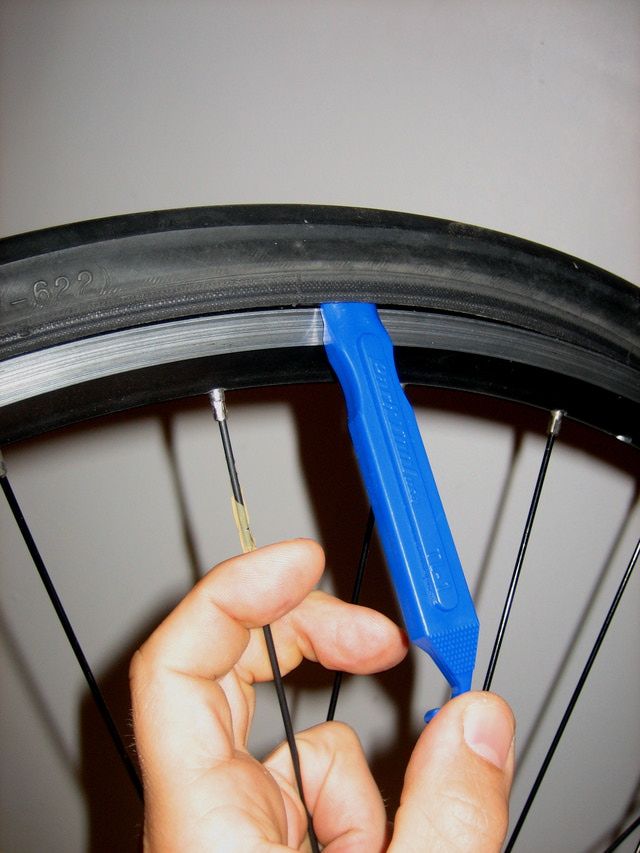 Press the patch firmly onto the puncture site after removing the foil. If there is a thin cellophane on top of the patch, then it can be left.
Sprinkle chalk, talcum powder, or road dust around the patch to prevent the camera from sticking to the tire.
6. Check tire
Before installing the tube, check the inside of the tire to find the cause of your puncture. The location of the puncture on the camera will help you find the cause of the puncture. Run your fingers into the tire and carefully feel around the inside to find the source of the puncture and remove it.
7. Install tire
After repairing the tube and checking the tire for glass, spikes, or any other sharp debris, reinstall one bead on the rim. Inflate the tube a little and install it on the rim, first by inserting the nipple into the hole in the rim.
Start installing the second side of the tire from the opposite side of the rim to the nipple, use your fingers to lift the tire beads (the part of the tire that connects the wheel rim) over the edge.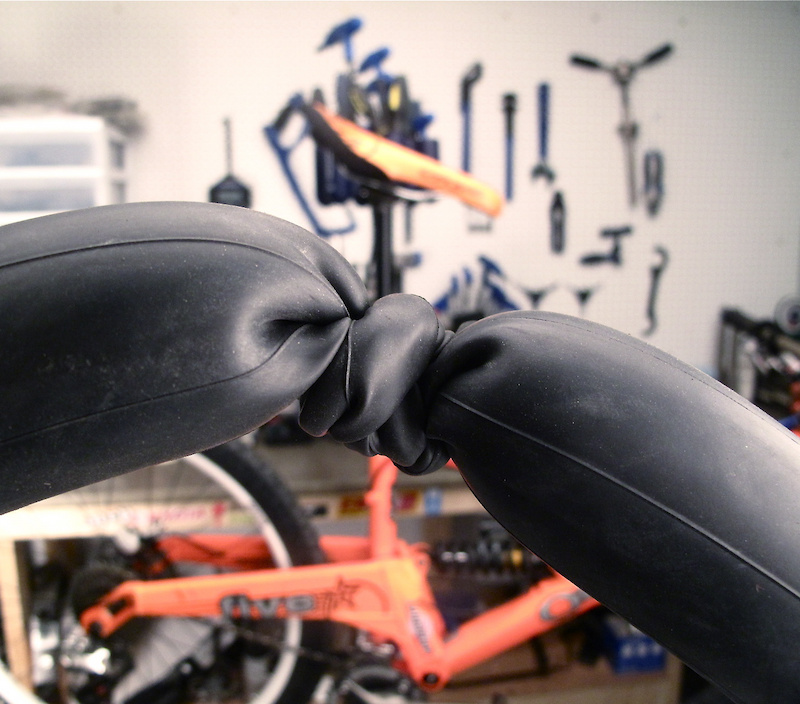 Install the entire tire on the rim in this way.
8. Make a final check
Check that the inner tube is not pinched between the rim and tire bead. Inflate the tube until the tire is still soft, but has already taken its shape. Make sure that the tire beads are evenly placed in the rim around the entire perimeter. If not, bleed some air out of the chamber and evenly position the tire against the rim.
Pressurize the chamber to the recommended pressure and check again that the tire beads are still sitting flat and that the chamber is not visible anywhere from under the tire. Finally, make sure the tire tread is placed fairly evenly by spinning the wheel. If not, then lower the camera and start again from the beginning of this step.
Tips for repairing a puncture
When removing the inner tube from the tire, pay attention to which way the inner tube has been installed in the wheel. This will help determine the position of the hole in the chamber and the position of the target in the rim.
Mark the puncture site with a ballpoint pen so you don't lose it.
If you do not have sandpaper with you, you can roughen the chamber around the puncture by rubbing the chamber against a rock or pavement.
Carefully remove and replace the inner tube with the rim. To prevent repeated puncture, do not use sharp tools such as screwdrivers, etc. when installing or removing. Use special if necessary. rim removal tool or other tool with blunt edges
Identification of a puncture
Two small holes in the chamber placed fairly close together indicate a double puncture. This is because the puncture object can get stuck between the tire and the rim when driving over a sharp object. Make sure the sidewall of the tire is not cut. A hole on the inside of the chamber indicates that the puncture was caused by a pin. Check the inside of the rim to make sure the edges of the tape are properly covering the spoke holes and that there are no protruding spoke ends protruding above the inside of the rim. If this happens, you will have to cut off the protruding part of the spoke with a file.
A less common cause of puncture is the rough edges of the hole in the nipple rim. The puncture in this case will be near the nipple and such a chamber can no longer be restored.
Make your own Puncture Repair Kit:
Weekly inspection
Check your tires by inspecting the tread for damage or severe wear.