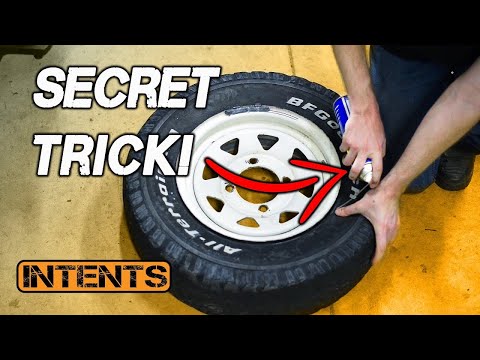
Tubeless tires on lawn mowers will eventually fail. Although you could take the tire and wheel to a shop to have the tire changed, changing a tubeless lawnmower tire isn't particularly difficult. Tubeless tires are held on a rim by a rubber covered metal band called a bead. The hardest part of changing a tubeless tire is getting the bead over the rim. By using some common tools, the process isn't particularly difficult.
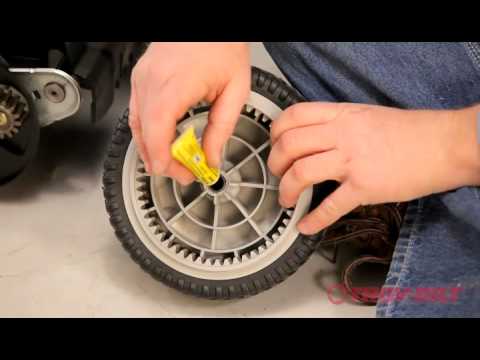
Remove the valve from the tire stem to allow all air to flow out of the tire.
Wrap a ratcheting cargo strap around tread of the tire in the center of the tread. Tighten the strap until the center of the tire is pressed fairly close to the inner rim. This will help remove all air in the tire and will reduce some of the tension on the sidewall beads.
Slip a stout flat blade screwdriver under the bead in one of the side walls. Press down and out on the screwdriver until the bead pops out from the rim.
Slip another screwdriver next to the first. Work this screwdriver around the rim popping the remainder of the sidewall bead off the rim. In some cases, you may need three or four screwdrivers, depending on the tension on the bead and the size of the tire.
Release the cargo strap and remove it. This will make it easier to remove the final bead to release the tire from the rim.
Slip a flat blade screwdriver under the final bead and lift the bead over the lip of the rim.
Slip a second screwdriver next to the first and work the bead off the rim, moving the screwdriver as the bead releases until the tire is free.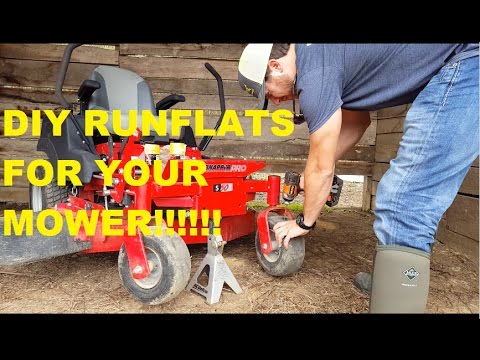
Apply dish soap to the bead of the new tire. This will help the bead slip into place.
With your hands, slip one part of the bead onto the rim. Clamp this in place with a pair of vice pliers. Be careful not to damage the bead or rubber by applying too much pressure.
With a screwdriver, work the rest of the bead on to the tire by slipping the screwdriver under the bead and lifting it over the lip of the rim.
Use a screwdriver to lift the second bead over the rim.
Clamp the vice pliers to the rim to keep the first bit of the second bead in place. Use a screwdriver to work the second bead over the lip of the rim.
Rinse the newly installed tire thoroughly to clean off the dish soap. Install the valve and inflate the tire.
Be very careful not to damage the rubber or bead on the new tire with metal tools.
Having a flat or partly flat tire on a riding lawnmower can be very uncomfortable. It can affect the mower’s handling and cause it to slip on the surface, making the job very taxing. It also adds unnecessary load on the engine and can cause it to consume more fuel. A flat or partly flat tubeless tire can be caused due to various reasons. This blog post shall investigate these reasons separately and discuss the procedure for inflating a tubeless tire on a lawnmower.
How to inflate a tubeless lawnmower tire? Follow these steps below:
Tubeless tires do not use a separate rubber tube to hold the air in them. The pressurized air is contained inside the tire, enabling it to support the lawnmower’s entire weight, including the person. The air pressure inside the tires can fall due to various reasons. The tire may get punctured by a sharp object causing the air to leak out. Generally, in winters, the low temperature causes the air to condense inside the tires, resulting in a pressure drop. In all these cases, it becomes inevitable to fill the tire with air to ensure a smooth ride.
For further elaboration on the steps mentioned in bold, we recommend going through the entire article.
Contents
 2.1 – Punctured tires:
We shall elaborate on the procedure for inflating a tubeless tire along with other problems that can arise with a lawnmower tire.
There can be two main ways of performing tire inspection. You can inspect the tire visually and see if any tire appears flat and needs repair. You can also determine the air pressure inside each tire and see where you need to pump more air.
You may need a pressure gauge to determine the value of air pressure inside each tire. You can do this by attaching the pressure gauge to the valve stem of a tire.
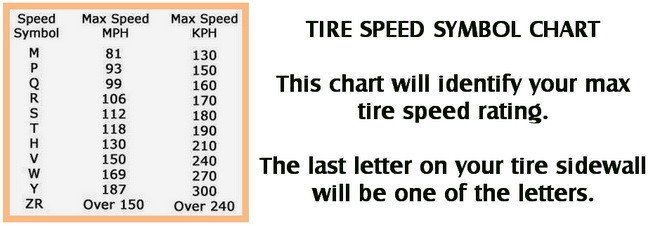
If an air compressor is available to you, it has a pressure gauge installed with it so that you need not purchase one separately. The recommended pressure value is usually mentioned on the side of each tire. If not provided, you can check the manufacturer’s recommended value as listed in the lawnmower’s manual.
Determine the air pressure inside all four tires. If the value falls short of the recommended value by a significant amount, you may need to pump air inside it. We shall come towards that step afterward.
If any tire appears flatter than normal, try to bend over and press it. If you can squeeze it easily, you need to pump air inside it. If a tire doesn’t have adequate pressure, you might get an indication of that while riding the lawnmower.
Also, check for sharp objects such as iron nails, pins, glass splinters on each tire’s tread area. If that is the case, your tire is punctured, and it needs to be repaired before inflating it with air.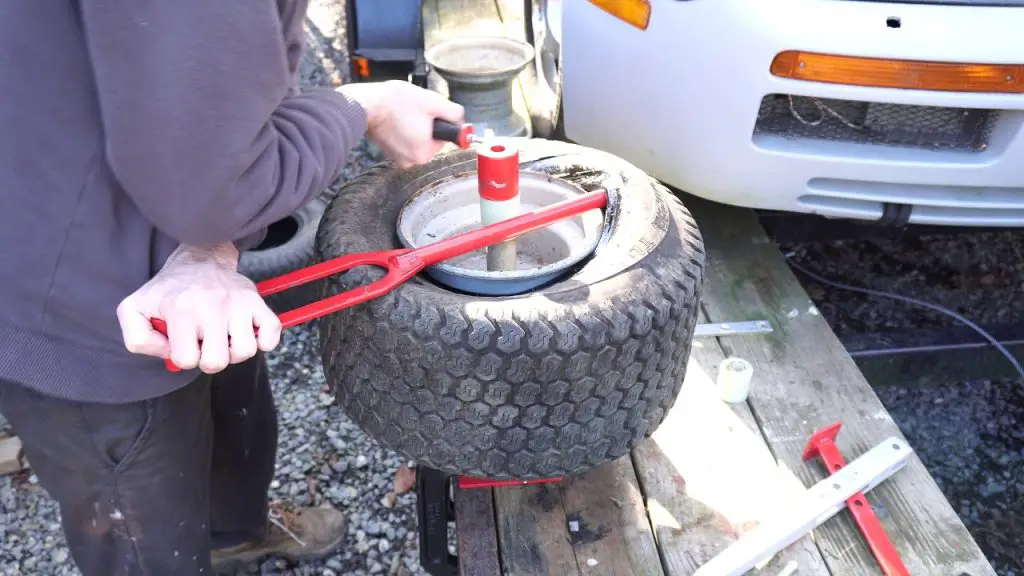
You might come across a situation when the tire has gotten off the rim completely, and the air inside it has escaped. In all these cases, the tire needs to be fixed first before filling it with air.
Here, we shall explain how to fix tires that have either been punctured or have lost contact from the rim. If your tire isn’t damaged, you can move directly to step 3 without following this step.
If a sharp object such as an iron nail is stuck inside a tire, it can cause air leakage. To check if the air is leaking, you can pour soap water at the puncture site and see if any air bubbles are formed. Please be sure that you don’t remove the sharp object from the punctured area until the hole has been fixed. For fixing the punctured tire, you can follow the steps below:

For tubeless tires, it is possible if your tire loses contact with the rim due to a high cornering force and loses all the air.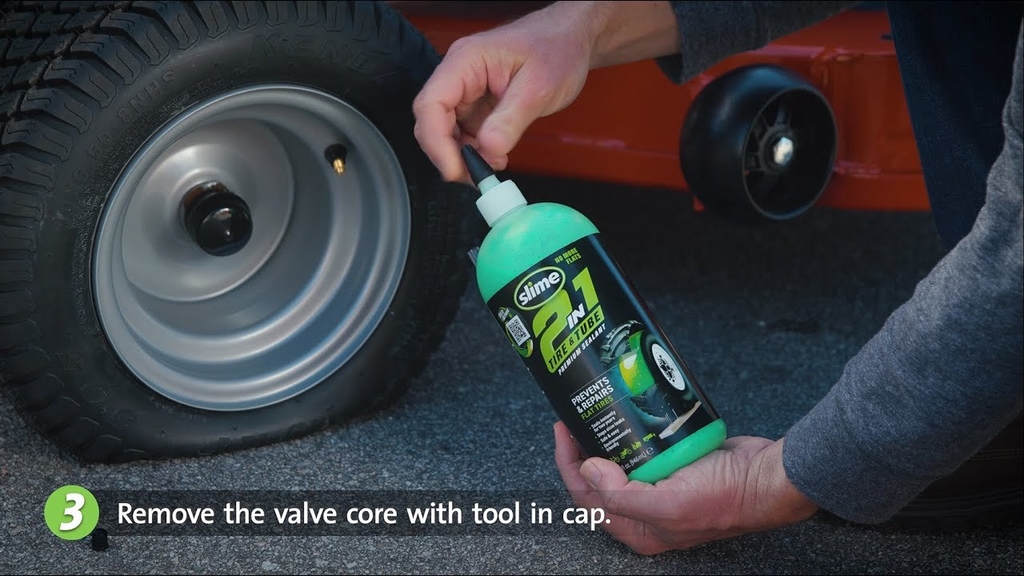 It generally happens when tires have become old and are near the end of their service life. However, if you still want to fix this tire, you can follow the steps below:
With the air filled inside the tire, you can remove the rope, and the tire is all set to be used again.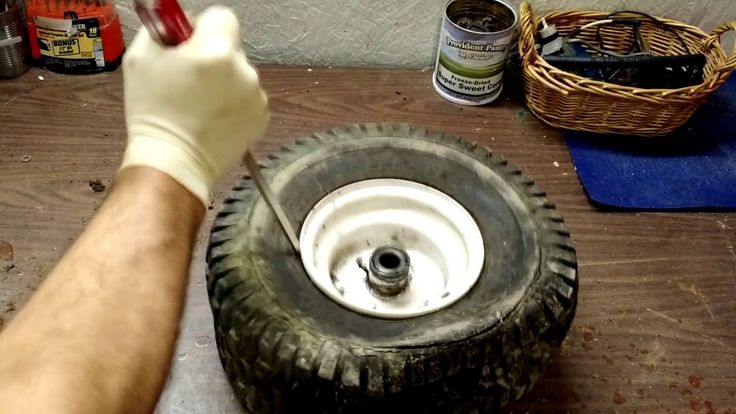
Once the tire has been repaired from any damage, we can now pump air inside it. For this action, you can follow these steps:
A rule of thumb says that the sealant should be replaced after every six months. The sealant tends to dry out with time and can break if the tires are driven on a bumpy surface. In these cases, you don’t need to remove the old sealant unless there are clumps that can be picked out by hand.
Tubeless tires are used in most riding lawnmowers. Such tires do not have an inner tube, and the rim locks their beads in place. They have the following pros and cons:

You should replace your tubeless tires when their treads have worn out completely and no longer provide sufficient traction. When the tire keeps on leaking air right after getting filled or when it has been torn due to a knife or highly sharp object, it should be replaced.
You should check your lawnmower’s tire pressure regularly during the season. We always recommend filling the tires to the prescribed level and not more than that since it may cause the tires to burst. Avoid driving your mower when the tire is flat as it is uncomfortable and loads the engine excessively. If you have ever punctured your tires before, be sure to keep filling them with sealant every six months as the old sealant wears out after that.
Modern passenger cars are equipped with tubeless tires. Tires with rubber chambers inside are extremely rare today, only on super-budget vehicle options. Car owners have long appreciated all the convenience and benefits that tubeless tires have. Unlike chambered rubber, they keep air in the wheels by being sealed to the rim. The tightness of tubeless tires is ensured by a two-millimeter layer of rubber applied to the tire from the inside. It is he who prevents the passage of air. The coating of soft rubber layer provides tightness at the junction of the tire with the rim of the rim. The tire bead sits on the so-called rim shelf, which is equipped with a special rounded ledge. Thanks to him, the tire is securely connected to the wheel rim, and complete tightness of the joint is achieved. A tubeless tire is filled with air through a valve installed on the rim, on its rim. nine0003
Why did tubeless tires become so popular that they gradually replaced tubed tires? First, tubeless tires are much lighter. This is a very important and great advantage, because heavy weight enhances the inertial movement of the wheel when driving on, to put it mildly, imperfect road surfaces, which we still have much more than smooth autobahns. As a result, this affects the condition of the chassis, accelerates its wear. In addition, tubeless tires do not heat up during driving in the same way that chamber rubber heated up, in which the inner cylinder rubbed against the tire while driving. Such friction led to its rapid wear, and also increased the likelihood of tire rupture during movement. When a tube is punctured, the tube tire loses air very quickly, since it escapes not only from the puncture site, but also through leaky tire beads that do not fit snugly against the rim shelf. In addition, if such a tire is punctured, you will not be able to stop the car immediately, it will travel more than a dozen meters by inertia until it comes to a complete stop. During this time, the tube and the tire can be damaged more thoroughly, the rubber of the inner cylinder will “chew”.
 With tubeless tires, this option is excluded. Even if a puncture occurs, thanks to the tightness of the chamber and its periodic pumping, you can get to the tire service. nine0003
Tubeless and tube tires also differ in how they are mounted / dismantled. If chambered rubber can be freely disassembled or, conversely, installed at home, then such a number will not work with a tubeless one - the risk of damaging the side flanges is too high, damage to which will lead to depressurization of the tire. Due to the peculiarities of installation and dismantling, many motorists find it impossible to repair a tubeless tire with their own hands, especially on the road, not in a comfortable garage, but on the side of the road. And in vain. Of course, it will not be possible to completely eliminate the problem at a professional level without special equipment. But to make sure that the damaged tire still travels, and sometimes not only reaches the tire fitting center, but goes more than one hundred kilometers after an impromptu repair, is quite realistic.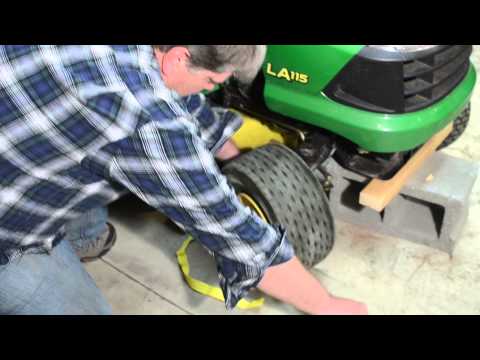 nine0003
To do this, use special tire repair kits, which can be purchased everywhere today by going to any car shop. Better yet, buy everything you need to repair a tubeless wheel yourself separately and always have it ready. By doing this, you will save some money, which is always nice. The fact is that manufacturers of ready-made repair kits, in an effort to make their kits more expensive and solid in appearance, include in them both really useful tools and materials, as well as those that you can easily do without. Using repair kits or separately purchased harnesses and tools, you can repair tubeless tires not only for cars, but also for trucks. This can also be regarded as one of the advantages of tubeless tires over tube tires. It is much more difficult to repair it with a puncture. It is necessary to disassemble the wheel, remove the chamber, find the puncture site, and then degrease the working area, cut out the patch, and seal the rubber balloon. After drying, the camera is installed in place, and the wheel is beaded.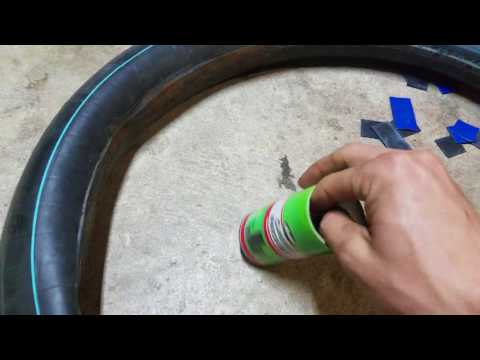 With a tubeless tire, everything is much easier. nine0003
RUNWAY Tubeless Tire Repair Kit, 7-Piece
If you find that your car's tubeless tire wheel is damaged, first assess the severity of the situation. If, in your opinion, you can do without repair, having reached a reliable tire service on periodic pumping of the wheel, then it’s better to do so. Tubeless tires were designed to hold air even with foreign objects sticking out of the cord. But do not forget that riding with a nail or other object in the tire causes the puncture to gradually expand and the tire around the damaged area begins to gradually collapse. nine0003
But, if it so happens that the damage to the wheel received on the road is too extensive, the chamber does not hold air and it will not be possible to complete the journey while inflating the tire, you need to choose the best method of temporary repair and start it immediately. A tubeless tire is repaired in the following ways:
When choosing a repair using a tourniquet, you need to decide what type of material will be used. The harness can be cord or rubber. Let's consider both of these options. nine0003
Wheel repair kit, 6 pieces
Cord harness has found wide distribution as a repair material for tubeless tires. With this harness, you can carry out repairs in any conditions: on a city street or on the side of a country road. It is a strip of high-strength nylon, which is richly impregnated with high-quality rubber-based adhesive. Such harnesses are supplied to the domestic market by many manufacturers, they have certain differences in technical characteristics and cost. But all cord harnesses are installed according to the same type of scheme: nine0003
First of all, they find the place of damage and mark it with wax crayon or another marker.
Remove the item that damaged the tire if it is stuck in the cord.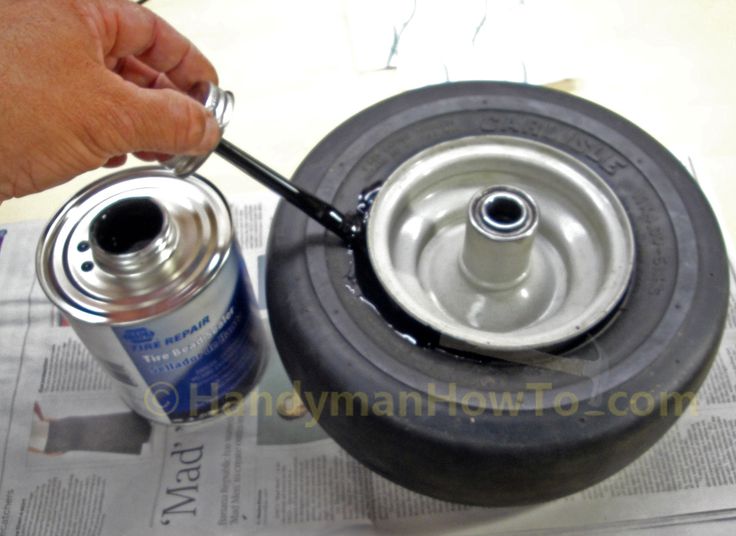
Then you should check the tire pressure, it should not fall below 0.5 atmospheres.
Take a spiral awl and use it to determine at what angle the tire is damaged. nine0003
Apply vulcanizing glue to the awl.
Using the awl inserted into the puncture, coat the puncture site with glue in the most thorough way, for which you need to rotate the tool lubricated with it clockwise. Perform this action three times - lubricate the awl and insert it into the puncture, then leave the tool in the cord for the time being.
Insert the tourniquet into a special needle, focusing on the center.
On both sides, cover the surface of the tourniquet with vulcanizing glue.
Remove the helical awl from the tire where you left it at the puncture site.
Install a pen with a needle and a tourniquet placed inside into the puncture.
By pressing the handle, install the needle with the tourniquet into the puncture, advancing to the stop at a given angle.
Remove the pen with the needle from the puncture site without rotating it.
Carefully cut off the parts of the tourniquet sticking out on the surface. nine0003
Then you need to determine how tight the tire is repaired. This can be done with the help of a special liquid, which is used to determine the puncture site. If, after applying such a liquid, no air bubbles appear, then the tire is temporarily repaired and can be used further. If air bubbles appear, try installing an additional tourniquet in the place of damage to the tire.
This method of temporary repair is inexpensive, but it has proven its effectiveness more than once. A tire repaired in this way without repair will serve you for a long time - up to 6 months. nine0003
A rubber harness costs more than cord, but it is also more reliable. They install it in much the same way as the cord one, but there are still some differences. For example, when installing a rubber band, do not use an awl in the form of a rasp, since it can damage the rubber band during installation. In addition, the rubber band must be attached to the adhesive specified by the manufacturer in the instructions for the repair kit.
Raw rubber band for repairing RUNWAY tubeless tires, 5 pcs
In this case, an anchor is a special type of bundle, one end of which ends with a small patch. The anchor is installed in the same way as other types of harnesses, but in addition, it glues the puncture site with an internal patch. To do this, the tourniquet is pushed inward, and then pulled a little in the opposite direction. Anchor can only be installed using a special cutter with a diameter of 6 mm.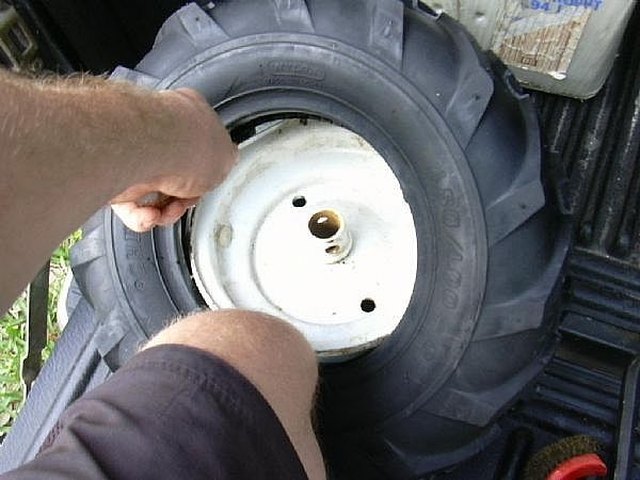 It is purchased separately from the set. But your efforts will surely be crowned with success, because the anchor is considered the most reliable option for repairing a tubeless tire with a harness. But with the help of harnesses, you can not repair side punctures. And in any case, even if the repair is successful, it is necessary in the coming days to choose the time to visit the tire service. Remember that prolonged use of the harness will cause irreversible damage to the tubeless tire. And until the problem is fixed, constantly monitor tire pressure. nine0003
The second option for repairing tubeless tires involves the use of sealant. This option cannot be called optimal, but it has become widespread, since tire repair in this way is carried out very quickly, literally in a matter of minutes. And the result of its implementation is guaranteed to allow you to get to the intended purpose of the trip, without first stopping by the tire service you met along the way.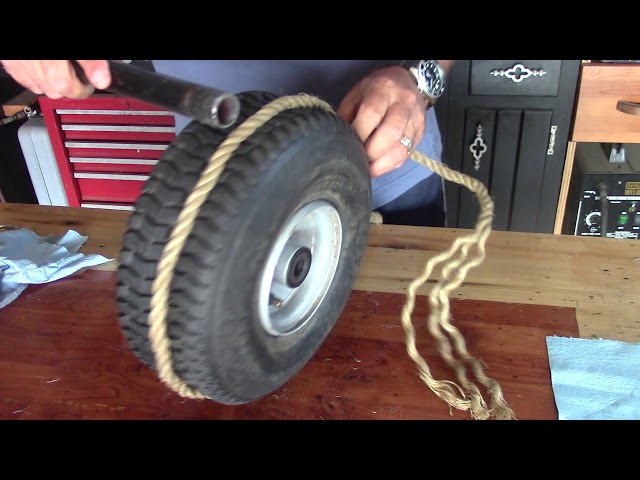
The sealant is very easy to apply. In this case, it is not necessary to remove a nail or other object from the cord, due to which the tire was damaged. Simply attach a bottle filled with sealant to the valve on the rim of the wheel and see that the contents of the bottle are pumped into the wheel. Keep in mind that repairing a tire with sealant will significantly disrupt the balance, so choose a moderate speed. But on the other hand, repairs with the help of a sealant are easy, simple and very fast. You can use it even while standing in a traffic jam. nine0003
Today, you can easily buy different types of sealants. The most widely used gel, liquid, aerosol formulations. Gel ones are good because they can be used all season, both in the summer heat and in the cold season. But at the same time, they significantly worsen the balance of the wheel. Liquid sealants are highly reliable, but they are not very convenient to use. Aerosol compositions make it possible to restore the performance of the wheel without a jack and a pump.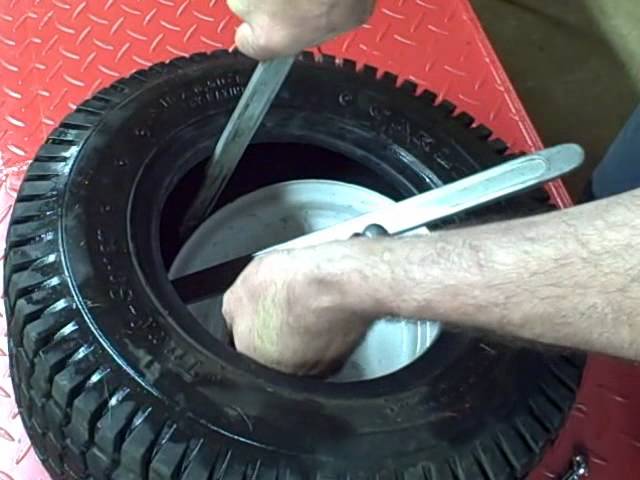 But in the cold winter period, they will not work. If we compare the restoration of a tubeless tire, carried out with the help of sealants and harnesses, cord or rubber, then the latter are considered the preferred option, since they provide a fairly high quality of the repair performed with their help. nine0003
As you can see, do-it-yourself tubeless tire repair is possible, albeit temporary. You just need to stock up on funds for its implementation, without delaying the purchase of harnesses or sealant, because a lot of trouble awaits us on the roads. Meet them fully armed and quickly solve the problem. For guaranteed success, you must strictly follow the recommendations given by the manufacturer of repair materials in the instructions for use.
Car repair,
Each of the drivers may have such a situation when a tubeless tire deflated on the way, but the spare tire was not in the car, or this is already the second wheel for a long road. In this case, there are only two ways out - one way or another, wait for help from others (take the wheel to a tire fitting, call to bring a spare tire, call a tow truck, etc.), or you can repair a punctured tire yourself.
Before moving on to the very topic of the question, it is worthwhile to carefully study all aspects of the operation of tubeless tires, but their widespread use has clearly proved that they have a clear advantage over tube wheels.
The main advantage for the driver is the ease of repair, because if a wheel with a chamber is punctured, it will have to be removed and disassembled in order to remove the chamber, and only then carry out the repair itself, and then you will have to do laborious work (if it is done without special equipment) in reverse order. Tubeless tires, in most cases, can be repaired without dismantling the wheel, and without even removing it from the car. nine0003
In addition, when punctured, a tubeless tire deflates for a long time, and sometimes drivers ride with several nails or self-tapping screws in the wheel without noticing the problem for up to several months. Therefore, if necessary, you can pump up a wheel with a puncture and have time to get to the nearest tire service.
However, there are several nuances that complicate operation. For example, with a strong impact on the edge of a pit or a curb, the tire can depressurize and instantly deflate, or if the wheel is not completely deflated, it can disassemble during a turn, which will lead to an instant descent. nine0003
Also, such a wheel is very difficult to inflate with a conventional pump or a mobile compressor, if it is disassembled (flew off the disk), in this case a professional compressor with high pressure is needed.
Usually, this procedure is not too difficult, and the puncture site is easily detected by visual inspection due to the culprit of the damage, which remains in the tread.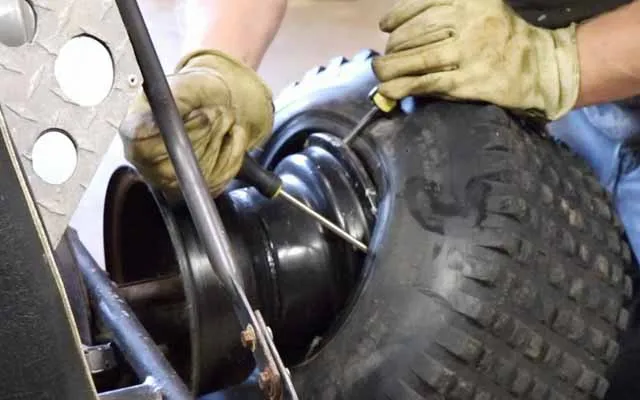
Alternatively, a soapy solution of any soapy liquid or plain water may help. By pouring on the tire with our “puncture indicator”, you can quickly find the required place by the emerging air bubbles. nine0003
But in the case when there is no soap or water, you have to carefully inspect the tire, while listening to hissing and trying to find the puncture site with your hand. This method helped me repeatedly in deaf and deserted places.
Using a special sealant for repairing tubeless tires is the easiest and fastest way to repair a wheel and get to a professional tire shop. If you do not have such a can, then we advise you to buy it, sooner or later - it will save your nerves, time and mood. nine0003
And so, if there is a nail or screw left in the tire, then it should not be taken out immediately, first we connect the bottle with sealant to the nipple and if the bottle is new, then we completely inflate the wheel, if there is already insufficient pressure left in it, then before repair will need to pump up the wheel to at least 1 atmosphere.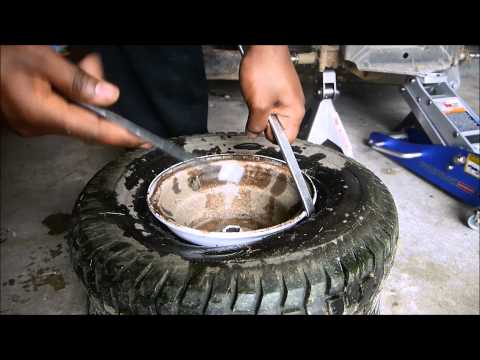
After the sealant is pumped into the wheel, it is necessary to remove the foreign object, and the sealant under air pressure will seal the puncture site from the inside, but remember that this method of repair is temporary, and it will last for about 100 km, which is enough for a visit tire fitting. nine0003
It should also be remembered that the use of sealant disturbs the balance, and you cannot drive fast on such a wheel, the safest speed will be about 60 km / h.
This method is the most correct for emergency road repairs. Similar kits are sold in any automotive store, and even in any large supermarket. The kit usually includes a special awl to expand the puncture, a hook for the lace, the laces themselves with bituminous impregnation and, in some cases, glue. nine0003
Before carrying out repairs, in order not to spoil the integrity of the cord (the inner hard part of the wheel made of steel wire and nylon thread), it is worth reducing the pressure to 1 atmosphere. Then you should use an awl to clean and widen the hole, without which you will not be able to insert the lace. But you should not immediately remove the awl from the hole, otherwise the tire will release all the pressure and insert the lace will not work.
Then you should put the cord into the eye of the hook, distributing it equally on each side, after which the awl is taken out and the hook with the cord is put into the hole formed, here you should treat the action carefully and not overdo it. The lace should go into the tire about half or a little more (the sealing harness should be folded in half). nine0003
After that, it is necessary to pull out the hook with one sharp movement, while the tourniquet will remain in the tire. Repair can be considered completed after cutting off excess pieces of lace and pumping the wheel to the required pressure.
It is worth noting that when using high-quality sets, this repair is considered to be complete and the puncture will be securely closed until the end of the wheel's service life. The only thing that may be required is balancing.
However, if the damage to the wheel is serious, then you will have to take care of buying a new tire. Recall that it is forbidden to repair cuts on the wheel, such a wheel is no longer allowed for operation even as a spare. Therefore, it is better to choose a cheaper tire than to pay for the repair of a cut, especially since today you can choose a new wheel even through your phone or from your home computer by visiting a specialized website. For example, one of these sites is the online store of tires and disks Internet-shina.ru at http://www.internet-shina.ru. nine
© 2007-2022.
The CarsWeek online publication was registered with the Federal Service for Supervision of Communications, Information Technology and Mass Media (Roskomnadzor) on April 25, 2017.
Registration certificate EL No. FS77-69477. Founder: Sergey Grigoryevich Bogachkov.