A flat tire on an electric scooter can stop the fun your kids are having by riding it. However, you can bring the fun back by simply replacing the tube or the wheel. In this article, we are discussing how to fix a flat tire on Razor Electric Scooter E100 and E300.
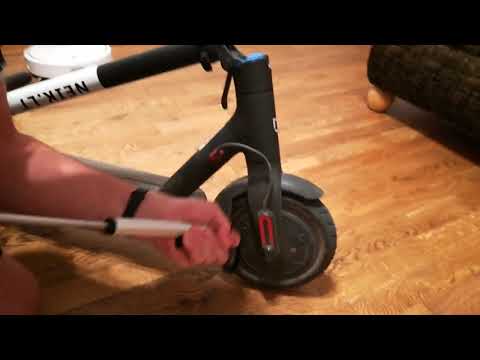
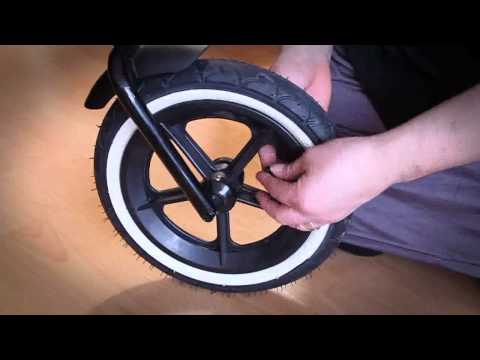
II. Tips before you attempt disassembling anythingStep 1. Use two 5 mm Allen keys, loosen the axle bolt, and take out the front wheel. Place the fasteners safely.
Note: ElectricScooterCritic.com is reader-supported. When you buy through links on our site, we may earn an affiliate commission at no added cost to you.
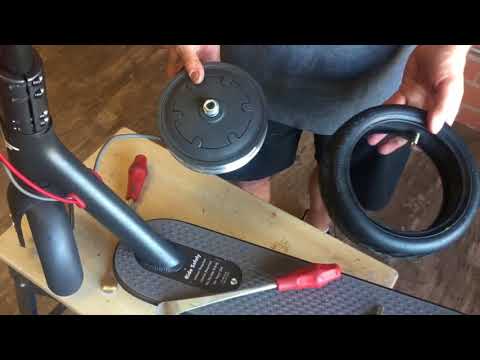
Step 2. To take out the tube, you have to disassemble the hub. The hub has two parts (upper and lower) fastened together by 4 screws. Remove the screws and take out the hub. Take out the old tube and examine the tire for the source of puncture and remove it.
Push the new tube into the tire, inflate a little and ensure the tube is completely inside the tire. Assemble the hub and mind the location of the valve stem. Tighten the screws.
Inflate the tire to the correct pressure and assemble the wheel onto the scooter. Now you are ready for a test ride.
Note: If the tire is damaged, it is better to replace the complete wheel.
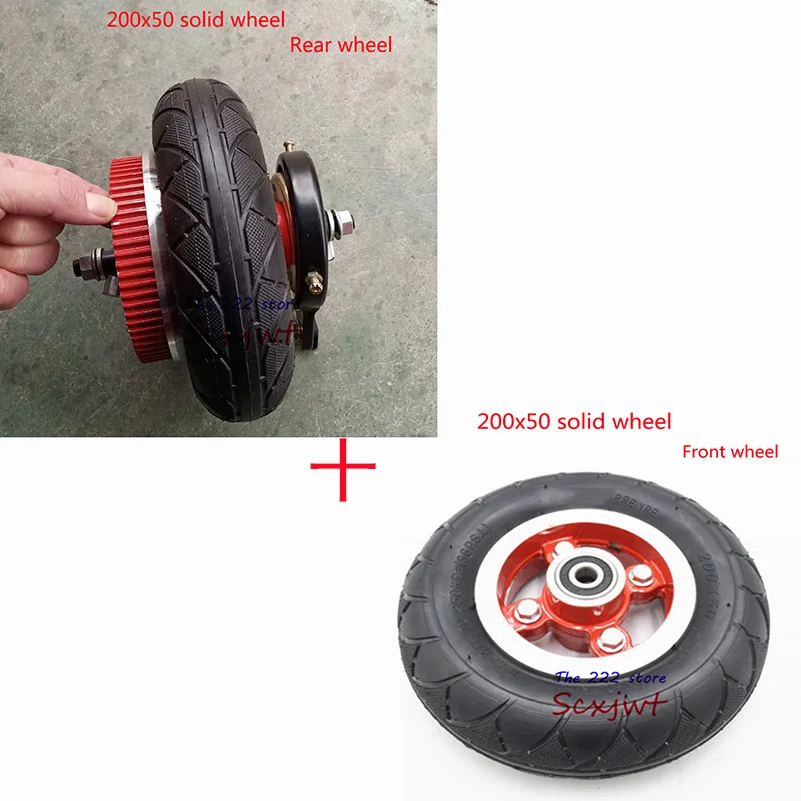
Rear wheelThe rear wheel of Razor E100 is made of Urethane and there is no tube. If there is damage to the rear wheel, the whole rear wheel with the hub motor must be replaced. You can take out the wheel by following the steps below:
Step 1. Remove the deck plate and battery strap. Use a Philips screwdriver to remove the six screws on the deck plate and take it out. The screws may be of different sizes, so keep them in order.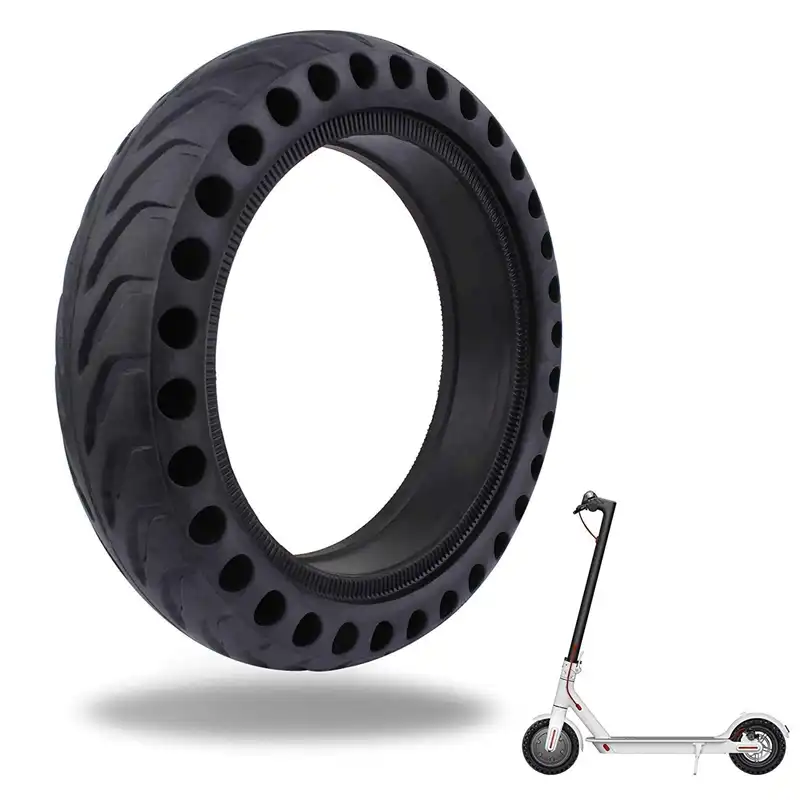 Using the same Philips screwdriver, remove the two screws and take out the battery strap. Keep the screws in order.
Step 2. Disconnect the battery from the control module and take out the battery with due care. Disconnect the motor wire connection with the control module.
Using a pointed rod, depress the connector tabs and remove the wire from the connector. Pull the wire out of the battery space.
Step 3. Use a Philips screwdriver and remove the three screws that have fastened the motor housing to the left side frame.
Step 4. Use a 13 mm size wrench and loosen the locknut on the outer right side frame. Take the help of another wrench to prevent the rotation of the inside locknut.
Now you can take out the damaged rear wheel with the hub motor and replace it with a new rear wheel with a hub motor. Take the reverse steps and reassemble. Make use of the photos you took before disassembling.
You can download a PDF copy of the owner’s manual for Razor Power Core E100 from this link.
Step 1. Use two 17 mm wrenches to loosen and take out the lock nut, 2×washers, and spacer from the left and right side. Take out the wheel and the front axle bolt. Keep the fasteners safely in order.
Step 2. Unfasten the four screws using a Philips screwdriver and disassemble the hub upper and lower parts. Take out the old tube, examine the inner tire surface for pin or nail, remove it, and fit the tube into the tire.
You can inflate the tube a bit and it goes inside. Ensure the tube is not projecting out of the tire and assemble the hub. Inflate the tire to the correct pressure.
Assemble the wheel back and refer to the photos you have taken for reference.
Note: If the tire is damaged, it is better to replace the complete wheel.
Step 1. Use a Philips screwdriver and take out the chain guard. Keep the two screws safely.
Step 2. Use an Allen wrench and detach the brake cable from the brake.
Step 3. Use two 8 mm wrenches and loosen the brake housing anchor and disconnect it from the wheel. Keep the fasteners together.
Step 4. Use a 10 mm wrench and loosen the two numbers of axle adjuster screws (counterclockwise) equally by 5 turns.
Step 5. Use two 17 mm wrenches to loosen the axle, slide the wheel forward and loosen the chain. Remove the wheel, disassemble the axle and the fasteners and keep the axle and fasteners in order.
Step 6. Remove the brake drum by turning it counterclockwise. You can use a screwdriver, a small hammer, and use the hole on the brake drum to hammer it counterclockwise. Remove the brake drum, disassemble the hub by unfastening the 4 screws.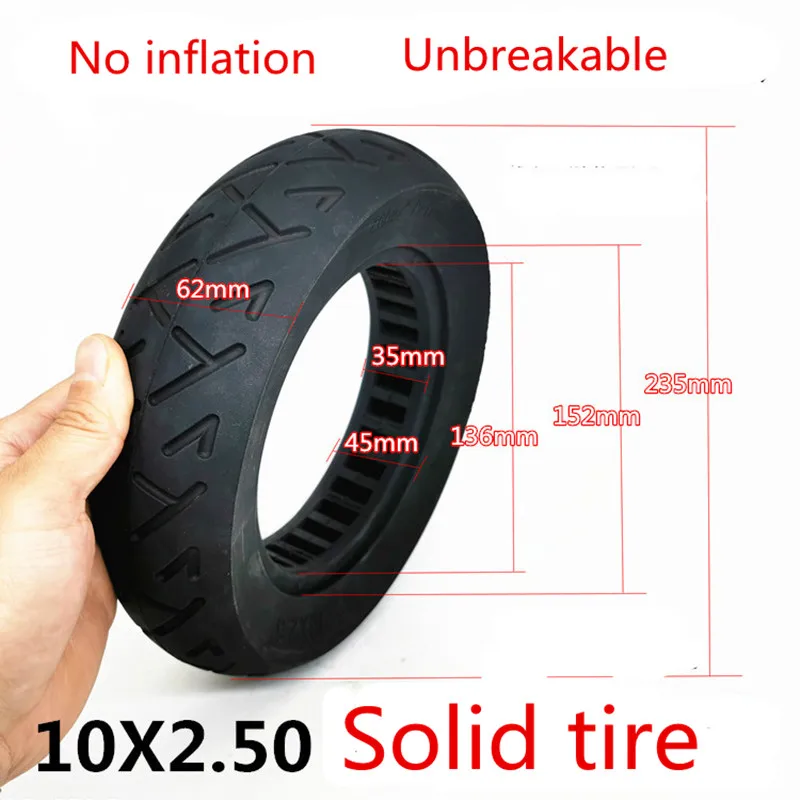
Take out the tube. Examine the tire for pins or nails. Push the tube inside the tire properly and you can inflate it a bit to ensure it is completely inside. Assemble the hub and brake drum (mind the location of valve stem). Inflate the tire to the correct pressure.
Assemble back the wheel by referring to the photos. Test ride.
Note: If the tire is damaged, it is better to replace both tire and tube.
You can download a PDF copy of the owner’s manual for Razor E300 from this link.
YouTube videosV. ConclusionA flat tire on an electric scooter may happen at any time. It is better to be ready with the spare kit, and the tools, so that replacement can be done immediately.
Cooperation
Comprehensive electric scooter reviews from all of the top manufacturer brands.
Razor is a renowned worldwide leader in electric scooters.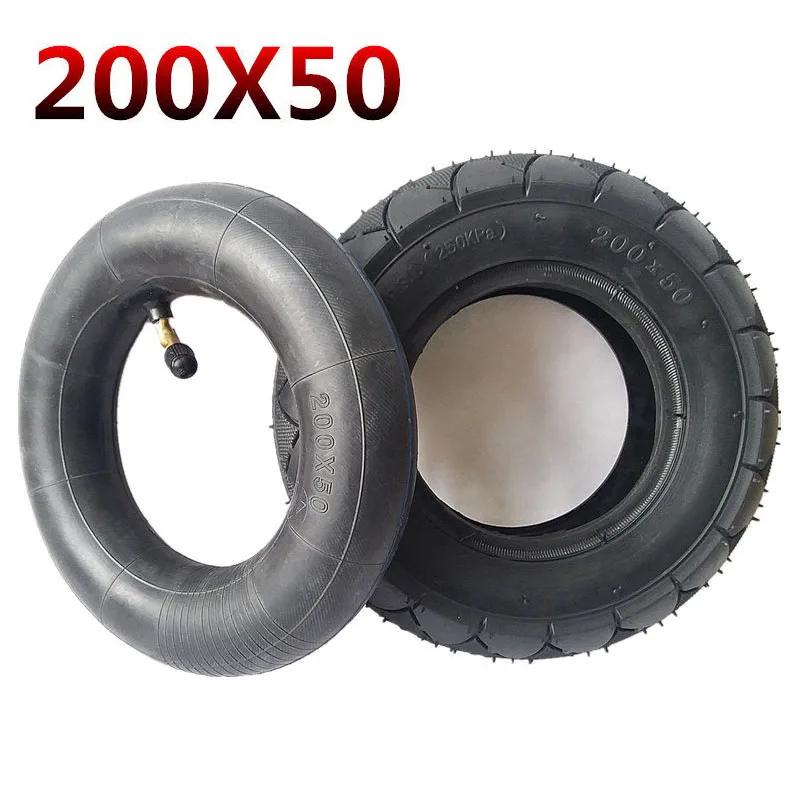 Since 2000, they have sold more than 15 million electric scooters. Due to their unique technology and features, they have become global experts in electric scooters innovation.
Razor believes commuting from one place to another should be both fun and practical. From manual scooters to skateboards, from hoverboards to electric scooters, they ensure people experience a fun ride with every product they bring into the market.
However, even the best scooter in the market is of no use if your tires wear out or go flat. If you are looking for repair or replacement of your tires, this guide is for you. In this write-up, we will discuss how to get a replacement tire for a Razor electric scooter.
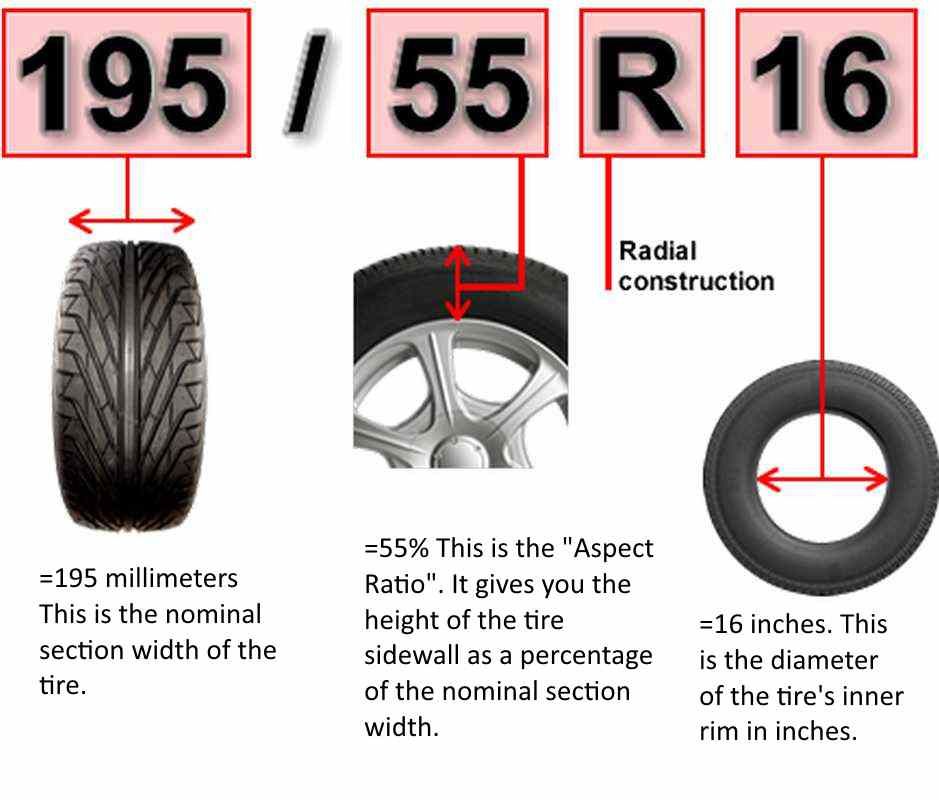
But before we get into the detailed guide on replacement, you must know some basics about the tires offered by Razor. As we all know, Razor comes with various models of electric scooters. Every model has different types of tires.
So here are two types of tires that are primarily used in the production of Razor electric scooters.
Pneumatic tires are air-filled tires. Razor Eco-Smart motor, E300, E200 are popular Razor electric scooters that are fitted with pneumatic tires.
Overall, Razor electric scooters that are constructed with pneumatic tires perform better as compared to solid tires. This is because air-filled tires are more efficient and offer better traction and balance.
Most tires you see on Razor electric scooters are pneumatic tires. All pneumatic tires are made of flexible rubber, and to maintain their structure, air pressure is required. There is a valve stem either on the side or center of the wheel used to fill the air in the tire. There are two subtypes of pneumatic tires: tubeless and inner tube tires.
Tubeless pneumatic tires are rare on electric scooters. Such tires have an airtight seal over the tire rim. Tubeless tires are more heavy-duty, puncture-resistant, and high performance. Generally, only expensive electric scooters are equipped with tubeless tires.
Inner tube tires on electric scooters are common. They have an outer shell with treads that touch the road when you are riding the scooter. Inside the outer shell, an inner tube has a valve system that holds pressurized air. These tires are easy to manage when you get a flat. All you need is to replace the inner tube.
The three significant benefits of pneumatic tires are better cushioning, better traction, and lower friction.
Lower rolling friction means that the tires lose less energy as they roll on the ground. There will be better mileage and better speed with pneumatic tires.
Better cushioning is due to air pressure in the tubes. They can absorb bumps in the road better.
Better traction allows you to stop quickly when sliding. Also, these tires offer better traction on wet roads.
There are two disadvantages of Pneumatic tires: maintaining tire pressure takes a lot of work, and these tires are easier to become flat. The most common complaint that a rider comes with pneumatic tires electric scooters is a frequent need to replace the tires.
Solid tires are made from either rubber or foam. The solid rubber provides integrity, which makes them more durable than pneumatic tires. Solid tires are immune to punctures and never get flat like pneumatic tires.
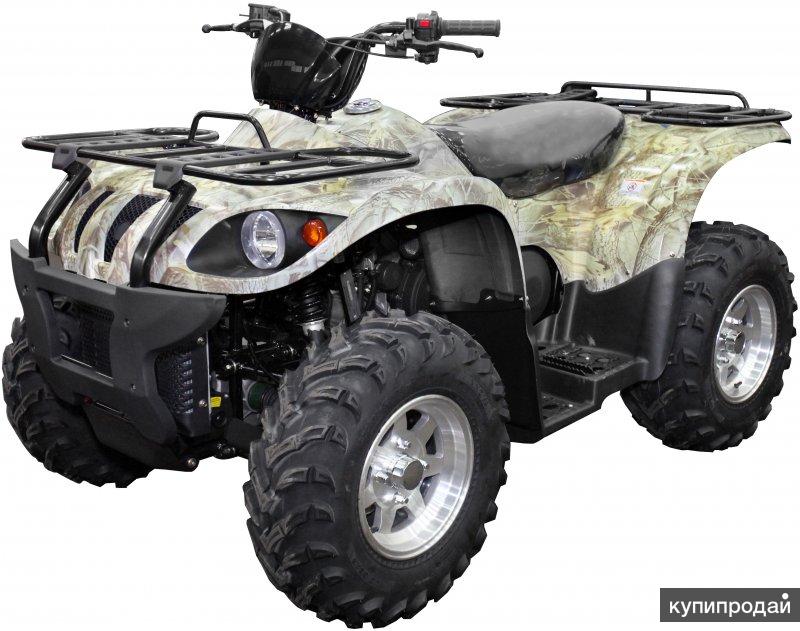
The Razor Dirt Quad SX McGrath is equipped with solid tires, which are tough to change and require the entire wheel to be replaced. They never go flat from getting punctured. They are often made of hard plastics that wear down quickly. There are two types of solid tires: honeycomb and filled tires.
Honeycomb tires have an internal design like a honeycomb that offers structural integrity and keeps the weight down. These tires offer more cushioning and tend to be lighter than pneumatic tires.
Filled solid tires are stiffer and heavier than other tires.
The primary benefit of solid tires is that they never flatten, and there is no need to maintain air pressure. They are also less expensive than pneumatic tires.
Disadvantages of solid tires include poorer traction and lower performance relative to pneumatic tires.
If you are looking for a replacement for your Razor electric scooter’s tire, then you should know what the process is and from where you can quickly get a replacement. Here, we will explain where you get a replacement tire for a Razor electric scooter.
To get a replacement tire for Razor electric scooter, you can visit the official website to learn about the quality and price of the tire you are looking for.
Whether you want pneumatic or solid front or rear tires, Razor gives you the convenience of getting your replacement tires all in one place, right from the scooter’s manufacturer.
As we all know, Amazon is a worldwide shopping platform that has everything from electric scooters to its spare parts. It is also a great place to get a replacement tire for a Razor electric scooter. For example, if you are looking for Razor E200 Electric scooter tires, buying TOPEMAI replacement tires (ASIN: B07h5NLNDB) is a great option. All you need to do is check your tires’ product model number and size before look up a replacement tire for your electric scooter.
Like Amazon, Walmart is a retail and online shopping platform where you can buy most anything you want. When it comes to replacement tires for Razor electric scooters, Walmart has almost every model and every size tire. To order tires online, you need to filter the search first with your model number, tire size, and types of the tire like pneumatic or solid, and there you proceed with the replacement of Razor electric scooter’s tire. You can also visit your nearest Walmart and go to the tire section to see the selection available there.
Monster Scooter Parts is an online retail shop that specially sells vehicle accessories and replacement parts.
Whether you are looking for a Razor E200 electric scooter rear-wheel or tube set for MX 400, you can always count on the website for high-quality and durable replacements at an affordable price. The website also comes with a return and money back policy; if you are not satisfied with the size or material of the tire, you can rely on their return policy.
When you need a replacement tire for a Razor electric scooter, you can visit the Electric Scooter Parts store and look at its website. It is an employee-owned company that specializes in selling electric scooter parts.
eBay is an online selling platform that also offers electric scooter parts. Regardless of the brand, you will find most every spare part and tire for an electric scooter on the website. This is another good source for getting a replacement tire for a Razor electric scooter, but make sure to check the shipping costs before you put through your order.
Before we get into replacing Razor electric scooter tires, solid tires and pneumatic tires have different replacement processes. Replacing solid tires is much more difficult compared to replacing pneumatic tires.
There are three ways to fix a flat tire of your Razor electric scooter.
The first method involves:
The first method is a bit complicated in some models as sometimes removing tires means removing many parts around the wheel. If this is the case, try the second method, fixing the tire without removing the tires.
The third way is to go to a professional to fix a flattened tire.
Tires are an essential component of an electric scooter, and they have to be intact and in proper condition to ensure a smooth ride. Whether you want to replace your Razor electric scooter tire or repair it, this article is intended to help you move ahead for your tire change and we hope it is helpful to you.
Razor A5 Air: scooter with inflatable wheels
04/06/2017
In Russia, off-road transport has always been very relevant: it is not always clear with us whether the road is ahead or not, the direction.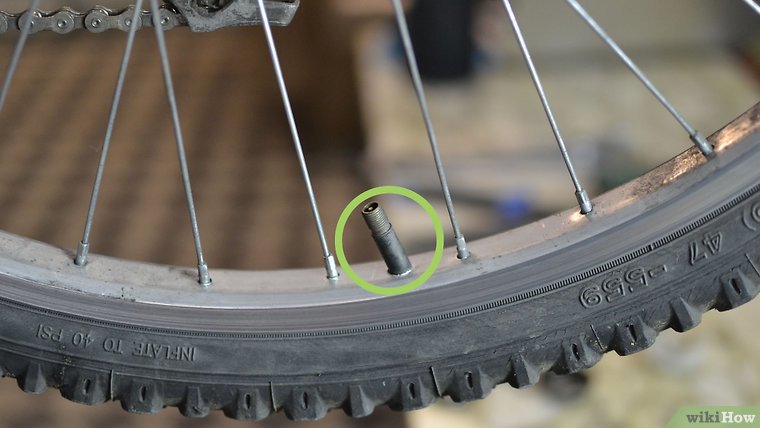 Accordingly, the novelty of 2017 from Razor - a folding off-road scooter - will take root in Russia!
Our newcomer boasts large inflatable wheels and features like this:
| Rider age: | From 7 years old |
| Rider height: | From 100 to 200 cm, for children and adults |
| Load capacity: | Up to 100 kg |
| Scooter weight: | 5 kg |
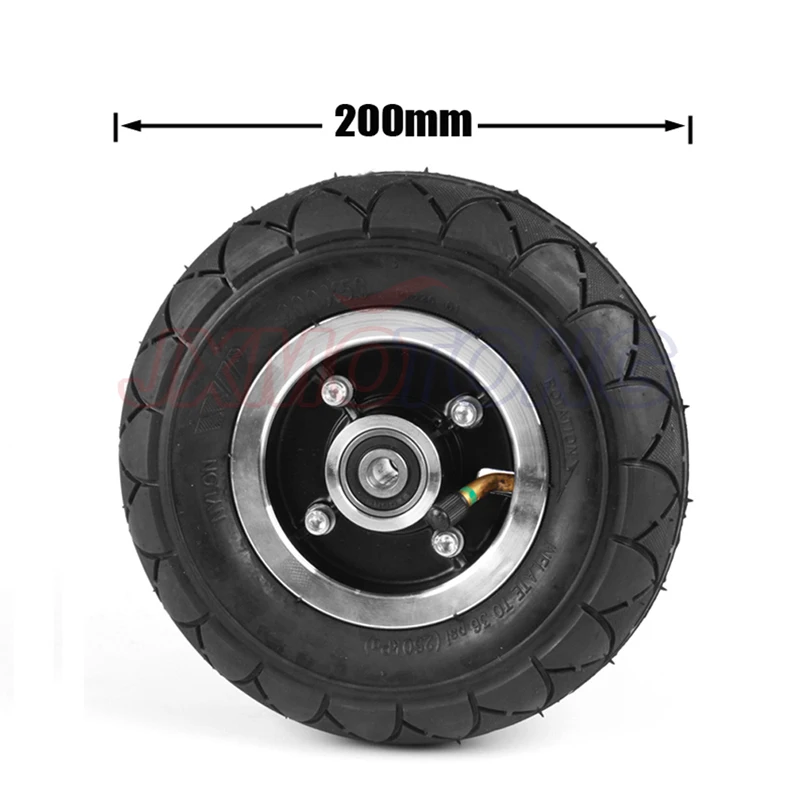
| Wheels: | nine0015 200 mm, road tires, 4 bar|
| Clearance | >3.5 cm |
Judging by this plate, the model looks like a real savior angel! Lightweight, comfortable and with inflatable wheels - definitely a cool choice for Russian roads.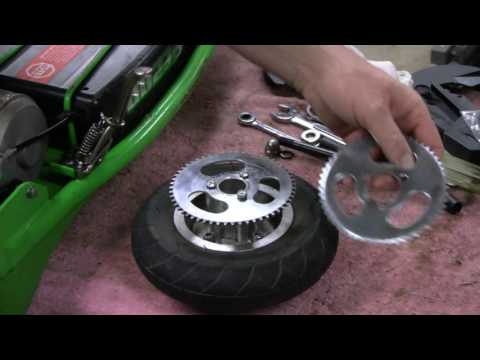 But, let's take a closer look at the newcomer.
In fact, this is the same super popular A5 Lux – the scooter that conquered the world. It's just that now it has received several significant upgrades and changes. Let's go details:
 The only difference is with a minus sign, but the minus is small. The scooter has gained a kilogram of weight, “having grown fat” up to 5 kg. Taking into account off-road specifics - not critical.
 On this, the differences, in general, end: otherwise, we have a well-known A5 Lux. And it's wonderful!
First of all, of course, to the wheels. They are moderately wide, with a pronounced tread - they look quite tenacious. Most likely, the scooter will still fall into wet sand or a serious abyss, but a beginner should cope with country roads and dirt roads without problems.
Next: handles. We conscientiously twisted them in different directions, and then gave the scooter a good knock on the floor - no characteristic clang was heard. On A5 Lux, he also did not always appear immediately, but so far everything looks as if Razor really solved this problem. nine0003
The next object of attention is the folding mechanism. It has one additional screw, on the rider side: a small valve. Twist it, and the backlash disappears. This thing works! It spins, by the way, quite easily and naturally, and the child can handle it.
Otherwise, the inspection turned out to be absolutely boring and uninteresting: the usual impeccable Razor, there is nothing to complain about. A metal frame, a tight-fitting fender brake, non-slip grips, an abrasive deck pad ... We have already seen all this in the A5 line, and we are happy with all this, but changes are interesting, not the usual solutions. Test drive time! nine0003
Fun fact: The Razor A5 Air is the first American scooter that we couldn't ride out of the box. First, I had to pump up the wheels - they were not deflated, but there were clearly no 4 atmospheres there either.
We didn't even want to test the Air on ordinary asphalt, but we did it. They noted the expectedly reduced roll, a drop in speed - the usual symptoms for the transition to "pneumatics". In general, when compared with the A5 Lux, the model has become more calm: it accelerates very smoothly, smoothly enters turns, smoothly exits them . .. It only slows down sharply: the wing brake, as usual, works out very hard, short black stripes remain on the pavement. nine0003
Briefly reporting on the asphalt and putting a tick for patience, they rushed to the pavement. We decided to skip paving slabs for the time being - we will return to it later. And the impressions from the paving stones are extremely positive: he just swallows it! If on the A5 Lux it shakes so that the teeth clang, then on the Air it feels closer to a sea cruise: it gently shakes up and down. We were waiting for the Razor inflatable wheel scooter to be good, but it's one thing to just wait and another to try.
Really shook only on the gentle stairs, but it's more like a category of "stunts" than regular skating. The handles, by the way, did not rattle, there was no steering play - the flight was normal. In general, the scooter goes absolutely silently, only the tires rustle. nine0003
The only thing to note: the clearance has not increased, but even decreased by half a centimeter! A5 - even with the Air prefix - is still not designed for storming holes and speed bumps, and even less so for jumping over curbs. Be careful.
Having quickly swept across the paving slabs (it even stopped rocking), we are in a hurry to off-road. We did not expect special miracles on rough terrain, but still. And for starters - wet gravel.
Riding has become noticeably more difficult, you have to push off much more often, but the scooter still treats the road with amazing indifference. Gravel? Let's go gravel! The situation was more complicated with sand: you can ride, but it requires serious effort. Plus, we got stuck a couple of times. nine0003
After returning to the usual country road (well-packed earth, mud in places), the process returned to its usual course. To be honest, it was on a country road that the difference with the city was generally minimal - the impressions are the same as from paving slabs.
The scooter has a 7-year limit, but in fact a five-year-old fidget can handle it. The steering wheel is only a centimeter higher than that of the classic A5, the clearance is even lower - the child quickly masters. But... We still do not recommend Air for children. nine0003
This model is too quiet, it is focused on getting from point A to point B with maximum comfort. Young riders prefer speed, then jumps and tricks are added to the speed ... The A5 Air is not designed for this.
If you take it for yourself, it is quite possible to let a child ride, but if you choose a scooter specifically for a child, there are more suitable models.
Driving on paving stones and tiles, gravel and earth left a strictly positive impression. At the same time, the scooter remained compact, you can easily take it with you anywhere, and we didn’t notice the “extra kilogram” at all. If you like to ride in silence and comfort, if you constantly have to ride on difficult roads, A5 Air is exactly what you need! nine0003
Featured Products
A5 Air
The new model has a number of pleasant innovations: firstly, the handles on the steering wheel will no longer rattle, and secondly.
A5 DLX
The new version of the A5 DLX (Deluxe) scooter now has a new folding mechanism that completely eliminates..
10 990₽
nine0132 A6Do you often move around the city and want more traffic? Due to the large wheels with a diameter of ..
15 990₽
Sale
Lil Pop
Luminous scooter for girls
2 990₽
4 490₽
Lil Tek
Luminous scooter for boys
2 990₽
4 490₽
report this ad
report this ad
hour (5 km/h). Please read and understand this entire manual before allowing your child to use this product! Contact Razor for help. WARNING: Riding an electric scooter involves potential risks, so care must be taken. Like any other riding product, an electric scooter has inherent hazards associated with its use (for example, sample, falling or getting into a dangerous situation). WARNING: PARENT AND ADULTS RESPONSIBILITY AND SUPERVISION REQUIRED: Since products such as electric scooters can and do pose a potential hazard clearly associated with their use, it is generally recognized that PARENTAL RESPONSIBILITY SHOULD BE SELECTED WHEN SELECTING PRODUCTS APPROPRIATE FOR YOUR DEVICE SITUATIONS IN WHICH CHILDREN OF DIFFERENT AGES MAY HAVE ACCESS TO THE SAME RIDING Aids Not every product is suitable for every age or height of a child, and different age recommendations can be found within this category of products, which are designed to reflect the nature of the hazards and the expected mental or physical abilities of the child to deal with the dangers. The recommended minimum rider age is 8 years and over. . Any rider who cannot fit comfortably on a scooter should not attempt to ride it. A parent's decision to allow their child to ride this product should be based on their maturity, skill, and ability to follow the rules. Keep this product out of the reach of small children and remember that this is for use only by persons who are at least fully comfortably and competently control the scooter. Persons with any mental or physical condition that could make them vulnerable to injury, impair their physical dexterity or mental ability to recognize, understand and follow safety instructions, and be able to understand the hazards associated with using the scooter, must not use or be allowed to use products that do not match their abilities. People with heart, head, back or neck problems (or who have previously had surgery on these areas of the body) or pregnant women should be warned against using these products. DO NOT EXCEED 120 lb (54 kg) WEIGHT LIMITS. The weight of the rider does not necessarily mean that the size of the person is suitable or maintain control of the scooter. CHECK AND MAINTAIN SCOOTER Do not activate the speed controller on the handle unless you are on the scooter and in a safe environment suitable for riding. nine0181 The electric scooter must move at least 3 mph (5 km/h) before the motor turns on.  Accelerate the engine to a speed of at least 3 mph (5 km/h) by depressing the throttle to start the engine. nine0003
DO NOT RETURN TO THE STORE.
The illustrations in the manual are for demonstration purposes only.
Illustrations may not represent the exact appearance of the actual product.
Specifications subject to change without notice.
Please have your product and 19 digit Product ID with you.
before contacting Razor for warranty assistance and/or replacement parts.
Product ID: _____________ - ____________ - ____________ SAFETY PRECAUTIONS
 Like any other riding product, electric scooters can and are designed to move, and so of course it is possible to lose control or otherwise get into dangerous situations. Both children and adults in charge of their supervision should be aware that in such cases the rider can be seriously injured or killed even if protective equipment and other precautions are used. RIDE AT YOUR OWN RISK AND USE THE GENERAL SENSE. nine0003
  nine0003
 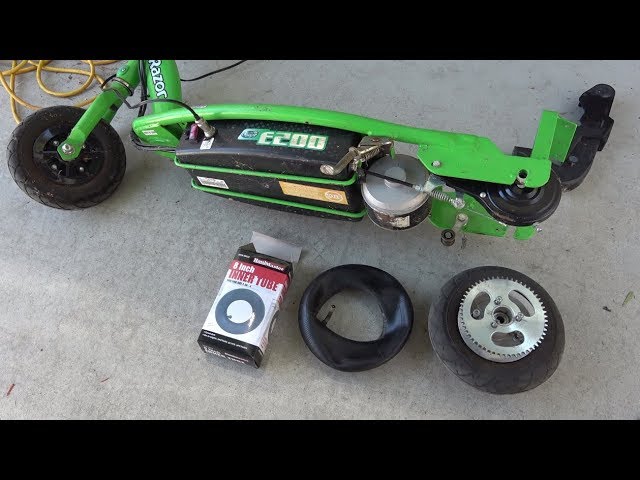 nine0003
Ensure all chain guards or other covers and guards are in place and in working order before use. Make sure the brake is working properly, that the tire is properly inflated and has enough tread left. The scooter should be serviced and repaired according to the manufacturer's specifications using only manufacturer approved replacement parts, and the original manufacturer's design and configuration should not be altered. nine0187 ACCEPTABLE RIDING PRACTICES AND CONDITIONS
Always check and comply with all local laws and regulations that may affect where the electric scooter can be used. Store safely away from vehicles and traffic at all times, and only use where authorized and with care.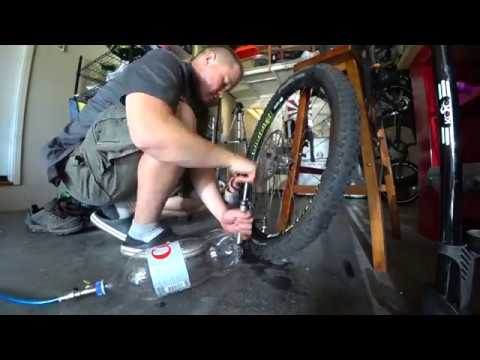
The normal top speed of this scooter is approximately 10 mph (16 km/h), which may vary depending on conditions such as rider weight, grades, tire inflation and battery level. Avoid excessive speeds that may be associated with descent.
Always keep your hands on the steering wheel. Do not touch the brakes or the motor of the scooter during use or immediately after riding, as these parts may become very hot. nine0003
Control a defensive ride. Beware of potential obstacles that could snag on your wheel, causing you to swerve suddenly or lose control. Be careful to avoid pedestrians, skaters, skateboards, scooters, bicycles, children or animals that may get in your way, and respect the rights and property of others.
The electric scooter is designed for use on flat, dry surfaces such as pavement or level ground, free from loose debris such as sand, leaves, rocks or gravel. nine0187 Wet, slippery, bumpy, uneven or rough surfaces can reduce traction and lead to possible accidents. Do not ride the scooter in mud, ice, puddles or water. Beware of potential obstacles that could snag your wheel, causing you to swerve suddenly or lose control. Avoid sharp impacts, drain gratings and abrupt surface changes.
Do not attempt or perform tricks or stunts on your electric scooter. The scooter is not designed to withstand abuse resulting from misuse such as jumping, curbing or any other tricks. Racing, stunt riding, or other maneuvers also increase the risk of loss of control or may cause uncontrolled actions or reactions from the rider. nine0003
Never allow more than one person to ride the scooter.
Do not drive at night or in restricted visibility.
Never use near steps or pools.
Keep hands, feet, hair, body parts, clothing, or the like away from moving parts, wheels, or transmission chain while the engine is running.
Never use headphones, cell phones or text messages while driving.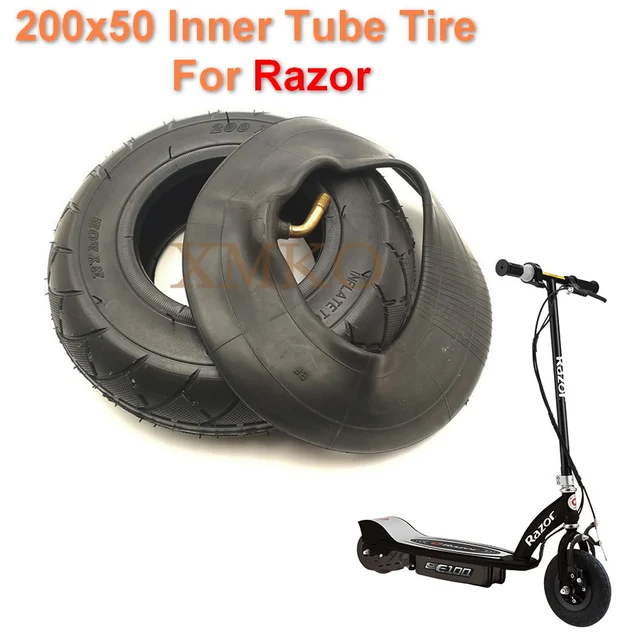
Never drive a car. nine0187 Do not ride the scooter in wet or icy weather and never submerge the scooter in water as electrical and drive components may be damaged by water or create other possibly unsafe conditions. Never risk damaging surfaces such as carpet or floor when using the electric scooter indoors.
RIGHT CLOTHING FOR RIDING
Always wear appropriate protective equipment such as an approved crash helmet (with chinstrap securely fastened), elbow and knee pads. A helmet may be required by law in accordance with local laws or regulations in your area. A long-sleeved shirt, long trousers and gloves are recommended. Always wear athletic shoes (lace-up shoes with rubber soles) and keep your laces tied and out of the way of the wheels, motor and drive system. Never ride barefoot or in sandals. nine0003
USING THE CHARGER
The charger supplied with the scooter should be checked regularly for damage to the cord, plug, housing and other parts.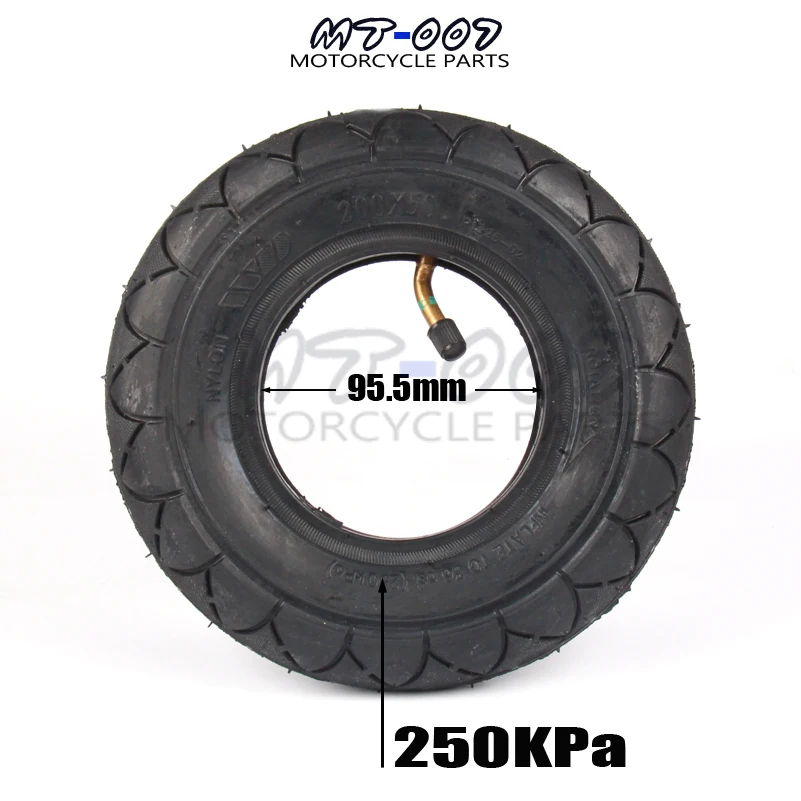 In the event of such damage, the scooter must not be charged until the charger has been repaired or replaced.
Use only the recommended charger.
Be careful when charging.
The charger is not a toy. The charger must be used by an adult. nine0187 Do not use the charger near flammable materials.
Unplug charger and unplug from scooter when not in use.
Before wiping and cleaning the scooter, always unplug it from the charger using a d.amp cloth.
LACK OF GENERAL SENSE AND THE ABOVE WARNINGS FURTHER INCREASES THE RISK OF SERIOUS INJURY. USE AT YOUR OWN RISK AND WITH APPROPRIATE AND SERIOUS ATTENTION TO SAFE USE. USE CAREFULLY. nine0003
Remove the contents from the box. Remove the dividers that protect components from damage during shipping. Inspect the contents of the box for scratches on paint, dents, or kinks in cables that may have occurred during shipping. Since the scooter is 95 percent assembled and packaged at the factory, there should be no problems even if the box has a few scars or dents.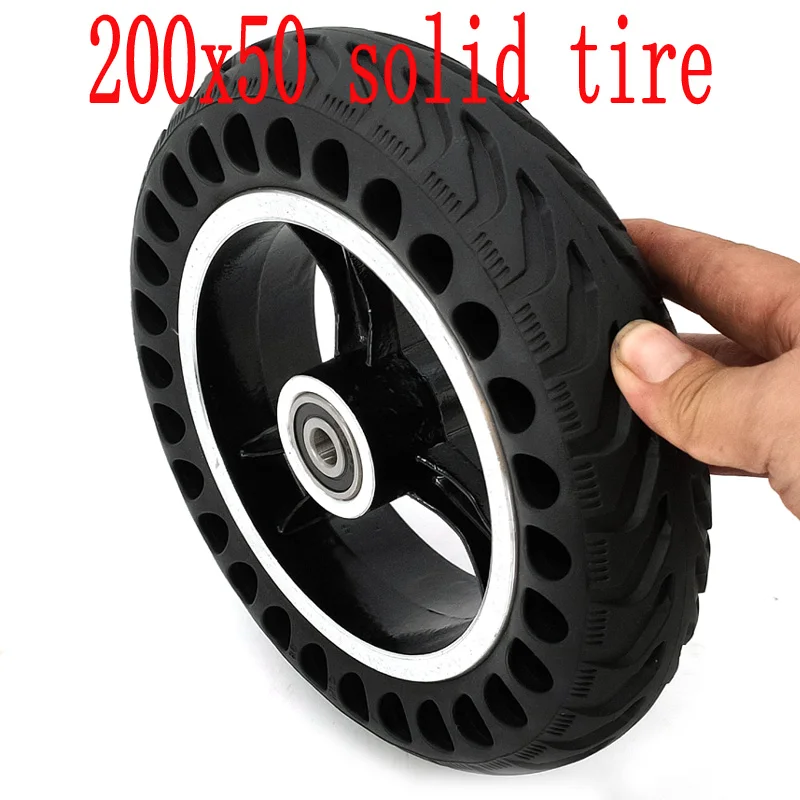
ENSURE POWER IS OFF BEFORE CARRYING OUT ANY ASSEMBLY OR MAINTENANCE. nine0182 .
Estimated assembly and setup time
Razor recommends assembly by an adult experienced in bicycle mechanics. It takes up to 10 minutes to assemble, not counting the initial charge time. Charging takes up to 12 hours.
WARNING: SHAVING PRODUCTS DO NOT BE USED WITH ELECTRIC SCOOTER. The scooter was built to Razor's specific specifications. The original equipment supplied at the time of sale was selected based on its compatibility with the frame, fork and all other parts. Some aftermarket products may not be compatible and will void your warranty. nine0003
Note: Electric scooter must move at least 3 miles per hour (5 km/h) when using the throttle to start the engine.
The location of products identifiers:
(see location on the left)
Need help? Visit our parts website, product support, a list of US authorized service centers, and support contact information.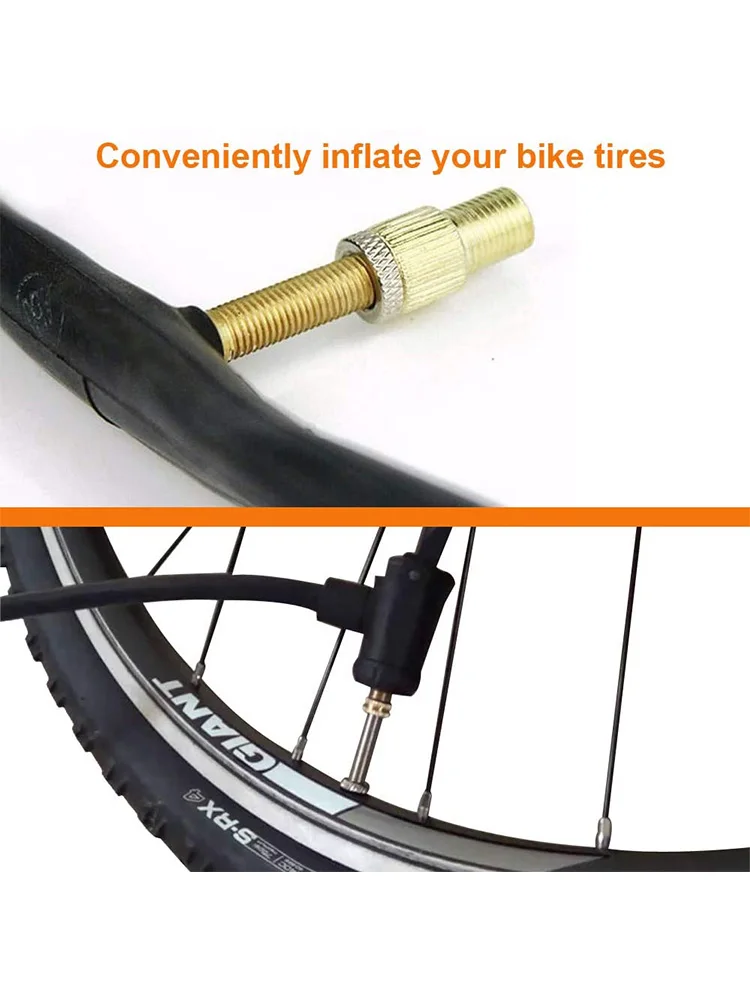 at www.razor.com. Please have the product identification code (located on the white label of your product) ready to help you get help. Additional Customer Service contact information is at the end of this manual. nine0351
Rules fastening
Requires tool : Hexagonal key 5 mm
9000 9000
Note: Before you attach the steering wheel to the fork, be convinced that all the cabbin / wires are not all the cabbin interfere.
WARNING: Improper tightening of the collar clamp can cause the handlebars to move while riding, which can result in loss of control and a fall. When properly tightened, the steering wheel will not deviate from alignment with the front wheel under normal conditions. nine0003
Note: Handlebar cable and wire assembly must not wrap around the steerer tube or handlebar. Sharp bends or kinks in the brake cable can cause brake failure.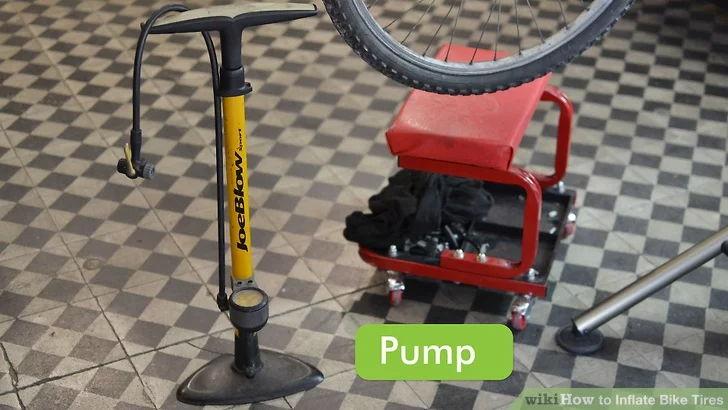
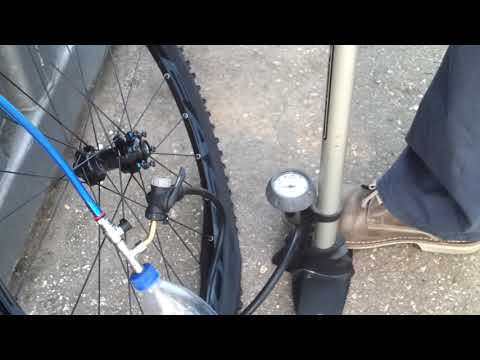
Inflating the tire
The front tire is inflated when delivered, but between production and purchase it can inevitably lose some pressure. Always inflate the tire to the correct PSI before first use.
Lower air pressure can reduce travel time. Check the tire periodically. Re-inflate if necessary. nine0003
1 Using a bicycle type tire pump equipped with a Schrader valve, inflate the front tire to the correct PSI indicated on the tire sidewall.
WARNING: Do not use the scooter for the first time until you have inflated the front wheel to the correct PSI. Failure to do so may result in damage to the electric scooter and void the warranty.
WARNING: Do not over-inflate as this may damage the tire or wheel. nine0003
Note: Compressed air supplies at petrol stations are designed to inflate large volume car tires. If you decide to use this air supply to inflate an electric scooter tire, first make sure the pressure gauge is working and then use very short pulses to inflate to the desired PSI. If you accidentally inflate a tire too much, release the excess pressure immediately.
Need help? Visit our website for parts, product support, a list of authorized service centers in the US, and support contact information at www.razor.com. Please have the product identification code (located on the white label of your product) ready to help you get help. Additional Customer Service contact information is at the end of this manual.
Your electric scooter may not have a fully charged battery; therefore, the battery must be charged before use.
Note: Charger design may vary from shown.
1 Plug the charger into a socket. The indicator on the charger should be green.
Note: If the green light (LED) does not come on, try a different outlet.
2 Make sure the power switch is in the OFF position.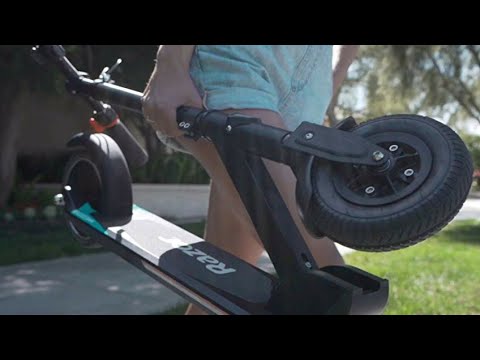
Connect the charger to the charger port on the product. While charging, the indicator on the charger should turn red. When charging is completed, the indicator will turn green again. nine0003
WARNING: Use ONLY with approved charger. Batteries should only be charged under adult supervision. The charger is not a toy. Always unplug your charger before wiping and/or cleaning your electric scooter with ad.amp cloth.
The charger supplied with the electric scooter should be checked regularly for damage to the cord, plug, housing and other parts. In the event of such damage, the electric scooter must not be charged until it has been repaired or replaced. nine0003
Chargers have built-in overcharge protection to prevent batteries from being overcharged.
Note: If the charger becomes warm with regular use, this is normal and is not a cause for concern. If your charger does not get warm during use, it does not mean that it is not working properly.
Wall socket - green (standby) Wall socket and device - red (charging) Charging complete - green (charged)
Note: Continue to charge the unit even if the indicator turns green before 12 hours.
WARNING. Failure to charge the battery at least once a month may cause the battery to stop accepting a charge.
brake
Check brake function. When you apply the brake lever, the brake should provide positive braking action. Make sure the brake does not rub when the lever is released. nine0003
Dash
Frame, fork and handlebar
 Make it a habit to check your scooter regularly. nine0074
 Hardware / Loose Parts
Protective Equipment
Laws and regulations
Insurance
 Information about insurance can be obtained from your insurance company.
 Memory
Note: The electric scooter must move at least 3 miles per hour (5 km/h) when the throttle is applied to start the engine. nine0003
Release the throttle and apply the brake lever until the machine comes to a complete stop.
Note: As an added safety measure, the scooter is designed to cut off engine power when the handbrake is applied.
Note: The motor will restart (no start) if the brake is released and the throttle is applied before the scooter drops below 3 mph (5 km/h). nine0003
Turn on the power switch " OFF " Before starting the repair or maintenance:
Tool required: 10mm spanner
1 To adjust the brake cable play, screw in or out the brake lever adjuster 1/4 to 1/2 turn until the desired brake adjustment is achieved. At this point, most of the settings are complete. If the brake still needs further adjustment, go to step 2.
2 If the brake is too tight or has too much slack, use a 10mm wrench to loosen the brake cable and adjust accordingly.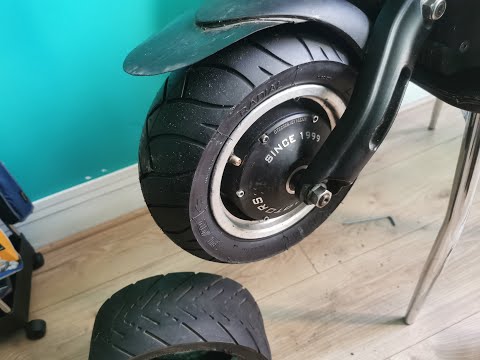 nine0003
3 Inspect the brake pads (A) for proper wheel alignment or excessive wear. To align the brake pads, loosen the lock nut (B) and adjust the pad so that it contacts the rim. Tighten and readjust if necessary. Before riding the scooter, check that the brakes are working properly.
Tools needed: 10mm wrench and two (2) 16mm wrenches. nine0003
1 Use a 10 mm wrench to loosen the brake cable bolt.
2 Using two (2) 16 mm wrenches, loosen the locknuts by turning the wrenches counterclockwise. Remove the wheel and install a new wheel. (Pay attention to the equipment sequence.)
3 Assemble, adjust and tighten the brake cable. Before riding the scooter, make sure the brake is working properly.
Note: Front wheel mounting sequence
Right side (throttle) 1 Using a Phillips screwdriver, loosen the two (2) screws on the chain cover and remove. 2 Using two (2) 13 mm wrenches, loosen the locknuts by turning the wrenches counterclockwise. 3 To loosen the chain, press the tensioner down to cause slack in the chain. 4 Remove the wheel and install a new wheel. (Pay attention to the equipment sequence.) 5 Lower the chain tensioner to install the chain on both sprockets. 6 Using two (2) 13 mm wrenches, retighten locknuts. 7 Replace the chain guard. Do not store in or below freezing temperatures. To properly maintain your battery and ensure maximum battery life, please read the "Charging the Battery" section on page 4 of this User's Guide carefully. Disposal: Your Razor product uses sealed lead acid batteries and must be recycled or disposed of in an environmentally sound manner. Do not throw lead-acid battery into fire; the battery may explode or leak. Do not dispose of lead-acid batteries in normal household waste. Burning, burying, or mixing sealed lead-acid batteries with household waste is prohibited by law in most areas. Return depleted batteries to a federally or state-approved lead-acid battery recycler or local automotive battery dealer. If you live in Florida or Minnesota, it is against the law to dispose of lead-acid batteries with household waste. nine0003 The charger supplied with the electric scooter must be checked regularly for damage to the cord, plug, housing and other parts, and in the event of such damage, the product must not be charged until it has been repaired or replaced. Wheels and drive system are subject to normal wear. It is the user's responsibility to periodically inspect wheels for excessive wear and to adjust and replace transmission components as needed. nine0003 Most frequently requested parts are available from select Razor retail partners. List of Authorized Razor Repair Centers: Note: Rear wheel mounting sequence The left side (brake)
8-3 Laying
8-2 Washing
Forple 8-7 Spring Wars
8-1 16 mm Rear-on
Medium
8-6 BC
Left side (brake)
8-5 Laying
8-2 Washer
Fork
8-7 Spring Washing
8-1 16 mm Rearplain Replacing the chain and rear wheel
7 9000 The necessary tool Phillips and two (2) 13mm wrenches.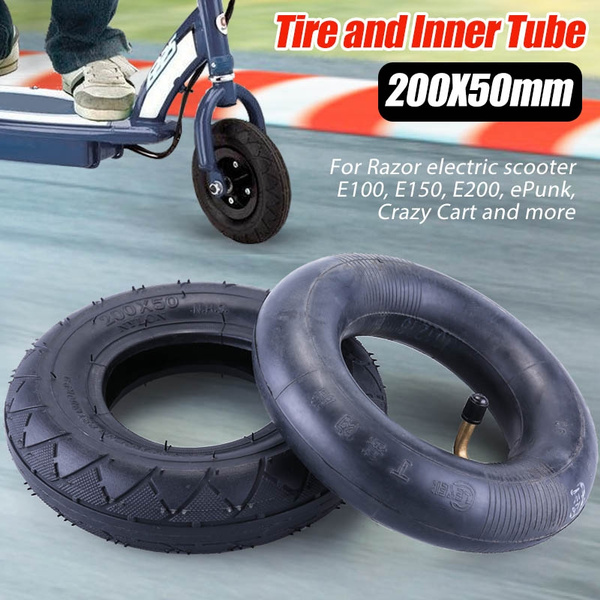 nine0003
Battery care and disposal
 nine0187
CONTAINS SEALED LEAD BATTERIES. BATTERIES MUST BE DISPOSED. charger
Use ONLY with the recommended charger.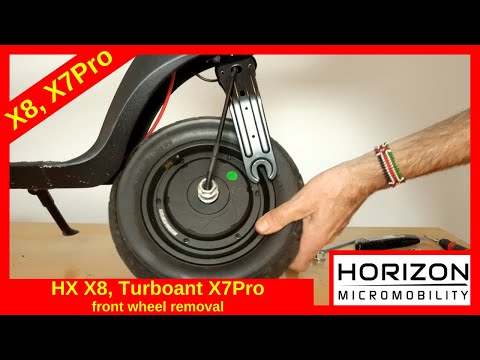
Wheels
Spare Parts
For a complete selection of replacement parts, visit www.razor.com. Repair Centers
• Check online at www.razor.com.
• Additional customer support contact information is located on the back of this manual.
18-1 13 mm Ruthada
18-2 Spring washer
18-3 Washing
19
Average
18-7 Bolt of the rear axle
Right side (throttle)
18-1 13 mm Ruthack
18-2 Spring Washer
18-3 Washers
Basket
18-4 WHIL )
18-6 Spacer (short)
US and Canada only:
For more information about battery recycling, call toll-free 1-800-822-8837 or visit http://www. call2recycle.org
WARNING: In the event of a battery leak, avoid contact with the leaked acid and place the damaged battery in a plastic bag. See disposal instructions on the left. If acid comes into contact with skin or eyes, flush with cool water for at least 15 minutes and seek medical attention. nine0187 WARNING: Battery posts, terminals, and related accessories contain lead and lead compounds. Wash your hands after work.
* Device(s) must be turned off and fully charged before any troubleshooting steps are taken.
NOTE: All troubleshooting steps must be performed by adults only.
For more troubleshooting tips, a list of available parts, or to find an authorized service center in your area,
visit our website www.razor.com or call toll-free +1 866 467 2967 to speak with a customer service representative.
Keep your scooter running for years to come with genuine Razor parts. Visit our website for more information on spare parts availability. (Specifications are subject to change without notice.)
attention: Insurance
Your insurance policy may not provide accidents related to this scooter / electric drive.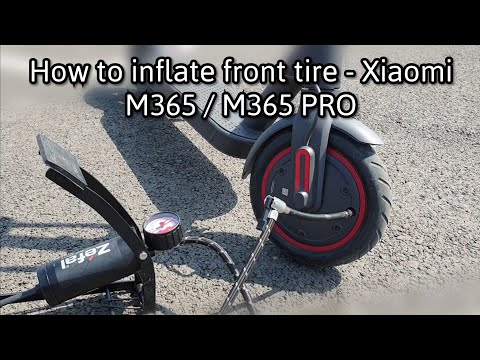 YOU MUST CONTACT YOUR INSURANCE COMPANY OR AGENT TO DETERMINE WHETHER COVERAGE IS AVAILABLE. nine0003
This device complies with Part 15 of the FCC Rules. Operation is subject to the following two conditions: (1) this device may not cause harmful interference, and (2) this device must accept any interference received, including interference that may cause undesired operation.
Note: This equipment has been tested and found to comply with the limits for a Class B digital device, pursuant to Part 15 of the FCC Rules. These limits are designed to provide reasonable protection against harmful interference in a residential installation. This equipment generates, uses and can radiate radio frequency energy and, if not installed and used in accordance with the instructions, may cause harmful interference to radio communications. However, there is no guarantee that interference will not occur in a particular installation. If this equipment does cause harmful interference to radio or television reception, which can be determined by turning the equipment off and on, the user is encouraged to try to correct the interference by one or more of the following measures:
- Change the orientation or location of the receiving antenna.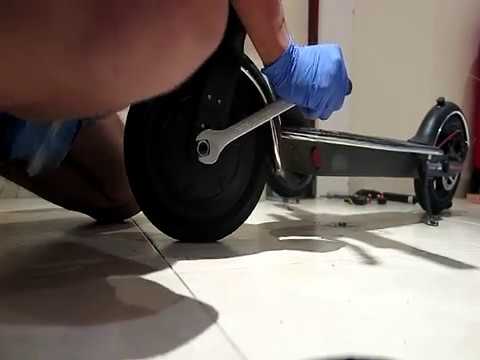
- Increase the distance between the equipment and the receiver.
- Connect the equipment into an outlet on a circuit different from that to which the receiver is connected.
- Consult the dealer or an experienced radio/TV technician for help.
WARNING. Changes or modifications to this device not expressly approved by Razor USA could void the user's authority to operate the equipment.
Razor Limited Warranty
The manufacturer warrants this product to be free from manufacturing defects for 90 days from the date of purchase. This limited warranty does not cover normal wear and tear on tires, tubes, or cables, or any damage, breakdown, or loss caused by improper assembly, maintenance, storage, or use of the Razor Electric Scooter.
This limited warranty will be void if the product:
The manufacturer is not liable for incidental or consequential loss or damage caused directly or indirectly by the use of this product.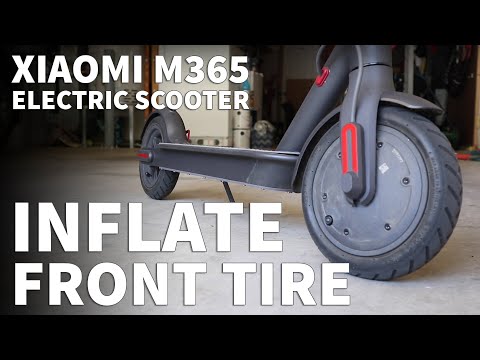
Razor does not offer an extended warranty. If you purchased an extended warranty, it must be honored by the store where you purchased it.
For your records, please keep the original sales receipt with this manual and write the serial number below. nine0187 __________________________________________
Need help? Visit our website for parts, product support, a list of authorized service centers in the US, and support contact information at www.razor.com. Please have the product identification code (located on the white label of your product) ready to help you get help. Additional customer support contact information is listed below:
America
LLC Raisor USA
Postal box 3610
Cerritos, Ca
USA
+1 866 467 2967
Monday Friday
8:00 - 5:00 Pacific time 9000 Europe, the Middle East, Africa
Razor USA LLC (Europe)
2 Trade route
2742 RD Vaddinskven
Netherlands
+44 (0) 120 267 2702
The United Kingdom and Ireland Razor USA LLC (UK)
Group BOUNTH BOUNDSENTS BUSINESS , Tiverton
Devon EX16 4NG
UK
+44 (0) 120 267 2702
[Email is protected]
distributed in Australia:
Fantastic Limited
Lux 2.