Self-mounting tires can be cost-effective, particularly if you have access to tire mounting equipment. With nothing more than a pry bar and a lot of work, you can install your own tires at home. After mounting your wheels and tires, it is strongly advised that you get them balanced at an auto repair shop.
Before you begin, make certain that you have the correct tire and rim size; for example, an 18-inch wheel will accommodate a tire that measures 18 inches. In order to avoid having to change your tires on a regular basis, it is advisable to invest in tire-changing equipment. Make sure you have the following items within easy reach at all times. Basically, all you need is two 4-foot pry bars, preferably with flat ends for tire removal, and a pair of pliers. A tool for separating the tire bead, a rubber hammer, and a tool for extracting the core from the valve stem.
Using A Tire Mounting MachineBefore anything else, remember to be aware of essential safety measures when removing and mounting tires on rims. Tires may explode if specific elements are missed. Always use tires that are the correct size and structure for the wheel. Verify that the wheel diameter matches the tire sidewall. Never seat tire beads at 40 PSI. Never overinflate a tire once the beads are placed.
Apply much tire bead lubricant to the tire beads and the rim. Tire lubrication is available at your local car parts store. To make it simpler to seat the tire on the rim to be inflated, spray the tire lubricant generously onto the inner lip of the tire (referred to as the bead) as well as the outside edge of the rim.
If your lubricant comes in a jar rather than a spray bottle, use a cloth or wooden dowel to apply it to the same edges. Don’t use soapy water or automotive grease for lubrication. Dish soap does not provide adequate lubrication, and grease can be exceedingly difficult to remove from the wheel. Bead lubricant is slippy, yet it dries and allows the bead to set.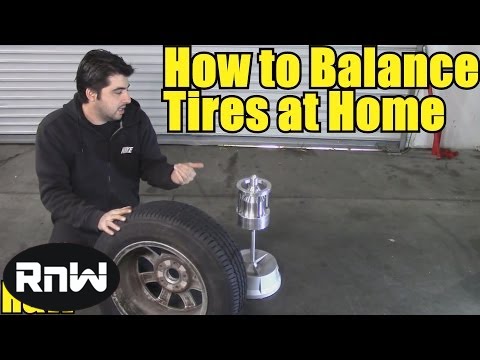
If there isn’t already a valve stem connected to the wheel, you’ll need to attach one in order to inflate the tire after it’s been attached to the wheel. There will be one hole on the inside of the rim that will run all the way through to the outside. From within the rim, insert a valve stem that has been cut to fit through a hole on the exterior. Next, using pliers, pull the stem through until it is firmly in place.
A little amount of tire oil added to the valve stem will also aid in the passage of the valve stem. The shape of the valve stem prevents it from going all the way through or popping out in any direction other than backward, so all you have to do is make sure it’s pulled into the hole and seated properly before continuing.
Step 3: Mount the tire to the rimInstall the tire with the help of the machine. Then, remove the wheel from the machine mounting. Attach the rim to the tire machine using the provided tools.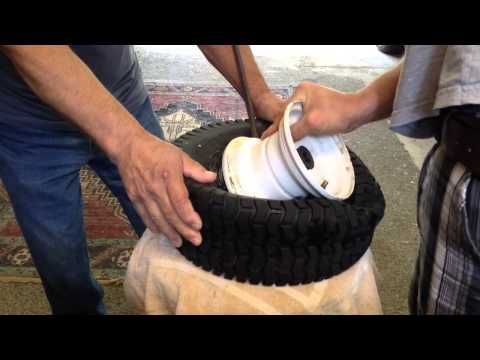 For processing the rim, the tire machine is set up such that it receives it with the rim facing up. Place the rim on the machine and, by pressing the proper pedal, activate the hydraulic press that holds the rim in place from underneath the machine.
The majority of tire machines are equipped with two pedals: one for activating the press and another for rotating the rim. If you’re not sure which pedal controls which function (or if your machine doesn’t have one), see the tire machine owner’s manual or the manufacturer’s website for further information.
Step 4: Placing the tire over the rim at a 45-degree anglePlace the bottom edge of the tire beneath the top edge of the rim on one side, with the tire resting at a 45-degree angle to the rim. The tire should be able to sit on its own without falling loose from the rim at this point. Preparing the mounting arm to glide into the angle gap by starting with one bead beneath its edge and allowing adequate space for it to glide into the angle gap is essential.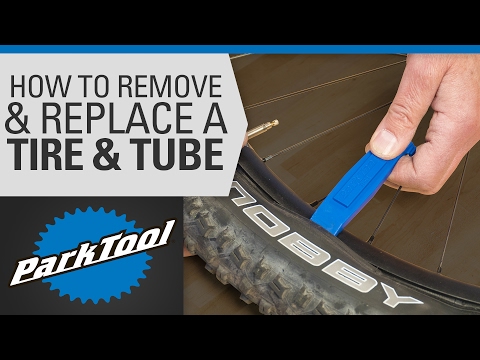
Position the mounting arm so that it makes contact with the rim’s outer edge in the same place as the tire has previously been positioned to pass through the opening in the mounting arm. If you are unable to get the mounting arm in at this stage, you should re-adjust the tire to provide yourself with adequate space. Due to the fact that the mounting arm works like a pry bar, pushing the remainder of the tire over the rim’s lip, it must begin at the point where the tire has already crossed the lip.
Step 6: Directly point the bottom bead of the tire towards the mounting armMake sure that the bottom bead of the tire is pointed directly towards the mounting arm. It may be necessary to gently adjust the tire after the mounting arm has been secured in place so that it makes contact with the arm while the wheel and tire are spinning. In the majority of cases, no modifications are needed at this point but double-check to ensure that the correct angle is being used.
Configure the tire such that the arm pushes the lip down and over the rim’s edge when the tire is rotated. A common occurrence is that the angle at which the tire rests on the rim to allow for the mounting arm is already at the proper angle. If the tire begins to slide off the rim, it indicates that the tire is not properly aligned.
Step 7: Rotate the rim and tireBy pressing the pedal, you may rotate the rim and tire. As the two rotate, the mounting arm will push the tire’s bottom bead over the top edge of the rim, causing the tire to deflate. Repeat the process until the two have completed one complete round and the bottom bead of the tire has extended fully beyond the top lip of the rim.
The tire will seem to be half-installed after you’re done, with the bulk of the tire resting on the rim of the wheel. The top bead of the tire will be the only thing that stops the tire from completely settling onto the wheel while driving.
Step 8: Adjust the mounting armReposition the mounting arm such that the top lip of the tire is guided onto the wheel rim. As previously said, push one side of the tire down with your hands until it dips below the top lip of the rim, then lower the mounting arm into the gap you’ve created with your hands by pressing the tire down. It is possible that you may need to use a pry to push the tire’s top bead onto the rim’s lip at that point. As soon as the mounting arm is fully lowered into place, the tire will begin to sit at an angle once again.
To rotate the tire and rim, press the pedal a second time. In this position, the mounting arm will push the tire’s upper bead against the rim’s lip as the wheel and tire rotate. After completing one complete circle, both the upper and lower beads of the tire will have gone over the rim’s upper lip. The tire is now firmly connected to the rim and just needs to be inflated to complete the installation.
Step 10: Inflate the TireInflate the tire with the use of an air compressor. Make sure your hands and clothes are far away from the tire before connecting the air compressor line to the end of the valve stem you previously installed.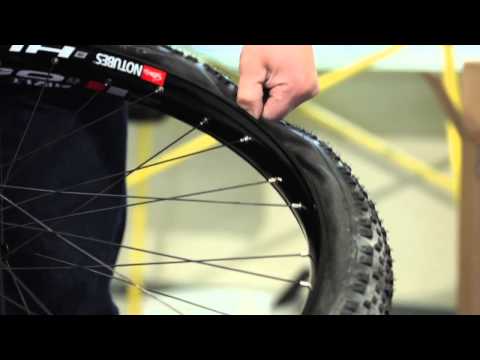 As soon as the airflow is initiated, the tire will quickly inflate.
You have to be careful though as any portion of your body or clothing that becomes caught between the tire bead and the rim’s edge will get compressed when the tire expands during inflation. Once the tire has been inflated to the proper air pressure, it is ready to be mounted.
Mount Tires To Rim By HandWhether you want to save money or do it like a do-it-yourself job, you will be relieved to hear that tire installation can be accomplished with your own hands and the proper equipment. Here’s what you’ll need to bring with you: lubrication for tires, a pair of pliers, a pry bar or a screwdriver, a clean piece of cloth, cardboard, and an air compressor.
Step 1: Insertion of the Valve StemIf there isn’t a valve stem already in place, insert one. Prepare the valve stem by lubricating it with a little amount of tire lubricant and pressing it into the hole on the inner part of the rim that will later be covered by the tire. Pulling the valve stem outward from the hole with a pair of pliers will be your next step. Note that it is important to pull the stem until it is firmly lodged in the hole in the rim of the jar.
Ensure that the tire bead and rim are lubricated. Even while tire lubricant is essential when mounting tires with a machine, it is very important when mounting tires by hand. Lots of lubricants should be applied to the inner bead of the tire as well as the outside edge of the rim. Apply the lubricant using a spray bottle or by hand. Inspect and reapply lubricant to the top and bottom beads of the tire as well as the whole edge of the rim to ensure that they are both properly greased.
Step 3: PositioningPlace the rim flat on the ground and the tire on top of it to complete the installation. In order to prevent scratching the surface of the blacktop or concrete you’re working on, put a piece of cardboard underneath the wheel. Make certain that the surface on which you are working is level, even, and sturdy.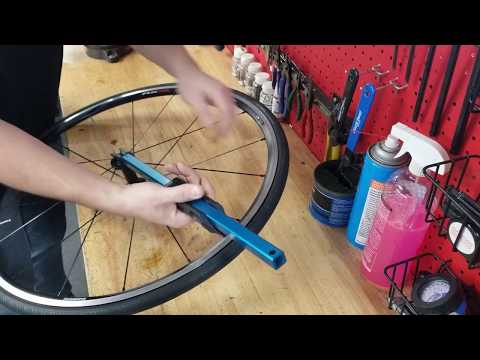
Step on the tire with both feet in order to push the bottom lip of the tire on the rim of the vehicle. As you step up onto the tire on one side, ask the assistance of a buddy to keep you balanced. Then, using your other foot, push down on the opposite side of the tire to drive the bottom bead of the tire down over the top lip of the rim and into the wheel well.
It may be necessary to jump a little in order to provide sufficient downward power to drive the tire bead over the lip. You should not do this without a buddy to assist you with balance, otherwise, you may fall.
Step 5: Adding a Little More LubricationIncrease the amount of lubricant applied to the top bead of the tire and the rim. Once the bottom bead has been placed, the true difficulty will be in getting the top bead to do the same. More lubrication should be used to assist in forcing the rubber down over the metal to make it a little simpler. The bottom bead will not need any more lubrication.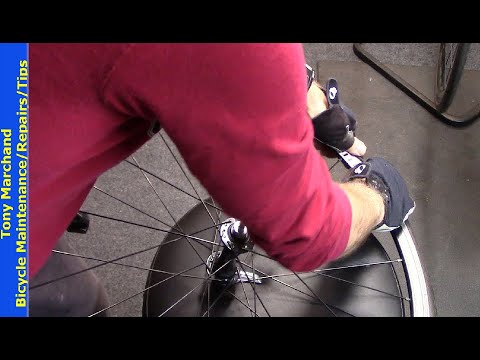
On one side of the tire, press the top lip of the tire down onto the rim. The tire should be angled downward such that one section of the top bead is down below the rim’s edge. If the tire doesn’t quite make it over the lip on its own, you may press down on the bottom part of the tire.
A pry bar will need to be able to slip into the gap between the tire’s top bead and the upper lip of the rim so you’ll need to create adequate room between the two. It is possible that you may need to use the pry bar to make the opening. If this is the case, be sure to leave it in place after you’re finished.
Step 7: CompletionUsing a pry bar, push the tire’s lip over the remainder of the rim until it is secure. Move around the wheel, pushing down on the tire with your hands and prying the bead of the tire over the top lip of the rim with your other hands as you go. This will require a significant amount of effort, but it should be completed by the time you have completed one complete round of the wheel.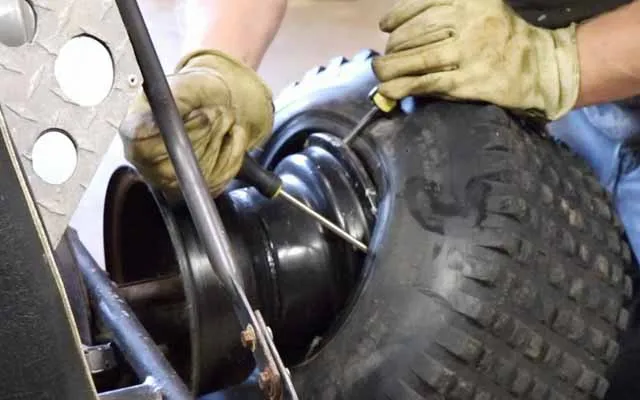
Press the pry bar into the bottom side of the top lip of the rim, making sure it does not damage any exposed metal on the rim’s surface. When you’ve finished going around the wheel, both the top and bottom beads of the tire should be fully beyond the rim’s lip, as seen in the picture.
Step 8: Filling The New Tire with AirWith the help of an air compressor, inflate the tire. The tire may be inflated by attaching an air compressor to the valve stem once both beads of the tire have passed the rim’s lip. Be careful not to get your fingers or clothes caught in the tire bead while the tire is inflating. After the tire has been properly inflated, you may proceed to the next one.
ConclusionWhether using tire mounting equipment or doing it manually, the process of putting the tire back on the rim will require some elbow grease. However, the process will get easier on the proceeding tires you’ll figure out what workaround works best.
Just always be cautious in inserting the bead breaker, or you risk damaging both the sidewall and the rim of the tire. Lastly, make use of the proper quantity of lubricant; neither too little nor too much is recommended.
Having spent the better part of a year installing tires at the Pep Boys in Fredericksburg, Va., I thought I knew a thing or two about how a tire is mounted to a rim. It was my first job after graduating from college, and knowing very little about working on cars, I was an eager pupil. As I soaked up knowledge from my well-meaning teachers, I felt confident that following their directions would give me the power to mount and balance tires perfectly.
But 16 years later, while re-learning how to use the tire mounting and balancing machines at Brooklyn Motor Works– where, in case you were unaware, we're rebuilding a 1988 Toyota Land Cruiser – I discovered that I also had to re-learn the whole tire installation process. But that's nothing new. As Carlos, Brooklyn Motor Works' proprietor has pointed out, we learn many things as hobby mechanics that must be un-learned when there are schedules to keep and customers to satisfy.
Anyway, here's the correct way to mount tires. Now that I know these simple tricks, I'm wondering if any of the 12 tires on the three dilapidated beater cars I drive around on a regular basis are actually mounted correctly. Chances are, they're not (I had 'em mounted at Pep Boys).
1. Remove the valve stem core to deflate the tire. Set the core aside for later use (if you're installing new tires, pull out the stem and install a new one, removing the core).
2. Use the tire machine to remove the tire from the rim
3. With the tire off, run your finger along the inside lip of the rim. Does it feel perfectly smooth? If not, it needs to be. Rust pitting can cause leaks, and will cause the bead of the tire to hang up when it's trying to seat on the rim (the beads are the really thick parts of the tire that come into direct contact with the inner and outer lips of the rim.
4. To remove rough patches, use several different grades of abrasive pads (I used coarse and medium Scotch Brite pads) to smooth out the inner lip of the rim, as well as the part of the rim the bead slides over as it seats on the lip.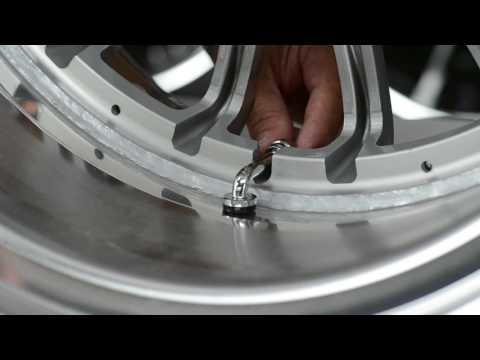 If there's too much damage, it may be necessary to get another wheel. You'll never be able to balance a wheel if the tire isn't properly seated upon it.
5. Before installing the new tire (or, if reusing the old one, the same tire, mounted the same way it was before), apply a generous amount of tire bead lubricant to the tire beads and the rim. Don't use soapy water (not enough slip) or grease (you'll never clean it all off and the bead could pop off the rim in hard cornering). Bead lubricant is slippery, but dries, allowing the bead to set.
6. Use the machine to install the tire. Then, remove the wheel from the machine mounts.
7. Spray more bead lubricant between the beads and the rim.
8. With the stem core still removed, inflate the tire to its maximum pressure (you'll see that number printed on the sidewall of the tire). The beads should pop onto the rim pretty quickly if the rim lips are smooth and you've used enough lubricant.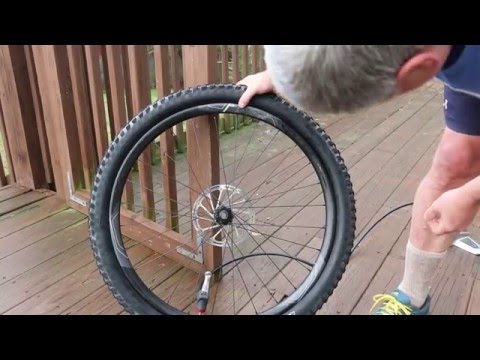 It'll go "POP.. POP!" as the beads seat.
9. Install the stem core and re-inflate the tire to its max pressure.
Assuming you followed all of these steps correctly, your wheel and tire are now ready for balancing. Then you'll adjust the tire pressure to the vehicle manufacturer's specifications when you mount the wheel and tire back on your car.
Now, I realize most people don't have access to a tire mounting machine, but being aware of what it takes to mount a tire will, at the very least, give you the tools to ask your tire installer if they're mounting your tires the right way. If the tire shop you're using is doing things the quick and dirty way (mounting tires dry on pitted rims), find a better shop! No one wants to feel a sickening shudder as the car passes 65 miles per hour on the highway.
Technical
Car tires are one of the most important and critical elements of a car, on which traffic safety directly depends. Therefore, the installation of tires on the car must be done correctly.
From this article you will learn:
- Tread pattern and direction of rotation
- Inner and outer side of tire
- "Right" and "left" sides of tires
- Tire balancing before installation
Despite the ease of mounting tires, in many workshops, out of ignorance or laziness, tire fitters manage to put tires on the car incorrectly.
Modern tires have several parameters that you need to find out before installing them on a car:
- tread pattern type
- direction of rotation
- where is the inside and where is the outside of the tire
- on which side of the car can the tire be installed - on the right or left
tread pattern, the direction of rotation of which is usually indicated by an arrow on the sidewall of the tire.
Therefore, the installation of tires in a directional pattern can only be carried out in a strictly defined position, which must be clarified before mounting them on a vehicle.
A minority of modern tires have a non-directional tread pattern. These tires can be installed on either side.
You can find out exactly the type of tire tread pattern and its direction of rotation from the seller in the store.
A tire can have an inner and outer side of the installation if its tread pattern is not symmetrical.
The inner side of the tire is indicated by the indication "Inside", this side of the tire must be installed inside the car in the direction of its movement.
The outer side of the tire is indicated by the indication "Outside", this side of the tire must be installed outside the car in the direction of its movement.
These mounting restrictions are due to the way the tire tread works, which only drains water most effectively when the tire is properly installed.
Some car tires are designed for a specific car model, or immediately for a group of identical models.
In this case, tire manufacturers can specify on which side of the car the tire can be installed "Left" - on the left, "Right" - on the right.
These limitations are also related to the most efficient operation of the tire tread installed on the correct side of the vehicle.
After mounting the tire on the rim, each wheel must be carefully balanced on a special machine.
The need for balancing is related to the difference in the weight of different parts of the tire (error), which is allowed by the manufacturer in the production of tires. This error is associated with the technological features of the production of tires.
The difference in weight is not noticeable when the wheel is stationary, but becomes very noticeable when driving at high speed - the wheel begins to "beat".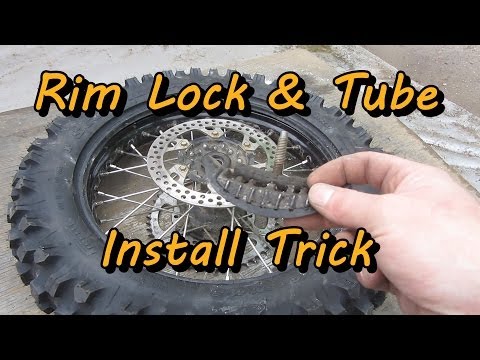
You can feel this “beat” on the steering wheel very well when the tire is installed in front.
For expensive tires made with state-of-the-art equipment, this difference is only a few grams and only a few balance weights are required for balancing.
For budget tire models, often produced on simple or outdated machines, the difference can be several tens of grams.
To balance such a tire, quite a lot of balancing weights may be required.
There are also cases when an inexpensive tire cannot be balanced “to zero” at all - in this case, this wheel is installed back.
When balancing a wheel, the pattern of tire manufacturing quality is most often manifested - the cheaper the installed tire, the lower its quality and the more difficult it is to balance.
Due to certain difficulties in balancing inexpensive tires, servicemen often do not complete the wheel balancing procedure, due to which the “beating” of the wheel may remain.
Therefore, it is best for the car owner to be personally present during the wheel balancing procedure right in the tire shop - then the likelihood that the workshop workers will want to cheat will be less.
In order for the car to be a truly safe vehicle, the car owner needs to know how tires are installed correctly, and independently control all the actions of the masters who mount tires on his car.
You might be interested
Subscribe
5375 people already read this site! Read and you.
top
Adblock detector
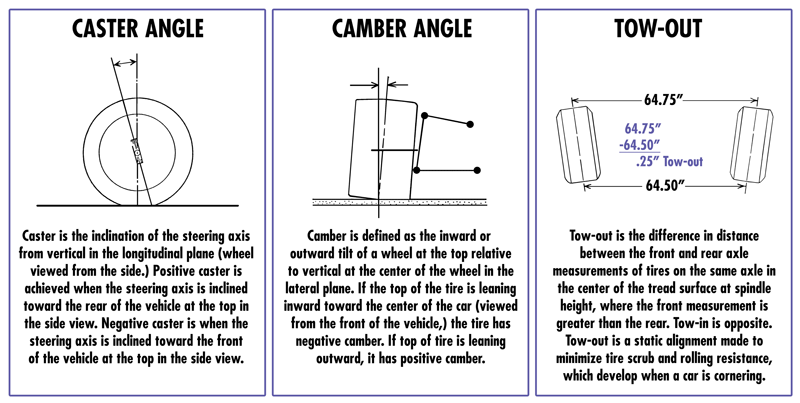
1. Make sure that the number of mounting holes (LZ) and the diameter of the circle of their location (PCD) correspond to the installation dimensions on the vehicle hub. Mounting holes always make a larger diameter than a bolt or stud and you can make a mistake in choosing a wheel if the PCD differs from the standard one by a couple of millimeters, for example 4x98 and 4x100, 5x112 and 5x114.3. It is unacceptable to install a wheel with a 5x114.3 mount on a hub with an LZxPCD 5x112 mount. In this case, only one of all the nuts (bolts) will be completely tightened, and the rest will be “taken away” and the fasteners will be undertightened or tightened with a warp, and, as a result, the fit of the wheel to the hub will not be complete. On the move, such a wheel will “beat”, and not fully tightened nuts will unscrew by themselves, and the car on the move may completely “lose” the wheel.
2. Tire fitting must be done with good equipment to avoid damage to the paintwork of the wheel.
3. When balancing a tire on a wheel using Velcro weights, the appropriate balancer mode must be selected.
4. Vehicle manufacturers are constantly improving their cars and expanding their equipment, so when installing a wheel on a car, you should make sure that nothing prevents the hub and wheel mating surfaces from tightly closing, and that there is no contact between the back of the wheel and brake parts, suspension, steering gear of the car. Tight closure can be prevented, for example: guide pins (“catchers”), heads of brake drum screws protruding beyond the mating plane, non-standard elements of the suspension and brake system.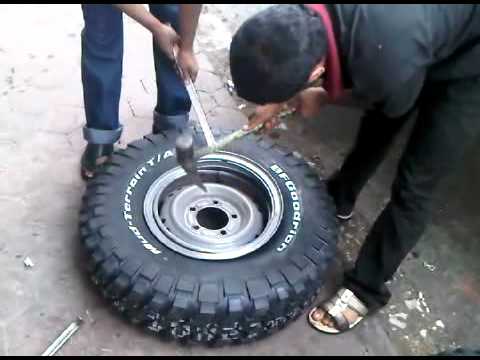 When installing the wheel, the following requirements must be met:
- The minimum clearances between the wheel and brake parts (based on the worst case when new brake linings are installed) must be at least 3mm;
- the minimum clearances between the wheel and suspension parts (for example, lower and upper suspension arms) must be at least 4 mm;
- the minimum clearances between the wheel and steering gear parts (for example, steering rod or steering knuckle ball joint) must be at least 4 mm;
- The minimum clearance between the wheel and other structural elements of the vehicle must be at least 2 mm.
Before installing the wheels, the seating surfaces of the hubs and discs should be cleaned of dirt.
5. Make sure the wheel fits into the vehicle's hub in its center hole. If the diameter of the center hole of the wheel is larger than the diameter of the hub, select the appropriate centering ring (adapter).
Fitting an adapter is a must to ensure accurate wheel centering.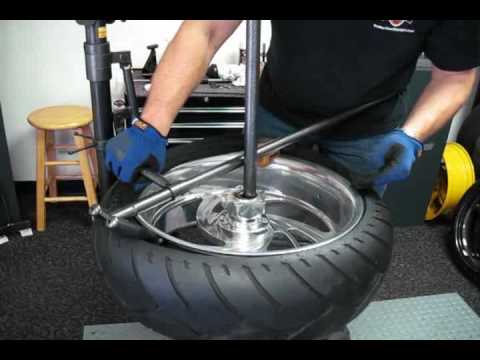 During the operation of the car, after repeated removal and installation of the wheel, the centering ring may be damaged, it should be replaced with a new ring.
6. To fasten light-alloy wheels, it is necessary to use bolts (nuts) with a head ("skirt"). You should make sure that the mating profiles of the fasteners and the holes in the wheel match, and that the length of the threaded part of the bolt or stud is sufficient for its reliable fastening. The number of turns of the bolt (nut) until fully tightened should be at least 6-8 turns. The tightening torque of the fixing bolts (nuts) is given in the passport for the car, as a rule, it is at least 90 Nm for M12x1.25 thread, not less than 110 Nm for M12x1.5 thread.
For M14x1.5 thread, the tightening torque is 110-170Nm. Check the tightening torque of the bolts (nuts) after the first 40-50 km of run. Coincidence of the interface profiles of fasteners and holes in the wheel ensures the correct centering of the wheel and the reliability of its fastening.