How can I replace a '50s or early '60s 20" solid rubber bicycle tire?
I have been looking everywhere.
The wheel measures 17" by 1 1/2". New ones are too small to fit.
Any information would be appreciated.
5
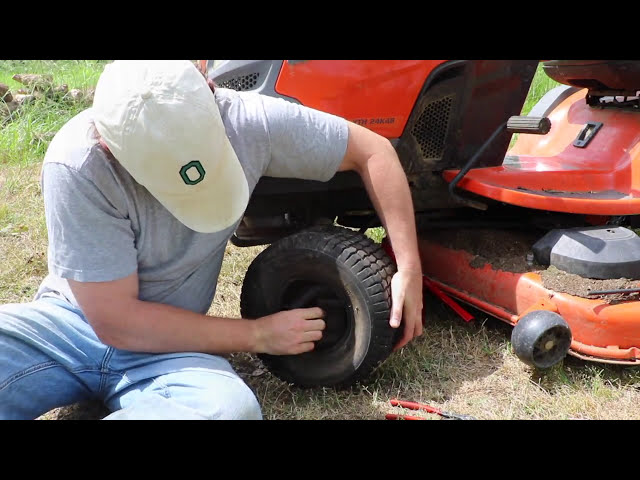
Measuring the wheel diameter will not give you the correct tire size. I suspect it is a 16 x 1 3/4 tire. I think they are still available. These tires are replaceable. You cut off the old one with a hacksaw. Mount the new tire by first soaking it in hot water for about 20 minutes. The heat will make it larger in diameter and more pliable. Work it on the wheel with your hands and if needed careful use of a screwdriver. I rubber mallet will help seat it.
3
My guess is that this is either for a child's toy bicycle or for a bike trailer, since those are really the only products that would use a solid tire (ouch ouch ouch) in that size.
As you've found, it's going to be very hard to find a new, replacement solid tire. Remember that you need to match the diameter, width, and rim shape. Even if you did find the right size and shape, you're going to struggle to put it onto the wheel. Many solid tires were molded onto the wheel or glued, so getting the old solid tire off and putting it on will be a challenge.
My own suggestion would be to go to Goodwill, junkyard, bike coop, or somewhere that has a large assortment of old children's bicycles. Find one with a wheel in the right size -- that takes modern pneumatic tires. Use that wheel - and get a new tube and tire if necessary.
If you're restoring a vintage bicycle and need the original product, I think you're out of luck unless you can find someone with the same bike who is willing to part with a wheel/tire.
You might consider an antique toy restoration company. My company has mounted 100s of solid tricycle tires of all sizes. Our exclusive process insures that the tire will not tear during mounting, and guarantees a tight, snug fit. www.hoosierboyrestorations.com
Hoosierboy Restorations is a full-service antique and toy restoration company dedicated to the art of restoring and preserving items from the early to mid-20th century. We specialize in metal and wooden items primarily made in the U.S.A. We treat every artifact with the utmost care, and respect it deserves to insure its original authenticity. At Hoosierboy Restorations, we combine traditional "old-time” craftsmanship with the latest restoration techniques of today. This is all to provide the highest-quality, finished product that you will be proud to share, and will enjoy for many years to come.
2
It would help if you mentioned what unsuccessful searches you've done so that others don't have to repeat those steps.
I didn't find much for 17 inch solid tires. Google shows results for 16 inch solid tires and 18 inch solid tires.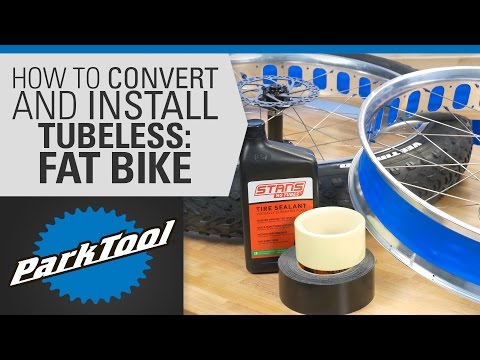
If those don't help, then one solution is to make your own. I have not done this, but there are resources out there that may get you started
Freeman Manufacturing & Supply
O Rings USA
Versimold
Let us know how you go.
2
Sign up using Google
Sign up using Facebook
Sign up using Email and Password
Required, but never shown
Required, but never shown
By clicking “Post Your Answer”, you agree to our terms of service, privacy policy and cookie policy
By Bob Forgrave
President, Flatbike
It’s a sunny day, you’ve got the time off, your bike is calling you…and it’s got a flat tire. And the bike pump is … somewhere. If this has ever kept you from getting out on a bike, then here’s exactly what you need. Here, on one comprehensive page, are five ways to thorn-proof your bike, from the simple to the hilariously expensive…
A few weeks ago, I got a call from Randy, a private pilot who likes to fly his CHANGE folding mountain bike into remote places for exciting adventures in his private plane. He wanted tips on how to avoid thorn flats.
How remote? And what kind of vegetation are we talking about?
Cacti in West Texas can have some awfully long thorns…
Those are some serious spikes. And West Texas cacti aren’t the only problems. Blackberries, devil’s club, goathead thorns, ‘wait a minute’ vines…nearly all parts of the country have some species that are unfriendly to inflated tires.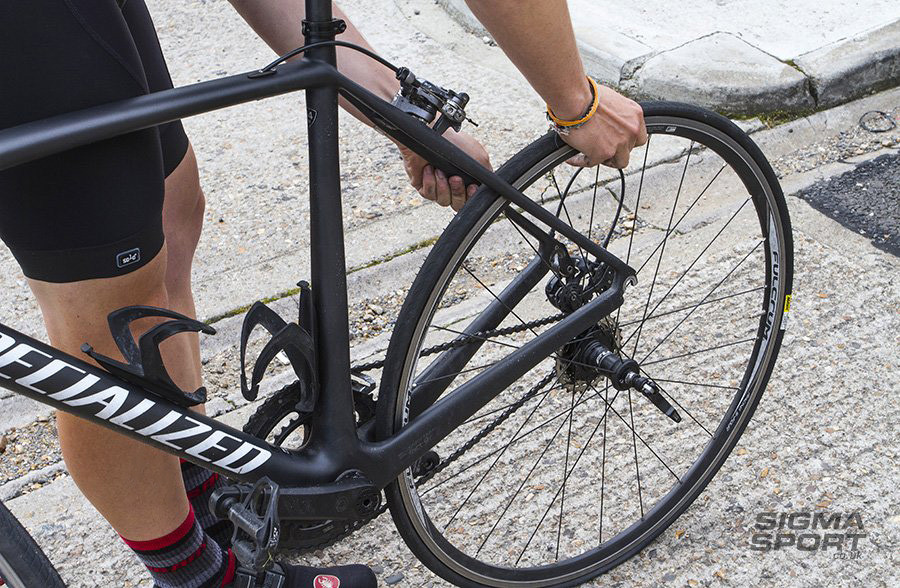
Basically, if you know you’re headed into thorn country, there are five different ways to address the issue of puncture flats.
Tires and inner tubes come in thicker, thorn-resistant versions, which are tougher for thorns or broken glass to puncture. Why don’t all bikes come like this? Because extra rubber results in extra weight. How much do you want to free yourself from flats?
Using a set of these in the 80’s, I once went over 2,000 miles between flats; when I finally got one, it was from a thumbtack inserted in the sidewall at a bike rack. Even the best intentions won’t stop everything…
The Specialized Armadillo tire series has different levels of rubber thickness, with more thickness protecting more, but also offering a bit stiffer ride. The Continental Gatorskin, on the other hand inserts a layer of Kevlar clear around the tire to protect against anything–perhaps even sidewall thumbtacks.
Kevlar: If it can stop bullets, it can stop thorns.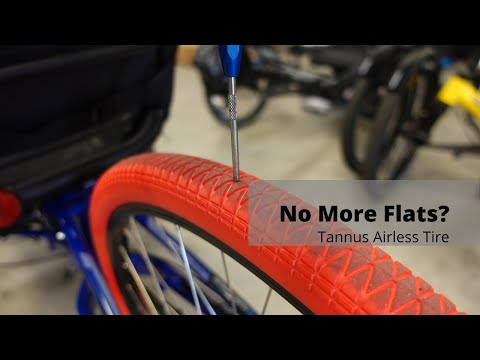
You can also protect against thorns at the inner tube level. But thicker tubes are becoming harder to find in recent years.
Kenda owns a large portion of the thorn-resistant tube market.
FLATBIKE ASSESSMENT: Good, easy plan. We include Continental Gatorskin flat-resistant tires standard on our Flatbike Century folding road bike.
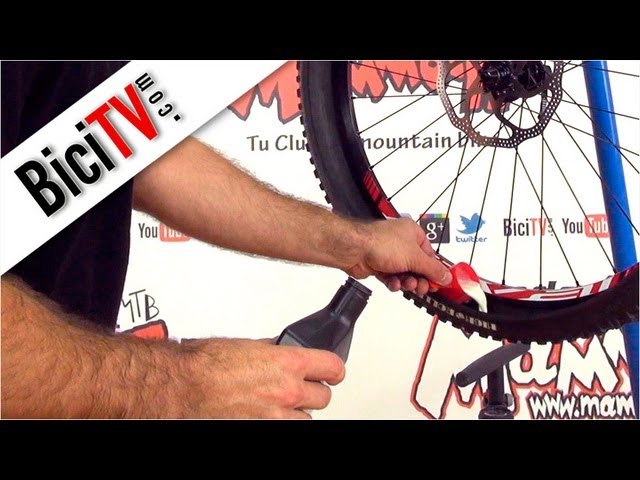
The idea is simple. A small amount of liquefied goo stays inside your tire. When you get a puncture and the air starts leaking out, the goo rushes to the opening and clogs it.
In practice, this often works, especially if the hole is small enough, the hole is on the bottom of the tire, and the self-sealing compound in your tire is recent enough to be still liquid.
Otherwise, you end up with this inside your tires (The “tire coral”, not the money).
If you go with this approach, you probably want a tubeless tire, because there’s simply no way to change the liquid inside an inner tube. Notable self-sealing solutions are Slime and Stan’s. The website MBAction has a great review of these and other sealant solutions, with the wonderful testing warning, ‘All tires were harmed during the testing process.’
FLATBIKE ASSESSMENT: Wait & see. Some folks swear by the tire sealant approach, and we’re interested to hear from you. But a tubeless tire works best with a compatible rim. Useful extra aids are a bucket of soap water, a sponge, and an air compressor. And after that, we wonder if the time previously spent fixing flats on the road is simply transferred to garage maintenance, installing and removing old filler.
For a while, before my thorn-resistant tires, I rode a 1980’s technology, solid rubber tire. Potholes were memorable on my spine, but traction was good and I never got a flat.
On the surface, an update to this approach sounds appealing. Flat tires are the #1 maintenance issue bringing customers into many bike shops.
That said, compressed-air tires distribute a shock across the entire rim, while solid tires distribute stress only locally. And some bike shops charge a premium for replacing a solid tire. Has advanced technology made a difference?
With today’s advanced polymers, there are more options and better options than ever. One example is the Tannus Airless Tire. Made of closed-cell polymer foam, it is reportedly as light as most tire/tube combos, good for over 5,000 miles and comes in 12 stylish colors. Tannus even claims equivalent rolling resistance to inflated tires.
No more flats. Ever.
During Bike Expo NY 2018, a Tannus rep offered to put a set of Tannus airless tires on a CHANGE 702 folding commuter bike, which I then rode in the 40-mile Five Borough Tour, plus another 20 riding to and from the event.
After a 60-mile day, I must say that the difference between the solid rubber tires of the 1980’s and the carefully calibrated polymer tires today could not be more stark.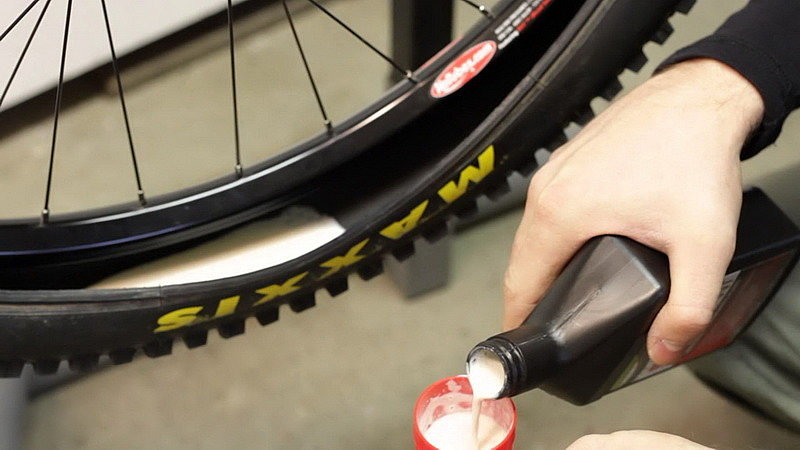 Even a cobblestone road was possible at 15 mph–still not fun on narrow tires, but the choice of tire composition was never in question after the first few wheel rotations.
Among the joys of that 10-mile pre-ride was a surprise section on this road. It felt just like a regular air tire!
FLATBIKE ASSESSMENT: Airless tires will remain more difficult to install/uninstall than inflated tires. But not by much, with the right tool. And it’s a one-time deal.
Last we’ve heard, there’s also about a 5% loss in rolling efficiency. If you keep your tires fully inflated all the time, pumping up for every ride, these aren’t for you. But if you often go weeks between fill-ups, adding 20 lbs or more when you fill up, then you’re going to experience an increase in rolling efficiency. We’ll continue to explore this area as it matures.
4. Like solid tires, but not.We got this tip from a reader–thanks, Donny–and it has developed into a brilliant idea that’s worth a category all its own.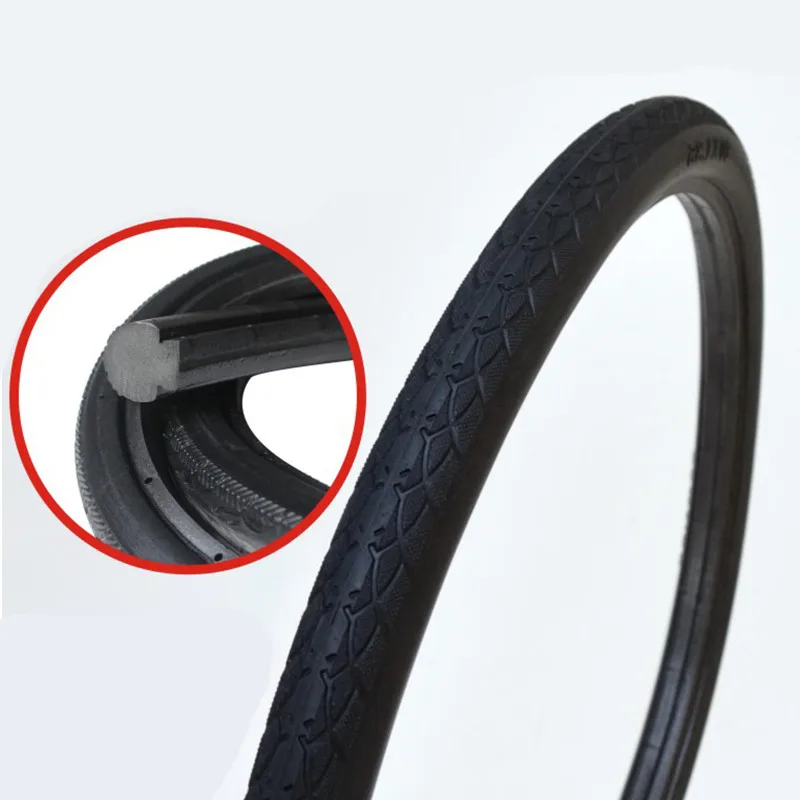 But first, let’s take a step back and look at what riders (road and MTB) actually do with their tires.
Road riders have a preferred pressure that must be maintained over time for maximum efficiency. They rack up many miles on pavement that may occasionally have a pothole, broken bottle, or goathead thorn. Under low pressure, ‘pinch flats’ may also occur, without any obstacle in the way.
Goathead thorns: Nasty stuff.
MTB riders, on the other hand, vary their terrain–one day dirt trails, another day lots of bumps and big jagged rocks–so their tire pressure varies accordingly. The rockier the terrain, the more pliable you want your tire to avoid punctures and increase grip. Broken glass isn’t usually an issue, but goathead thorns and cactus thorns are worse.
So while an airless tire might make sense for a road bike rider, it would take away the ability for MTB riders to adjust pressure for different terrain. Enter a new category: the tire liner.
A tire liner goes between your tire and innertube, protecting against puncture.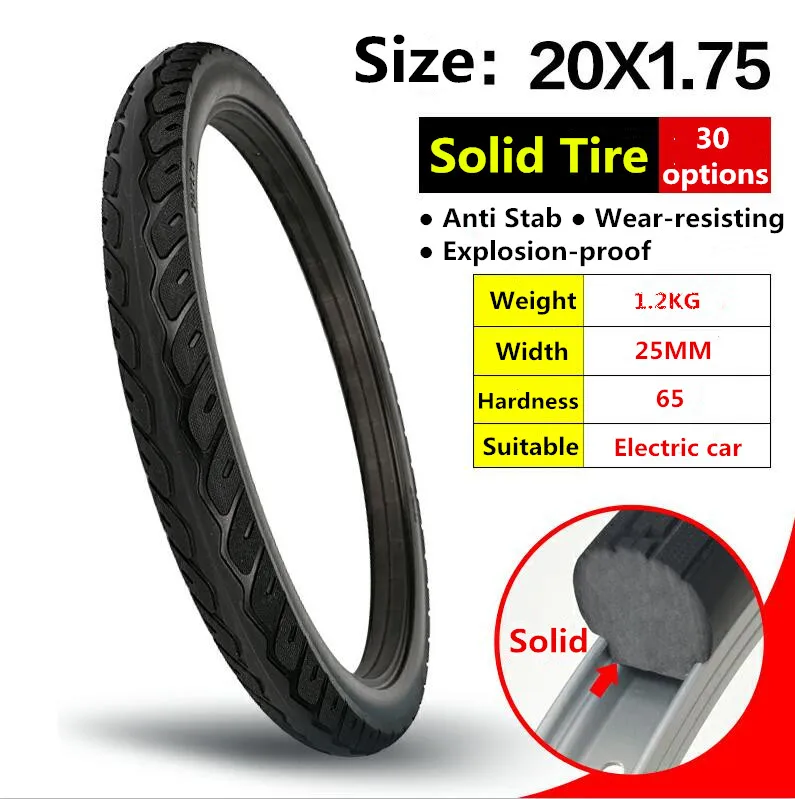
A tire liner can be inexpensive. The one shown here from Mr Tuffy is just ten bucks, with a 70% satisfaction rating. Folks have ridden over 1000 miles with it, and even ‘successfully’ run over broken glass. (And “Ed” in the comments has an even cheaper solution that may be more reliable.)
But it’s still not flat-proof. And you can create your own flats, both from semi-inflated tires (pinch flats) and from having your rim liner slide to the side and rough edges puncture your inner tube (anyone have a name for that?). And tire liners are no match for goathead thorns.
Now here’s where it gets really interesting. Suppose you took the inflated tire idea, and the foam solid tire idea, and the liner idea, and melded them together into a single product that inflated but was thick enough for goathead thorns?
Tannus Armour: an MTB-focused liner that’s finally designed for goathead thorns.
The Tannus Armour is a special type of liner–the red part–with 15 mm of the Tannus solid-tire material under the tread of the tire, and 2mm on the sides.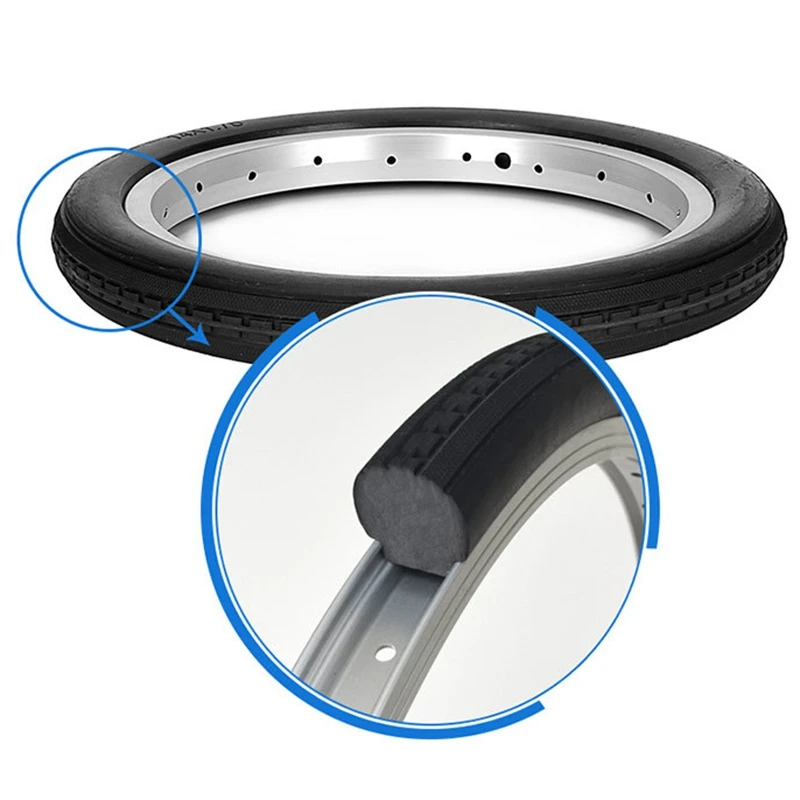 It’s like having most of the advantages of an airless tire, plus the ability to adjust pressure to your terrain.
Normally, this is a ride-ending disaster. Not with Tannus Armour.
Even in the worst case scenario, with a random goathead thorn doing a stealth insertion from the side that goes through tire, 2 mm liner, and inner tube, giving you a flat…you still have 15 mm of solid tire to ride back on, protecting your rim from rock damage.
FLATBIKE ASSESSMENT: We cannot pass this up. We are now offering Tannus Armour at Flatbike, both separately and as an add-on to our our full-size folding mountain bikes. We now offer Tannus Armour for 20″, 26″, and 27.5″ wheels.
5. And now for something completely different…
What if price were no object, and you could just optimize for the ride on your own wheel? This is the idea behind the Energy Return Wheel.
According to company literature, not only does this completely flat-proof option perform as well as a standard mountain bike wheel, but it outperforms a standard wheel, particularly on uphills. Available for the low, low price of just $2,699 from EnergyReturnWheel.com.
FLATBIKE ASSESSMENT: Hmmm. That’s…different. Can we still afford the rest of the bike? And do we have to clean the insides of the tires after a ride?
Overall, that’s five different ways to solve the flat-tire problem. Which one works best for you?
See you on the trails!
Bob Forgrave is president of Flatbike, an
ecommerce company offering full-size folding bikes
and kits to make any bike take up half the space.
425-985-6219
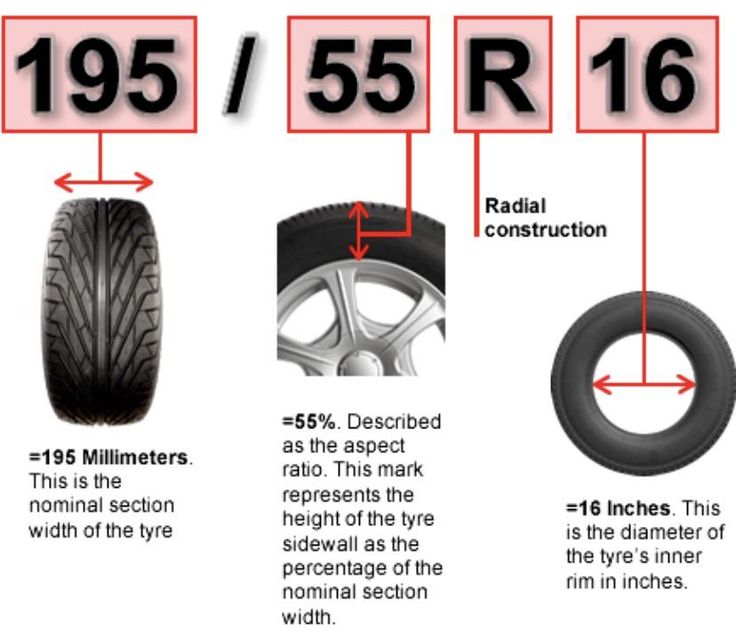
TIRE SIDEWALL MARKING
Indicates the type of rim the tire is compatible with. Unless otherwise noted, should be used on rims with hooks.
Nominal profile width and suitable wheel diameter in millimeters according to ETRTO.
Country of manufacture.
Minimum and maximum pressure in bar and psi. inch.
Specifies the direction in which the tread pattern should be directed when the wheel is rotated forward.
Specifies that the tire should be installed with an inner tube only, not tubeless or otherwise.
TIRE TYPES
TUBE TYPE: A tire for use with an inner tube only.
TUBELESS: A tire for use on tubeless rims only, which can be fitted without an inner tube. Can be used with internal chamber.
TUBELESS READY: A special type of tubeless tire that requires a sealant inside to maintain pressure. Can be used with internal chamber.
TUBULAR: A fully enclosed, stitched or vulcanised, tire construction (tube) that requires a special tubular rim and is glued to it when mounted.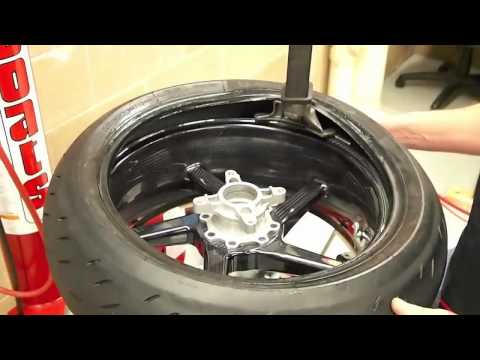
TIRE INFLATION RECOMMENDATIONS
Never exceed the recommended tire pressure.
Proper pressure affects the load, speed and handling of a bike and is vital to performance and safety performance such as braking, maximum traction and tire life.
Inflate tires "cold", that is, not warmed up on the road.
Do not exceed the maximum pressure indicated on the tire sidewall.
Insufficient tire pressure causes excessive creasing and rapid wear.
Excessive pressure causes discomfort when driving and reduces the contact area of the tire with the road surface, which impairs handling and traction.
Before every ride, it is essential to check and maintain the correct tire pressure (while the tires are “cold”), especially on tubeless systems, which are more prone to sudden pressure loss.
WARNING: Driving on tires with improper air pressure is dangerous! This can lead to an accident, accident, serious injury or even death.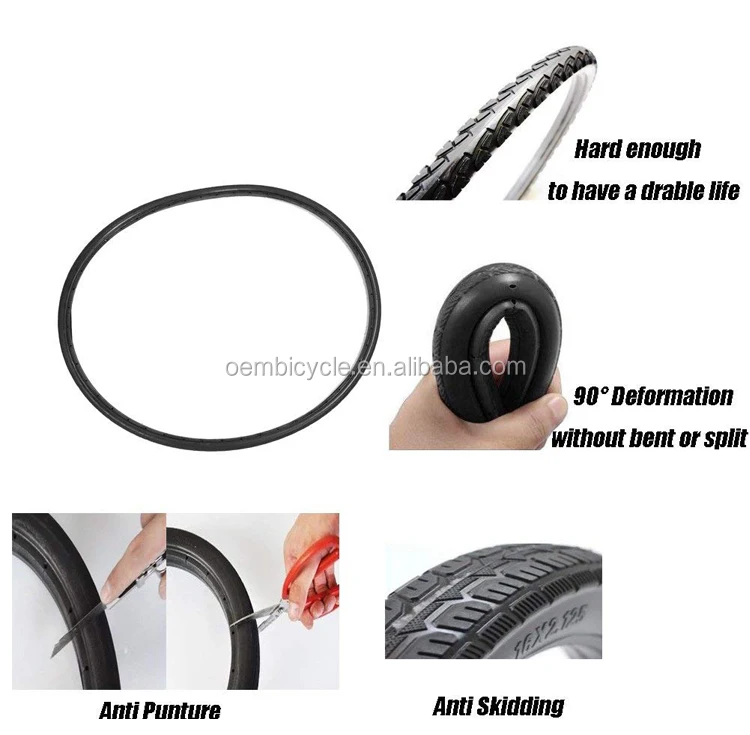
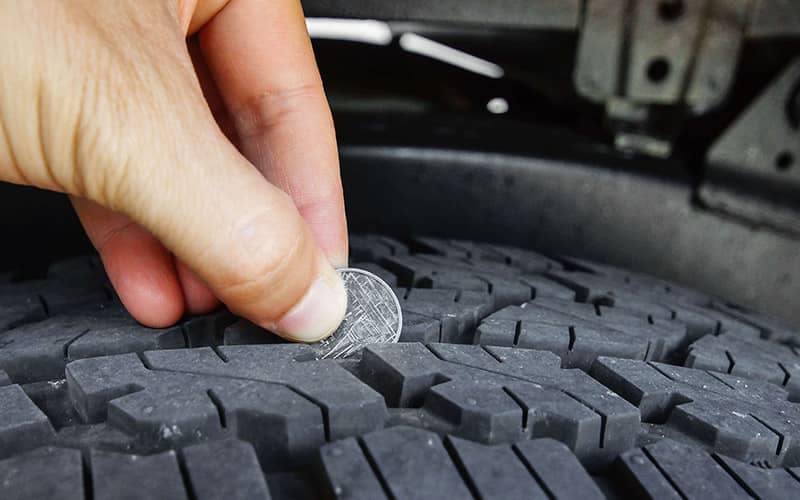
TIRE CHECK
The condition of the tires and the air pressure in them should be checked before each trip, and also, and even more carefully, after hitting any object on the road. If the tread is worn and the body material (cord) becomes visible, bulges, cracks, cuts, holes, uneven wear appear on the tire, or the tire shows signs of any other damage, it is recommended to replace it immediately.
Over time, the condition of the tire will in any case deteriorate under the influence of external forces, such as contact with the road, punctures, improper repairs, mounting-dismantling, inflation-deflation, heating-cooling, excessive exposure to ozone, improper storage conditions, etc., etc. . To reduce the impact, tire manufacturers add anti-ozonants and antioxidants to their products.
Since it is not possible to accurately predict what external forces a tire will be subjected to, there are no scientifically based limits on the life that a tire can be given. It is recommended that the condition of the tires (as well as tubes and rim tapes) be checked regularly by a bicycle specialist who can assess their suitability for further use.
As for tubeless systems with liquid sealant inside, it is necessary to check the condition of the sealant itself and change it regularly in accordance with the instructions.
To avoid cosmetic damage, use low-pressure tap water to clean and wash the tire sidewalls. Never use cleaners to improve the appearance of the sidewall, otherwise you will remove antioxidants, which can degrade the quality of the rubber and lead to cracking of the sidewalls. Using hydraulic sprayers with high water pressure can also cause damage to the sidewall.
Avoid excessive mechanical stress on tires and tubes (for example, do not brake by blocking the wheel, do not run into sharp objects, do not drive with insufficient or excessive tire pressure, etc.).
If your bike has rim brakes, the rim is subject to constant wear and tear, which over time can lead to tube failure and puncture. In any case, if you have any doubts about the condition of the tires, consult a bicycle specialist.
High tire pressure can damage the rim, so check the maximum pressure allowed for the specific rim before installing the tire (check with the wheel dealer or rim manufacturer for information on whether the rim can withstand tire pressure).
CHANGING TIRES
PREPARATION
1. Before installing or removing a wheel, read the bike manufacturer's instructions and make sure you know how to handle the wheel mounting mechanism.
2. Verify that the rim, tire, and tube are compatible with each other by checking the instructions for each component manufacturer. A mismatch between tire and rim can cause the tire bead to come off the rim or damage to the inner tube, resulting in a rapid loss of air pressure. If you're unsure, be sure to check with a bike specialist.
3. Make sure that the mounting area of the tire is clean and that foreign objects do not get into the tire, as they can damage the tube, rim tape, the tire itself, or contaminate the sealant (in the case of a tubeless tire).
4. Make sure the rim is in good condition. If it is damaged, then it must be replaced.
5. Check the condition of the rim tape, if used. If it is damaged or does not completely cover the spoke holes in the rim, it must be replaced. Poor quality rim tape is very often the cause of a sudden loss of air pressure.
6. Check the maximum allowable pressure for the given rim type. It must be equal to or higher than the tire. Tires that allow a pressure reduction equal to or greater than 3 bar (43 psi) must be mounted on lug rims.
7. A tire capable of inflating more than 5 bar (73 psi) must be mounted on a lug rim. Hooked rims are marked with a "C" in the size label. If you have any questions, please contact a bicycle specialist.
8. In the case of installing a tire with a tube, talc helps to properly place it in the tire. For latex cameras, its use is mandatory, but it is also recommended for butyl cameras. It is also recommended to install a new tube each time a new tire is fitted or after a puncture.
9. When installing a tubeless tire (Tubless), always check the condition of the valve (nipple) and change it if it looks damaged or if air pressure is lost.
10. When installing a Tubeless Ready tire, always check the sealant and change it if it is dry. Also read the sealant manufacturer's instructions carefully to make sure it's right for your tire.
TIRE REMOVAL PROCEDURE
1. Unscrew the valve cap (nipple) and locknut, completely deflate the tire.
2. Peel off one side of the tire all around from the edge of the rim by applying pressure starting from the area opposite the valve. Tubeless tires may require more effort for this.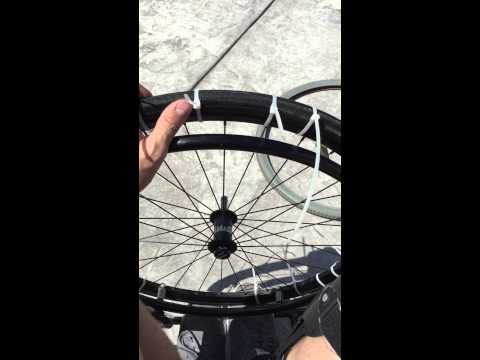
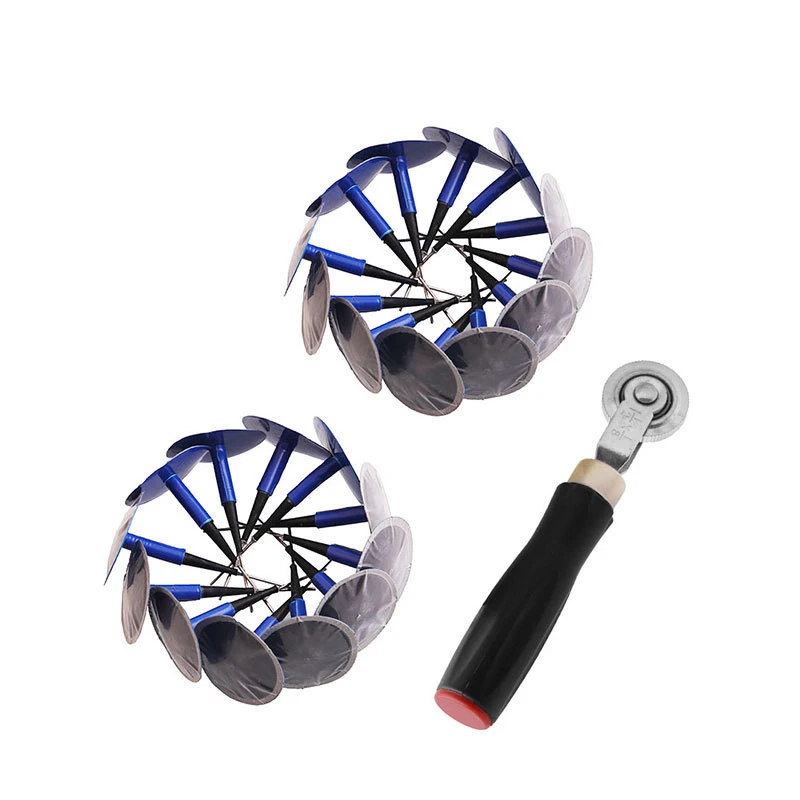
3. Position the tire pryer next to the valve and carefully insert it between the tire and rim, being careful not to pinch the inner tube (if any). Then, using a lever, lift the sidewall of the tire off the rim. To make the job easier, always make sure that the other bead is in the rim bed.
4. While holding the first rig in this position, insert the second rig about 10 cm from the first and repeat the above operation. Then run the pliers around the circumference of the tire to completely separate one bead from the rim.
5. Remove the inner tube, if present, or liquid sealant, if present and still liquid, and then remove the second tire bead from the rim with your hands.
TIRE INSTALLATION PROCEDURE
1. If installing a tubeless tyre, make sure the rim is sealed, tubeless tyre-compatible, or tubeless-compatible. If the rim is tubeless compatible, you will also need a tubeless rim tape that will completely cover the spoke holes.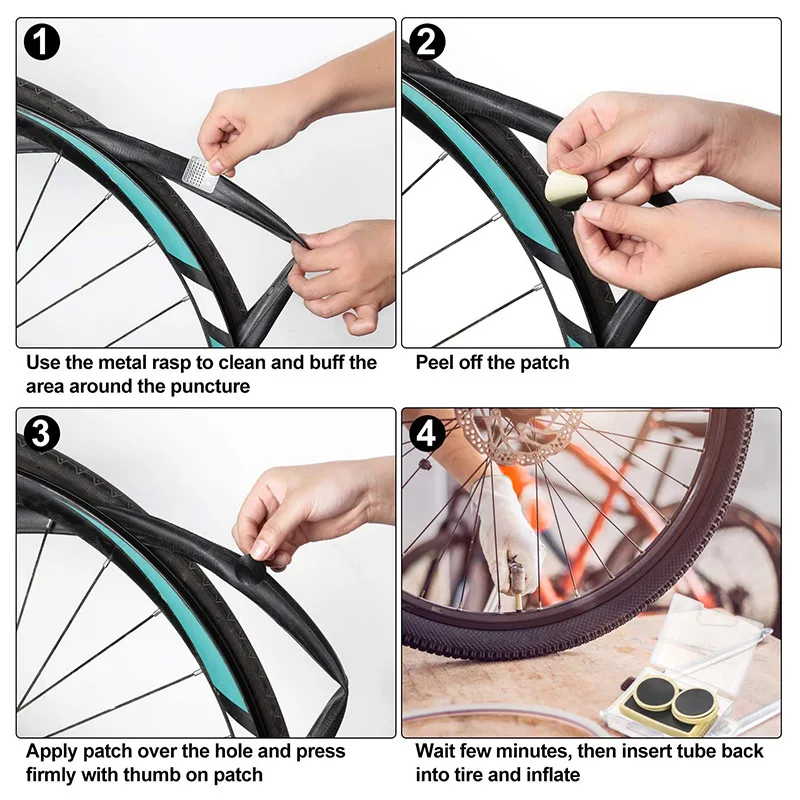 It is possible to lubricate the entire circumference of the rim with a special tubeless lubricant (do not use oil or grease) - this will facilitate the installation procedure and the correct positioning of the tire on the rim.
2. Insert the first bead of the tire into the rim, observing the direction of rotation of the tire indicated on its sidewall, starting opposite the valve.
3. If installing a tire with a tube, slightly inflate the tube, but only so that it becomes rounded, and gently insert into the tire, starting at the valve and completely carefully placing it in the rim.
4. Starting on the side opposite the valve, press the other bead of the tire into the rim and push it around the rim in both directions until it fits properly in the rim. For tubeless installations, add the recommended amount of sealant before inserting the last bead piece. If the tire bead becomes difficult to push into the rim, or the last part of the bead does not snap into place, make sure that the bead around the entire circumference of the rim is in place. If necessary, squeeze the sidewalls of the tire into the rim with your hands.
5. If fitted with a tube, make sure it is not pinched between the tire and the rim or valve, and then secure the valve to the rim with a locknut.
6. Inflate the tire to the maximum allowable pressure using a pressure gauge pump so that the beads are properly seated on the rim. Tubeless tires click into place with a characteristic popping sound. Rotate the wheel by hand at low speed and at an angle to check that the beads are correctly positioned and also that the liquid sealant is spread inside (if the installation is tubeless).
7. The tire is properly seated when the thin line above the side of the rim is equidistant from the edge of the rim all around. Then reduce the pressure to your preference (within the markings on the sidewall of the tire) and close the valve. Do not exceed the manufacturer's maximum pressure for tire, rim and rim tape.
8. When inflating a tubeless tire for the first time, a strong jet of air is required, so you may need a compressor.
9. Before each ride, check the air pressure, tire bead fit, wheel-to-hub attachment, and brake pads (disc or rim).
10. Before using newly installed tires, be sure to first brake test and do a few test maneuvers.
USING TIRES ON FULLY SEALED CARBON AND ALUMINUM CLINCHER RIM WITHOUT RIM TAPE
Fully sealed carbon and aluminum rims, such as tubeless rims, usually don't have spoke holes in the rim, so manufacturers don't mandate the use of rim tape.
However, keep in mind that in the case of bikes equipped with rim brakes, the heat generated during braking directly enters the tire system, significantly increasing the thermal load on all components, such as the tire, the inner tube (if any) and the rim itself. In the event of prolonged braking, riding without a rim tape can cause the tires to deflate quickly, with the risk of losing control of the bike.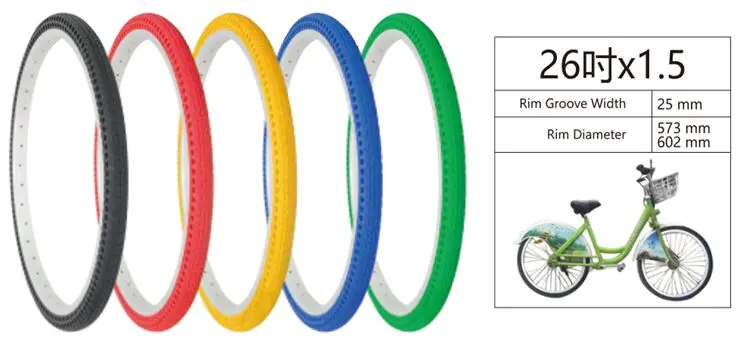
This becomes even more relevant in the case of latex and lightweight tubes, as well as tubeless installations. In order to minimize the chance of failure due to overheating, it is recommended to use rim tape for any installation, and to avoid continuous, prolonged braking when descending a mountain, if possible.
USING CLINCHER TIRES WITH CARBON RIM
Carbon rims sometimes pose a risk of tire edge damage due to sharp rim edges. Therefore, before mounting the tire, it is recommended to make sure that there are no sharp edges on the rim hooks. To verify this, carefully run your finger along both edges of the rim - there should be no nicks, sharp protrusions or excessive roughness on it. If there are, then the rim needs to be replaced.
If in doubt, please consult a bicycle specialist.
TIRE STORAGE
Tires should be stored in a cool, dry place at 10°C - 21°C, avoiding contact with heaters.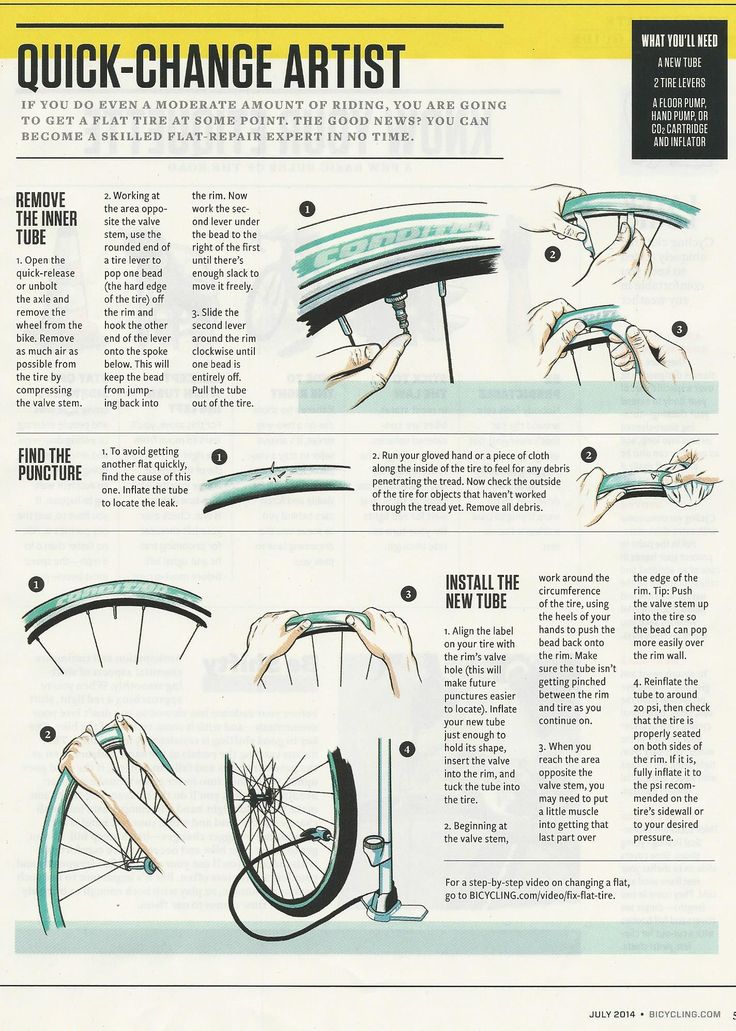
Storage temperatures that are too low are not harmful in and of themselves, but can cause tire stiffness. In this case, before unfolding the folded tire and mounting, it is necessary to keep it for several hours at a temperature of about 16°C.
Do not park your bike in direct sunlight or in very hot places for a long time.
When the bike is not in use and is on wheels, keep the tires inflated and rotate the wheels periodically to avoid flat spots, especially if tubeless tires with liquid sealant are installed.
TIRE AND RIM COMPATIBILITY ISO 5775-1
Well, not really sticks, of course: this is how the flexible polyurethane plates in airless Michelin X Tweel wheels look from the side. Michelin-starred say that in the future these tires may replace conventional pneumatic - but for now I drove a loader that was shod in them.
When I hear the expression “airless tyre”, my childhood memories of the Druzhok bike with solid tires, that is, completely molded from rubber, come to mind. The ride, of course, was harsh (although this is not so important in childhood), but you could not be afraid to pierce the wheel with a nail or glass.
But it turns out that an airless wheel is not always rigid! Michelin began developing airless tires with polyurethane plates around the turn of the 2000s, and at the 2004 Paris Motor Show presented the first such concept wheel.
Polyurethane plates quite rigid
Here the central disc, the plates, and the metal-cord rim with rubber tread are one piece, and the plates replace the air that is inflated with a conventional tire. When hitting an obstacle, the plates located at the bottom of the wheel bend, and the rest help them, stretching and distributing the load.
But the installation of such wheels on cars is out of the question: first, "airless" must pass a huge number of tests and tests on a variety of surfaces. That is why the first production model, X Tweel (Tire + Wheel, "tire + wheel"), is designed for equipment that operates in more or less constant conditions - lawn mowers and skid steer loaders.
Skid steer loader - a machine with a bucket in front, which turns by braking the wheels of one side or the other. This equipment is produced by companies such as Bobcat, Case or JCB - I rode the latest brand of loaders equipped with an 85-horsepower Dieselmax engine.
Management is so elementary that even a child can handle it. He pushed the lever - went forward, pulled it towards himself - reverse gear, let go - stopped. There is also an “acceleration” pedal on the floor: if you press it, you will go faster. Turn - with the help of levers, as if you were driving a small tank. And most of all I was surprised by the visibility: the bucket is so clearly visible that you can drive literally millimeters from the obstacle. By the way, mini-loaders are deprived of elastic suspension, so all depreciation is due to tires only.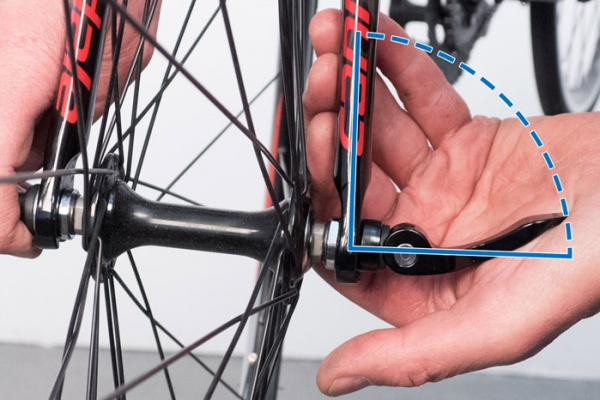
I had three loaders at my disposal. One is on pneumatic tires, the second is on solid tires (yes, like a children's bike), the third is on Michelin X Tweel. The buckets are completely filled with gravel, and the test area is filled with obstacles in the form of bars and stones.
First - JCB on solid tires. He jumped on the stones like a mountain goat, shaking the gravel out of the ladle and the soul out of me. Of course, such wheels are not afraid of punctures, but work on them all day - thank you! In general, tough and also very expensive (how much - we'll say a little later).
The second loader is on conventional pneumatics. He was already softer driving over obstacles, but, moving off them, he bounced like a ball. Of course, it’s not as tough here as on the “casting”, but constantly jumping is also not much fun.
Well, how will Tweel show itself? I expected some extraordinary sensations - no, the loader, of course, still passes rough obstacles. But the jumping and hard hitting almost completely disappeared, and the gravel didn't fly out of the bucket even when I pressed the accelerator pedal on the obstacle of stones.
But what about reliability? Michelin-stars strongly discourage the use of these wheels where there is a risk of damaging the rather delicate polyurethane plates. At the same time, it is claimed that the failure of one or two plates will not affect the operation of the wheel, and its temperature range is from minus 40 to plus 50 degrees.
Last but not least, Michelin X Tweel 16.5-inch wheel loader tires will go on sale in Russia next spring. The cost has not yet been determined, but in the US, where these wheels are made and sold for a couple of years, they cost about 900$ each. The price of solid wheels for loaders is about the same, but pneumatic ones are almost half as much. At the same time, the Michelin-stars promise to eventually start restoring airless tires in Russia (the tread allows you to do this up to three to five times), as well as to repair the plates.