Installing chains on your ATV may seem a bit tricky at first. But as long as you know the steps involved, including a few key success criteria, it’s actually not that hard.
I made this step-by-step guide so that anyone should be able to install ATV chains on their bikes. For those with some previous chain installing experience, you may even find a few tricks for an even faster and snugger install.
The guide fits both ladder-style chains and diamond-style chains.
My personal experience with installing tire chains began over 15 years ago. I had to install chains on the tractors on the farm every winter. I’ve also been using chains on my ATV for the last couple of seasons.
Page Contents
Take a note of the size of your tires. This number will be marked on the side of the tire.
ATV tire chains come in several different sizes, where each size is made to fit a range of tire sizes.
You should generally have no problems finding chain-sizes that fit your specific tire size. But sometimes there is necessary to make a small modification to the chain to get a snug fit.
You will need just a few tools to install ATV tire chains:
Most ATVs are actually not designed with the use of tire chains in mind. Many bikes do not have enough space in the wheel wells for the tires to spin freely when chains are fitted.
The front wheels are often the ones causing problems because of the space needed for turning.
There are no clearance issues on my Polaris Sportsman after installing two-inch spacers on all four wheels.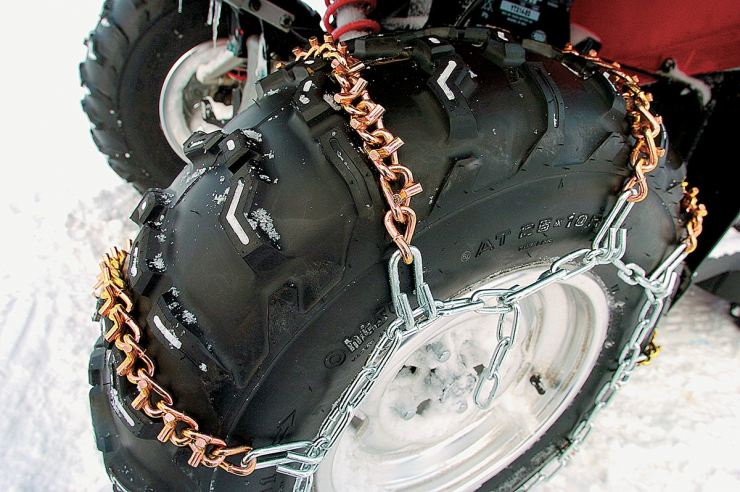
As a general rule, I recommend a minimum clearance of two inches anywhere around the wheel.
This also includes the distance between the tire’s sidewall and any fragile components like the brake-lines or plastics. Ensure you also measure the clearance when turning the wheel completely to the left and the right.
Because you have limited space, it is crucial to achieving a really snug fit when you install the chains.
This will keep the chains as close to the tires as possible. Thus needing less space around them without running into any collision issues.
If the chains are fitted too loose, they can cause severe damage to the bike’s brake lines, fenders, suspension, exhaust, or other parts that get hit.
This is especially true when riding at some speed. The centrifugal forces involved will sling the chains outward from the tire. Thus, needing much more space than if the chains were installed snug.
But sometimes, a snug fit will not be enough to give you enough clearance.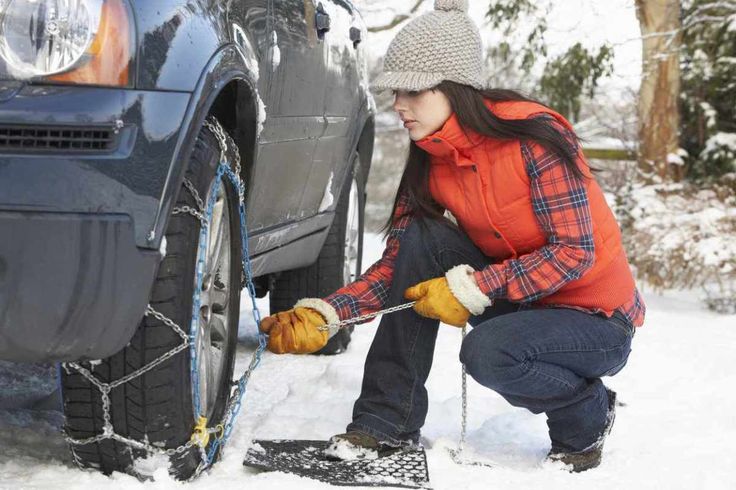
By installing wheel spacers, you move the wheels outward. This creates more space on the inside of the tire.
Wheel spacers will give you better clearance.You can either use special spacer bolts or a one-piece wheel spacer made out of metal. The spacer bolts are the cheapest option. But proper wheel spacers are generally a bit stronger. So they are what I recommend getting.
Wheel spacers come in different sizes, adding anything from ½ – 2 or even 3 inches of extra space on each tire. A spacer width of about 1,75 – 2 inches will be enough in most cases.
Going too wide will only add unnecessary strain on the bike’s bearings and suspension. This is not recommended.
During the installation process, you will be pushing the ATV slightly forward. This will be a lot easier if you have some sort of hard, smooth surface to work on. A concrete driveway or a garage floor is ideal.
Working on a clean hard surface will also make the whole process a lot more enjoyable.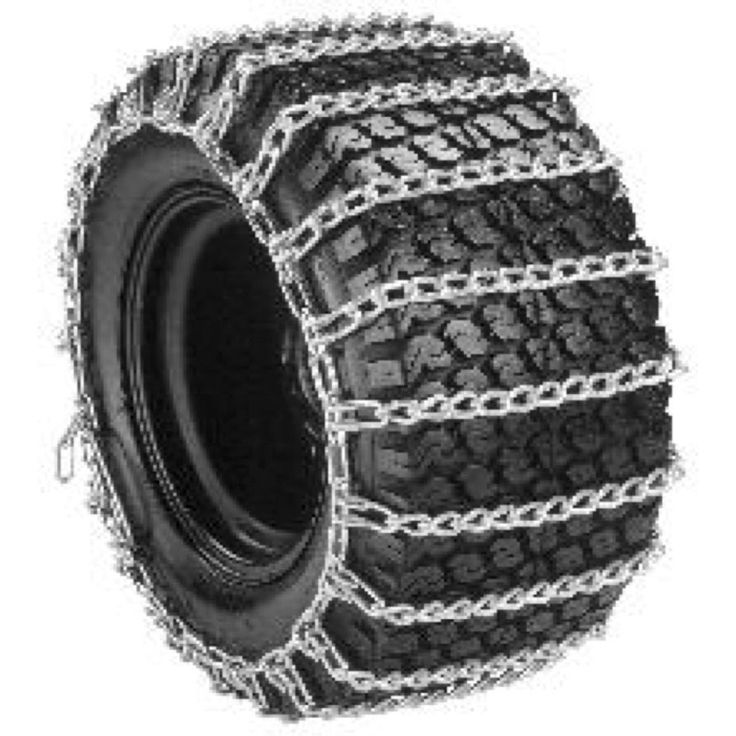 You won’t have any wet mud or gravel that will make your hands cold and your clothes dirty.
In a pinch, it’s no problem installing tire chains out in the woods, neither. It’s just a bit messy and requires some more fiddling to get a good result.
Put the bike in neutral to roll freely, but leave the parking brake on for now.
The easiest way to assure a snug fit is by deflating the tires slightly before installing the chains. And then, after the chains are in place, you inflate the tires again.
Dropping 3-4 PSI should be fine. Some even prefer deflating them completely to achieve a very tight fit.
Use a valve tool to speed up the process. Or you can push down the little pin inside the tire valve – if you have the patience.
Slightly deflate the tire using a valve stem core removal tool.Valve stem removal tools are cheap and can be bought at most auto supply stores or tire shops.
Caution! It’s important to know that this procedure for snugging up the chains is not risk-free.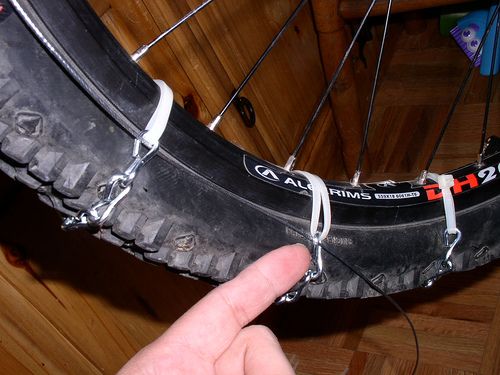 If you do it incorrectly, or if the chains are weak or damaged, they may break, and the tire may blow up. You should never do this on weaker chains like ordinary truck chains.
However, most quality ATV chains should be strong enough to handle this procedure, as long as you don’t overdo it.
If you are not confident that you can keep track of how tight the chains get when re-inflating the tires, you should skip this step.
Instead, you should use other means of keeping the chains snug. Installing chain tensioners is a good option.
Lay the chain flat behind the rear tire and remove any twist and tangles. For the front tires, you lay the chains in the front of the tire.
The studs (the aggressive side of the chain) and the ends of the cross-chain hooks should be facing upwards.
Lay the chain flat behind the tire. Studs should be facing up.At one end, you will find a boomer fastener on one side and a C-hook on the other. Or, on some models, you will find a boomer fastener on both sides and no C-hook.
Ideally, you should orientate the chain so that the „bend“ of the boomer fastener is facing forward in the tire rotation direction. This lessens the chance of it coming unloose when riding in deep snow and mud or from debris rubbing against the tire.
Boomer fasteners do, however, need more space than a C-hook. If space is limited, it’s better to orient the chain so that the boomer fastener is outside of all tires, even if that means that the “bend” of the fastener is facing backward on one side of the bike.
There are ways you can prevent the fastener from coming undone, like adding a strong zip-tie.
If the type of chain you have uses boomer fasteners on both sides, lay the chains with the boomers facing forward. This will ensure correct installation.
On diamond pattern chains, you will find a set of shackles at one end of the chain. Remove these and set them aside for now.
Remove shackles and set them aside.
I find that it’s easier to keep the chain nice and straight if you drag them straight from the front or from the behind of the tire. Or, you can lift them over the tire from the side.
It’s really a matter of personal preference.
Use both hands to slightly lift and adjust the chain sideways so that the same amount of chain hang down on each side of the tire. It needs to be in the center of the tire.
The studs and the ends of the cross-chain hooks should be facing up and away from the tire. Untwist any twists so that the chain is laying as smooth against the tire as possible.
If any sharp parts of the chain are in direct contact with the tire, it will soon start wearing on the tire. After a while, this can cause a flat or even a blowout.
The front end of the chain should now be at about ground level. Tuck this end in under the front of the tire to be ready for the next step that is rolling the bike forward.
Release the park brakes so that the bike rolls freely.
You may also start the bike and ride it if you need to. But this will leave you with less control of the positioning of the chain.
If needed, stop and make adjustments to the chain to sit as tight as possible on the tire and stay in the center.
Continue moving the bike until about 15 inches of the chain lay behind the tire. The other end of the chain should now be hanging freely at about 2 o’clock on the tire.
The chain is in position and ready to be connected.In this step, it is crucial to make sure both the inner and outer chains are the same length.
If one side ends up being shorter, it will be tighter than the other side. This will drag the chain over to whatever side is tighter when you ride.
Grab the 15 inch part of the chain that still lays flat on the ground and lift it against the end that hangs at 2 o’clock. You will be connecting the side chains that go all around the tire.
At one end, there will be a fastener (boomer or C-hook, depending on the model). At the other end, there will be some free links available.
Connecting a C-hook:
Connecting a boomer fastener:

Start with the inside fastener. Try to get the chain as tight as you can while still keeping it at the center of the tire. The “leftover” links should be facing away from the tire. Make sure nothing gets twisted.
Then move on to the outside fastener. Use the same number of links as you did on the inside.
If the chains you are installing are ladder chains, you can skip step 8.
If the chains you are installing are diamond pattern chains, you will find that you still have two loose ends of chain at one end. At the other end of the chain, you will have two metal rings.
Grab the loose chains and thread them up through each of their rings ring from underneath. Tighten until the chain is snug. Then pull one of the tail ends over to the side chain.
Connect the tail ends to the side chain using a shackle.Make sure that all studs are facing outward and everything lays as flat to the tire as possible. Any twist and bumps will make the ride a lot more uncomfortable and may cause premature wear to the chain and tire.
Tighten about as much as you did on the two side fasteners so that it feels snug. Connect the tail end to the sidechain using one of the small shackles you removed in step 3. Tighten the shackle only by hand for now.
Tighten the shackle by hand for now.Count the number of tail links from the one that you’ve already connected. Then repeat the process with the remaining tail end on the other side of the wheel. Use the same number of tail links on this side as well.
Some chain kits come with shackles included. If your kit didn’t, or if you have lost them, you can get new ones for cheap at most hardware stores. Get one with about the same thickness as the chain links; 4-6mm is common.
Both tail ends are now tightened and fastened.Then repeat steps 3 – 8 with the remaining tires.
Now it’s time to put air back into the tires. Use a pressure gauge to keep track of much air you are adding.
As you put more air into the tires, the chains will tighten up. Ideally, they should become tight/snug just before you reach your desired tire pressure.
Inflate the tires again. Be careful so that you don’t overinflate!If you had tightened the chains too much before you started inflating the tires, they might become too tight. Do not overinflate. Doing so could potentially break the chains and have the tire explode with a force so powerful it can cause severe injury.
If the chains are getting tight before reaching about 75% of proper air pressure, do not continue. Deflate the tires and loosen the chain by one link on each side. Then inflate again.
Now it’s time to test your installation. Start by riding very slowly to make sure nothing is catching.
Then take some turns to see if you’re still good when turning the wheels to the max. Do not ride faster than about 5mph on your test ride.
In fact, never go fast. Chains are for slow riding.
The ride doesn’t have to be so long; a couple of runs up and down your driveway is fine. You only need the chains to „slip in place, “which will happen naturally when the wheels rotate.
This will often allow you to re-tighten the chain when you get back from your test ride. One more link on each of the tighteners is normal.
It does require some work to deflate, tighten and re-inflate the tires once more. But it may be necessary to get the snug fit you need.
Now tighten all shackles using some pliers or a wrench.
Any loose ends of the chain need to be securely fastened. If not, they will quickly damage your fenders or other components of the bike.
You can retain the piece of chain that’s left by the boomer tensioners onto the arm of the fastener itself.
In this pic, the free links of the chain are hooked onto the boomer fastener.The free links of chain by the C-hook also need to be fastened. Use a heavy-duty zip-tie or preferably a shackle. You can use this method to fasten all free links of chain if that’s what you prefer.
As a final option, you can cut them off using an angle grinder.
But doing so does come with the disadvantage of making the installation a bit harder the next time. You will also lose the possibility of using the chains if you later decide to get slightly bigger tires.
Now you are done!
If you do not like the potential risk involved with using tire pressure to snug up the chains, there are other ways. You can get almost the same effect by adding chain tensioners. It will keep the chains centered on the wheel and keep them from sliding around.
Be aware that you should not install these until after taking a test ride and re-tightened the chains.
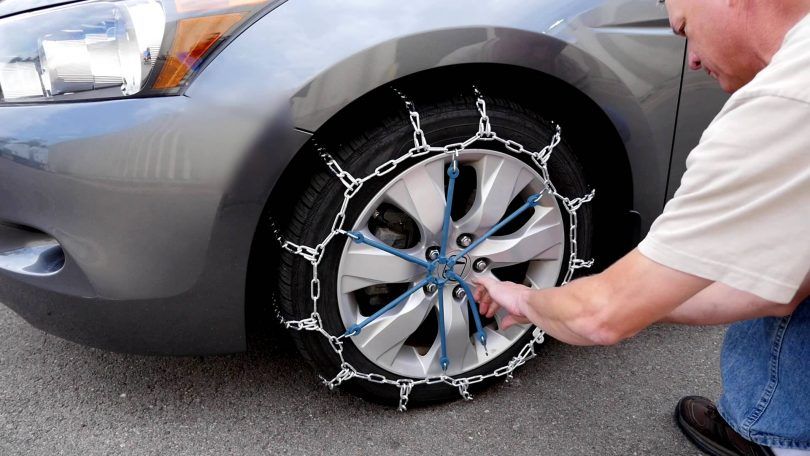
Chain adjusters are springs or rubber bands with small hooks on each end. They are made as a star pattern where each spring connects to the side chain.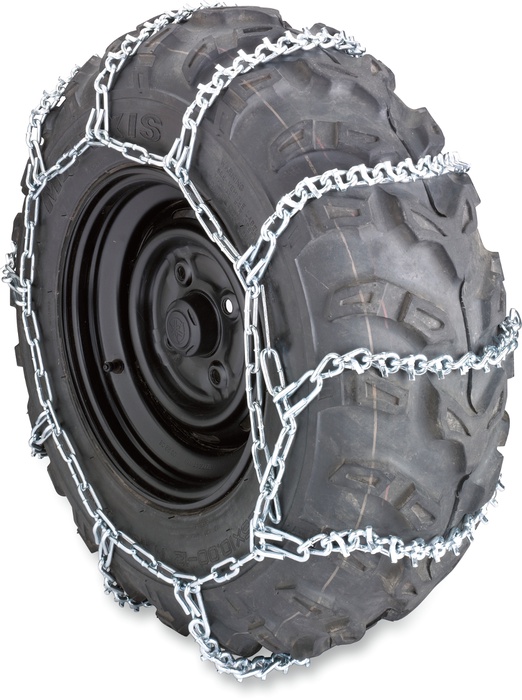 4-6 spring-loaded „arms“ are common.
You can also use a basic bungee cord installed in a star pattern to get the same effect.
You should add a tensioner both on the inside and on the outside of each tire. This will stretch the chain towards the center of the tire and keep it snug at all times.
Sometimes you won’t be able to find chains that fit your tires. Or you may have bought a new ATV with smaller tires than the one you had before.
Also, when the chains have been used for some time, they will wear and stretch out. Painted chains will stretch just from wearing down the paint. The paint is not thick, but it adds up when counting every link on the chain.
So at some point, you may need to shorten the chains. This is just a part of owning chains for any vehicle.
All you need to achieve this is an angle grinder or some good bolt cutters.

You need to cut away at least one complete „diamond“ to get a good result on diamond-shaped chains.
How do ATV tire chains work?
ATV tire chains have sharp studs that penetrate the ice for better grip. Because of the aggressive pattern they provide, they also improve traction on compact snow and gravel. They are not made to be used at any kind of speed.
How long do ATV chains last?
ATV tire chains’ life expectancy heavily depends on factors like surface hardness, speed, and proper installation. Snugly fitted chains will last about twice as long as loosely fitted chains. Using chains on hard surfaces like concrete or asphalt will wear much faster.
How to tighten ATV tire chains?
ATV tire chains can be tightened by adding chain adjusters to both the inside and outside of the wheel. Many prefer attaining proper chain tightness by slightly deflating the tires before installation. After installation, they are re-inflated. This procedure requires caution.
How to repair a broken ATV tire chain?
When a link breaks on the ATV tire chain, use a pin connector to replace the broken link. This repair will make the chain just as strong as it was originally.
How-To Installation Product & Troubleshooting Problems Power Sport, ATV, UTV, Snowmobiles, Dirt Bikes, and Off-Roading Snow Removal Tips and Tricks Home, Lawn, and Outdoor Power Equipment Tips and Tricks
October 8, 2019
If you have to navigate mud in the spring and fall or snow in the winter, you know how rough it can be on your outdoor power equipment and power sport vehicles. One of the best ways to avoid getting stuck is by installing tire chains. If you've never installed them before or if you need a refresher, keep reading. We've got you covered. From best practices to deciding if you need chain tensioners, we'll walk you through the installation process.
Before ordering from www. theropshop.com, double-check the size of your tire. You'll need the outer diameter, the width, and the rim diameter. These measurements should be cast into the tire's outer wall, but if not, take care when measuring. If you're even a half-inch off on a single dimension, it can throw off the fit of the chains.
Once you know your tire size, click tire chains to see our inventory, then select the chains that match your tire dimensions. If you're not sure which chains you need, give us a call, send us an email, or chat with us through our website. We're here to help.
Keep in mind, our tire chains are only compatible with tires with turf-style treads. If you've got lug, ag, bar, or industrial treads, you'll need diamond-style chains to prevent them from falling between your treads.
1. Once your new tire chains from The ROP Shop arrive, set up your lawn tractor/snowblower/ATV where you can easily roll the unit forward or backward over the chains without hitting anything. The chains can cause damage to some surfaces, and cement can damage the chains. If you can set up on a patch of cleared ground, that's usually the best way to go.
2. Have your brake and/or hydrostat engaged until you're ready to move.
3. Untangle the chains, checking for twists. This part can be tricky. Stay patient and take your time, checking each section between cross chains.
4. Lay the chains out behind your tires. We recommend installing them on two adjacent tires at the same time for efficiency's sake. If you're not comfortable doing that, take it one at a time.
5. Check your setup. When the chain surrounds the tire, the curved hooks of each cross chain should point outward so they won't dig into your tires' sidewalls. Make sure the hooks won't end up under the treads when you roll your machine over them.
SNOW CHAIN AND TENSIONERS FROM THE ROP SHOP
The ROP Shop Pair of Chain Tensioners fits all Tire Chains offered by The ROP Shop
SKU: 100159
$11. 49
49
The ROP Shop Pair of 2 Link Tire Chains fit 20x10x8, 20x9x10, 22x10x8, 20x10x10, 21x8x10 Turf Tires
SKU: 100151
$44.99
The ROP Shop Pair of 2 Link Tire Chains fits 20x8x8, 20x7x12, 20x8x10, 20x9x8, 21x7x10 Tires
SKU: 100152
$44.99
The ROP Shop Pair of 2 Link Tire Chains fits 23x10.5x12, 22x11x8, 22x11x10, 23x10x12, 24x9.5x12 Tires
SKU: 100153
$49.49
The ROP Shop Pair of 2 Link Tire Chains fits 26x12x12, 25x10x8, 24x10.5x12, 24x13x12, 26x10x12, 26x11x12, 25x12x12 Tires
SKU: 100157
$67.49
6. Disengage your brake and/or hydrostat and put your unit into neutral, then roll (don't drive) your machine until the tire is centered at the 3/4 point of the chain. We recommend rolling, not driving, to prevent accidents and damage to equipment. If you have to drive over the chains, take it slow and easy.
7. After rolling your machine into place over the chains, release about 10 PSI of air pressure from the tire. This will help with an easier install and a snug fit. To make the process easier, don't release the air pressure until after you've rolled the equipment.
8. Take the corners of the chains under your unit. While keeping the chains from twisting, pull them up and over the tire until they drape on the other side.
9. Pull the inner chain tight and fasten the hook. Count the number of links remaining on the inner chain, then move to the outer chain, placing the fastener through the link with the same distance as the inner chain.
10. Re-inflate your tires back to factory specifications. Make sure the chain doesn't fall between your tire's treads. If it does, it's not going to do you much good. You'll likely need diamond-pattern chains instead.
And there you have it. You're just about ready to tackle mud or snow, but we recommend giving the chains a test drive before getting to work. This will smooth out any unseen kinks and allow the chains to settle.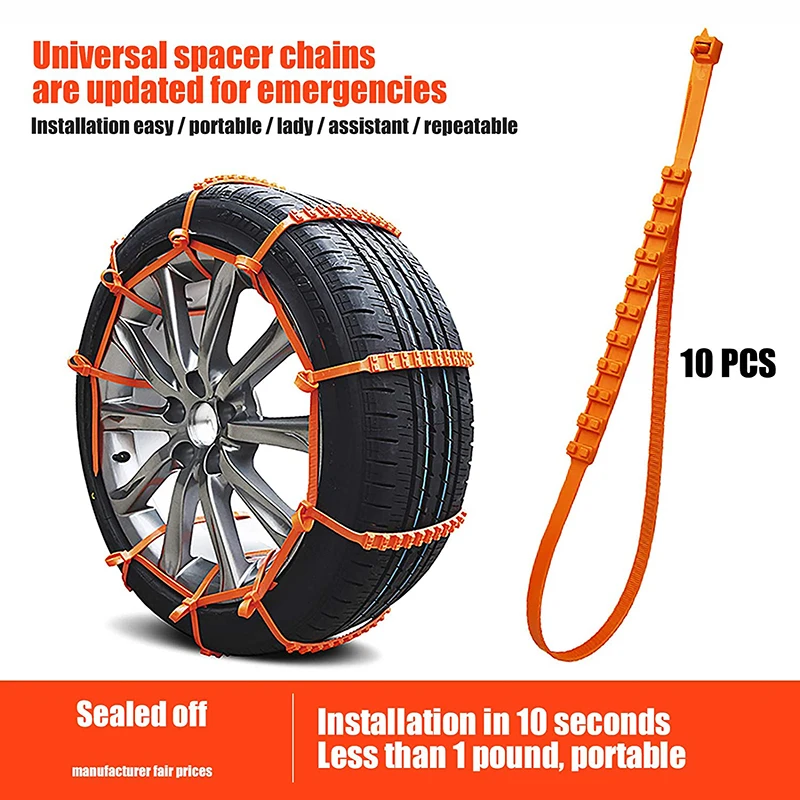 Drive slowly and check for any loosening. You don't want your chains to fall off and get damaged, and you don't want them to damage your equipment.
If you do need to tighten a chain, loosen the outside latch, keeping it connected to the link. Adjust the inside hook as needed, keeping track of how many links you tighten. Since the inside is just a hook, it's more difficult to adjust. Adjusting it first will make it easier to then tighten the outside latch. Count the same number of links as you tightened on your inside and re-install the outside latch in the new link.
When you're satisfied with the fit, use wire or heavy-duty twist ties to tie back any extra chain links. If you'll likely use the chains again on the same unit season after season, you have the option of removing the slack with bolt cutters. For extra Ruggedness, we recommend leaving them. Saving the extra links on the chains will give you some play in case you replace your unit or your tires. If you save the slack, mark the link the fastener attaches to for quicker installation in the future.
RECOMMENDED SNOW CHAIN AND TENSIONER COMBO PACKS
The ROP Shop Pair of 2 Link Tire Chains with Tensioners fit 20x8x8, 20x7x12, 20x8x10, 20x9x8, 21x7x10 Tires
SKU: 800117
$50.99
The ROP Shop Pair of 2 Link Tire Chains with Tensioners fit 20x10x8, 20x9x10, 22x10x8, 20x10x10, 21x8x10 Tires
SKU: 800116
$76.49
The ROP Shop Pair of 2 Link Tire Chains with Tensioners fit 23x10.5x12, 22x11x8, 22x11x10, 23x10x12, 24x9.5x12 Tires
SKU: 800118
$76.49
The ROP Shop Pair of 2 Link Tire Chains with Tensioners fit 24x12x12 & 24x12x10 Tires
SKU: 800105
$76.49
The ROP Shop Pair of 2 Link Tire Chains with Tensioners fit 26x12x12, 25x10x8, 24x10.5x12, 24x13x12, 26x10x12, 26x11x12, 25x12x12 Tires
SKU: 800106
$98.99
Video intro screen for Rugged UCheck out our video. We've provided examples of tire chains installed upside-down and of chains riding too loose to the tire. Both issues can cause problems driving, but worse, they risk damage to your unit and to you. Check your installation against the video, and make sure you purchased the correct chains for your tire size.
If you've properly installed your chains, they should fit the tire snugly. If you're looking to decrease the chance of your chains coming loose, or if you want to increase the pull on your chains, you could install The ROP Shop’s spring tensioners (SKU: 100159). Simply attach each spring to four opposing points over the rim.
We hope you found this helpful. For more assistance with fitment, call us, email us, or chat with us on our website. We're always here to help you Stay Rugged.
THE ROP SHOP TIRE CHAINS
SHOP TIRE CHAINS Share Article Items you might like...Read Article
Home, Lawn, and Outdoor Power Equipment Tips and Tricks
June 13, 2022
HOW AND WHY TO AVOID DULL MOWER BLADESMowing with dull blades is a recipe for disaster.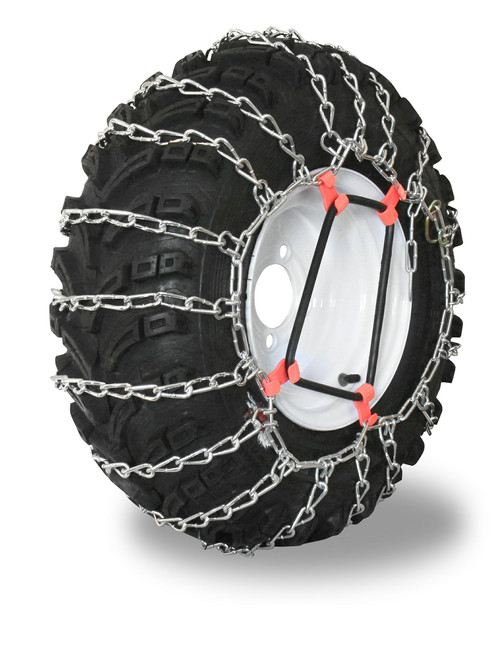 We don't just mean for your lawn, but for your mower too. Learn how to spot the signs of blunt blades and how to sharpen them. Your trusty Rugged experts are here to help.
Read Article
May 18, 2022
HOW TO FIND YOUR PRESSURE WASHER MODEL NUMBERYour pressure washer model number is your key to finding the correct replacement parts and accessories. Learn how to locate yours here!
Read Article
May 10, 2022
WHY YOU SHOULD WASH YOUR MOWER DECK (AND HOW TO DO IT)Washing your mower deck has less to do with staying tidy and more with maintaining the health of your equipment and lawn. Take a look at this Rugged U blog and learn how a clean deck can prevent multiple headaches.
Read Article
Home, Lawn, and Outdoor Power Equipment Tips and Tricks
March 18, 2022
EARLY SPRING LAWNCARE: SEVEN STEPS TO GREEN GRASSIf you're excited about lawncare season but don't know where to begin, your friendly experts at The ROP Shop have you covered.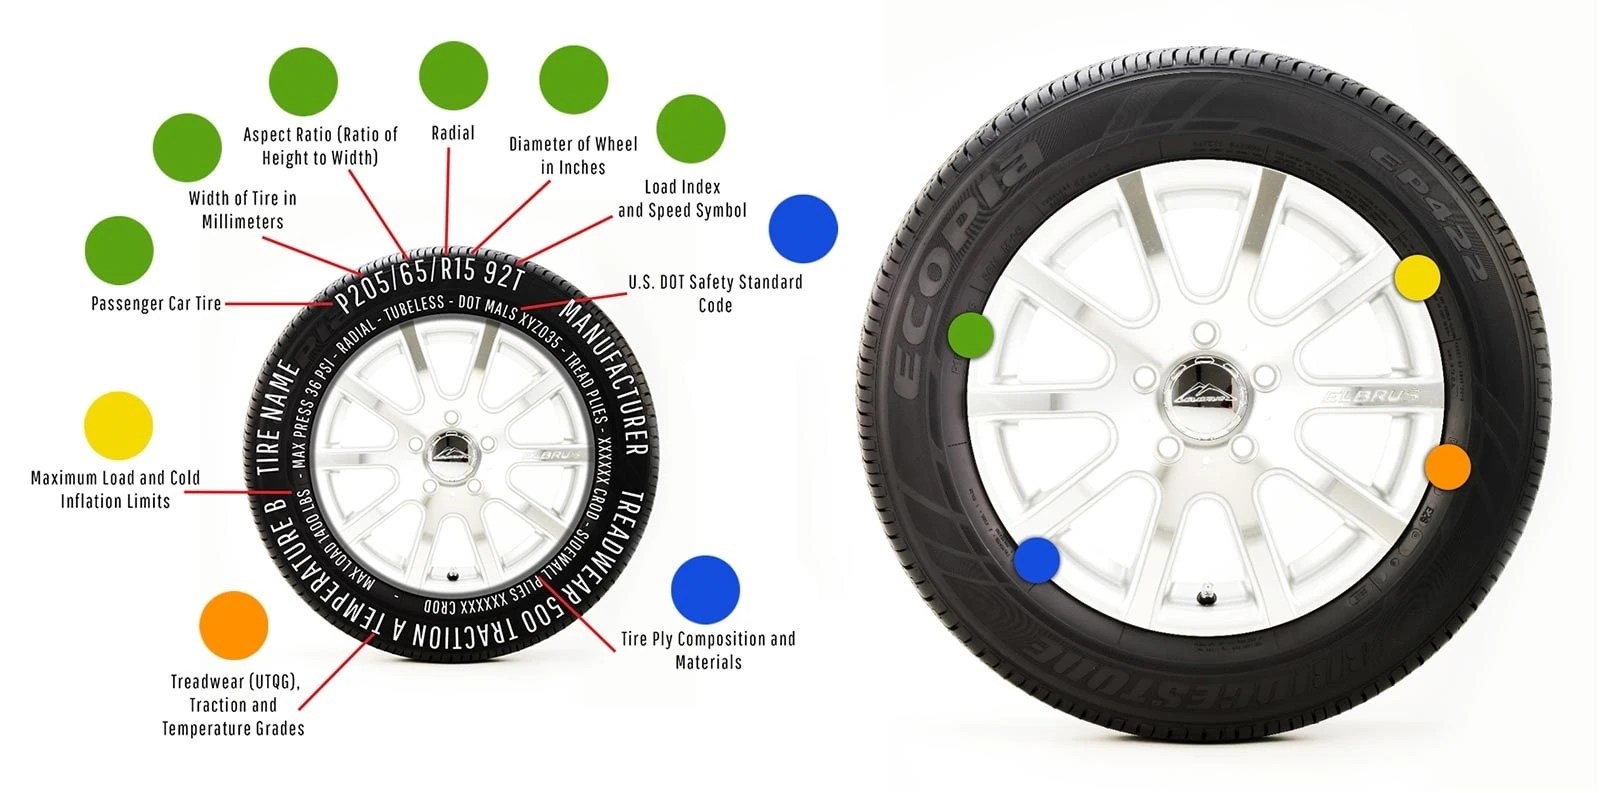 Keep reading to get a head start on thick, lush grass this spring!
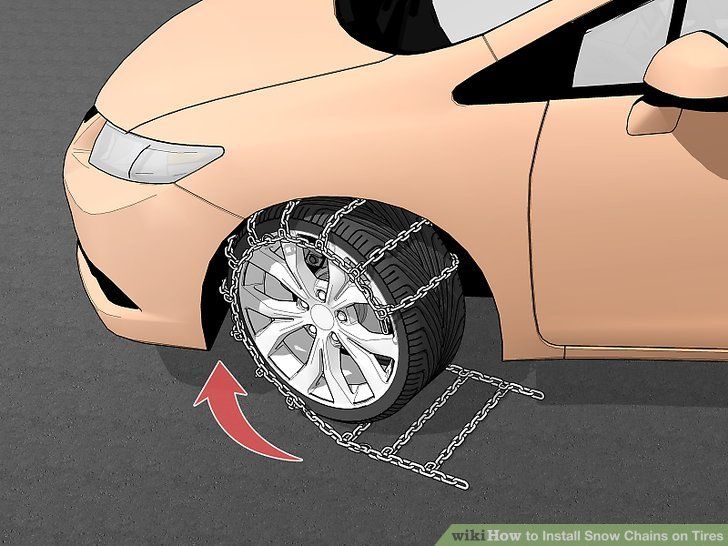
An effective way to significantly increase the car's cross-country ability is to install snow chains on the wheels. The tool is simple, but you usually have to mount it on wheels literally in the field. How to do it quickly and without stress and nerves?
A paradoxical thing: many drivers are so afraid of the procedure for installing chains on wheels that they are ready to abandon the chains in favor of some simplified devices such as bracelets, nets and the like. Although in fact it is the chains that are the easiest to install. However, this is true only if you know the basic techniques for putting a car in a chain.
Snow chains on wheels significantly increase the vehicle's cross-country ability, but do not turn it into a tractor.
Before installing this powerful piece of equipment on a machine, consider whether the chained wheel looks like a photo or another machine. Understand the appearance and placement of each element of the chain: the working part, the side branches and the lock. Regardless of the brand, it is customary to highlight each element in its own color - to simplify putting the chain on the wheel.
See also: What not to do when driving on fresh snow
If you know the chain design and terminology, you can immediately go to the second part of the article, where we talk about mounting them on the car.
The working part is located on the tread, its elements cross the tread of the tire across or almost across, but usually there are several longitudinal links. The working part of the chain has a neutral color, as a rule, this is the tone of the galvanized metal coating.
Properly dressed chains look like this. Side branches (red and blue) keep the working part on the tread
The side branches are ring-shaped and respectively hug the tire on both sides - they keep the working part of the chain on the tread.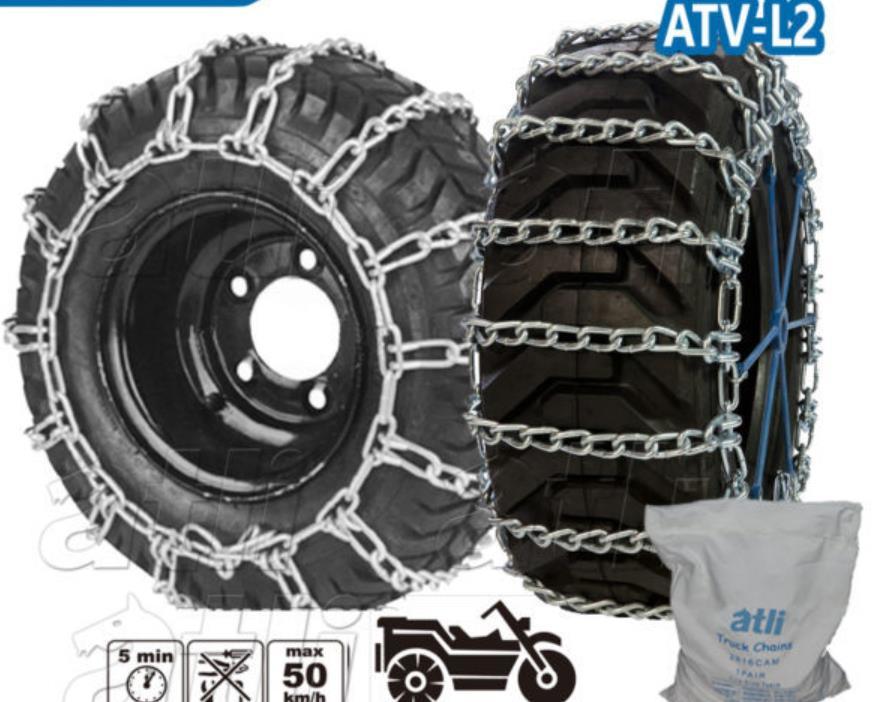 The outer side branch, like the working part, is made of the chain itself, the inner one, which is not visible on the car, is made of a rigid cable in a plastic sheath. The inner, cable branch is detachable, but has a fixed diameter. The outer branch is chain, consists of two parts and closes through a carabiner and a lock, thanks to which it easily changes the length (that is, the diameter). In addition, there is a hook with a rubber shock absorber on the outer ring. Lateral branches are usually colored: blue, red or yellow.
Lock is designed to tighten the outer side branch (reducing its diameter) and fix the achieved diameter. Actually, it is located on the very side ring. Locks come in various designs, including those with automatic tension. They are often made in a bright color, usually red.
See also: In the Carpathians with skis: we go to a resort with cars
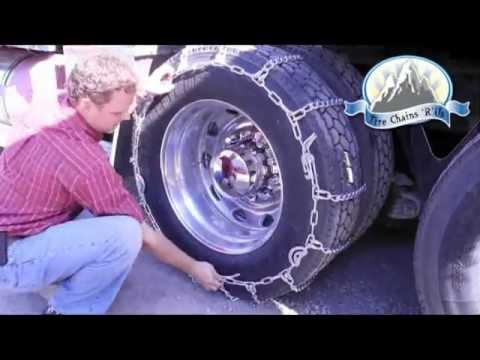
There is nothing complicated in this operation, the only unpleasant thing about it is the need to squat near the wheels and the need to hold cold metal with your hands. Therefore, it is desirable to have gloves for such a case, preferably leather.
The algorithm for installing chains on wheels is generally simple. We advise you to use gloves and some kind of padding under your knees

After putting on the chains, drive up to ten meters and tighten the side branch in the lock again (on the photo in red)

If your kit has a self-tightening lock, the last two operations are not necessary and you can go straight away. But it’s better to stop after a few minutes of driving, get out of the car and make sure that the chains fit the tires well. Keep in mind that in many cases the chain can scratch the wheel rim, which is not very pleasant for the owner, especially if the rims are alloy. But with a strong desire, you can almost always pick up a chain of such a size that it will not be located outside the bar.
Most chain manufacturers allow a maximum speed of 35 - 50 km/h.
Also remember that it is very important not to drive too fast with the chains on the wheels, as this will damage the tires, rims, and even the fenders of the car. It is also very undesirable to drive with chains on wheels on clean asphalt (short sections do not count).
In order not to get tangled in the chains, removing them from the case somewhere on the side of the road or in a deep rut, we strongly advise you to practice installing them on the car in advance - for example, at the beginning of the season or before leaving for snowy areas. This will be useful even if you already have some experience in this matter, and even more so if the kit is new.
See also: How not to slip in the snow: 5 tips
Showing 1-40 of 73
 2R20 (280/85R20) “Ladder-thorn”
  5-38 “Ladder”
  5-25 “Ladder”
  3-24 “Ladder”
 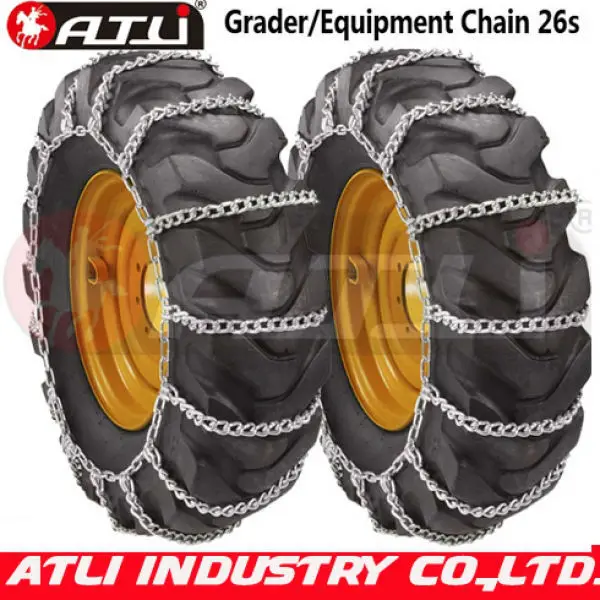 5-25 “Ladder”
 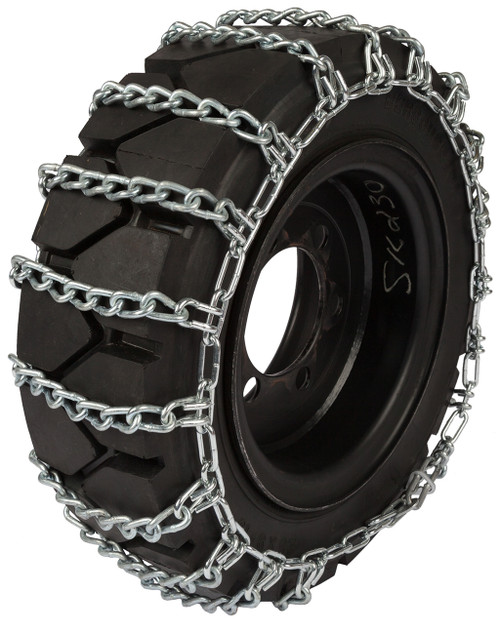 5-25 “Ladder-thorn”
 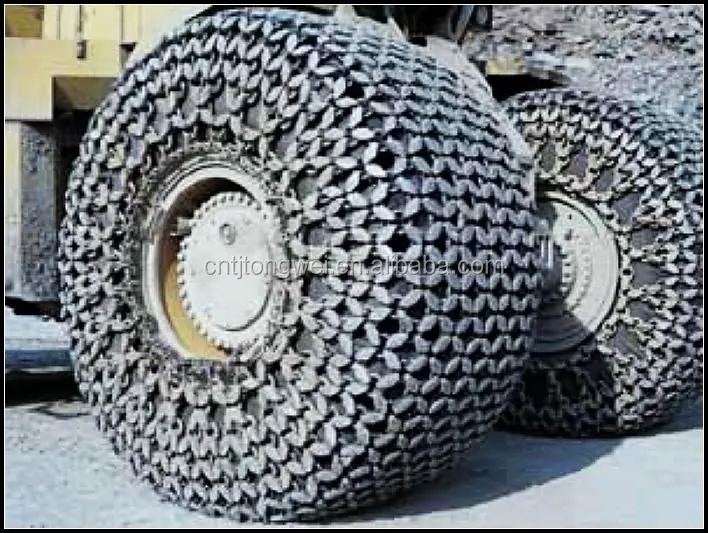 5-25 (385/95R25) “Spike ladder” Skalolaz
 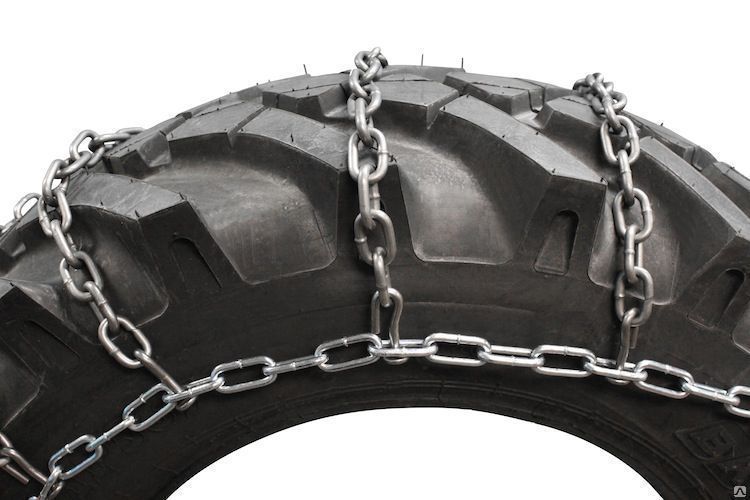 6-28 “Ladder-thorn”
  5-25 “Ladder-thorn”
  5-25 Skalolaz
  00R25, 505/95R25 “Ladder”
  9-38 “Ladder-thorn”
  5-25 “Ladder-thorn”
 Anti-skid chains are used to increase the patency and prevent slipping of equipment in difficult conditions. Their action is based on the formation of a zone of high pressure in the area of contact between the tire and the ground. Chain links take on the entire weight of the machine (mechanism), pressing into the snow, ice or mud to provide additional support for the transmission torque.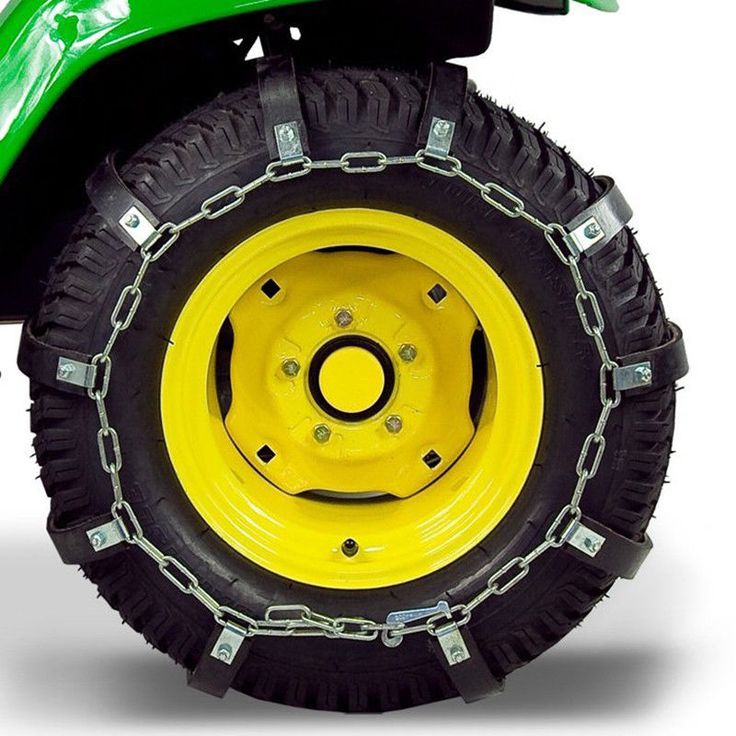
These chains can be used on all types of equipment operating on difficult ground or in winter:
Manufacturers produce chains for wheels with different types of patterns. The most popular configurations:
Each solution has its own advantages and preferred conditions of use.
" Ladder " have the simplest device in the form of two longitudinal strips connected to each other by a series of parallel segments. When installed on a tire, these elements take up a position across the tread.
Advantages of the "ladder" pattern:

Disadvantages:
" Zigzag " is assembled with the intermediate elements diagonally positioned. This configuration provides continuous contact with the road surface, eliminating jerks or bumps when the tire rotates. "Zigzag" better keeps the car from slipping on slopes.
" Honeycomb " consists of a larger number of diagonal segments that form hexagonal weaves. This is the densest version of the pattern, having the greatest mass.
Advantages of the "honeycomb":
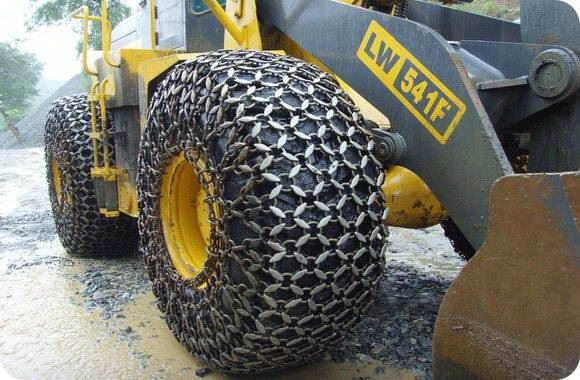
Disadvantages:
In addition to chains designed for mounting on a single tire, special modifications are produced for machines with twin wheels on the axle. They are called "sparks". "Sparks" are distinguished by a large width, while the cross-country ability of a heavy machine with "sparks" in a difficult area is much higher than with chains installed only on external wheels.
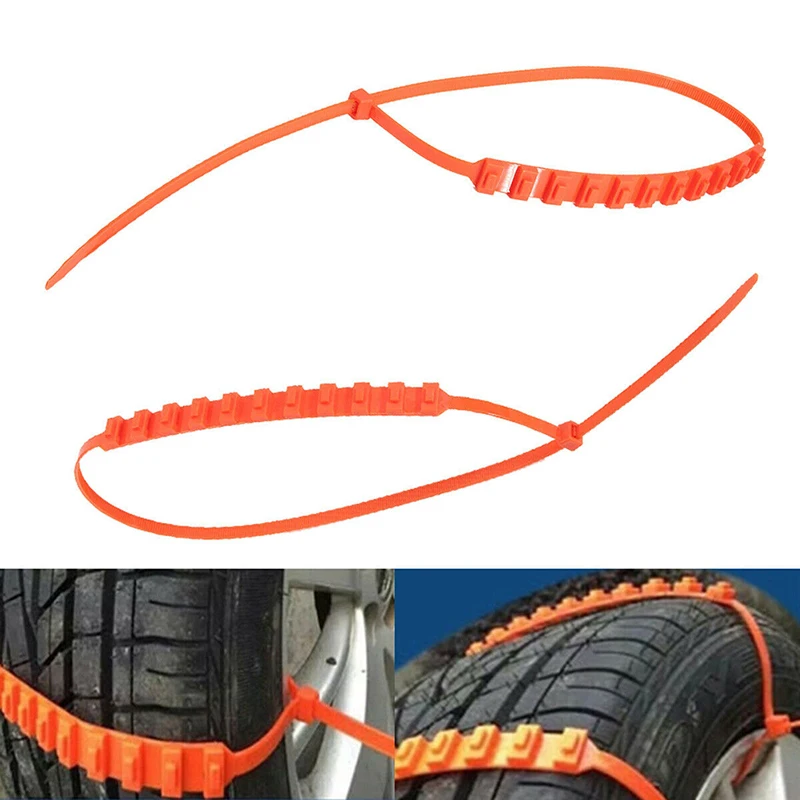
Conventional snow chains cover the entire running surface of the tread after installation. There are constructions of segments that can be installed separately. They are called "sectors" or "bracelets". The convenience of such parts in operational installation even on an already stalled axle or tire.
Short or long links of industrial production according to GOST 2319 are used for snow chains-81, TU 12.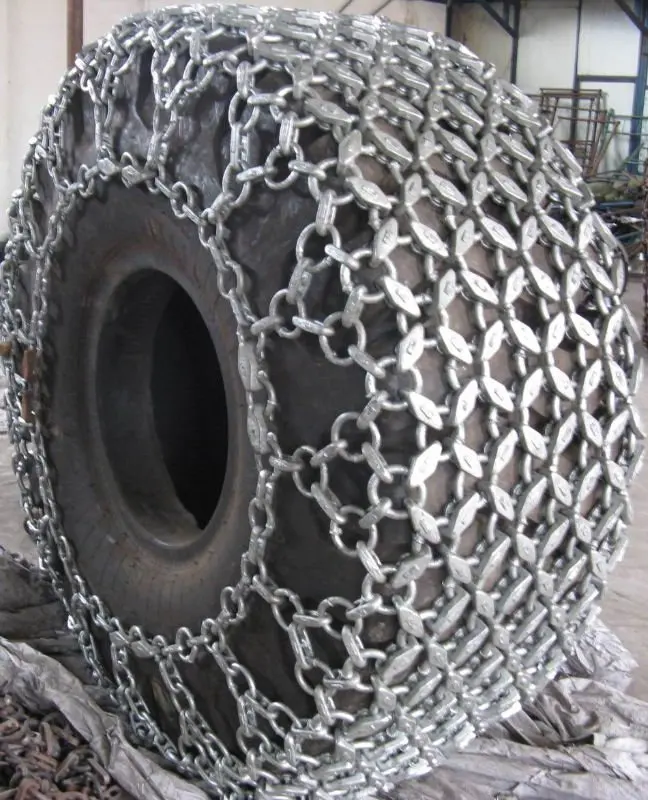 0173856.15-88 or specifications of a particular manufacturer. The caliber (the diameter of the round bar from which it is made) is usually from 5 to 13 mm.
For each tire size, it is possible to produce anti-skid systems with different link thicknesses, taking into account the outer diameter of the wheels, the weight of a loaded or empty machine, and its power. Specific thicknesses are indicated in the marking. The higher this parameter, the greater the load the product can withstand, but the heavier it is.
The standards provide for the production of chains from various grades of metal - from ordinary carbon steels of normal quality (St3 - St5), and better alloyed ones (09G2S, 25G2A, etc.) The use of a more expensive steel grade with a greater the number of alloying elements significantly increases the strength, durability of the links, their resistance to wear.
All steels used for the production of links are improved, that is, their mechanical properties can be significantly improved by proper heat treatment.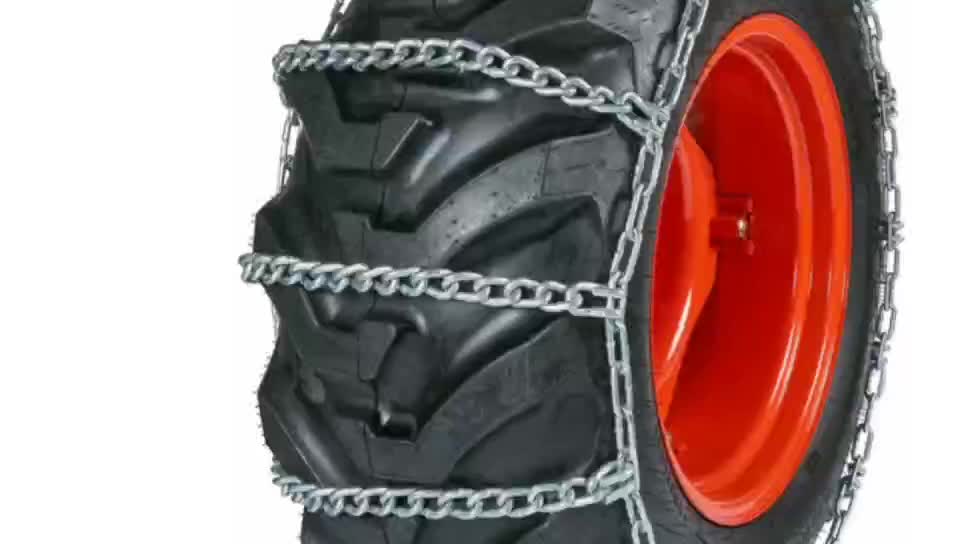 It is performed after all operations related to flexible bar and link welding. Therefore, properly performed hardening is a mandatory requirement for a long service life of the metal.
Some brands are equipped with studs for additional grip on the road (snow, ice, soil). They are made in the form of separate elements of high-strength steel and fixed on the links that form the working surface of the contact. The advantage of this design is a noticeable increase in controllability, a decrease in braking distance. The disadvantage is that the equipment cannot be operated on a hard surface due to the accelerated wear of the links and the roadway.
Chain elements are used to prevent slipping and slippage of the wheel tread in particularly difficult road conditions. Their areas of application:
