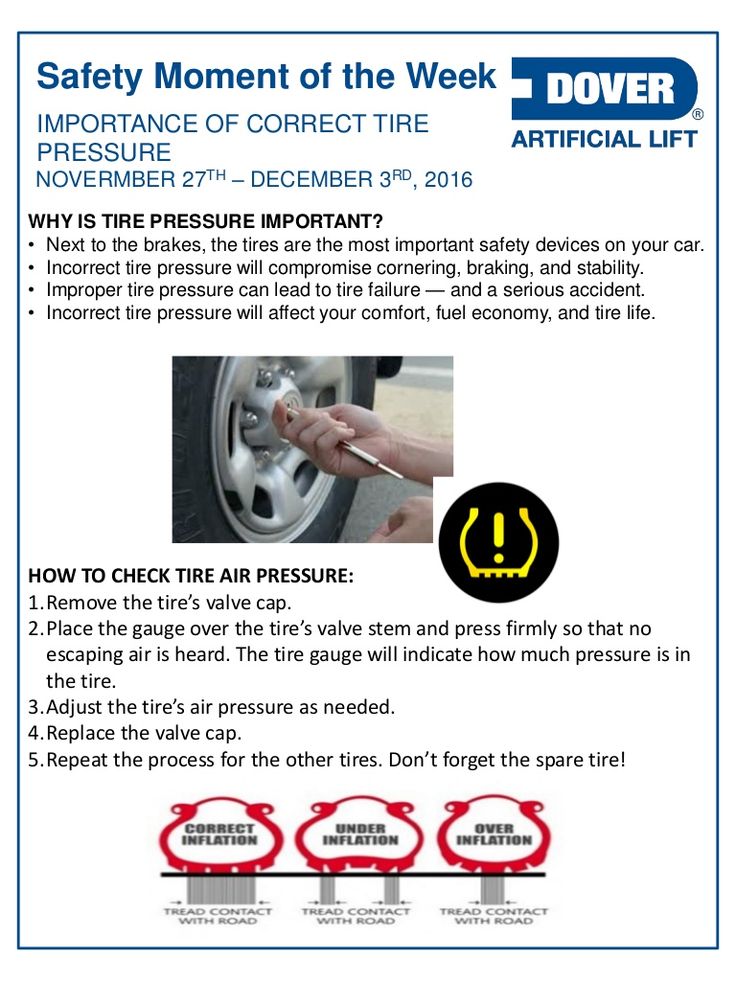
If your tire valve stem is leaking, you have several options for replacement. Determining what’s best depends on where the valve stem is leaking. If you don’t know how to replace a tire valve stem, you might wonder if it can be done without removing the tire.
In this guide, we cover all of the steps, so you can avoid a trip to the tire shop. We also discuss when you can use the valve core tool to make the process even easier.
Can You Replace a Tire Valve Stem Without Removing the Tire?Yes, you can replace a tire valve stem without removing the tire from the rim. However, you must deflate the tire and separate the tire bead from the rim on the side where the tire valve stem is located. It can be a bit tricky but is definitely doable.
If the air is leaking out of the core of the valve stem, you have a much easier fix. Spray a soapy solution on the valve stem to see where it is leaking. If the air bubbles come from within the core itself, you can get a valve core replacement tool and a new part without spending a lot of money.
Jack up the appropriate wheel and remove the old core using the tool you purchased. Once it is out, you can easily screw in a new core. Just don’t screw it in too tightly or the threads could become stripped. Refill the tire with air and give it another go.
The process is a little more difficult if you need to replace the tire valve stem. Many people prefer to take the vehicle to the tire shop for a professional replacement. However, you could do it yourself with the right tools and expertise.
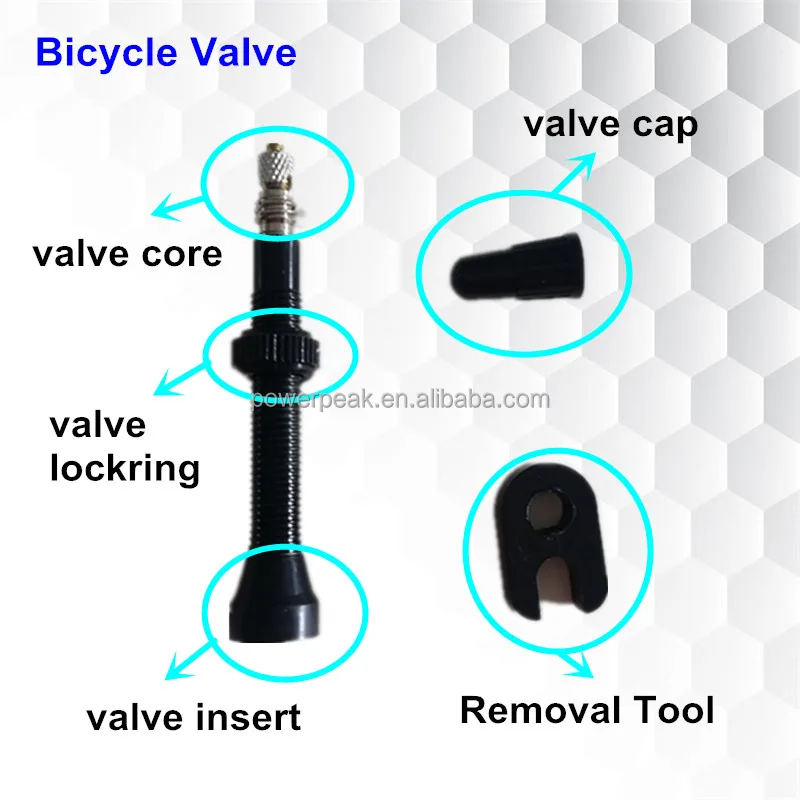
Where is the Tire Valve Stem Located?The tire valve stem is found in the wheel of the vehicle. It’s the valve where the tires get inflated. Inside the valve stem, there’s a valve core that’s spring-loaded utlizing the pressure from within the tire to seal itself. On the valve stem, there is a cap that keeps the debris and dirt from getting inside. This cap doesn’t help to keep the air in but is needed to keep the core and stem in good condition.
As the valve stem gets older, it can become brittle or crack. These problems lead to leaking, making it difficult to keep the proper amount of air inside the tire. Depending on how bad the situation is, the leak could be slow or fast. Either way, you will need to replace the core or the entire valve stem.
RELATED: Do Tires Lose Air If The Air Tire Valve Cap Is Missing?
How To Replace a Tire Valve Stem Without Removing The Tire1. Gather MaterialsTo complete any automotive job, it’s important to have all of your tools handy. You don’t want to be searching around to find what you need. For most cases, these are the tools you should have on hand:
 Loosen Lug Nuts
To work on the tire, you will first want to loosen up the lug nuts. It’s not time to take them off yet.
You only need to loosen them up on the tire you plan to work on. With your lug nut wrench, turn them all slightly so the job is easier later on.
RELATED: How to Remove a Stuck or Stripped Lug Nut
3. Jack Up CarMake sure the vehicle is parked on level ground. You also want to set the parking brake and possibly put wheel chocks down on the tires, which will remain on the ground.
Carefully raise your vehicle up enough to get the tire off. You can set the vehicle on sturdy jack stands to complete the rest of the job.
4. Remove WheelYou loosened the lug nuts earlier, making it easy to get the wheel off now. Take the wheel off that needs work.
Set it down on a flat surface. Make sure the outside part of the wheel remains facing up. Also, put the lug nuts in a safe location, so none of them get lost.
RELATED: How to Remove a Stuck Wheel on Your Car (5 Easy Steps)
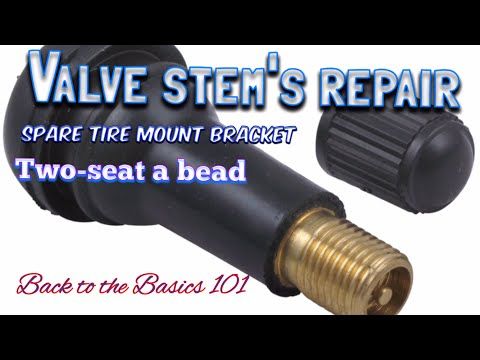
5. Deflate TireIt’s time to let all of the air out of the tire. To do this, start by taking the cap off of the valve stem.
With your valve stem removal tool, take out the core. Once this is completed, the air will freely flow out from the tire.
6. Separate Tire BeadTo replace the valve stem, you must separate the bead from the tire. You can use a tire iron and sledgehammer to accomplish this task.
While you pry the tire apart, hit the sidewall with the sledgehammer. Continue working in the same area until the bead breaks. It should make a popping or cracking sound once it is accomplished. Also, the inner lip of the tire will become visible.
With the bead broken, you want to keep moving around the tire. Perform the same movements until the entire bead is broken around the tire.
Only remove the bead on the side where the stem is located, if you remove both sides and rotate the tire by mistake you have to rebalance the wheel.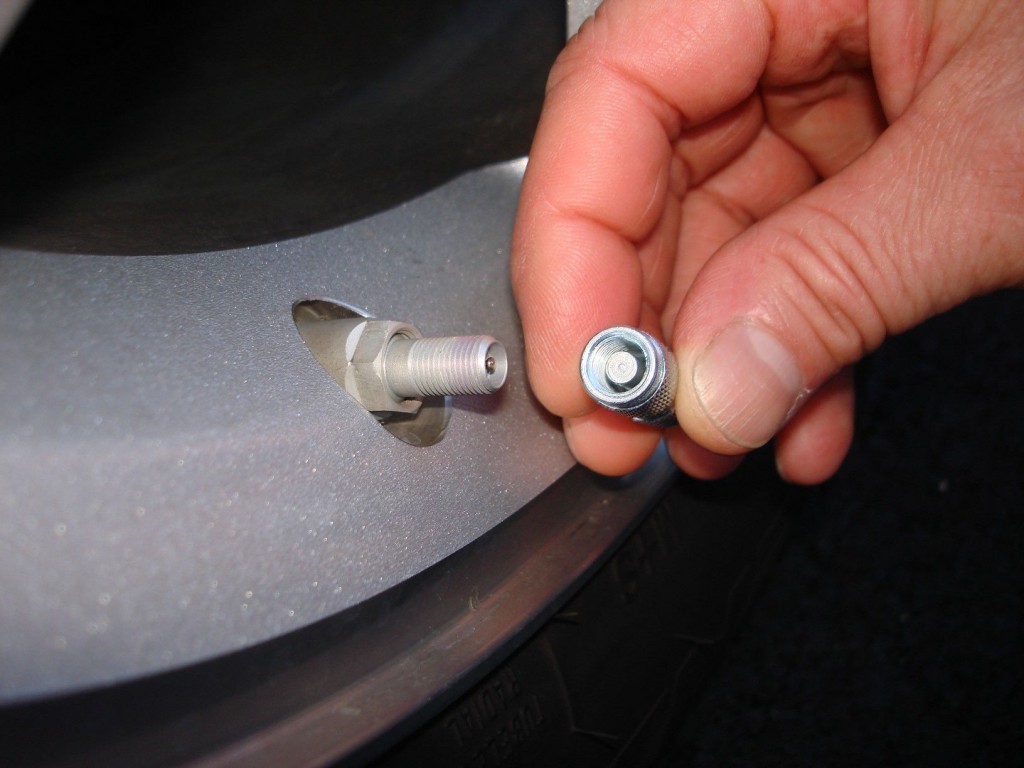
RELATED: 5 Symptoms of Unbalanced Tires (& Tire Balancing Cost)
7. Remove Valve StemLift up the tire lip away from the wheel. You can use your tire iron to pry it upward and pull the lip over the wheel edge. You can do this to take the tire off of the rim, although some people successfully skip this step.
With your needle nose pliers, you can remove the valve. Pull it away from the wheel to remove it. You can sometimes also use a knife and cut it to remove it easily, however, be careful so the cut part doesn’t stay inside the tire.
8. Install New Valve StemFind your replacement valve stem. Install it into the wheel from the inside.
You will need to use your needle nose pliers to pull it through. Make sure it is properly seated and use some kind of lubricant to install it more easily because you don’t want to deal with any more leaks once the job is done.
9. Reinstall/Inflate TireInflate your tire to the appropriate pressure.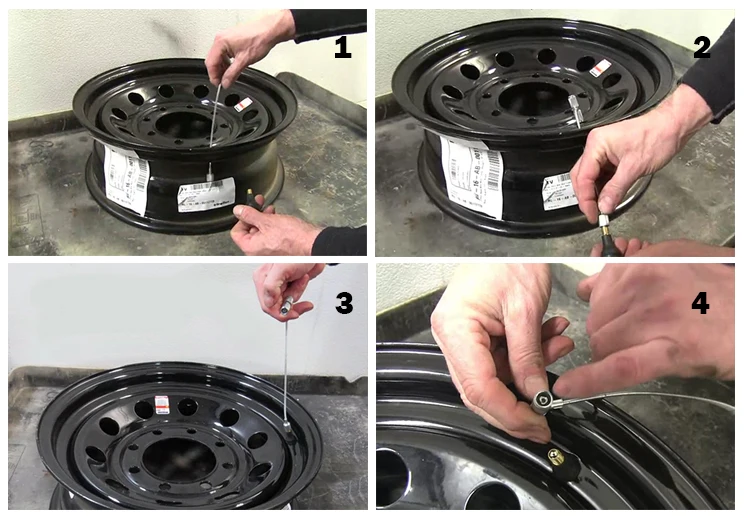 You can find the recommended psi on the driver’s side door jamb. If the tire doesn’t want to inflate by itself: Press the tire back over the rim until the bead clears the edge. Work around the wheel while inflating the tire until the tire is properly seated.
If you rotated the tires on the wheel by mistake or installed a heavier or lighter tire valve stem, you have to rebalance the tires.
RELATED: How to Find the Correct Tire Pressure For Your Car (4 Steps)
10. Check for LeaksBefore you mount the tire back on the vehicle, it’s best to check for leaks. Use your spray bottle with the soapy solution and apply it all around the tire valve stem. If there are no air bubbles coming out, you are good to go.
Reinstall the tire back on the vehicle. Once the lug nuts are secure, you can lower the vehicle from the jack stands and put all of your equipment away.
Replacement Tire Valve Stem CostIf you can replace the valve stem yourself, it might only cost $5-$10. The process will take some of your time, which must be factored in.
On the other hand, if you choose to go to a tire shop for valve stem replacement, you might spend $25 or more. Plus, you will have to wait for customers that arrived before you, so it could actually take longer to accomplish.
November 23, 2021 Roadkill Customs How To & DIY
From cars to trucks, ATV’s and motorcycles, all of these vehicles suffer from bothersome leaky or broken valve stems. Especially with vintage cars and trucks, the stem can become dried and brittle and be very prone to leaking. Aluminum car and truck wheels are also notorious for corrosion around the valve stem base allowing air to leak out.
While changing the stem is not a difficult task, breaking and reseating the tire bead can be a challenge for many DIYers. Enter the AME Valve Stem Replacement Tool Kit that allows you to replace the valve stem quickly and easily without removing the tire from the wheel. Save yourself time, money, and the headache of replacing valve stems the hard way.
Time Needed : 1 minutes
How To Replace A Valve Stem Without Breaking The Tire Bead
Deflate the tire if not already flat. Insert T-Handle between the rim and valve stem.
Turn T-Handle 1/4 turn to hook the valve stem and pull it out.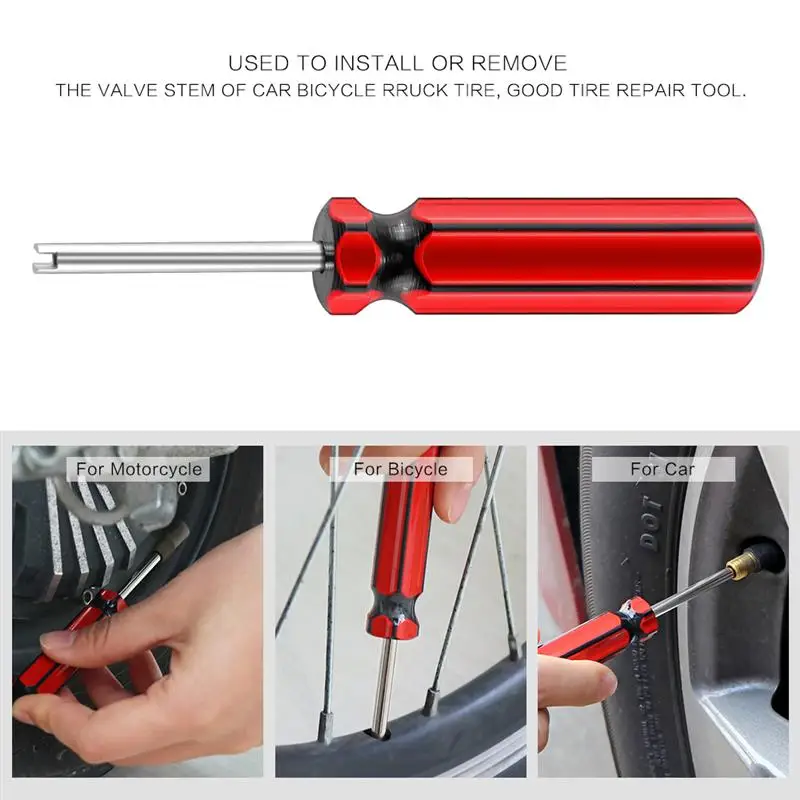
Thread a new valve stem on the end of the plunger rod. Apply tire/rubber lubricant to the base of the valve stem.
Position the insertion guide cone over the valve stem hole.
Push plunger rod/valve stem assembly completely through insertion cone.
Pull back to seat the new valve stem and un-thread the plunger rod.
This tool kit is great for cars, trucks, trailers, and off-road vehicles and ideal for any leaking rubber valve stem. AME International is a leading manufacturer of tire-changing tools and automotive maintenance equipment.
Editor’s Note: This kit will not work for TPMS equipped vehicles that have the sensor in the valve stem hole. Valve stems are not included with the kit.
New: $38.00
Buy on Amazon
New: $3.49
Buy on Amazon
New: $21.12
Buy on Amazon
Follow Us on Flipboard
 How the valve seal works and how to understand that it needs to be changed
 Author: Mikhail Balandin
We often hear the phrase that, they say, "he eats oil - it is necessary to change the valve stem seals." If a person has not seen what this very cap looks like, different pictures may form in his head. What is this cap, what is it on, what does it close, why is it to blame for the fact that the motor eats oil? Is it difficult to replace it? And is it his fault? Today we will try to understand all these issues. Some things here seem very simple, and some things are more difficult than they seem.
So, from the very beginning: what is a valve stem seal? This cap, which is correct to call the oil-slinger, and not the oil scraper, is just a valve seal. If absolutely correct, then “the sealing element of the gas distribution mechanism of an internal combustion engine with an overhead valve arrangement; rubber cap mounted on the valve guide and valve stem to allow engine oil to enter the combustion chamber.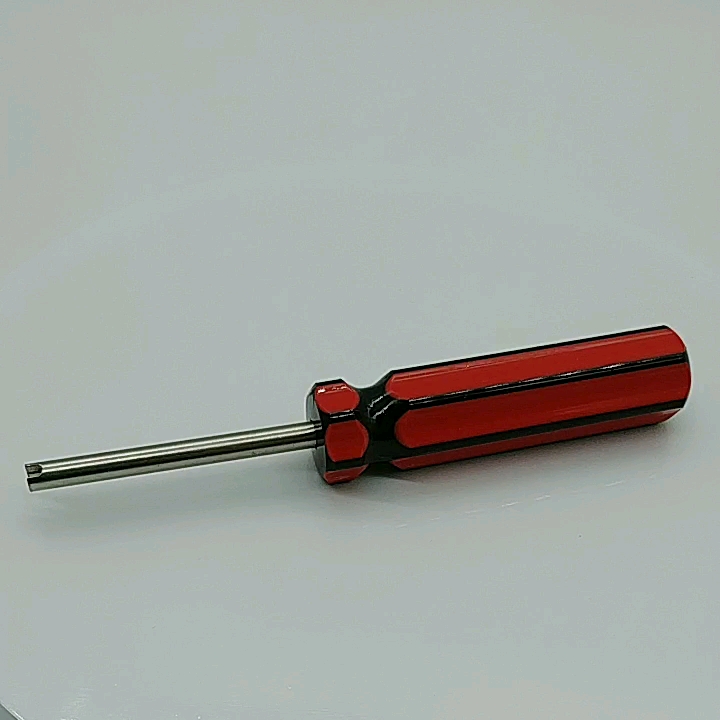 In general, from this definition, the task of the cap is also clear: to prevent oil from entering the combustion chamber along the valve stem.
If, for simplicity, we neglect all sorts of rockers, pushers, hydraulic lifters and some other parts of the block head, then we can say that at one end the valve rests on the camshaft cams. The other (the one that ends with a plate), it goes into the combustion chamber. That end, which is in interaction with the camshaft, is constantly in the engine oil. And the task of the cap is to prevent this oil from leaking down to the valve plate. This is the very simple thing that I promised at the very beginning. Now let's move on to the more difficult part.
The slinger cap works in very difficult conditions. First, because of the very high temperature. Secondly, the valve stem is still a fidget. In just one minute of running the engine, it can run up and down more than a thousand times. Of course, it is difficult to work in such conditions. Friction, heat, and engine oil can kill anyone, and a cap is no exception. You must have heard something like "the caps are numb". Indeed, being in such an aggressive environment, caps lose their properties, primarily elasticity. The “hardened” caps cannot fit snugly against the valve stem, which means they cannot perform their function.
It must be said that caps now last much longer than before. The owners of the classic Zhiguli were doomed to change these penny (but at one time scarce) parts often. The reason is in the material of the caps. Old-school car enthusiasts probably remember the products of the Kursk Rubber Products Plant (now Kurskrezinotekhnika OJSC), which produced caps for the VAZ. Those caps were made from 51-1537A-2 acrylate rubber compound. The heat resistance of this mixture is up to 150 degrees, and the temperature to which a working cap can be heated is 180 degrees. It is clear that such caps could not serve for a long time.
Interestingly, on the engines of the early VAZ-2108, the caps lasted longer than on the "classic". The fact is that we did not have caps that would fit the "chisel" motor, so at first there were German products "Goetze" and "Elring", and then, in the early nineties, domestic caps appeared that could work in these motors. And they were made not from a mixture of 51-1537A-2, but from the then-new IRP-1287 composition based on SKF-26 fluororubber (they were produced at the Reserve NPK in Samara). Domestic caps became better, but at the same time they could still “slide” off the valve guide, after which the engine began to eat liters of oil.
By the way, why can the cap slide off the sleeve? Theoretically, some caps can do this easily, and some cannot, with all their desire. The reason is in the different design options.
The main parts are more or less the same. The cap is a sleeve of variable diameter. The lower part is wider - it should fit snugly on the valve guide. The upper part of the cap is narrower, it should tightly wrap around the valve stem. To do this, outside the cap in this narrower part, there is usually a coil spring ring, which provides a tighter fit of the cap rubber to the valve stem. In the lower part, the one that covers the valve sleeve, there is also a metal element - a steel ring, thanks to which the cap must be fixed very securely on the guide sleeve.
The difference between collar and flange caps lies precisely in this lower part of the cap. If the collar is simply put on the valve sleeve, then at the flange the steel ring at the bottom expands and ends just with a flange. When such a cap is installed, the valve spring rests against this flange, and thus the flange cap sits in its place more securely than the lip cap. The cuff can still fly off, but the valve spring will not allow this to be done.
However, lip caps are now also very reliable, and there is no problem with their exodus from their place on the valve sleeve. But other problems on used cars occur regularly.
What can go wrong, I already said: due to aging, the cap cannot ensure a good removal of oil from the valve stem, and it begins to seep into the combustion chamber. In this case, the consequences are varied, but all as one are unpleasant: carbon deposits form on the valve plate, compression may drop, the dynamics will become worse, smoke will pour out of the pipe. Well, the main thing is oil consumption. Actually, caps are usually remembered only because of the oil. And that's just because changing them is considered easier than getting into the cylinder-piston group and dealing with rings or liners. Often this happens, and replacing the caps can solve the problem of "oil burner".
The main thing is to understand whether it is worth contacting them. There are fairly simple ways to find out if they are the cause or not.
The most effective method is to try to press the gas sharply with a warm engine. It is important to observe two conditions: first let the engine idle for at least five minutes and press the pedal sharply. The point is that at idle, leaking oil accumulates, and when pressed sharply, it, together with a large amount of the mixture, burns out and flies out into the pipe. So someone is revving, and someone is looking at the exhaust. The blue club flew out - these are the caps. At the same time, after this club, the smokiness may be normal.
To check everything again, you can try to brake the engine. Smoke will fall - these are also caps. Smoke during regassing is also a sign of the death of caps.
On the one hand, these methods are quite reliable. On the other hand, there are some subtleties that make such a simple diagnosis meaningless. The subtleties lie in the fact that a similar ingress of oil into the combustion chamber may be for another reason. For example, due to valve stem wear. It gradually becomes thinner, and in advanced cases, even the newest cap will not save the situation. Or the valve stem may be worn. Rarely seen, but it does happen. After all, the cap is able to work only with the longitudinal movement of the valve, as it was intended by the designers. Its axial movement due to wear of the rod or guide cannot be compensated by the cap, and the oil will still get inside the cylinder. And there may also be problems with ventilation of the crankcase gases, which give similar symptoms.
It is useless to measure compression to find diseased caps. If she fell, the cause is more likely to be in the compression rings.
It turns out that the only absolutely reliable method for diagnosing oil seals is the mandatory disassembly of the cylinder head. And everything described above should only encourage you to do this not the most exciting thing.
There were times when these caps on "kopeks" were changed in garages for beer with roach. It was possible there. Hypothetically, they can also be replaced on a modern machine. But of course there will be more complexities (if only due to a more compact layout and more stringent assembly requirements), so I don’t think that anyone wants to mess with it on their own. Who wants to - he does not read all this, but has long been removing the valve cover and looking at the camshaft. And if someone still thought that he would do such nonsense with his own hands, I can recall the following.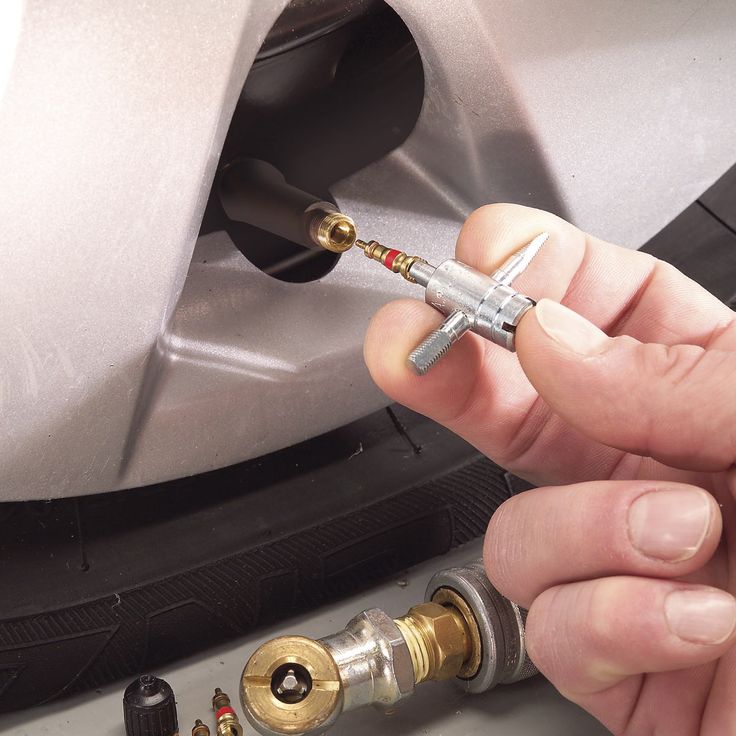
It is pointless to put new caps on valves with dead stems - the oil will still leave in liters. It will also go away if you mix up the caps and put caps from the intake valves on the exhaust valves, and from the exhaust ones on the intake valves. The valves are different, their caps are too. The slightest loose fit - and hello, "maslozhor." Maybe even more than it was.
In a good way, for this work it is better to completely remove the cylinder head. At the same time, you can assess the condition of the CPG (maybe the reason is not at all in the caps), check the head of the block (for example, by crimping), assess the condition of the mating planes (the head can lead) and the valves themselves. Of course, in some cases a very handicraft replacement will help, but disassembling the motor twice because of your own laziness or craving for economy is very disappointing. And it is also very important not to save on the caps themselves: a “singed” cap made of bad rubber will live very little, so the savings will not pay off.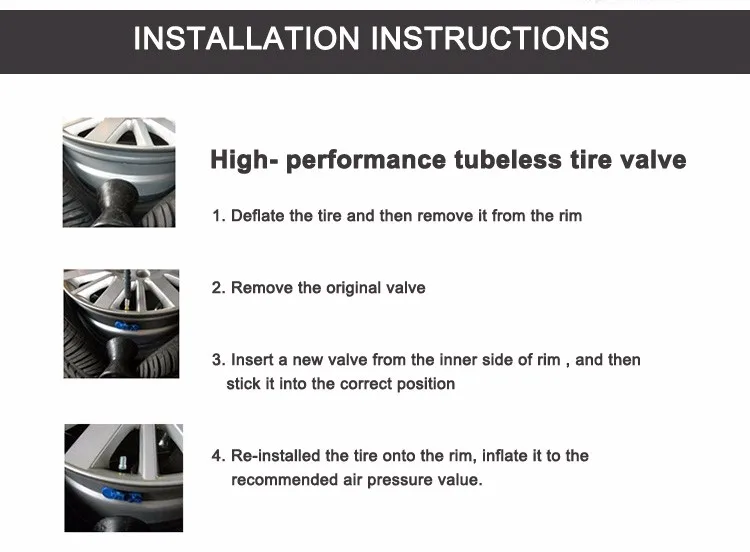
Poll
Have valve seals failed?
Your vote
Total votes:
practice
Articles / Tests Ninety-nine secrets: check what you know about the VAZ-21099 Some thirty years ago, the VAZ-21099 was a symbol of prestige and a real dream car for residents of newly formed states that arose within the CIS on the wreckage of the very country in which ... 999 3 2 11/12/2022
Articles / Tuning Complete set that was not: tuning Subaru Forester II SG Attitude towards tuning, even among car owners, can be different: someone is a fan of any modifications, someone is fond of styling, someone loves sleepers, and someone (for example, me) is generally a pro . .. 3113 0 2 11/11/2022
Articles / Repair and maintenance Air filter index: Parts price pullback, no shortages and a flurry of fakes The ruble exchange rate has stabilized in recent months at a relatively comfortable level for importers. Did prices for spare parts and consumables follow? In general, yes, and the prices for some... 1471 2 one 09.11.2022
Test drives / Test drive Haval Dargo vs Mitsubishi Outlander: the dog is barking, the stranger is coming In the Haval dealership in the south of Moscow, life is in full swing: buyers look at cars, communicate with managers and sign some papers.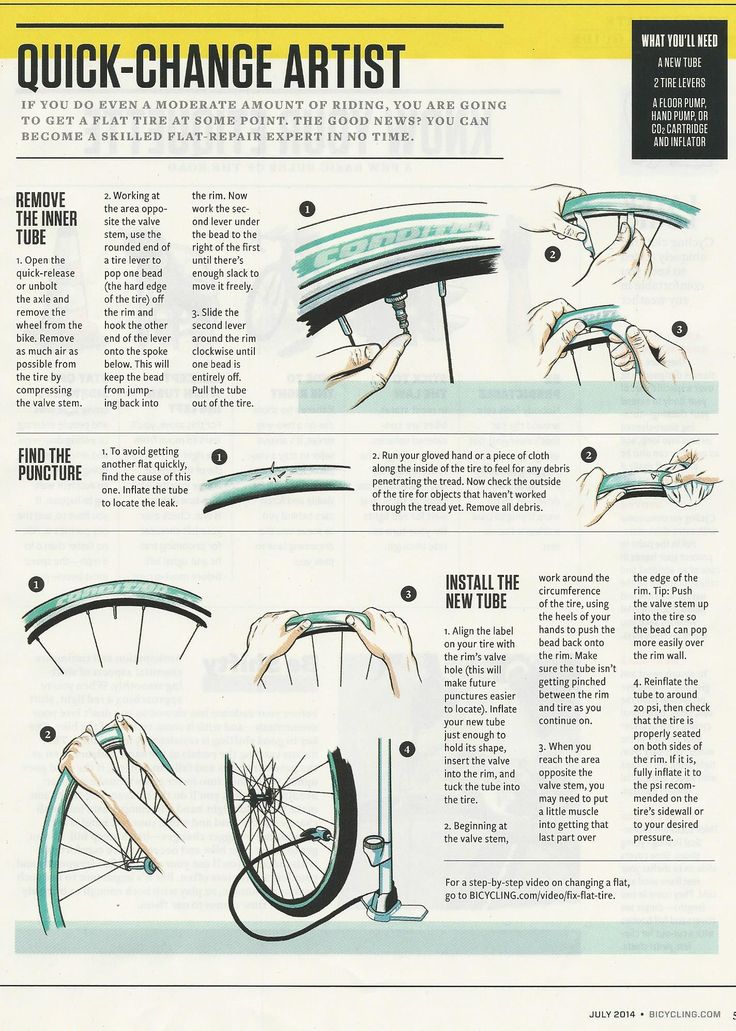 While I was waiting for the test Dargo, the same cross... 15949 7 205 13.09.2022
Test drives / Test drive Motor from Mercedes, emblem from Renault, assembly from Dacia: test drive of the European Logan 1.0 It would seem that what's new can be told about the second generation Renault Logan, known to every Russian taxi driver, as they say, up and down? However, this car has... 13382 ten 41 08/13/2022
Test drives / Test drive Geely Coolray vs Haval Jolion: Free Cheese? If! Do you want to buy a car today with a full warranty, on credit at an adequate rate, without wild dealer markups? Now this is still a task, because a full-fledged chain of "representation - s. .. 10453 26 thirty 08/10/2022
The tire valve is the tip that inflates the tire and ensures it is sealed. It is attached either directly to the inner tube or to the wheel rim. The tire valve is damaged while driving and must be replaced at the same time as the tires.
La d'un valve tire A car tire is a rubber tip that sits on the tire. The tire valve, fitted with a plastic cap, has two main functions:
The tire valve can be attached to the inner tube or to the rim, as is the case with tubeless tire valves.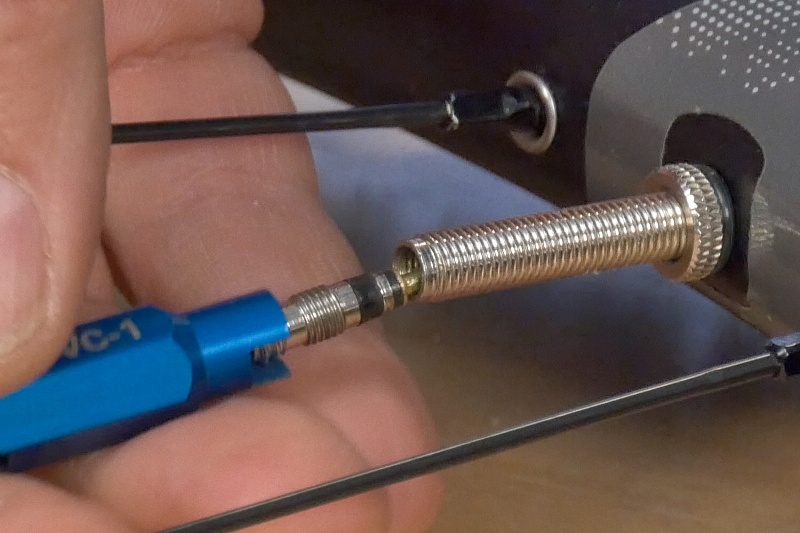 It comes in two types:
In short, the tire valve prevents air from escaping the tire, but also prevents dirt from entering the tire. Hence, it also plays a protective role. Finally, it allows, in particular, to make tire pressure and then maintain this pressure by keeping the air inside.
One of the functions of a tire valve is to seal it by keeping air inside the tire. But over time and miles, it can get worse as it is subjected to the pressure and centrifugal force of rolling tires.
If the tire valve is damaged, it can cause Air leak and pressure drop tire. The main cause of tire valve leakage is its age, and the mechanism it contains eventually fails.
The risk of tire valve failure is the slow release of air from the tire. No matter how hard you apply pressure and re-inflate it, it will continue to lose air. However, driving with improperly inflated tires is dangerous: loss of traction, increased stopping distance, reduced tire life and risk of bursting.
Therefore, the valve in a leaking tire must be repaired or replaced. We also recommend replacing tire valves every time you change tires.
To change the tire valve, you must disassemble the wheel and separate the tire from the rim. You must use valve stem extractor to replace the latter.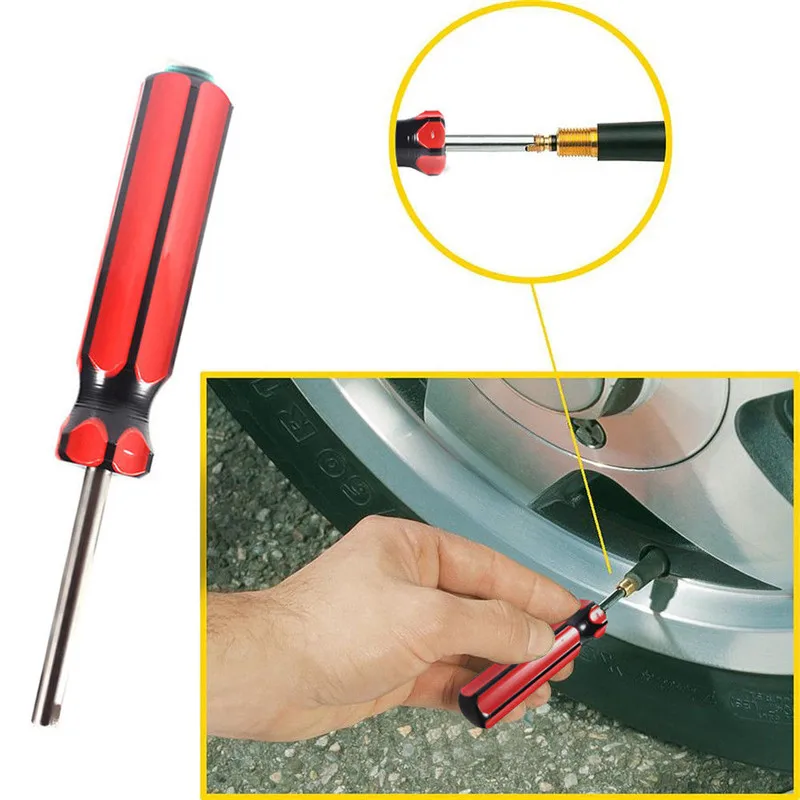 However, there are also CIP tire valve replacement tools, but these are often not compatible with electronic valves.
Finish loosening the wheel nuts and remove it. Lay it on the floor with the outer side up. Remove the tire valve cap, then remove the core with a valve stem remover. Let the tire go down.
After the tire is flat, you must detach it from the rim. You can use a sledgehammer all over the tire. Then, using an iron, remove the tire from the rim by inserting it between the tire and the edge of the rim.
After separating the tire from the rim, you can remove the stem from the tire valve. Use pliers to remove the old valve and install the new one in its place. You can then put the tire back on the rim and inflate it to the pressure recommended by the manufacturer.