Every item on this page was hand-picked by a House Beautiful editor. We may earn commission on some of the items you choose to buy.
Can someone open an Etsy shop for these?
By Taylor MeadPinterest/Style Me PrettyRemember when we told you to reconsider tossing your old trampolines and globes? Well, before you go ahead and throw away those old tires you found while spring cleaning your garage, consider making it your next DIY project.
I mean it! Upcycling them into something new—and, surprise, actually good looking— is this season's hottest trend. Sure, you might be thinking "Well what could I possibly turn a rubber tire into?" And my answer for you is: an adorable rope ottoman to spice up your outdoor space for the warm months ahead. Here's how to do it:
View full post on Pinterest
View full post on Pinterest
$10 at Amazon
Credit: Amazon$8 at Amazon
Credit: Amazon$17 at Amazon
Credit: AmazonNow 14% Off
$13 at Amazon
Credit: Amazon$35 at Amazon
Credit: Amazon$7 at Amazon
Credit: Amazon$59 at Amazon$59 at Home Depot$67 at Walmart
Credit: Amazon$55 at Amazon$48 at Home Depot
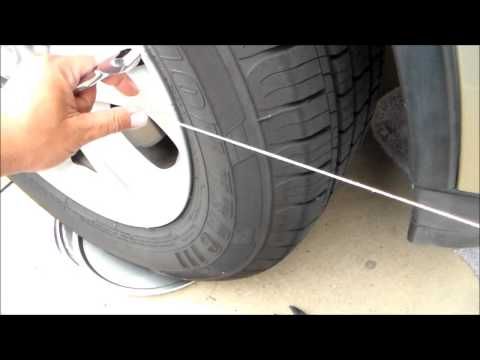
Credit: AmazonIf you still have doubts, watch this Diva of DIY video tutorial, where DIY guru Leanne takes you step by step through the process:
View full post on Youtube
Or, if you're feeling like taking your tire DIY game a step further, turn it into a planter!
View full post on Pinterest
Follow House Beautiful on Instagram.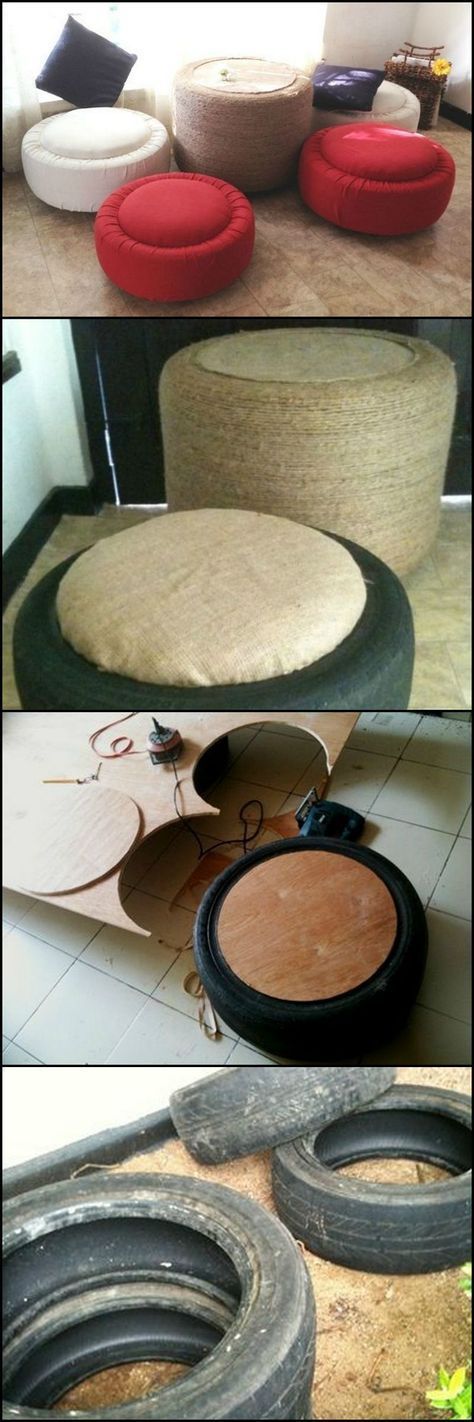
Inside Melanie Rose's Sex Room Design Process
58 Best Home Quotes
From House Beautiful for QVC
10 Fun Finds to Help You Beat the Heat
20 Best Board Games the Whole Family Will Love
Advertisement - Continue Reading Below
15 of the Best Board Games for Adults
33 Fun Easter Games for the Whole Family
The Best Backyard Swing Sets You Can Order Online
22 Movies to Watch at Home On NYE
100+ Creative Activities to Do When You're Bored
18 of Netflix's Must-Watch Christmas Movies
14 Fun and Festive Christmas Activities
Ina Garten's Advice for Hosting From the 2000s
Advertisement - Continue Reading Below
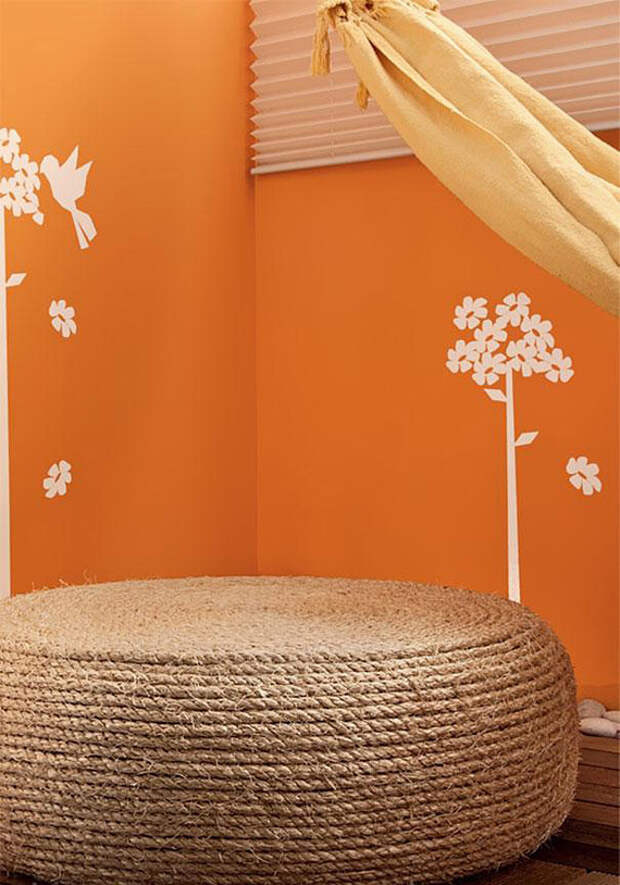
Repurpose a used care tire and transform it into a stunning custom piece of furniture for your home with this DIY Tire Ottoman tutorial.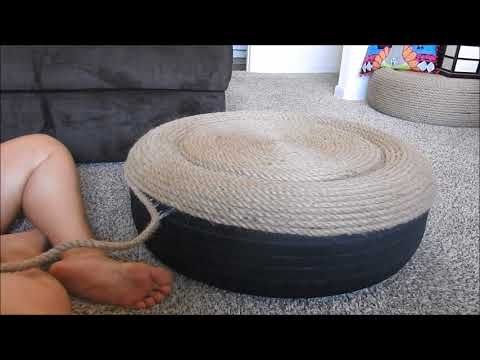
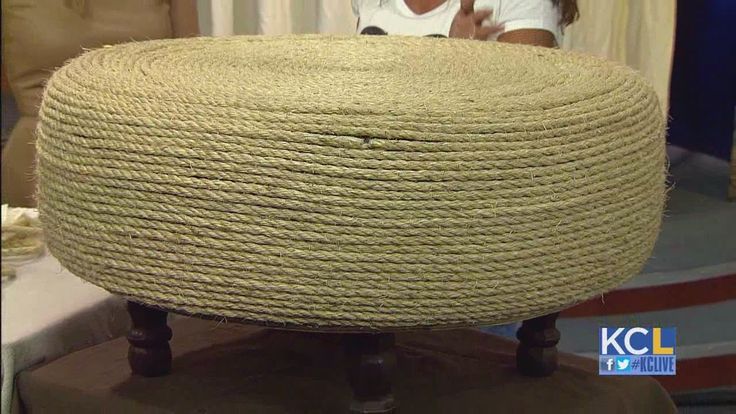
This rope tire ottoman can be used as a footrest, as a small coffee, as a side table or for extra seating. It adds a really cute rustic look to any room.
Lately I’ve been obsessed with making an ottoman made out of tires. It’s such an inexpensive project compared to the cost of buying something similar from a store. Yet it looks so chic.
I love how inviting this rustic rope ottoman is. Trust me, nobody will believe it is actually a tire. It’s such an epic piece of furniture that you can’t help but just adore.
This tutorial offers the instructions for a basic wire wrapped tire ottoman but you may want to take it further, so here are some more ideas to run with:
 Cover the tire to the inside rim with rope and use one of the round pieces of plywood as a lid. Simply wrap the “lid” separately with rope or upholster with cute fabric and a little cotton batting for a completely different look.
Old Tire: Any old tire will do in the size you desire. For reference, my tire has a 24-inch diameter and is 9 inches tall.
The Rope: I used twisted nylon rope to create the tire in this tutorial, but for a more custom look try using other fibers like sisal or manilla. The rope length will vary depending on the size of the tire you use. I always recommend getting a bit more than expected, just in case.
Circular plywood: Be sure it is the same size or just slightly smaller than the diameter of your used tire.
Hot glue gun & glue sticks: You will need plenty of good quality hot glue sticks for this project so stock up ahead! I recommend Gorilla brand, I find it has a much stronger bond than other brands.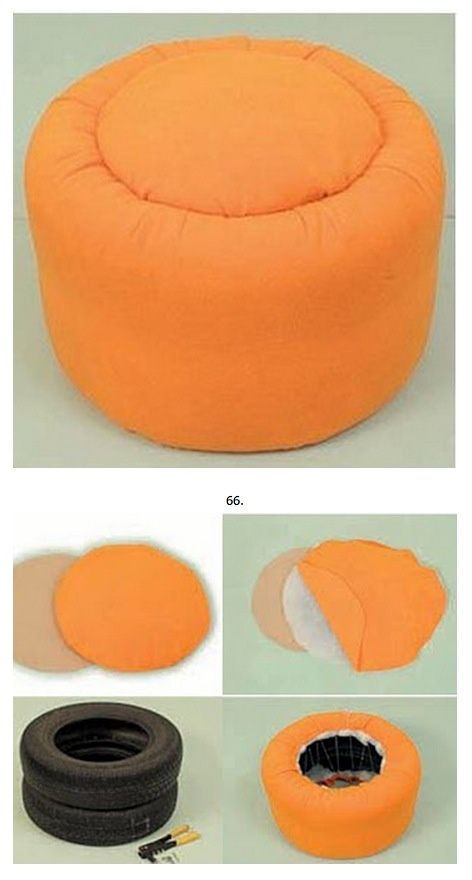 Alternatively you could use a construction grade adhesive like Liquid Nails.
Sealer: I do recommend sealing the Ottoman, just use a concentrated, clear sealer.
If you are looking for more great do it yourself projects to give your home a lift, check out some of my favourites:
DIY Union Jack Trunk
Ikea Tarva Dresser Makeover with Fabric
IKEA Hack: Kitchen Furniture Makeover
Materials:
Old tire
About 150-200 feet of ⅜” rope
2 pieces of circular plywood (same diameter as your tire)
Hot glue gun and glue sticks
Sealer (optional)
Directions:
If you’re using a used tired, scrub it with water to clean. Make sure it is thoroughly dry before continuing this tutorial.
Glue one piece of the circular plywood to the top and bottom of the tire.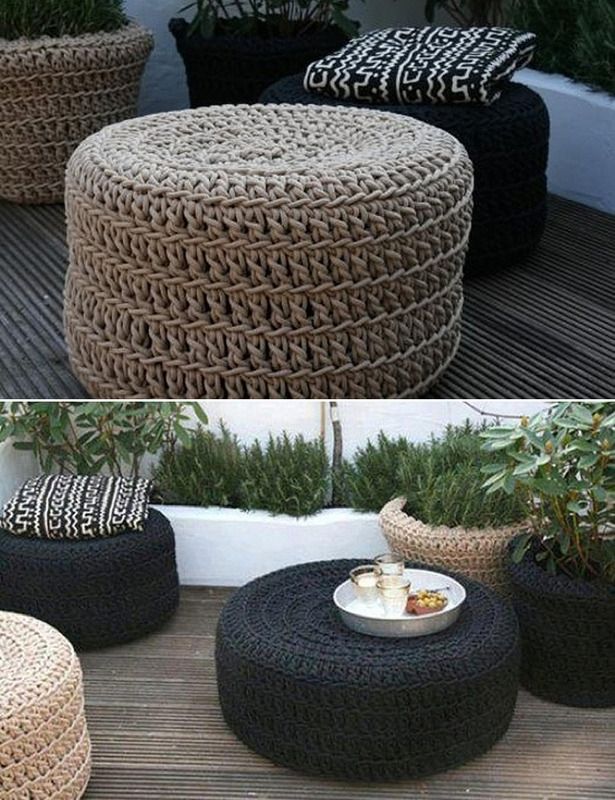 Optimally, you can also screw the wood, but it doesn’t necessarily need to be 100% secure as the rope will make sure everything stays in place!
Begin to coil the rope around the centre of the plywood, applying glue on each round and pressing down hard to make sure it’s secure.
Continue coiling the rope around the tire until it’s fully covered. For the rim, I recommend gluing the rope to the tire, but occasionally gluing the rope together to make sure it’s secure and no openings are left that will reveal the tire.
Once you reach the bottom, cut down the rope with your scissors or flip it over to continue coiling to cover the bottom plywood (this step is optional, as the wood will not be visible as it will be facing down).
Optional: Apply the sealer with a brush and cover the full surface of the ottoman with it. Wait one hour, then apply another coat. The sealer is ready to touch after one day but it can take two weeks to completely dry.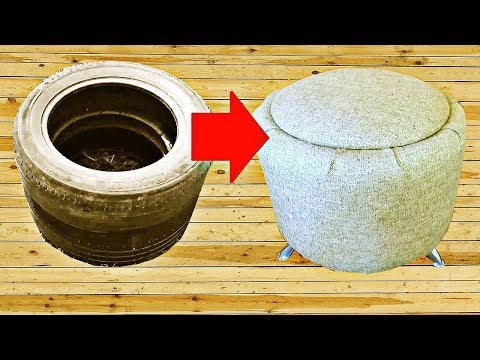
Elizabeth Lampman
Elizabeth Lampman is a coffee-fuelled Mom of 2 girls and lives in Hamilton, Ontario. She enjoys travelling, developing easy recipes, crafting, taking on diy projects, travelling and saving money!
How to make an ottoman from tires with your own hands .
The site has a lot of workshops on making homemade furniture from car tires. In this manual, ottomans will be made from tires.
Required materials for making an ottoman:
Bonding
First of all, wash the tires well to remove all dirt. Now apply glue to the highest point where the tires will touch. Place tires on top of each other. Adjust the height yourself. In this manual, 1 stool was made from 3 tires. Wait a day for the glue to dry.
Making a boot
Measure the height and diameter of the tire. Add to the results obtained 2-3 cm for the seams. Cut out the rectangle.
Cut a circle smaller than the tire diameter for the bottom cover.
Wrap the tires with a rectangle of fabric wrong side up. Secure the pipe shape with pins. The shape should be a little tight. Now slowly remove the pipe and stitch it. Fold the resulting part 2 times in width and make marks, as shown in the photo. Thus, the pipe was divided into 4 equal parts.
Now fold the circle in 2 and make marks. The circle is also divided into 4 equal parts.
Connect the pipe and wheel at the marked points. Spread the fabric evenly and fasten the pieces with pins. Sew the circle to the pipe.
Unscrew the resulting cylinder and put on the tires.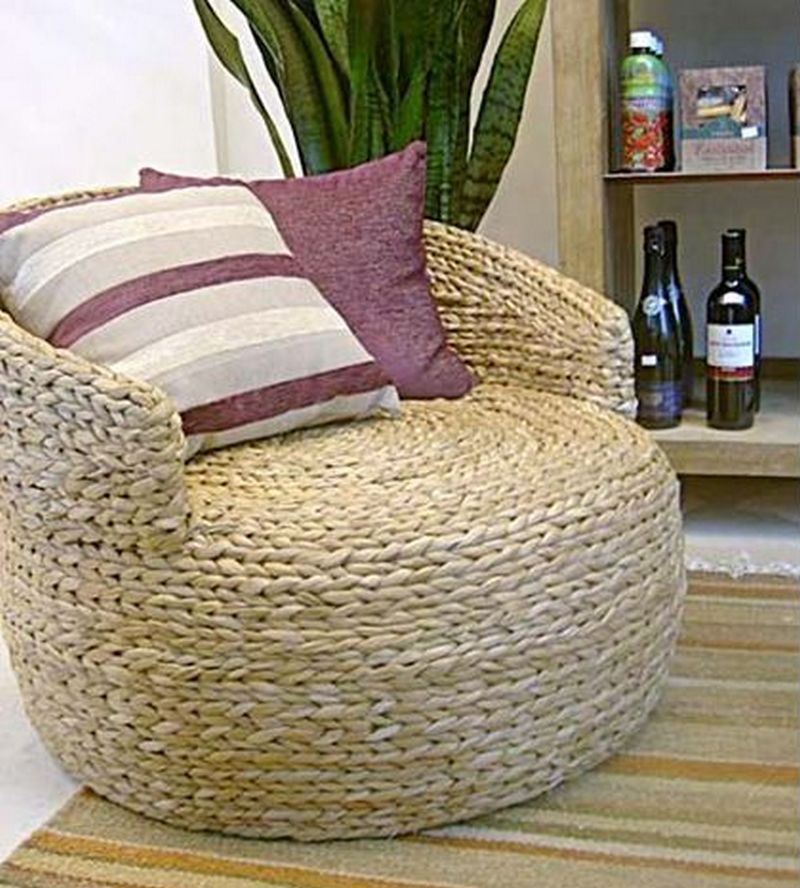 Then you need to pull the fabric tightly and attach it with a stapler to the rubber, as shown in the photo.
Cover
Measure the tire diameter and decrease the measurement by 40 mm. Take 9mm plywood and cut a circle out of it with the resulting diameter.
Now place the foam on top of the plywood circle, and circle the circle 25mm larger.
Then cut out a circle of fabric even larger than the foam by 25 mm.
It remains only to connect all parts of the cover with a stapler, and then glue the cover to the base of the stool.
Storage box
The stool can also be modified to store items.
1. Place the wooden disc on the tire. Mark where the bolt holes should be. Remove the cover and make holes. They should be slightly larger than the diameter of the bolt, as rubber has the ability to compress.
2. Apply glue to the cover, screw the bolts into the holes in the plywood and tighten the nut.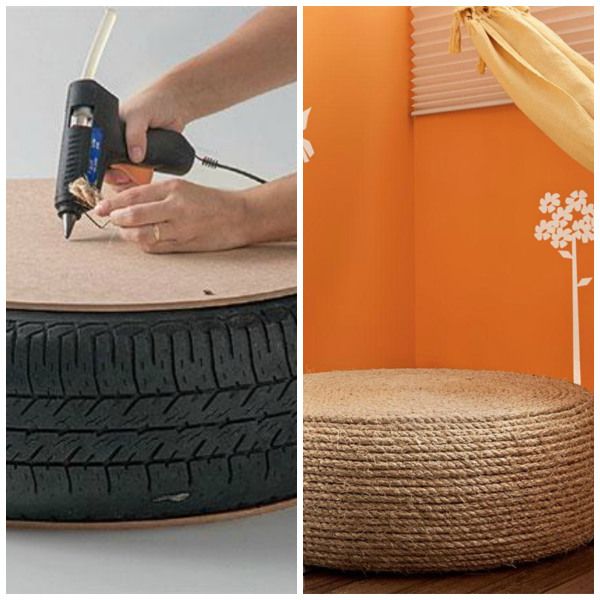 Now apply glue to the foam rubber and cover everything with a cloth. Remember that the foam rubber should be slightly larger than the plywood, and the fabric should be even larger than the foam rubber.
Staple the fabric to the plywood with a stapler.
3. The tire cover is made in the same way as shown above.
Now you need to make holes in the fabric in places where there were already holes in the tire. To do this, you need to pull the fabric towards you, and punch holes through the fabric into the tire. Insert a bolt and nut into the holes, and secure the stapler fabric to the inside of the tires. Remove the bolt.
Tire stool with storage is ready!
Tire ottomans
it is made of synthetic leather and it is waterproof!
Good afternoon, dear subscribers of the construction portal - StroyVopros.net. With this lesson, we continue step-by-step guides aimed at improving the suburban area, as well as its design.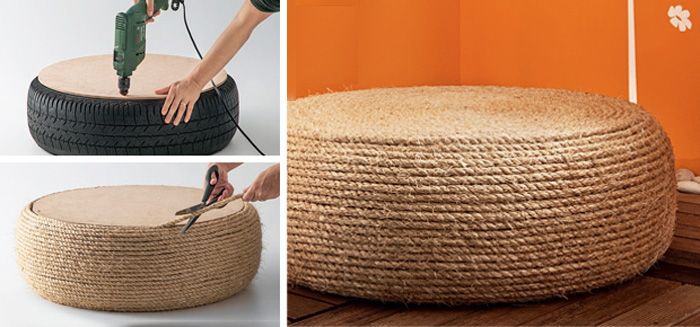 Today we will analyze how to make an ottoman from tires with your own hands.
Do-it-yourself ottoman from a tire
Rope twine
Necessary tools to create an ottoman from a tire
We drill holes in the plywood and in the tire
Fasten the plywood sheet to the rail
By the way, please note that the plywood sheet is attached on both sides, because we will attach roller legs to the bottom of our ottoman, which will move our ottoman on wheels.

Starting to lay the twine
We start laying the twine in the shape of a snail
When the cover is glued on, we proceed to glue the tire
Turn the tire over and start laying the rope from below
Tire ottoman is almost ready