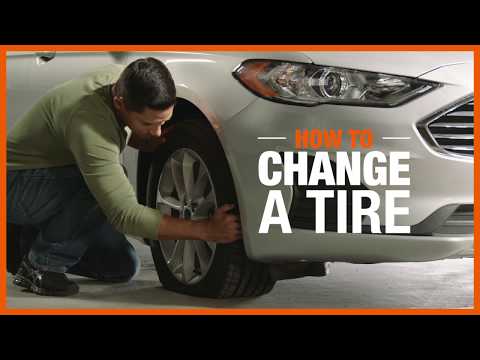
When you hear that thumpa-thumpa-thumpa sound while driving down the road, you know one of your tires is flat. And that means you'll soon be changing it yourself, if you're not lucky enough to have access to roadside service for your vehicle. If the mere thought of using a car jack makes you break out in a cold sweat—and it does for many people—not to worry! Just study these three video clips and follow these six simple steps, and you'll be able to get your vehicle in the air in short order without hurting it or—more important—you.
Get off the road and as far away from traffic as you can. If you're on a highway and near an exit, take it. The goal is to get off the road entirely and on to solid, level ground—such as a parking lot—where you can use a car jack safely. Failing that, you want to find your way to a road or street with as little traffic as possible, where you can pull off to the side, away from the flow of cars, and be on a spot solid enough to support a jack.
If you're on a highway and can't get off, you'll just have to find the safest location you can; you can't drive for miles on a flat tire without destroying it and possibly damaging your vehicle. In that case, pull over to the right shoulder, as far off the road as possible. Make sure you're on a solid, level surface, so that the jack doesn't sink into the ground rather than lifting the car. A soft surface might also cause the jack to lean to one side as it's lifting the car, which can cause the car to fall.
Make sure the vehicle's engine is off, that it's in park, and that the parking brake is engaged. If you happen to have something that you can use to block a tire (a brick, a piece of wood, or a large rock will do), place it under the tire at the opposite corner of the car from the corner you're going to jack up (e.g., if you're jacking up the right front, block the left rear tire). This is further insurance that the car will not roll off the jack.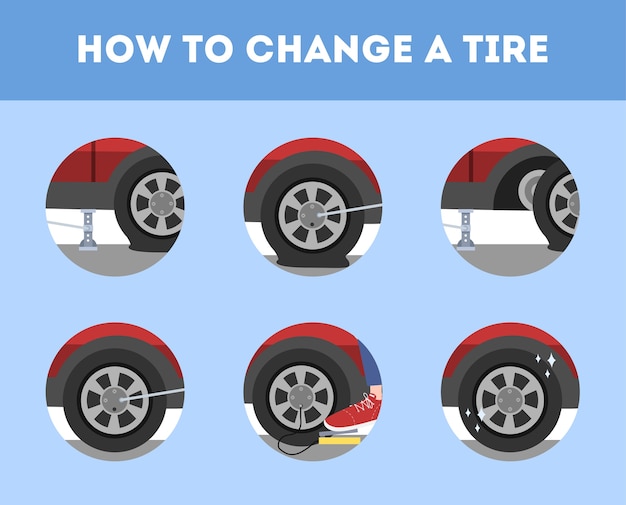 If you have passengers, it's a good idea to have them exit the car, but it's not absolutely necessary.
In most vehicles, the jack is stored in the trunk or in an SUV's wayback, under the cargo-floor cover. After you find it, you need to locate the jacking points on the car's body, where the jack engages. The jacking points for most vehicles are reinforced metal ribs specifically designed to safely lift the vehicle. On most vehicles, there are four jacking points. They're located under the car's rocker panels, just behind the front wheels and just ahead of the rear wheels. In the above video, our Car and Driver tech is pointing to the right front jacking point on the Hyundai Sonata sedan we're about to lift. To be sure about the jacking point locations for your vehicle, check your owner's manual.
Most car jacks have a slot at the top, on their engagement flange, that slips onto the jack point's reinforced rib—but your car may have a different setup, so check your owner's manual to be sure you understand exactly how your jack works with the jacking point.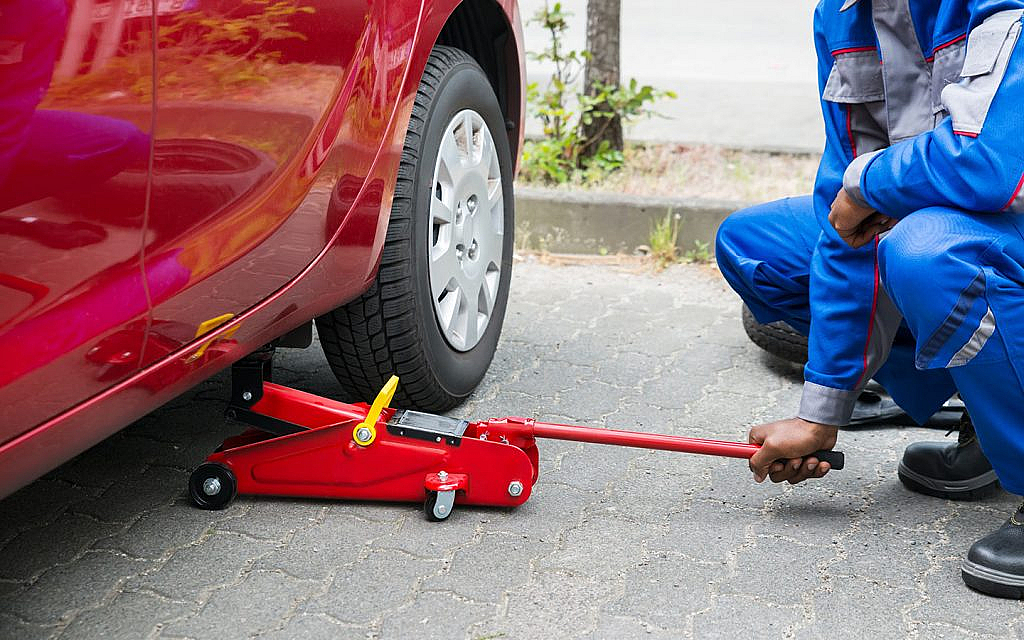 In the above video, our tech needs to spin the jack down first, so it can fit under the car before he begins jacking it up.
Turn the jack handle clockwise slowly until the flat tire comes off the ground. Take your time and make sure that the jack remains positioned straight up and down as it lifts the car. You don't want the jack leaning, because it won't hold the car securely that way. If you're lifting the car to get under it, to do some work, or to change the oil, you must place a jack stand under the rocker panel near the jack and snug it up to the car's body. This will ensure that the car cannot fall on you, should the jack slip or fail entirely.
Getty Images
Safety note: If you're jacking up the car to work on it at home, it's a good idea to use a more robust floor jack—the kind with the long handle that you pump (pictured above). This is the type of jack used at repair shops and in the pits at car races, because it's much stronger and more stable than a car's onboard jack. A jack stand placed in the proper position is pictured below, alongside a floor jack (with its handle removed).
Getty Images
When you're ready to lower the car, slowly unwind the jack handle in the opposite direction (counterclockwise) until the car's tire is firmly in contact with the ground and you can remove the jack. Return the jack to its storage location, secure it, and you're almost ready to roll. But before you fire up the engine, don't forget to remove whatever you used to block a tire, or you might think the parking brake is stuck on when you try to drive off.
$100 at Home Depot
Now 19% Off
$28 at Amazon
Now 22% Off
$70 at Amazon
$70 at Amazon
This content is imported from OpenWeb. You may be able to find the same content in another format, or you may be able to find more information, at their web site.
What do the Red Bull Formula One team and myself have in common? For one, both our cars are powered by Honda, and while mine has the larger 1.8L engine, their 1.5L power unit makes roughly 5x the horsepower - approximately 750. And, we both change tires ourselves. Granted, their pit crew can change all four tires in just about 1.88 seconds (a world record!). Seriously. That fast. I, on the other hand, take slightly longer - 45 minutes or so. But hey, that also includes swapping out the summer carpets for winter mats.
Changing your own tires is something that most people won't likely do on their own. Have a flat? Call CAA. Time to put the winters on? Call your mechanic. Despite this fact, changing my tires yesterday reminded me of the importance of proper lifting technique. Yes, something as simple as lifting a tire, or anything heavy, can cause a world of hurt if done improperly.
A good description of proper lifting technique can be found here c/o WebMD. Here’s what it says:
✓ Keep a wide base of support. Your feet should be shoulder-width apart, with one foot slightly ahead of the other (karate stance).
✓ Squat down, bending at the hips and knees only. If needed, put one knee to the floor and your other knee in front of you, bent at a right angle (half kneeling).
✓ Keep good posture. Look straight ahead, and keep your back straight, your chest out, and your shoulders back. This helps keep your upper back straight while having a slight arch in your lower back. This is called neutral spine.
✓ Slowly lift by straightening your hips and knees (not your back - maintain neutral spine!). Keep your back straight, and don't twist as you lift.
✓ Hold the load as close to your body as possible, at the level of your belly button. This is crucial.
✓ Use your feet to change direction, taking small steps.
✓ Lead with your hips as you change direction.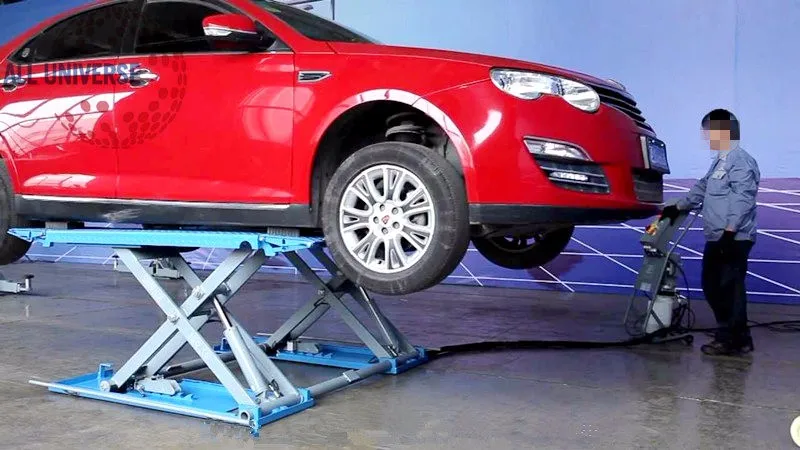 Keep your shoulders in line with your hips as you move.
✓ Set down your load carefully, squatting with the knees and hips only.
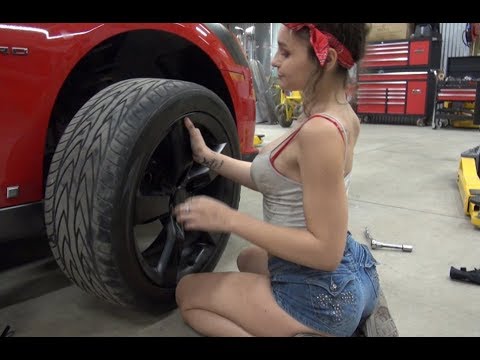
I've been changing my tires twice a year now for quite a while. Sure, I could take it to our mechanic, but there's a certain enjoyment derived from spending a little bit of time with a 3-tonne jack and a tire iron, and getting a little greasy.
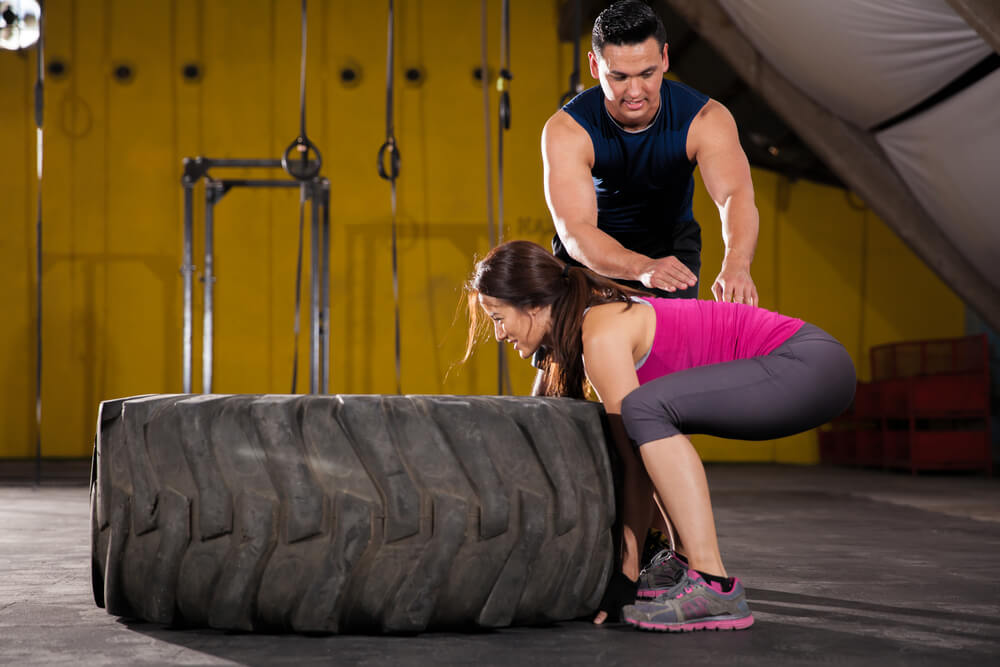
I always employ all the tips listed above, with some modifications, as the wheel hub is only a foot off the ground, so while I don't have to lift the tire very high to get it on/off, I still need to be in the correct position to keep my posture neutral. I always roll the tire into position so I can minimize twisting when lifting it. I crouch down with a wide base of support (as described above) and maintain a straight (neutral spine!) back. I get a firm grip on both sides of the tire, and I rest my forearms on the tops of my quads (thighs) for extra support. Then I lift and on goes the tire.
While I know a̶l̶l most of you will never change tires on your own, it's good to be familiar with the process, just in case you need to put on your spare. Hopefully this post will help you 'spare' your back should that need ever arise!
A complete guide to learning to ride on a rear wheel on a motorcycle
To begin with, it must be said that everything stated here is my personal experience and the experience of other stun riders I know . Following the following tips won't help you avoid falls, sprains, sprains, or even fractures, but it's still safer than if you taught yourself.
Preparing the bike for riding on the rear wheel.
Oil:
Many bikes suffer from oil starvation with long runs on the rear wheel and leaving the bike for 12 hours with the engine running. Gixers and CBR 900RR are especially famous for this (models '93-'95 895cc, engines of the SC-28 series) * . You can protect the engine from oil starvation by moving the oil intake closer to the rear wall of the crankcase or by pouring oil above the set level (usually to the maximum level provided). * I and some other stunt riders add 1 liter of oil more than the norm. Overflowing oil doesn't seem to be a problem for Hondas, but I've read that there have been problems with gixers. (So it is, but not for all models. When oil is overflowed in models since 2001, problems begin with clutch slippage, due to which the motorcycle loses traction and categorically refuses to climb onto the rear wheel. But at the same time, oil overflow does not affect on SRAD '9 models8-’00.)* So the best solution for the jixer would be to install an extended oil pick-up. You can buy a modified jixer oil scoop here Streetfighters.ru Store.
Gearbox:
No special training or modifications to the motorcycle are required for training. Almost every sportbike gets on the rear wheel from first gear without problems. If your bike isn't spinning in first gear, it's not the bike. High gears are not needed until you start riding the rear wheel sitting on the tank - High Chair Wheelie (and then on weak motorcycles), riding in a candle without hands and in a circle.
Tires:
When you wheelie at high speeds, you need good tires in the back (no Kings Tire or touring balloons). A tire with a visible or even palpable cord can create dangerous vibrations. I've tried doing a wheelie on a lunging wheel, and it's causing the bike to wobble insanely and it's hard to find the balance point. The new tire completely eliminated this problem. Decrease tire pressure below normal.
To ride in a spark plug at speeds over 30 km/h, set the tire pressure to between 1.4-2.1 atm.
For driving in a candle at speeds below 30 km / h 0.84 - 1.4 atm.
In general, the optimal pressure for driving on the rear wheel. 1.2 -1.4 atm. A lower tire pressure will make the ride in the plug less stable.
Drop sensor:
Most (or all, I'm not sure) bikes with injectors have this sensor. It can turn off the engine if you lift the bike very high into the candle. The sensor must be disabled. It's easy on Hondas. It is necessary to cut off the wires going to the sensor and bridge them together, and insulate the remaining wire. This method does not work for jixers. The copper ring in the sensor must be removed, or insulated with something like silicone.
Exhaust pipes:
if you learn to ride in a candle for 12 hours, then the pipe (or pipes) will have to be shortened. On some bikes, the pipes touch the ground at the same time as the tail. If the pipe gets caught on the ground, it may cause a fall. I would even say that it will inevitably lead to a fall. * The pipe can be shortened by simply cutting off a piece from it and welding or riveting the tip back onto it, or simply buying it. but sometimes it can save you from falling. When you lower your front wheel to the ground and the wheel is not straight, you can start to wobble, possibly leading to a fall. If you control the drop of the wheel and its position when it touches the ground, then you can do without a damper. But it's better that he was.
Bars:
While learning to ride a wheelie, you are likely to drop your bike. Don't go to a fortune teller.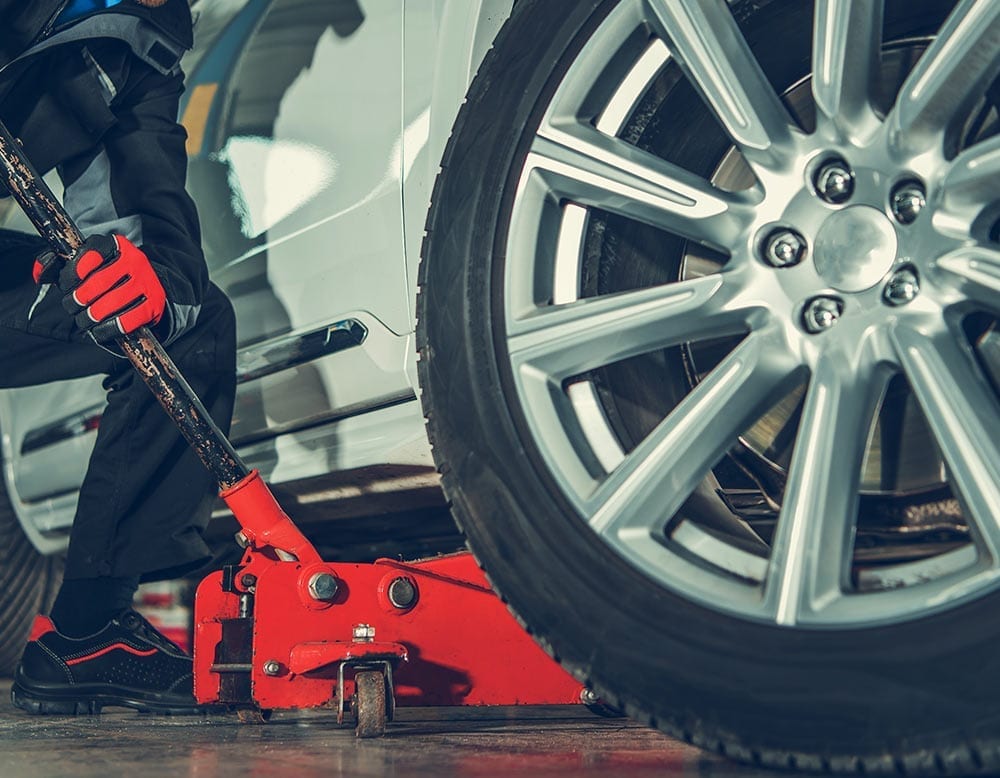 * Arcs will provide the best protection you can count on. They will certainly save a lot of money, but they will not completely protect your bike in case of falls. Bars can be ordered here:
MXD Cage
Racing 905 Cage
Powers Cages
Freestyle Ingenuity Cages
Wicked Crew Extreme Team's Cages
Bars can also be made by yourself or contact your motorcycle service.
Yoke (12 o'clock frame):
Yoke if you plan to train 12 o'clock wheelies. There are two opinions whether it is worth learning to ride in a wheelie with a yoke or better without it. My advice: yoke, but remember that the impact of iron on asphalt is much harder than plastic. But plastic is much more expensive. Here such a solution can come to the rescue: you need to put the Yoke in place; you can do it yourself or contact your motorcycle service.
Protective gear:
Be sure to wear a helmet, jacket, gloves and other protection if you want to continue riding after falls. (On my own, I advise you to buy wider jeans and wear knee pads under them.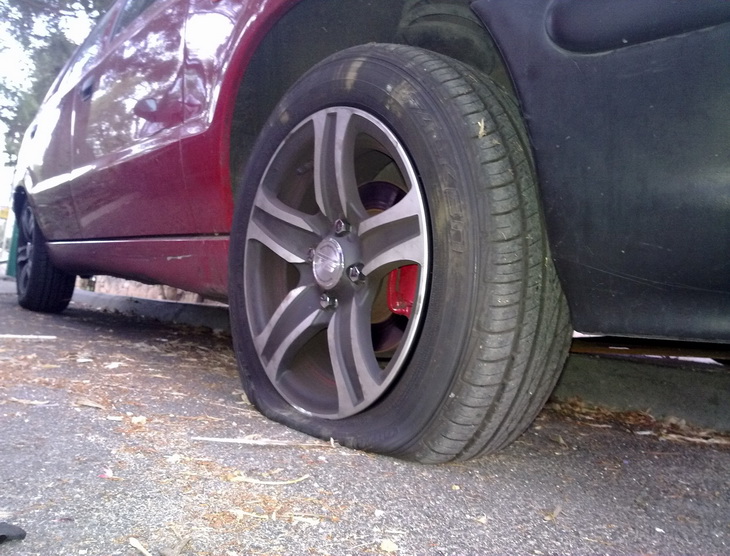 Also a very useful thing is the "tortoise", well, or, in a competent way, full protection of the torso.) *
Before doing a wheelie on a bike.
If you have an ATV or motocross bike, it's best to practice on them first. You will learn to control the gas and understand where the balance point is, this will help you a lot in learning to ride a rear wheel on a full-size motorcycle.
So if you are ready to learn to ride in the rear then:
1. Make sure the rear brake works and the brake foot is in a comfortable position for you;
2. Check chain tension. The free play should be 3-4 cm. Remember that an understretched chain can come off and cause a lot of trouble, and an overtightened chain will quickly devour the stars and may break;
3. Check that there are no cracks in the footpegs and that all bolts are properly tightened.
Speed and fit on the bike.
I recommend learning wheelies in first gear. It's easiest for a bike to slip in first gear, and it's also important that many bikes have a rev limiter in first gear.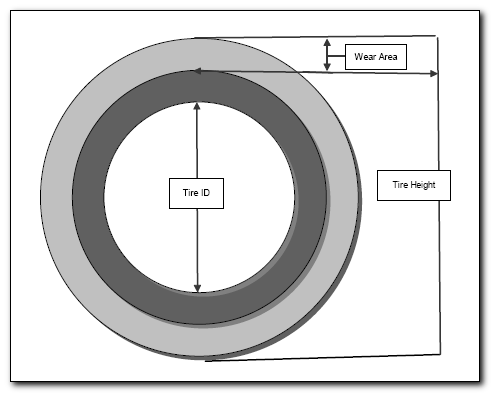 This will prevent you from over-revving the engine. You and your bike will also suffer less damage when falling in first gear due to the noticeably slower speed of the wheelies. For this very reason, I don't think it's a good idea to wheelie at high speed until you get into the habit of using the rear brake. It's also much easier to go from climbing in first gear to climbing in second than vice versa. I think 30 km/h is a good speed to start learning, at slower speeds the bike becomes less steady and loses stability. I also recommend starting training with your left foot on the passenger footpeg and your right foot on the front footpeg with your toe on the brake pedal. At first it will look awkward, but then you get used to it. Most people think that riding in a candle is much easier to control while standing than sitting. (It's very easy to explain. Standing will make it much easier for you to move the bike while maintaining your balance.)* It's also much easier to lift the bike into the candle while standing.
Remember! Only falls can teach you how to ride on the back wheel and work the gas smoothly.
Why the Clutch Lift is the Best Method.
Clutch lift is the best method of lifting the bike into the candle because there is always enough power to lift the bike onto the rear wheel. At the same time, this leads to slightly faster wear of the clutch discs. What does not concern the chain. I have never heard of any problems with the chain as a result of additional loads. There are many advantages to the clutch lift method over the gas lift method:
1. This method allows you to lift the bike into a candle, which cannot be lifted off the gas;
2. You can drive in the candle at a lower rpm, respectively at a lower speed. This allows beginners to hold the bike longer at the candle and balance point. And also get less painful injuries *;
3. Rise is more predictable. This should be explained. When gas lift occurs, the front rises relatively slowly. When the front rises about a meter above the ground, there is a sharp jump upwards, since the gas is almost completely open. This can lead to unpredictable consequences. When the clutch lift is done correctly, the front rises almost immediately to the balance point, and there you can control the height of the lift already with the gas and / or body position. With a little practice, the clutch lift will become very stable and not scary at all.
4. All pros lift the bike with the clutch. You want to be like them, don't you?
How to raise the bike with the clutch?
There are a couple of different clutch lift methods. I prefer the second method.
Method 1: Accelerate slightly first, then depress the clutch with one (or two)* fingers until the discs disengage. Then add gas and quickly release the clutch.
Method 2: Close the throttle, fully depress the clutch with one (or two)* fingers. Open the gas to normal speed (you can do the so-called gas flow) * and drop the clutch.
When learning this way of climbing, don't throttle too hard before dropping the clutch. This will allow you to feel and learn the process of lifting the motorcycle with the clutch. Gradually increase the speed, and soon your wheel will rise close to the balance point. When climbing, slow down as you approach the balance point. If you are already past the balance point and releasing the throttle does not help bring the bike back to its normal position, lightly apply the rear brake. Climbing off the clutch in second and third gear may require extra effort, depending on the size of the bike. If the bike won't get out of the clutch, then a jerk will help. Do it at the moment you release the clutch and lean back a little.
Gear change.
I don't recommend shifting gears while riding in a spark plug unless you can use the clutch. Shifting gears in a spark plug is hard on the gearbox. Also, if you make a mistake with the gear, the bike will drop very sharply on the front wheel, which is bad for the fork legs. My advice: learn to ride in a candle in one gear, without switching.
How to correctly lower the front wheel to the ground.
Hold the throttle until the front wheel touches the ground.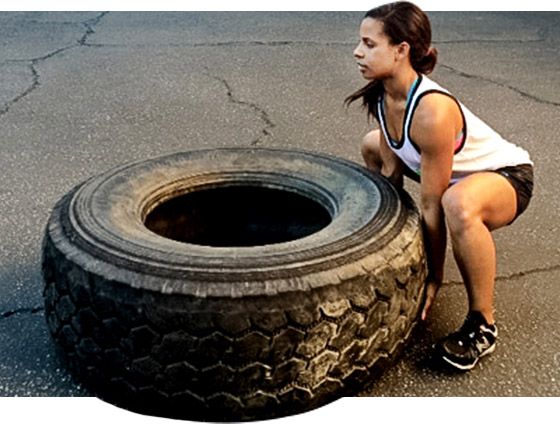 If you need to quickly lower the front wheel to the ground, turn off the throttle first. When the wheel goes down, then open the gas. Then the landing will be soft.
How to ride a candle for a beginner. Step-by-step instruction.
1.Reduce tire pressure to 1.2-1.4 atm.
2.Engage first gear.
3. Accelerate to 20-25 km/h.
4. Depress the clutch.
5. Add some throttle and drop the clutch.
6. Repeat step 5 increasing the speed until the front wheel is close to the balance point.
7. Reduce the throttle if the wheel is over the balance point.
8. Gently apply and release the rear brake.
9. Hold the throttle until the wheel drops to the ground.
Longitudinal balance (back and forth) in the candle.
Fore-aft balancing controlled by throttle and rear brake. It is very good to learn first on an ATV or motocross bike. If the front wheel is in front of the balance point, then you must increase your speed. This can be compensated by more gas. If you have passed the balance point, then use the rear brake or engine braking to return to it. The point of balance is the position of the bike in which it is not necessary to increase or decrease speed to stay in the same position. The height of the balance point depends mainly on the speed of riding in the candle. The higher the speed, the lower the balance point. The balance point also depends on the weight distribution of the motorcycle and the position of the rider on it. The goal of riding in a candle on balance is to keep the bike in balance for as long as possible. This is done by opening and closing the throttle, and applying the rear brake if required. Over time, you will learn to keep the bike in the candle, smoothly working the gas / brake.
The balance is transverse (right-left) in the candle.
This kind of balance is controlled by the position of your body on the bike. It is very useful to practice on a bicycle, motocross bike. When the motorcycle rides in a candle at a speed of over 35 km / h, then it is in balance. If the speed is less, then you have to balance the body. The principle is pretty simple. Quickly move to the same side that the bike falls on. For example, if the bike is leaning to the left, move to the left. This movement will cause the bike to turn to the left, compensating for its lean.
Prevent/stop splitting after wheelie.
From my experience, I think a front wheel flare can be caused by a worn tire (with a large flat contact patch), rough throttle and/or some body movement. Flail after landing from a candle at low speed is due to high pressure in the rear balloon and / or loss of lateral balance.
Candle ride control.
To steer the bike well in the candle, the bike must be at or behind the balance point. To control the bike in a candle at a speed of about 35 km / h, you just need to tilt it a little in the direction of the turn. To turn at lower speeds, you first need to tilt it in the direction you want to turn. For example, if you want to turn to the right, first slowly lean to the right. Then lean to the left a little faster, turning the steering wheel a little to the left. This will cause the bike to start to roll to the right. Then, without leveling the bike, you have to hold that angle. This will cause the bike to turn right.
Rear brake use + slow candle driving / 12 hours.
Slow wheelie is riding behind the balance point. This is one of the hardest parts of learning to ride a wheelie because it requires not only skill but also courage. To learn how to use the rear brake, you must keep the bike behind the balance point by holding it with the rear brake. You will soon get used to it and riding in this position will become normal for you. To ride slowly in a candle, it is enough to keep the bike behind the balance point. If you get scared at this point and hit the rear brake hard, it will cause the front wheel to move forward and down without slowing the bike down. When slowing down, you should keep the bike behind the balance point by applying gentle pressure on the brake. As for the 12 hour ride, do the same, just release the rear brake a little and let the bike rest on the tail (or better yet, on the frame specially prepared for this) *. If you plan to stop in a 12-hour stance, then first brake and stop moving, and only then turn off the engine.
Slow driving in a candle.
First of all, increase the idle speed. I increase to 3500 rpm. High idle makes the slow wheelie very smooth. But be careful, the first time you try to drive in a slow wheelie with increased idle speed, you can roll over, so protect yourself with a rear brake. When riding slowly on the rear wheel in the spark plug (with the idle running high)*, after some practice, you will only use the rear brake and use the throttle only to lift the bike up the spark plug and lower it to the ground.
Once you understand all this, then all the varieties of riding in a candle will become clear to you.
 Ride angle correction with rear brake
 WikiHow works like a wiki, which means that many of our articles are written by multiple authors. When creating this article, 33 people worked on editing and improving it, including anonymously.
Rear wheel stunts can be fun, but make sure you do them in a safe place and where they are legal. First of all, you make them as if by touch, focusing on the sound of the engine, and not based on what the tachometer reports. Each motorcycle has different engines and sprockets, without having to look at the tachometer. Watch the road and be prepared to get bruised.
The first step is to go out on the goat. The bottom line is you need a bike with enough power to get your front wheel off the ground. You should feel comfortable when the front of the motorcycle becomes "light". Most shop bikes won't be able to do this without some modification. You can also try to get the bike up to a good speed in first gear (about 10-20 km/h) and once you get more power (when the engine starts to spin faster with a bit of gas), let it go a little bit and then put on enough gas again .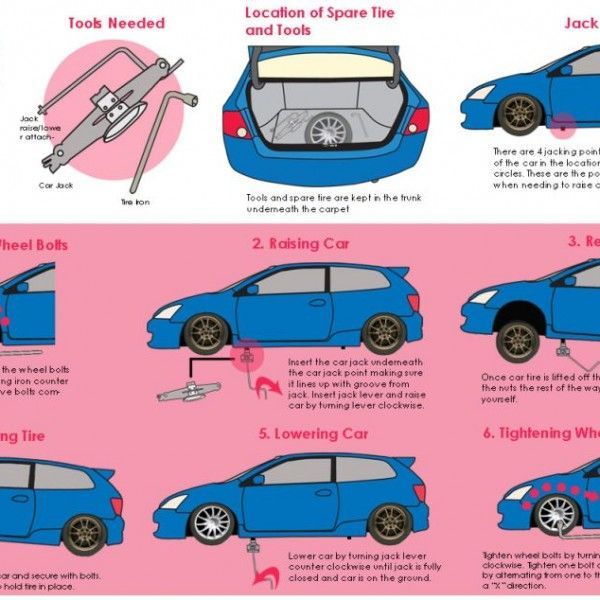 Not enough to roll over, but enough. You will notice that the front end will lift up and if you let off the gas it will go down. Raise the motorcycle while adding more gas after increasing the rpm. If you don't have a stabilizer, then it's time to buy one. Trying to get the bike off the ground and then back down will cause the front tire to shake. If you don't land almost perfectly straight, you'll end up somersaulting the bike over the front of it. You will be hurt, and the bike will suffer. Once the front is light, try riding with the wheel up. Once you master this trick, move on to the next step, which is the clutch.
Drive at a speed of about 10-20 km per hour in first gear
Pull the clutch and increase the engine speed a little, then release it. Do this a few times with a little more throttle each time until you start to feel comfortable with the way the front of the bike lifts slightly. The front will get power faster than the rear wheel of the motorcycle, so be prepared.
Once you get the hang of lifting the front end a bit, it's time to worry about the throttle and brakes. Use the throttle to maintain the height of the motorcycle and the rear brake and keep the motorcycle from spinning. Squeezing the throttle at first will almost always flip you over and you'll hit the front end pretty hard.
If you can manage your brakes well enough, you should theoretically be able to ride the rear wheel of a motorcycle while the engine is running. But first, you will slow down and drop the front down. Here you need to shift into second gear. This is a shift without using the clutch when your engine is revving up to 3,000 rpm from its final value. Let the front drop slightly and shift into second gear at the same time.
As soon as you shift into second gear, pull on the throttle to prevent the bike from coasting down and find a balance point from which your bike will be stable in the air on the front wheel. The point of balance can be found by leaning against the rear of the bike so that the center of gravity of the whole system (you and the bike) is in the center and you can spin long enough. But be careful not to shift your body position to the back side, as you can fall in this case, and "keep an eye" on your rear brake for any such situation.
 Spin your engine up to high RPM, ease off the throttle a little, and shift sharply so you don't fall into neutral.
 There are several ways to raise the motorcycle on the rear wheel. I call it combinations. I propose to consider a way to lift the bike onto the rear wheel through the clutch. This method also has different variations, we will consider everything in sequence. You can often hear a lot of controversy, but which is more correct: lifting the motorcycle from the gas or through the clutch? Here you need to understand that lifting a motorcycle from gas is a very limited range of the motor. Whereas, when working through the clutch, you yourself set the number of revolutions by releasing the clutch and transferring them to the rear wheel. If everything sounds so easy, then why is there such an argument? Because in reality, everything is somewhat more complicated.
Errors that prevent lifting on the rear wheel.
Let's take a look at the most common ones based on my experience. The first is the wrong grip. Namely, a grip not set or set incorrectly prevents accurate dosing of gas. In turn, the sharp and ragged work of the gas makes you nervous. The next thing is to simultaneously open the gas and release the clutch. This results in a dip at the beginning of the climb and a shot of the bike up after it. Here, slow, smooth release of the clutch. Just like in the previous example, the bike throws out with a delay.
Be with a motorcycle for you. I'm not exactly sure, I know it's not as easy as most people think. And I see this often when I give students a simple test. Try to come to a complete stop and pick up a little speed again, at least in a straight line. Using the rear brake. In this test, it becomes clear how you work: clutch, gas, rear brake. If the exercise is completed successfully, that is, there are no unnecessary regassing, jerks during acceleration and uncertainty in balance, then the controls are synchronized. You can proceed to the study of lifting the motorcycle on the rear wheel.
First basic exercise: speed up to 5-10 km/h -> clutch release -> closed throttle -> coasting to near zero speed 2 km/h, in the absence of strong lateral rolls, continue steering and quickly apply the rear brake to a complete stop -> release the rear brake -> open the throttle and then start the clutch work without releasing it all the way -> slipping the clutch discs -> accelerate on a motorcycle up to 10 km/h -> at the moment of acceleration, the side roll will disappear and the motorcycle will be stable -> complete the acceleration by depressing the clutch and close the gas.
This exercise will give you precise control of the clutch, throttle, brake and steering. Also, landing, grip of the hands will automatically take the correct position. Otherwise, this simplest basic exercise cannot be performed lightly. If you are constrained and do it with effort, with wooden hands and not only, then it is still worth working for synchronization. And be with a motorcycle on you. Since accuracy is essential in order to prevent a fatal mistake when lifting onto the rear wheel.
Position on a motorcycle is also important. Try to hold on with everything you can and cannot, your knees in static tension are pressed to the tank, but not much, your left foot is holding on to the footboard, your right is on the brake. Hands in tension, but it is important to follow the brush and control the portion of the gas. This, perhaps, is the very minimum of a proper landing. The case in a good way should help a lot to lift the rear wheel, but it is extremely difficult to immediately put it into operation. Therefore, it is important to follow the minimum recommendations for landing, so as not to mess up in the rise.
Combination #2
The difference and difference when performing the same combination on different 600 cc or 1000 cc motorcycles lies in the changes in the values in the formula, in the form of speed, portions and time intervals. The sequence of actions remains the same in both cases. The values below are based on a 600cc motorcycle.
G - Gas portion (1 - weak gas, low speed 3000-4000PM, 2 - medium gas 5000-6000PM, 3 - high gas 7000-10000PM, closed gas -x). * 0.5 + 1.5 for example, such numbers through a hyphen indicate an increase in the portion, opening the gas 1.5-0.5 covering the gas, a decrease in speed.
V - Time (0.5 , 1.2 sec).
C - Clutch (1 pressed, 2 released, 3 smooth release) * do not hold the clutch, quickly release it and throw it.
S - the speed at which the rear wheel will be lifted (from 1 to 50 km / h)
K - combination, sequence in actions.
> - next action
Formula: K2-> S 15~25 = C1>G1>C2>Gx>G0.5>G1.5 close the throttle -> open the throttle -> gradually build up the gas for a smooth landing).* In combination, it is important to monitor the time value and the portion of the gas and the speed with which the ascent is made.
Do the first lifts no more than 15-20 cm and work on a smooth landing. For a smooth landing, it is necessary to cover the gas at the moment of separation of the front wheel. If you don’t have time to cover it, which happens most often, close it completely. Let even with a hard landing, but without a coup. After a hard landing, control the throttle to prevent accidental reopening. Bring your actions to automatism at a low altitude. By experimenting with portions and time intervals, you can gain the experience you need.
Before doing the exercises, try to mentally imagine and pronounce the entire chain of actions without hesitation. Saying Combination No. 2 haltingly and remembering what to do for what, on a motorcycle will be much more difficult.
Operate the clutch with one or two fingers while still being able to hold the steering wheel with the others. Also pay attention to the free play of the clutch handle. How to feel it? Standing still, fully depress the clutch. With the engine running and in gear, begin to slowly release the handle and as soon as the motorcycle pulls forward, squeeze it back. Repeat the exercise without looking at the pen. It is necessary to fix the “starting point of movement” in muscle memory. We don't need a free ride at all. We can work with the pen in a range of only five millimeters: from the full contact of the discs, to the point where they disengage.
"Return". The only way to catch the bike if you've gone too far on the gas uphill is to use the rear brake. However, knowing about this is not enough - during the trick everything happens too quickly to skip the action through your head. You need to develop a steady reflex on the rear brake. Therefore, before going further, it is necessary to pay sufficient attention to the "return" exercise. The essence is simple: raise the motorcycle and immediately lower it with the rear brake. Gradually increasing the angle of rise, you will come to the fact that you will catch the motorcycle in the desired position with the rear brake. From here you can already try slow passages and even balance.
When the motorcycle starts to lift off the front wheel, lightly apply the rear brake and be ready to correct the angle by pressing. Repeat the exercise to bring this action to automatism, while not in a hurry to rise high. The body is configured for self-preservation and in case of going into a negative angle, the legs will be “removed” from the footboards against your will. In order for the foot to begin to press on the pedal in a negative angle, the rear brake reflex is needed again.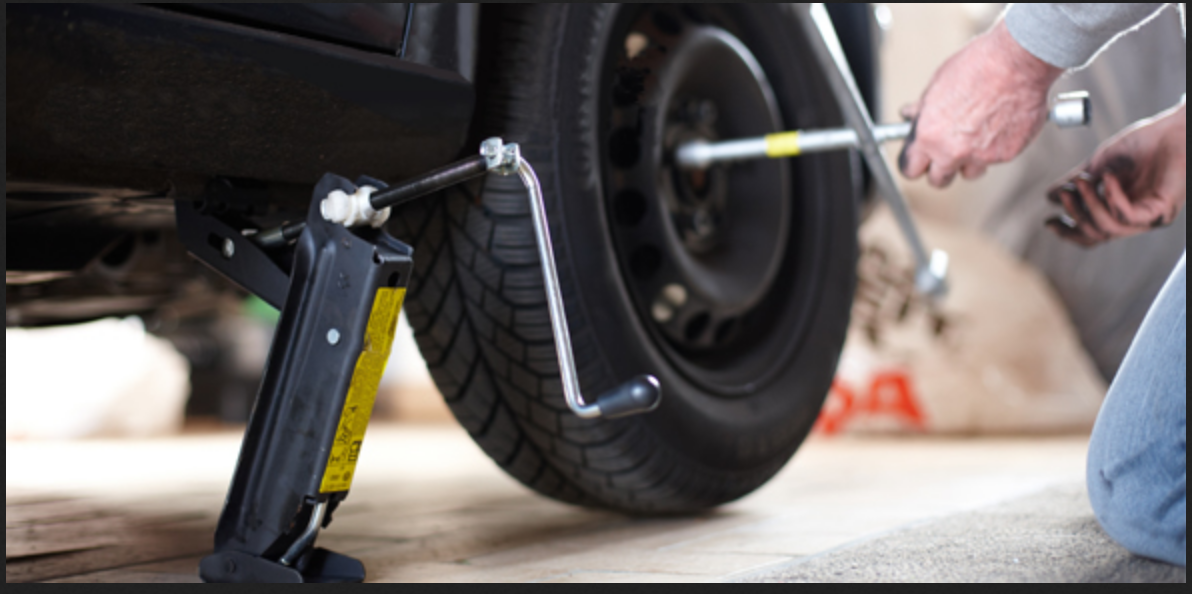 It is better to buy it on a light motorcycle and preferably under the supervision of professionals.
Follow the news, continuation of the article "How to lift a motorcycle on the rear wheel" and watch my video on this topic.
How to raise the motorcycle on the rear wheel from the gas.
This article should never be used as a guide to action or training material . Here I share my personal experience experience and mistakes (highlighted in the appropriate color).
motorcycle: Yamaha FZ6, 98hp
so, where did you start:
1. search for a place where the probability of collision with cars and pedestrians is minimal. stopped his choice on the section of the new bypass near the exit to Razdolnaya. The reason for the choice is a separating barrier (oncoming cars are excluded), two-legged people do not walk and a fairly large straight section in both directions.
2. climbed all over the Internet, talked with those who already knew how (collection of theoretical material)0003
And the day came. ..
..
I rode back and forth a couple of times, made sure that there were no sand, debris and oil stains, I decided to try it. I stand, I wait until there are no 100-200 meters ahead and behind the cars. Waited for the necessary clearance, went. I accelerate to 30 km / h, sharply throw the gas and just as sharply open it to half, the bike swayed back and forth, maybe even the wheel came off a little, but the effect is zero in the end. I understand that I need more gas, but it’s scary ... Again I’m standing, waiting for the clearance between the cars, accelerating to 50 km / h, lying down on the tank , I throw / open the gas to the end and - lo and behold !!! the bike raised the wheel probably by 10-15 cm, a surge of adrenaline and fear, which instinctively made it sharply drop the gas , the body went forward, and since it was already lying on the tank, the eggs about this tank clanged kaaaak !!! (there was definitely a ringing, I heard it!). Bottom line: a lot of positive emotions mixed with pain and a surge of adrenaline (which I then barely washed off the seat). The next day, the muscles of the shoulders and legs ached (the motik squeezed to such an extent). Then a few days / weeks of not very successful attempts to put and drive on the back with a more or less high separation of the wheel at least 20-50 meters. A couple of "voiced" blows on the tank with a not very successful setting of the front wheel. I can’t say that I already know how to ride in the back, but sometimes it’s already possible to put it on. I speed up to 69km / h (70 is already an unacceptable traffic speed, and it is our sacred duty to comply with traffic rules ), I sit down evenly, my arms are straight, I release the gas and on engine braking at 50 km / h I open the gas to the end - the wheel rises and here the main thing do not throw abruptly , and for safety net I strain my legs - in case of a strong blow with the front wheel, it turns out that I get up, and not just the body goes forward, (eggs are protected). Hands are straight - this does not allow you to fly forward.
 In the event that the motik goes to the side, I use the steering wheel (due to the gyroscopic effect) and put my body on the desired trajectory. I put a smooth release of gas (the steering wheel must be straight) .
what I did wrong: 1. do not lie down on the tank 2. do not turn off the gas abruptly. 3.you can not relax your hands
Wheelie (The Complete Guide to Wheelie Riding)!
To begin with, it must be said that everything stated here is my personal experience and the experience of my other familiar stunt riders. Following the following tips won't help you avoid falls, sprains, sprains, or even fractures, but it's still safer than if you taught yourself.
Preparing the bike for riding on the rear wheel.
Gearbox:
No special training or modification required for training. Almost every sportbike gets on the rear wheel from first gear without problems. If your bike isn't spinning in first gear, it's not the bike. High gears are not needed until you start riding the rear wheel sitting on the tank - High Chair Wheelie (and then on weak motorcycles), riding in a candle without hands and in a circle.
Tires:
When you wheelie at high speeds, make sure you have good tires in the back (no Kings Tire or touring balloons). A tire with a visible or even palpable cord can create dangerous vibrations. I've tried doing a wheelie on a lunging wheel, and it's causing the bike to wobble insanely and it's hard to find the balance point. The new tire completely eliminated this problem. Decrease tire pressure below normal.
To drive in a candle at speeds over 30 km / h, make the tire pressure between 1.4-2.1 atm.
For driving in a spark plug at speeds below 30 km/h 0.84 - 1.4 bar.
In general, the optimal pressure for driving on the rear wheel. 1.2 -1.4 atm. A lower tire pressure will make the ride in the plug less stable.
Drop sensor:
Most (or all, I'm not sure) bikes with injectors have this sensor.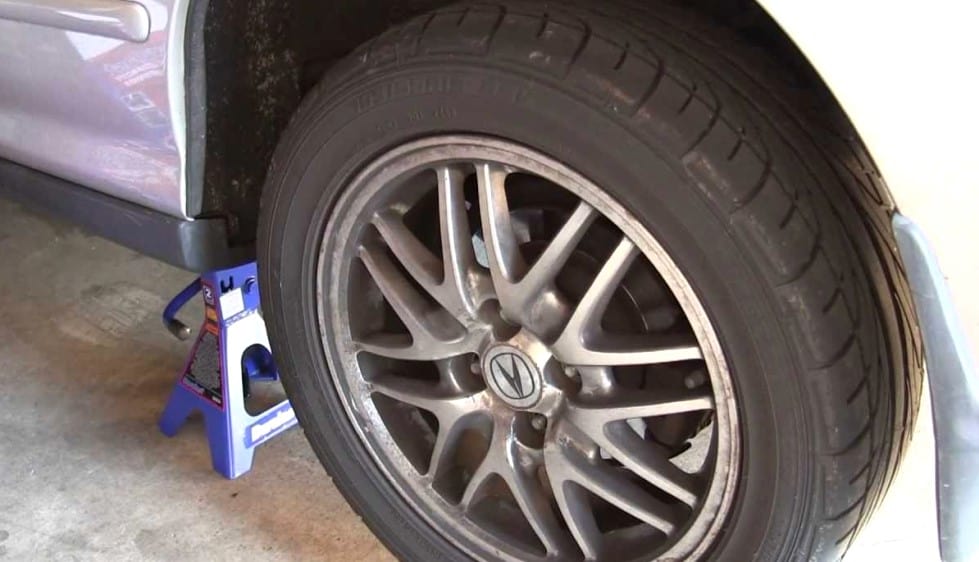 It can turn off the engine if you lift the bike very high into the candle. The sensor must be disabled. It's easy on Hondas. It is necessary to cut off the wires going to the sensor and bridge them together, and insulate the remaining wire. This method does not work for jixers. The copper ring in the sensor must be removed, or insulated with something like silicone.
Exhaust pipes:
if you are learning to ride in a candle for 12 hours, then the pipe (well, or pipes) will have to be shortened. On some bikes, the pipes touch the ground at the same time as the tail. If the pipe gets caught on the ground, it may cause a fall. I would even say that it will inevitably lead to a fall. * The pipe can be shortened by simply cutting off a piece from it and welding or riveting the tip back onto it, or simply buying it. Ready-made short pipes can be purchased here:
www.starboyz.com
steering damper:
A damper is not necessary in principle for wheelies, but sometimes it can save you from falling. When you lower your front wheel to the ground and the wheel is not straight, you can start to wobble, possibly leading to a fall. If you control the drop of the wheel and its position when it touches the ground, then you can do without a damper. But it's better that he was.
Bows:
While learning to ride a wheelie, you are likely to drop your bike. Don't go to a fortune teller.* Arcs will provide the best protection you can count on. They will certainly save a lot of money, but they will not completely protect your bike in case of falls. Arcs can be ordered here:
Streetfighters
MXD Cage
Racing 905 Cage
Powers Cages
Freestyle Ingenuity Cages
Wicked Crew Extreme Team's Cages
Arches can also be made by yourself or contact your motorcycle service.
Yoke (12 o'clock frame):
Rope up if you plan to learn 12 o'clock wheelies. There are two opinions whether it is worth learning to ride in a wheelie with a yoke or better without it. My advice: yoke, but remember that the impact of iron on asphalt is much harder than plastic. But plastic is much more expensive. Here such a solution can come to the rescue: you need to put the Yoke in place, you can buy it again at Streetfighters.ru or in foreign Racing 905 Cage , Freestyle Ingenuity Cages , do it yourself or contact your motorcycle service.
Protective equipment:
Be sure to wear a helmet, jacket, gloves and other protection if you want to continue riding after falls. (My advice would be to buy wider jeans and wear knee pads under them. Also a very useful thing is the "tortoise", well, or, in a competent way, full protection of the torso.) *
Before doing a wheelie on a bike.
If you have an ATV or motocross bike, it's best to practice on them first. You will learn to control the gas and understand where the balance point is, this will help you a lot in learning to ride a rear wheel on a full-size motorcycle.
So if you are ready to learn how to ride in reverse then:
1. Make sure the rear brake works and the brake foot is set to a comfortable position for you;
2. Check chain tension. The free play should be 3-4 cm. Remember that an understretched chain can come off and cause a lot of trouble, and an overtightened chain will quickly devour the stars and may break;
3. Check that the footpegs are not cracked and that all bolts are properly tightened.
Speed and fit on the bike.
I recommend learning wheelies in first gear. It's easiest for a bike to slip in first gear, and it's also important that many bikes have a rev limiter in first gear. This will prevent you from over-revving the engine. You and your bike will also suffer less damage when falling in first gear due to the noticeably slower speed of the wheelies. For this very reason, I don't think it's a good idea to wheelie at high speed until you get into the habit of using the rear brake. It's also much easier to go from climbing in first gear to climbing in second than vice versa. I think 30 km/h is a good speed to start learning, at slower speeds the bike becomes less steady and loses stability. I also recommend starting training with your left foot on the passenger footpeg and your right foot on the front footpeg with your toe on the brake pedal. At first it will look awkward, but then you get used to it. Most people think that riding in a candle is much easier to control while standing than sitting. (It's very easy to explain. Standing will make it much easier for you to move the bike while maintaining your balance.)* It's also much easier to lift the bike into the candle while standing.
Remember! Only falls can teach you how to ride on the back wheel and smoothly work the gas.
Why the Clutch Lift is the Best Method.
Clutch lift is the best method of lifting a bike into a candle because there is always enough power to lift the bike onto the rear wheel. At the same time, this leads to slightly faster wear of the clutch discs. What does not concern the chain. I have never heard of any problems with the chain as a result of additional loads. There are many advantages to the clutch lift method over the gas lift method:
1. This method allows you to lift the bike into a candle, which cannot be lifted off the gas;
2. You can drive in the candle at a lower rpm, respectively at a lower speed. This allows beginners to hold the bike longer at the candle and balance point. And also get less painful injuries *;
3. Rise is more predictable. This should be explained. When gas lift occurs, the front rises relatively slowly. When the front rises about a meter above the ground, there is a sharp jump upwards, since the gas is almost completely open. This can lead to unpredictable consequences. When the clutch lift is done correctly, the front rises almost immediately to the balance point, and there you can control the height of the lift already with the gas and / or body position. With a little practice, the clutch lift will become very stable and not scary at all.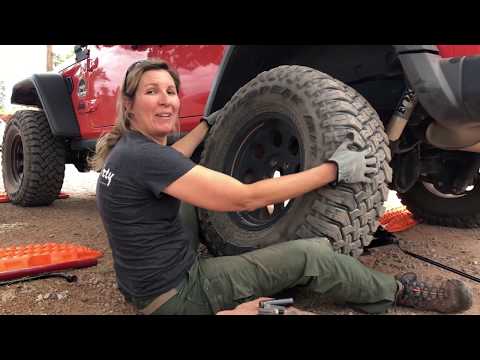
4. All pros lift the bike with the clutch. You want to be like them, don't you?
How to raise the bike with the clutch?
There are a couple of different methods for lifting from the clutch. I prefer the second method.
Method 1: Accelerate slightly first, then depress the clutch with one (or two)* fingers until the discs disengage. Then add gas and quickly release the clutch.
Method 2: Close the throttle, fully depress the clutch with one (or two)* fingers. Open the gas to normal speed (you can do the so-called gas flow) * and drop the clutch.
When learning this way of climbing, don't throttle too hard before dropping the clutch. This will allow you to feel and learn the process of lifting the motorcycle with the clutch. Gradually increase the speed, and soon your wheel will rise close to the balance point. When climbing, slow down as you approach the balance point. If you are already past the balance point and releasing the throttle does not help bring the bike back to its normal position, lightly apply the rear brake. Climbing off the clutch in second and third gear may require extra effort, depending on the size of the bike. If the bike won't get out of the clutch, then a jerk will help. Do it at the moment you release the clutch and lean back a little.
Gear change.
I don't recommend shifting while riding in a spark plug unless you can use the clutch. Shifting gears in a spark plug is hard on the gearbox. Also, if you make a mistake with the gear, the bike will drop very sharply on the front wheel, which is bad for the fork legs. My advice: learn to ride in a candle in one gear, without switching.
How to properly lower the front wheel to the ground.
Hold the throttle until the front wheel touches the ground. If you need to quickly lower the front wheel to the ground, turn off the throttle first. When the wheel goes down, then open the gas. Then the landing will be soft.
How to ride a candle for a beginner. Step-by-step instruction.
1. Reduce tire pressure to 1.2-1.4 atm.
2.Engage first gear.
3. Accelerate to 20-25 km/h.
4. Depress the clutch.
5. Add some gas and drop the clutch.
6. Repeat step 5 increasing the speed until the front wheel is close to the balance point.
7. Reduce the throttle if the wheel is over the balance point.
8. Gently apply and release the rear brake.
9. Hold the throttle until the wheel drops to the ground.
Longitudinal balance (back and forth) in the candle.
Fore-aft balance controlled by throttle and rear brake. It is very good to learn first on an ATV or motocross bike. If the front wheel is in front of the balance point, then you must increase your speed. This can be compensated by more gas. If you are past the balance point, then use the rear brake or engine braking to return to it. The point of balance is the position of the bike in which it is not necessary to increase or decrease speed in order to remain in the same position. The height of the balance point depends mainly on the speed of riding in the candle. The higher the speed, the lower the balance point. The balance point also depends on the weight distribution of the motorcycle and the position of the rider on it. The goal of riding in a candle on balance is to keep the bike in balance for as long as possible. This is done by opening and closing the throttle, and applying the rear brake if required. Over time, you will learn to keep the bike in the candle, smoothly working the gas / brake.
Balance cross (right-left) in the candle.
This kind of balance is controlled by your body position on the bike. It is very useful to practice on a bicycle, motocross bike. When the motorcycle rides in a candle at a speed of over 35 km / h, then it is in balance. If the speed is less, then you have to balance the body. The principle is pretty simple. Quickly move to the same side that the bike falls on. For example, if the bike is leaning to the left, move to the left. This movement will cause the bike to turn to the left, compensating for its lean.
Prevent/stop splitting after wheelie.
From my experience, I think front wheel flare can be caused by a worn tire (with a large flat contact patch), rough throttle and/or some body movement. Flail after landing from a candle at low speed is due to high pressure in the rear balloon and / or loss of lateral balance.
Candle ride control.
To steer the bike well in the candle, the bike must be at or behind the balance point. To control the bike in a candle at a speed of about 35 km / h, you just need to tilt it a little in the direction of the turn. To turn at lower speeds, you first need to tilt it in the direction you want to turn. For example, if you want to turn to the right, first slowly lean to the right. Then lean to the left a little faster, turning the steering wheel a little to the left. This will cause the bike to start to roll to the right. Then, without leveling the bike, you have to hold that angle.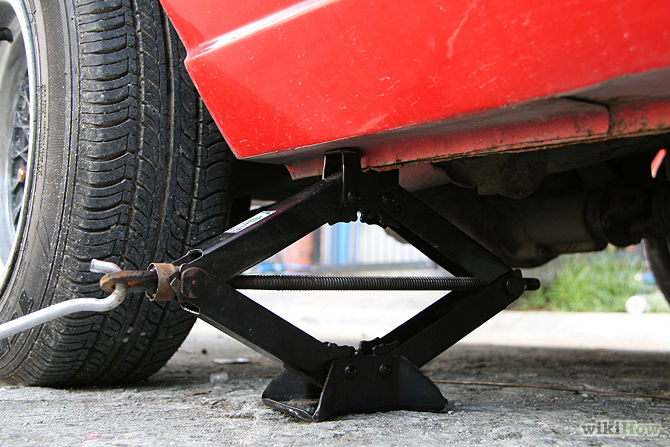 This will cause the bike to turn right.
Rear brake use + slow candle driving / 12 hours.
Slow wheelie is riding behind the balance point. This is one of the hardest parts of learning to ride a wheelie because it requires not only skill but also courage. To learn how to use the rear brake, you must keep the bike behind the balance point by holding it with the rear brake. You will soon get used to it and riding in this position will become normal for you. To ride slowly in a candle, it is enough to keep the bike behind the balance point. If you get scared at this point and hit the rear brake hard, it will cause the front wheel to move forward and down without slowing the bike down. When slowing down, you should keep the bike behind the balance point by applying gentle pressure on the brake. As for the 12 hour ride, do the same, just release the rear brake a little and let the bike rest on the tail (or better yet, on the frame specially prepared for this) *. If you plan to stop in a 12-hour stance, then first brake and stop moving, and only then turn off the engine.