After you’ve been riding a quad for some time, you start building experience and confidence. It only makes sense to want to build some jumps in the backyard. Sure, a full on motocross track would be great, but not everyone has the time or space for that. Besides, you’d be surprised what you can do with just a little space, and how much fun you can have riding on a small track.
The topics I go over in this article can be used for any size space you have available, and you can make your track as big or as small as you’d like. But, the first step is planning.
When you start planning your ATV riding track, there are a lot of things to consider. Before you even start designing the layout, there is planning to do. First, you need to pick the site. This is important, and you don’t want to end up with legal problems later on down the road.
If you have neighbors close by, be prepared for noise complaints. I know, I thought everyone loved the sound ripping engines all day too. I can’t for the life of me figure out why, but they don’t. If you get dry seasons where you live, then you have to worry about dust kicking up too. A fence could help with the noise and dust, but you’ll need to check with your local building department about any setback requirements, and putting in a fence adds to the cost of the track. If you can, find a place with plenty of room where it bother the neighbors.
Water will always find its way to the lowest point, and will cause erosion on its way there. If you can find a naturally sloped area to build your track, then great. Otherwise you may end up putting in drainage pipes or sloping the terrain yourself. Take care to think about erosion control while you choose your location and start your planning. If you do install drainage pipes, keep in mind that they need to be covered with a fair amount of dirt. The ATV’s you plan on riding on the track will destroy most drain pipes over time.
You don’t want to get sued. You will probably want to allow people over to ride on your track at some point. Having it all to yourself is great, but sooner or later, you’ll want to ride with other people. Talk with your insurance agent to find out what your policy covers. Your insurance might go up if you want to allow visitors to ride ATV’s on your property. Accidents happen, talk with a lawyer to find out what would happen if someone got hurt on your property. In some cases, even a trespasser could sue you for damages if your track wasn’t properly fenced off. I’ve even been to places where I had to sign a waiver, basically saying I won’t sue if I get hurt.
If you can avoid having to buy dirt to build your track, you’re already ahead of the game. Buying dirt can be expensive, try to only buy dirt if you have to. I recommend working with the natural terrain. This will be done differently for every piece of land, but try to locate any hills and use them to your advantage.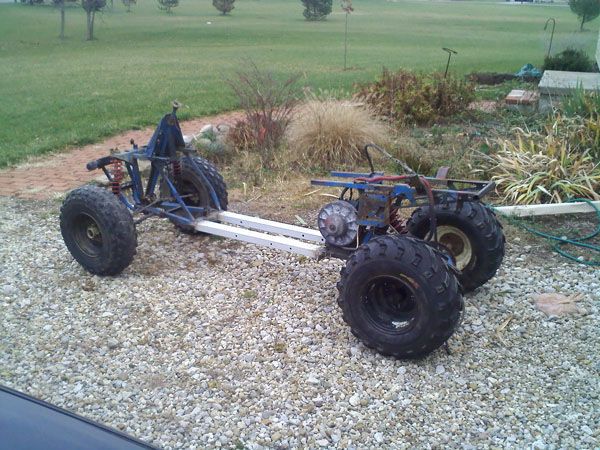
It may be a good idea, if you have the space, to dig a pond near the track, and use the dirt from that to build the track with. You could dig out the side of a hill, use the hillside as a berm, and use the dirt for some tabletops or jump ramps. You have to get creative here if you want to save yourself from buying dirt. If you do end up needing to buy dirt, loamy soil works best but is the most expensive. Clay based soil holds its shape better, but sandy soil drains better. Loamy soil is a good medium between the two. I lean more towards clay based soil because I like the track to hold up over time.
Once you have all the approvals and a good spot picked out, its time to start designing the track.
For me, this is the fun part. I just love planning out what’s going to go on the track, to me, it’s exciting. The first step here, is decide what type of track you want to build. Maybe you want more of a supercross style track as opposed to motocross. Or maybe you just want a few whoops and jumps with a more natural feel to the track.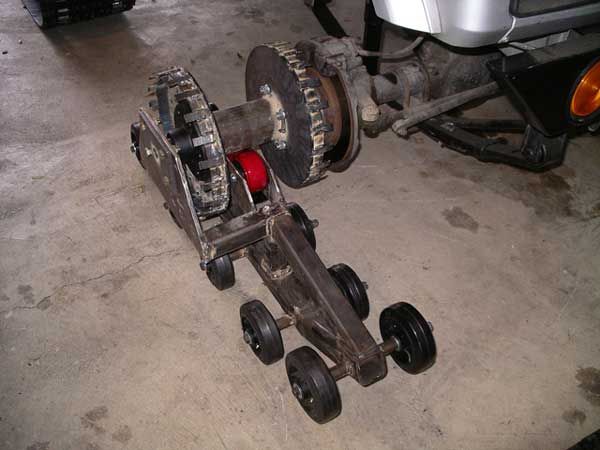
The type of terrain you have to work with might affect your decision too. If you have a super flat piece of land you might consider a supercross track, if you don’t mind bringing in a lot of dirt. If you have more hilly terrain, I would go with a more natural track or a motocross style track.
Also keep in mind why you’re building the track in the first place. What skills do you want to improve on and what type of riding do you enjoy the most? If you want to work on speed and cornering, I would go for motocross or a natural terrain track. If you can’t get enough of the jumping, level an area and build jumps, supercross style. If you’re building this for fun, I would go with a bit of a combination. Mostly natural terrain, but with enough obstacles to keep it fun.
Actually starting the design is very different depending on which type of track you chose to go with. If you want a more supercross style track, you will need very accurate drawn up plans of every obstacle and where they will go. A more natural motocross style track, you can basically wing it, I wouldn’t even worry about drawing up plans.
To start with a supercross track, create a scale drawing to work with. Supercross is entirely man made, you will need to flatten a good portion of land to make one of these. Try to design long straight lanes, that way you can put bigger obstacles in your track. Keep it simple with complete 180 degree turn arounds back to back. It would look like a series of parallel straight aways at first. Then add your obstacle in. You will need a lot more dirt to build this type of track.
If you want to go with a natural terrain track, there’s no need for planning or drawing. You could simply scout out your area on your ATV and sort of free ball it. Try to make the most of the land you have to use. Hills are great spots to create banks, step-ups, step-downs, berms, jumps, and so on. Avoid sharp turns, and plan using areas with available dirt. Avoid large rocks and trees that will get in the way, but keep in mind you can rent machinery to help scrape up the terrain.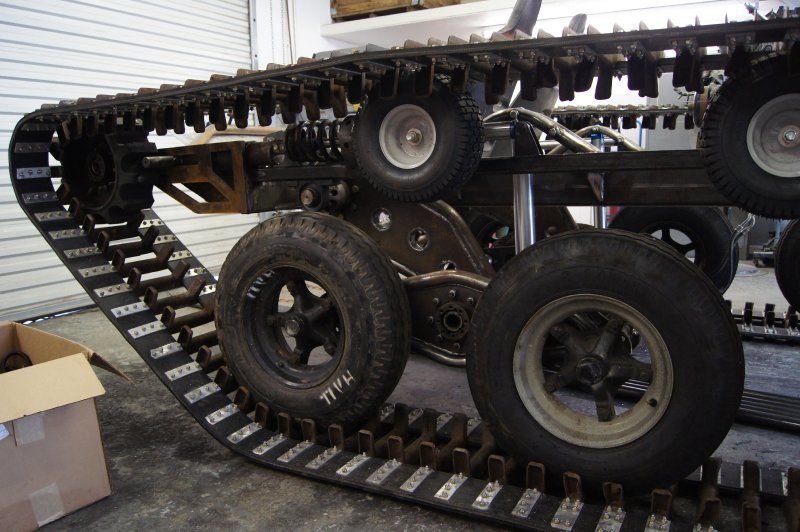 Creating jumps out of hills, and building upon existing features will help you. The very first tracks ever made were made out of the natural terrain, for me, that’s the way to go.
If you don’t want to spend hours shoveling, you may want to rent some heavy machinery. A small bulldozer could handle most of what you’re trying to do, you shouldn’t need much more than that for a small backyard ATV track. If your plan is simple enough you shouldn’t need to be carrying the dirt all that far. You will mostly be focusing on grading and shaping the existing terrain.
The bigger machines will work better and push more dirt, but they will cost more to rent. This one’s up to you, if you want to get it done fast, get a bigger dozer. You may need a water truck, or a way to get water to your track to pack the dirt down. It depends on what kind of dirt you’re dealing with, but dry dirt usually doesn’t pack very well.
If you plan on building a supercross style track, you will probably need a bucket loader or an excavator.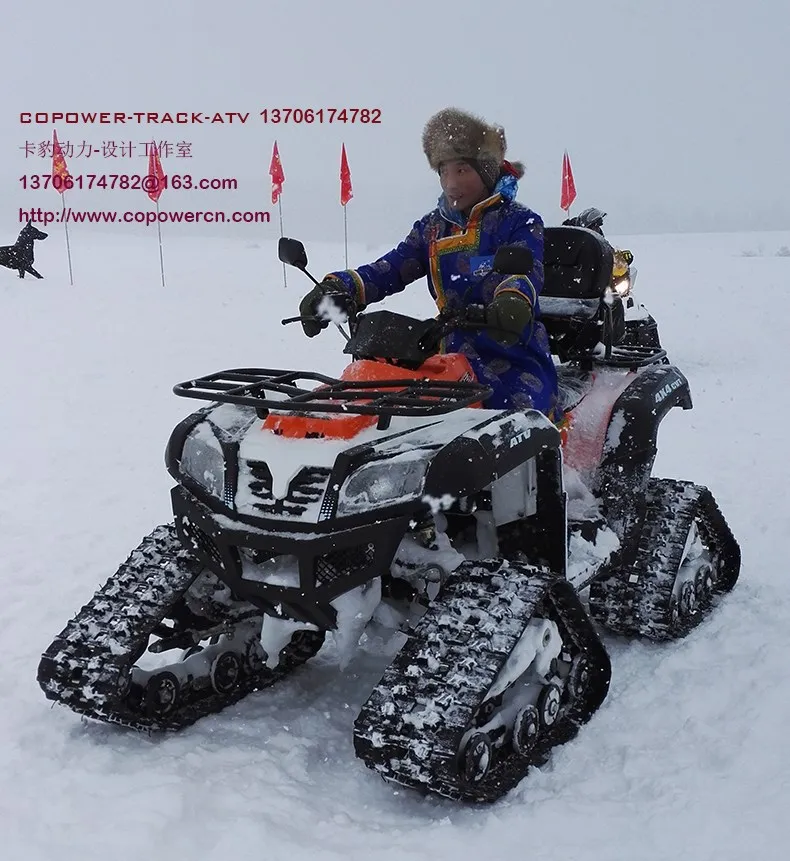 You will need to move a lot of dirt to where it needs to go and shape the track. You probably won’t get much use out of a bulldozer though. Supercross tracks are a lot more detailed finish work, the dozer wouldn’t be useful for that.
There are some obstacle you have in mind that you just need to have. I get it, but make sure you leave yourself room for improvement later on down the road. You’ll be a lot happier with your track if you can upgrade sections as you become a better rider. You don’t want all your obstacles jumbled together anyway, it will ruin the flow of the track.
Some ideas to get you started:
Don’t make a track you’re scared to drive on, you need to ride a lot to get better. You can always upgrade the track as your skills improve.
For a supercross track you will need some long measuring tapes, and some stakes and flags. Measure out the jump peaks and place your stakes before you start piling dirt on. Use your scale drawing and map out the entire track before hand. If you can, mark the stakes at the heights you want your obstacles to be.
For a natural terrain track you don’t really need to do any of that. I find it useful to place down a couple flags to remind me of where I planned certain obstacle. I also mark where I want to scuff up the terrain to make actual lanes to ride in around the property. Doing this also helps you to confirm if your plan for the track will actually work out or not.
You have a game plan down, you have the equipment, and everything marked out. Now comes the hard work, actually building the track. The best place to start is at the end, working your way back to the start. I suggest doing this because that way you’re not ruining the faces of the jumps with the equipment.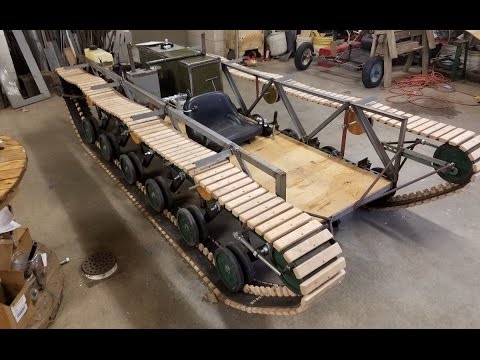 In fact, you will always be working on the faces of the jumps if you build the track in reverse order.
You can do this per straight away, or work in reverse on the entire track as a whole. You can also work from the middle of a straight away outwards in both directions, especially if you build a larger obstacle in the middle of that lane. Either way, you would finish the lane and build the turns last, so you avoid ruining any berms or bowls you have planned for your corners.
This is more for a supercross track where everything is tight together. If you have a more open natural course, just do what makes sense to you. I would still recommend building any jumps or obstacles from the end to the front to keep the take off area nice.
It’s time to start piling the dirt where your obstacles are going to be. If you have a loader, grab a full bucket of dirt. Keep in mind that you will want to try grabbing the same amount of dirt every time. Get yourself into the area you will be working and line yourself up straight with the obstacle. If you can get yourself head on with the jump, it will make the rest of this process a lot easier. Just try to imagine at which angle you will be approaching the jump on your quad. Dump the dirt starting at the back of the obstacle.
Keep adding bucket loads of dirt until you’ve created the basic shape of the obstacle. You will want to add a little more dirt to the top to compensate for packing it down. If you marked your stakes for the correct height you wanted, this part will be a lot easier. I would start by doing the sides of the jump first, then filling in the middle. Make sure your obstacle is wide enough, having everything pre-marked makes this simple, just fill the areas you staked off.
This is where a bulldozer comes in handy. To start with the bulldozer, drive over the jump with the tracks to pack everything down.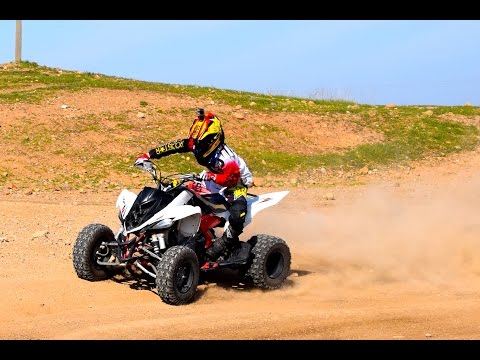 It’s ok to go back and forth, make sure the entire obstacle is packed down nicely. Now use the blade of the dozer to level off the jump and smooth out the areas that the tracks ruffed up.
Be sure to get rid of any bumps or indents on the jump. This is the fine tuning stage, you want to end with a nicely finished obstacle. You could also finish up the surface using the dozer. If you want better traction for your quad, leave it as is, you’re done. Fair warning though, it will be a lot more maintenance.
To pack the surface down, simply roll over the front of the jump with the tires of the loader. There will be less maintenance, and the jump will be more consistent, you will know what to expect every time you hit it. You can use the bucket of the loader to smooth out the tire tracks after you’re happy with how packed down the front of the jump is.
For a nice lane that flows well, I would consider a distance of about 30 feet between jumps. You can do a lot more than this though and still enjoy the track.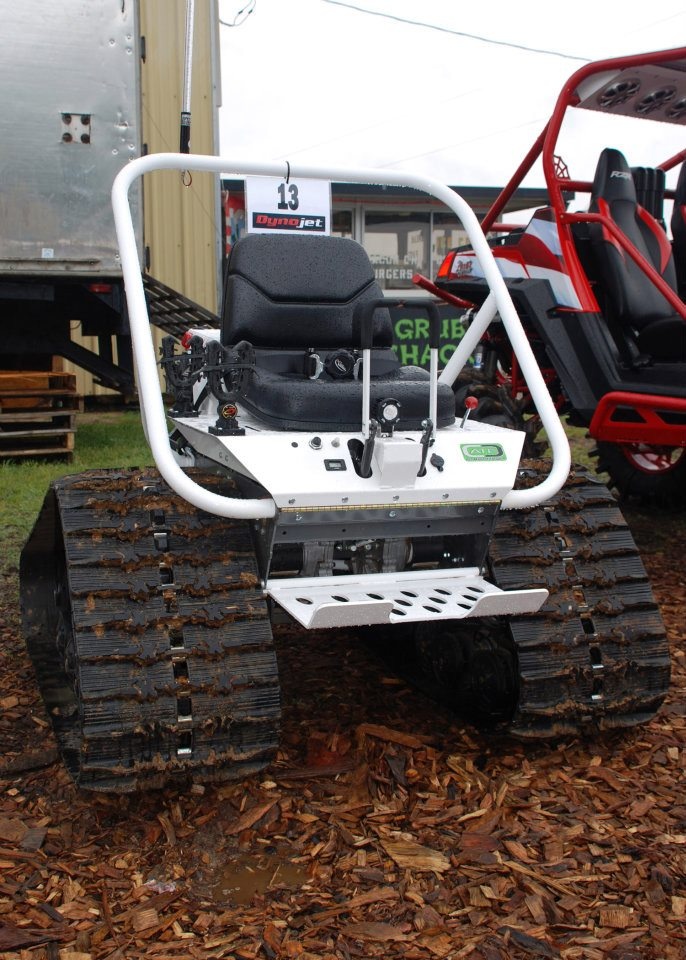 Especially on a more natural track that flows with the landscape. Make your jumps where it makes sense to, but keep in mind not to have too many obstacles close together. Unless you plan on using them together, like for take off and landing purposes.
A good pitch for quad jumping is around 3:1. That means for every three feet your ramp is length wise, it will be one foot high. When you just naturally dump a pile of dirt, the ratio is more like 1:1, which is way too steep for a four wheeler. Of course, make the track to your liking and skill level, you can always change things later on as you improve.
Take care to keep the jump consistent all the way to the top, and side to side. If there is an indent or a hump, it could prevent the rider from leaving the jump at the top, which can be dangerous. Avoid creating any lips at the top, this could kick the rear tires up as you leave the jump.
After you’ve got the pitch you want, you will want to curve the jump a bit. Leaving it at an exact 3:1 ratio won’t give you that much lift. If you curve the face of the jump slightly, it will allow your suspension to compress into the ramp, and decompress on take off, giving you some nice lift.
Take your time and make sure the ramp faces are right. Make sure your jump is lined up with the track. Double check for kickers, swells, and indents. Make sure the top edge is level. Always do a slow pass around the track to make sure everything feels right before going full throttle. It’s always best to slowly get used to a track you’ve never ridden on before, especially a newly built track.
Always wear proper safety riding gear, to check out some quality gear I put through some tough testing myself, visit the Recommended Gear section of this site. The only thing left to do is enjoy all your hard work. Be careful, it can get addicting, before you know it you’ll be building all different kinds of obstacles.
Sharing is caring!
Whether you are the proud owner of an all-terrain vehicle or you simply love the idea of off-highway recreation, there is a lot you can do with a substantial spread of private land.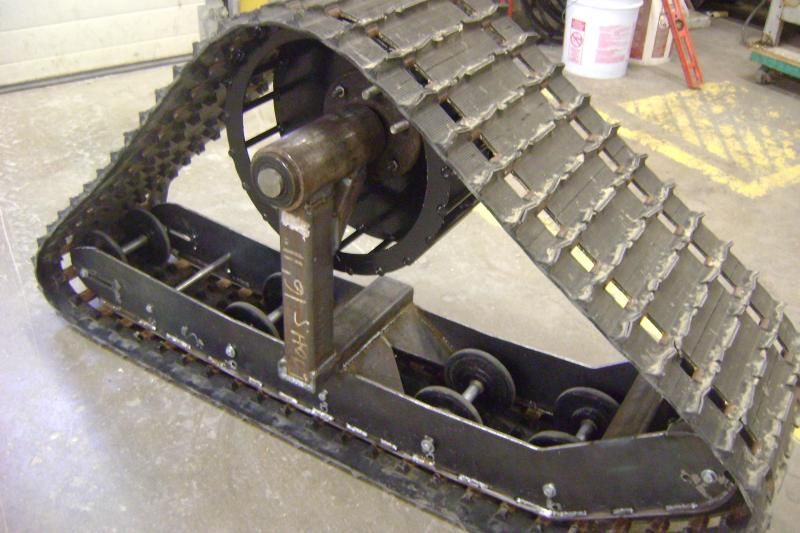 ATV riders are always on the hunt for new trails to tackle with their off-roading machines, but not many people realize just how much goes into building a safe and sustainable trail. Rest assured, riders! Although planning and building a trail can be sweaty and strenuous work, the reward is well worth the effort. In this guide, we not only take a closer look at the planning stage and factors to keep in mind when wanting to build your own trail but also some helpful suggestions from forest management agencies.
Before you start hacking away at those face-slapping branches or clearing woody brush and cleaning up debris, you must take great care in planning each and every aspect of your ATV trail. There may be limitations on certain parcels of the property. As a rule of thumb, you should always avoid straight lines. Instead, allow your ATV trail to ramble from one interpretive point to the next. Every parcel of land has its own contour lines that will make trail development a little easier and reduce the risk of erosion.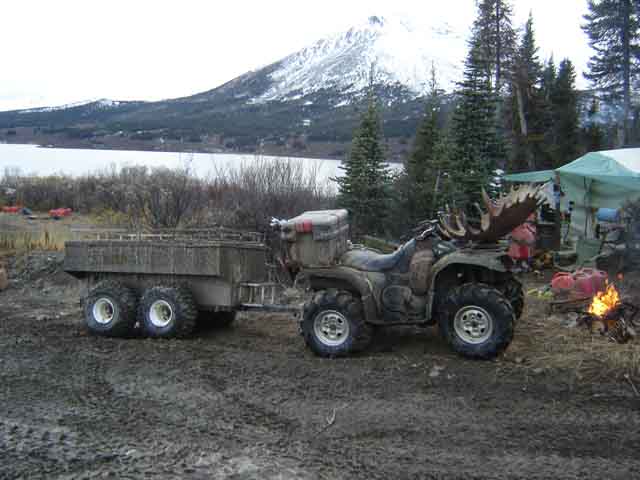 You must also keep any potential effects on the surrounding resources in mind. When you can, use areas that have well-drained soils, as these will be more stable, less fragile, and easier to traverse.
On the subject of safety, look for any terrain features that may pose safety concerns for riders that will be using the trail. Are there any steep drop-offs, rocky outcroppings, or unstable tread surfaces? Choose alternative corridors that can help you avoid or minimize potentially hazardous situations. You can use topographic maps to lay out and evaluate the land you want to use for your ATV trail. You should also consult county soil maps or contact local agricultural officials to ensure that the soil conditions are fit for off-roading. Walk the proposed course to get a clear view of what obstacles you and your fellow riders will face once the trail is cleared and ready for recreation. This will also help when it comes to deciding whether there should be any speed limitations to avoid the risk of injury or damage to the trail.
There are two main types of ATV trails that riders use today: loop and recreational. A loop ATV trail is one that is typically 8 – 10 miles long or more and composed of a series of loops for varying experience levels. A recreational ATV trail is one that can span several hundred miles in length and cross multiple jurisdictions. These trails may even share with other motorized recreational vehicles. With a recreational ATV trail, public access must be provided at strategic points. Before any construction can begin, you or your club must set aside some land for parking and other purposes.
Ripping and roaring down the trail can be exhilarating, of course, but one important part of responsible ATV ownership is creating a sustainable trail. In fact, the U.S. Forest Service has a lot of suggestions when it comes to building a new trail or improving an existing one so that you can safely keep water and soil healthy with sediment control. Shared stewardship is crucial and the U.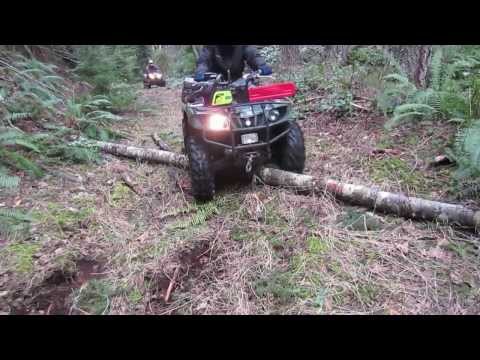 S. Forest Service offers a variety of techniques to help you build and maintain a trail.
 These actions contribute sedimentation to the stream, which can lead to the loss of fertile topsoil, clogging, flooding, harm to plant and animal life, and more. To prevent these disturbances from impacting the aquatic environment, you must minimize the amount of contact an ATV has with the water in a stream. Ruts on stream approaches allow concentrated water flow that contains sediment to enter the stream directly. One technique you can use to get the trail across water is to build culverts and bridges. You can also minimize direct contact by using a ford.
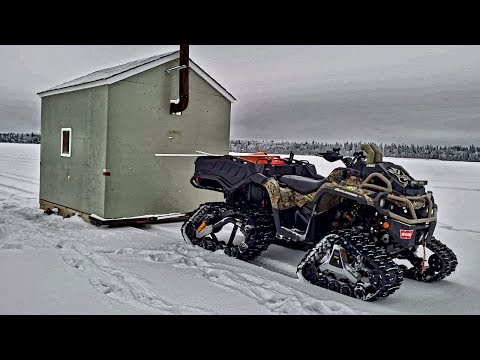
Using your all-terrain vehicle, a chain saw, a hack saw, shovels, and other tools, you can easily clear debris from the proposed course and create a trail that is worthy of an off-roading adventure. If you don’t have enough property to build your own trail or your club is interested in creating an all-new ride area, there may be a way to secure government funding for your ATV trail project. Every state has its own Recreational Trails Program (RTP), which has its own procedures to solicit and select projects for funding. Contact your local trail advisory committee to learn more!
26.07.2016
Today, an all-terrain vehicle with four wheels on its board is commonly called an ATV. The first such vehicle appeared in 1970. It was released by Honda under the name US90. The resulting transport from the car inherited practicality and stability, and from the motorcycle he got amazing maneuverability. Since the model had large wheels installed, with massive lugs, the US90 had a very high cross-country ability.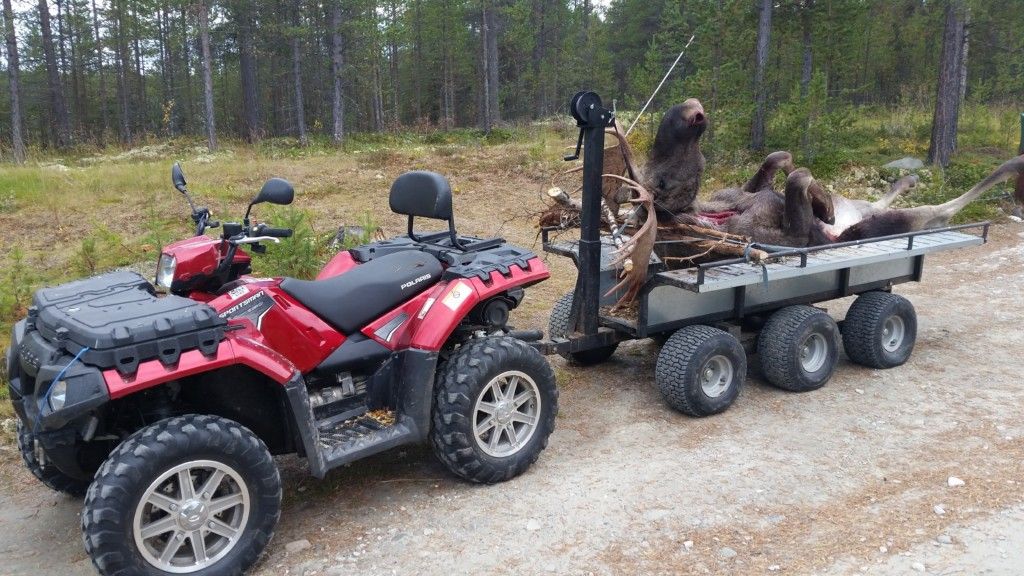 Since then, manufacturers have begun mass-producing ATVs.
Track specifications include all track dimensions, side and front offsets, and adapter weights.
The most important characteristics that you should pay attention to first of all are the contact area (contact with the ground), the increase in ground clearance and the reduction in maximum speed, which is usually indicated as a percentage.
The type of wheels and rollers, the material from which they are made, as well as additional units in the form of gears, hubs and bearings, a stabilizer, a guide skid are also referred to as technical characteristics.
Manufacturers often indicate the duration of the initial installation of caterpillar tracks on an ATV, which is very convenient.
Today there is a huge variety of tracks for ATVs. When choosing caterpillar models for yourself, you should consider the following nuances:
 In order not to make a mistake when buying, there is a corresponding marking on them. So, in winter, depending on the manufacturer, “winter” or “snow” is indicated. While all seasons are marked "4 seasons".
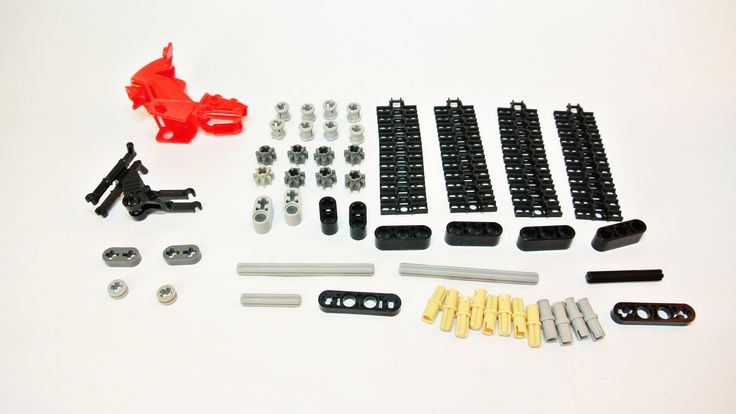
In order to put your pet on a caterpillar, you need to purchase a special kit, which consists of several boxes, where 4 tracks are stored in a disassembled state, one for each wheel.
Before proceeding with mounting them on the ATV, it is necessary to fully assemble each track separately, and only then proceed to install the tracks on the ATV.
According to the manufacturers, it will take about two hours to assemble the entire kit at first, if there are two people. Over time, assembly can be done much faster.
Since ATVs are often stored outside the city, delivering it to a service center is sometimes very expensive and problematic, and sometimes simply impossible. In this case, you can use improvised means and independently replace the wheel with tracks with your own hands.
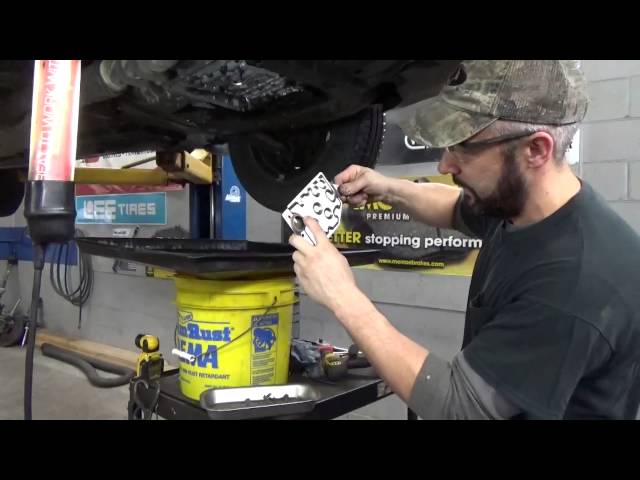
To do this, raise the front or rear using a jack or winch. Next, remove the wheel and change the lower bolt to a longer one that comes with the tracks.
It is very difficult to put the track pinion on the wheel studs. This is due to the fact that the tracks are very heavy, about 20-30 kilograms each. Then it should be fixed with the help of special nuts with which the wheel itself was clamped. When it is finished with one axis, it is necessary to repeat all the steps with the remaining axis.
If you are going to transport it on a trailer after installation, please note that after installing the tracks in their place, the size of the vehicle increases significantly, both in width and in length.
Buying tracks for an ATV is, of course, acquiring some brutality. ATV on tracks looks very impressive and stylish. But the main advantage of tracks over wheels is the ability to perform heavy work when the usual tread grip of an ATV wheel tread is not enough.
The main disadvantages of using an ATV track can be listed in the following paragraphs: ;

Track tension should always be checked.
Do not go out on the ice.
Avoid fallen trees.
Every time you ride the ATV on tracks, you must have with you: a chainsaw, dry socks and clothes, as well as a spare CVT belt and a tool for changing it.
Carefully pull the ATV on the tracks back with the “winch”, as this can easily pull out the suspension.
Avoid riding in deep snow: an ATV is not a snowmobile.
It is best to avoid riding a quad bike alone on tracks.
Always be aware of the high fuel consumption and the need to refuel.
Source
Source
Published Updated ATVs0
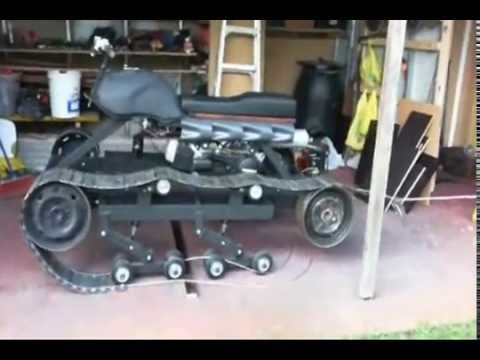
When choosing equipment for recreation and farming, many buyers prefer utility ATVs. Universal devices successfully cope with spring and autumn mud, but in winter their effectiveness is reduced. But what if you need equipment to work in winter? There is a solution - an ATV on tracks.
Devices that look like a miniature tractor will easily drive through the snow, transport cargo, and help you get out hunting or fishing. However, users of tracked vehicles should be aware of a number of technical features:
 But you have to pay for everything. Trucks weigh more than wheels, so fuel consumption increases significantly.
 Caterpillars can be used not only in winter, but also when driving on difficult tracks. Due to the tracks, the car keeps better on wetlands, mud, sand, etc.
When choosing a caterpillar ATV, it is important to consider not only its power, but also other parameters. First of all, you should pay attention to:
 Winter tracks are spelled "Winter" or "Snow", and all-season parts have the inscription "4 Season".
 In fact, almost any ATV can be turned into a kind of snowmobile. On sale there are special sets of caterpillars that are installed instead of wheels. The only drawback of such a kit is that you will have to assemble the tracks for the ATV with your own hands. The buyer will have to independently connect all the links, install long bolts and fix a heavy track (about 20-30 kg) on the axle. The whole procedure can take about 4-5 hours.
Caterpillar ATVs are very popular, so it is important for the buyer to understand the brands of the truck. Their durability, reliability and maneuverability depend on the quality of the tracks.
The list of the most popular trucks includes:
 The company's products are distinguished by affordable price and versatility. Tatau tracks can be installed on any ATV with an engine of at least 300 cc.
 There are also less popular companies developing caterpillars. Therefore, it is important for the buyer to find out the features of the chosen brand, its strengths and weaknesses.
One of the brightest caterpillar ATVs on the Russian market is the Gepard model, created by the Stealth brand. The manufacturer completes the flagship series with high-quality tracks of its own production.
Almost any well-known brand machine can be equipped with tracks. The only condition is the power of the engine. If the engine displacement is less than 300 cc, the car simply will not go.
Most often, tracks are not included in the package, and they have to be purchased separately. But there are exceptions. Tracks are also included in the delivery set of some devices from Polaris and CFmoto. Of course, it is unrealistic to meet such a complete set on a state employee.
The main advantage of an ATV with tracks is the ability to transport goods off-road. Thanks to the tracks, the machine confidently keeps on snow, sand, mud and even wetlands. Due to the better grip on the road, the carrying capacity of the device increases significantly.
In addition to cross-country ability, tracks do not give the car any special advantages, but they add disadvantages. The list of the most serious cons includes: