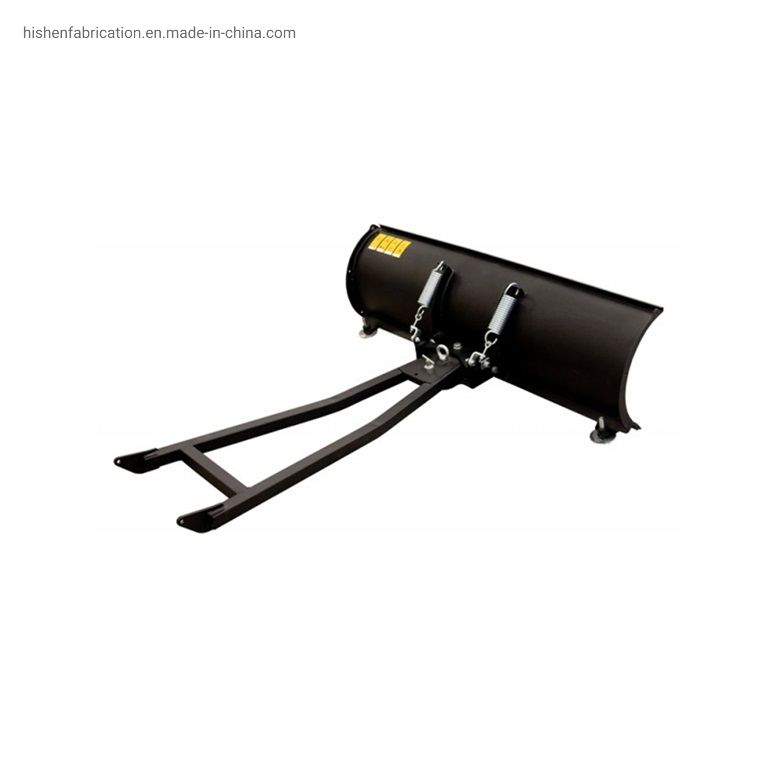
Utility September 15, 2021
Once snow starts piling up, ATV and UTV owners have a leg up over those wrangling shovels and snow blowers by hand. Outfitting your off-road vehicle (ORV) with a snow plow makes winter your playground: You no longer need to fear those blizzard-ridden forecasts. Rather, you might even start looking forward to them! After all, keeping your driveway or access roads clear when you’ve got a plow on your rig is not only a breeze: It can also be downright fun.
A full winter workout of plowing requires that your ATV or your UTV is in tiptop shape, especially considering the extra load shoving and piling snow puts on your machine. Take time before the snow comes to give your ORV a thorough once-over and tend to any major upkeep issues.
Many riders do this in the fall while the weather’s still pleasant, which helps them roll into the plowing season with a bit more confidence to tackle what Mother Nature throws their way.
During the winter plowing season, you’ll still want to stay on top of the routine inspections and maintenance you should be carrying out whenever you use your machine. Make sure fluid levels are adequate.
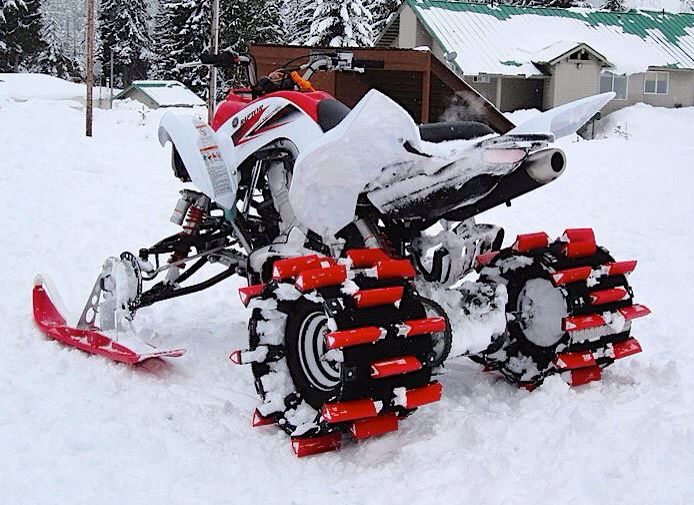
You’ll also want to make sure you’ve equipped your four wheeler or side by side (SxS) with the proper tires to handle well in snow. Tracks may be helpful in improving your traction in areas with extreme snowfall.
Check your owner’s manual to make sure your machine is powerful enough to wield a plow and shove and haul snow. An underpowered machine may simply be unable to push through drifts; it may also suffer expensive damage from being overtaxed. A bigger engine can handle larger plows and heavier snow.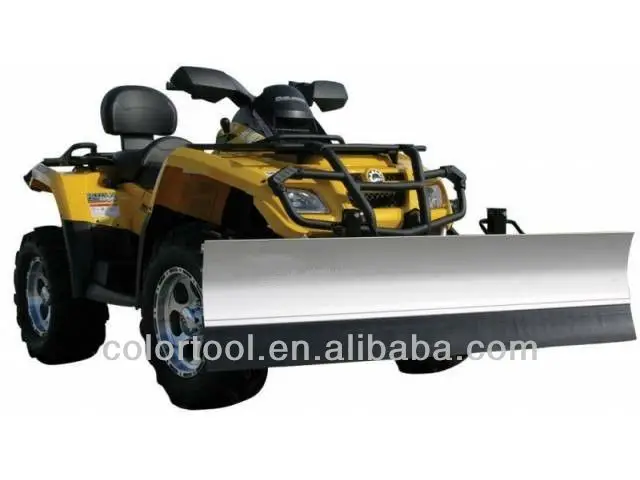
When it comes to ATVs vs. UTVs for snow plowing, context matters. If you’ve got just a small walkway or driveway to keep clear, a narrow ATV outfitted with a small plow may do just fine. For bigger driveways, access roads, and other larger areas, a UTV capable of handling a heavier, wider plow is often the better route.
Keep in mind there are different strategies for snow-plowing with an ORV, from directly pushing snow into heaping drifts to angling it into windrows you maintain all season long.
Just going out and powering through the snow with your 4-wheeler plow may not be the right approach. Make sure you’re paying attention to the thickness of the snowpack and adjusting the plow depth accordingly: You don’t want your plow blade to be digging into bare earth or pavement. If you’re in a climate where snow tends to accumulate throughout the winter, you’ll likely be lowering your plow over time; early in the season, or when snowpacks are scanty, keep your plow higher.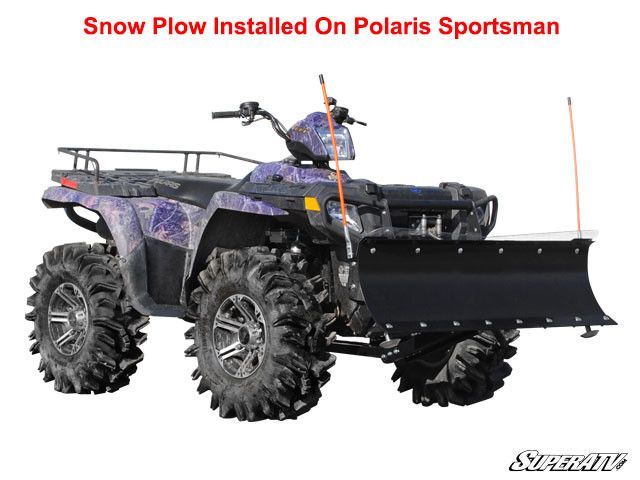
You also want to keep in mind the aspect or incline of the ground you’re plowing. A driveway, for example should ideally slope a little bit away from your garage or house. Here’s where adjusting the angle of our plow comes into play.
Besides considering the amount of space you’re likely to be plowing, think about the amount of snow your location typically receives as well as its relative wetness. More and/heavier snow may require a bigger engine and larger ORV.
While we’re discussing the depth and angle of your snow plow, we’ll throw in an extra tip about avoiding mishaps or all-out disasters. Before the snow falls, make sure the areas you’ll be plowing are clear of as many obstacles as possible, and mark permanent obstacles such as retaining walls, well heads, prized garden beds, and the like with reflective or flagged poles.
After you’ve wrapped up your plowing for the day, the job’s not done: You want to clean off the plow attachment and stow it correctly to minimize the chance of damage. Knock or wipe off any snow, ice chunks, or dirt that are clinging to the plow; left on, they may freeze and become that much harder to dislodge, as well as encourage rust on the blade. Lower the plow to the ground when you park to avoid unnecessary strain on your machine’s winch and suspension.
Think your quad or UTV is only useful on those spring-through-fall trails? Think again: You can put that ORV to work all winter long with the right plow attachment and associated accessories. Choose the right plow and accessories, and you’ll be the neighborhood hero.
The store will not work correctly in the case when cookies are disabled.
JavaScript seems to be disabled in your browser. For the best experience on our site, be sure to turn on Javascript in your browser.
Skip to Content
US - EN
Filter by
Shopping Options
Availability
Fits on
Product Line
Activity
Our ATV snow plow systems are designed to allow you to do more with your ATV. Its simple, easy to install mounting solution makes it easy to use when you need it most. Our ATV snow plow accessories are engineered to perform in the harshest weather conditions to help you complete the tasks you need to get done, such as clearing trails, sidewalks or driveways. Get your ATV ready for winter with this versatile solution.
View as Grid List
Items 1-24 of 28
Page
Show
122436
per page
Sort By PositionProduct NamePriceWeightQuantitySet Descending Direction
$46. 99 USD
Add to Wish List Add to Compare
$174.99 USD
Add to Wish List Add to Compare
$57.99 USD
Add to Wish List Add to Compare
$69.99 USD
Add to Wish List Add to Compare
$1,289.99 USD
Add to Wish List Add to Compare
$159.99 USD
Add to Wish List Add to Compare
$45.99 USD
Add to Wish List Add to Compare
$93.99 USD
Add to Wish List Add to Compare
$439.99 USD
Add to Wish List Add to Compare
$149.99 USD
Add to Wish List Add to Compare
$499.99 USD
Add to Wish List Add to Compare
$114.99 USD
Add to Wish List Add to Compare
$114.99 USD
Add to Wish List Add to Compare
$279.99 USD
Add to Wish List Add to Compare
$489.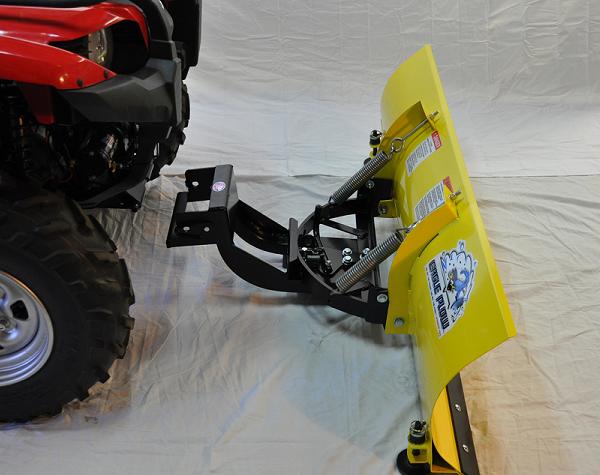 99 USD
Add to Wish List Add to Compare
$419.99 USD
Add to Wish List Add to Compare
$93.99 USD
Add to Wish List Add to Compare
$94.99 USD
Add to Wish List Add to Compare
$93.99 USD
Add to Wish List Add to Compare
$114.99 USD
Add to Wish List Add to Compare
$799.99 USD
Add to Wish List Add to Compare
$359.99 USD
$359.99 USD
$329.99 USD
View as Grid List
Items 1-24 of 28
Page
Show
122436
per page
Sort By PositionProduct NamePriceWeightQuantitySet Descending Direction
Is there a way to make my ATV more useful during winters?
Winters can provide a tough challenge for most vehicles if they’re not equipped with the right accessories.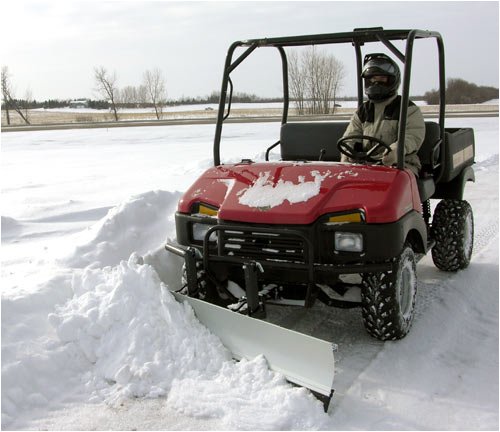 That’s why equipping your ATV with a snow plow to clear snow and debris is a must have for snowy regions. Whether it’s for work or play, our snow plows come in various sizes and applications, and are adjustable to ensure you get the job done properly when you're tasked with plowing snow. Upgrade your ATV with a snow plow and you'll never let any snowfall stop you from doing what you want to do.
Is an ATV Blade Right for You? If yes, then why? Will a snow plow be useful for an ATV and be able to handle heavy snow drifts?
In the northern regions, concepts such as snow, blizzard, snow drifts are very common.
In winter, in the outback, in the villages, and even in underdeveloped towns, you often go out into the street, look, and there the devil is. Everywhere there is a snowfield, you can’t get through. You have to wait half a day for a tractor or some other snowplow to drive by. Many have large areas in the yard on the plot, summer cottages, which are also covered with snow.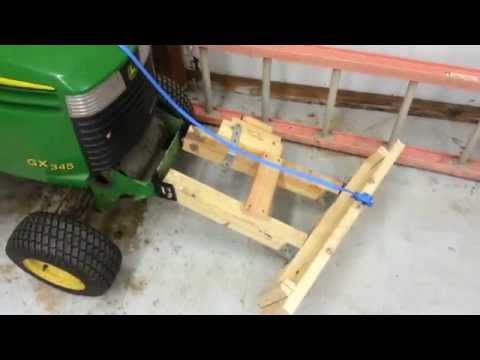 But the difference is this: no one will clean your snow there. And you have to turn back such volumes yourself.
Of course, some people are only happy, but for others, snow removal causes certain inconveniences, because it will take a lot of time and effort. And so, if you have an ATV in your possessions, or better on tracks and large areas of personal plots, I advise you to purchase a blade for an ATV.
This item or an additional component of the quadric is simply necessary, and its purchase will make life more fun and free in time, and your paths, paths, parking lots, skating rinks will be clean. Who is not afraid of the cold, you can get a children's ATV and give the child the opportunity to frolic in the winter)).
ATV snow plow - easy and quick to install. Its main components:
 Powerful springs will allow you to hit an oncoming obstacle, reducing the possibility of blade breakage. Adjustment is carried out by a screw tension;
 ATV blade is made of steel, the thickness of which is from 2 to 6 mm.
When choosing a snowplough for your ATV, it is worth considering the necessary requirements. Judge the following: dumps differ in height and width. The width should slightly exceed the width of the ATV. This is explained by the following: during cleaning, the bucket must free the road from snow directly to the ATV itself, it is necessary in order to better grip the wheels with the road surface, and snow chains can also help a lot. Otherwise, the movement will be difficult for the quadra, and if there is a lot of snow, you will not be able to clean the required area.
Depending on the control and method of lifting, plows can be divided into three types:
here's a video of the pneumo-operated blade, it's interesting to watch
The first method speaks for itself. But here you have to sweat a little, but such a snow plow for an ATV is the most affordable and cheapest option. The second way is a little better - maneuvers with a bucket are performed by a winch pre-installed on the machine, the third case is an electric motor. This method is the most technologically advanced, but also expensive.
Remember, not every square can clear snow. Power should not be less than 300 cubes. Otherwise, the efficiency will be small.
Snow plow from China - plus one - availability. In terms of quality, of course, not very good. The fastening of the bucket to the frame is weak, it is welded with a single point of poor quality. Most of the proposals have a width of 1.25 m, which is not enough for the production of high-quality cleaning. In operation, the bucket must have a rotation angle, and a width of 1.25 will not allow this. Also cheap low-quality components, simple design. Well, respectively, agree yourself, what price, such quality.
Snow plow WARN – I will immediately note that the workmanship is quite good, the design is well thought out. The width allows you to do quality work in a short time. Reliable adjustment and control mechanisms. Accordingly, a good quality product cannot be without a good price. I note the high cost, a snow plow of this brand has a limited number of copies, due to delivery from America.
ATV STAR snow plough, also of high quality. High-quality paint - will protect against corrosion. Pretty good accessibility in Moscow. The difference from the American counterpart is an affordable price. They are much cheaper. As a result, in my opinion, it is worth looking at this particular model.
This video depicts a homemade blade with dimensions of all parts, fasteners
Many ATV owners have a desire to make a do-it-yourself blade for an ATV. This is certainly not a bad idea, and a person with arms growing out of the place from where it is supposed to construct a blade will not cause any special problems.
do-it-yourself blade for an ATV video https://www.youtube.com/watch?v=VWKMLQRRI6I
Why not. After all, this is a sure way to save money. It is almost impossible to get drawings of a blade for an ATV, since there is no such information on the Internet, but you can develop a manual yourself and make a blade according to your own methodology. In this subtitle, I can somehow help you solve this problem.
And so, do-it-yourself blade - what is required?
First: a sheet of iron, springs, a grinder, a welding machine, a ruler, a pencil (chalk), metal profiles, and of course, various components in the form of nuts, bolts .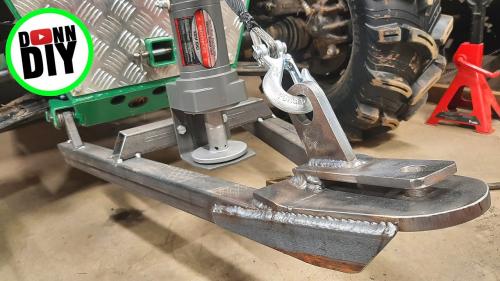 ..
..
that's what we should strive for
to design a do-it-yourself blade for an ATV, you need blade drawings, which we will now provide. In fact, the design is quite simple and does not take so long, the main thing is not to be lazy and resolutely approach the matter. Garage quad masters have created many types of attachments and they all have different ones, they do what they can and what they think of.
We also offer you a do-it-yourself blade for an ATV. Stebno isn't it?))
Do you find the material useful? SHARE WITH YOUR FRIENDS below! I will be grateful!
Video of a homemade blade
Removing snow with a shovel is a rather laborious process. To facilitate it, a homemade snow blower can come to the rescue. Having made it, you will not only free yourself from the hard work of clearing the snow, but also save a lot of money by not spending money on expensive models of units in the factory.
The main task of the snowbrush is the capture and discard of the Snow masses, for example, from the sideworm, from the striper. . Snow blowers made by craftsmen have a different design. But according to the type of snow capture, the models differ in screw and rotary.
The main part of the snow blower is the auger, which looks like a meat grinder screw.
There are two types of screw units.
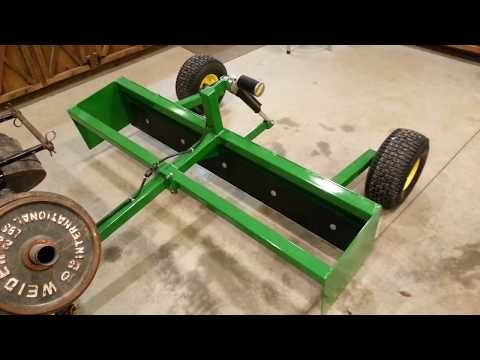 The helical blades consist of two parts and converge in the center where the tossing blades are located. When moving the mechanism with a bucket, a layer of snow is cut, which immediately falls under the rotating knives. The latter crush the snow and move it to the central part of the hull. Since the blades are located in the center of the auger, they capture the crushed snow and throw it into the nozzle installed at the back of the bucket. The higher the speed of rotation of the shaft with the blades, the further the snow is thrown. Auger knives can be either with a smooth edge or with a serrated one. Blades with a smooth edge are used for clearing fresh snow, and are often made from a conveyor belt. A toothed auger is used when it is required to remove icy and packed snow.
  An auger snow blower works on the same principle as a single-stage unit, but thanks to the rotor blades, the snow is better crushed and thrown out over a long distance (up to 15 meters). The following figure shows the structure of a two-stage type snow blower.
The rotary type snow blower is the simplest design and consists of a round volute body and guide vanes . In the upper part of the body there is a sleeve through which snow is thrown out.
Rotor with blades is installed in the central part of the volute. This impeller is driven by an engine (petrol or electric). The rotor, rotating at high speeds, captures the snow, crushes it in the body of the snail and throws it out through the sleeve.
Homemade snow throwers can be of two types.
 Therefore, the motor is not installed on these mechanisms. The transmission of rotational motion from the engine to the rotor occurs by means of a chain or belt drive.
 Before you make a manual snow blower, you need to understand what type of engine is better to choose - electric or gasoline.
Electric units are quiet and very easy to maintain . They also do not require any consumables. The only inconvenience of electric devices is the electric cable that constantly interferes with movement. Of course, you can use the engine running from batteries, but the operating time of such a cleaner will be limited by the battery charge level. Therefore, if you are going to make an electric snow blower, be aware that it can only work within the yard, that is, the range of movement of the unit will be limited by the length of the power cable.
Petrol snow blowers are powerful and rather noisy units . They cope with thick snow covers, including icy ones. Gasoline devices have an advantage over electric ones, not only in terms of power, but also in mobility, since they do not depend on the electrical network. Due to this, the units can be used for cleaning snow drifts in large areas, for example, near private sector yards, in high-rise building yards, on sidewalks, on separate sections of the road, etc. But despite the listed advantages of gasoline devices, they also have disadvantages:
Based on the above, you can understand that if you need to clear the yard of a summer house or a small private property from drifts, then it is better to stop at the manufacture of an electric snow blower. If you intend to regularly clear large areas of snow, then a gasoline drive will cope with this task better than an electric one.
To make a snow blower with your own hands, you will need to choose an engine that will rotate either the auger or the rotor of the unit. If you are going to make an apparatus with an electric motor, then any asynchronous type electric motor with a power of at least 2 kW and a rotation speed of 1500 to 3000 rpm is suitable as a drive component. If you take an engine with less power, then it will not cope with thick layers of snow and will stop all the time. In this case, cleaning drifts with a shovel will be much more effective.
As a drive component, some craftsmen use motors from electric trimmers and chain saws. It is not uncommon to find homemade snow plows made from a lawn mower. But the power of these units is only enough for cleaning freshly fallen and loose snow.
A more powerful variant of the driving part for the snow thrower is the Internal Combustion Engine (ICE). It can be taken from a chainsaw or petrol trimmer. Also, a snow removal unit can be made from a motor cultivator or a motor block.
The auger for the snow blower is the main moving part of the machine, the manufacture of which is not difficult. It is best to use a rubber belt from a conveyor 10 mm thick and 1.5 m long for the manufacture of the auger . From the rubber strip, it is necessary to cut out rings in the amount of 4 pieces with a diameter of 28 cm. The details are easily cut using an electric jigsaw.
Tip! To cut rings from the tape, you can do without a jigsaw. Screw 2 sharp screws into a small board and use this device as a compass. After a few full turns of the cutter, the ring will be cut.
Below are drawings of all auger parts.
Shaft is 27 mm diameter metal pipe . Adapters are fixed to its ends, on which bearings are installed. A cut 120 mm long is made in the central part of the pipe, into which a central plate will be installed, designed to throw snow. Also, 4 plates are put on and welded onto the pipe. Rubber rings will be attached to them and to the central plate. How this is done can be clearly seen in the next photo.
A metal strip can also be used to make the auger. But it is preferable to use rubber, because it does not scratch the paving slabs and is not damaged when it comes into contact with a hard obstacle, such as a curb or a fence.
It's also easy to make a bucket that will serve as a housing for the auger. For this purpose, roofing iron is usually used. The drawing below shows the dimensions of the bucket.
For bucket sides, plywood or 10 mm thick OSB can be used. The latter option is more suitable for this purpose, since it is more moisture resistant than plywood. Bearings are installed on the sidewalls of the housing (you can use the 205th, closed), and the screw shaft is already inserted into them. Bearings must be closed with glasses.
Important! When assembling the snowplow assembly, it is necessary to make a small gap, about 2 mm, between the bucket and the auger so that the latter does not touch the body.
To remove snow from the bucket, a hole is cut in its upper part. As a drain, you can use sewer plastic pipe with a diameter of 150 mm or another. The main thing is that the diameter of the chute exceeds the width of the folding blades of the auger.
To direct the snow ejected by the shovel to the side, a plastic bend can be put on the pipe.
The bucket with auger is mounted on a pre-made of metal angles (50 x 50 mm) frame (see drawing above). To fix the engine on it, corners of 25 x 25 mm are used.
Tip! If you attach a slightly curved sled to the frame, as shown in the following figures, then working with a snow thrower becomes much more convenient, since it becomes possible to tilt the mechanism for better gripping of snow.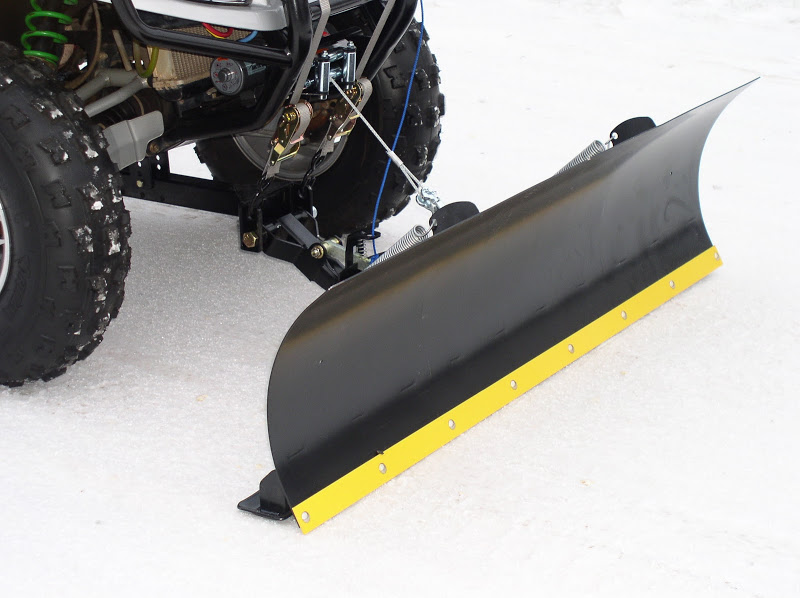
But this unit can be further improved. The modification of the snow blower is to add small wheels to the rear of the skid . In this case, the snow blower will be more convenient to pull back and transport.
Snow throwers based on the auger are the most powerful and capable of handling even icy snow. In addition, the auger is most often used in self-propelled snowplows.
This snowplow is made by hand quite simply. Since it will be powered by a chainsaw engine, a few additional parts for the chain drive will be required. For these purposes, you can use front and rear sprockets from a motorcycle, as well as a chain from it.
How the frame and auger are made has been described above. A long handle is attached to the frame. A large sprocket from a motorcycle is installed on the auger shaft on the right side, and a small sprocket is installed on the chainsaw engine shaft.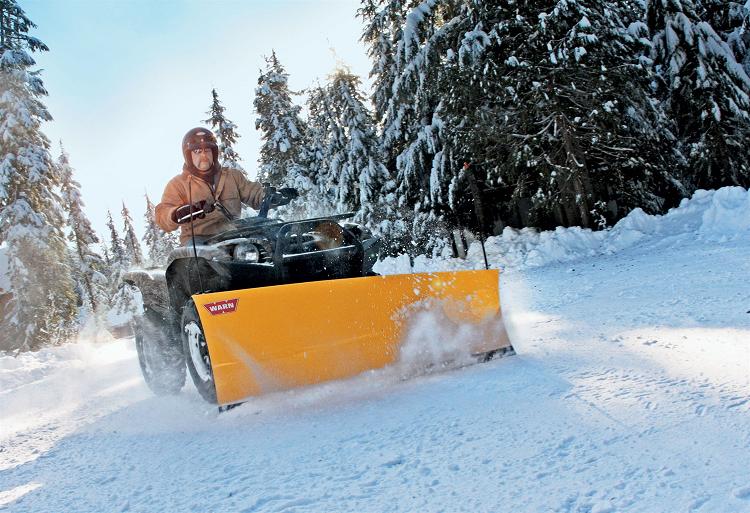 Next, the chainsaw is mounted on the frame, after which the chain is put on and pulled on the sprockets. To control the engine, the gas cable is brought to the handle attached to the frame.
Below are homemade drawings on a chassis, where a chainsaw is used as the main part of the drive.
But there is one caveat. The gearbox for this type of unit is quite expensive, and it is not advisable to buy it for the manufacture of attachments to the trimmer. Therefore, on the basis of the latter, rotary-type snow blowers are made, which will be discussed later.
The simplest addition to the motoblock is snow plow.
A self-made snow plow attachment (shovel) on a walk-behind tractor is screwed to the frame of the unit, after which it turns into a small bulldozer.
Tip! Instead of a blade, an auger can be attached to the front of the frame of a walk-behind tractor or a motor-cultivator, as a result of which you will get a self-propelled snowplow.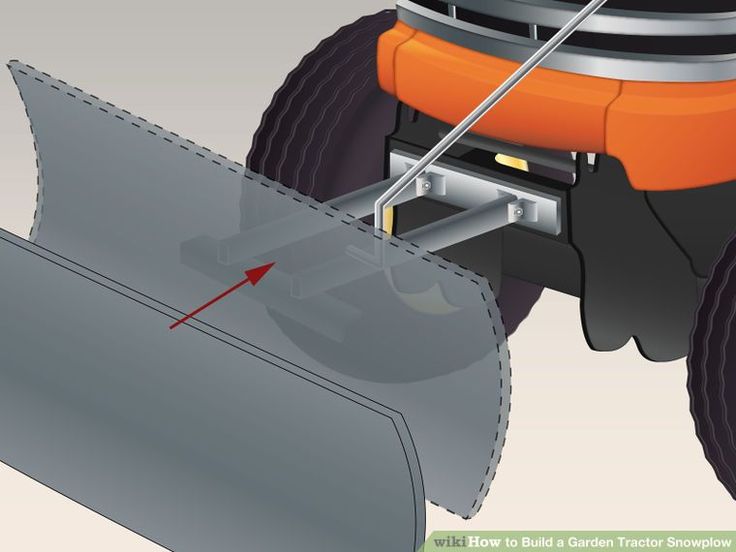 This attachment for a walk-behind tractor, if not needed, can be easily disconnected from the main unit.
Below is a diagram that clearly shows the design of a snow blower based on a cultivator.
The scheme is decoded as follows.
The self-propelled snow blower makes clearing snow much easier, especially in large areas where the use of the device on skis, pushed by the operator, requires a lot of physical strength of the latter.
To make a snow blower, you can use the drawings below.
The material for the manufacture of the rotor and its blades is sheet steel 2 mm thick. The rotor housing is made of roof iron or sheet steel thinner than 2 mm.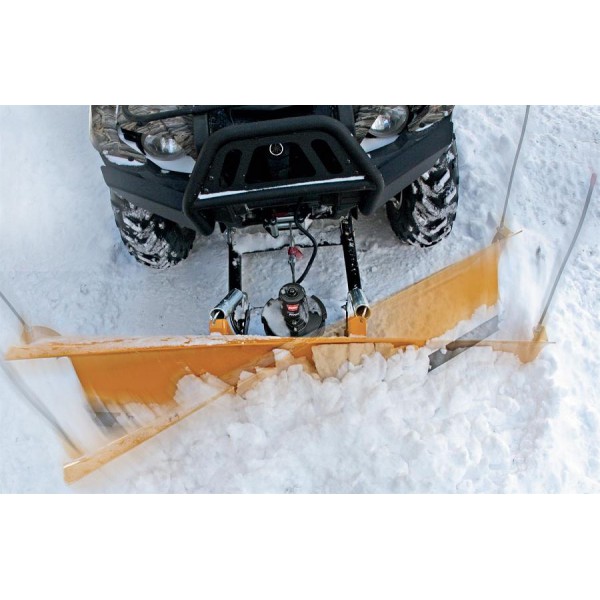 All dimensions of parts are indicated on the drawing.
The transmission of rotation from the motor to the rotor shaft can be done using the belt or the chain. It is also possible to connect the gearbox shaft of an electric trimmer or lawn mower to the rotor shaft. Fortunately, these units already have an angular gearbox. The whole structure is mounted on a frame with a chassis. The result is a lightweight handheld snow blower on wheels.
Please note that the electric snowblower based on the trimmer should not be subjected to heavy loads, as its gearbox may fail. The same recommendation applies to the lawn mower if you decide to assemble a snow thrower on its base.
A simpler design of the unit mounted on a frame with skids can be assembled according to the diagram from an old magazine.
Thanks to the above drawings, the assembly of a snow blower cannot be difficult for any home craftsman.
Often there are situations when you need to remove snow at night: in this case, the snow blower headlight will be a useful addition to .