14 Feb
Now that you have a stand you need something to hang on it and every boxer needs a heavy bag.
There are a variety of ways to make your own heavy bag but I think there is one that stands out far above the rest. Most people will take a large bag like a canvas duffle bag, fill it with sand and hang it up. I guarantee you’re going to hate that bag. It will be rock hard and eventually the bag is going to tear, rip or deteriorate and you’ll have sand all over the place.
Luckily there is a cheaper, better option – the tire heavy bag.
Old tires are usually free – just go to your local dump and grab four old rubber tires. We’re going to bolt them together, attach a couple brackets to the top and hang it. Not only is it going to last you forever – it has give when you hit it and it can serve as an uppercut bag as well as a heavy bag. Four regular size tires (about 23″ diameter) will weigh about 80-90lbs and if you want you can make it taller or shorter adding or removing weight as you please.
This tire heavy bag is just as good and probably better than some brand name bags on the market.
What You Need to Make Your Home Made Tire Heavy Bag
The list of materials you need to build a tire heavy bag consists of:
You could probably get away with only using six bolts/nuts to hold the tires together if you need to cut costs down by another $2.
How to Assemble Your Home Made Tire Heavy Bag
It’s super simple. You bolt all the tires together, put the U brackets on the top tire and then hang it with your choice of rope or chain.
That said – I did encounter a couple of challenges when putting it together that I’ll point out to try and save you some time and effort.
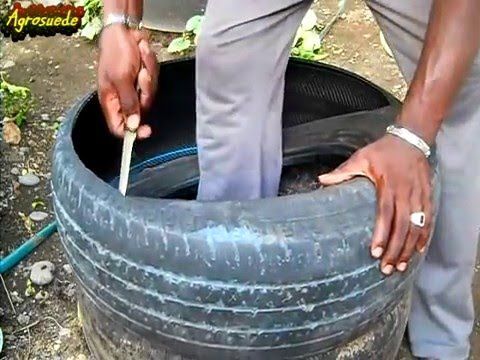
1. Bolt Your Tires Together. To do this you take two tires and lay them beside each other.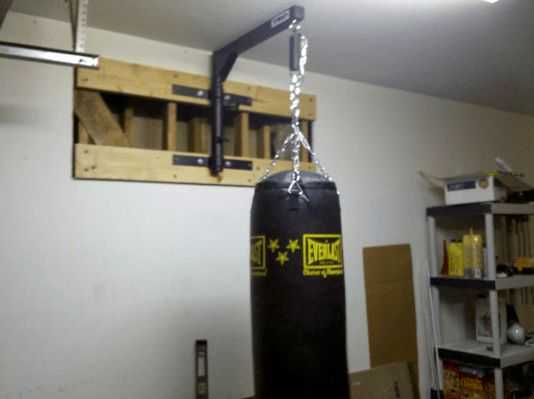 You mark a spot in the middle closest to you on one of the tires. Take a tape measure and extend it out. Keeping one end on the mark you just made make two more marks that are the same distance apart so you basically form a triangle of marks on the tire. For the tires I used the distance was 18″.
2. Draw a line on the mark closest to you as it will be important in a minute. Next mark the second tier the same way. Again, draw a line on the mark closest to you – so both marks that are nearest you will have the lines. When you flip the right tire over onto the left tire, you want the lines to match up. But before stacking the tires take out your drill and drill holes where you made the marks. You’ll have to push hard to start so the bit doesn’t run all over the tire and once you puncture the tire move the drill up and down and side to side to make the hole a little bigger than the bit. I used a 5/8″ bit for the 5/8″ bolts and had a hell of a time pushing the first bolt through the hole.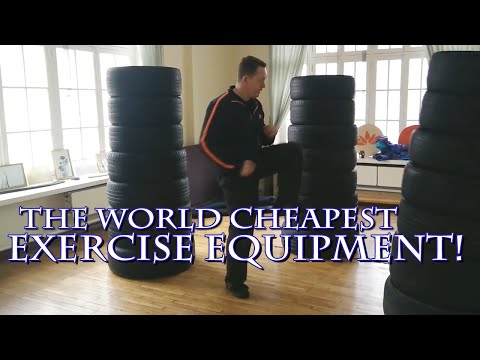 The bit makes a hole but the rubber really grabs the bolt. You’ll save yourself a lot of time and effort and frustration by ensuring the hole is big enough for the bolt to slide through.
Once you have your holes drilled, take three of the bolts and insert them from the inside of a tire so the threads are pointing out. The pictures should give you a good idea of what I’m saying. With all three bolts pushed through one of the tires flip that tire over matching the lines up and push the bolts into the inside of the other tire.
This won’t be easy. It took me a while to wiggle the bolts through and if your measurements are off at all it gets even harder. You’ll notice my tire bag is a bit asymmetrical – I could have taken more time to ensure things lined up right.
My second tip here is to just get the bolt far enough that you can put on a nut. Don’t worry about the washer for now. Once you have the nut on – use a wrench and tighten it down. It will pull the bolt the rest of the way through.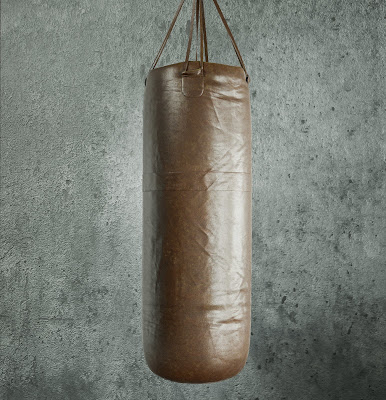 Then take the nut off, put a washer on and then put the nut back on and tighten down. You now do the same thing for the other two tires one at a time, stacking them on top and bolting them to the two you just bolted together.
3. Put on the U-Brackets. Once you have your four tires bolted together – mark the top tier the same way you did the bolts, then use one of the U-brackets to mark where the smaller holes need to be drilled for each U-bracket. Drill them, insert the U-bracket and tighten. All done.
4. Hang Your New Tire Heavy Bag. You can use rope or chain – whatever you have. Feed the rope through the U-brackets in a manner that allows you to hook it onto whatever bracket you have attached to your heavy bag stand. Alternatively you can just loop a chain or rope right over the top beam. I won’t bother trying to explain this part – I think it’s easy enough to figure out how to get it hanging.
And there you have it – a tire heavy bag that will give you hours and hours and hours of punching pleasure. You should know that this isn’t my invention. People have been building these things for years. I actually came across it on YouTube (of course):
Like Loading. ..
..
Tags: &, a, About, acid, active, all, Amateur, Anaerobic, and, and weave, Athletes, Back Kicks, balance, bath, Block, Blocks, Body, Body Conditioning, bodybuilding, boxing, Breathing, Bruise, Carbohydrate, cardio, Causes, clean eating, Combinations, Conditioning, Cougar, Cramp, Defence, determination, diet, Dietary, Drinks, Duck, Ducking, During, eat clean, Energy, Epsom, Equipment, Exercise, Exercises, Eye, Eyesight, Fat, Fatigue, Fibre, Fighters, Fighting, Fining, Fist, fit, fitness, fitness addict, fitness model, Five, For, Formulas, Front Kicks, get fit, Growth, Guidelines, gym, Heal, health, healthy, healthy choices, Heat, HISTORY, Homemade, Hooks, How, How to Use, Ice, Importance, Improve, Improving, Injury, instagood, instahealth, intestine, Jab, Jabbing, Kick, kickboxing, Kicking, Knee, Lactic, lifestyle, make, Marques's, Massage, Mastering, Minerals, motivation, Moving, Muay Thai, Muscle, Newton's Laws Of Motion, Nutrition, of, Oil, Old, Olive, Open, Opponent, Pack, Pain, Palm, photooftheday, Phrase, Pivoting, Post Exercise, Power, Pre-Exercise, Primitive, Professional, Promote, Protein, Punching, Putting, Queensberry, Ranges, Recovery, Relaxation, relief, Requirements, Resistance, Ring, Roundhouse, rules, Safety, salt, School, Session, Shadow, Shin, Shins, Shoulder, Side Kicks, Soaks, Soreness, Sparring, Splints, Sport, Sprain, sprains, Stance, Stitch, stomach, Strain, strains, Strategies, Stretching, strong, Styles, Systems, Targets, Techniques, Terminology, Test, Testing, The, Three, Threshold, Throw, to, Together, train, Training, Treatment, Types, Upper Cuts, Using, Utilisation, Ventilator, Vitamin, Water, Weaving, Weight, workout, Your, Zones
If you like training outdoors and want a punching bag that you could leave out and it’s not going to deteriorate in the weather, then make yourself one of these. I made this one from old tires that I got for free from a tire shop. Most tire shops will be happy to donate some old tires if you tell them they will be used to make a punching bag. The steps below give you a basic overview of how to make one yourself. For more detailed instructions check out my Fighter DIY eBook.

Good luck making it and hope you enjoy! If you have any questions feel free to ask them in the comments below.
This project is one of many projects in my Fighter DIY eBook. The eBook contains complete detailed and fully illustrated instructions that you can follow with ease. Download it today!
https://youtu.be/GLk8JxyC64I
10-Step Instructions: Get a ball - soccer ball or volleyball is ideal. Get a drain plunger and good quality duct tape and tape the plunger onto the ball, ensuring not to cover the air inlet. AmazonUS: https://amzn. to/304M8eJ For the base get a 2 foot wide MDF or "particle" board. For the mast/pole, get a 1-inch diameter PVC pipe (in Australia this is referred to as 20mm; in US it’s referred to as 3/4 inch) - you'll need roughly shoulder height. AmazonUS: https://amzn.to/2XopfRy For the base you'll need a short 1/2 inch galvanised steel pipe. The length of the steel pipe should be roughly 1 foot and will dictate the speed - faster with a longer steel pipe. AmazonUS: https://amzn.to/2Xo2gpJ . You'll also need the corresponding flange to mount the pipe onto your board. Amazon US: https://amzn.to/36Tbfm8 Attach the flange to one side of your board with thick, short screws. You will need to drill appropriate size pilot holes first to allow your screws to
Read more
10-Step Instructions: Get 13 pool noodles (for a 6 foot tall punching bag), a roll of cheap packing tape and a roll of cheap cling wrap (or two). For your pole get a one inch wide PVC pipe - roughly 6 foot long. For your platform get an MDF (particle) board at least 2 foot wide and 1/2 inch thick. Alternatively if you don't want to make the base, you can simply use an umbrella base such as this one from Amazon: https://amzn.to/3nY3J19 . For mounting your pole, get a one inch galvanised steel pipe roughly one foot long and a flange to mount it. You'll also need 4 thick, short screws to fix the flange onto your board - these are ideal: https://amzn.to/3gCO82H . Note, if you want to make your punching bag more rigid, use a two foot galvanised pipe. For fixing your PVC pipe onto your galvanised pipe you will also need a one inch hose clamp. Setup your platform and pole: screw the flange onto one end of your board; insert the galvanised pipe into one end of the PVC pipe and lock
Read more
Do you know where you can fit a set of expired tires? The solution is to make a device out of them that performs the functions of a punching bag.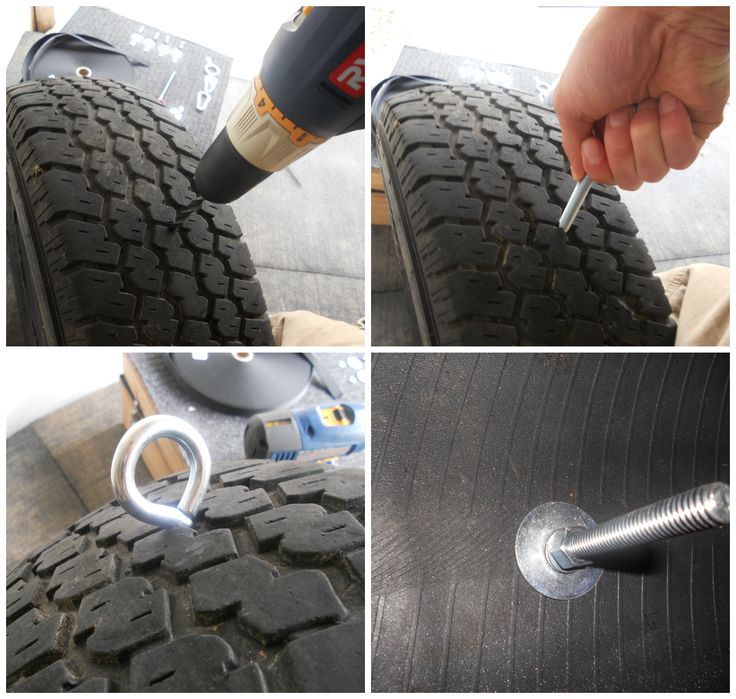 Not everyone wants to visit the gym and can for various reasons: a person does not have time, cannot allocate funds, lives far from the gym, and others. In addition, the pandemic has made many adjustments to the sports sector. Trite, not everyone likes to play sports in medical masks in a stuffy gym. But this is just an excuse to look for workarounds in a different direction, and not completely abandon your favorite sport. Some prefer jogging in the fresh air, then they work out on simple horizontal bars. Others create devices for sports from improvised means. Homemade pears are a good addition to a mini gym in the house or in the fresh air.
Consider four basic options for making a punching bag from tires and improvised means. You should always pay attention to the fact that the tires should be even, without bumps and spikes, there should not be any wire sticking out.
1. For the first method, you will need 4-8 tires, a hook or anchor bolt, and a thick rope. Of the tools you need a drill, puncher and screwdriver.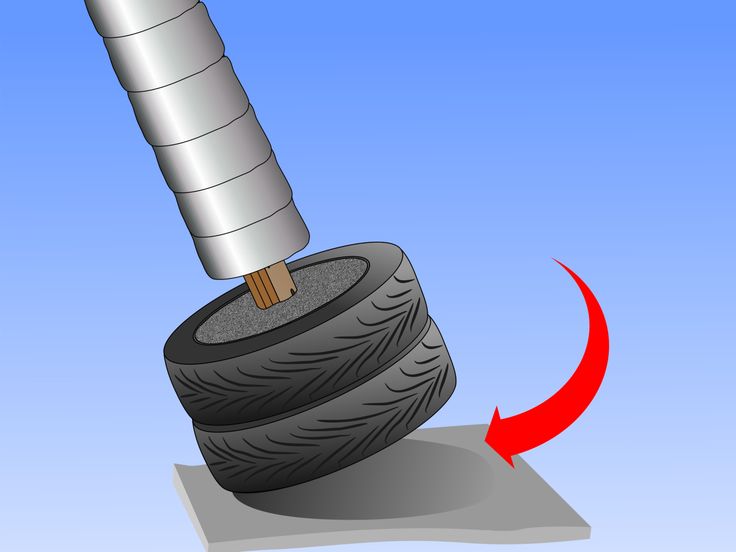 The manufacturing process is relatively simple and does not require special professional skills. Tires should be pre-washed and polished well. Then you need to make holes for the rope: in each sidewall there are 4 punctures, located one opposite the second. The tires will lie one on top of the other so that you can pierce them with a rope. After pulling through all the tires, the cord is tied at the bottom into a knot, which can be singeed if desired. At the top, all the ropes are collected, tied together and hung on an anchor bolt or hook, which are attached to the ceiling or suspended from the crossbar. To fix the structure on the ceiling, it is necessary to drill a hole with a puncher so that the hook does not fall into the cavity in the concrete slab, but into an integral place. Screw the anchor bolt into the ceiling and hang the finished product on it.
2. Bolts with nuts and chains can be used instead of rope. This modification is best made from four tires.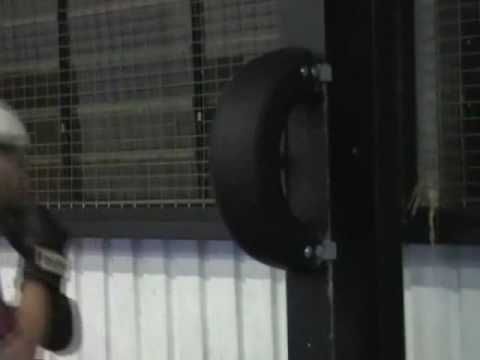 The process is a little more complicated than using ropes, but this design is more reliable. Each tire is fastened to the other with 4 bolts and fixed with washers for strength. The top of the first tire and the bottom of the last remain intact. Then, on the topmost tire, we make four holes for the mounting bolts with a loop. We thread each chain into a loop and hang all 4 pieces on one carabiner at the top.
If the projectile is too light, you can weight it down with sandbags. To do this, two strong planks are laid out at the bottom of the pear with a cross, bolted to the tire, and a load is placed on them. Thus, the weight of the rubber bulb can be varied according to needs.
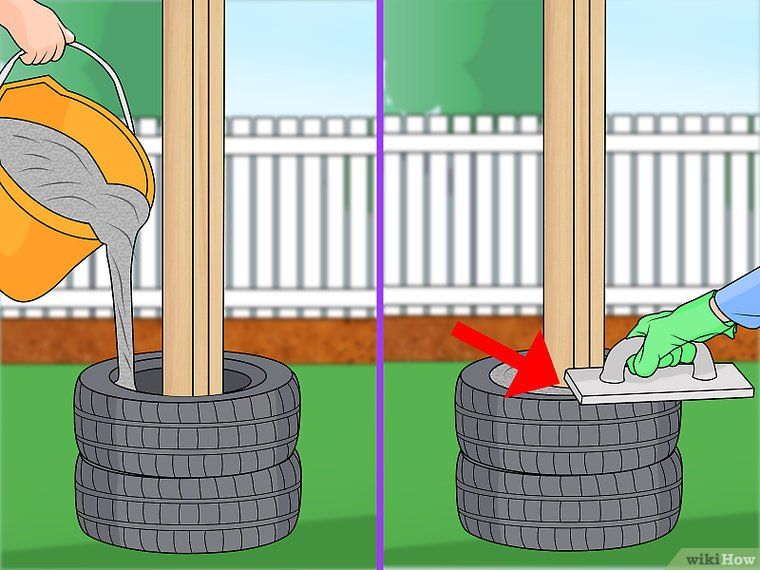
3. For the third option, you will need the following items: wooden pole, tires, screws, metal strip. First, we dig a meter-long hole, put a rod there and compact it well. We use sand and gravel for this. The column should be of such thickness that the tires sit tightly on it. Each tire put on a log is fastened with screws, and the bottom one is fixed with a metal strip.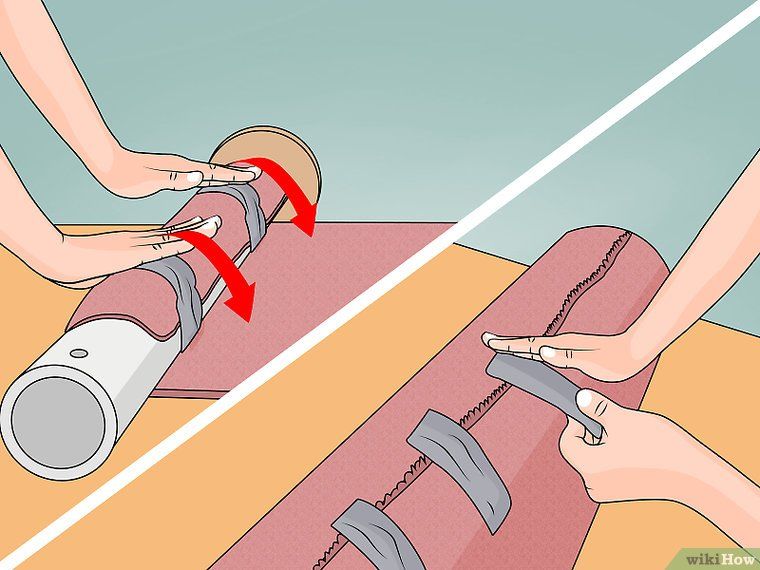 The number of tires depends on the required projectile height. It is optimal that the design be slightly higher than the level of the head. Thus, it will be possible to practice strikes in various techniques.
4. The fourth option is a single tire product. Such a projectile is made in 10 minutes and is compact. The tire is tied with a rope and fixed on a tree. A homemade pear is suitable for practicing a single blow.
Many mentors advise doing boxing training at home with a bag, but not everyone has the opportunity to buy it. Now you will know how to make a simulator and work out blows on a pear from tires outside the gym.
These activities are intense and work all muscle groups to help shape your figure and burn calories. When exercising with a projectile, boxing gloves must be worn to protect your hands from injury.
You can order rubber crumbs by calling
+79213400212
+79213400212
or leaving the application on our site
Our manager will contact you within 10 minutes
Leave the application
© Lexor LLC. All rights reserved. Postal, 73
Hello dear readers of our site about boxing boxingblog.ru. The topic of today's review is how to make a boxing bag out of tires. Such a simple and inexpensive projectile is ideal for people living in the private sector. Put it in your yard and you can practice on it at a convenient time. You live in an apartment, and you have a park or square nearby, install it there. In this case, there is a high probability that children will hang on it, and it will not last long, but then it is easy to repair it and continue to work on it. We'll look at three ways to do this.
Contents of the article:
- See also: Punching bags: suspension and floor types are considered >>>
One of the most time consuming methods, but convenient and durable.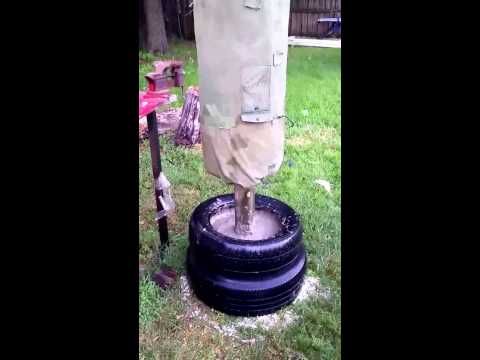 For assembly you will need:
Take four car tires, it is better to take rubber without studs, it is softer, and you will not injure your fists when working on it. We put one wheel on the other and drill holes in them. Make at least eight holes on each wheel, so the design will be more reliable and last longer.
When everything is drilled, it is necessary to fasten them with bolts, for strength from above we fix them with washers. As we fix this whole structure, we make four holes for the fixing bolts in the form of a loop on the top tire. We will hang for them. Having installed the mounting bolts, we hang the pear on the chains and hook the carabiner on top.
If the projectile is too light, it can be made heavier by stuffing it with sandbags. You need to take two strong boards, put them in a cross on the bottom of the pear, and fix them with bolts.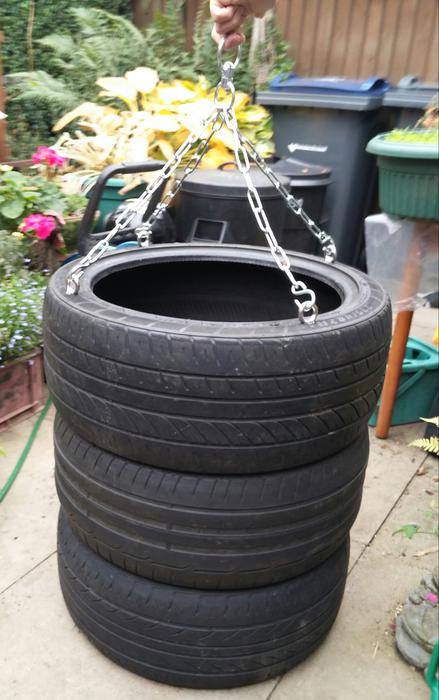 After, put a few sandbags inside, which will give a good weight. If it turns out to be too stiff, find the optimal weight for yourself by removing 1-2 bags.
Visually, how to make a boxing bag out of tires with your own hands, see this video:
The pear is ready, choose a suitable place for it and start training. It must be remembered that such a projectile is very hard and working on it with bare hands is traumatic. Put on special projectile gloves, and feel free to start training.
The structure can be easily removed and can be moved to another convenient place. It is convenient to work out series and beat accent blows on it. It will take its rightful place in any gym, percussion martial arts.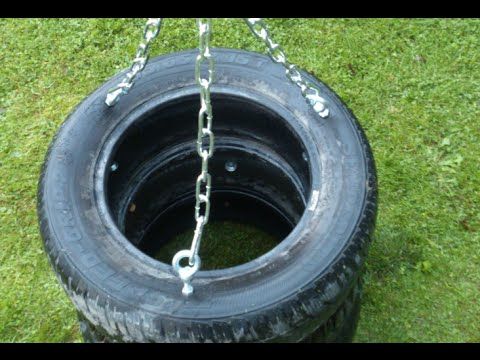
- See also: Self-filling a punching bag: an overview of traditional fillers >>>
The principle is the same as with bolts. We put the tires one on one and drill four holes in them. After, we take the cable and stretch it between the wheels. He will connect them, and for him we can hang our homemade pear. Next, we take a metal chain and hook our structure to a pre-selected tree. As you can see, the design is easy to manufacture, you can do it yourself, within a few hours. The only thing you need is help to hang it up, it's almost impossible to do it alone.
If you want to work on it not only with punches, but also with kicks (low kick), increase the number of tires to 7-8 pieces. In this way, you will lengthen our design, it will turn out to be quite heavy and comfortable for footwork.
Do not take a small section cable, it will quickly fray and your projectile will quickly become unusable.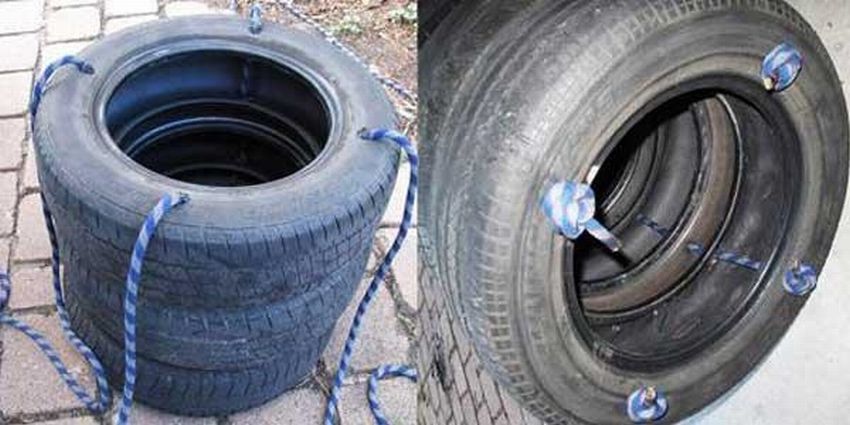 Take it with a diameter of 40-65 mm, its wear will be large enough and when the neighbor's children begin to hang on it, it will not tear.
- See also: Making a boxing bag with your own hands: yourself >>>
Probably the easiest way to make a practice tool. We only need two things:
A hole needs to be dug. It should be deep enough so that the pillar does not loosen and fall when struck. A meter pit will provide a long service life for homemade sports equipment. After we put a pillar in it, it is advisable to fill in crushed stone or rubble stone there, this will give the projectile stability.
Then, we start putting tires on the dug-in pole. We take them so that it is slightly above the level of your head. So it will be convenient for you to beat various blows on it. There is an overhand blow in boxing, it is delivered like a side kick, only its trajectory is from top to bottom. It will be convenient for you to work it out if the tires are highly folded. If someone else comes to work on it, with a height higher than yours, it will be very pleasant for him to work on it.
Pole not possible, attach tires to tree. We'll have to cut them on one side and circle along its trunk. To prevent the wheels from flying off during impacts, nail them to a tree and fix them with washers. This bag is well suited for parks, there are many who want to work out blows on rubber after you leave.
There is an option for lazy people. Take one big wheel, preferably from BelAZ and hang it with a rope on a high branch of a tree. Such a projectile will be light, and not as good as the previous projectiles, but it can work well with single hits.
There is no time or desire to make an outdoor trainer by hand, the easiest way is to buy a punching bag in a specialized store or find it on the Internet and order it on the site. You will save time and effort. It is convenient to order a pear on a special tripod in the kit.