Buying a windshield for your UTV could easily set you back more than $200, or double that for high-end windshields with special coatings. Add a rear windshield, and your budget will be at least $500. Read on to learn more about how to make a windshield for a UTV by yourself.
What You'll Learn Today
Making your own windshield will save you money. And it’s not that hard. All you need to do is buy a sheet of the right material (glass, polycarbonate, or acrylic), cut it to shape and affix it to your side by side.
You may not be able to make some of the advanced designs that store-bought windshields come in such as flip-up, flip-down, and vented windshields.
But with basic tools, you can easily make a full or half UTV windshield. Using a clear hinge, you can even make a foldable windshield.
UTV windshields come in three types of materials: acrylic, polycarbonate, and glass. Let’s look at each material in more detail.
Acrylic is the cheapest material for a UTV windshield. Common brand names for acrylic sheets include Plexiglas, Lucite, Perspex and PMMA.
Acrylic is a type of plastic that’s ten times as strong as glass, has high resistance to scratches, and has the best clarity of any windshield material.
That said, we do not recommend using acrylic to DIY a windshield sheet. Even though it’s stronger than glass, it still cracks easily when hit by debris. And in case of a big impact or a roll over, it shatters in a way that can harm the occupants of the vehicle.
It also scratches easier than glass and coated polycarbonate.
Polycarbonate is the most popular, and the best, material for making UTV windshields.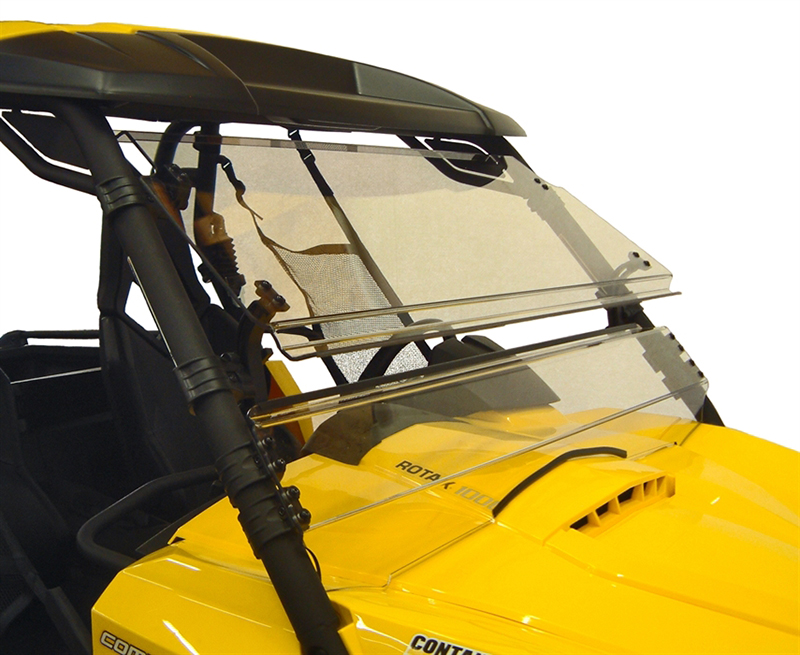 Specifically, coated polycarbonate.
You can get an ordinary polycarbonate sheet and DIY a windshield out of it. But uncoated polycarbonate scratches easily, which can quickly reduce visibility.
Coated polycarbonate sheets such as Lexan MR10 and Makrolon AR2 have excellent scratch resistance.
The biggest advantage of polycarbonate is its strength. Polycarbonate is 25 times stronger than acrylic and 250 times stronger than glass.
There’s a reason why some bulletproof screens are made from polycarbonate sheets.
A coated polycarbonate windshield is perfect for a utility UTV. It can withstand scraps from branches and bushes, and can withstand the impact of small rocks and debris.
And since it’s clearer than even glass, you’ll have excellent visibility.
The last option is glass.
While a glass windshield is strong, it’s not as strong as acrylic or polycarbonate. It’s good enough for most farming environments.
Glass is also highly scratch resistant. It’ll look good for a long time.
That said, there are two downsides of glass to be aware of. One, it’s a pricey option. If you are on a budget, use polycarbonate or acrylic.
Two, it’s heavy. It also requires a rigid metal frame (unlike polycarbonate that you mount with straps) that adds more weight.
If weight is a major concern for you, stick to polycarbonate or acrylic.
Once you decide which material you are going to use, buy a sheet of it. Usually, a ¼ inch sheet of polycarbonate is adequate.
It’s thick enough to resist impact, but not too thick that it’s heavy and difficult to work with.
A standard 2’ by 4’ sheet is adequate to make a full windshield for most ATVs. You’ll also need to buy four windshield mounting straps, as well as a length of edge trimming.
As for tools, you’ll need a contour gauge and a circular saw or jigsaw.
 You’ll need to cut the polycarbonate sheet to match the curves and angles on the hood of the UTV. The easiest way to create this template is using a contour gauge.
  The velcro straps will go through these slots.
 Note that this guide is for a polycarbonate windshield, which is what most UTV owners get. Mounting a glass windshield is more complicated since you need to design a metal frame for it first.
If you need more help making a polycarbonate windshield for your UTV, watch how this DIYer has done it in the video below.
https://youtu.be/IeYf35JVPB8Video can’t be loaded because JavaScript is disabled: DIY Side by Side windshield for less than $100 (https://youtu.be/IeYf35JVPB8)
Yes, you can. Plexiglass, a brand name for acrylic, is strong and has some scratch-resistance.
But it’s not the best material especially for farming and utility UTVs that are used in rough environments. Coated polycarbonate is much stronger, and better resistant to scratches.
Only use plexiglass if you are on a tight budget, but expect to replace the windshield soon.
Also, keep in mind that Plexiglass can be dangerous when it breaks. It shatters into little sprinters.
For most farming UTVs, a full windshield is the best. It provides complete protection against wind, dust, debris and the elements.
You can opt for a half windshield if you want to feel some wind.
An even better option is a 2-in-1 folding windshield. Don’t worry, you don’t have to buy an expensive flip or foldable windshield; you can DIY one.
You use the same process as above, but cut two separate sheets of polycarbonate then join them horizontally at the center using a clear golf cart hinge.
Now you can remove straps on the top half of the windshield and fold it down over the bottom half/
It depends.
The main reason for installing a rear windshield is to reduce the dust swirl that forms when you only have a front windshield.
A front windshield creates low pressure in the UTV, attracting dust-laden wind.
However, this is only a problem if you ride on dusty trails. If you don’t stir up dust when riding your UTV around the farm you can do with just the front windshield.
But if, after some riding, the inside and back of your ATV are dusty, a rear windshield will help.
Some UTV owners also say that adding a rear windshield reduces road or trail noise, especially if you often ride on gravel. It can also enhance sound from a speaker if you love listening to radio or music as you ride.
You can DIY a rear windshield from the same coated polycarbonate material you’ll use to make the front windshield.
Found it somewhere cheaper? We will price match any advertised, in stock, shipped price on any item we carry!
Move your mouse over image or click to enlarge
PlanetSXS is not affiliated with UTV Manufacturers in any way. References within this web site to Polaris, Yamaha, Can-Am, Honda, Arctic Cat, John Deere and UTV and/or Side by Side Manufacturers is for the convenience of the public, and does not constitute endorsement or recommendation by PlanetSXS.
PlanetSXS offers parts and accessories directly from the manufacturers and from our distributors.
PlanetSXS is not responsible for any problems, issues or damages as a result from aftermarket accessories, parts, wheels, tires and other/all products purchased from PlanetSXS.com and installed on your/other's vehicles.
FREE UPS Ground Shipping Promotion on Orders Over $99.00
• Free UPS ground shipping promotion is valid only on orders shipped to the lower 48 contiguous continental United States.
• Order total of $99.00 for Ground Shipping must be reached with product purchases only and will not include shipping, overweight charges or other miscellaneous fees. Free shipping order value is calculated on the total amount of your order excluding overweight packages. Over-sized packages and special shipping fees are not waived with this offer. Charges are subject to change. Confirm your shipping charge and method at time of order.
• Offer does not apply to orders shipping to Hawaii, Alaska, Puerto Rico, Canada, APO/FPO, Postal Office Box or any international orders.
Exceptions to FREE Shipping Promotion
• Offer does not apply to orders shipping to Hawaii, Alaska, Puerto Rico, Canada, APO/FPO, Postal Office Box or any international orders.
• Hazardous chemicals, aerosols and batteries must be sent ground due to shipping carrier regulations. Regular shipping charges will apply.
• Orders are held to ship complete
You may return most new, unopened items for a full refund within 30 days of delivery. These items should be in their original packaging and have their serial number or UPC. Special order returns are at our discretion on a case by case basis. If you would like to make a return or exchange, you must contact us by phone or email and submit an RMA (Return Merchandise Authorization) number before returning your items. This RMA number is usually written on the bill of lading (issued by the mail carrier's shipping department) or somewhere on the packaging. If you cannot find your RMA, one may be obtained by contacting us by phone or email. You will be responsible for any shipping costs when returning an item.
All returns will be subject to a 15% restocking fee. Remember, if you would like to return or exchange your item, you must contact us before sending it back. Items returned to us without notification will not be eligible for a refund or exchange.
Returns will not be accepted on items that are:
Sale
 0
0From 195.00 279.95
Sale
From 124.00 181.95
Sale
From 91.00 155.95
2,799.99
2,079.99
969.99
499.99
729.99
3,999.99
3,499.99
2,699. 99
99
1,999.99
Attention!
It should be noted that after installing the windshield, some ATVs report inconveniences such as reduced visibility (especially when the glass is covered with dirt), the inability to fully move the body's center of gravity forward when making maneuvers, and the risk of hitting the head on the upper edge of the glass during heavy braking . In no case do we dissuade you from buying, but simply draw your attention to possible inconveniences when using this accessory.
At the moment, you can find a huge number of models of windshields: they differ in size, the presence or absence of protective shields for hands, transparency (there are tinted windows), you can also find windshields equipped with rear-view mirrors, lighting devices and even cup holders.
The so-called universal windshields have gained the greatest popularity among ATVs, the installation of which is available for almost all models of ATVs.
Installing a windshield on an ATV.
Installation of glass will take you 5 to 15 minutes on average and does not require any special skills.
To begin with, you will need to mount the special clamps that come with the kit on the handlebar.
Subsequently, corners are installed on the clamp, which serve as a windshield mount and have adjustment, which may be required due to the characteristics of a particular ATV model.
After the clamps are installed on the steering wheel, it is necessary to fasten the metal corners to the windshield. They are fastened with special clamps, which are tightened with a lamb bolt (if necessary, the glass can be easily removed without keys).
Installation is almost finished, now you need to mount the corners on the clamps that we installed on the steering wheel and adjust the required distance to the windshield using a hex.
This completes the installation of the windshield on the ATV, and you can go for test rides and draw your own conclusions regarding the usefulness of this accessory.
Almost all windshields are more or less abraded by sand and dirt and lose their original clarity over time. We recommend that you only clean the glass with a wet cloth, as the use of a dry cloth will significantly increase the abrasive effect and, as a result, reduce visibility.
We hope you share your windshield experience with us in the comments and wish you the best of luck in choosing, installing and using this accessory.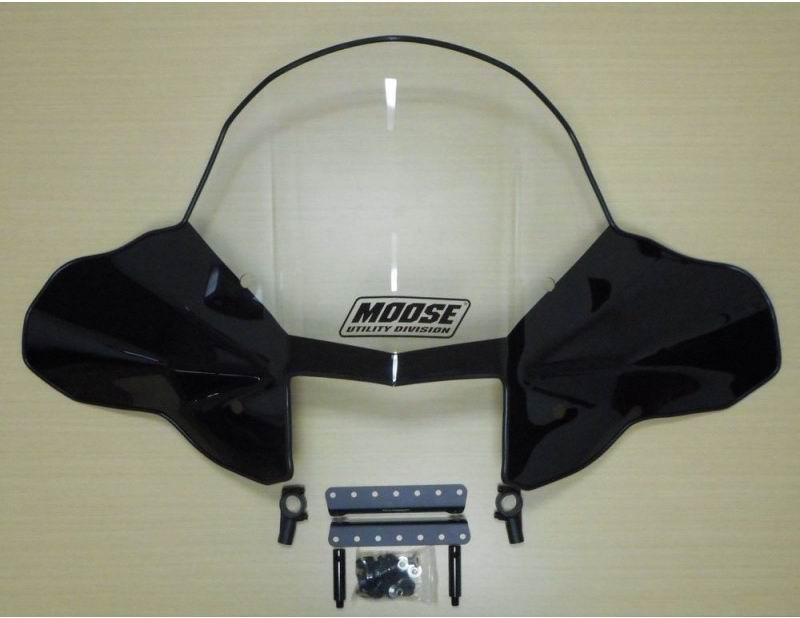
« ATV suspension ...
ATV does not start ... »
The windshield is quite an effective and necessary element of tuning on an ATV. Want to ride a quad? And it's cold outside, windy, slushy. This additional option will take care of your safety, doing a good job of protecting you from rain while driving, wind, branches, stones and splashes from under the wheels of the car in front. Also, the windshield installed on the ATV in winter will save you from the flow of cold air penetrating through. To protect your hands, you can optionally install protection for quadra handles .
The windshield can be made of clear plastic, black plastic, also glass and metal, which is attached to the ATV handlebars using special fasteners.
If you don’t want to spend money, you can also get confused, make a windshield with your own hands, but keep in mind that a homemade ATV will not have the proper design and beauty, it will be inferior to factory counterparts in functional terms. Since you need to: choose a suitable material that can bend under the influence of temperature and physical force, and not break; take into account in the manufacture of technological features, the development of fasteners.
In most cases, the windshield, its factory copy, includes a universal mount that frees ATV lovers from the problem of attaching an accessory to an ATV, suitable for almost all models. The principle of fastening to the steering wheel is based on special latches - clamps.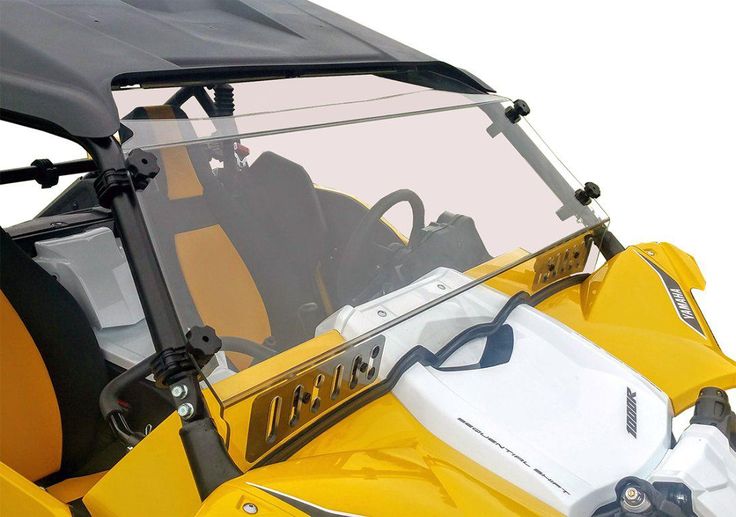
The surface of the glass is often clogged with dirt, to avoid this we install arch extensions . It tells how this revision can be done with your own hands
Mounting the windshield will not give you any trouble. Everything is very simple and fast.
We begin the installation with the collection of clamps that are installed on the steering wheel. The main thing is not to make a mistake, the two parts of the clamp are different, they must be correctly compared with each other.
We put the sealing ring on the steering wheel. We assemble the design of the clamps (consists of several parts), the assembly is carried out directly on the steering wheel.
Having installed the clamp on one side, proceed to the other, the whole procedure is similar.
Further installation of a corner on an accessory. Long side to the glass, short side to the steering wheel. We put the ears on the corners, fasten them to the glass with bolts. The bolts are equipped with a rubber ring that protects against damage.