9 Jul 2015
Gallery9
EVER since Henry Ford started power-sliding his 539-cube Sweepstakes racer in 1901, burnout smoke has been white. Always. But this changed a while ago when a couple of enterprising competitors rocked up to an event with expensive imported tyres that made coloured smoke, blowing everybody away.
MORE
Check out our Burnout videos
Enter Highway Tyres. They’re no strangers to the burnout scene, having supplied burnout maestro Steve Loader with his tyres of destructive choice for the past few years. And it was this relationship, combined with a competitor survey Highway conducted at the 2012 Ultimate Burnout Challenge (where more than 100 people expressed interest in buying coloured burnout tyres), that moved Highway to make these specialised tyres locally, giving birth to the Highway Max Coloured Smoke burnout tyre. Nowadays, the colour of a burnout competitor’s tyre smoke is as much a part of their signature as their machinery and array of tyre-frying tricks.
9
So what’s the secret behind coloured smoke? First, we need to explain why a regular tyre makes black smoke when you throw it onto a fire, yet produces white smoke when it’s flung around a doughnut pad.
For a tyre to ignite (ie burst into flame), it needs to be heated to at least 400 Celsius for some time. The physical act of burning the tyre not only releases the petroleum products used in its manufacture, it also releases a cocktail of toxic chemicals that includes benzene, lead, and even more esoteric toxins such as polycyclic aromatic hydrocarbons (PAHs) – all of which are extremely dangerous to breathe. It’s this concoction of burning oils and chemicals that creates the thick, dark cloud of smoke when a tyre combusts.
9
In a burnout, the tyre spins rapidly on the tarmac creating friction and so heat, though the temperatures reached are well short of what’s needed to ignite it. The heat created from the abrasive spinning action oxidises certain compounds within the rubber, which vaporise and are released as white smoke (the grey tinge often seen in burnout smoke is caused by fine rubber particles mixed in with the smoke).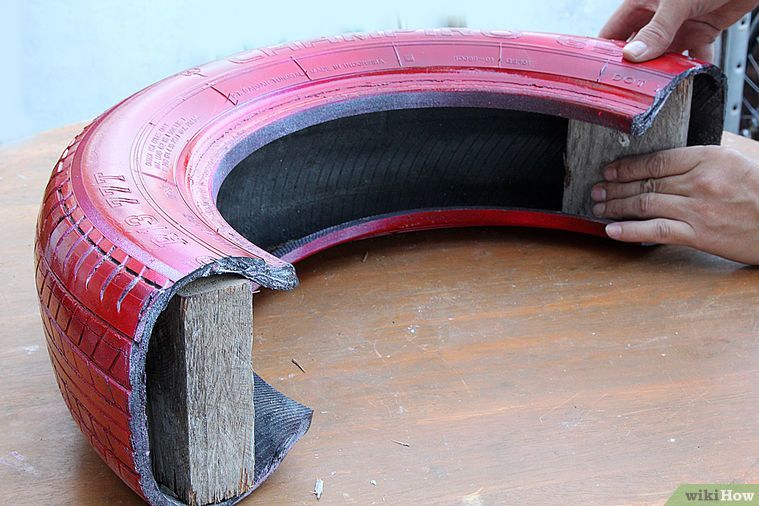
MORE
Australia set to reclaim burnout world record at Summernats 32
The secret to creating coloured burnout smoke is to introduce particular compounds into the raw rubber that vaporise in a coloured plume at the temperatures created during a burnout. So what are these compounds? Well, Highway Tyres aren’t saying. Think of it as the tyre’s 11 secret herbs and spices.
9
As for how they’re made, Highway Tyres are Aussie remould specialists, and so their Coloured Smoke tyres are high-quality remoulds – which certainly helps keep costs down. To ensure they’re up to the brutality of a stout burnout, Highway specifically selects only the best carcases. The tread and sidewalls are buffed, removing just the right amount of material. A thin layer of fresh rubber is then applied to the sidewalls before the all-important, pre-coloured rubber is applied to the tread area. At this stage the tyre looks more like a slick. Also, the pre-coloured rubber looks identical to the non-coloured variety, so a coloured stripe is added to aid identification. From there the tyre goes into the segmented press where, over a period of 32 minutes at 155 Celsius, the tread pattern and sidewall are moulded.
| Watch next: The best gender reveal burnouts - Video
After a final inspection, which includes inflating to 65psi and spinning it up to check balance, it’s ready to destroy the nearest burnout pad. As Karl from the warehouse says, “This is one of the few industries where all the hard work goes up in smoke – we love it!”
Highway Max Coloured Smoke remoulds are just as tough and long-lasting as their regular remoulds – an attribute Steve Loader has proved time and again. However, Highway do not wish to promote illegal street burnouts. Therefore their coloured tyres are for competition only.
To add colour to your next skid, contact the experts at Highway Tyres. They have outlets in every state.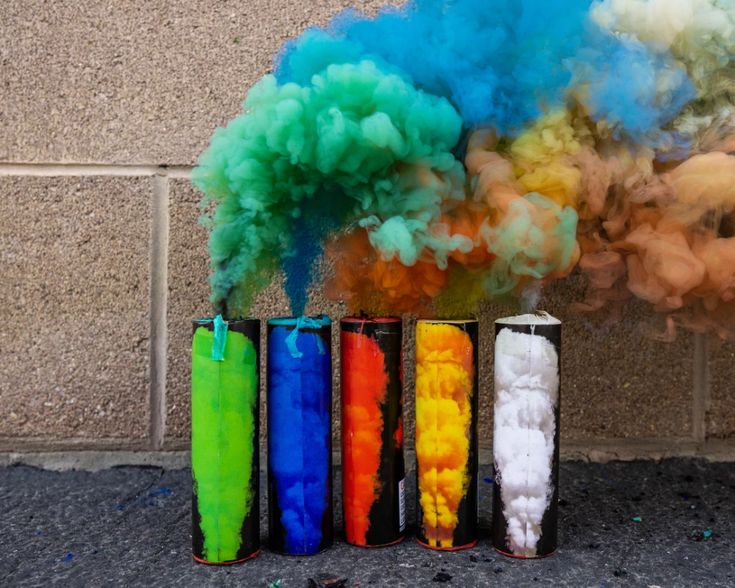 Go to www.highwaymax.com.au to find out where.
Craig Parker
Journalist
Simon Davidson
Photography
Table of Contents
Congratulations! Someone knows the sex of the new baby (or is about to), and now it’s time to plan the big gender reveal. Maybe the parents are really into cars, or they love those videos of big clouds of colored car smoke revealing the gender of the baby. So you know you want to do a burnout at the party. But how do you get colored burnout smoke for a gender reveal?
The answer is simple: you just need gender reveal burnout powder. But you might still be wondering how to use gender reveal burnout powder.
No problem! I’ll walk you through step-by-step how to use burnout powder. I’ll also discuss how many packs you need to get, what the best kind of powder is, and, well, how to do burnouts in general. This is one of my favorite methods of revealing a baby’s gender! It’s relatively safe and has a huge impact for a big onlooking crowd of friends and family.
A tire burnout gender reveal is quite simple, but can be done in a number of ways. You could get burnout gender reveal tires that have special colored rubber compounds that are then spray-painted black to conceal the surprise until the burnout.
However, this method is very expensive (because tires in general are expensive). The burnout also takes longer to reveal the color. This is because you have to burn through the spray paint and enough of the tire to release a bright hue.
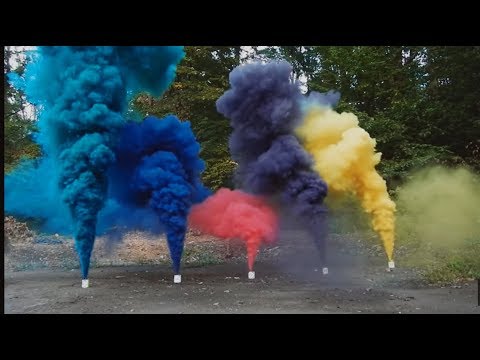
A cheaper and more commonly used method is to use colored powder concealed in special bags. Some are designed to stick to your tire. These bags burst during the burnout, spraying the powder out behind the car in a dramatic cloud. This method produces brighter colors and usually a bigger cloud of “smoke” (dust) as well.![]()
Some people even put the colored powder directly into their exhaust pipes, either by itself or in addition to the packs under the tires.
Burnouts are illegal pretty much everywhere on public property. On private property, however (like your driveway), it isn’t specifically illegal… But you could still be charged with disturbing the peace of endangerment if a neighbor or police officer wanted to press the issue.
For this reason, it’s recommended that you do a gender reveal burnout on private property set far back from the main road. You should also do it during normal daytime hours, and not late at night when people are sleeping.
If you’re using the right kind of car (we’ll talk about that later) and you’re only planning on doing the one burnout, your car will likely be fine. This is not a guarantee, though. A burnout puts a ton of pressure on a car’s transmission, axles, and driveshaft.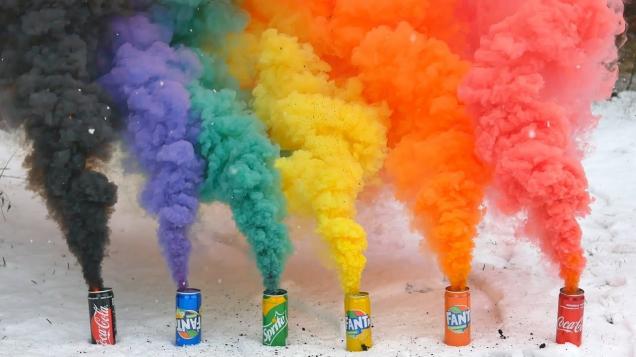 Enough strain can cause these things to break down.
A gender reveal burnout should be done by someone with the right kind of car, with experience doing burnouts, and only long enough to throw the powdered dust out behind the car (which will only be a couple of seconds). But know that you are always taking the risk of doing damage to your vehicle when doing a burnout.
Also, burnouts tend to be bad for your tires – so if possible, use a pair of old tires to make this kind of magic happen.
Tires are made of rubber, and rubber is a Group 1 carcinogen. Burning rubber releases airborne latex along with bits of carbon black, oil, sulfur, steel, and other metallic elements.
Does this mean using a gender reveal burnout kit is going to give all your guests cancer?!
Well, not really. One of the factors in how dangerous the “smoke” can be lies in the concentration of the vapors being inhaled. Doing the burnout in a large, open, outdoor area will quickly dilute the cloud of smoke.
Also, when using colored burnout powder, you’re not going to be burning that much rubber; the powder will be creating most of the smoke before the tires even really have a chance to get hot. The powder is usually made of cornstarch – you know, the stuff you eat! Still, inhaling cornstarch has been proven to cause inflammation and even scarring in the lungs.
All of this information just means your guests – and particularly the expectant mother – should stand far away from the car while it’s performing the gender reveal burnout. Don’t worry, they won’t miss that brightly colored cloud of dust.
First of all, if you’re wondering whether it might be easier and/or cheaper to just get colored gender reveal tires for your burnout, the answer is definitely not. Tires are much more expensive than colored powder packs and have to spin for a lot longer to produce a noticeable amount of colored smoke.
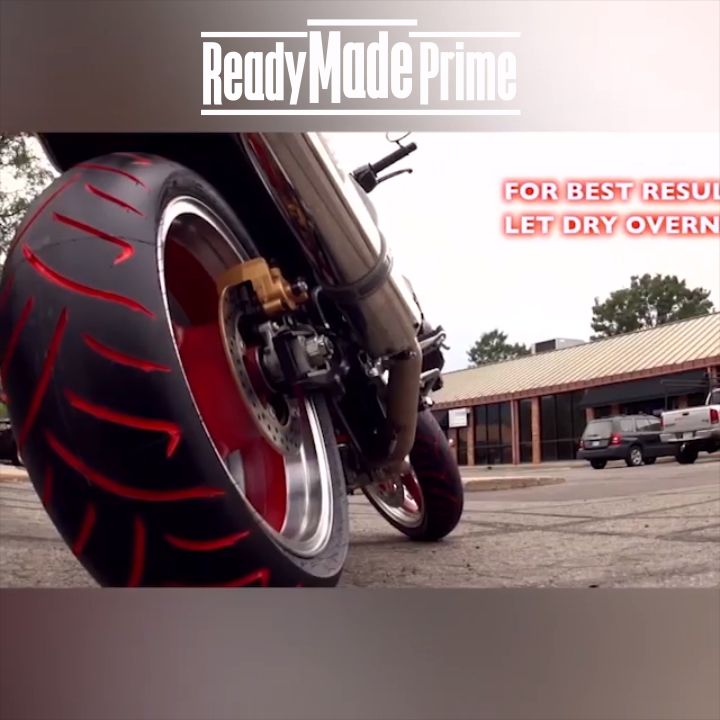
That being said, yes, tires DO come in different colors! Highway Max can provide you with a blue or pink burnout gender reveal tire pack in tons of different sizes (and will spray paint them black so no one knows what it’ll be until they start burning!).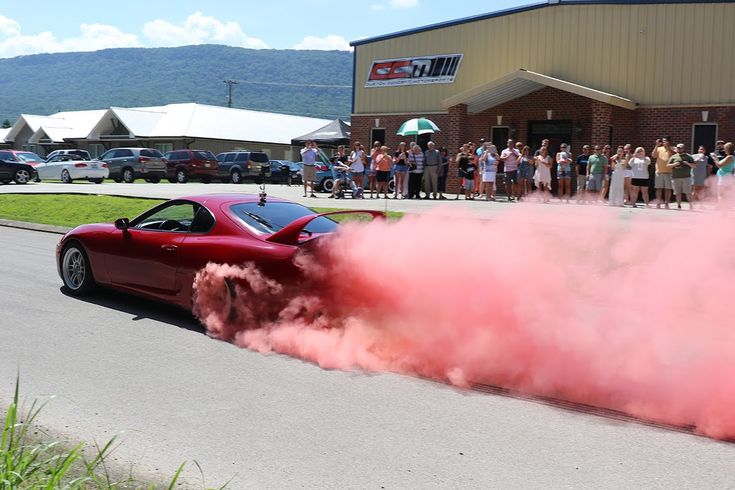 They are the number one gender reveal burnout tires company in the world. The smoke color is BRIGHT, too – here’s a video of a truck using some of Highway Max’s tires.
As mentioned earlier, most gender reveal powders are made with cornstarch – and those are the only kinds I recommend you use. They are safer for the environment and safer for your guests (though again, no one should be directly in the clouds and inhaling the burnout gender reveal smoke!). Colored cornstarch also won’t damage your car and should wash off easily.
Burnout gender reveal powder is usually just cornstarch mixed with concentrated food coloring. This may leave you wondering… why don’t I just make it myself? A DIY gender reveal burnout is bound to be cheaper, right?
You could, and I even have a tutorial on how to DIY gender reveal powder at home. But it takes a chunk of your time, it’s pretty messy, and it has the potential to go wrong.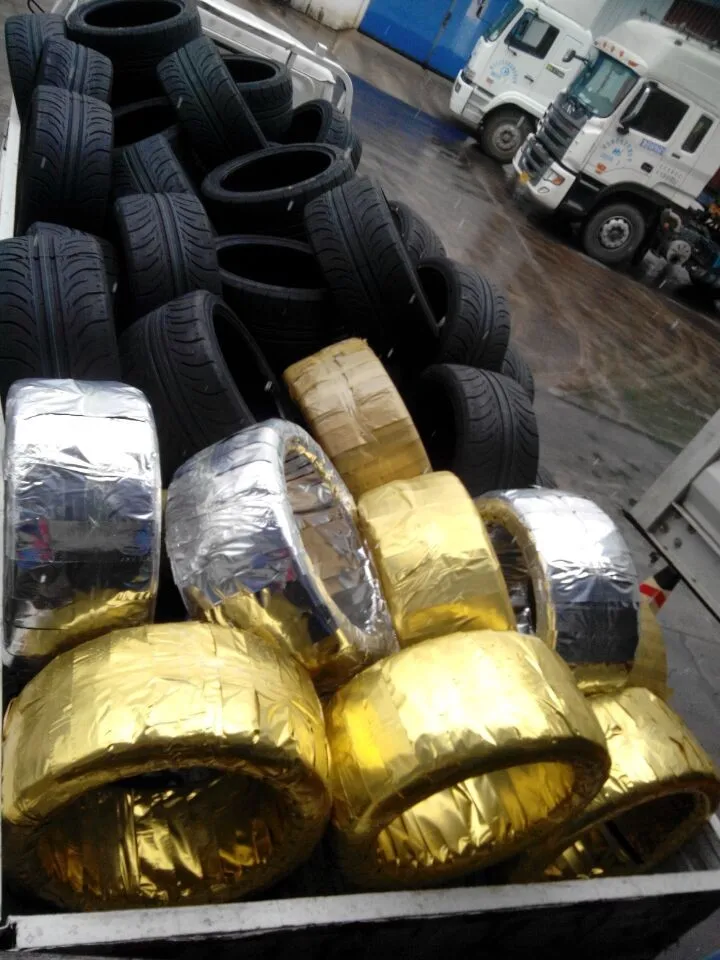 It’s also really difficult to get the cornstarch back to as fine a powder as it once was (you have to add water to color it). Professional companies are the best at that part!
For these reasons, I recommend you just buy premade colored powder packs. These companies have been making this stuff for years (even before gender reveals were popular) and you’ll know it’s properly colored, dried, and sifted to create the perfect cloud effect.
Most packaged gender reveal burnout packs include one pound of powder per bag. Two bags (two pounds) of powder should be plenty for your gender reveal if you’re doing a rolling burnout.
If your vehicle is better suited to a standing burnout, you may want to use four bags (four pounds) of powder, directly sticking two bags to each tire. (Many products are designed with this in mind – you simply peel off a sticker and slap the adhesive part onto the tire.) One pack may decide to fly off before busting under the tire.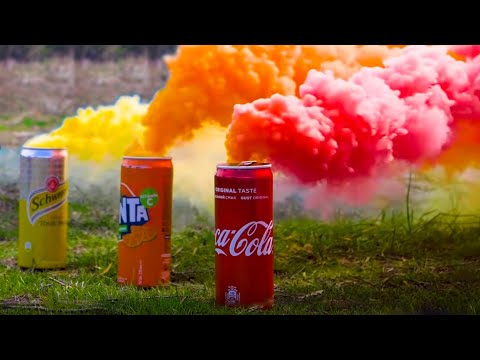
I’m going to walk you through a couple of scenarios of how to do a gender reveal burnout. Blackout gender reveal bags can be used in a burnout a few different ways, depending on your vehicle. These are the three methods for using them, and you’ll need to figure out which one applies to your car:
If you’ve never done a burnout before (though I really think you should know how to do one already before attempting one at a gender reveal), this is how it’s achieved:
 It needs to be rear-wheel drive, without question. It doesn’t have to be a manual, but that makes it a lot easier. You’ll also need a lot of horsepower. 4-cylinders won’t cut it. Smoother/balder tires will work the best.
If your vehicle is an RWD manual transmission, this is what you do:
If your vehicle is an automatic with rear-wheel drive, you’ll need to do something like this:
No matter what car you’re using and what kind of burnout you’re going for, the key is to practice it first. Nothing’s more disappointing than a failed gender reveal burnout where the bag just pops but the powder doesn’t get thrown back in a big, beautiful blue or pink cloud.
This video is a great example of where you should place your powder bags in front of the tire ahead of a rolling burnout in order to get the best effect.
If the parents-to-be are more into motorcycles than fast cars, you may be wondering if you can do a motorcycle burnout gender reveal. The answer is yes – but safety is even more important if you’re going to attempt it.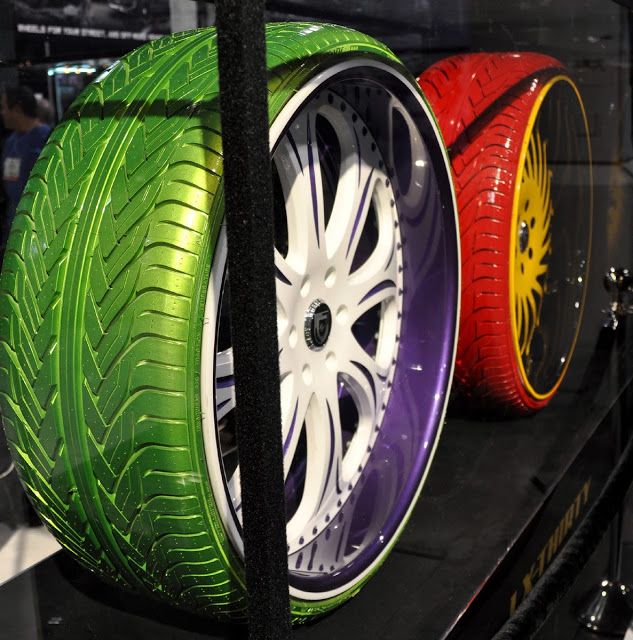
A motorcycle burnout should only be attempted by a professional/someone who has experience doing them on the chosen motorcycle. Otherwise, you run the risk of an accidental wheelie and your motorcycle possibly falling on top of you. Your brakes could even catch on fire.
You’ll treat a motorcycle burnout similarly to a standing burnout in a vehicle. You’ll want to have two one-pound bags of gender reveal powder that can adhere directly to the back tire of the motorcycle.
This is how to do a burnout on a motorcycle:

Now you know how to do a gender reveal burnout with powder!
This is actually the easiest and safest method of all for using gender reveal powder.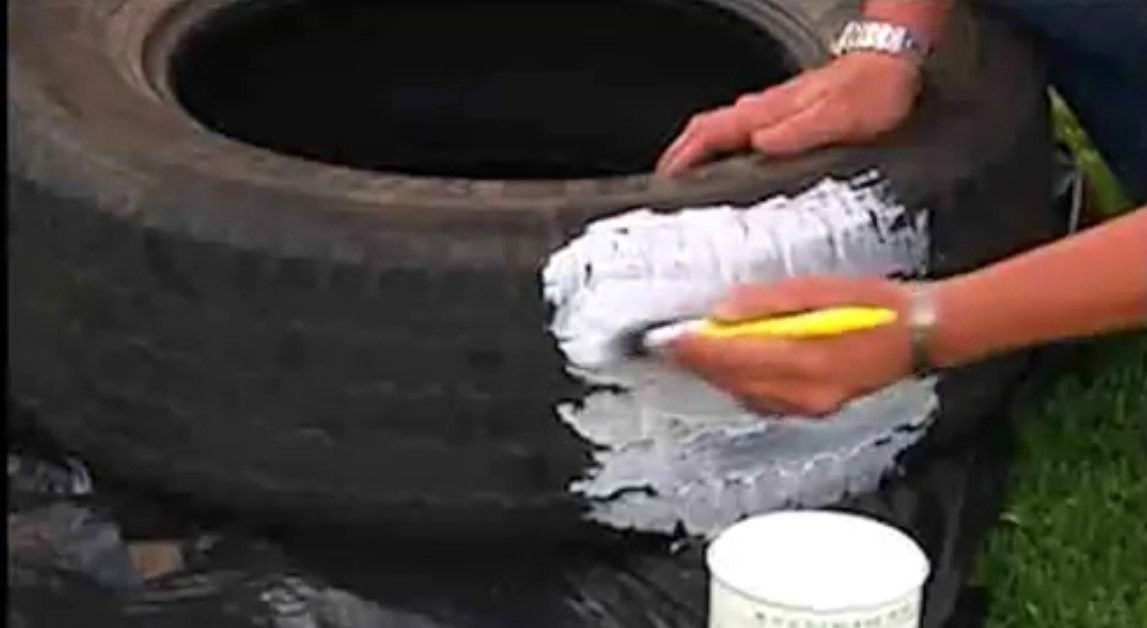 The reason people tend to prefer doing burnouts is that the dust cloud is usually bigger and shoots up into the air instead of straight behind the vehicle.
Furthermore, putting gender reveal powder in your exhaust pipe means you can do this type of reveal with any vehicle – as long as it has an exhaust pipe. It won’t matter if your car, truck, or motorcycle is automatic or manual, front-wheel drive or rear-wheel drive. The powder will still shoot out of the exhaust pipe!
To put the powder in the exhaust pipe, someone who already knows the gender will need to open the packages of powder and funnel it into the exhaust. It doesn’t have to go in very far, and you can put a tissue or lightweight paper towel in the pipe afterward to help conceal the powder until it’s time for the reveal.
Keep in mind that the car will need to already be in place wherever you want to do the reveal because once the car starts, the powder will come out. This method also tends to cause some powder to fall on the ground during insertion, so you’ll want to be able to easily clean up or conceal any colored powder that’s in eyesight to the partygoers.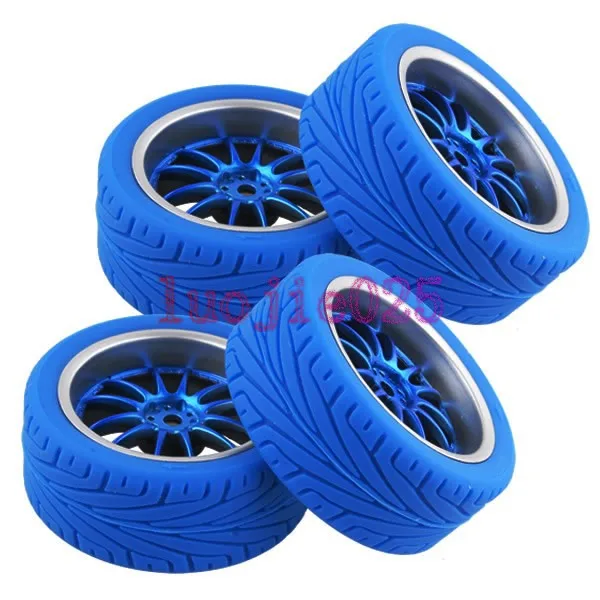
The angle of your exhaust pipe can make it difficult to put the powder inside, but as long as the pipe is long enough, it’s never really impossible. This video shows one method for inserting powder into an exhaust pipe that points down to the ground:
Once the powder is in the exhaust and you’re ready to do your gender reveal, all you have to do is leave your vehicle in park (I’d lock the parking brake just for good measure), then mash the gas pedal right as you’re starting the car. Voila!
Be sure to use plenty of powder, because the dust cloud from this method doesn’t seem to last as long as the burnout method. Put at least two pounds of powder in the exhaust – three or four if it will safely fit. (Cornstarch powder should not hurt your muffler at all, and can be fully blown out with a drive around the block after the reveal.)
Once all of the colored powder has blown out, the exhaust smoke may just be white or black (if you can see it at all), and you don’t want anyone to miss the important part!
This post may contain affiliate links. If you make a purchase after clicking one, I may receive a small commission at no cost to you.
You don’t need to look any further than Amazon for a burnout gender reveal kit. Multiple brands and sellers offer brightly colored powder in one-pound blackout bags (so no one can see what color is inside!). They typically come in sets of two one-pound bags per order so you can use one for each wheel.
Most of these bags will come with double-sided tape on them so they are easy to stick to tires for a standing burnout. You just peel the sticker covering the tape off and slap it on the tires. Even if you’re doing a rolling burnout, you should remove the sticker so that once the tire does land on the bag, it will stay with the tire and not get flung away before it busts.
If your bags do not have sticker tape on them for some reason, the best gender reveal burnout tape for attaching it to your vehicle would be something strong but not too strong, like Duck Brand packing tape.
Whether you plan on doing a standing burnout, doing a rolling burnout, or stuffing the powder in your exhaust, I recommend buying at least four bags of powder, and 6-8 if you can afford it. A test run is always advisable because this is a big moment for the parents-to-be and their families!
Below are the brands and sellers on Amazon I recommend for getting your gender reveal tire burnout kit.
Once you know whether it’s a boy or a girl, it’s time to settle on a name! Check out our list of 1000 baby girl names or some baby boy names and their meanings (including the worst names you should avoid).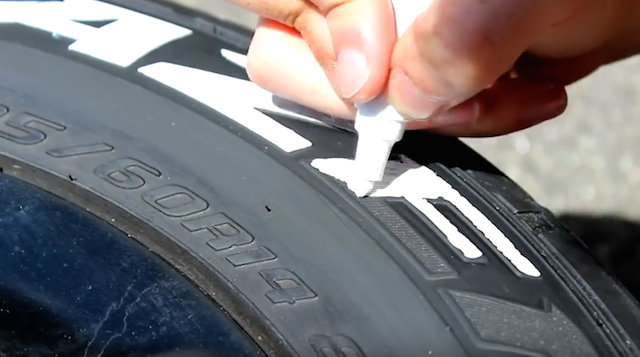 And if mom-to-be isn’t already, it’s time to start using a stretch mark cream on her belly!
Introduction
What is the feature of the directional tread pattern?
Advantages and disadvantages of
directional tiresHow to properly install directional tires
Conclusion
When choosing good tires, you often face the problem of not only a huge number of models, but also a variety of tread patterns, which also need to be sorted out. One of the most popular patterns is the traditional directional pattern, which has been used on the tread surface of a wide variety of tires for decades.
What are directional tires and why are they still in demand not only among motorists, but also among professional motorcycle racers? In the article, we will reveal all the secrets and technologies of directional tires, as well as show you how to install them correctly. Here, nuances and discoveries await us at every step.
There are four types of car tire tread pattern:
directional symmetrical,
non-directional symmetrical,
non-directional asymmetrical,
directional asymmetric.
Each drawing is designed for its own version of the road and has its own set of advantages. Different tread patterns have different functionality and behavior on the road. When mounting tires on wheels, their own installation principles also work, which will need to be strictly observed so as not to create an emergency. We will talk about them in the corresponding section.
The essence of the directional tread design is clear at a glance: the blocks, ribs and tread grooves of the V-pattern are directional, spinning the wheel in a certain direction. Most often, directional tires are found in winter models, but there are many of them among summer ones. In symmetrical tires, both halves of the directional tread are mirrored, in an asymmetric design, both halves have a different structure and different functionality.
It is necessary to mount the wheels only in the right direction, otherwise all the advantages will come to naught, and at the same time problems with handling and accelerated wear will be added. Excessive strong pressure will accumulate in the center of the working area, due to which the tire will begin to rise above the road and harm traction in how many areas.
The directional tread pattern is best suited for wet tarmac, as the grooves that widen from the center to the sides are much better at shedding water from the contact surface. This not only improves grip on wet surfaces, but also works in favor of protection against the effect of hydroplaning. This works even better for a rear-wheel drive car - the front wheels will quickly clear the water before the rear axle sets foot on the road.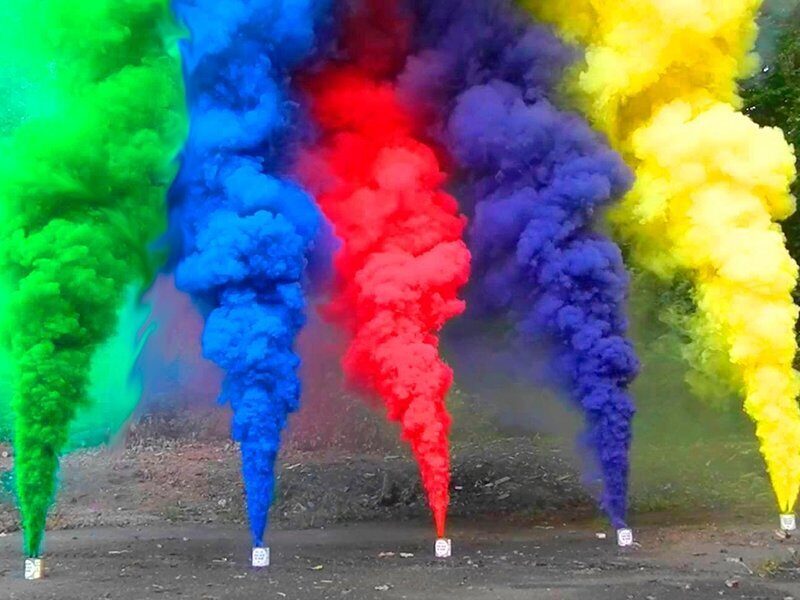 Accordingly, contact with the track in such a car will be much more thorough.
The directional pattern of the winter models excels in raking snow and removing dirt from the contact surface - ideal for snowy trails in the winter.
On a dry summer surface, they also give the car a couple of advantages - first of all, it concerns directional and lateral stability. For high-speed tires, this is one of the most relevant designs, as directional tires have a positive effect on the reactions of the car at high speed.
However, their driving disadvantage is the increased noise level during active work on asphalt, and the higher the speed, the stronger the rumble. Also, directional tires are more expensive than non-directional tires, but cheaper than asymmetric ones. It is better not to install directional tires if you often drive on dirt roads or are completely forced to drive off-road. They will not show effective work on soft and medium hard surfaces. For rural areas, a tread pattern with a non-directional arrangement of large lugs is better suited.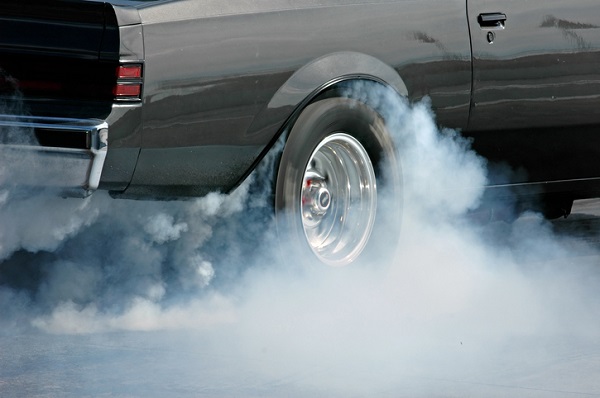 Remember that, being put on disks, wheels with directional rubber can only be changed from the front axle to the rear and vice versa, but not rearranged on the sides. To do this, the tires will have to be disassembled and put as needed.
Although we've talked about directional tires, it's the symmetrical design that's most common. Asymmetric directional pattern is very rare. This is due to the fact that such tires are not only much more difficult and expensive to manufacture, but they have one serious drawback for car owners. Due to the very strict installation scheme for the car, constant difficulties arose with spares - I had to constantly carry two spare wheels with me instead of one, because you never know which tire will be damaged, and you can’t change directional asymmetric tires with sides. In addition, the warehouses constantly accumulated tires for only one side, which are completely useless without a paired wheel.
As mentioned above, one of the "secrets" of directional tires is their installation pattern. Simply put, you need to find the inscription Rotation (from the English. "Rotation") with an arrow on the sidewall. It is this marker that is an indicator - in which direction the tire pattern should “look” when installed on a car. If you make a mistake with the direction of rotation and put the rubber against the arrow, then the drainage system will rake in water like a mill, and not discard it, leveling all the advantages of the model, or even exacerbating them. The fact that the tires are installed incorrectly will tell you a sharply increased noise in the cabin.
If for some reason you could not find this marker, then you can do it even easier - pay attention to the tire tread pattern itself. The rubber of the directional design is a kind of "herringbone" that is directed forward. Simply mount the tires so that the tread pattern faces the direction of travel of the vehicle.
Rubber with an asymmetric device should only be mounted according to the marking, since each individual side is designed for its own tasks and should never be confused.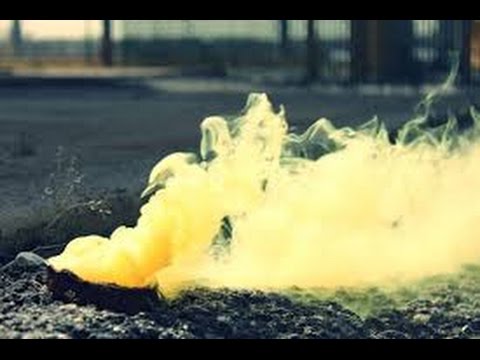 The correct direction of asymmetric tires will help determine the labels:
Outside, or the outer side of the tire, must face outward.
Inside, or the inner side, respectively, looks inside the car.
Right and left asymmetric tires are much less common. Left (or simply L) will be written on one tire - it means that it must be placed to the left of the body, Right (R) - to the right. You can change them only on one side of the body - front with rear and vice versa.
But much more often, directional tires can be mounted on a rim on either side, the main thing is to follow the direction of the pattern.
And don't forget to balance freshly assembled wheels - tires will never show their advantages and characteristics without good balance. Only after that you can proceed to the installation on the hubs. After installation, go around the car in a circle and check the markings. Recall that we need the rotation direction under the Rotation arrow.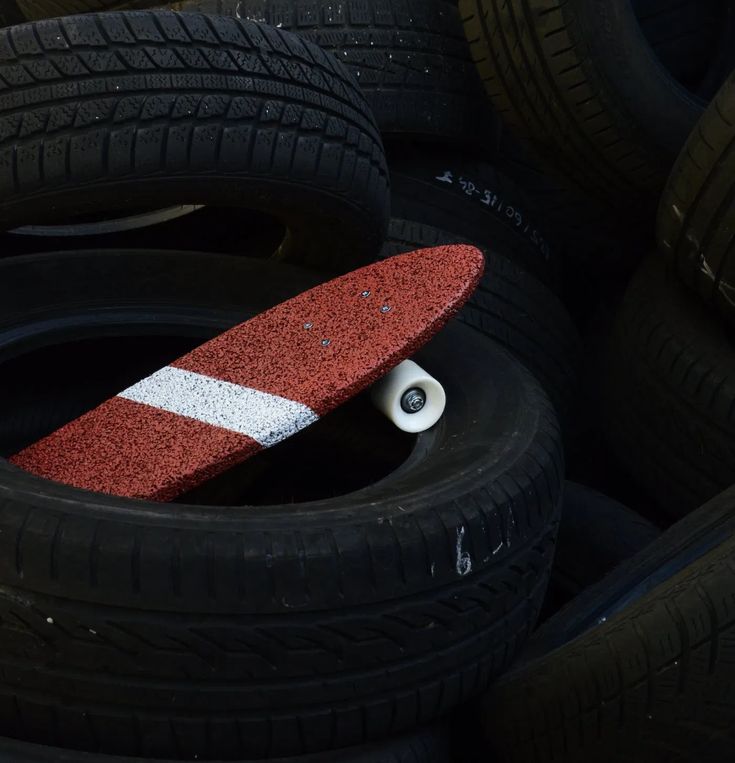 If you have an asymmetric directional tire, then make sure that only the Outside is visible. Left (Left) and right (Right) asymmetric tires must show the sides of the body in the direction of travel.
You can learn a couple more tips about directional tires from this video:
Viktor Vasiliev
Color marking is available on each tire. It is applied at the factory during tire production. After all, it is very important to make sure that the tread tape is installed on the tire evenly and without distortions. That is why colored stripes are applied to the still wet tread tape. Automation focuses on them to center the tape on the tire.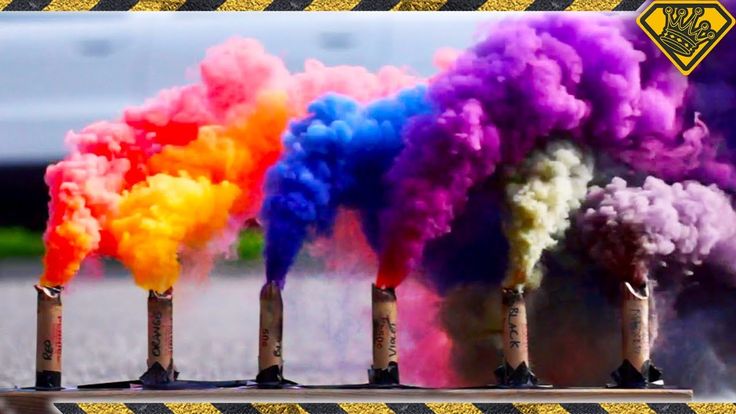 After vulcanization, these stripes remain. Logisticians in the warehouse of finished products begin to focus on them. After all, tires come there in huge rows, so it’s difficult to find out the size and model of a tire without a hint.
It is not bad to pay attention to the colored lines for the buyer of the new “rubber”. The fact is that tires are often sold out of order. Often there are situations when tires produced in different years were collected in one set and offered to gullible people. But it is best to install tires from the same batch on the car. This is where stripes can help. If they are identical on the tires, this is an indirect sign that the rubber was released at the same time. At the same time, it would be useful to inspect the sidewall of the tires, where the production date is written.
Photo from open sources
Next, pay attention to the dots. The red mark means the place with the largest radius. The fact is that a tire is never perfect and some part of the tread is higher than its rest of the working area.