What to do with recycled tires? Tires are actually the perfect size to use as a planter in your garden. This guide teaches you how to make both simple and inside out DIY painted tire planters. All of your questions will be addressed. From sourcing tires, painting them, and making a planter, you will find plenty of inspiration to get your creativity flowing.
On this page
Please note – you don’t have to paint your tires. The non painted planters also look great when done right!
Regardless of the size of your yard, there are many ways to fit a tire. This guide will provide you with a wide range of ideas for all sizes and budgets. Lots of tips and tricks will be shared to successfully make your DIY planter.
Learn to make a Simple Tire Planter. Using car or tractor tires is the most common way to make one. Find out where to get used tires, what paint works best, and how to construct your own. We also answer questions you might have about health risks when using tires in your garden.
Learn to build an Inside Out Tire Planters . They are a fun twist on the classic style. We will get into detail about how to make these and any equipment you might require.
Build a DIY Tire Vegetable Garden. It’s a great way to get extra use from your planter. Use the tires to make raised beds and to keep your crops separate.
Jump to Ideas and Inspiration – 70 beautiful photos and ideas for your project have been gathered so that you can deck out your planter.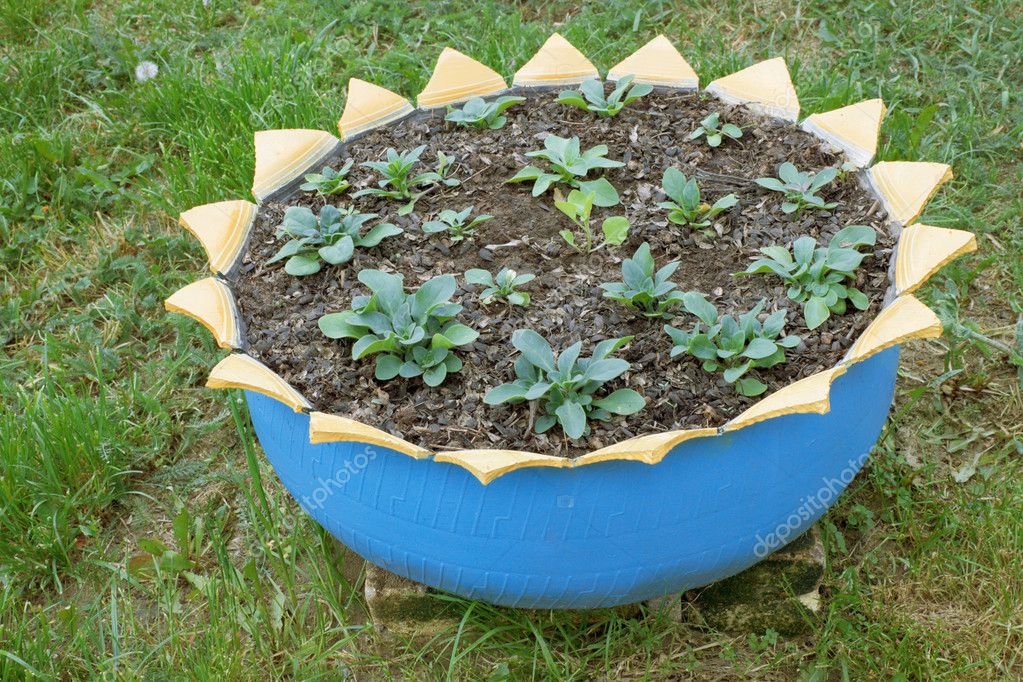
Jump to Creative Tire Planters that are anything but ordinary add a nice touch. Read on for ideas like how to turn your tire into a teacup planter!
Tires can be used in an assortment of ways to make the best planter for your needs. Be it a single tire with one large plant, many tires stacked together, or even a hanging tire, the options are endless! Let’s take a step back from the final product and answer some common questions.
For the DIY projects we will explain, the best tires to use are those from cars, tractors, ATVs, and motorcycles. Keep in mind what your purpose is when choosing a tire.
The easiest recycled tires to access are your own. Most tire shops sell used tires at reduced prices, and if you don’t need road safe tires they might have some to give away. If you live in a big city, search for a tire dump or junkyard.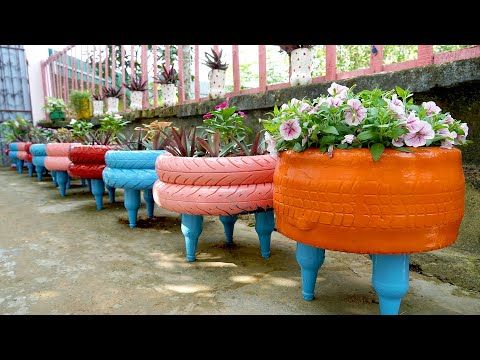 Since tires are hard and expensive to dispose of, chances are you will be able to take as many as you like at no cost.
As well don’t underestimate online platforms such as Facebook and Craigslist. One person’s garbage is another person’s treasure, or tire planter! Keep in mind that worn tires will work best as they will be easier to cut and maneuver into shapes.
It is not necessary to paint your tire but it is a great way to add a splash of color to your garden, especially when your flowers aren’t in full bloom! If you choose not to paint your tire, note that black rubber will absorb far more sunlight and can get quite warm.
Before you begin to paint, hose down your tires to remove any dirt or dust. Once they are dry, the paint should have no problem sticking. For maximum results, use a white primer appropriate for rubber as a base coat. This will also make it easier to layer on a lighter color. Some spray paints will have a primer included in the product so double-check what kind of paint you have.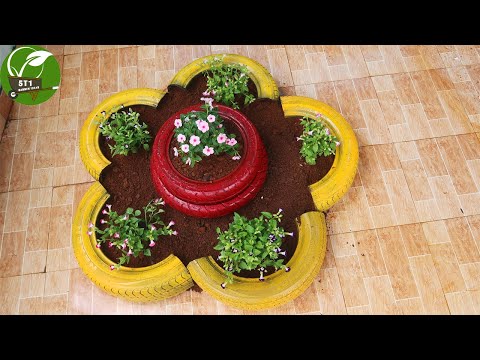
When choosing the paint, make sure to choose a non-toxic outdoor paint. Materials for industrial and marine use will be durable, but any outdoor latex or acrylic paint will work.
While you can use large brushes to paint your tire, spray cans are the easiest way to spread the paint evenly. When deciding on a color to paint, think about where you will be placing your tire and whether it matters if it heats up in the sun. For warm locations and delicate plants, lighter colors are the best option to keep the temperature of the soil consistent.
You can use acrylic paint as long as it is made for exterior use as your tire will constantly be faced with the elements. Regular acrylic paint is not entirely waterproof and requires a sealant. Keep it simple and avoid the extra step by purchasing paint meant for outdoor use. While acrylic paints can be more expensive, they maintain greater flexibility when they dry, making them more resistant to cracks and flaking over time.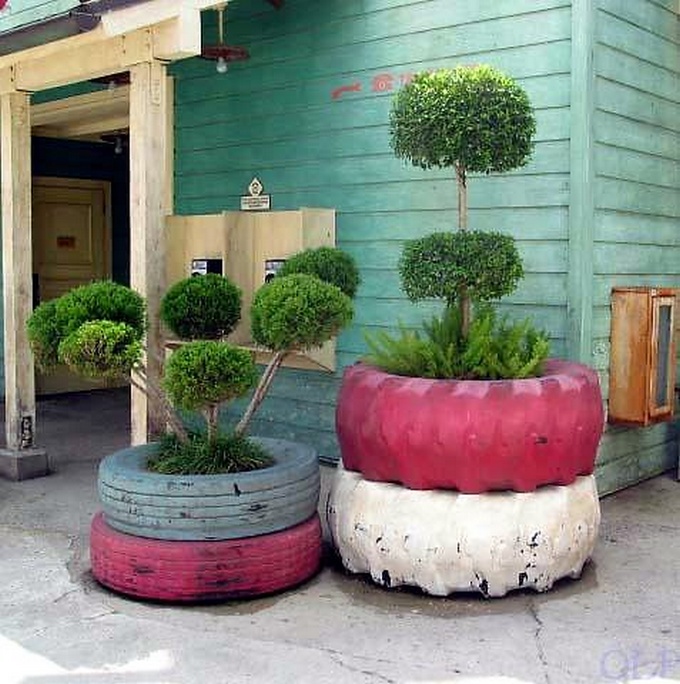
Once your tire is painted you are one step closer to having a nice looking planter. Decide whether you want a single tire in a permanent location, stacked tires, or a raised tire planter. Depending on your choice, you will want to put something on the bottom of the tire.
If you plan to leave your planter in a fixed spot where there is already earth, you do not need to put anything in the bottom. If the planter will remain in a spot with no earth beneath it, you can place some straw or cardboard at the bottom before adding dirt. Poke some holes in the cardboard to ensure airflow and water drainage.
If you plan to stack multiple tires to make raised beds, you will need to have a sturdier base. A plywood plank cut into a circle and drilled to the tire is a good option for a secure foundation. Once again drill holes into the plywood so that water does not accumulate. If you plant to stack many tires, it is a good idea to screw them together to avoid accidents.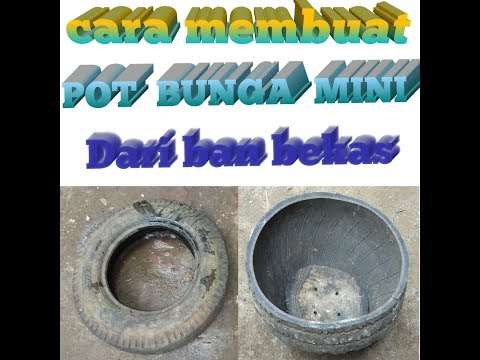
Now that we’ve looked at some common questions about appropriate materials, it’s time to dive into this DIY project.
The first thing to do is to get a tire for your project from one of the options suggested above. Clean your tire properly, and make sure it is dry before you start to paint. If needed, use a primer. Once the primer is dry, paint the tire with your preferred color. Feel free to add patterns and designs.
Decide if you want your planter to be in a permanent spot on the ground or if you want to raise it on a platform. The advantage of a platform is that you can move the planter around as you please. If you use a platform place a layer of cardboard or plastic with holes so that water can drain out.
Next, simply add soil and decide what you will plant in your new planter!
For an extensive description with photos of each step, check out this great guide.
Now that we’ve gone through how to make a basic planter, it’s time to look at some variations.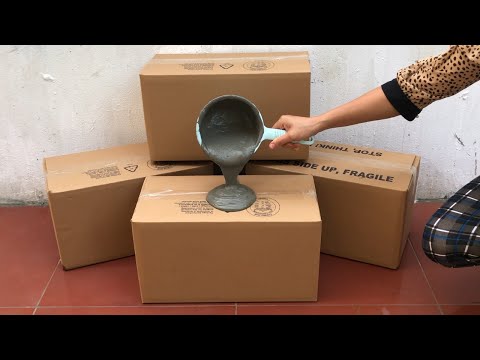 How about hanging your planter? If you have a sturdy tree or railing this could be a good place to hang it. Of course, you can also drill hooks into a wall. For a rustic look, you can use a rope tied to your tire. However, for something more secure, a chain is ideal.
The same initial steps to make a basic tire planter must first be followed. Find a tire, clean it, and choose if you want to paint it. Depending on where and how you want to hang your planter, choose the tire size accordingly. This is a good place to use smaller motorcycle or ATV tires.
When your tire has been cleaned and painted, drill some holes in the bottom half so that rainwater does not accumulate. You can put a layer of porous material such as cloth so that the soil does not fall out.
Next, drill a hole in the center at the top of the tire to insert an eye bolt, securing it with a nut on the inside. If you plan to use a rope and a solid knot, you can skip this step. From the eye bolt, attach your chain which can hang from a hook or railing as desired.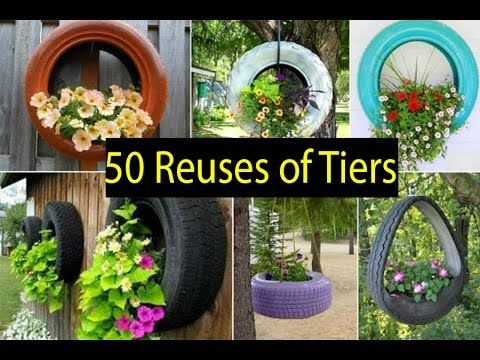
Once your tire is hanging in place, fill the bottom with topsoil. Then, plant your flowers and your hanging tire planter is ready!
Also, see this guide for making a hanging planter.
Rubber tires are made up of a large number of components, many of which are indeed toxic. This is why it is difficult and expensive to dispose of old tires. Therefore, using tires for DIY projects has lots of benefits since they do not need to be brought to a dump where they will be burned, leaching toxins into the air.
Both sides of the debate have many arguments and are ultimately inconclusive. While you can surely find many people who would refuse to use tires to grow edibles, there is no straight evidence that they are harmful. Accordingly, it really is a personal decision and risk assessment.
Tires do eventually begin to leach certain components into the soil. However, these chemicals would end up in the air if the tires were to be burned during disposal.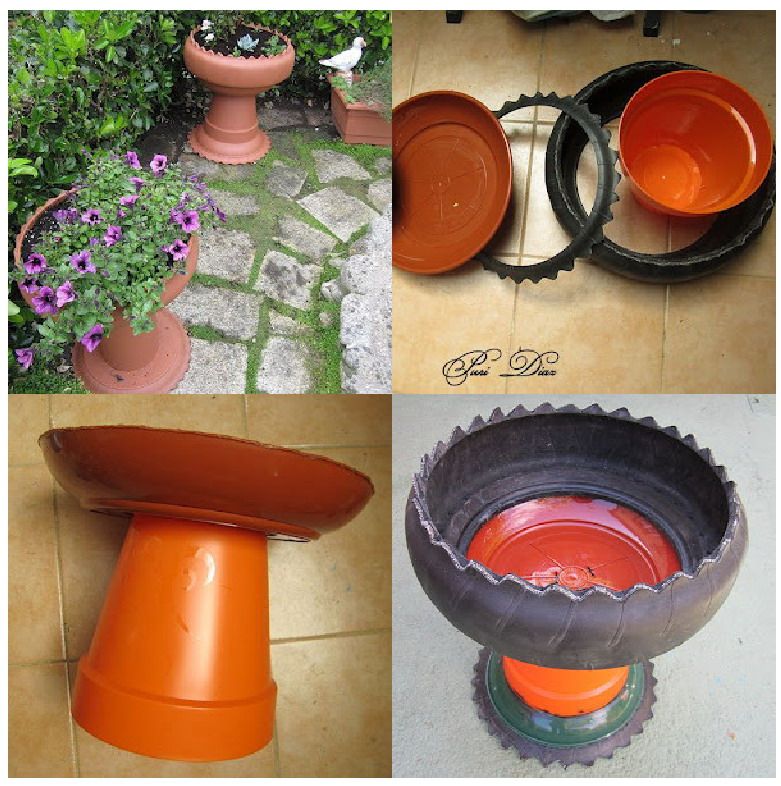 Generally, it is understood that it would take decades for the tire to really begin to degrade. At that point, it is also not certain whether the molecules released would actually make it into the plant.
A good compromise if you plan to use your planter for edibles is to rotate them for flowers after a few years. However, if you want to be as safe as possible, simply avoid using tire planters for food plants and stick to decoration!
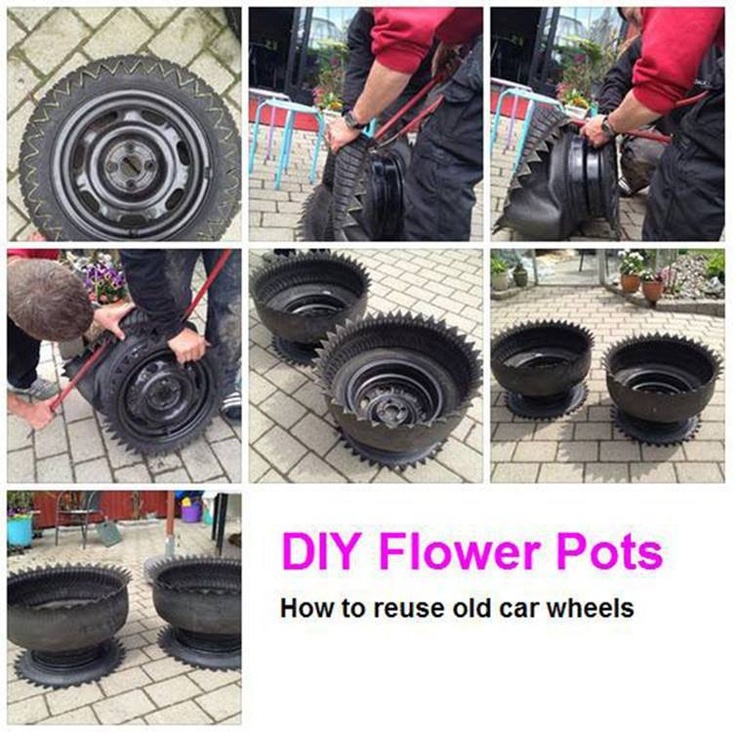
If you want your tire to look a little less like a tire, inside out planters are a unique twist on the standard. Just as the name says, these are made from tires that have been inverted. When choosing a tire to invert, there are a few extra details to consider.
Not all tires can be used to build an inside out tire planter. Older tires will be more flexible and are better suited for this DIY project. Tires can be tested by pushing the curve where the tread meets the rubber sidewall. If it pushes in easily your tire will be less challenging to flip. If not, keep on looking!
Inverted tire planters require the additional step of cutting the tire. To facilitate the process, draw a line where you want to cut. Since you are just cutting the softer inner wall, any sharp knife will do. Make sure to keep safety in mind – gardening gloves are a good idea at this stage.
Once you have cut through the tire, it is time to invert it. Find the soft spot where the curve meets the tread from the first step and push. At the same time, pull the inside cut wall towards you. It might take a few tries but once the tire starts inverting it is just a matter of making it around the circle.
All of these steps can be done if your tire has a rim. You will simply have a pedestal for your planter! Given the force and handling required to invert your tire, wait until this step is complete before properly cleaning and painting it.
Visit felderrushing.net to see detailed photos of each step to make sure everything goes smoothly!
Not only can you use tires to make decorative planters for flowers, but you can also use them to set up a vegetable garden.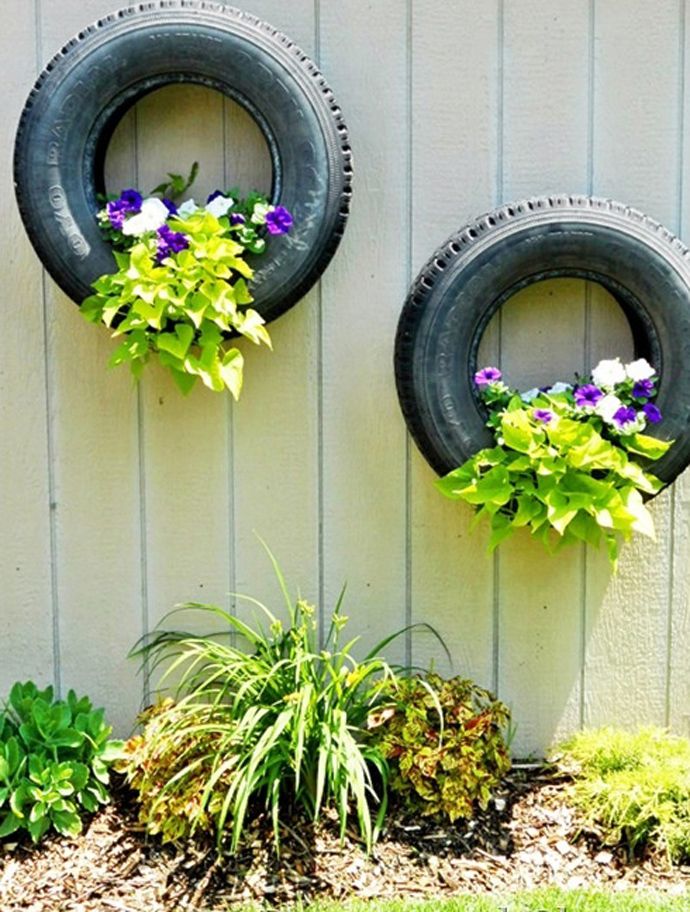 As mentioned above, since the tires are not being burned, the likelihood of toxic elements entering your vegetables is very low and would take decades. Rotating tires for different uses as well as lining them can be good ways to eliminate any risk.
There are quite a few benefits to using tires for your vegetable garden, as well as some considerations to keep in mind for maximum results.
Building raised vegetable gardens from lumber can be quite expensive so recycling tires is a great way to save some cash. As well, by raising the planters, you will avoid some ground pests and reduce weeds. Raised tire planters are especially useful for gardeners with back issues or decreased mobility as they don’t require constant bending or kneeling.
Tire planters can be a huge advantage if you live in a place with hard-packed soil. Plants can have difficulty extending their roots into these soils, whereas you can fill your planter with topsoil and compost and raise it to the height you desire by adding extra tires.
If you are painting your planter, it is important to use lighter colors if you want to plant vegetables that require cooler soil. Black tires will absorb the sunlight and heat the soil, which is a benefit for crops such as potatoes, peppers, and carrots but can easily ruin others. Since the soil will remain warmer than ground soil, tire planters are a great way to start planting earlier in the season. Common gardener frustrations such as frost won’t be an issue as your soil will stay protected.
Besides using your tires for DIY planters, a stack of tires can make a great compost bin. Stack tires until you reach the height you want. Once your bin is full, remove each tire one by one while you use the compost and begin stacking your next bin.
Paint your planter light blue to hold more delicate crops such as lettuce.
Separate your vegetables and herbs to make watering and picking extra simple.
Layer your DIY tire planters to create a tiered look.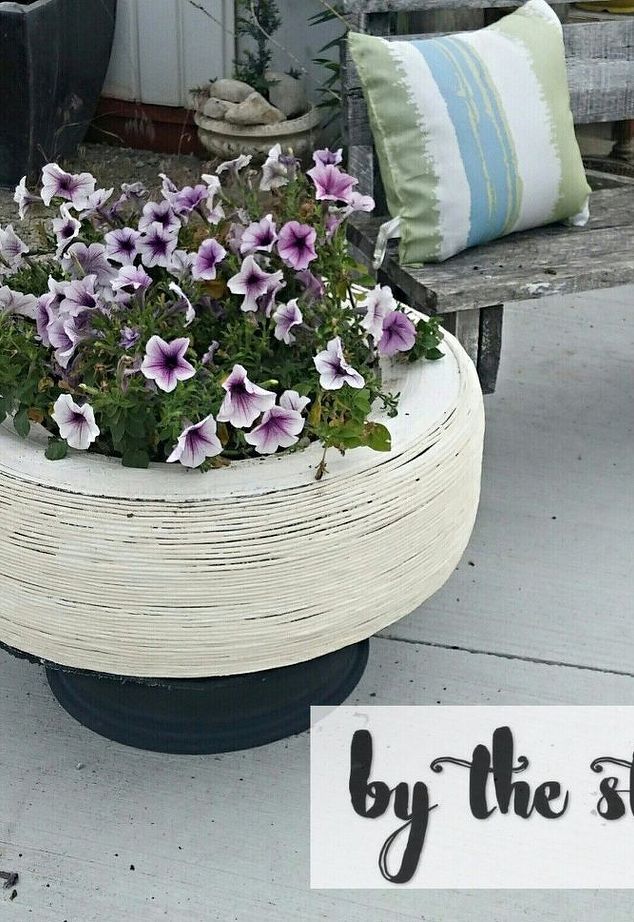 Use bright colors to complement your flowers.
Tread marks can add an extra pattern to your painted tires.
Tiered tire planters can also create low wall partitions between separate parts of your garden.
If you have plenty of tires, create this fun pyramid shape. Make sure to leave space for your flowers to grow and receive sunlight.
Think about using different sizes of tires to create a quirky look.
If you want to keep your planters low to the ground, lay them side by side with different flowers showcased in each.
A single tire planter can brighten up any corner of your garden if you fill it with colorful flowers.
No need to stop at flowers – succulents are a great choice for filling your DIY planter.
Large tractor tires make the perfect base for small bushes.
Smaller tractor tires are great to use as individual flower pots.
If you have a large tractor tire, fill it with plants and make a flag stand.
Place inverted tire planters on top of regular tires to create a cool look.
A simple inverted planter painted in a solid color looks like a star-shaped pot.
Get creative by painting your planter in different colors for a petaled look.
Inverted tire planters can also be stacked to create layers.
No need to worry if your tire still has a rim. Your inside out planter now has a pedestal!
Stacking tires for your DIY planter is a great way to make all your plants visible.
A single stack of tires can make a great focal point for your entrance.
If you have lots of tires, why not create a wall?
Stacked tire planters near your balcony make it easy to water your plants from above.
If you’ve always wanted your very own wishing well, look no further! A few stacked tires with the right paint job will do the trick.
Patterns and designs are a great way to add life to your recycled tires.
Anywhere you can attach a hook makes a good home for a hanging planter.
Decorate stone walls with brightly painted hanging tire planters.
Bring a brick wall to life by painting it in pastel tones and hanging planters.
As long as your plants are happy, you can fill your new DIY planter to the brim!
No need to go overboard with different flowers. A simple plant will look great.
Make sure to have some fun while doing your DIY project!
Feel free to leave your tire paint free and natural, the bright flowers are sure to compensate.
A solo tractor tire is a great piece to display some blooms.
Bamboo walls make a great spot to hang your tires. Fill them with flowers and greenery to brighten up your space.
Simple stacked tires make a great home for creeping plants.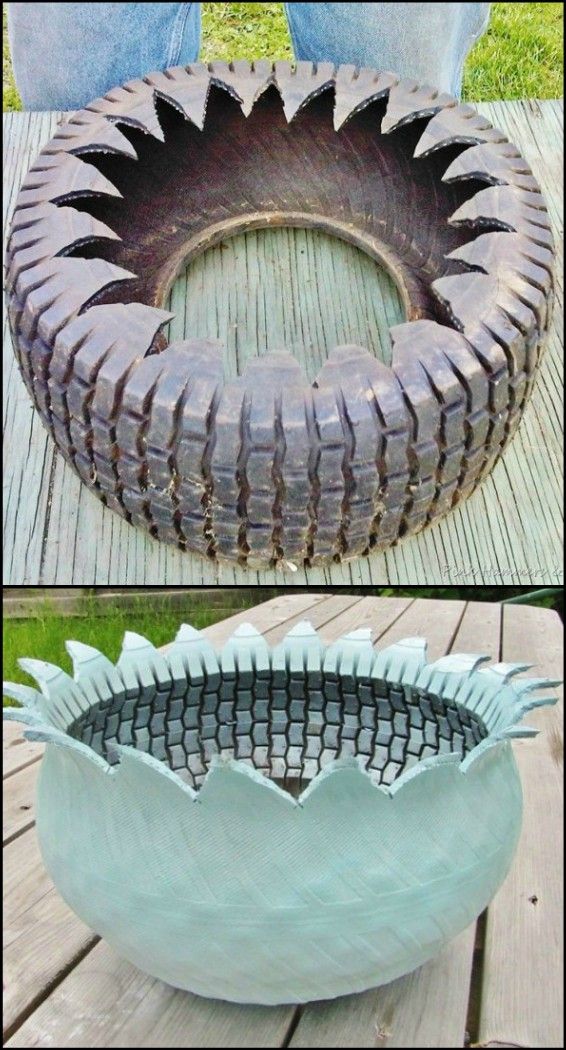
If you are motivated, the options are truly endless. Tires decorated as sushi rolls, animals, teacups, and wishing wells are just some of the multitude of DIY projects you can do with recycled tires.
Depending on the style of teacup you want to make, you can use an inverted tire with a rim, or stack two tires to make your base. You can get creative with the handle; for example using strips cut from a tire, plastic, an old garden hose, or a hardened rope. Simply screw the two sides at the level you prefer.
Check out these two videos for different takes on teacup designs.
A very detailed approach using stacked tires.
A simpler teacup using an inverted tire with a rim.
If you want to create a design that resembles a pot instead of a flat tire, be sure to use a tire with the rim still on. Then, follow the same steps as for your inverted planter with the rim acting as your stand.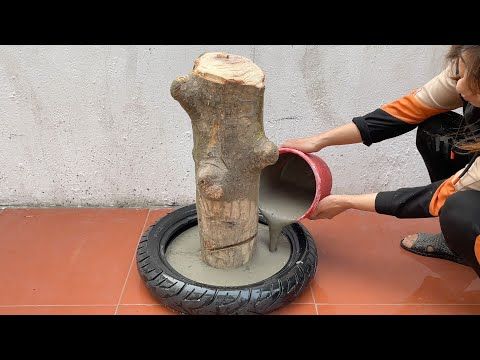
Bring the tropics to your garden with these DIY hanging parrot and toucan tire planters.
Who knew what a knife, some green paint, googly eyes, and determination could accomplish?
Make sure you have a sharp knife and draw your cutout lines when attempting these floral designs.
Stone walls can be the perfect backdrop for your tire wall. Secure everything in place to avoid any mishaps.
Did someone say swan lake?
Cut your tires in half to make this flower-shaped bed.
It’s tea time!
by Addicted 2 DIY 92 Comments
Sharing is caring!
Hey there everyone! Earth day is coming up next month, which means it’s the perfect time of year for people start thinking of ways to reduce, reuse, and recycle.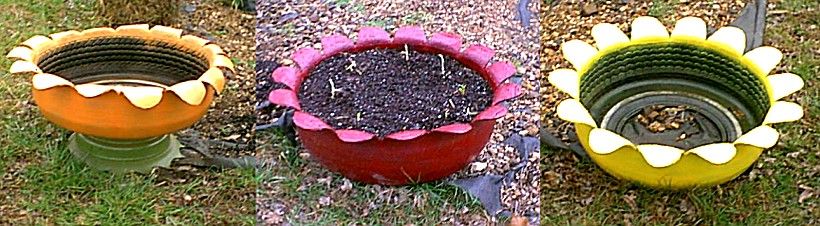 I love the challenge of coming up with ways to reduce waste. If you don’t believe me, you should see my scrap wood pile. I hate the idea of throwing it away when there could be a great project just begging to be built! To build this tire planter, I was able to not only recycle an old tire from my local Discount Tire, but I was also able to dig into my scrap wood pile to complete it!
Here’s what you’ll need to make this tire planter:
I grabbed all of my materials to figure out how I was going to build the planter.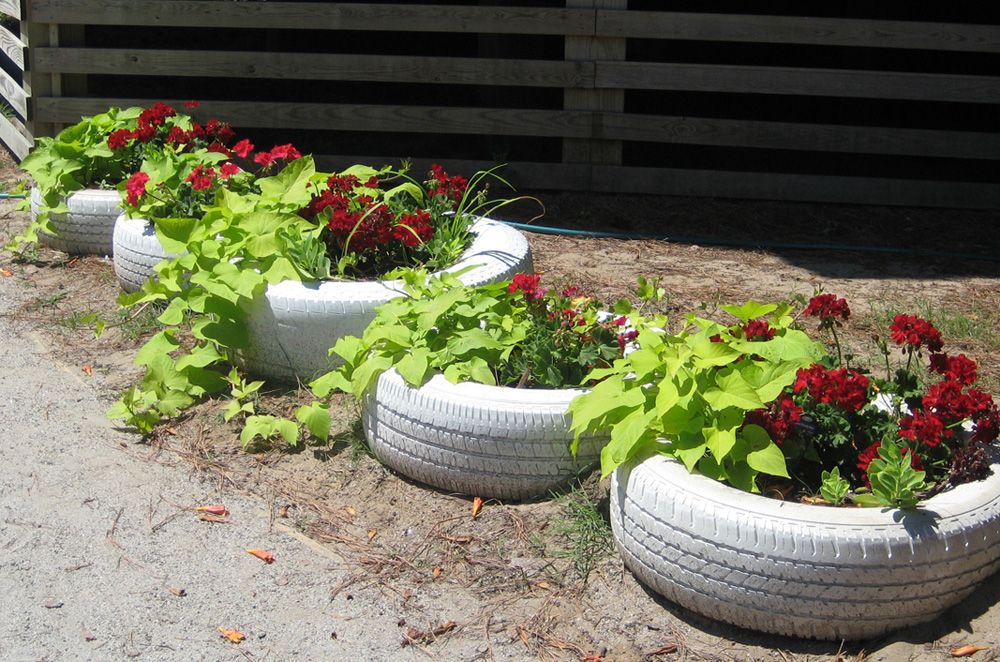 I started to use 1×3 wood for the legs, but they just didn’t have enough substance to them, so I grabbed a 4×4 from my scrap pile and cut three legs from it. I happened to have some wooden spools leftover from another project, so I stole the end off of one of them to make the base for my planter. I also bought a plastic planter tray to keep the wood from being wet constantly from the flowers.
I lined up my spool on my tire and traced around the tire to get the proper diameter for the base. I wanted the diameter to be about an inch smaller than the tire all of the way around. If you don’t have a wood spool, you can easily do this with a piece of plywood.
I grabbed some nuts and bolts from our hardware stash and figured out where I wanted to drill my holes.
Using a 3/8″ drill bit, I drilled four holes through the plywood and into the sidewall of the tire. I pushed my bolts through and flipped the tire.
It was a little tough to get to the bolts to attach the nuts, but I found that standing on the inside of the sidewall pushed the end of the bolt through enough.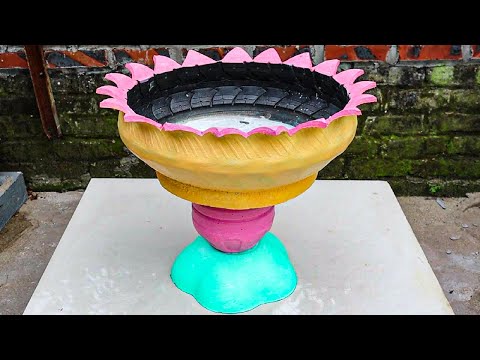
Then I ratcheted all of them tight.
Next it was time to attach the rope. I used my hot glue gun and some super glue and started gluing the rope on from the bottom edge of the wood base. I alternated the super glue and the hot glue to ensure good adhesion onto the tire. The super glue gives the rope a permanent hold to the tire, and the hot glue holds everything in place while that dries.
I kept working my way around the tire, trying to keep the rope tightly wrapped. This step takes a little bit of time, so I ended up taking the tire into the house and finishing it up while I watched TV.
Figuring out where to attach the legs was tricky. I’d never built anything with only three legs before. I ended up finding the center point and positioning the legs in a triangle at the center, then marking the positions with a pen so I could place them after drilling holes.
I needed this base to be really strong to hold the weight of the tire and the flowers I put in it.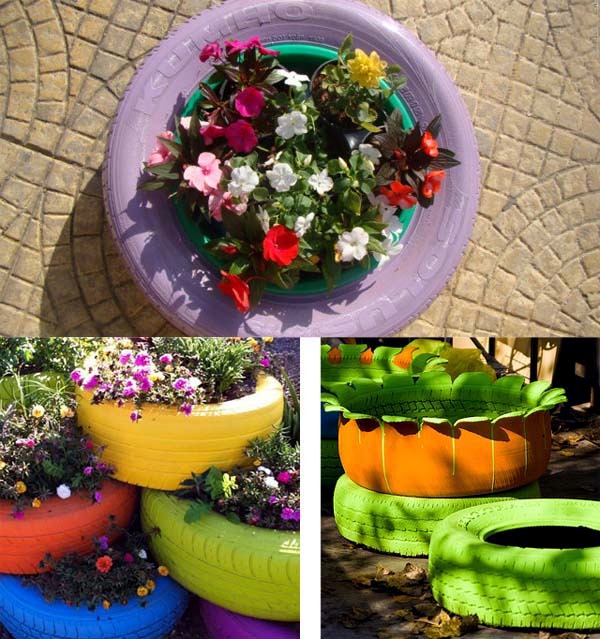 I drilled 1 1/2″ pocket holes into two sides of my 4×4 legs.
I glued up the legs and then attached them to the wood bottom using 2″ pocket screws. If you don’t have a Kreg Jig, you can also use angle braces.
Once the legs were attached and all of the rope was glued on, I sanded the legs and applied weatherproofing stain. I didn’t take a picture of this step, but I used Behr tintable weatherproofing stain in Padre Brown. A sample sized can is really all you need.
I bought a pot of mixed flowers from my local home improvement store and it fit perfectly inside the tire. I love the idea of flowers, but I’ve also thought about making more for fresh herbs or strawberries! The height is perfect to keep the bunnies around our house from eating everything.
I absolutely love how the tire planter turned out! I had struggled with different ways to build this for weeks, but the rope idea finally popped into my head and it came out better than I could have imagined.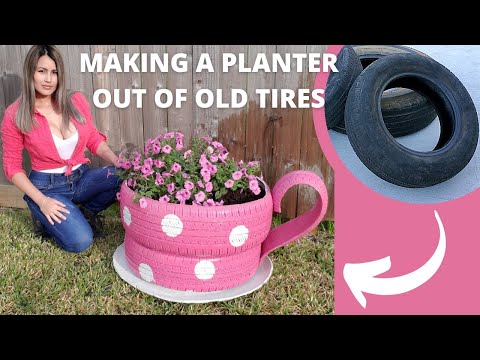 Truth be told, my husband hated the idea of me doing a project with a tire, but once he saw the finished planter he really likes it! To keep up with the upcycling spirit, I also built a tailgate bench using an old ’55 Chevy tailgate that I’ve had lying around. I knew it would be the perfect compliment to the tire planter! I’ve also shared the step-by-step tutorial for that project.
Have you ever created any projects from recycled tires? I’d love it if you shared them! It’s always fun to see what others can come up with. If you’re looking to build this project or others with tires, definitely head to your local tire shop. They’d be happy to help you turn old tires into new creations! You can even check out how I recycled old tires for Christmas!
SaveSave
SaveSave
Filed Under: Crafts, Projects, Projects for the Home
How to make a DIY tire flower pot .
Do it yourself in your country house or at home a flower pot from an unnecessary car tire.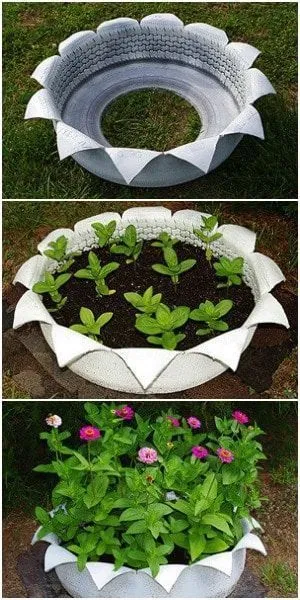 You can put such a planter both on the ground and hang it in the air.
Another fun and easy creative recycling project for car tires involves making beautiful flower pots out of them. nine0003
Pots made from this material look great. Outwardly, they are executed in such a way that from afar no one will ever say that such pots are made of tires.
This craft can be placed on the ground or hung in the air.
First you need to find your tires. Or at least one. If these are not available, you can simply ask your friends for them. The tire size you need depends on your project. But it would be best to start with a small, but not too small, tire.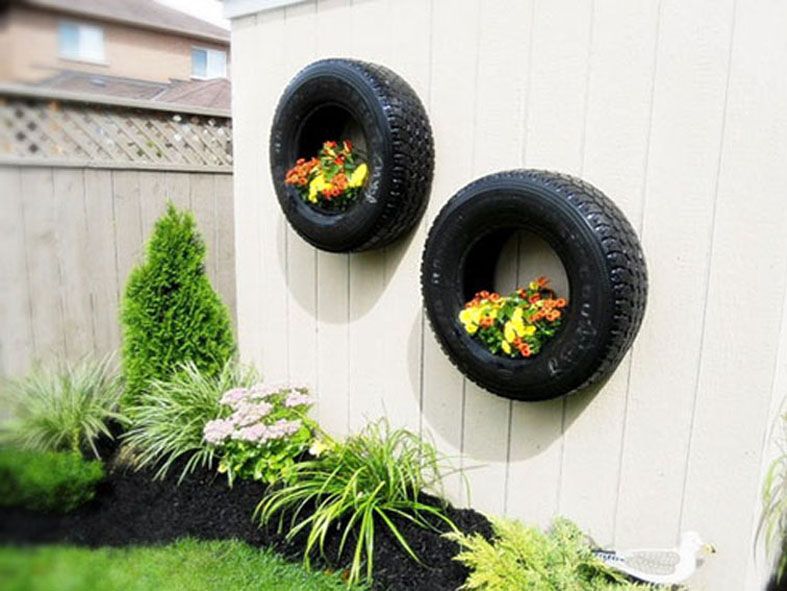 As soon as the first moment is passed, the main thing remains - to make the pot itself. But remember that you need to do everything with gloves so as not to get your hands dirty. Now take a long thin knife and start carefully cutting off the top with a sharp wave. nine0003
Simply put, make cuts in triangles, the base of which should not exceed five centimeters. This can be calculated with a ruler, or just by eye. It is very important that the notches are exactly this shape, then it will be easier for you to turn the tire inside out.
Make sure you cut the tip completely into a sharp wave. If something is not cut, cut it. But in no case do not cut off a piece of rubber! By the way, if it doesn’t work with a knife, then you can use scissors. They are safer. Then remove the cut off top and set it aside. Don't throw it away as it will come in handy later. nine0003
Now carefully wipe the inside of the tire with a dry or slightly damp cloth.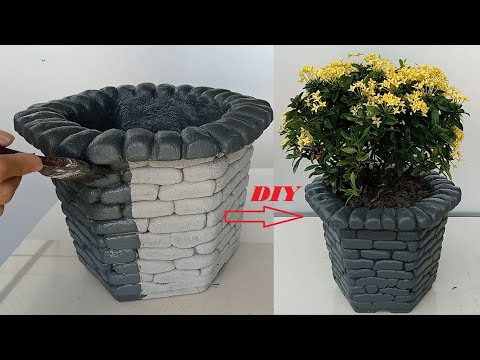 If it is completely dirty, then just wash it and let it dry, and then carefully turn it inside out. It turns out that the corrugated side is inside.
If the rubber is very tight and you can't get it out, then there is a little secret. You just need to lightly press your knee inside and pull the edges of the tire towards you. That way she'll get over it faster. nine0003
Once the tire is turned out, you will need the piece you cut off earlier. But first, take a brush with paint and paint the inverted tire well. This must be done both outside and inside. Once this is done - take a piece of wire, or any other metal and durable mesh.
Cut it so that the diameter of the mesh is slightly larger than the diameter of the cutout on the bottom of the tire. Place a piece of mesh on the bottom of our pot, after pouring glue or liquid nails under it, and firmly glue the piece that you cut out of the tire on top. Make sure nothing is left behind.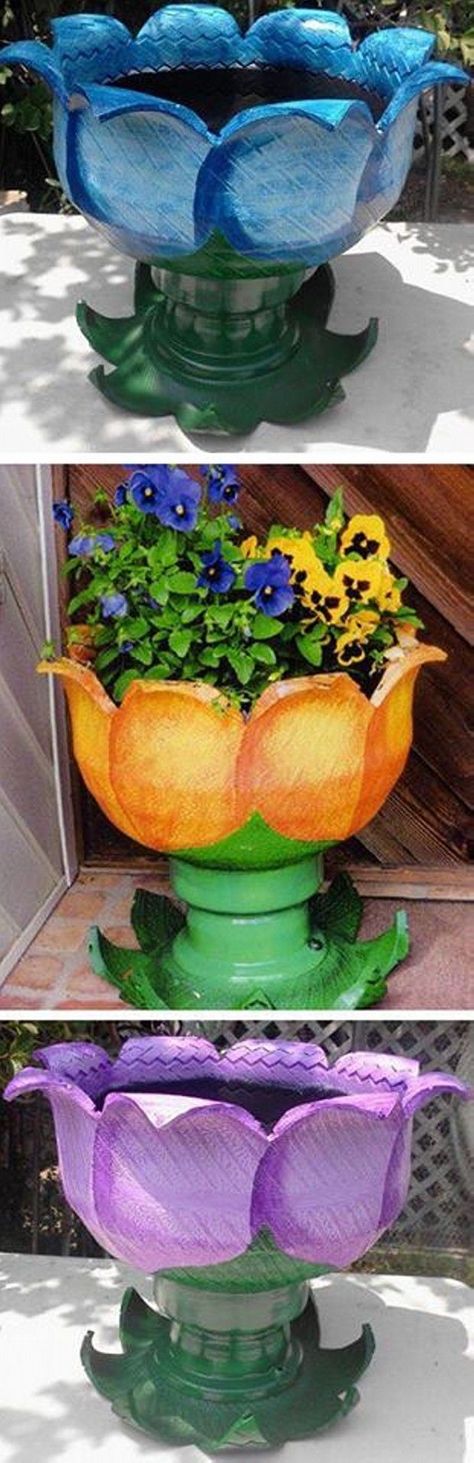 Let dry. This mesh will not only hold the soil for the potted plants, but it will also act as a drain. nine0003
By the way, you can paint your tire either by hand, using a brush and paints, or using a special spray. Both the first method and the second fully justify themselves. The only thing is that in order for the paint to lay down well, it is necessary to apply at least three layers of it one by one.
Once everything is ready - the paint and glue are dry - you can fill the pot with earth and plant plants in it. For example, petunias will look very good in such a pot. In addition, this planter can not only be placed on the ground, but also suspended. But for this, pots made from small tires are more suitable. nine0003
If your pots are made from very large tires, you can use them not only for flowers, but also for other seedlings. For example, for fruits and vegetables.
That's it. Feel free to experiment with different colors, sizes and shapes of pots.
Sometimes you want to show your creativity in some unusual role. For example, decorate a flower garden near the house. To do this, you need to know how to make flowerpots (tires and other available materials are full everywhere). You should not visit expensive supermarkets in search of elite material, because you can pay attention to ordinary tires that magically turn into fairy-tale heroes. nine0003
Content
We recommend that
Old Coarses - Free Clotes - Free Free Coats material. Its benefits are in form. With the help of light movements and imagination, the rubber tire turns into a wide and roomy flower pot. In terms of time, this activity is very fast. It will take the master about an hour to cut out a certain figure with an electric jigsaw or a good knife, paint it and transplant flowers there.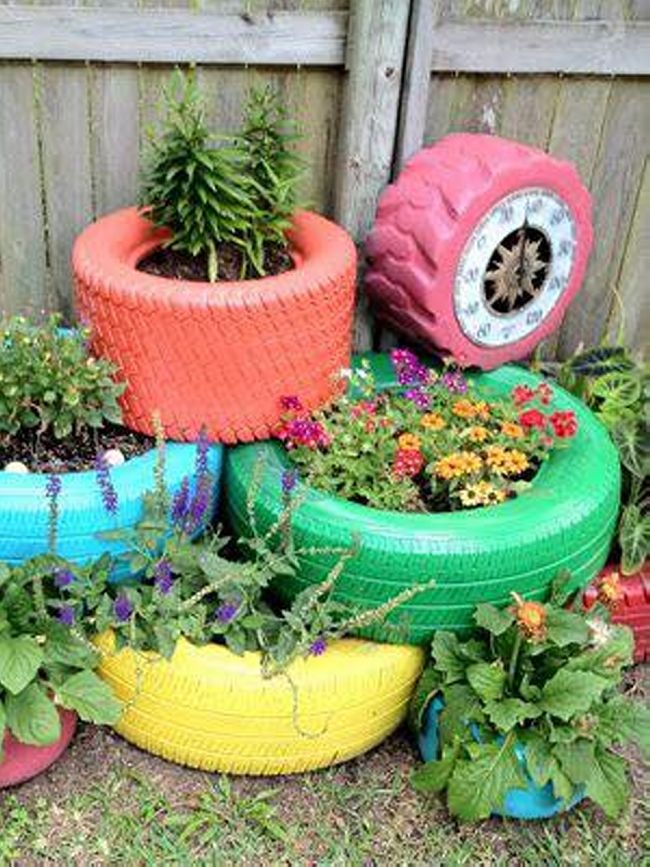 nine0003
Work materials:
It is best to take winter tires without studs, they are soft and easy to deform. Before work, the rubber material must be well cleaned of dirt and earth, so as not to spoil the appearance of the scenery. nine0003
First, consider the algorithm for creating the simplest and most common version of the design of a rubber pot for a flowerpot. This will be a bowl of tire with jagged edges in the form of flower petals.
Place the cleaned tire in a well-lit area and draw a chalk drawing on the side.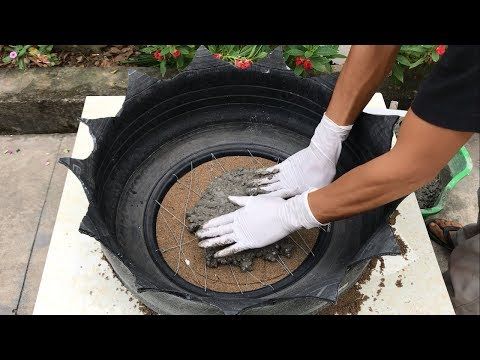 For example, draw petals in the form of triangles. With a knife or jigsaw, cut out the pattern along the contour. After this action, the master makes several longitudinal cuts every 8 cm, and then turns the tire inside out. The last manipulation is difficult, so a man should do it. So that the appearance of the cut edge does not hurt the person, the edges must be carefully sanded. nine0003
For the stability of the product, you will need to take care of the leg. It could be a wheel rim. Then put foam rubber in the middle and fill it with earth to the very top. It remains only to decorate the flowerpot with any elements and paint it beautifully. You can use several tires of different diameters in order to make an unusual pattern out of them.
Tires primed and painted. It is best to use paints of light shades, because the flowerpot will be constantly under the open sun, gradually losing its color. nine0176
The easiest way to design a flower bed with rubber tires is to combine tires of different colors.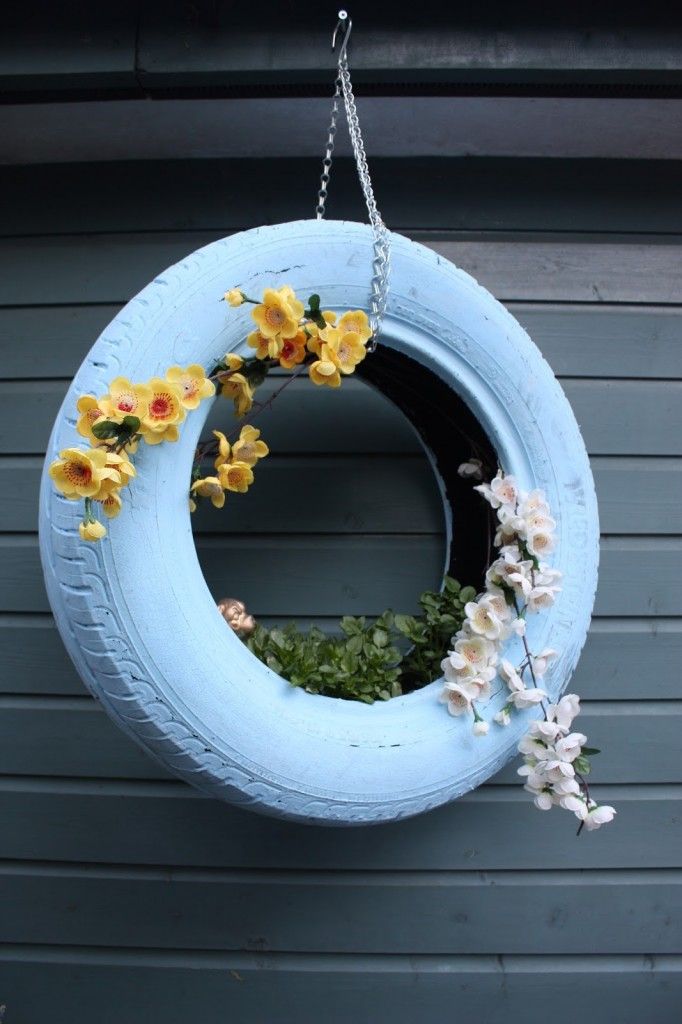 They can be arranged in a row or in a circle, laid in the form of a multi-level ladder. Tires of different diameters look interesting if they are laid one on top of the other in the form of a pyramid.
For the most creative craftsmen, the hanging planter is the perfect choice. To do this, a strong metal chain is attached to the tire and hung, for example, from a tree. Be sure to cover the bottom with dense material. nine0003
The most difficult options are the creation of different figures or household items from several tires. So, many craftsmen with the help of several tires, a pipe and a bent metal ribbon decorate the yard with spectacular flowerpots in the form of a teapot and cups.
A regular tire pot can be decorated with stars around the edges. This is easier to do if you break the circle into 6 or 9 triangles, into which you enter the same ornament.
After drawing, it remains to cut along the contour. If you cut 3-5 waves close to the disk, you can get a flowerpot with smooth shapes.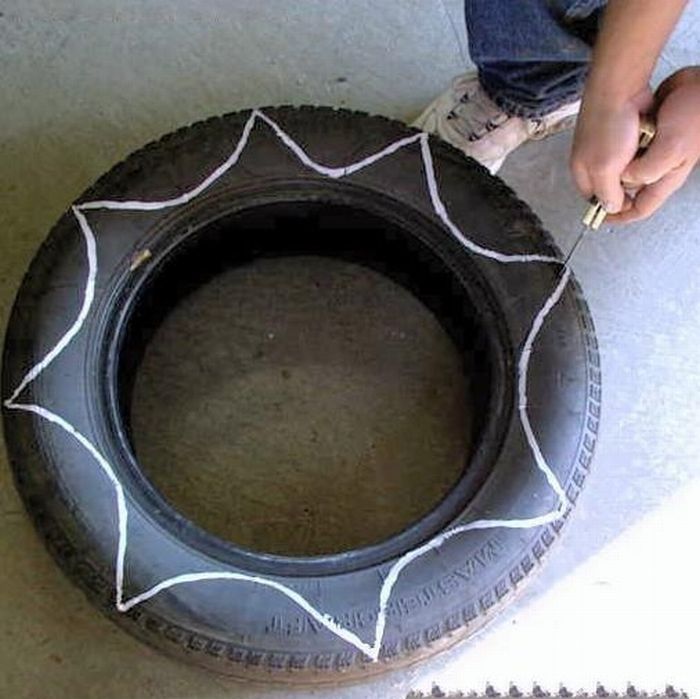 By alternating several deep cuts with short ones, you can complicate the contour drawing a little. Here you need to get used to and dream up. nine0003
If you want to create high products for flowerpots, then you need to take care of his leg. A leg made of concrete and pebbles or other decorative stones looks creative. The process is easy: the master wraps the lower part of the flowerpot (disk) with a decorative mesh or wire and kneads the solution. Cement, water and sand are poured in a ratio of 1:0.5:3, but in such a way that the resulting material has a liquid consistency.
Use a trowel to spread mortar over the disc. To give the leg a more spectacular look, it is necessary to decorate the solution with small pebbles or multi-colored fragments of broken glass. After a while, glass and pebbles are washed with water to wash away the dirt that has stuck to them. And in order for the concrete base not to crack under the sun's rays, over the next 3 days it needs to be moistened with water from time to time. nine0003
There will be no limit to children's happiness if a turtle, swan or other fairy-tale creature appears near the house. To create a turtle, you will need tires and a tread. The body will be 1 whole tire. The protector must be cut into 4 parts and attached to the sides. This is what the paws will look like. You can fasten them to the main body with wire staples.
A small piece of rubber is cut into a tail, and a piece of plastic pipe is cut into a turtle's neck. A few old newspapers should be crumpled into a ball and attached to the neck with tape. For a complete resemblance, a straw hat is put on the head. The final touch will be the coloring and drawing of the eyes, mouth, paws. nine0003
Swan - a product for those who have already tried to make something out of tires. The master will need to cut out the neck, wings, head and tail. This can be done according to this scheme (photo 1). It must be drawn on the tire and carefully cut out.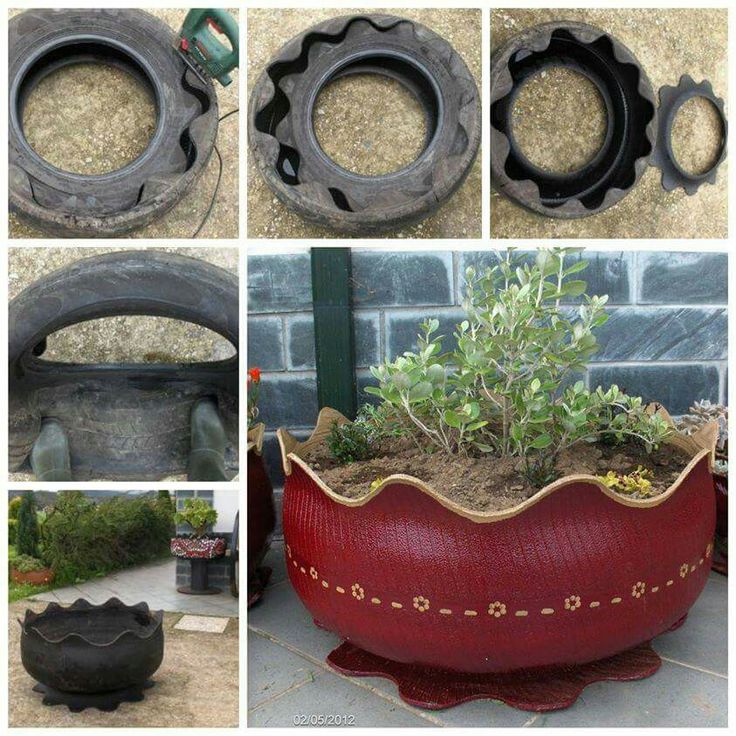 The black outline marks the border of the neck and head, the blue one is the 2 wings, and the red one is the tail. After this manipulation, the product should be turned out.
Separately, make a beak from any material and paint it red. Now you can start assembling the swan. Put together 2 parts of the head and insert a beak between them, strengthen the structure with self-tapping screws. They are best inserted into the eye holes, hiding with circles of black electrical tape. Then the assembled neck with the head needs to be slightly lifted and pressed into the tire, the resulting fold should be fixed with self-tapping screws. Now you just need to paint the beautiful swan white and plant it with flowers. nine0003
So, dolphins, parrots and other birds and animals can be cut out of a tire. The main thing is to think over the scheme, transfer it to paper, and then to the bus itself. Then it's up to the small: cut, fold and fasten, and then paint with bright colors and attach the decor.