How To
A Quick Trailside Lesson
By ATV Rider
May 9, 2014ADVERTISEMENT
 If it is leak-free, you’re ready to ride!
How To
10 Things to Know When Purchasing Used ATV Shocks
How To
Can Your Truck’s Tailgate Handle Your ATV?
How To
Starting Repairs on a 2010 Arctic Cat 400
How To
Sponsorship Lessons from a Pro
How To
Top Quad: Building a Racer on a $3,000 Budget
Repairing your ATV tire is simple. Your ATV tires are prone to rips, punctures, and holes after being constantly attacked by rough surfaces. An ATV tire is an expensive part that owners might need to replace often. But there is a way to patch them instead.
Similar to normal car tires, ATV tires can be patched. They could even last long before they need to be replaced. Ideal for those that want to save money, plus you can do it yourself at home.
Patches may last a while, but they are not a permanent fix. The harsher terrain your ATV is exposed to, the likelihood the patch will end up breaking and then you will need a new tire.
When repairing your tire, it’s not uncommon to patch it. Patching is the process of fixing holes inside of the tire or splits from the sidewall. Plugging is from the outside of the tire and is better for smaller or sharp punctures which needles, nails, and screws cause. It is much easier to plug your ATV tire than patching, providing you have a plug kit.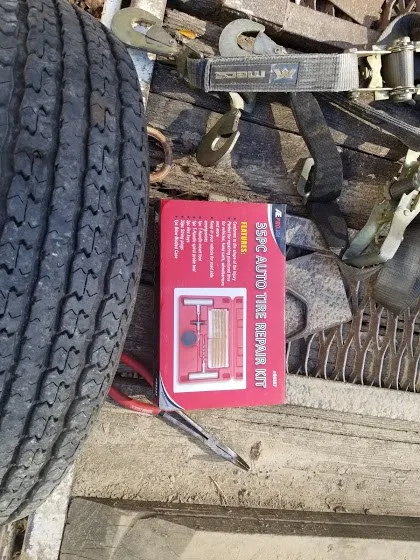
When dealing with tubeless tires, it is simple to repair from the outside using a patch. Keeping the wheel on your ATV, you need a tire repair kit and CO2 cartridges.
Tire repair kits include tire reamers, tire pluggers, plug strings and rubber cement.
To use the ATV tire repair kit on big holes, you need to find the hole and remove any objects that pierce the tire. Be wary of sharp rocks.
Push the tire reamer in the big hole and move it up and down your ATV tire. This prepares it for the plug by cleaning and abrading the hole.
Thread a single plug string into the tire plugger, covering the ATV tire with rubber cement. Make sure to centrally align the plug ring inside the eye of the tire plugger.
Push in the plugger and plug string two thirds into the hole, without twisting.
Pulling out the plugger quickly you will see the plug strings are now on the ATV tire and are plugging the hole.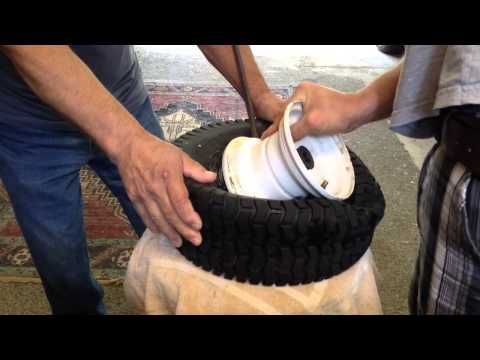
Remove any additional plug material using scissors or a knife.
Use your CO2 cartridges to refill the tire. Once pressurized, use some water to pour on the plug to see if there are any air bubbles. If the bubbles are present, add additional cement on top of the plug for sealing. If you do not have access to water, feel the air with your finger to check for leaks.
If this has worked, you’re ready to get back on adventuring on your ATV!
If this hasn’t worked or your hole is too big, patch the ATV tire from the inside.
Off-road are the core piece of riding gear for ATV & UTV riders
Find out the best look for you
Repairing your ATV tire from the inside is better, as repairs on the outside increases the chance of rubbing occurring.
Start by taking the tire off the ATV wheel. Repairing from the inside is best done at home (or at least practice at home beforehand) so you will know what to do.
Use two tire irons that have flat blades. Here you can maneuver the tire off the rim. First deflate the tire if it is not sufficiently deflated by pushing the center of the tires valve.
Push one flat blade between the ATV rim and tire.
Do the same with the other blade on the other side of the tire, directly in line with it.
Go around the rim and remove the tire away from the edge using the blade until it meets back at the other blade.
Repeat this on the other side of the tire with the other blade.
With big holes in your ATV tire, it’s important that this step is performed correctly.
An ATV tire patch kit comes with a tire marker, scuffer, rubber cement, tire patches and buffer tools.
Mark the spot on the ATVs tire that needs patching by using the tire marker.
Using the scuffer, rub the marked area to prepare it for the new patch.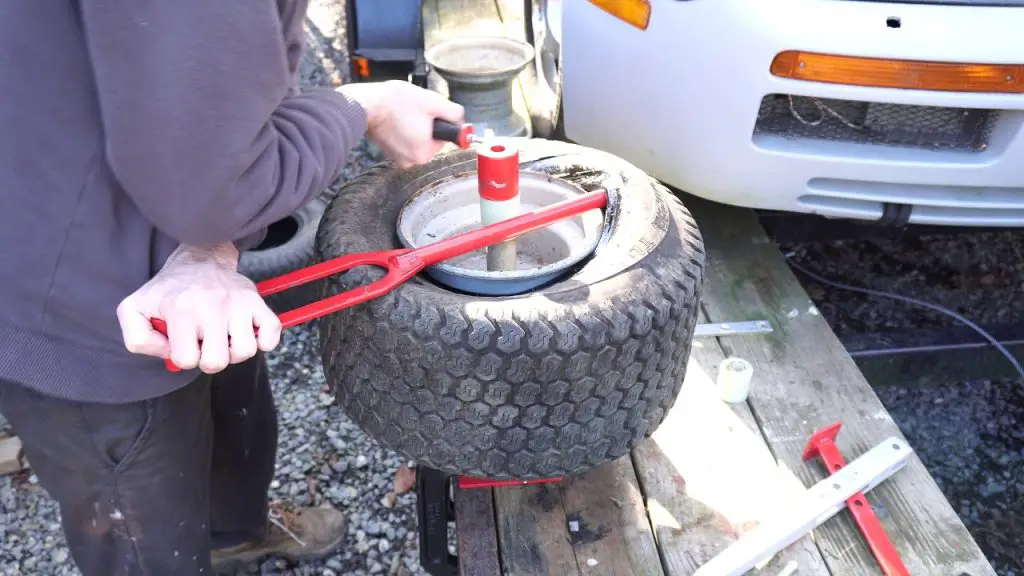 Make sure to remove the rubber pieces if any arise from rubbing.
Use the cement to spread over the scuffed area and hold on until it becomes sticky.
Take off the label from the rear of the patch. Stick it down to the area which you scuffed and added cement to earlier.
With the buffer tool, smooth the edges of the patch and remove any air bubbles. No gaps should be between the patch and the tires surface.
Leave for the cement to dry and the patch is safely installed before putting the tire back on the rim.
Once you are confident the big hole in the tire has been repaired, re-install the tire onto the ATVs rim. This is just the opposite of taking it off the rim. Use the tire iron and lever one side on to the rim, repeat for the other side as you slide the tire back on the rim. Re inflate using CO2 cartridges and enjoy the rest of your adventure!
HIT
ENDURO LIGHT Graphite
the most durable
458 EUR
HIT
ENDURO Camogrey
the most durable
657 EUR
ENDURO Graphite
the most durable
279 EUR
HIT
ENDURO Graphite
the most durable
657 EUR
AQUAMASTER-ZIP LIGHT Camogrey
with central zipper
598 EUR
HIT
ENDURO LIGHT Camogrey
the most durable
458 EUR
AQUAMASTER LIGHT Red
reliability & comfort
438 EUR
NEODRY Black
NEOPRENE SOCKS
17 EUR
11. 90 EUR
ENDURO Camogrey
the most durable
279 EUR
AQUAMASTER Blue
reliability & comfort
647 EUR
-20%
HIT
AQUAMASTER Red
reliability & comfort
259 EUR
207.20 EUR
-40%
HIT
AQUAMASTER Orange
reliability & comfort
259 EUR
155.40 EUR
AQUAMASTER Red
reliability & comfort
677 EUR
ENDURO BF Camogrey
bootfoot waders
528 EUR
ALL SEASON Black
HIGH-ACTIVITY THERMAL UNDERWEAR
69 EUR
ENDURO BF Camogrey
bootfoot waders
329 EUR
MUDWAY Graphite
RELIABLE JACKET
179 EUR
MUDWAY Camogrey
RELIABLE JACKET
179 EUR
NEOSENSOR Camoarmy
SEMI FINGERLESS GLOVES
12 EUR
8. 40 EUR
MUDWAY Red
RELIABLE JACKET
179 EUR
Explore all
03.03.2014
Whether you're on a race track in the middle of a race or on a forest trail known only to you, a flat tire can ruin your plans. And if in a race it can cost you victory, then far from civilization you can get stuck for several hours. Tire problems aren't just limited to ATVs, but with the right tools, they can be avoided or fixed with little effort. We've put together a collection of tips to help you deal with this kind of trouble.
Prevent breakage
In an ideal world, tires would be so strong that they would never puncture or deflate. But at the same time they would have to be very rigid, because of which the ride quality would suffer. Therefore, we can only accept the possibility of a tire puncture. Luckily, there are a number of products on the market that can prevent punctures or allow you to travel even with a punctured tire.
One of the latest inventions in this area is Tire Johnys inserts made of dense foam material that almost completely fills the internal volume of tires. These inserts are easy to install and will outlive more than one set of ATV tires. For four inserts, you will have to pay about 400-500 dollars.
Tire Balls is the name of a unique way that will allow you to travel at full speed with a punctured tire. It is a set of oval rubber balls that are poured into the tires. These balls weigh a little more than Tire Johnys inserts, and the process of installing them is much more complicated. But on the other hand, you can only replace individual balls that will last you for many years. This pleasure will cost 170-200 dollars per wheel.
Small holes
But if you do get a puncture, you can use liquid sealants to heal small punctures up to 1.5 cm long. Tools such as Slime, Quad Boss and High Lifter use a mixture of rubber, fibers and glue to repair punctures in tires.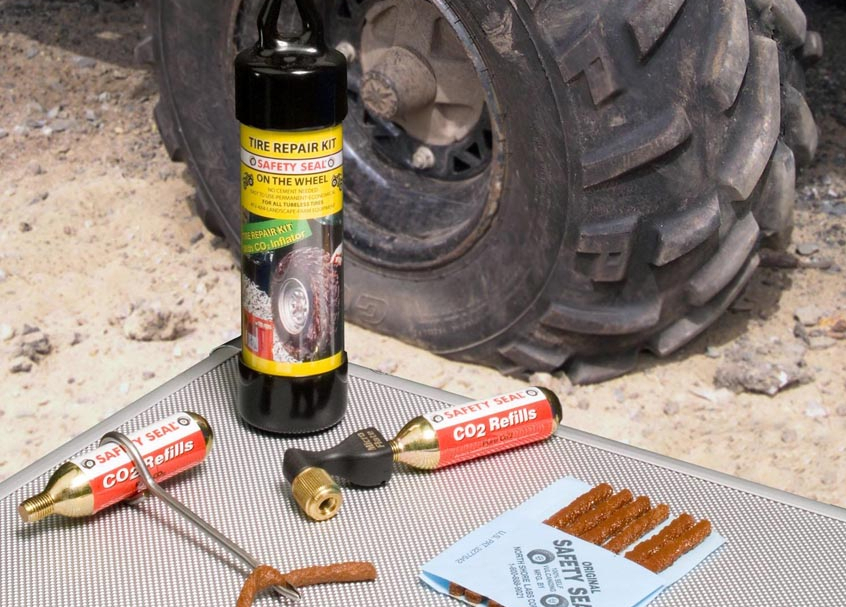 These sealants cost between $30 and $50 a gallon. They can also be used as a prophylactic.
Repair on the road
On almost any trip, the rider of an ATV may encounter a punctured tire, but this little inconvenience should not be the end of your outdoor activities. That's why it's so important to always have the tools you need for repairs with you. And even if you do not use them yourself, you can make life much easier for another driver.
It's easiest to stock up on a dedicated tire repair kit while on the road, such as Slime's Smart Spair Kit, which has some tire patches and a small 12-volt compressor. It costs only $40 and will fit in any luggage compartment of your utility ATV.
For sport ATVs with minimal tool space, you can use the Genuine Innovations tool kit. It includes several patches and a carbon dioxide cartridge that can be used as a hand pump as needed.
Another option is the Kolpin Flat Pack, which consists of two hand pump tubes, hose, patches and all necessary tools that fit compactly inside the tubes. You can mount this kit on a cargo frame or on a bumper, and it will cost $40.
Other ways
More often than not, a blown sidewall of a tire means that its life has come to an end. But, as it turned out, even large holes on the side walls can be fixed with special patches. We did this repair on a Honda 700XX ATV tire and used the inner tube as insurance. We have driven over 100 miles on the retreaded tire and have no complaints about it. Try and retread your tires this way before ordering replacement tires.
Home workshop
Tire work at home requires a good compressor, a set of patches, sealant and the necessary tools to install the patches. Another important device for working with tires is a pressure gauge, which will help you set the pressure inside the tire. Remember that ATV tires have low pressure so you will need a sensitive gauge.
If you inflate the tires just above the recommended pressure, you can reduce the number of punctures, but the ATV will skid more. If the pressure in the tires is slightly lower than standard, their grip on the track will increase, but you risk puncturing the sidewalls of the tires.
August 31, 2017
ATV - great technique, but every ATV must know the simple steps to repair their "beast". These actions include tire puncture repair .
ATV tires are different from car tires. Low pressure quad tires which increases the chance of puncturing or cutting the tire. Every ATV rider should have a puncture repair kit. ATV punctures are more the norm than an emergency. And without tire repair experience, riding an ATV is very difficult.

When leaks are noticed, stop and start looking for a puncture. It is most convenient to look for a puncture by first removing the wheel, but the first stage can be carried out by dismantling the wheel.
If you are unable to locate the puncture, then remove the wheel and lower it into water, such as a puddle, lake, river. If the wheel is already heavily deflated, and the air is no longer coming out, then you need to pump it up and perform the described actions.
In the water you will immediately understand where exactly the air comes from
We take the wheel out of the water. Now you need a reamer, the tool helps to make the puncture surface rough on the rubber. This helps ensure a better bond between the adhesive and the rubber. We act like a file, only the effect is the opposite.
Take a tool to install the patch.