Examine your shipment
Before you accept the shipment you must make sure that your ATV has not been damaged during shipping. You should inspect the box for any tears or oil stain. Sometimes the shipping company may place heavy items on top of these ATV and bend the crate, which in turn may damage your ATV.
If you suspect your ATV has been damaged during shipping you should make sure that the driver sign the damage on the bill of lading. It is important that you note the damage on the bill of lading as shipping companies only reimburse you or the shipper for the damaged incurred during shipping if the driver sign it before they hand the ATV to you. Here at Superior Powersports, we use only the best shipping companies to ship our products and inspects every shipment before it is sent out.
Now your ready for assembly
Removing The Crate
You will first need to disassemble the crate that has protected your ATV. First you will need to take off all of the cardboard that your ATVs was wrapped in. Then you will need to remove the bolts that keeps your ATV from moving around and get damaged. Once you have taken the bolts out, please have two peoples to lift the crate out.
Locating the battery, owners manual and bolts
The unit should come with a bag full of bolts, instructions, and a basic tool set. It is usually located either next to the ATV (On the foot rest) or underneath the seat (the seat has a latch in the back that you have to press to remove) there should also be a box with the battery in it. Some batteries are ready to go, but most others, you may have to put water solution that comes with it in a seperate container and charge up before you can use them.
Putting the front tires on
Once you have located everything you begin to put the wheels on. Depending on your ATV model, some ATVs comes with the rear wheels already attached, some not, and the ATV should be about 90% assembled. Make sure that the bolts on the rear tires are on there on tight in order for the wheels not to fall out during riding. Have someone help you lift the front of the ATV and attach the two front tires. Again make sure that the bolts are on tight and screwed in appropriately in order to prevent them from falling out. There should be a washer and a pin that will go on there. Twist the pin with pliers in order to secure the bolt on the tire. Check the tire pressure for the tires with a tire pressure gauge in order to make sure the tires have the appropriate amount of tire pressure; the tire pressure depends on the size of the tires, it should be listed on the side of the tires.
Attaching the handle bars
Located the handle bars and adjust them to the height appropriate for the rider. You will need to use the Allen wrench to tighten the Allen screws for the four-wheeler. If you do not have an Allen wrench or cant find it you will need to get a hold of one. Make sure that the handle bar height is the correct size for the rider. Depending on your unit you will need to attach the break lever and starter on one side and the thumb throttle on the other side. You can screw this on with a regular screwdriver. Again for safety make sure that they are adjusted appropriately for rider of the four-wheeler. Once you're done go over all of the screws and make sure they are on tight as sometimes vibration from the engine can cause loose screws.
Attaching the front bumper or front and rear racks (some models)
Depending on the your model you might need to attach the front bumper or the front and rear racks. Located the screws for them in the bag and attach them where the manual tells you to attach them. There are many models out there so it depends on what kind of model you have.
Connecting the battery
Now you will need to connect the battery. First make sure that the battery is charged. Some units come with a complimentary battery charger. Most of these ATVs operate with a 12 Volt seasonal battery if not charged regularly these batteries may need to be replaced every 3-4 months depending on use. Like I said earlier some batteries come with small liquid bottles for you to put in the battery. This is not battery acid, its simply a water and salt solution that will make the battery work. Locate the water solution pack open it and attach it to the battery until the liquid drains into the battery. Once you have made sure the battery is charged and ready to go you can now attach the battery. Make sure that you attach the positive post to the positive wire and the negative post to the negative wire. Put the battery into its compartment underneath the seat and screw on the terminals to the appropriate post. Attach the banana shaped seat it its place, the latch should click when you attach it and it should be pretty sturdy.
Your ATV is now Assembled
You are now done and ready to start up your ATV. Before you start up your ATV you might want to change the oil in it as many of them sit in the factory or warehouse for month before they are sold. Since they are mass-produced the factories sometimes use low-grade oil. Changing the oil before your first start can prevent many problems down the road. Once you have changed the oil you are ready to get your new ATV started. Enjoy your ATVs.
 Created with Sketch.
We offer Free Shipping* to most states please check our IN-STOCK category
Sort By: Featured ItemsNewest ItemsBest SellingA to ZZ to ABy ReviewPrice: AscendingPrice: Descending
Quick view
Now: $1,559.89
Compare
Quick view
Now:
$1,629. 99
99
Choose Options Compare
Quick view
Now: $1,828.99
Choose Options Compare
Quick view
Now:
$1,849. 00
00
Choose Options Compare
Quick view
Now: $1,949.00
Choose Options Compare
Quick view
Now:
$1,949. 99
99
Choose Options Compare
Quick view
Now: $1,949.99
Compare
Quick view
Now:
$1,999. 90
90
Choose Options Compare
Quick view
Now: $2,049.00
Choose Options Compare
Quick view
Now:
$2,078. 99
99
Choose Options Compare
Quick view
Now: $2,098.00
Choose Options Compare
Quick view
Now:
$2,128. 99
99
Compare
Quick view
RPS TK150-B 150cc ATV, Single Cylinder Four Stroke Air Cooled, Automatic With Reverse At Affordable Atv, we specialize in everything motorized that goes off-road. We’re a licensed dealer with years of experience and thousands of sales under our...
Now: $1,559.89
Compare
Quick view
Suitable for Age 16+ Years. GET YOUR Vitacci Cougar Sport 125CC ATV FROM THE BEST FOR LESS
AffordableAtv offers unbeatable prices on the Vitacci SPORT 125CC ATV, and it is backed by a 1-year warranty. We will even ship your order right...
Quick view
Suitable for Age 16+ Years. Vitacci Cougar Sport 125CC ATV, Air Cooled, 4-Stroke, 1-Cylinder, Automatic - Fully Assembled and Tested AffordableAtv offers unbeatable prices on the Vitacci SPORT 125CC ATV, and it is backed by a 1-year warranty...
Quick view
Suitable for Age 16+ Years.
Vitacci Cougar Sport 200 169CC with Chrome Rims, Air Cooled, 4-Stroke, Cylinder, Automatic
Affordable Atv offers unbeatable prices on the Vitacci Sports 200 169CC with Chrome Rims, Air Cooled, 4-Stroke, Cylinder,.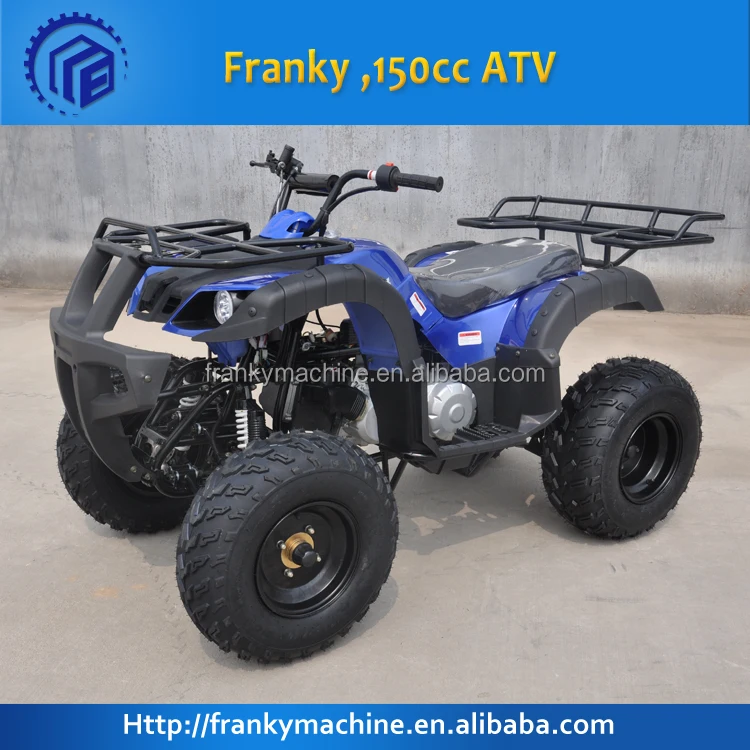 ..
..
Quick view
Suitable for Age 16+ Years. Vitacci UT 200 169CC with Chrome Rims, Air Cooled, 4-Stroke, Cylinder, Automatic When you're investing in motorsports, make sure you get your moneys worth by working with the best in the business. Affordable Atv...
Quick view
RPS NEW 200CC DESERT CRT-1 ATV When you're investing in motorsports, make sure you get your money's worth by working with the best in the business. Affordable Atv offers unbeatable prices on the RPS NEW 200CC DESERT CRT-1 ATV,...
Quick view
RPS ATV CRT200-4A ( sport style 200 atv with aluminum wheels ) - Available in crate
Affordable Atv offers unbeatable prices on the RPS ATV CRT200-4 - Available in crate, and it's backed by a 1-year warranty. We'll even ship your...
Now: $1,949.99
Compare
Quick view
Taotao BULL150 150CC, Air Cooled, 4-Stroke Tao Tao Bull 150 If you mess with the Bull you get the horns. This is a full sized quad suitable for adults and teens. It does still have a governor to limit the throttle if you choose. This quad is a...
Quick view
New RPS UT 200 ATV Deluxe Full Size Adult ATV, Aluminum Rim ,Automatic with Reverse
This RPS utility style is a full-size Adult ATV that has an automatic transmission with reverse, electric start and full suspension.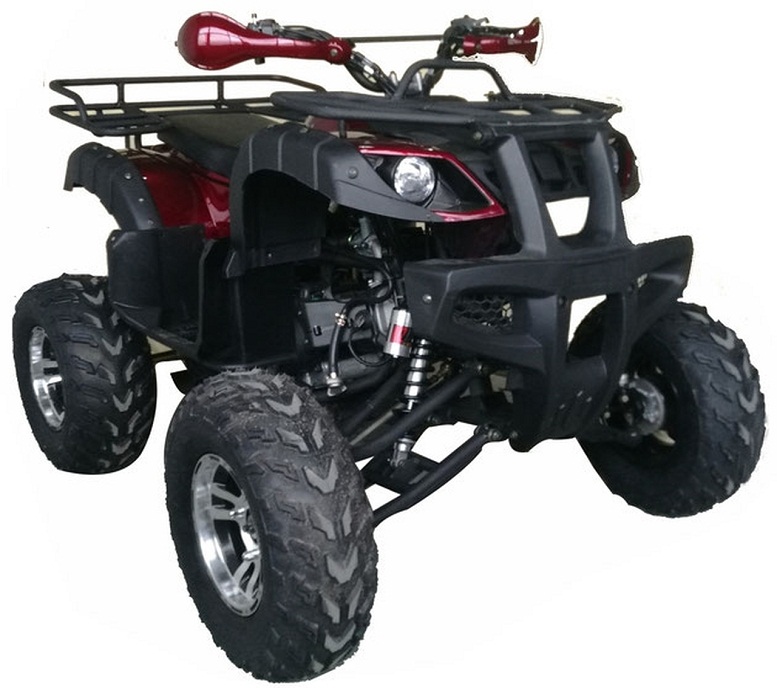 The UT200 -21 is...
Quick view
Suitable for Age 16+ Years. GET YOUR VITACCI PENTORA 150CC CARB ATV - AUTO FROM THE BEST FOR LESS When you’re investing in motorsports, make sure you get your money’s worth by working with the best in the business. Affordable ATV...
Quick view
Suitable for Age 16+ Years. Vitacci Cougar Sport 200 169CC with Chrome Rims, Air Cooled, 4-Stroke, Cylinder, Automatic - Fully Assembled and Tested Affordable Atv offers unbeatable prices on the Vitacci Sports 200 169CC with Chrome...
Quick view
New TK 200 Sport ATV, Alloy Wheels With New and Improved Front Shocks Available in Crate At Affordable Atv, we specialize in everything motorized that goes off-road. Were a licensed dealer with years of experience and thousands of sales under our...
Now: $2,128.99
Compare
Compare Selected
Articles
20 Feb
At first glance, it may seem that assembling a homemade ATV is not an easy task. In fact, everything is much simpler than it seems, with the necessary parts and tools. An all-terrain vehicle of this type is usually constructed from parts that can be found on any unused motorcycle that is in decent working order.
To assemble the machine yourself, you may need the following tools:
• Welding machine.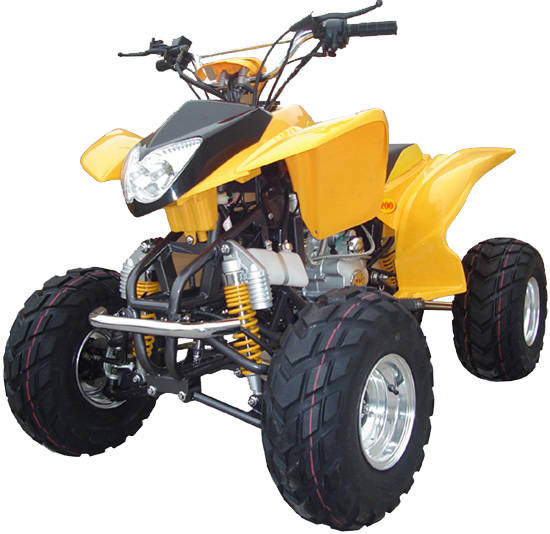
• Bulgarian.
• Good set of ring and socket wrenches.
• Other small tools such as pliers and screwdrivers.
To assemble the ATV, you will need a small room with good lighting and heating. If you assemble in the summer, you can sit under a canopy.
As a power unit for a homemade all-terrain vehicle, engines from Soviet-made motorcycles such as the Ural or Dnepr are suitable. For lighter and more maneuverable equipment, you can use units from motorcycles such as "Java" or "IZH", which were equipped with single-cylinder two-stroke engines.
To simplify the design of the future ATV, together with the engine it is better to use the same transmission and drive with which they were originally equipped. To design a machine with all-wheel drive, you will need to install an additional gearbox. This is extremely rarely used in home-made devices, since it will be difficult to implement an additional node without a sharp increase in weight at home.
The frame for a homemade machine is usually made by yourself from scratch. As a material for the frame, you can use blanks from an old motorcycle. The pipes from which they are made are light in weight and have the necessary strength and flexibility. In extreme cases, you can choose the material yourself. Here the main parameter will be weight. Excessively thick pipes or profiles will make the ATV very heavy and unbearable for fast and maneuverable riding.
Shock absorbers with springs from the same motorcycles can be used as suspension. The suspension itself is made in the form of the letter "A", and is movably fixed on the frame. Shock absorbers and springs should be selected in such a way that they can withstand the weight of the future car, and provide a smooth ride with good handling on bumps and pits.
Partially motorcycle steering can be used, with the addition of two-wheel drive.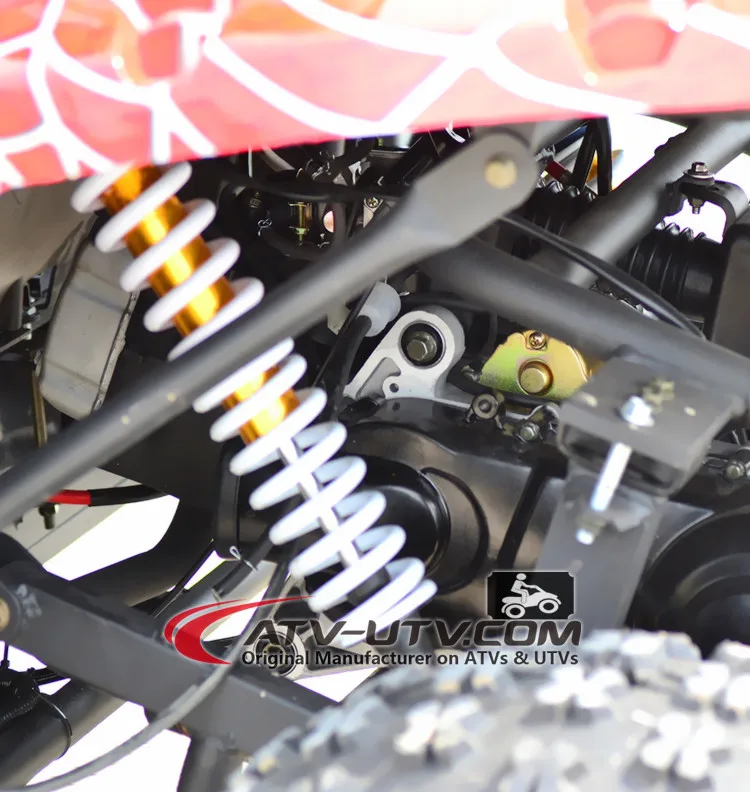 The drive is carried out by adding levers and ball joints to the design, which can be borrowed from the car. The main task of steering is precise and comfortable steering.
ATV wheels are best used from inside the vehicle, as they are wider and will allow for more cross-country ability. The diameter of the wheels must be calculated in such a way that a home-made ATV can develop sufficient speed, and also have a harmonious appearance.
Attachments, gas tank and controls can be mounted on a motorcycle frame that is structurally connected to an ATV frame. In this case, special attention should be paid to the stability of the all-terrain vehicle, its appearance and the convenience of the driver.
Do not forget about installing all the necessary lighting and outdoor signaling devices on a homemade ATV. The headlights, taillights and direction indicators can be used from the same motorcycle from which everything else was taken.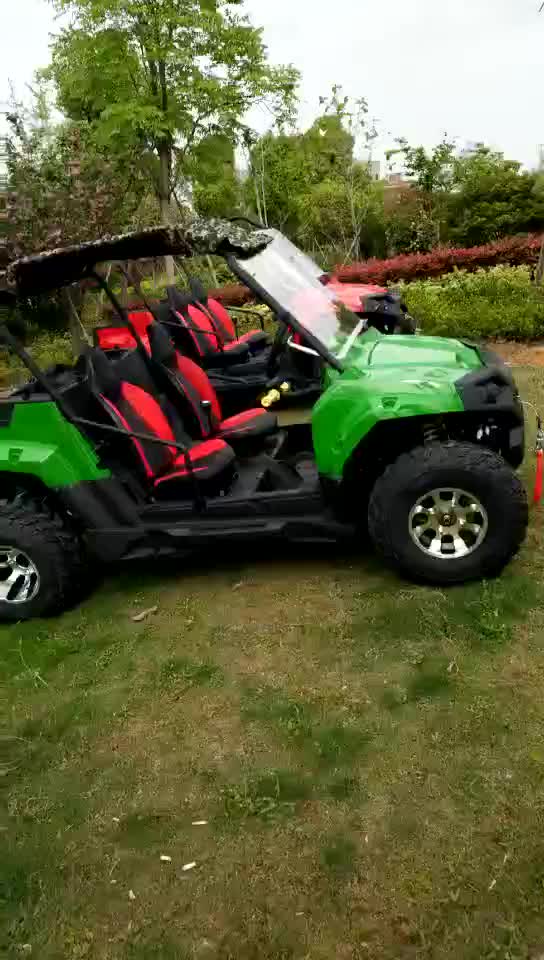
Look how homemade ATV is in action!
Electric quad bike is an off-road machine that gives adrenaline and driving pleasure. Extreme lovers and country residents especially appreciate such vehicles. Electric ATVs are designed for active pastime, entertainment and trips off public roads: on asphalt, unpaved areas, rough terrain.
Electric ATVs of different power, design and functionality are on sale. But if you wish, you can assemble a homemade electric ATV with your own hands. This will require skillful hands, free time, the necessary parts and tools:
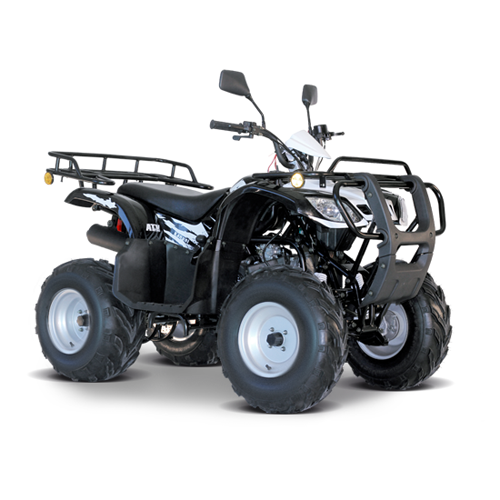
Assembly in the warm season is recommended under a canopy, and in the cold - in a heated room with good lighting.
Typically, a frame for a homemade ATV is built from scratch from existing material, such as parts of an old motorcycle. To create a spatial welded frame, light and flexible pipes with good strength properties are suitable. The main elements can be made from pipes Ø25 mm with a wall thickness of 3.2 mm, and crossbars, struts and other auxiliary parts - from pipes with a diameter of 20 mm.
Thick pipes or a massive profile should not be used - they will add excessive weight to the structure, which will negatively affect speed and maneuverability. When assembling a children's electric ATV with your own hands, it is appropriate to use a frame made of durable solid polyethylene. The rear part, where the transmission parts and the motor are attached, is recommended to be made of light and durable aluminum alloys.
Motorcycle shock absorbers with springs are suitable as suspension.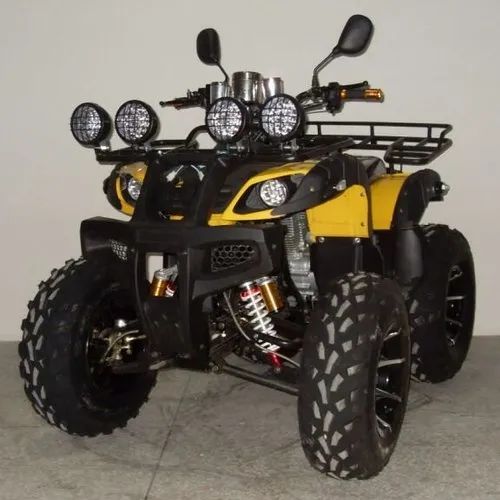 The suspension is made A-shaped and movably fixed on the frame. Shock absorbers and springs must be strong so that they can confidently withstand the weight of the assembled structure. They should also provide a smooth ride and good handling when driving through pits, potholes and other bumps. You can make independent wheel suspensions on 2 triangular wishbones using shock absorbers from Oka or another car. The levers can be welded from round tubes Ø20 mm.
Partially, steering elements (lever and shaft) can be taken from the Ural or another motorcycle, supplementing it with 2-wheel drives. To implement the drive, automotive levers and ball joints must be added to the design. The main thing is that the designed steering provides accurate and comfortable control of the machine.
Wheels for a homemade electric ATV can be borrowed from the car, for example, 15-inch off-road tread patterns. They are wide enough, so they will provide the all-terrain vehicle with the necessary cross-country ability. The diameter of the wheels is selected depending on the size of the structure, so that the assembled all-terrain vehicle looks harmonious and can reach the desired speed. Instead of car wheels, you can take motorcycle wheels.
A motorcycle frame is suitable for attaching attachments and controls. It must be structurally connected to the frame of the electric ATV. When designing an all-terrain vehicle, special attention should be paid to ensuring its stability, a comfortable fit for the rider and a harmonious visual appearance of the vehicle.
The braking system of an ATV needs to be reliable, so it is recommended to use manually operated hydraulic disc brakes front and rear.
The BLDC electric motor, which is built into the rear axle, is ideal for equipping a homemade all-terrain vehicle. But other options are also possible, for example, the use of scooter motor wheels. Motor power is selected depending on the weight of the future structure, the features of its use, the desired speed and traction characteristics. Light maneuverable models are usually equipped with motors with a power of 500–800 W, and more powerful motors are installed on heavier machines and to obtain high traction and speed parameters.
A traction battery is required to power the ATV's electric motor. The best option in terms of price, capacity and service life is a Li-ion or LiFePO4 lithium battery. A controller is used to control the operation of the battery and the electric motor.
The battery voltage must match the voltage of the electric motor and the capacity must be sufficient for the intended travel distance. For example, an electric quad bike weighing 120 kg with a 1000 W motor built into the rear axle and a 60 V, 20 Ah battery can travel up to 40 km on a single charge. The maximum speed of such a machine is up to 45 km / h. The range of an ATV on a single charge depends not only on the capacity of the battery, but also on the weight load on the structure, terrain, weather conditions and other factors.