I headed off from my house one Saturday early in my biking career, drooling with excitement for the mountain bike ride I’d been awaiting all week. Then, before I had reached the trailhead, I noticed my rear tire was significantly low. I felt like I was riding through mud – on the pavement! Remembering a gas station with an air pump on my way to the trailhead, I figured I could easily pump up my tire without a wasted trip back to my house.
But, when I tried to inflate my mountain bike tire… AAACK! Foiled! The gas station had a standard car pump and, new biker that I was, I forgot my bike tires have a presta valve. A week of hungering for a mountain bike ride… RUINED! All because of a puny little valve. Oh, the angst. Do NOT let this happen to YOU!
Unless you grew up biking, most of us are so familiar with car tire valves, we assume it’s the only type of valve. In truth, car tires use what’s called a Schrader valve. It’s about the diameter of a pencil and has a tiny “button” in the center that, when pressed, allows air in or out, but holds air pressure relatively steady when not compressed.
Presta valves, on the other hand, are significantly skinnier than Schrader valves. They don’t have a button in the center of the valve and instead have an attached screw mechanism at the tip. When screwed closed, it holds air pressure in the tire. When unscrewed, you can pump air in or release air out.
Presta ValveCurrently, presta valves are the most common type of valve on high-end mountain bikes. Racers and high performance cyclists prefer them. They’re becoming increasingly common – even on mountain bikes on the low-end of the price spectrum.
Why, you ask. (Perhaps with a significant number of swear words as you kick your flat mountain bike tire or throw your useless Schrader pump.) Why use an uncommon, obscure valve that doesn’t fit a standard pump? Is it just to make mountain bike newbies suffer? Why? Why?
No, it’s not just to frustrate you.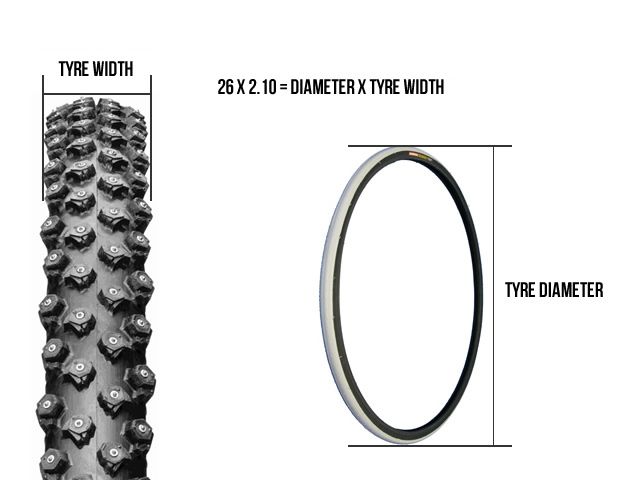
Presta valves are generally more reliable and allow pumping your tires to a more precise pressure. By virtue of design, all Schrader valves release tiny amounts of air over time, requiring occasional “topping off”. Having a cap on the valve can significantly decrease the air loss, but it still means, at any given moment, your tire may not have the pressure you pumped it to.
A casual mountain bike rider may not know what pressure they should be riding or even notice when the pressure is off. But for high-speed riders, tire pressure can have a significant impact on speed, race performance and riding safety.
The screw on the tip of the presta valve allows a rider to close off the tube at the desired pressure and not require a cap. Barring an unnoticed leak or a puncture during a ride, the tire will now reliably hold the pressure you want.
You can inflate a presta valve with a common air pump, such as at a gas station or portable air compressor. However, you need an adaptor that’s ridiculously small in size but huge in importance: a presta valve adaptor.
Here are the steps to inflate a presta valve with a standard pump:
Since more and more mountain bike tires use presta valves, most bike pumps are either universal (meaning one hole works on both presta and Schrader valves) or they have two separate holes, one for each valve type. However, you should always carry a valve adaptor when you ride for situations when a standard pump is the only option. Some cyclists do this by keeping a valve adaptor screwed on their tire valve all the time. Just make sure the valve is screwed closed before putting the adapter on!
I own each of these tools and only recommend things I own and use.
 A couple psi can make your tires sticking or not. Get a good gauge, I highly recommend the Topeak Smartgauge D2, it’s accurate, flexible and easy to use. An Amazon best seller, here’s a link 👉 Topeak Smartgauge D2
 Presta valve adapters are extremely tiny and portable. This also means they’re easy to lose. The good news is they’re fairly cheap. I usually buy a handful at a time and keep one in my garage bike tools and one in my portable tool kit for rides. Having one in your glove box isn’t a bad idea, either!
All bike shops sell valve adapters and some general sporting goods shops and hardware stores carry them as well. You can also buy valve adapters online easily and cheaply.
This simple question actually does not have a straightforward answer. The simple rule is to refer to the tire manufacturer’s specs on tire pressure that are printed on the sidewall of your tires. Consensus of riders is that mountain bike pressure should be 30 psi on the front tire and 33 psi for the rear tire. This information should serve you well if you have only a casual interest in mountain biking and are doing entry-level to intermediate trails two or three times a month.
However, if you spend a significant amount of time on your bike (and an equally significant amount of time dealing with pinch flats, blowouts or skidding out on corners), you’ll want to dive deeper into the science of bike tire pressure. DIY Mountain Bike has a fabulous, in-depth article and survey results examining appropriate bike tire pressure.
The fastest and easiest (and cheapest) way to check your tire is with your hand. When you squeeze it, it should be hard in the center with only a tiny bit of give farther out on the tire near the treads. A hand test, however, is – not surprisingly – not very accurate!
If you want to be precise, a tire pressure gauge will be necessary. But be warned: tire pressure gauges are notoriously unreliable and the sensitive sensors are easily broken. For my recommendation, read my tire pressure gauge product review.
If you’re in a pinch (perhaps literally!), and you don’t have a universal pump or a valve adapter, you can modify a tube cap to create a functional adapter using a presta valve CAP.

Remember to screw the tire valve shut after inflating! I know you’re tired of hearing that, but it’s important.
Now that you know everything you need to about how to inflate a presta mountain bike tire, you’ll never find yourself hungering for a ride and find yourself deterred by a standard tire pump!
And don’t forget to screw the presta valve closed…
Professional writer Kat Jahnigen was 2 miles from the nearest village – and roughly 2,310 miles – from the nearest English-speaking town – when her bike tire burst. At that time, she was a college student on a bike trip across the desolate, rocky island of Crete. It suddenly occurred to her that it would’ve been good to learn some basic bike repairs before setting off on a solo bike trip.
Check out Kat’s website WriteHire at writehire.net.
Before every ride, it’s a good idea to get in the habit of checking your tire pressure. Tires need the right amount of air to function optimally, and getting them to the right psi efficiently can require some finesse. Mitch Mcleod at Kamikaze Bikes in Collingwood, Ontario, walks us through exactly how to pump a bike tire, so you can keep rolling confidently.
angelsimon//Getty Images
There are two popular tube valves: A Schrader valve is wider and flat on the end, while a Presta valve is narrower and features a locking nut at the top, which can be loosened to add or release air. An easy way to remember the Presta valve is that you press to let air out.
Mcleod says that a common mistake many new (and even experienced) riders make when pumping their bike tires is trying to use a Schrader bike pump with a Presta valve, which just won’t work no matter how hard you try.
If you’re unsure which pump to buy, check out our list of tested and reviewed bike pumps, or ask for recommendations at your local bike shop. When it comes to bike pumps, you almost always get what you pay for. A little extra investment can give you a more accurate psi reading, a sturdier bike pump, and even easier inflation.
Tony Pedulla
First, remove the plastic cap that might be covering the end of your valve. (Sometimes these get lost, so no big deal if yours is missing.) Then—Mcleod says this is a commonly skipped step with Presta valves—unscrew the tiny locking nut at the top. Don’t be shy; the nut won’t fall off, so there’s no need to worry about unscrewing it too much. Give it a couple of taps to make sure it’s moving—you should be able to hear and feel a bit of air come out out. (If you have a Shrader valve, you can skip this step.)
Trevor Raab
Before you pump, check the sidewall of your tire: It should list the pounds-per-square-inch (psi) range that your tire can safely handle.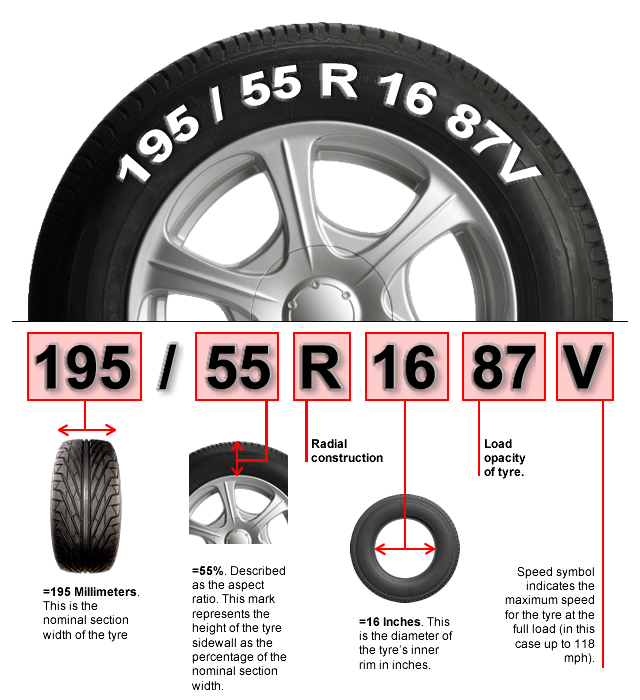 Typically, a road bike tire can go between 80 and 130 psi, while a mountain bike tire holds between 25 and 50 psi. Hybrids usually take between 40 and 70 psi. Where your personal psi preference falls within the range for your tire will depend on your weight and riding style—play around with it and figure out what you like, or you can use our handy guide here.
$30 at Amazon
$64 at Amazon
$70 at Jenson USA
$23 at Amazon
Katja Kircher//Getty Images
Fit the pump head onto the valve. Pumps will have either a switch that flips down or up, or an internally threaded screw top. Both systems serve to keep the head in place as you start pumping, which ensures that air actually goes into the valve instead of leaking out while you pump.
If air seems to be coming out of the pump and not into your tires, you may need to readjust the pump head slightly. Just detach and reattach to reset the seal.
Trevor Raab
Using the gauge on your pump to guide you, pump the tubes up to your optimal pressure. And use your upper body and core to pump. Squats are great for building leg strength, but they aren’t required for bike maintenance. Let your arms or even your abs do the work—it can seriously feel like a mini workout.
Once you’ve pumped your tires to the pressure you want, simply flip the switch on the pump head so it pops off, and retighten the locking nut before you replace the valve cap. Then, as Mcleod so aptly puts it: “Go shred.”
The main question that most beginner cyclists are interested in is how much to inflate the tires?
Well, maybe not the main one. Maybe not a question. But only interested.
It is impossible to give an unambiguous answer to the question posed. It just doesn't exist. But do not rush to disperse, we have something to say about this. After all, many factors influence the choice of the optimal pressure in the wheels: the desired level of comfort, the level of grip, the presence of a chamber, the chosen discipline, tire design and size, rubber composition, rim design, rider weight ... There are not all criteria to start from. list. If only because in each case the rider has his own unique variables.
However, we will cover the main points.
The first source of air pressure data for road and MTB tires is found on the tires themselves. Information is applied in numerical values with paint or embossed text and it contains, as a rule, a double value - separately in psi (pounds per square inch) and separately in BARs. The latter is used more often in our latitudes, we call this value “atmospheres”.
Two values are always indicated - minimum and maximum. In the operating instructions, the manufacturer recommends adhering to these values for safe driving.
Let's see why developers introduce restrictive measures and how this affects security.
When using a tire at a pressure below the minimum, there is a risk of getting a “snake bite”. This type of puncture occurs when hitting an obstacle, the rim crushes the tire and hits the obstacle through this same tire. In the best case, only the camera will be damaged, it will receive two cuts at a short distance from each other. It is almost impossible to cure such a puncture, the camera goes to the trash. In reality, people try to seal such holes, but the cuts tend to diverge, increasing in size.
In the worst case, the tire itself is damaged. Repair can be carried out, of course, but such rubber does not last long. When you try to pump it up, the camera will leak out of the holes, breaking the damaged cord. Yes, this is dangerous, few people will like a tire rupture in motion. And in general, the lower the pressure, the higher the likelihood of getting a puncture, not necessarily a “snake bite”.
Tubeless tires are less prone to such punctures, but still. It will most likely be impossible to use it in tubeless mode in the future.
Pressure less than the minimum affects the wear of the chamber.
Yes, it didn't seem to you.
The chamber is subject to wear. This fact is far from known to everyone, since the camera quickly goes to the trash due to numerous punctures and tearing nipples. Wear occurs due to its friction against the inner surface of the tire in the process of deformation under the influence of rolling. This friction leads to a thinning of the material of the chamber, after which it breaks or numerous holes begin to appear in it. Sticking such a camera is useless.
Further, under reduced pressure, it is possible for the tire to slip on the rim under extreme loads during active screwing or braking.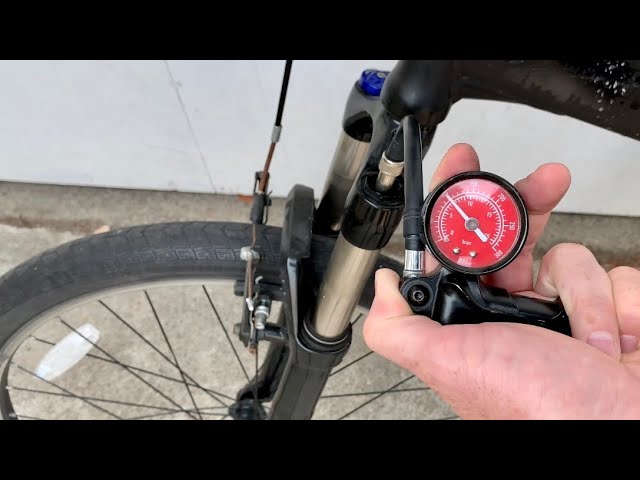 The most dangerous is slippage during braking. It is possible, both on chambered and tubeless tires. In both cases, depressurization will occur. Of course, if such a dramatic event occurs at the time of emergency braking, then the consequences will be very sad.
There is also an increased risk of wheel breaking while driving, especially in technical corners. The tire will simply come off the rim.
In addition, at low pressure it becomes much more difficult to pedal and controllability deteriorates to a large extent, the bike does not obey the steering wheel due to excessive deformation of the rubber - it begins to “float”.
On the positive side, the ride becomes much softer, the grip increases many times over.
Exceeding the maximum pressure by a small amount does not mean that the tire will burst like a balloon. In fact, tires are calculated with a large margin of safety.
For a rider, increased pressure promises terrible discomfort. Rubber stops absorbing road bumps and starts to translate them all into the saddle and steering wheel.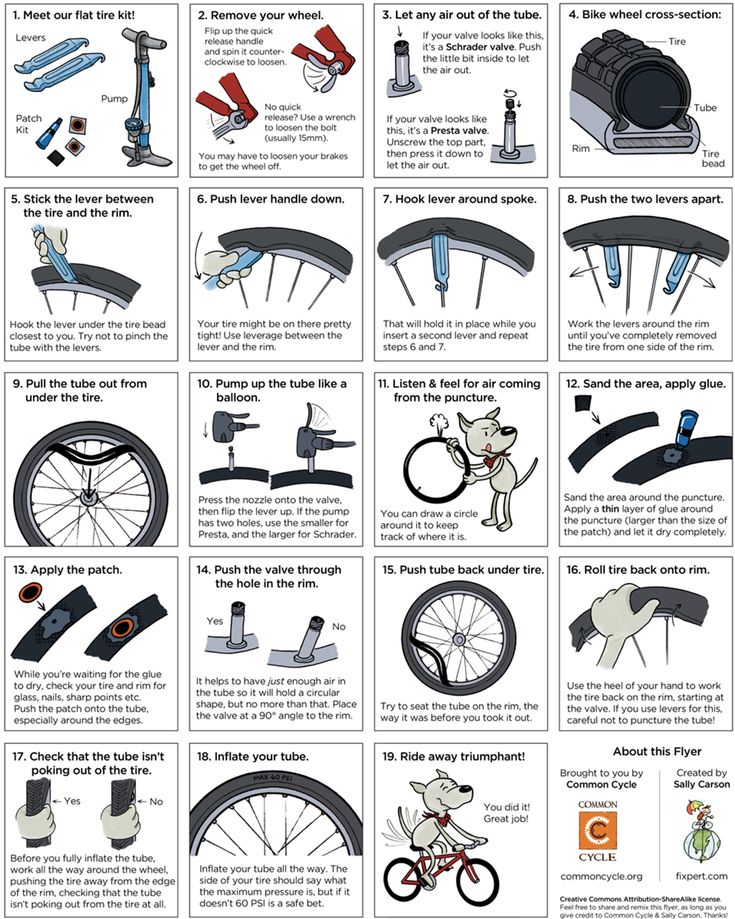 In addition to this, traction becomes much worse, the wheel tends to get stuck in loose substances, if we talk separately about MTBs. Highways are not driven on quicksand, but in general, all these statements are true for them. Driving on hard tires is just unpleasant.
Significant overpressure causes cord breakage. It is located over the entire area of \u200b\u200bthe tire, the first bells appear in the appearance of bumps. To be more precise, these are already the last calls, since the first ones cannot be tracked.
In addition, the load on the suspension increases, if any, and the vibration load on attachments, which also does not promise anything good and does not contribute to long-term operation.
Wheel disassembly at high pressure while driving is also possible.
Despite the fact that we have described a large number of negative manifestations of underestimating or exceeding the pressure allowed by the manufacturer, these restrictions are not strict (more on that below).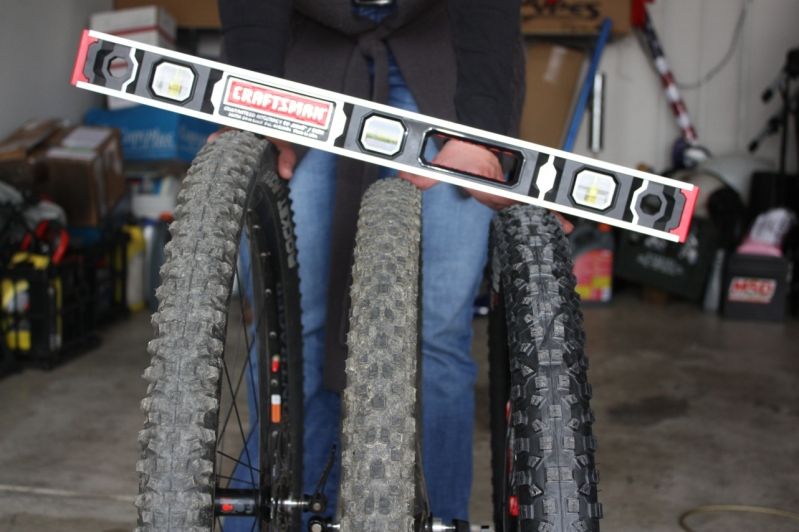 Companies cannot foresee all scenarios for the use of their products and are forced to be guided by average values.
Rider weight is an important factor in choosing the “ideal” pressure.
Imagine that we have two people, their weight is 30 and 100 kilograms. Now let's imagine that they got on MTB hardtails with the same tire pressure at the level of, for example, 2.5 atmospheres. The manufacturer's limitation in the minimum pressure, at the same time, is in the redistribution of 2 atmospheres.
Does this pressure suit both equally?
Of course not.
In the case of 30 kilograms, it is likely that this value will be excessive. In the case of 100 kilograms - insufficient.
That is, if you are seating a child who weighs 30 kilograms or less, then it is pointless to adhere to the minimum value indicated by the manufacturer. Light weight won't deform the tire enough to provide decent comfort and traction. That is, the pressure can be safely reduced below the minimum.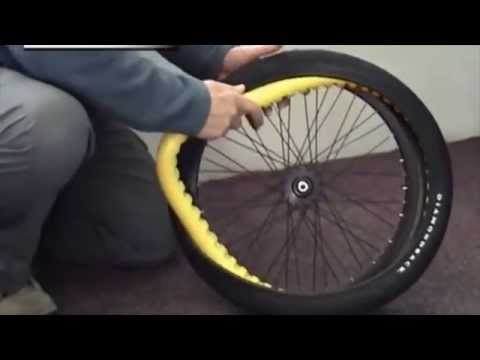 True, an excessive decrease is also not recommended, everything is good in moderation. The wheel should not show a tendency to break apart, and the tire bead should fit snugly and evenly against the rim.
On the contrary, 2 atmospheres may not be enough for a heavy rider. Perhaps the appearance of excessive deformation and the manifestation of all the risks associated with this, which we have already talked about. By the way, there is also a weight limit. As a rule, this is 130 kilograms. This is written on each tire (there are two in total), but this does not mean that in general the bike will take out all 260 kg.
It is not recommended to exceed the maximum pressure values even if the rider does not have enough of it. That is, if the rider strongly deforms the tire at the maximum value, then such a tire is contraindicated for him, it is necessary to select other models that allow high pressures.
Resume.
It is possible to lower the pressure below the minimum, provided that the rider's weight is below the average (60-70 kg).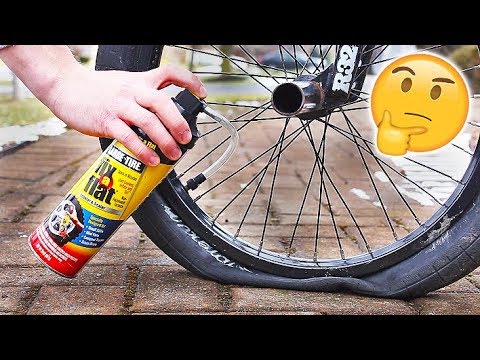 With exceeding the maximum pressure, the situation is different, it is not recommended to exceed it in any case, regardless of weight.
Providing comfort to the rider is reflected in the increase in its speed characteristics. Understanding comfort, however, is of course completely different for each individual rider.
Someone is ready to put up with heavy pedals providing themselves with more grip at low pressure, it is more important for someone to keep light pedals at high pressure, someone is guided by considerations of maintaining a low level of vibration (also low pressure) ... That is, that's all very individually, it is impossible to indicate a specific value on which it will be comfortable for you to ride.
This is the dimension of a tire, which characterizes its thickness. In the road world it is measured in millimeters, and in the MTB world in inches.
A simple rule applies here - the larger the volume of the tire (its thickness), the less pressure it needs. You yourself will feel it when changing tires to more or less fat ones. It will become apparent that 3 atmospheres in a 1.75” diameter is far from the same as in a 2.6” diameter. The latter will ask for pressure relief for a comfortable and confident movement. This is for MTB.
The transition from 23mm to 28mm on a road bike is also a big one. If for the first ones the maximum is at the level of 9 atmospheres, then for the fatter ones it is already only 8. The difference in comfort is colossal. The only negative effect on a road bike with a fatter tire is an increase in aerodynamic drag at high speeds.
Any tire is not just a rubber shell, it is a multilayer construction. By the way, we talked about this in detail when we introduced readers to the varieties of tires.
The number, filling and area of mutual overlap of these layers directly affects the optimum pressure. Tires with thick sidewalls, for example, will require less pressure. The thin walls of the sidewalls, on the contrary, are larger.
The presence of an anti-puncture layer also has an effect, it makes the tire tread somewhat stiffer, which requires pressure reduction. Its absence, on the contrary, makes the tire more pliable, the comfortable pressure increases.
Tubeless tires, or using conventional tires in a tubeless version, allows you to enjoy the benefits of rolling at low pressures. The absence of a chamber allows you to get away from the manufacturer's warnings if the deformations remain at a decent level and do not damage the rubber. Yes, and the chamber itself ceases to create additional rolling resistance.
In general, everyone praises tubeless tires and not without reason.
Maximum pressure limits are sometimes marked on the rim itself. It is likely that it will be much lower than what is written on the rubber. In this case, you will have to be guided by the smaller of the two.
Exceeding the maximum allowable pressure for the rim promises its rapid destruction at the most inopportune time. And it's good if this happens immediately after pumping. When no one is around. And the bike will be somewhere to stand without moving.
By the way, such restrictions are more often applied to MTB rims, with road rims it is a little easier, they are always calculated for high pressures. Road tubes do cross the 10 bar threshold, but tubes don't put as much strain on the rim walls as clinchers do.
If now it is not clear what we are talking about, then once again I recommend reading our article, where we talk in detail about the types of tires.
The width of the rim also decides. The wider it is, the less pressure the tire needs to run smoothly without parasitic deformations, mainly in technical corners.
It is important to understand that different road conditions also require a differentiated approach.
Snow, sand, gravel, stones, loose earth, liquid mud - the surfaces formed by these substances have a low bearing capacity.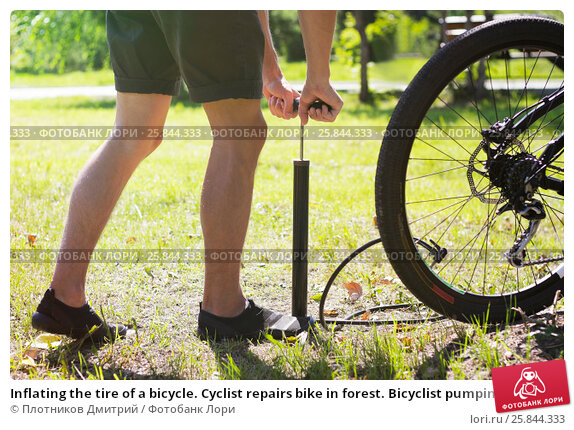 Reducing tire pressure helps offset this negative factor. There is an increase in the area of \u200b\u200bthe contact patch, as a result of which the grip, patency, speed and comfort grow.
Asphalt and dense primer require a different approach. Harder wheels will show themselves better here. The increased pressure will reduce rolling resistance and increase average travel speed without sacrificing comfort.
A perfectly smooth road or track surface allows you to drive at maximum speeds without any particular twinges of conscience, if we talk about highways.
All this we bring to the conclusion that even when changing road conditions within the same trip, it is advisable to change the pressure in the wheels. The operation requires the expenditure of additional forces, although it pays off with interest.
I had to ride a mountain bike out of town on paved roads for several tens of kilometers. I drove at maximum speed (more than 4 atmospheres). Then the guys and I turned onto primers to drive away from civilization - this is another couple of kilometers. Then I stopped and lowered the wheels. I did several tests until I found the optimal pressure. On the way home, I repeated everything in reverse order. Thus, I rode quite quickly on asphalt with light pedals, and on the ground I could hardly get up from the saddle, the wheels turned out to be so soft, although the pedals became much heavier. So it goes.
I also had experience with Schwalbe Kojak folding rubber in size 26x2.0”. It is not intended for such operation, it does not have the inscription Tubeless Ready. However, it didn't bother me.
I had the opportunity to compare them when working with and without cameras. First, the removal of the tubes took nearly 500 grams of weight off the bike. Secondly, the pressure of 3 atmospheres was comfortable for me on the cameras. I found it optimal, because in addition to asphalt, I sometimes moved out onto dense soils.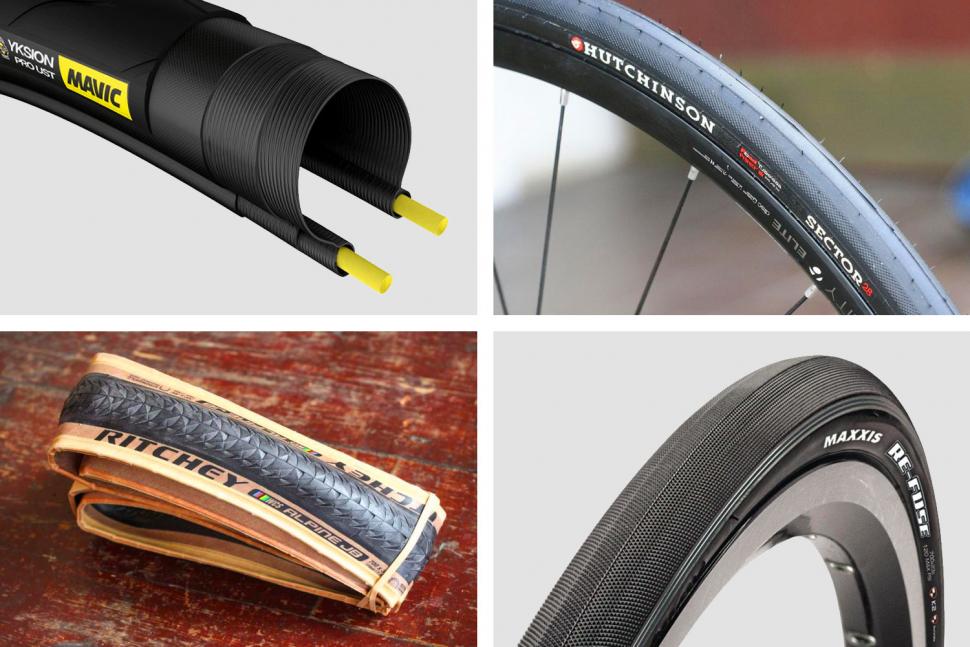 When I wanted more speed, I drove out at a pressure of 4-4.5 atmospheres.
The transition to tubeless mode amazed me. Ride has become easier, enlightened people say that this is due to the lack of rolling resistance that the tube provided. The pressure at which it was comfortable for me to ride dropped to 1-1.5 (!!!) atmospheres with my weight of 65 kg. The minimum threshold value specified by the manufacturer, by the way, was at around 2 atmospheres.
I also have the experience of switching to a road bike. It has already been said above that the 28 mm tire is more comfortable.
In reality, when I put the 28th tire instead of the 23rd, I was very surprised at how much softer the bike began to ride. Air pressure, with my own weight, I can afford to leave at 5 atmospheres with a minimum value on the tire of 6 atm. At the same time, I didn’t lose in coasting, I rarely develop high speeds and for short periods of time, because I drive in the city. I just don't care about aerodynamics in this case.
Once again, we emphasize that the optimal and comfortable pressure in bicycle tires is very individual and depends on a large number of factors. It is impossible to develop a single standard for all conditions. Different situations require different variables to be taken into account. And that's okay. Feel free to experiment, you yourself will feel everything. Give yourself time and a couple of thousand kilometers to find your ideal.
Whether you choose a road or MTB bike, the information in this article applies equally to both disciplines.
And buy yourself a pump. Then the manometer. And even better - a pump with a pressure gauge.
Full name
Borik Vladimir
Passionate cyclist since 2014. I could not stand it when the bike made extraneous sounds in motion, which forced him to sort out everything, re-grease and renew it many times. He likes to delve into the subtleties, therefore, numerous bulkheads of his bike later turned into a job as a bike mechanic.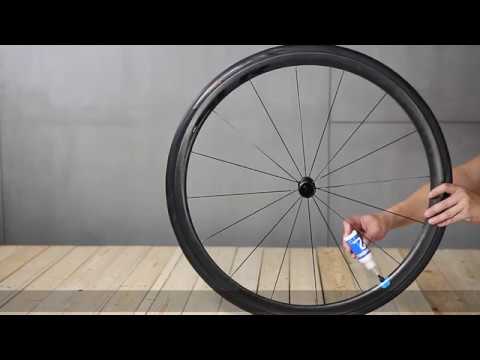 Passed a thorny path from Shimano Acera to Comance Tomahawk through SLX to XTR to Specialized S Works, and then just switched to a budget road bike on Campagnolo Xenon 10 equipment.-year, where Light took 5th place on the route. Currently remains an active bicycle user and continues to deepen his knowledge in this area.
It's a good idea to check the tire pressure before every ride. For normal operation of tires, they must have a certain air pressure, which is important to maintain.
As many of you know, there are two types of nipples now available: the Schrader valve (car valve) is thicker and cylindrical in shape, and the Presta valve (bike valve) is thinner and has a lock nut at the end that must be unscrewed to release air. That is, in the case of the Presta valve, you simply unscrew the nut, press on it with your finger, and the air comes out.
A typical mistake many beginners (and not only beginners, by the way) is that they try to inflate tires with a Presta valve with a regular car pump - naturally, no matter how hard you try, this will not work.
If you're not sure which pump to buy, check out our list of trusted bike pumps, or just ask your cycling friend for advice. In the case of pumps, everything is usually fair - as a rule, you get exactly what you paid for. If you spend a little more money, you'll have a more accurate gauge, a more reliable pump, and even easier tire inflation.
First, unscrew the plastic cap that may be covering the nipple. Sometimes, by the way, caps are lost, and there is nothing to worry about. Then Presta faucet owners often forget this - loosen the little lock nut at the end of the nipple. Do not be afraid here - the nut will not go anywhere, so you can unscrew it right up to the stop. Click on it a couple of times to make sure it moves - when you press it, you should hear the rustle of air escaping. If you have a Schrader valve, you can skip this step.
Before you inflate a tire, look at the tire sidewalls - it should indicate the safe pressure range for this model.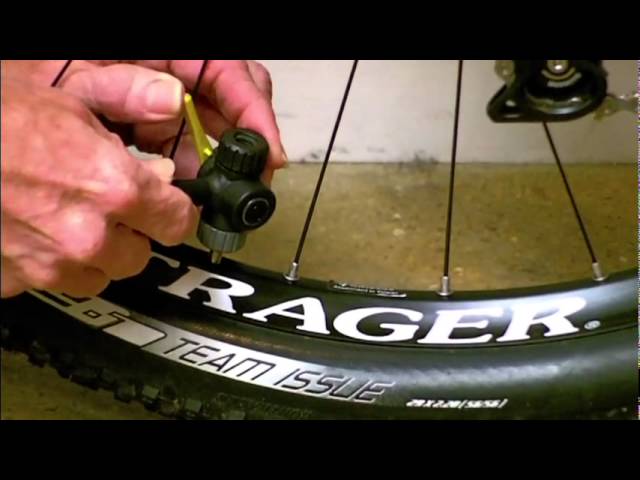 Typically road tires are rated between 80 and 130 psi, while mountain bike tires are rated at 25 and 50 psi, respectively. Hybrid bike tires are typically rated at 40 to 70 psi. The optimal pressure for you depends on your weight and riding style - here you need to experiment and see what you like best, or you can use our quick guide.
Connect the pump valve to the nipple. Some pumps have an adapter inside the valve that can be reversed to select Presta or Schrader valves, others will have a threaded head. The purpose of both systems is to hold the valve in place while inflating so that air enters the nipple rather than escaping.
If the air is coming out instead of going into the tire, the pump valve may need to be repositioned a bit. Try simply unplugging it from the nipple and plugging it back in.
While looking at pressure gauge, inflate tires to correct pressure.