By Keith Dooley Updated March 07, 2022
Riding mowers are a matter of convenience for some homeowners and a necessity for others when cutting large areas of grass. The tires on a riding mower are designed to be durable, but due to normal use, there may be times when a tire loses air pressure. When this happens, the tire may separate from the rim. Sealing a mower tire to the rim requires a few basic steps and can be accomplished at home.
Park the riding mower on a flat and level area, leave the transmission in gear and set the parking brake. Put on gloves to protect your hands while working.
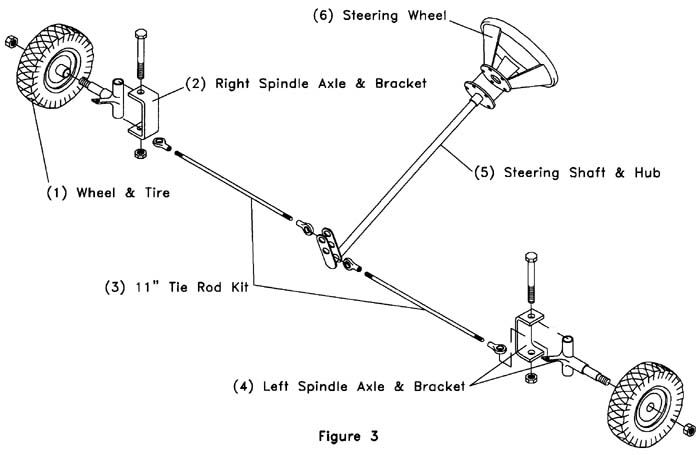
Pull the plastic cap off the axle with the flat tire. Remove the snap ring with snap ring pliers, and then pull the ring and washer off the axle. Place a tire jack under the front of the mower. Home Depot points out that the jack must be under the frame and not the motor. Raise the mower so the flat tire is off the ground and pull the wheel and tire off the axle.
Inspect the tire for damage such as a slit or puncture that could prevent proper inflation. Remove a damaged tire from the rim by prying the tire over the rim with blade screwdrivers. Obtain a suitable replacement tire if necessary from a mower repair shop or hardware store.
Install the replacement tire onto the wheel by working the tire over the rim with the blade screwdrivers. Apply tire seal along the edge of the rim where the tire will seat.
Place a ratchet strap around the tire and pull down until snug, instructs Random Knowledge Guy. Apply enough pressure to the tire with the strap to force the sides of the tire down firmly against the wheel. Use a tire pump to inflate the tire partially and force the sides of the tire to seat against the rim.
Loosen the ratchet strap a little and add more air. Continue to loosen the strap and add air until you are sure the tire is securely seated on the wheel. Remove the strap, and then fill the tire completely with air. Use a tire pressure gauge to check the pressure. Refer to the manufacturer's recommended tire pressure; it is usually listed on the side of the tire.
Place the wheel and tire assembly back on the mower axle. Install the washer and snap ring, and then replace the plastic cap on the axle. Lower the mower with the jack to use the mower.
Gloves
Tire jack
Snap ring pliers
Blade screwdrivers
Replacement tire
Tire seal
Ratchet strap
Air pump
References
Writer Bio
Keith Dooley has done work in the field of landscaping and design for more than 10 years. He has implemented his own designs, as well as pulled from techniques learned through studies, creating many landscapes for others to enjoy.He has also maintained lawns, athletic fields, town parks, large gardens and game fields.
If you’ve had a lawn mower for more than a couple of seasons, chances are you’ve had a flat tire. In this article, we’re going to tell you how to get a flat tire back on the rim and how to change a tire if you need to.
With our step-by-step guide—lawn mower tire flat & off the rim? Here’s how to fix it, you’ll be back to cutting your lawn in no time.
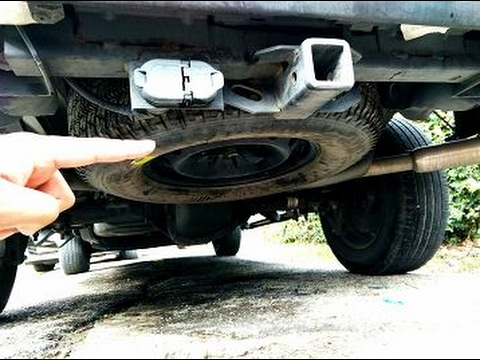
A tire that’s slipped off the rim is never a wanted sight!Using simple tools and a few helpful tricks, you can get your tire back on the rim or replaced. With a little effort and minimal cost, your mower will be ready to go again.
Want to know how to get your lawn mower tire back in working order? Let’s get stuck in.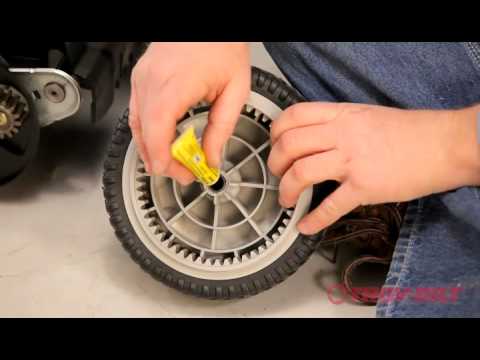
For this repair, you’ll need a few tools. And if you need to replace the tire, a few more. For both repairs, don’t forget your safety gear. Here, we’ve listed what each job requires:
Not all flat tires are created equal. Sometimes a flat caused by a very slow leak or just time can simply be reflated. And it will last a good while until next time. But sometimes a flat causes the tire to come off the rim of the wheel, and this requires a more complicated fix. And in the worst case, with a damaged or worn-out tire, you’ll need to replace it.
No matter if your tire is just off the rim, or needs replacing, we’ve got you covered. Here is our step-by-step guide to fixing a flat on your lawn mower. Steps 1, 2 and 3 are required for both fixes. After that we’ve split the instructions depending on whether you’re putting it back on the rim (steps 4a to 7a) or changing the tire (steps 4b to 10b).
I know it’s obvious, but we’re nothing if not complete. Make sure your mower is on a flat surface. Then turn off the mower and remove the ignition key. It’s a good idea to chock the wheels as well.
What might not be so obvious, is that we highly recommend you remove the spark plug cable as well. Removing the cable means there is no chance of the blades moving while you’re fixing your flat. It’s never wasted time to do things safely.
In order to get to your tire, you’re going to need to jack up the mower.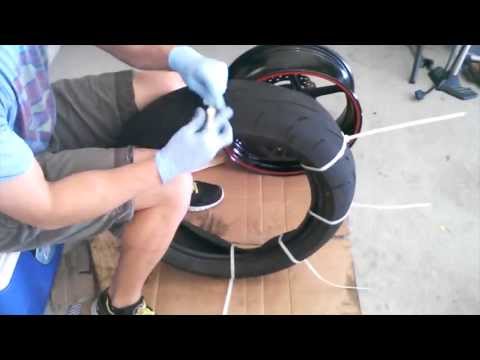 Any jack will do as long as it’s rated for more than the weight of the mower. We would recommend fixing your flat on a hard surface, driveway, garage or shed. But, if your mower is still on grass, and you’re using a bottle jack, you’re going to need to put wood under the jack to stop it from sinking into the grass.
Jak up the mower so your tire spins freely. You want enough height to make it easy to get your hand underneath the tire. Once you’ve reached the required height, support the mower with a jack stand.
You need to check the tire for obvious damage, holes or sharp objects. If it helps, put a little chalk mark on the tire. Carefully roll the wheel round, inspecting both side walls and the surface for damage. When your chalk mark comes back around, you know you’ve covered the whole tire.
If you can’t find any obvious holes or damage, and the tire is not completely worn out, you can try putting it back on the rim, inflating it and seeing if it holds.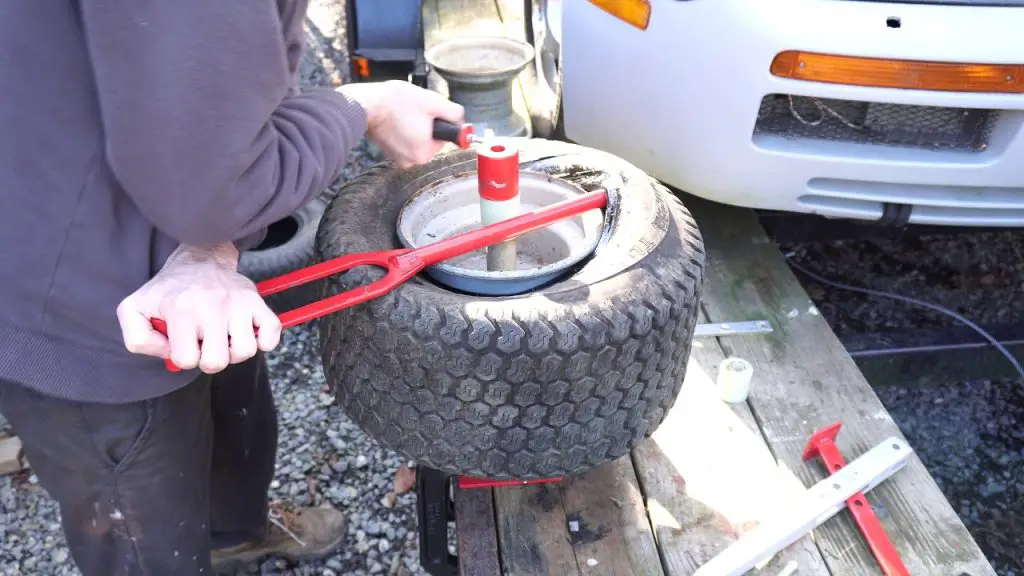 If the tire is punctured, ripped, or completely worn out, you’re going to need a replacement.
These days most mower tires are tubeless. That means there is no inner tube inside the tire that holds the air. Instead, the air is held inside the tire by a seal formed between the tire bead and the rim.
In order to refill a tire where the bead has come off the rim, you first have to create a seal between the bead and the rim.
The easiest way to do this is to apply pressure to the surface of the tire. This pushes the bead outwards and helps create the seal you need. On used tires, it’s usually not possible to do this by hand. So instead, we can wrap a ratchet strap or a rope around the tire and use that to help.
Get your ratchet strap around the tire and ratchet it a few times to apply pressure. This pushes the middle of the tire down and the sides outwards.
Once you’ve applied a bit of pressure, try pushing the sidewalls near the rim. If the bead seems solid against the rim, you can start adding some air and seeing if you have a seal.
If air still escapes from the sides and the tire won’t inflate, ratchet a couple of times on your strap and see if that helps. Once you have a seal, inflate the tire enough to keep the pressure on the bead so that you can remove the strap.
After removing the strap, you can continue to inflate the tire. The optimum tire pressure will be on the tire wall. And that is the number to aim for. Usually it’s between 15-40psi and often around 20psi.
Make your to check the tire and inflate to the right pressure.Make sure you check your tire and inflate to that pressure. Under or over inflating can increase tire wear, decrease grip, and increase the chance of a puncture or blowout.
That’s it, your tire is back on the rim and fully inflated. Re-insert your jack and raise the mower enough to remove the jack stand.
Lower the mower back onto all its wheels. We recommend letting it stand for a few minutes before moving it. This way you can wait and see if your tire will keep pressure.
Once your happy everything is working, don’t forget to reconnect the spark plug wire and remove any chocks on the other wheels.
So, you’ve inspected the tire and decided to replace it. Now you need to remove the wheel. Take off the axle cover if there is one. Underneath will be a retaining ring. Use a slot screwdriver or pliers to pull it off.
Now you can remove the washer and pull off the tire. Beyond the tire is an inner washer. It’s best to pull that off as well. Make sure you put your two washers and the retaining ring somewhere safe. It’s really annoying to find you lost one when it’s time to put the tire back on.
Take the tire and lie it flat with the valve facing upwards. Remove the stem cap and use the stem core removal tool to unscrew and pull out the core.
Push down on the tire to dislodge the bead. Using a couple of slot screwdrivers, pry the tire up and off the rim on one side. Take your time. Pry a little of the bead up, slide another screwdriver next to the first and pry a bit more. Continue around the rim until the whole side is free. Flip the tire over and do the same again so that you can pry the tire completely off the rim.
While you’ve got the rim separate, give it a clean. Removing any dirt and grime will give a better seal between the new tire bead and rim.
Now it’s the reverse procedure from removing the tire. Using your slot screwdrivers (and make sure there are no sharp edges that could damage the tire) pry one side of the tire onto the rim. Flip it over and pry the other side on.
Flip your tire vertical again and find your compressed air. With a new tire, and not attached to the mower, it shouldn’t be necessary to use a ratchet strap or rope to get the bead to seal.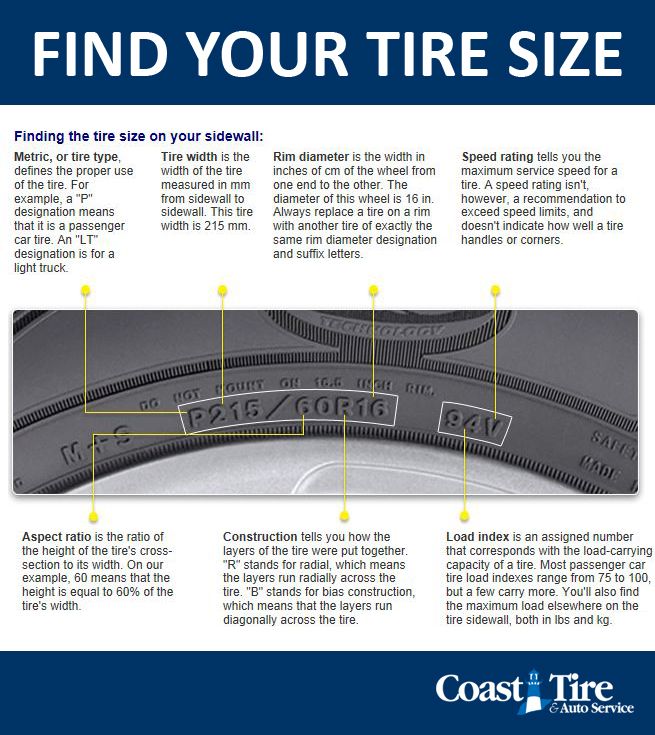
Push down a little on the tire and start to inflate. The bead should seal. Once you’re happy you have a seal, re-insert the valve stem core.
With the valve stem in, you can continue inflating the tire to the optimum tire pressure. Remember to check the optimum pressure on the tire wall and only fill to this value. As we said above (step 6a), over or under inflating a tire is not a good idea.
Using the reverse procedure from taking off the wheel, you can now re-install it. Find your washers and the retaining ring.
Put the back washer on first and then slide on the wheel. Add the front washer. Using pliers, put the retaining ring back on the axle and then replace the axle cover.
That’s it, you have a new tire. Re-insert your jack and raise the mower enough to remove the jack stand. Lower the mower back onto all its wheels.
Once your happy everything is working, don’t forget to reconnect the spark plug wire and remove any chocks on the other wheels.
Well done! You have fixed your mower tire and are ready to get back to your lawn.
I hope this guide has been useful to you. Whether you’ve put your tire back on the rim or replaced it completely, following our step-by-step guide should get your mower back on the grass in no time. Happy mowing!
Russia
EgyptGambiaIsraelKenyaKuwaitLebanonMozambiqueOmanQatarSouth AfricaTunisiaTurkeyUnited Arab EmiratesZambiaZimbabweSaudi Arabia
AustraliaAzerbaijanMainland ChinaFijiFrench PolynesiaHong KongIndiaIndonesiaJapanKazakhstanMalaysiaNew CaledoniaNew ZealandPapua New GuineaThe PhilippinesSingaporeSouth KoreaTaiwanThailandTurkmenistanUzbekistanVanuatuVietnam
AlbaniaAustriaBelarusBelgium (fr)Belgium (nl)Bosnia and HerzegovinaBulgariaCyprusCroatiaCzech RepublicDenmarkEstoniaFinland (fi)Finland (sv)FranceGeorgiaGermanyGreeceHungaryIcelandIrelandItalyLatviaLithuaniaLuxembourg (de)Luxembourg (fr)MoldovaMontenegroNetherlandsNorth MacedoniaNorwayPolandPortugalRomaniaRussiaSerbiaSlovakiaSloveniaSpainSwedenSwitzerland (de)Switzerland (fr)Switzerland (it)TurkeyUkraineUnited Kingdom
Self-propelled lawn mower (rear wheel drive, 5.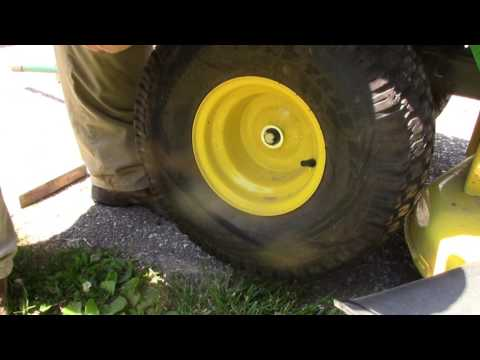 4 km/h) with powerful engine, easy start and steel deck, 48 cm wide, for lawn mowing, both in private and commercial use. All wheels are mounted on ball bearings and are designed for a long service life. It can be operated in the mulching mode (multiple chopping), as well as with the ejection of mowed grass.
LB 248SArt. No.: 967 65 63-01 | ||||
|---|---|---|---|---|
| Engine | LB 248S Art. No.: 967 65 63-01 | |||
| The rated capacity at the operating speeds | 2.4 kW | |||
| Workpieces | 2 900 rpm | 9005Engine Brand Brandon -Brandon AD SNDONNA | Engine Model | 0059 210 mm |
| rear wheel dimensions | 210 mm | |||
| 38 kg | ||||
| Sound and noise level | ||||
| Sound pressure | 82 db ( | |||
| Measurement of noise level | 94 dB (a) | |||
| Noise level | 95 dB (a) | |||
| Vibration | ||||
| Vibration on the Handlebar | 4. 6 m/s² 6 m/s² | |||
Operating instructions
Recommendations for purchases
Practical recommendations
Practical Tips
Practical Tips
Practical Tips
Practical advice
Showing 9 of 9
HUSQVARNA
Rating:
( 0, votes - 0 )
vote
Availability: in stock
114 990 rub
Reserve
Quick standby
Lightweight and compact yet robust lawnmower with powerful engine, large fuel tank and aluminum wheels with rubber tyres.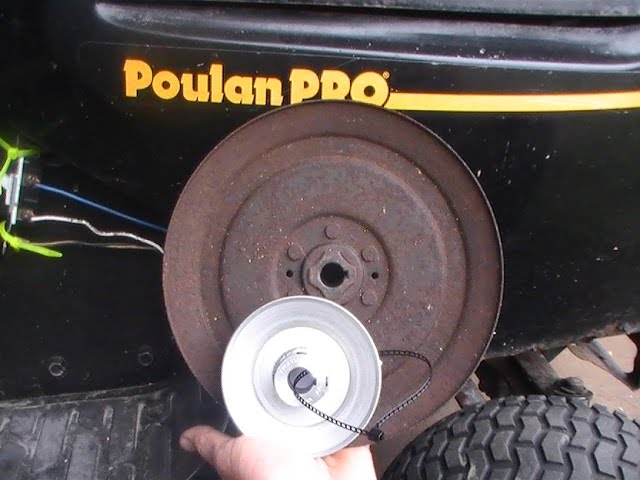 An excellent choice for professionals who need high quality at an affordable price, reliable and long lasting performance and outstanding results.
Durable aluminum alloy cutting deck
Strong and durable cutting deck designed for best performance
Aluminum rims and rubber rims
Robust construction to guarantee durability in continuous professional use. Aluminum rims with sealed bearings. The rubber rims of the tires provide better contact with the ground and the stability of the lawnmower when moving.
Kawasaki Professional Engine
Powerful engine with large 1.9 liter fuel tank for professional use.
Convenient operation
Intuitive controls, easy-to-reach drive levers make our mowers easy and comfortable to use.
Foldable handle
For easy storage and transport.
Easily adjustable handlebars
Quick and easy handle height adjustment
Dust Collector
Designed to keep dust inside and out of the user's side when mowing.
Central cutting height adjustment
Quick and easy grass cutting height adjustment. One lever controls the entire deck.
Aluminum cased transmission
Aluminum cased professional grade transmission designed for long term professional use.
Maximum forward speed
4.1 km/h
Forward speed, min.-max. min
0 km/h
Forward speed, min.-max.
0 km/h-4.1
Operating speed
2800 rpm
Rated power at operating speed
2.9 kW
Rated power
0.2 kW
Cutting height, min.-max.
26-74 mm
Article gross weight
56000 g
Weight
51000 g
Grass bag volume
65 l 9Ol000 Yes
Handle height adjustment
2 Step
Weight
50 kg
Front wheel dimensions
210 mm
Rear wheel dimensions
Wheels with ball bearings
Yes
Set Bioclip®
Separate
Brake/inclusion of a knife
NO
Collect
CLG Product (CALC)
YES
9000 9000 9000 9000 9000 includedType of grass bag
Fabric with dust protection
Grass bag volume
65 l
Deflector
No
Management
Underbail
Principle of movement
Self -propelled, one speed
Wheels
Rear
folding handle
folding handle
Type
Ergonomy
Self-propelled
Side tilt handle
No
Soft grip
Yes
Throttle control
Yes
Wheel bearings, front/rear
Yes/Yes
Type of engine lubrication
Forced lubricant under pressure, separate oil filter
Fuel consumption (g/kW)
450 g/kW · h
Fuel tank volume
1.