SKI SNOWBOARD GEAR EDUCATION BIKE GEAR EDUCATION TEACH CHILDREN SKIING GEAR SIZING CHARTS
Once you learn this skill, flat tires won't be such a daunting task. It is very simple as long as you have the right tools and the proper technique.
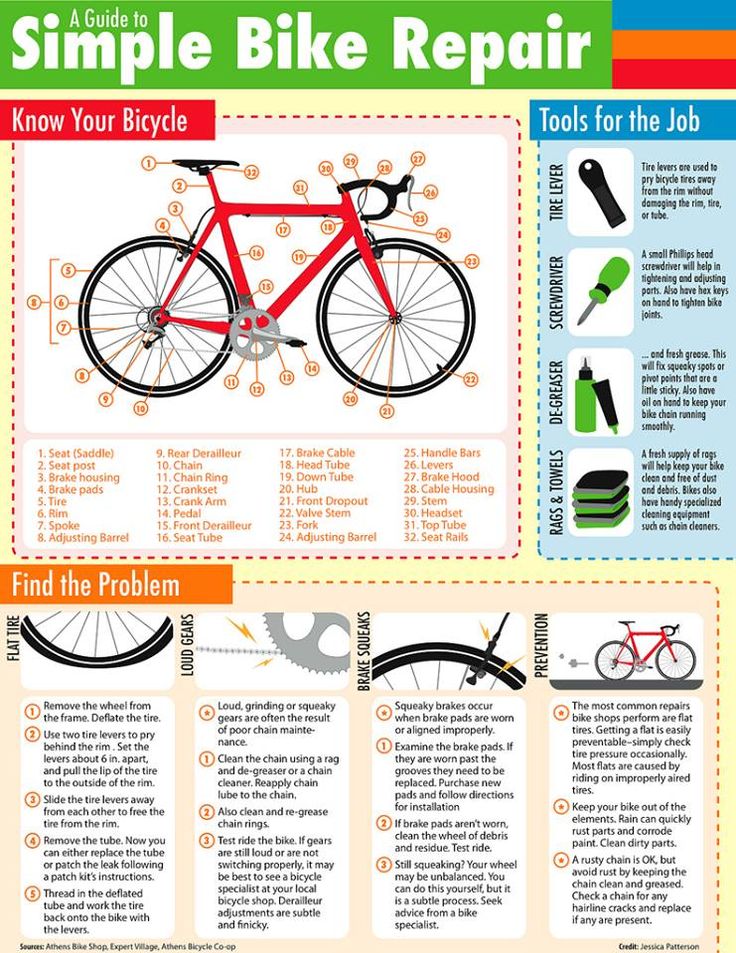
Tools you'll need for the job:
Tire levers
Bike pump or CO2 inflator
New inner tube and/or tire
Firstly, remove the wheel from your bike. Then, nature usually does the second step for you, which is to deflate the tire completely. Once you have done these two steps, it's time to get down to business.
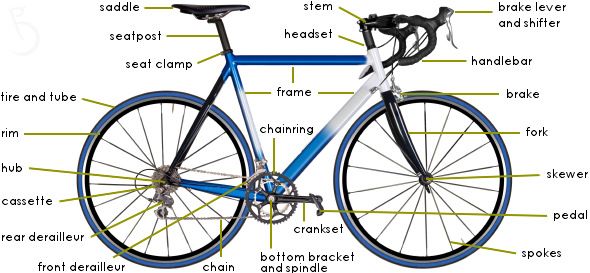
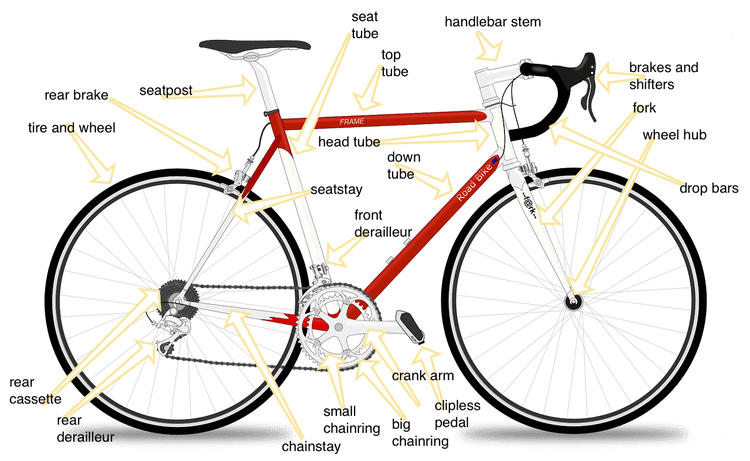
Use your lever to start removing half of the tire's bead (the part that touches the inside of the rim on both sides is the bead). To do this, you need to use the end of the lever that is hooked to get under the edge of the bead. Use the lever to peel the bead over the edge of the rim.
Once you have it over the rim, slide the lever along the rim to continue peeling the bead off one side of the rim. Always start peeling the bead off at the valve stem!
Now that you have half of the tire off the rim, you can easily pull the tube out. You can either chuck the tube, or find the hole and patch it. Next, check the inside of the tire for the object that punctured your tube. It is very common that you will find a thorn or piece of glass still embedded in your tire. To do this, take a rag, or carefully run your thumb along the inside of the tire where your tube touches it. While you're doing this, you can also inspect the outside tread of the tire to check for cuts. If you feel anything but smoothness, take a razor blade, awl or fingernail and remove the obtrusion.
So, we got a flat, figured out what caused the flat, now we need to replace the tube and be on our way. The best way to do this is to blow a tiny bit of air into the tube to give it shape before putting back into your tire. Start by putting the valve through the valve hole and work your way around, stuffing the lightly inflated tube back into the tire and rim. Once it's all the way in there, start at the
OPPOSITE SIDE from the valve and begin putting the bead back onto the rim with your hands. By starting at the opposite side of the valve, it will give you a tiny bit more room to get the last part of the bead over the rim, making life a little easier. So, work your way around the rim setting the bead back onto it. I like to use both hands working in opposite directions from each other. When it gets hard to put the bead on, deflate the rest of the air from your lightly inflated tube.
Start by putting the valve through the valve hole and work your way around, stuffing the lightly inflated tube back into the tire and rim. Once it's all the way in there, start at the
OPPOSITE SIDE from the valve and begin putting the bead back onto the rim with your hands. By starting at the opposite side of the valve, it will give you a tiny bit more room to get the last part of the bead over the rim, making life a little easier. So, work your way around the rim setting the bead back onto it. I like to use both hands working in opposite directions from each other. When it gets hard to put the bead on, deflate the rest of the air from your lightly inflated tube.
Now, the hardest part is the last bit. Some tire and rim combinations are worse than others, but most of the time you can do this with your hands. You will find that the last part of the tire's bead is the tightest. It is best if you can do this with your hands, but if necessity presents itself, carefully use the tire lever. The reason it is bad to use the tire lever is because you run the risk of pinching, and puncturing your new tube… So, grab the tire and tube and use your thumbs to lift the bead over the last bit of the rim. It might take a little bit of grunting, but 90% of the time this can be done with your hands.
You've done a great job so far, but you're not quite done! The next couple of steps are important so that you don’t cause your tube to explode in your face!
Once your tire is completely back on your rim it is time to pump it up. If you are using a CO2 inflator to do this, pay close attention! First, you want to push the stem into the tire to prevent the tube from being pinched under the bead of the tire. Then, add a little bit of air to your tube to give the tire shape. I usually put about 20-30 psi in the tire. Now, pick the tire up and spin it in your hand while holding the hub. Inspect the edge of the tire to make sure that the bead is "seated" against the rim evenly around the whole wheel.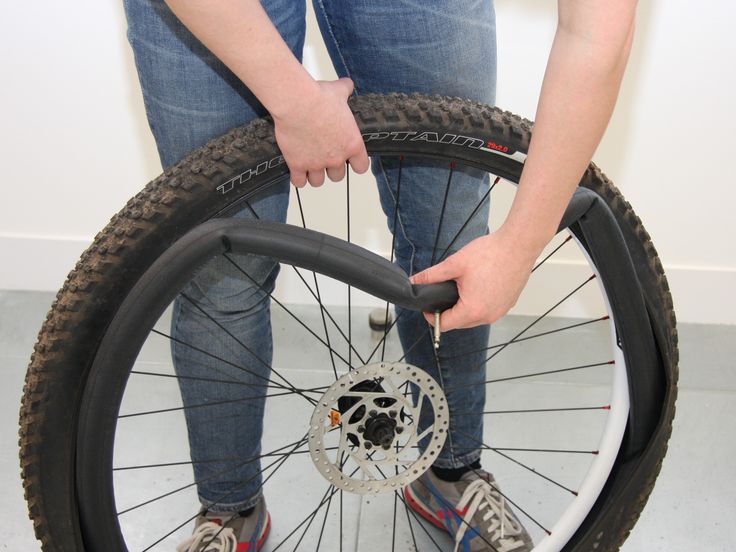 If it isn't, you will either see a bulge or a depression of the tire against the rim. Use your hands to either pull these depressions out, or push the bead down into the rim. This should be easily done with 20-30 psi in the tube. This is also another good time to look for any big cuts in the tire as the tube will be bulging if there is a cut. Once you're done inspecting, and everything looks good, it is safe to continue pumping your tire up to the specified psi, install the wheel on your bike, and continue on your way!
With a little bit of practice, this whole process can be done in about 10 minutes. With a lot of practice, you can do it in the rain in 5 minutes!
Updated: Jun. 09, 2022
Next Project›
Family Handyman
Follow these simple steps for replacing a punctured bicycle tube.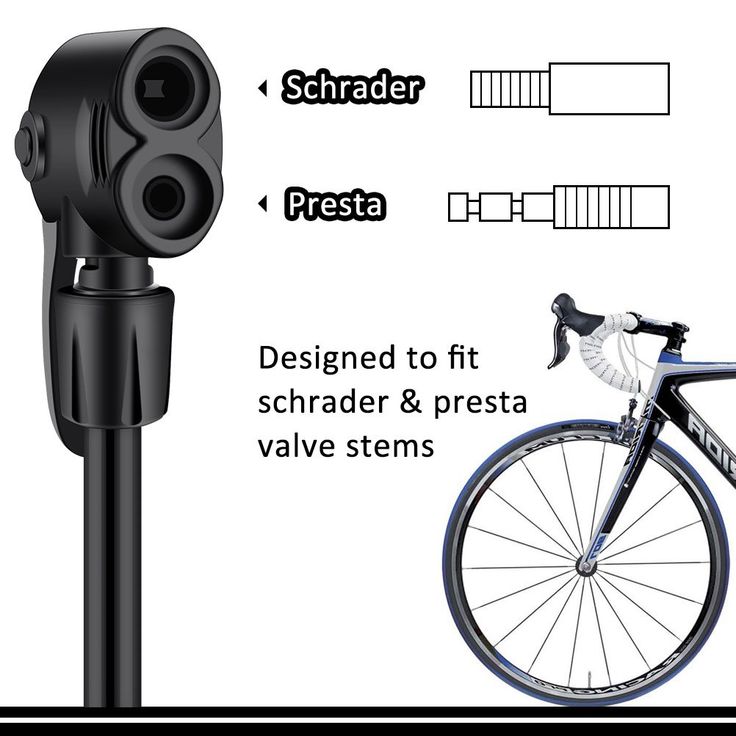 You can even fix the flat on the go if you have a spare tube, tire levers and a pump.
By the DIY experts of The Family Handyman Magazine
Step 1: Remove the tire and old tubePry under the bead of the tire with one of the tire levers and hook it to a spoke. Move over about 4 to 6 in. and insert the other tire lever. Pry it down and then slide it along the rim to release the tire.
The first step of how to change a bike tire is to release the brake and loosen the axle nut so you can remove the wheel from the bike. Most bikes have a quick-release mechanism on the brake and a quick-release lever on the axle. If you’re not sure how to remove the wheels on your bike, check the manual or visit your local bike store and ask someone on staff to show you how. Do this before you have a flat so you’ll be prepared. For a guaranteed trouble-free fix, buy a new tube rather than patching the old one (see “Valve Types” below).
After removing the wheel from the bike, the next step is to take one edge, or bead, of the tire off the rim so you can remove the damaged tube (Photo 1). Pull out the tube. Then remove the tire completely from the rim, put it around your neck like a necklace and turn it inside out while running your fingers along the inside to feel for sharp objects. Be careful, though—there could be bits of glass lodged in the tire.
If you don’t want to walk home after having a flat, here’s a tip: Assemble a tire repair kit like this. A repair kit is one of the most valued bicycle accessories you’ll want. You can put it in a resealable plastic bag and tuck it in a knapsack or buy a small pack that straps under your bicycle seat. Not including the seat pack, the kit cost us about $38.
Step 2: Install the new bike tubePartially inflate the new or patched tube and insert the valve stem into the hole in the rim. Then work the tube into the tire.
Press the bike tire back over the rim, being careful not to pinch the tube. If it’s too tight to push the last section by hand, use the tire levers to pry the bike tire onto the bike rim.
After checking the tire, put one bead back on the rim, leaving the other side loose so you can install the new (or patched) tube (Photo 2).
Photo 3 shows how to push the second tire bead back onto the rim after the tube is in place. When the tire is completely installed, check all around on both sides to make sure the tube isn’t pinched between the tire and rim. To do this, push against the bead and look into the space between the tire and rim to be sure it’s clear.
Now you’re ready to fully inflate the tire. But there’s one last thing to watch for. Occasionally the bead may not seat properly on the rim, so stop before the tire is inflated to full pressure and rotate the wheel while you inspect the area where the tire and rim meet. If you see a spot where the bead isn’t seated in the rim, let a little air out and work the bead into the rim with your fingers.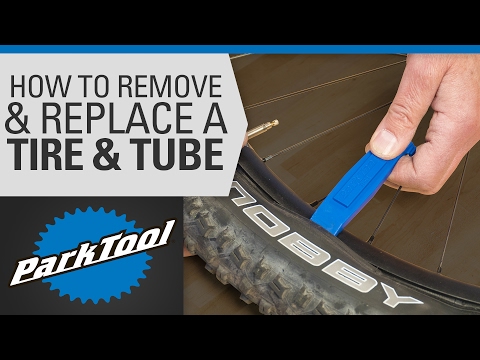 Then inflate the tire to the pressure listed on the side. Reinstall the wheel and spin it to make sure it’s centered between the brakes and rotates freely. If you’ve done an emergency repair using the CO2 cartridge, you may not have enough pressure. When you get home or to a bike store or gas station, fill the tire.
When you go to buy a new tube, take the old tube with you and match the valve. Presta valves have a nut on a threaded shaft that seals the air in and must be loosened to inflate the tube. You need a pump that’s compatible with a Presta valve to inflate these tubes. If you have Presta valves on your bike, keep a Presta-to-Schrader adapter with you so you can use a gas-station air pump to inflate your tire.
Next, check out how to change a car tire.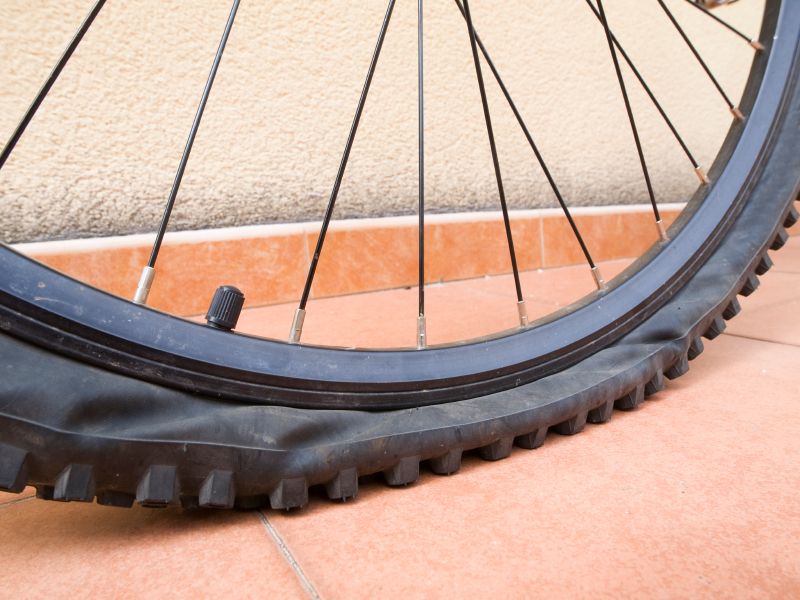
Originally Published: August 28, 2019
ⓘ
A wheel puncture on a bicycle is a fairly common occurrence, especially when riding on rough terrain or using substandard or worn tires. Such an unpleasant incident happens to a cyclist at least once a season, and some are "lucky" to change the camera two or three times in a short trip.
And if it takes five minutes for an experienced cyclist to change the tube on a bicycle, then for some reason beginners are very afraid to remove the tire on their own and most often drag their bike to a service or to friends. It's actually very easy to change the inner tube:

In order to pull the tire out of the rim, you need to pick up its edge with the first "wire" and pull it out of the rim. At the same time, the mount must be held so that the tire does not end up inside the rim again, and the mount itself does not fly into your forehead.
After that, with the second mount, similarly pull out the edge of the tire next to the first mount. Don't forget to hold the first montage while doing this!
If the tire tension is still high after using two mounts, the third mount should be used in the same way.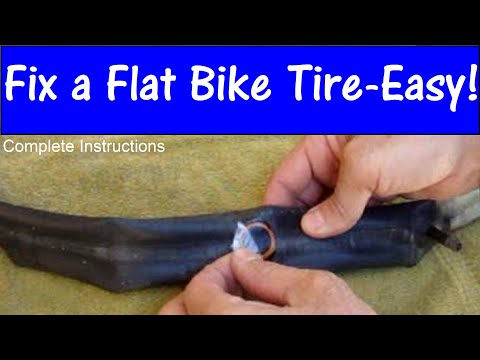
You should end up with one end of the tire completely out of the rim.
Done. Now you can start sealing the damaged camera or just install a new one.
I hope this article will help you learn how to change the camera yourself. Happy rides!
| Recommended reading: | GPS navigator for bike | How to choose a bike | What to do if the chain slips | Tired of riding around your city? Our bike tours are much more interesting!

 If necessary, completely deflate the wheel. This will make the job easier, as there will be no unnecessary resistance.
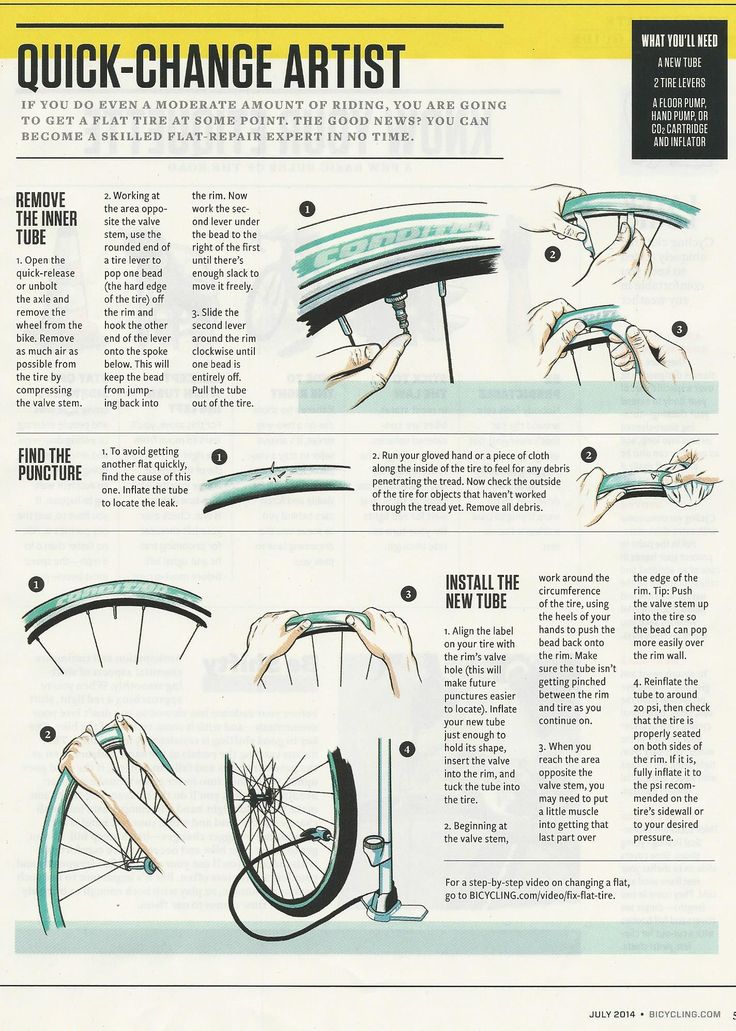
 You can do it with one, but it's better to use two. Use it to pull the tire towards you a little so that it easily enters the rim. You can push the tire a little inward with a mount so that it is better fixed. The main thing is that the attachment depth is the same throughout the circle.