Biketoworkday is supported by its audience. When you buy through our links, we may earn an affiliate commission. Learn more
Written by Gary Johnson / Fact checked by Henry Speciale
All seasoned cyclists know that bike tires can do wonders in their riding experience. Bike tires not only enhance the entire aesthetics of the bike but also provide a more efficient ride. It can enhance comfort, increase traction, and reduce rolling resistance for a quality ride.
However, eventually, your tires will not be as reliable as before. You will notice that your tires are worn out, which compromises your safety when biking.
Thus, here is our easy-to-follow guide on how to change a road bike tire without needing to go to a bike shop. It includes taking off the old wheels, inflating the tire tube, fitting and installing the bike tire into the rim.
Table of Contents
As mentioned earlier, road bike tires directly impact how efficient your bike riding will be. It allows a smoother ride and ensures safety when you are on the road. Road bike tires can also give you full control when riding.
Here’s how you can tell when a tire needs to be changed or replaced:
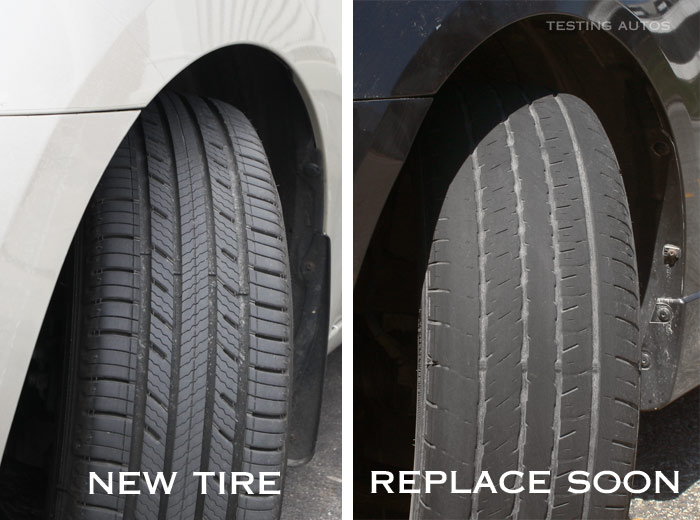
Worn out treadWhen you look at a bike tire closely, you will notice a unique pattern of groove cutouts on the rubber. These cutouts are the bike tread. It is useful when you are navigating on any type of road.
If the tread became shallow, your bike tires would start wearing out until it gets smooth or bald. This will result in loss of traction and most likely compromise the quality of your ride. It also indicates that you need road bike tire replacement
Punctures when cyclingWhen your tires wear out, you will start having punctures frequently. It not only poses a danger when riding but will also become a major disturbance for you. A regular puncture will discourage you from taking the road or join group cycling because of the distraction it causes.
If this happens, check on your tires and see if they need to be changed.
Dry-rotWhen your tires are frequently exposed to corrosive chemicals like gasoline or cleaner, they will exhibit dry rot. Having dry rot invites a potentially harmful situation. You might experience a tire failure, especially when riding at increased speed downhill. It is vital to check your tires for dry rot so that you can change a road bike tube and tire immediately.
Materials needed:
After discovering that your road bike tires need a replacement, you can head straight to a local bike shop for new tires. It is important to get the size of your wheels and measure your old tires. You should also consider the tread patterns and type of tire you want to use for replacing bicycle tires.
Step 2: Take off the wheelsThe first step to take in this process is removing the bike wheels. You can flip the bike upside down or use a bike stand for this step. You must loosen the brakes first for the front wheel, then locate the quick-release levers for easy removal.
For the rear wheel, you must adjust the gears first up to the smallest ring. Loosen the brakes and locate the quick-release lever. Then, focus on the derailleur on the cassette and pull out the wheel slowly.
Step 3: Deflate the old tires before removingFor the tire and inner tube to be removed quickly, you must completely deflate the tires first. Once deflated, you can push the part of the tire closest to the rim and move away up to the midsection of the wheel. Do this step around the bike until the tire is already loosened.
Step 4: Take the tire away from the rimOnce the tire has loosened its grip from the rim, you can use tire levers to separate the tire and the rim. You can use the hooked end of the tire lever and attach it to the outer edge of the tire. When you secure the attachment, you can now pull the level over the edge of the rim. Do this in a clockwise direction until you finally take the tire off the rim.
(Pro tip: You must apply consistent pressure when you remove road bike tires from the rim. In this way, the tire will not fall back into its old position)
Step 5: Pull out the tube from the inside of the tireLocate the tire tube and slide the tube out. When you touch the air valve, you can push it through the hole of the wheel frame and completely remove it.
Step 6: Fit the new road tireAt this point, you are now ready well-versed in changing a road bike tire.
First, you must lay the new tube flat and inflate the tube moderately with a pump. The tube must start getting in shape but should not be entirely inflated. Then, let the tube slide slowly into the tire and line up the tire tube valve to the rim’s valve hole. Check whether the tire fits perfectly into one side of the rim. You must get the proper fitting of the tire before inflating the tube.
Step 7: Install road bike tire into the rimBy this time, you have installed the half side of the tire and tube into the rim; using the tire lever, you can push the other side of the tire over the edge of the rim. Adjust the position of the tube inside when needed. When you replace road bike tube, ensure that the tube is properly installed between the tire and the wheel. Then, roll the rest of the tire to the rim edge slowly. Make sure that you put the tire in place for this step.
After putting the tires onto the rim, you can re-install the bike wheels to your bike. Next, inflate the tire tube using a bike pump. Then, you are done.
Changing your road bike tire is one of the skills you must learn as a biker. You will constantly encounter worn-out tires, especially when you regularly commute using a road bike. Thus, we have developed a simple guide on how to change a road bike tire so you can follow the entire process. We kept the steps uncomplicated; even a beginner biker can understand.
Gary Johnson
“I ride my bike to work for years, but is that enough? Our carelessness towards our surroundings has taken a toll on the environment. And now, everyone is responsible for changes; even the most minor contribution is counted. With this hope and spirit, I started with my partner to establish Biketoworkday to help more individuals commute to their work sites on their bikes.”
Changing a bike tire might sound like the easiest task in the world, yet we’re all too familiar with that heartbreaking image of a helpless-looking rider standing on the edge of the road with a broken tire lever in hand. The right tools and a good technique will get you out of trouble in races, Gran Fondos and local club rides. We’ll guide you through the process of fitting a tire and inner tube properly.
 Take it out of the box and inflate it very slightly. This will make the installation process easier and prevent the inner tube from twisting inside the tire.… but only pump it up until it unfolds.Putting in too much air is pointless and will make the whole procedure harder.… if your name is Greg Lemond or if your lungs are big enough you can unfold the inner tube with your mouth…Before you even attempt to fit the tire and tube onto the rim you have to work out which way the wheel rolls and align it with the rotation arrow printed on the sidewall.Now place the rim inside the tire……and pull just one side of the tire bead over the rim…Make sure you pull the entire first side of the tire over the rim. TIP: if you want to do it like the pros, align the tire logo with the rim decals and valve hole. You can still adjust the position once the first side of the tire sits in the rim.Push the valve stem through the hole. Do this on the side that’s not yet sitting in the rim.…and place the tube into the tire.
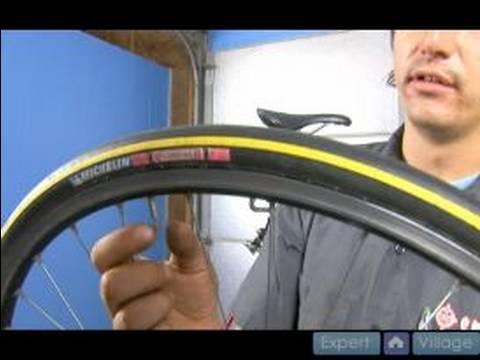 Make sure the valve is straight.IMPORTANT! Fit the tire starting on the opposite side of the valve. This trick allows you to push the tire deeper into the rim and makes the whole installation process easier.Using both hands, press the rest of the tire into the rim. Place the wheel on the floor or lean it against your thighs – this makes it easier to press it into the rim. TAKE NOTE: be careful not to pinch the tube between the rim and the tire.The closer you get to the valve the more difficult it will become to push the tire into the rim. That’s why it’s crucial that the tire always sits deep in the centre of the rim bed on the opposite side. Readjusting the tire from time to time might help too.Should the last few centimetres prove particularly hard you can use a tire lever to pull the tire bead over the lip of the rim – real pros can do this with their bare hands though! If you use a tire lever make sure that the tire doesn’t slip off the rim on the other side.
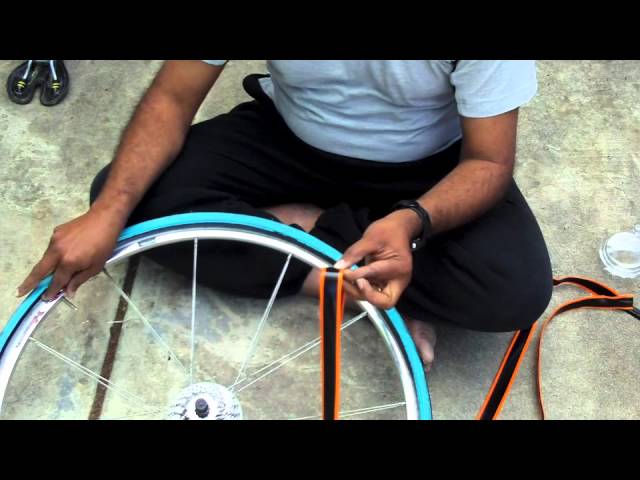 If you managed to get the tire on but the valve moved in the process you can still adjust it using a firm grip (your fingers grip the inner tube inside the tire) and a bit of pressure in the appropriate direction.If the valve and valve-hole are the same size, we advise against using the valve nut. This is mostly used to keep the actual valve straight and can cause the valve stem to snap.Instead of using the valve-nut hold your thumb on the tire and push down firmly right above the valve to fix the pump head onto the valve.
Now it’s time to pump up the tire. We recommend an air pressure of around 6-7 bar in the front tire and 7 bar in the rear – the wider your tires, the lower pressure you can run without risking punctures, with the added benefit of a massive gain in comfort.
Important: Every tire has a bead seat line. If the tire is sitting properly the line should be running evenly along the rim and be completely visible.
If that’s not the case, try to add more air until the tire pops into the rim properly. Once the tire is properly fitted you can decrease the pressure to your needs.
Did you enjoy this article? If so, we would be stoked if you decide to support us with a monthly contribution. By becoming a supporter of GRAN FONDO, you will help secure a sustainable future for high-quality cycling journalism. Click here to learn more.
Words: Christoph Bayer, Manuel Buck Photos: Valentin Rühl
Nikolaev bicycle shop "Sportek"
Published: 02.02.2021
Beading tires on a bicycle wheel is a fairly common and not complicated procedure.
We will not tell you in full how to remove and put on a tire on a wheel rim - there are many different videos and articles about this on the Internet. Let us dwell on only one important moment, but not often discussed by the authors of videos and articles, when, when putting the tire on the rim, the last 10-20 cm remain, and the tire does not want to “sit down” in any place.
In order to tighten the last part, you need to make sure that as you put on the previous parts of the tire, the bead cable does not start to get into its “rightful place” in those parts of the wheel where the tire has already sat down.
That is, during the beading process, you should try to keep the edges of both beads of the tire with the bead ring in the center of the rim - where its “deepest” place is. Thus, slack is formed and the last centimeters of the edge of the tire are much easier to throw over the high side of the rim.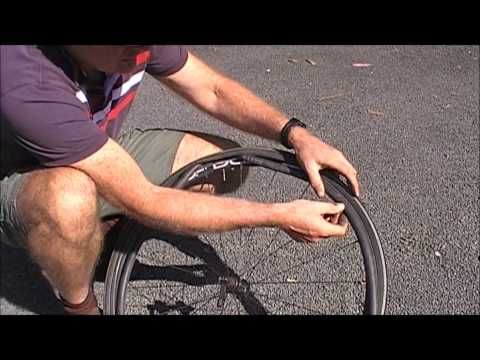
This is illustrated more clearly in the picture:
In case it doesn't work out at all, of course you can use the usual bead blades that many cyclists use.
But for these purposes, in addition to the commonly used blades, there are also special combined blades designed also for putting a tire on a wheel, and not just for removing it.
For example:
Featured Products
11 UAH
BauTech bead blade for bicycle tires (plastic)
15 UAH
BauTech bead blade for bicycle tires (metal)
Comments (0)
x
The rubber of a modern bicycle wheel in most cases consists of a tube and a tire. The option of one-tubes is not considered. Let's talk about installing tires. More precisely about its correct orientation.
If the tread pattern is symmetrical, it can be installed on either side. But there are also unidirectional tires i.e. with a non-symmetrical tread pattern designed for installation and rotation in one direction. For such tires, installation orientation already matters.
Some manufacturers clearly and unambiguously draw an arrow according to which the wheel should rotate at the recommended setting.
If installed on the front wheel - see the arrow Front, on the rear - Rear. Sometimes a tire is specifically designed to run on the rear only, or only on the front. Then the manufacturer also makes a warning label:
Installing such a tire in the wrong orientation leads to worse grip, poorer bike handling, less rolling and faster tire wear.
If an arrow is drawn and it is written in letters on the rubber how to install, then everything is simple. But what to do when the tire is clearly unidirectional according to the tread pattern, and there are no arrows and other indications?
First of all: "clearly unidirectional" means that the tread pattern resembles a "V" when viewed from the front.
The recommended installation is such that the rear wheel leaves " >>>>> " and the front " <<<<< " when driving from left to right.
Reason for this recommendation. The rear wheel is responsible for traction and flotation, so the "V" should "rest" with its feet on the surface for better grip ("/\"). The front wheel plays b o a major role in braking, so the figure is oriented in the opposite direction.
If you need maximum cross-country ability - put both tires ">".0003
The issue of grip/braking in relation to the orientation of the tread pattern is important when driving on dirt, sand. On asphalt, it doesn't matter.
And one more thing. If you look at the "Belarus" tractor or car tires, you will notice that the tires are installed exactly the opposite way: "<".