Don’t know how to break a tire bead by hand? No problem. We have you covered with all the information you will need in this step-by-step guide.
We break down the procedure from knowing what the tire bead is to successfully breaking it. Read on to save yourself from a trip to the auto shop!
The tire bead is a steel cable covered in rubber that holds the edge of the tire to the wheel. It prevents the tire from shifting out of position when it rolls.
When the wheels are fully inflated, the bead is secured in place within the grooves of the rubber by the air pressure inside.
A couple of reasons you might want to remove the bead yourself are saving money and keeping up the maintenance. Breaking down the bead helps keep the rubber surface clean because it allows you to remove any dirt or debris that would otherwise be locked in the surface.
A mechanic can do the removal but will charge you for a simple task easily done in your driveway. So, let’s learn how you can do it yourself.
Before you can get started on how to break a tire bead by hand, the first step is to position the tire on the ground.
You want the wheel to lay down flat on a hard surface. Working on concrete will be easier than on grass or dirt, where the surface may be uneven. You will need to release the air evenly before moving onto the following steps that will require you to have a good grip on the tire.
Releasing air from the tire will bring down the PSI or pounds per square inch, so the pressure against the wheel’s rim will decrease. This will make it easier to separate the bead from the rest of the rubber. In any other circumstance, you want to make sure your wheels are properly inflated.
One method is to rotate the cap on the valve stem counterclockwise to expose the metal pin located in the center of the valve. Use a screwdriver, a pair of needle-nose pliers, or a similar small tool to press down on the metal pin.
Once enough air has been released, lift the tool off the pin, and the wheel will stop deflating. Replace the cap when finished.
If you want to deflate the tire entirely, you can also unscrew the metal pin with a pair of needle-nose pliers. Air will escape much quicker.
Whichever method you choose, do not lose the cap for the valve stem or the metal pin. Keep them in a safe place until you are done.
The next step leading to the action of how to break a tire bead by hand is to prepare the area around the inner circle of the wheel. When the PSI is below the necessary level for keeping the bead secure, the rim will be easier to pull off. If the tire bead is stubborn, you may need to either deflate it some more or apply more pressure by standing on the tire as you pull it apart.
Since the bead is held firmly against the rim by steel cable and glue, you need to use a lot of force to break the connection. Applying an automotive lubricant along the edge of the rim will make it easier to slide the rubber out from around it.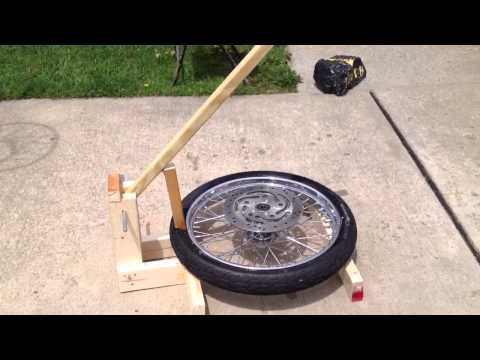 To prevent the metal from being scratched, you can tape it before adding the lubrication.
You want to push the rubber downward as hard as possible so the bead can pop out. Be careful to follow the seam to avoid damaging the metal rim. If you follow the prepping step above, the metal should be well protected.
The lining should be easy to grip and loosen until it can be pulled out from around the rim. The rim can also be removed without requiring additional tools or a machine. When the bead pops out, it will tear away from the rim.
Consider checking: How To Break Bead On ATV Tire
When learning how to break a tire bead by hand, realize that there’s a chance you can cause harm to yourself or the metal rim. Remember to stay safe and follow our step-by-step instructions.
If you ever have doubts, feel free to reach out to a certified mechanic.
Did you find this guide helpful? Then feel free to check out:
How To Set The Bead On A Tire
Getting trash and rubbish inside tires happens quite a lot, especially with vehicle owners having many off-road trips. To be more specific, the trash will make its way onto and into the tire. And this is the reason why we need to break a tire bead.
Tire bead is the innermost diameter of the tire that connects with the wheel rim. Most people think that breaking a tire bead is common knowledge for every driver. However, not that many car owners know how to break a tire bead. As long as the bead stays intact, there is no gap to form between the rim and the outer edge of the tire. Basically, there is no way to fix the tire from the inside, which is another reason to learn how to break a tire bead. In this article, our car experts will tell you what tool you need to break the tire, as well as how to do it.
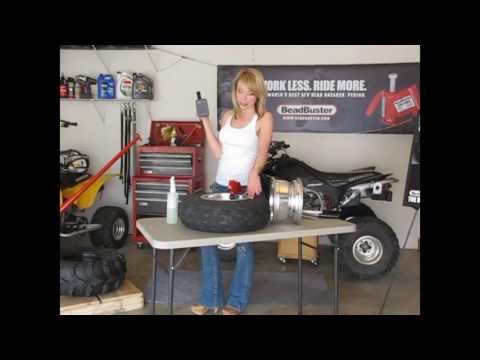
Bead BreakersBefore getting to know how to break a tire bead, it is essential to acknowledge your best tool. Bead breaker is the car tool with the purpose of separating tires from their rims. Different types of bead breakers have different ways of using. So let’s jump right into answering the question “how to break a bead on a tire“:
This bead breaker uses a plier-type tool in order to apply force between the bead and the rim’s lip. The tool has a spike to perform this task. To be more precise, this spike imposes a force on the bead and the sidewall of the tire to separate them. Therefore, it weakens and removes their connection. This plier type mechanism is amazingly effective and can get the job done very fast. However, it has its disadvantages. The spike is like a double-edge knife that might leave scratches on the surface and on the wheels themselves. Not to mention, this plier type mechanism is very heavy and big, which requires your full body weight in order to get the results.
Shoe and Lever MechanismJust like the name said, the shoe and lever mechanism has a shoe-shaped tool which can apply pressure on the sidewall of the tire. In order to break the connection between the bead and the rim, car owners must push the sidewall. This is, without a doubt, the most popular bead breaker among all, since it works amazingly well on motorcycle tires, new passenger vehicle tires, as well as trailers’ tires. The benefits of this bead breakers are quite a lot: First of all, it is very low cost, so anyone can purchase one for their vehicle. Second of all, the way to use it is quite simple and easy to follow. Last of all, it is made for passenger cars’ tires.
On the other hand, it does not work very well with old and hard-to-change tires. Since the shoe and lever mechanism is also large and bulky, this breaker can only be used on some particular types of tires.
Clamp and Ram MechanismLast but not least, the quickest and most efficient break beads of all time: Clamp and Ram Mechanism. If the first two mechanisms cannot solve the problem with difficult-to-replace tires, this bead breaker can deal with all of them. In order to make it work, this machine uses a pointed foot tool with the purpose of exploiting the space between the bead and the rim’s lip. Not to mention, this bead breaker also has a padded clamp. The part can go inside the sidewall with little effort. Long story short, not only this machine works with all types of tires with minimal human effort, it also causes no harm to the sidewall or to the tires. However, it is quite costly.
Knowing that you are already familiar with all the tools, let’s answer the question of “How to break a Tire Bead?”. In order to perform this task, car owners need to follow these steps:
Step 1: Prepare the ToolNo warrior goes barehand into the war. Here is the tool list that you need:
In order to start breaking tire bead, car owners need to be taken off the valve core to release air pressure out. This step needs to perform before and during the first stages.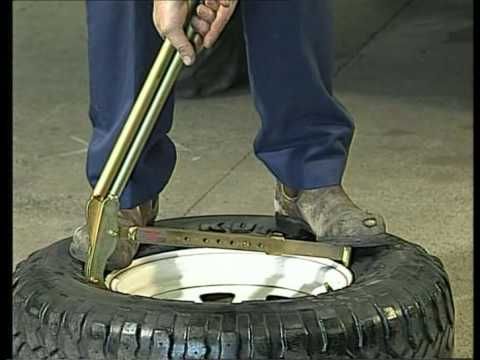
When the valve core is removed, car owners need to put the wheel under the brace. By performing this, the air will be pushed out and we can easily take the wheel off the rim. Just remember to wait until all the air pressure is lost in order to remove the wheel. A little tip to check the tire is to press your hands against the tire’s surface.
Step 3: Place Tire on a SurfaceIn this step, car owners need to lay the tire on a hard surface. After that, you should position the breaker bar between the rim and tire. Before proceeding to the following step, it is suggested to check if the tapered edge of the breaker bar is aimed toward the tire, not the rim.
Also, a solid surface is the necessary factor in this step, since it is capable of handling the pressure you are going to apply on.
SEE MORE
Inner Tire Wear: Causes And Fixes
Must Have Tools For Garage: A Comprehensive List
The next step of “How to break a tire bead” is to slide the breaker bar between the rim and the tire.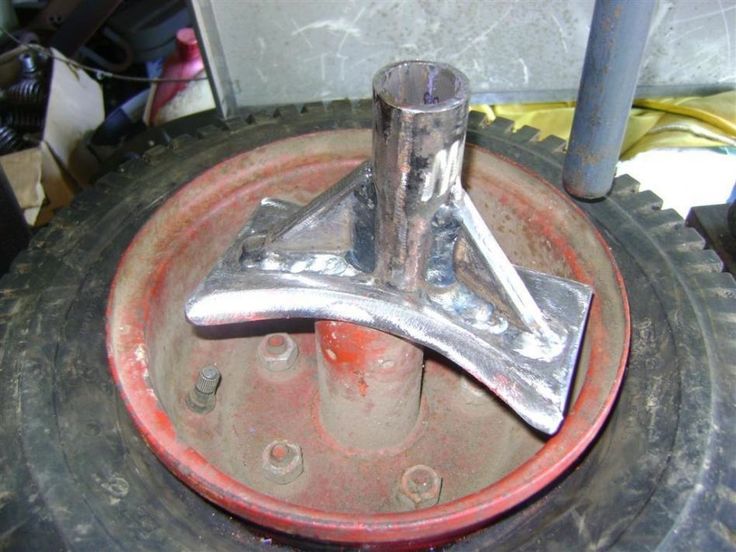 It is essential to check if the pointed edge of the breaker bar points away from the tire’s rim. The reason for this is that the edge is highly sharp and might create scratches inside. For that reason, car owners might want to aim the bar to the tire, not the rim.
When the breaker is already steadying in the distance between the rim and the tire, it is time to hit it with a hammer with the purpose of breaking tire bead. Wait, we are not telling you to destroy the tire! The purpose of doing this is to drive the breaker inside. So keep hitting it and pushing the breaker bar toward the ground until the bead is broken and we can tell by a small pop sound.
Just take time with this, breaking a tire bead is no joke (Photo Source: bendpak)Step 6: Rotate Around the Tire’s InsideLast step of how to break a tire bead is to remove the tire of the rim. Car owners are recommended to rotate the breaker around the tire’s inside while continuing hammering from above. Keep doing that until the tire is off the rim, then turn around and do the same with the opposite side of the tire.
Many people might be wondering, why do drivers need to learn how to break a tire bead? One of the reasons is that the process is simple to follow, even with beginning car owners. All drivers need is thirty minutes and this instruction. Another reason that it provides a great help in cleaning up debris and dirt inside the tire. By breaking the bead, vehicle owners can remove the rubbish inside and reduce the future problems. The last reason is to save the cost of paying a car repairman, since you can remove the tire from its rim by yourself.
With the development of tire fitting, many novice drivers, unlike experienced drivers of the older generation, do not know how to seal the tube, or how to change it, or how to separate the tire from the wheel to do this - that is, the disassembly process itself. They don’t know while they are driving around the city, but it’s worth going somewhere far to the sea, or at least to the country, and then an inexperienced driver can lie in wait for a surprise lying on the road, in the form of a nail. And the spare tire has been punctured for a long time. And any driver immediately becomes interested in how to separate the tire from the rim, especially if over the years it has thoroughly stuck to the edge of the rim. In this article, we will look at several ways to peel a tire from a rim - stripping, and when using them, you will not need to wave a sledgehammer.
On motorcycle wheels, the effect of “growth” of the tire bead to the edge of the rim is very rare, although it also happens, especially when using a wide tubeless tire, but on cars, the tire is always glued, and the stronger the longer the wheel has not been disassembled. And the process of "welding" the tire to the rim depends on the composition of the rubber, the surface of the rim flange, how much the tire was heated during operation, what pressure it had, and on the design of the rim itself.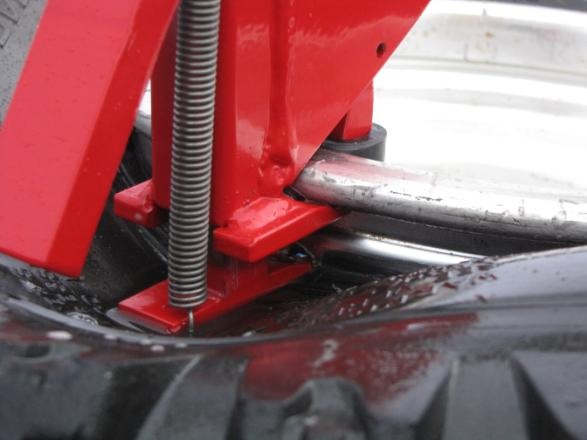
And if the rim is designed for a tubeless tire, that is, it has bulges (humps) on the edges to hold the tire and seal the joint during inflation, then such a tire is even more difficult to separate from the rim. In tire shops, there is a special machine for this, which develops a fairly large force to separate the tire from the rim. Naturally, on an autonomous journey, somewhere in the outback, you may not meet a tire service with such a machine, but instead Uncle Vasya can meet you with open arms, with a sledgehammer and a couple of cut corners.
Of course, there are kits for repairing tubeless tires on the road, but many drivers even install a tube in a tubeless tire if the rim is slightly damaged and the tire does not hold pressure. Although a tubeless tire can be repaired with high quality, if only to separate it from the rim. To separate the tire bead from the rim flange, many try to use their own weight by standing on a lying wheel.
But 80 kg weight rarely achieves anything, especially if the tire is normal and has not lost its elasticity. And a high-quality fresh tire, especially a tubeless one, can be torn off by its own weight even at 90 - 100 kg is not always possible. After all, force must be applied at the very edge of the rim and tire, and the foot slips here, and the shoe deteriorates.
There are several non-impact methods (I'll just remind you about impact methods that spoil the rubber), easy separation of the glued tire from the wheel rim. And the most common way, which by the way has several disadvantages, is a car hitting a board laid on a wheel tire, as in the photo on the left.
It is not always possible to put it into practice, because firstly you need a solid board, and secondly, in order to run into a punctured wheel, you need to replace this wheel on the car with a spare wheel, and if it is also punctured. Moreover, if there is a spare wheel, then by installing it, you can safely get to the nearest tire service.
The most common method (impact), which, by the way, was also used in tire mantage, until a disassembly machine appeared, is to separate the tire from the rim with a sledgehammer and a piece of a metal corner, as in Figure 1 a, or a piece of spring - Figure 1 b.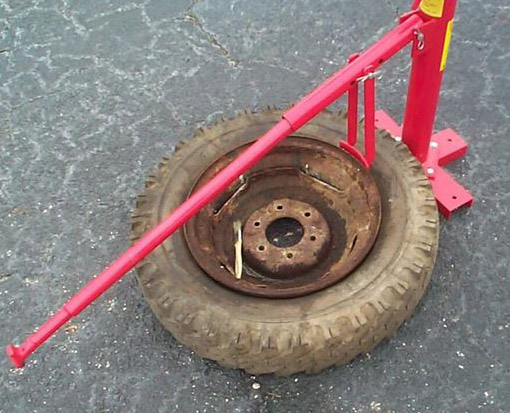
Although the sharp edges of the corner or spring should be naturally blunted, this method can still spoil a quality tire a little, and even the paint on the rim. Therefore, it should be used in rare cases, and why, if there are other unstressed methods that do not require swinging a sledgehammer and which we will consider below.
Other non-impact methods of wheel disassembly are based on the use of a regular jack of domestic cars. The use of a jack with the participation of the machine can be seen in the photo on the left. But most of the methods using a jack can be used without the participation of the machine (or rather, its weight).
And one of the best ways can be seen in figure 1. And compared to the common way shown in figure 2, this way has a great advantage.
With this method (as in Fig. 1), the overturning force acts on the jack much less, that is, it is much easier to hold it vertically (perpendicular to the wheel). In addition, this method allows the use of almost all car jacks (hydraulic, angular, diamond-shaped, etc.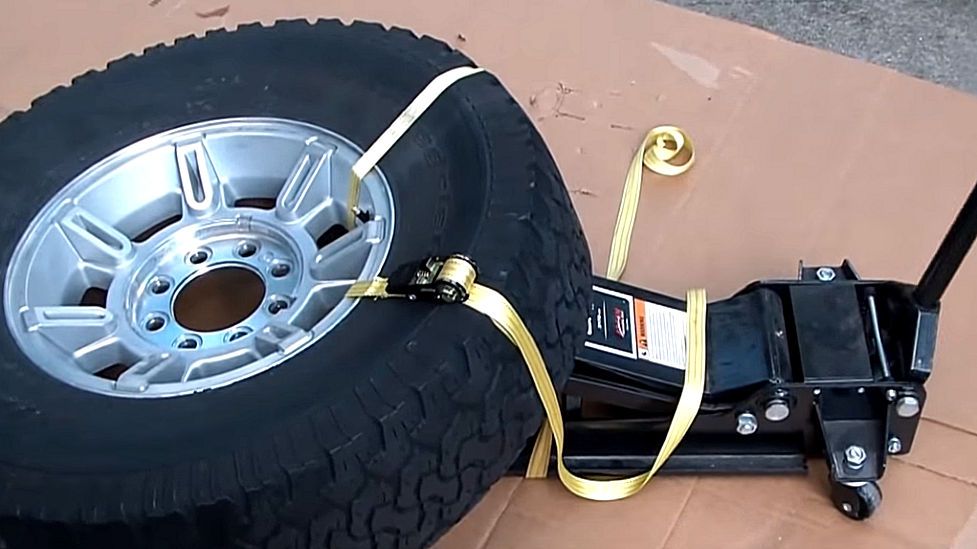 ).
).
And with this method, you do not need to carry any additional devices in the trunk, except for a jack and a strong rope or webbing. And the role of the lower stop will be successfully performed by a large open-end wrench or mounting blade. Well, if you are going to disassemble the wheel in your garage, then you can make a special recess in the wall into which a piece of the profile pipe is concreted, and then use it to stop the jack (as shown in Figures 5 and 4).
If, for example, you came to your country house and found a punctured wheel, then after finding suitable thick boards, you can use another way to disassemble the wheel, shown in Figure 6.
With this method, the peeling force of the tire will depend on the ratio of the shoulder A and B, so the length of the boards matters. By the way, now on sale you can find very useful lever devices for easy shockless disassembly of the wheel.
One of these useful devices is shown in Figure 7. It is quite effective and its only drawback is that it is rather large due to the length of the lever, although it depends on what kind of trunk the car has.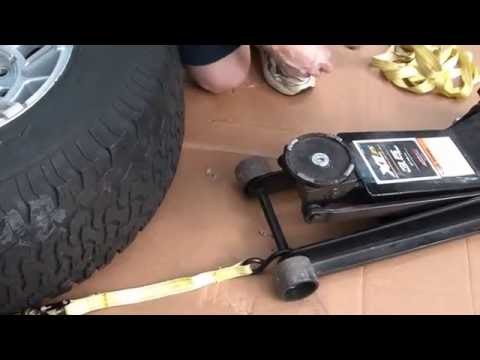
But if you have a small trunk, then the lever can be shortened (cut off), and to lengthen it, use a suitable pipe, which will be put on before work, lengthening the lever. You can search for sale or make your own and other spectacular devices, for example, as in Figures 9and 8. If you make the device shown in Figure 9, it will take up very little space in your trunk, but will be very useful.
The dimensions on the drawing can be changed slightly, according to the diameter of the wheels of your car. And finally, one more piece of advice. Before you start disassembling the wheel, it is useful to spray a penetrating liquid into the joint of the tire bead and rim, for example, a common “weed” (WD-40) or Unisma, wait about five minutes and then start working. And the tire will peel off the rim flange much easier.
By the way, it has been verified that these fluids do not have a bad effect on rubber. Well, I hope everyone will be able to seal the camera or repair a tubeless tire, and if someone is going to do it on their own for the first time, I advise you to read this article, which describes in detail the repair sequence for both tubeless and tube tires.
In addition to commercially available 12 volt vulcanizers, there are now many cold bonding kits for both tube and tubeless tyres. Each set comes with instructions for use.
In conclusion, I advise you to watch an interesting video under the article about a simple device for shockless wheel breaking, which you can make yourself from very affordable pipe cuts that can be found on any scrap metal.
Tags: How to easily peel off a tire from a wheel rim?, Several ways to disassemble a wheel tire.
The availability of tire shops has allowed the vast majority of drivers to do without the knowledge and skills of self-beading car tires. But for some, this skill can help in a number of situations. Not everywhere there are tire shops, not all wheels allow movement after a puncture, and someone can get into a difficult financial situation when the opportunity to save money on visiting a workshop would be useful.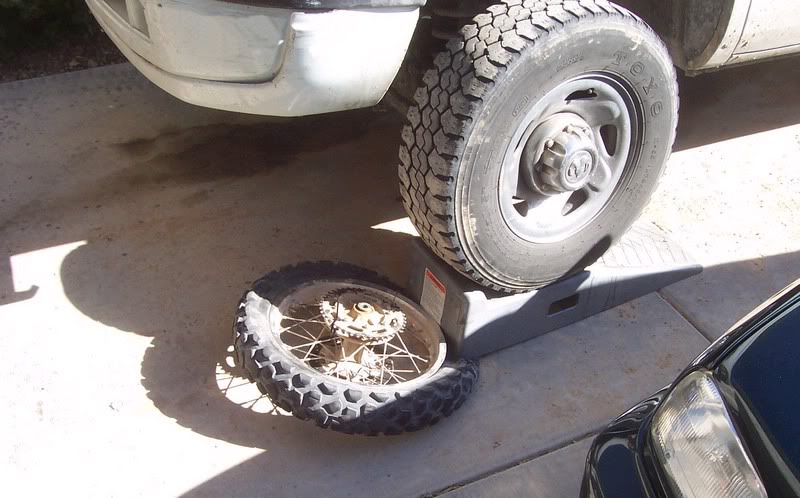 9Ol000
The procedure itself, with experience and some physical capabilities, will not be difficult.
Theoretically, all tires are divided into tube and tubeless. In the first type, a chamber is also embedded in the tire, which actually ensures tightness.
With high-quality and precise manufacturing of tires and rims from modern materials and proven technologies, the need for a chamber is eliminated, and with it the extra mass of the wheel assembly, which is unsprung, that is, especially harmful to the properties of the car.
Read: Why do drivers put tubes in tubeless tires and how to do it
Accordingly, any car owner will have to deal exclusively with tubeless tires. There are exceptions when the tire, due to age and minor damage, as well as due to corrosion of the disk, ceases to hold air.
Sealants do not always help, so in order not to throw away a tire with a still deep tread and preserved sidewalls, a tube is put into the wheel.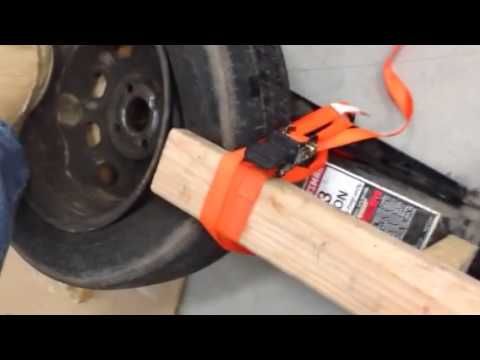 This is rare, but it still happens.
Wheels for tube and tubeless tires are also different. They differ in the size of the hole for the valve, as well as in the presence of a special annular protrusion on the rim shelf - khampa in the case of a tubeless version.
It prevents the wheel from breaking apart on the move if there is some loss of pressure. No hump will help from complete depressurization, the tire will be torn off the disk.
The suddenness of an event such as a puncture, as well as the shortage of repair shops along the roads in the old days, led to the emergence of many popular methods for dismantling a tire in order to replace the tube or apply a patch to it.
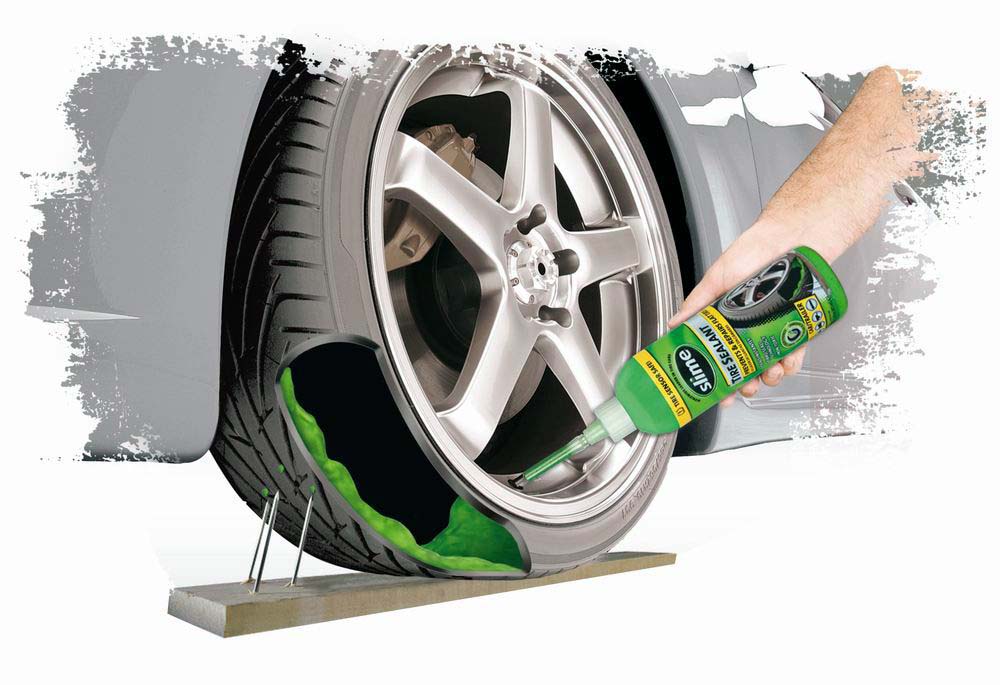
Tubeless tires are also puncture-repairable, for which there are appropriate first aid kits. There are also those in which there is no need for disassembly. But for a reliable repair, the tire is still better to remove.
Continuation: How to repair a tubeless tire yourself (harness set and repair kit)
There are two problems with dismantling. The first is to tear the edge of the tire off the rim shelf. There is a recess in the center, so the edge fits freely into it, and it sits on the shelf with a significant interference.
Especially on a wheel that looked like a lot, where metal corrosion and rubber degradation caused the tire to stick to the rim. The situation in the case of a tubeless tire is aggravated by the presence of a hump, the outer diameter of which exceeds the landing size of the tire, the bead will have to be dragged through it with force.
Second - move the edge of the tire over the edge of the disc. It is not easy enough, but in the presence of lubrication it is carried out with a pair of mounting blades. Or a roller fixture of an assembly machine.
The first problem is solved in various ways, differing in the nature of the application of the pull-off force.
When hitting, a lot of force is developed, but the situation is complicated by the elastic resistance of the tire. They hit the edge of the tire through a spacer in the form of a corner or other object that excludes rubber breaks.
The method is dangerous and not recommended for use. But many succeed in a hopeless situation.
The force is applied through the lever of one of the devices or a significant mass in the direction perpendicular to the plane of the wheel:
It is easiest and safest to have a dismantling tool in advance.
To make the job as easy as possible, you will need:
Even if the tire is completely flat, you must unscrew the spool from the valve, and a little pressure will still interfere.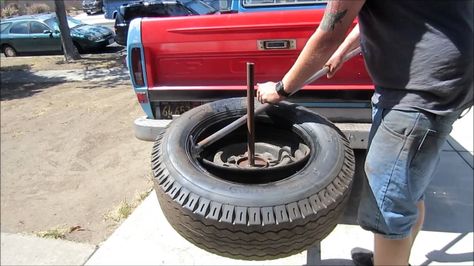
Gap between rim and tire is wetted with penetrating lubricant. Then a device is applied to the wheel and a gradual separation of the edge of the tire is made with its shift inward.
Don't do it in one motion, you could damage the tyre. Start on the opposite side of the valve.
After completely tearing off the edge and dragging it over the hump, everything is repeated from the opposite side of the wheel. The tire beads move to the middle of the disc, it is lubricated again.
Starting from the valve, the tire is dragged over the flange of the disc with two pry bars. The second edge is dragged in the same direction, it is necessary to act from the side of the disk.
Due to the lack of a hump, the process is easier. You just need to make sure that the camera does not get between the mount and the disk.
If it is not necessary to completely remove the tire, it is enough to remove the inner tube for repair after tearing off both beads and dragging the outer one.
If you don't use lubricant or soapy water, it is very difficult to drag the bead over the disc. The friction of dry rubber on metal will not allow this to be done, the risk of damaging the rubber increases.
In the impact method, the rubber with its elasticity sends a heavy hammer back with great energy, this is dangerous.
Read: How to unscrew the lock on the wheel if you lost the key
Even with a good tool, trying to tear off the bead in one motion will damage the inner cord of the tire. It is necessary to act in several steps around the circle.
Be especially careful with the edges of the cast alloy wheel.