Edit
Edit
Edit
Edit
Edit
Edit
Disconnect the electrical sensor connector located on the top frame of the right side of the four wheeler.
Be gentle so you do not break the plastic connector.
You will probably have to pry the clip on the connector with a small flat blade screwdriver to separate the two halves of the connector.
Edit
Edit
Edit
Use the Phillips screwdriver to remove the two screws holding the primer assembly on the carburetor.
When you take this screw out, be careful that you do not lose the spring underneath it.
Edit
Use a Phillips screwdriver to unscrew the four screws that secure the top metal cover of the carburetor, and remove the cover.
After you remove the metal cover, pull out the spring and rubber bellows that was underneath it.
Be sure to remember the position of the vacuum holder highlighted in the picture so that you can put it back in the same position later.
Edit
Edit
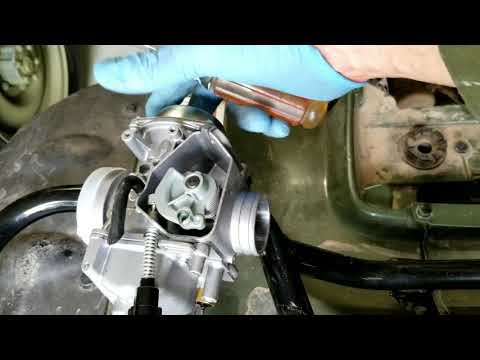
Thoroughly spray carburetor cleaner all over the outside, inside, and openings of the carburetor.
Be careful not to get carburetor cleaner on your skin or eyes or breathe it in.
Edit
Edit
Use a flat blade screwdriver to unscrew and replace the idle air adjustment needle along with its rubber o-rings provided in the carburetor kit.
Be sure to take note of the number of turns that the screw is initially screwed in, as this is the factory adjusted idle air for the four wheeler; you will want to put this screw in the exact same position when you screw the new needle in.
Edit
Edit
Edit
Edit
Edit
Edit
with 2 other contributors
Badges: 7
+4 more badges
A clean, well-tuned carburetor is a key factor in the performance of your Honda Foreman ATV and nothing makes cleaning carburetors faster, safer and easier than an ultrasonic cleaner.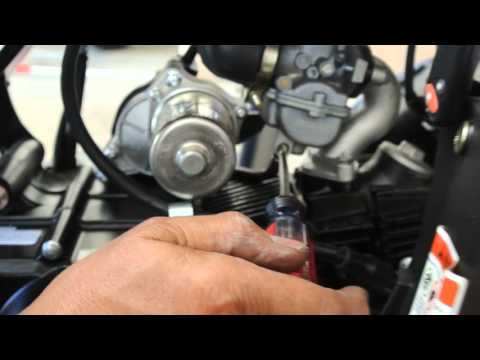 Whether you operate a Honda Foreman ATV service shop or do it yourself, you’ll be amazed at just how thorough an ultrasonic cleanerul can be in removing varnish, grease, oil and other contaminants from one of the most intricate assemblies on your Honda Foreman ATV.
Ultrasonic cleaners are used in a wide range of applications to remove virtually any soil or contamination by using the power of cavitation action. This is the term used to describe the implosion of billions of minute bubbles contacting carb parts being cleaned. The bubbles are created by generator-powered ultrasonic transducers bonded to an
ultrasonic cleaning tank and typically operate at an ultrasonic frequency of 37 to 42 kHz (37,000 to 42,000 cycles per second).
When the bubbles implode contaminants are quickly and safely blasted away from wetted surfaces without damaging delicate carb parts. So tiny are the bubbles that they penetrate minute cracks, crevices and blind holes impossible to reach by hand scrubbing using conventional parts washers or aerosol sprays The ultrasonic parts washer will complete the job in less than an hour, meanwhile freeing you up to attend to other tasks. And it will do it in an environmentally friendly manner because the ultrasonic carburetor cleaning formula is a biodegradable concentrate that minimizes disposal problems.
Ultrasonic carb cleaners come in a variety of sizes from bench top units to a floor-mounted
industrial ultrasonic cleaning machine, so you can select any size you need. Our most popular 1½ gallon models for cleaning one carburetor at a time are the TOV150-6L and Eh250EL. Select an ultrasonic carb cleaner equipped with a heater to improve the ultrasonic carburetor cleaning process.
Whatever the model and size ultrasonic carb cleaner you use there are steps to take before cleaning begins.
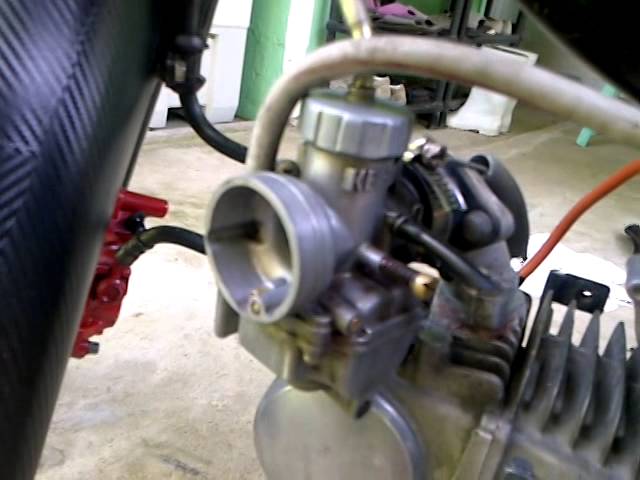
Step 1: Removing the Carburetor
First, remove the fenders and take out the seat. Take out the airbox to get a good look at the carburetor. Unscrew the bolts and pull the gas tank off. From the top of the throttle linkage, unscrew the throttle cable. Remove the other end of the throttle cable from the carb.
Unscrew the top and drag the end of the cable out. The needle and slide connected to the cable should pull right off. Remove the black plastic cover on the side of the carburetor by unscrewing it. Unscrew the plastic nut from the carb and pull the choke cable out. Once the choke cable is out, the carb heater will unplug at the wiring harness. After the following steps, the carb should come off easily with just a few pulls and turns.
You now hold in your hand, your Honda Foreman carb.
Congratulations! You have successfully removed your Honda Foreman carb from your ATV! You may now proceed with the next step.
Step 2: Cleaning the Carburetor
Although you can clean your carburetor without any disassembly you will achieve the most thorough cleaning with partial disassembly to allow the solution into the float chamber. Remember that only surfaces that are wetted by the cleaning solution will be cleaned. Fine mesh baskets can be used to hold very small parts.
Set the thermostat to 70°C. While the solution is heating, place your carburetor parts in the basket taking care that they do not touch each other. Once the operating temperature is reached lower the basket into the cleaning solution and set the timer for 40 minutes. Cleaning time depends on the condition of the carburetor and may have to be adjusted.
At the end of the cycle remove the components from the bath. If they are not clean replace them in the bath until the cleaning is complete. Then rinse them in fresh water to remove all traces of the cleaning solution and allow them to dry.
Safety note: DO NOT reach into an operating ultrasonic bath. Instead remove the basket if you want to inspect or rearrange the parts.
Step 3: Reinstalling the Carburetor
Return your Honda Foreman ATV carb to its original position, making sure to screw the nuts and bolts holding it into the assembly. After the carburetor is secure, plug the carb heater wires back into the harness. Return the choke cable by screwing the plastic nut back on the carb. Push it in and make sure it stays in place. Screw the plastic cover back on.
Return the other end of the throttle cable to the carb. Insert the needle and slide connected to the cable on top of your Honda Foreman carburetor. Make sure it stays in place then once it won’t budge, screw the top tightly back on. Return the throttle cable to the top of the throttle linkage exactly where you found it.
After this, a few more steps must be done. Screw the gas tank tightly back on the ATV. Return the airbox so that the carburetor remains hidden. Now for the last step, put the fenders back and install the seat.
Admire the piece of work you just put back together.
Voila! Start the engine, and your Honda Foreman ATV should be good to go.
Oils that rise to the surface of the bath should be skimmed off and disposed of properly.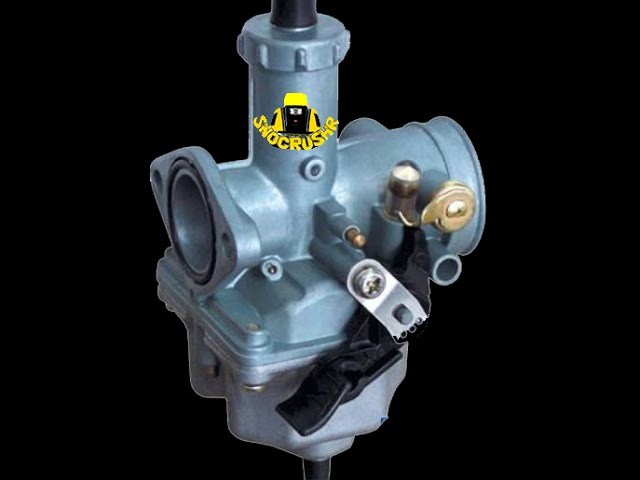 When the solution becomes discolored or cleaning time takes longer it is time to replace it. Drain the tank and dispose of the spent solution according to local regulations. Take the time to remove sludge that settled to the bottom of the tank. Clean the tank using a cleaning process recommended by the manufacturer.
Questions: Contact the iultrasonic ultrasonic cleaning experts at 973 821-4400
Disclaimer: This advice is not provided by a licensed mechanic. Follow at your own risk. We assume no liability for any damages caused by following the advice in this article.
It often seems like an insurmountable task for beginners to tune and adjust the carburetor of an ATV, but in fact, it is far from being the case. Using our instructions, you can easily set up a carburetor with your own hands.
Due to incorrect carburetor settings, problems such as: acceleration dips, jerks while driving, uncertain start of the engine, poor acceleration dynamics, overheating, loss of power, increased fuel consumption, formation of deposits in the combustion chamber.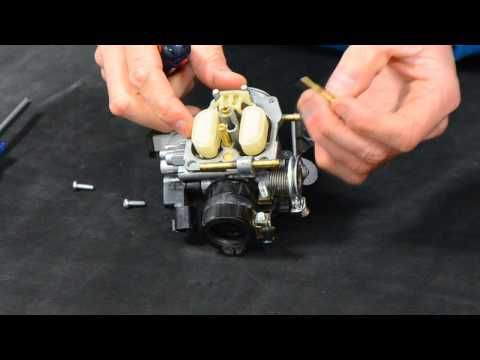
So what exactly are we going to tune?
Attention! The adjustment is carried out under the condition of a warm engine and a clean carburetor.
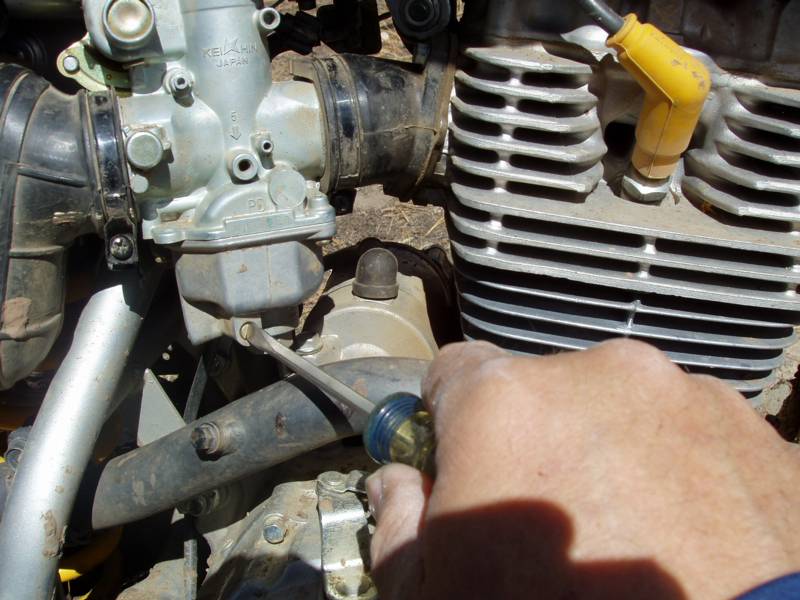
First, make sure there is no condensation in the carburetor. First, you need to drain the gasoline from the float chamber, for this you need to close the fuel cock and partially unscrew the screw No. 1, after the gasoline has drained from the float chamber, tighten the screw No. 1.
Let's look at photos of candles with various deposits and defects.
A 100% indicator of a correctly adjusted combustible mixture is carbon deposits on a candle.
Consider the location of the screws for adjusting the quality of the mixture and idle speed of carburetors of different models.
#1 Float chamber plug; No. 2 Mixture quality screw;
#3 Idle adjustment screw.
1 - quality adjustment screw at idle; 2 - fuel inlet fitting; 3 - fitting through which you can sleep fuel from the float chamber; 4 - screw-plug of the float chamber.
1 - ventilation tube; 2 - idle speed adjustment screw; 3 - screw for adjusting the composition of the air-fuel mixture.
ATV carburetor speed and mixture adjustment.
1. Start and warm up the engine until it reaches operating temperature.
2. Adjust the idle screw to set the idle speed to normal. Completely, until it stops, tighten the fuel mixture screw, the engine should stall. If this does not happen, check the tightness of the air supply system from the air filter.
3. Loosen the fuel mixture screw 1 turn. (Turning the screw clockwise, we enrich the mixture, unscrewing it counterclockwise, we lean).
4. Start the engine and, by adjusting the idle speed screw, set the speed slightly higher than normal
5. Slowly unscrew the fuel mixture screw until the engine reaches maximum speed (we unscrew the screw no more than 2 turns, but depending on engine wear and other malfunctions, the range may vary).
6. Re-adjust the idle screw to set the idle speed to normal.
7. Press the throttle trigger several times, check if the idle speed is stable.
Adjustment of the mixture quality with a needle.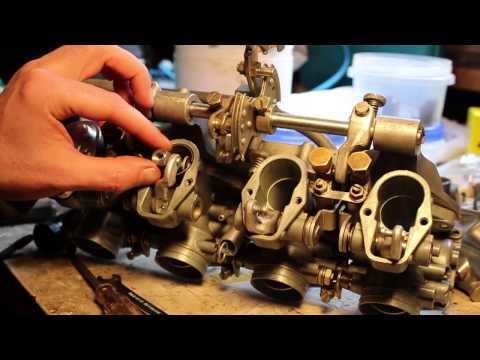
Probably you have heard more than once about adjusting the quality of the mixture on the carburetor by manipulating the needle. I note that these are extreme measures, for the initial adjustment, use the mixture quality screw, and only if you do not get the desired result, unscrew the mount and remove the needle. What does she represent? This is the main element that regulates the amount of gasoline supplied to the combustion chamber. Connected directly to the throttle handle through a cable. When you turn the knob, the needle rises higher, opening up a channel for fuel, thereby delivering more mixture, which increases power, which translates into speed.
You will see 5 grooves on the needle at the attachment point. Initially, the retaining ring fixes it in the central position, this is the best option. But sometimes it is not possible to achieve the required quality of the mixture. Then we will need the remaining grooves, 2 on top and 2 on the bottom, this suggests that we can adjust the dose gradually.
Lifting the retaining ring up and locking it in this position lowers the needle, which, in turn, blocks the channel more than usual. Gasoline enters less than air, and the mixture becomes leaner. Lowering the ring down, we raise the needle, and everything happens exactly the opposite.
Be aware that an excessively lean or rich mixture can lead to serious malfunctions from overheating to loss of power, carbon deposits in the combustion chamber and all the consequences that follow from this. Keep an eye on the condition of the spark plug electrodes, this is the main indicator that will help you determine the quality of the mixture.
If you have any questions about the adjustment and tuning of the carburetor, you can ask them below in the "Comments" column.
 Over time, the system starts to work incorrectly, which increases fuel consumption, worsens dynamics and other problems appear. So how do you adjust an ATV carburetor?
 The operation and life of the engine directly depends on the quality of the fuel mixture. The carburetor is responsible for the preparation of the composition, but after prolonged use of the equipment, the settings “go astray”. This results in:
 The quad becomes "sluggish" and reluctantly picks up speed. In addition, jerks appear when accelerating.
 Many riders who decide to buy an inexpensive ATV simply do not spare the technique and ignore this procedure. But even if you plan to change your device in 1.5-2 years, adjustment is needed. The reason for this is increased fuel consumption. A quad with an untuned carburetor "eats" 30-40% more gasoline, and these are tangible costs.
So how do you adjust the carburetor on a Chinese ATV? For this you need:
However, it is important to remember that all adjustments are made only with a "clean" carburettor. This means that the rider needs to remove all the dirt from the node and flush the system to remove condensation and sediment from it.
Note: The engine must be warmed up to operating temperature immediately before adjustment.
To set the carburetor idle, the float chamber must first be cleared of fuel. To do this, start the ATV, close the fuel cock and wait until the machine stalls (5-10 minutes). To speed up the process, you can take a little ride on the quadric. Of course, gasoline can be drained, but in any case you will have to warm up the device, so the first method of "removing" gasoline is more effective.
Then:
Read the manual before adjusting the carburetor on a 125cc ATV to be sure. Remember that the location of the bolts is different in different devices, so read the documentation in advance.
To evaluate the quality of the fuel composition, make a test run.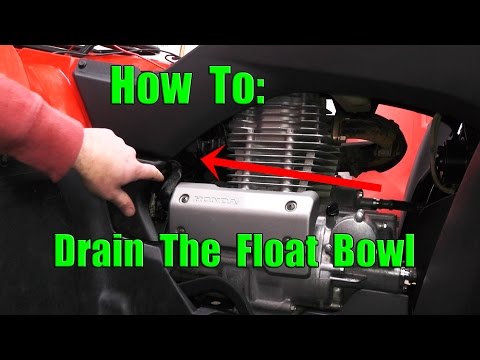 After that, unscrew the candle, and evaluate its condition. If it is:
Also look out for these “symptoms”: damaged tip (electrode failure), oil deposits (damage to rings and caps), chips and inclusions (sign of motor failure).
To adjust the mixture you need to twist the needle cover and pull it out. To get the needle, pull out the cable. After that, move the ring in the required direction (lower - more air, but less fuel and vice versa)..jpg?x-oss-process=image/auto-orient,1/quality,q_70/resize,m_mfit,w_350,h_350)